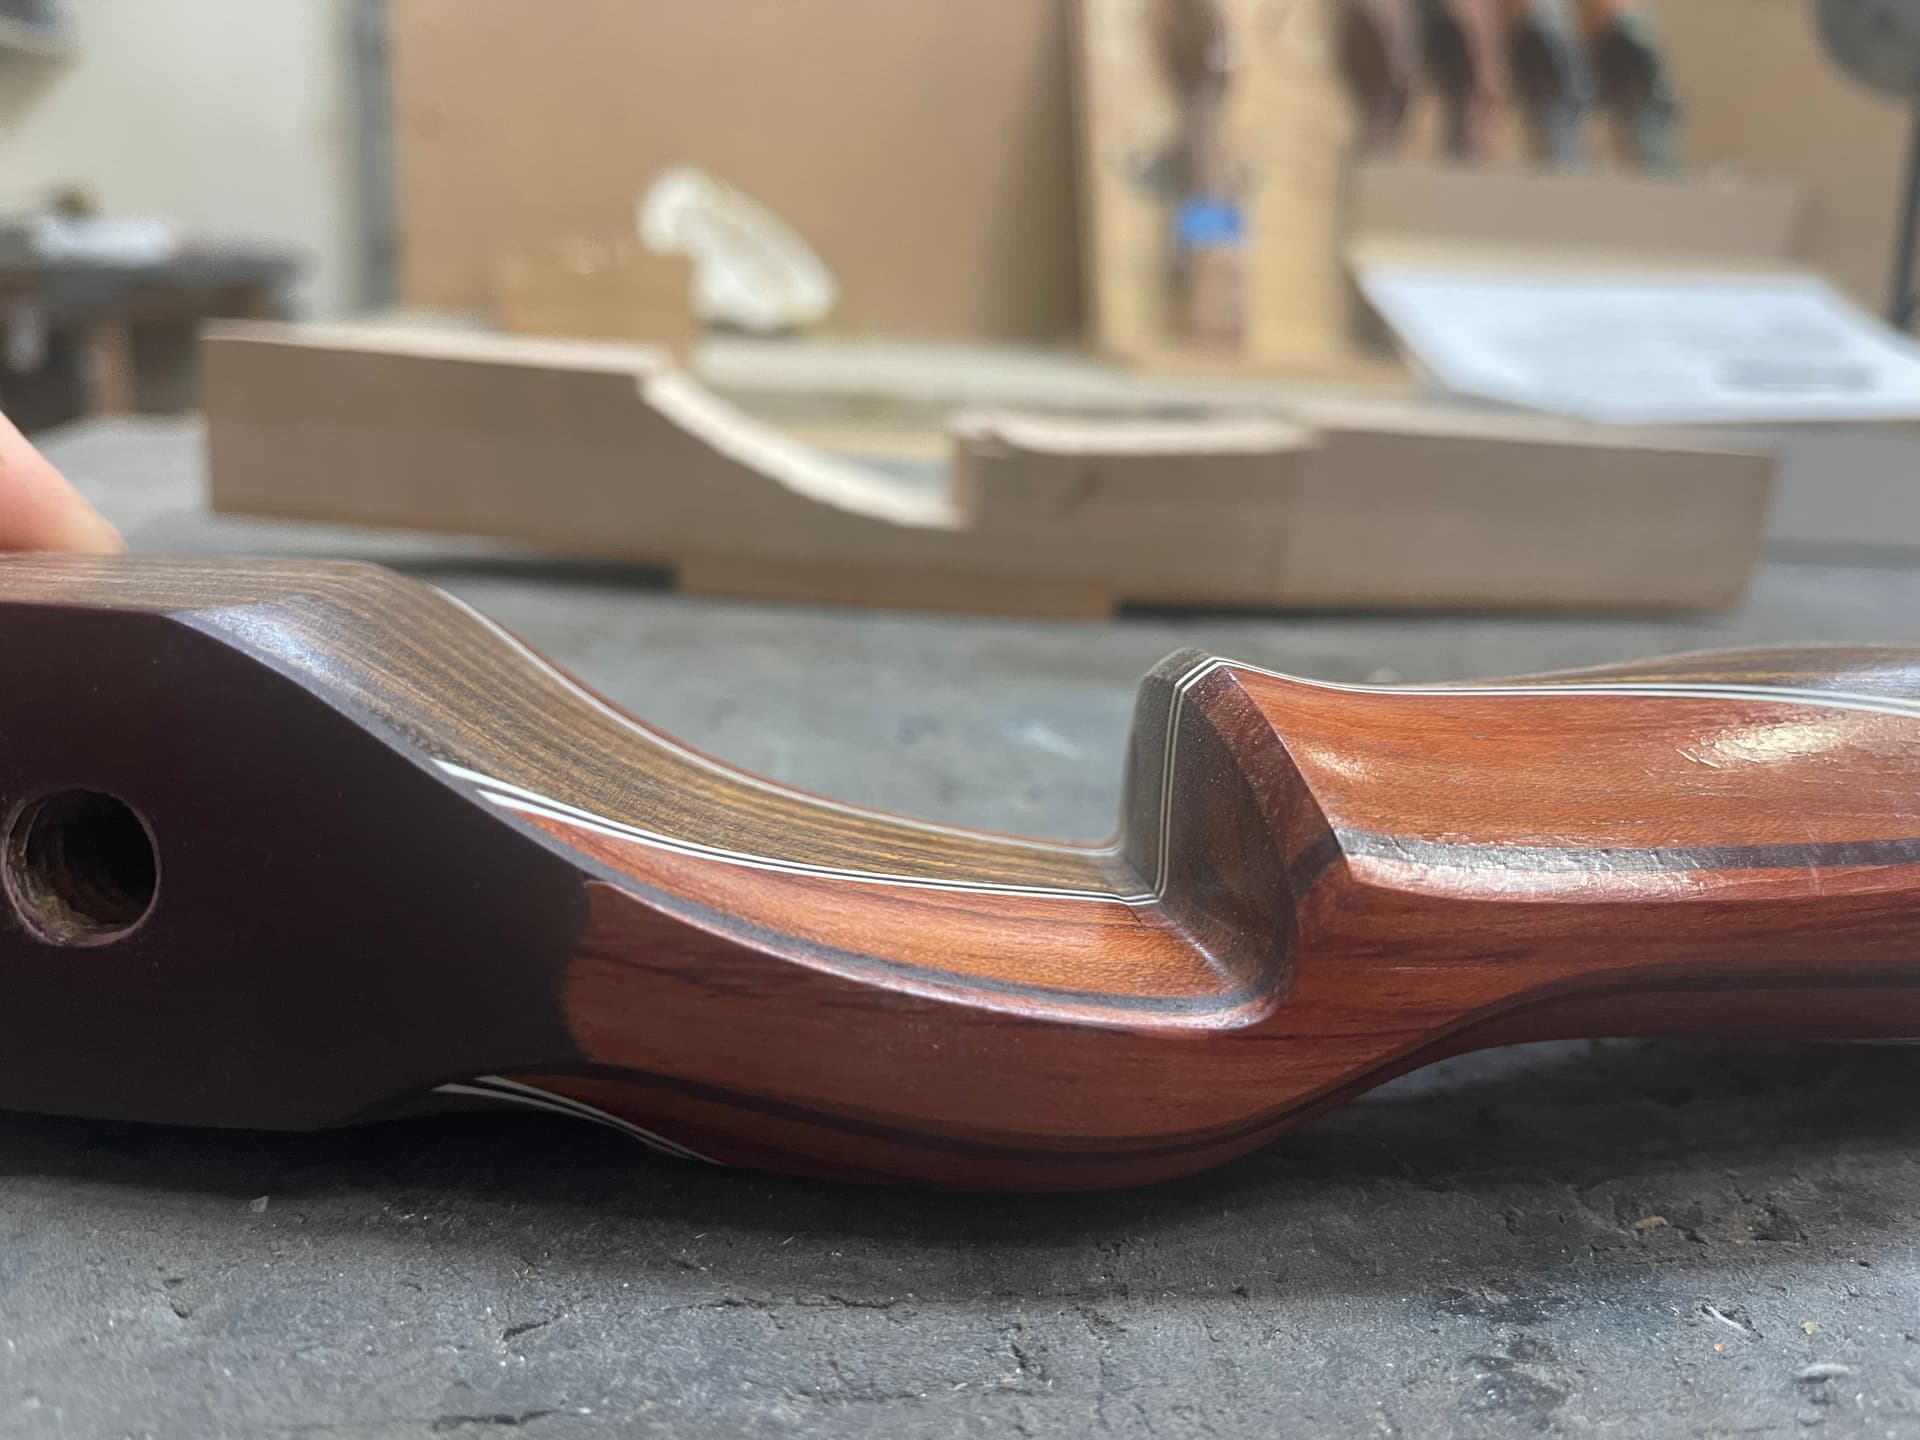
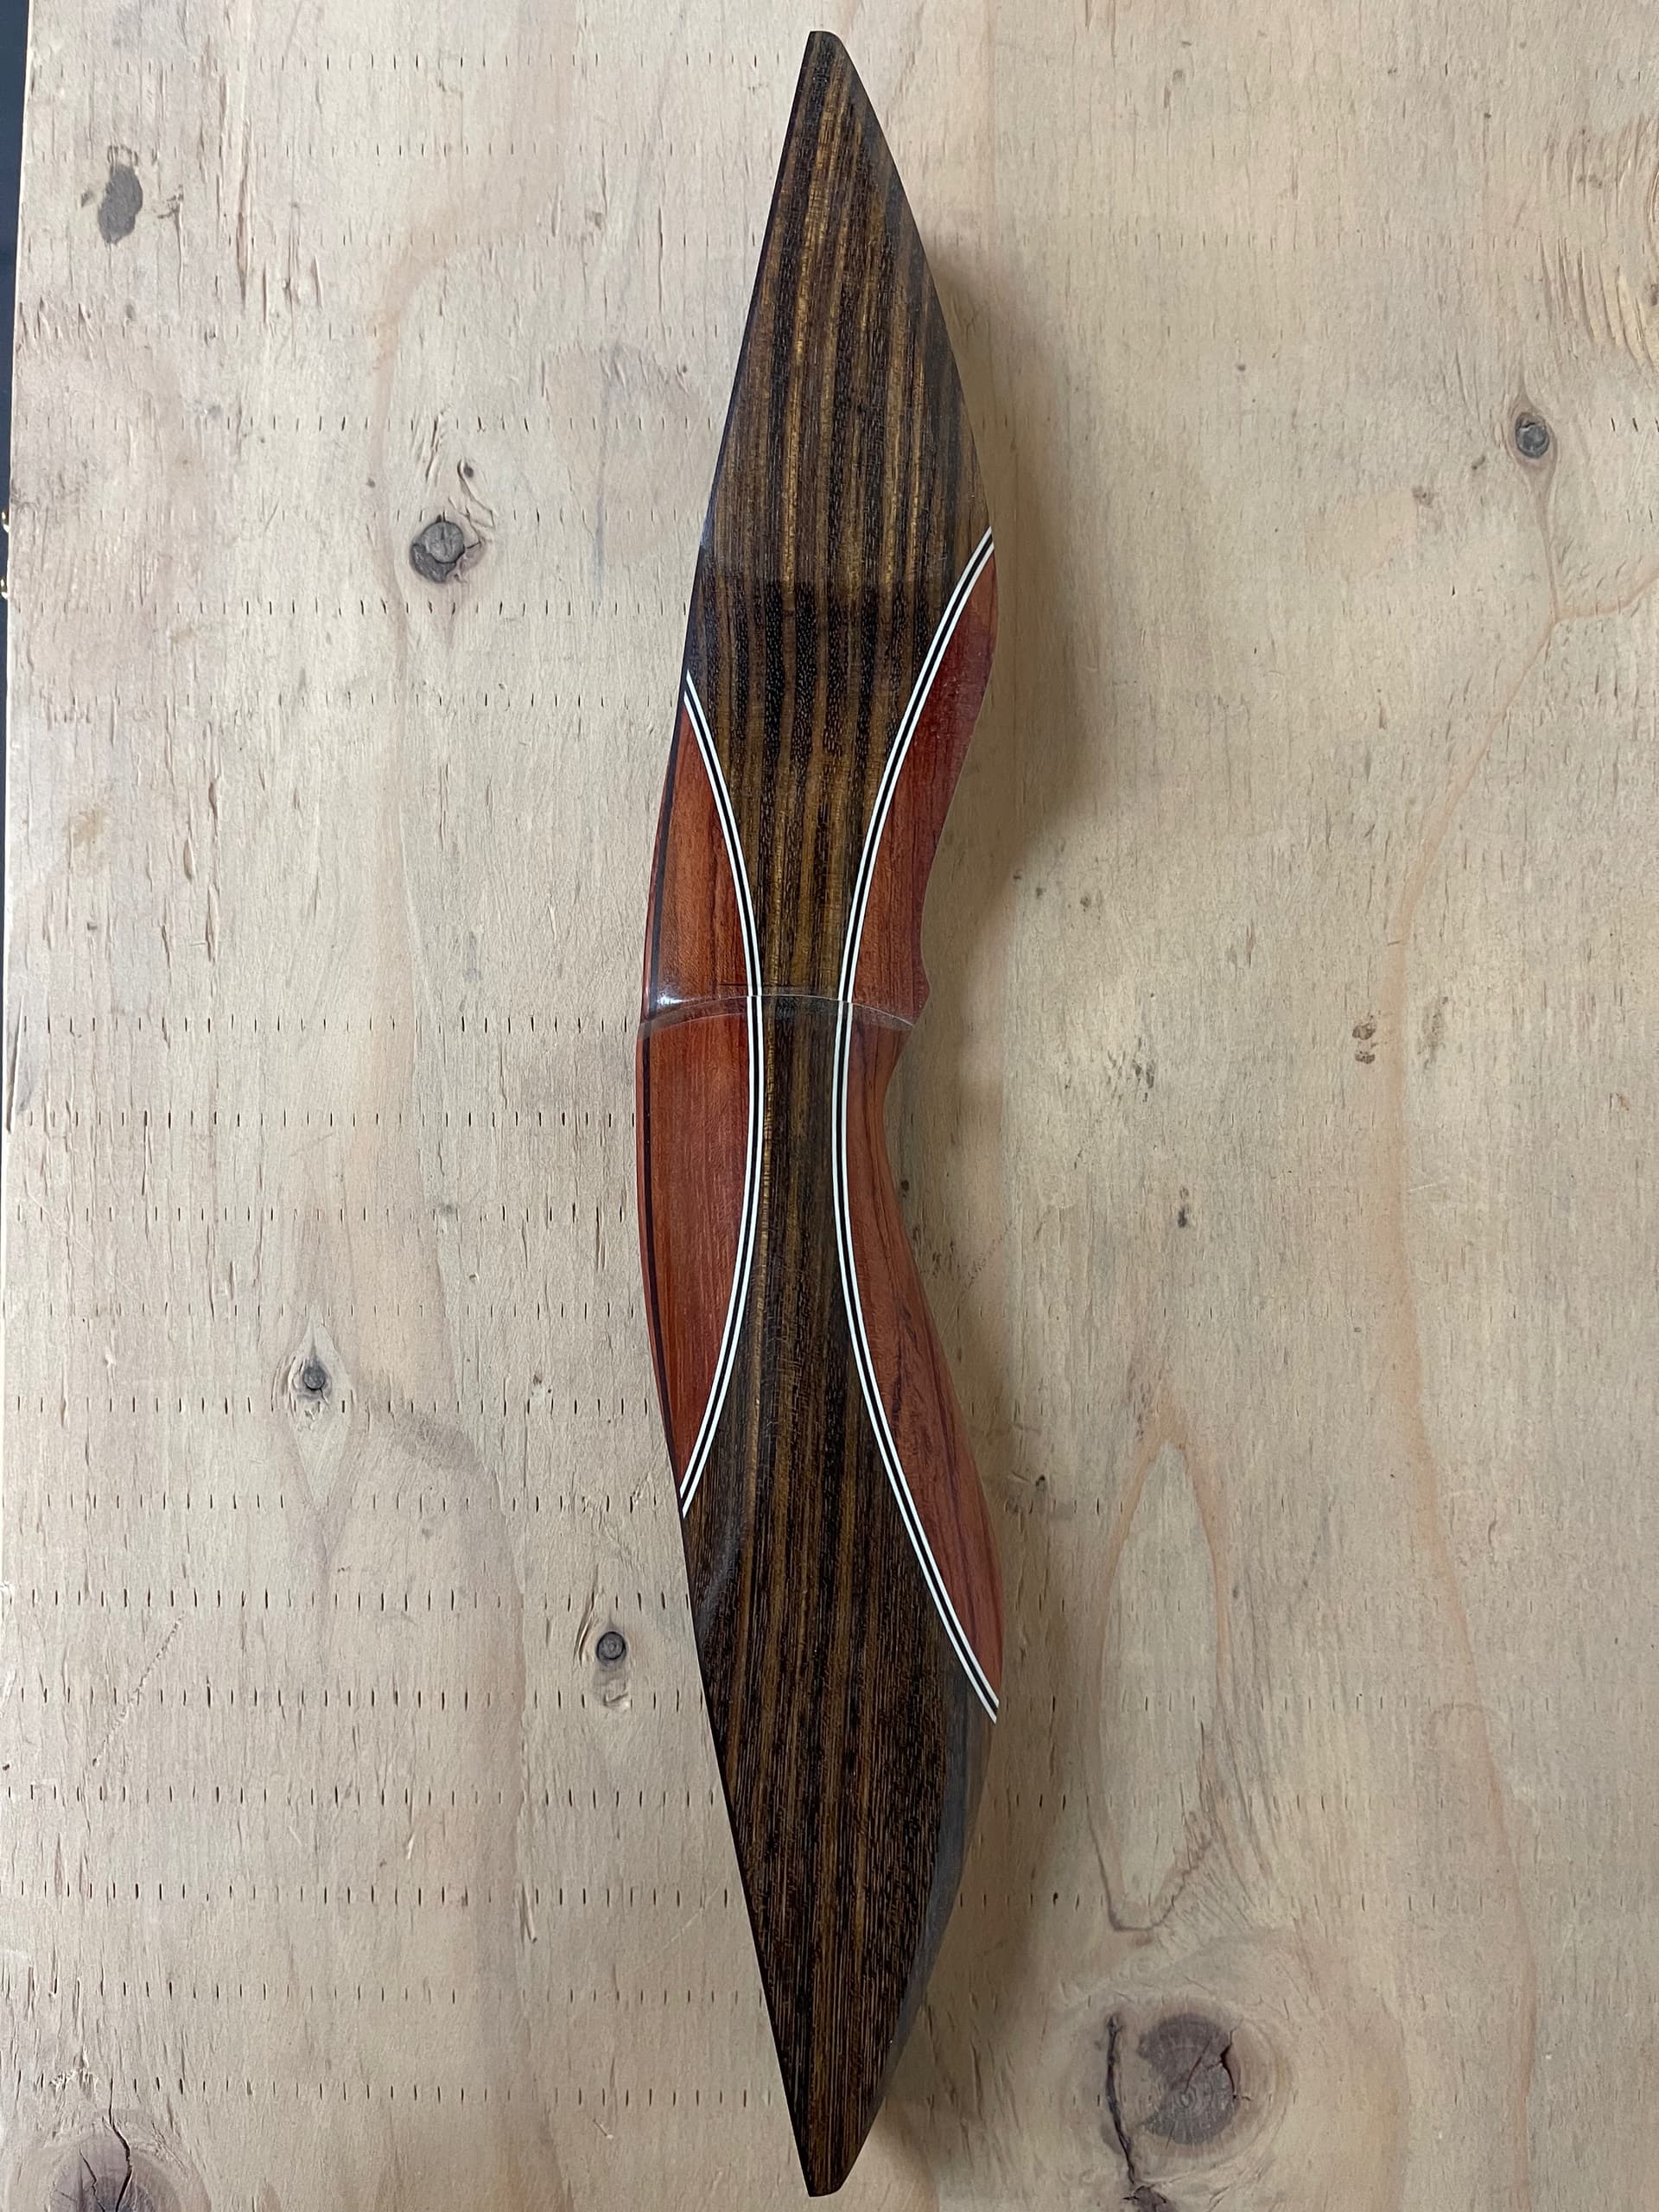
Can anyone tell/show me if it’s possible to cut this transition smoothly into my stock piece. I want it as close to the finished shape as possible.

What CadCam program are you using?
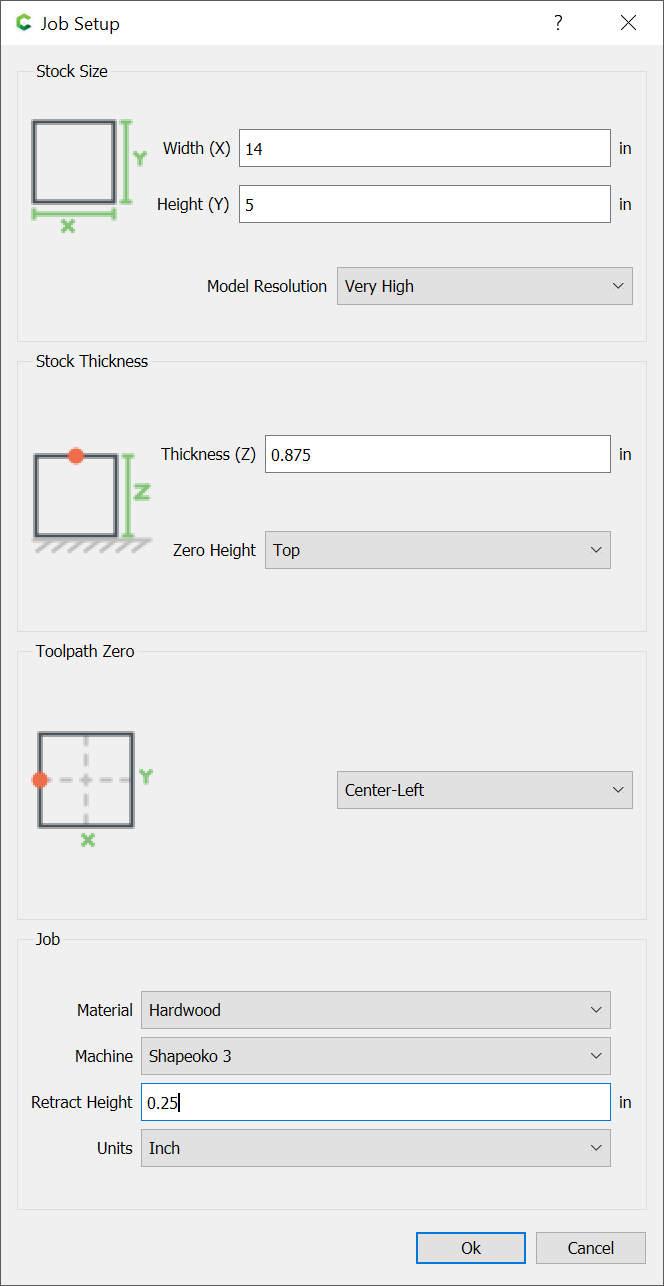
I’m using carbide create pro
If you are leveraging 3d finish operation you should pick a smaller stepover value. I usually use .2mm on parts I’m trying to get smoother finishing on.
You would need to model this shape, either directly in Carbide Create Pro, or in a 3rd party program — have you considered 3D CAD such as Alibre Atom3D?
It should be workable to do it in Carbide Create Pro — model the arrow pass/cutout first, then restore the shelf/handle, then model that shape.
Alternately, see the technique at:
which is sort of workable, but requires a great deal of patience.
If you get stuck trying to do this, post the file and we’ll do our best to walk through it w/ you.
Unfortunately I’m new at this so everything you just said went right over the top of my head. I just got the CC pro and am struggling with it pretty bad right now. It’s actually consumed my whole week and I’m no further along then when I started. I’ve watched every tutorial several times over, but the guys making the tutorials know what they are doing and blast right through them. Not explaining why they are doing what they are doing, it’s kinda like “give a person a fish and feed them for a day, teach them to fish and feed them for life”.
I’m pretty decent with carbide create, but the pro seems to work from the bottom up, not the top down.
The picture I showed was done on carbide create, I ordered the pro so I could get a better finish. I tried a smaller step over on the CC but didn’t make a difference. I think my cut paths are too far apart maybe.
Please post the file (or mail it in to projects@carbide3d.com ) and we’ll do our best to assist.
Thank you! I appreciate the help. I’ll try to post as soon as I figure out how to do it.
The Upload button is the 7th from the left when you are composing a reply — the one w/ an up-arrow.

pro riser.c2d (60 KB)
hope i did it right posting the file
Okay, there are a couple of different ways to approach this.
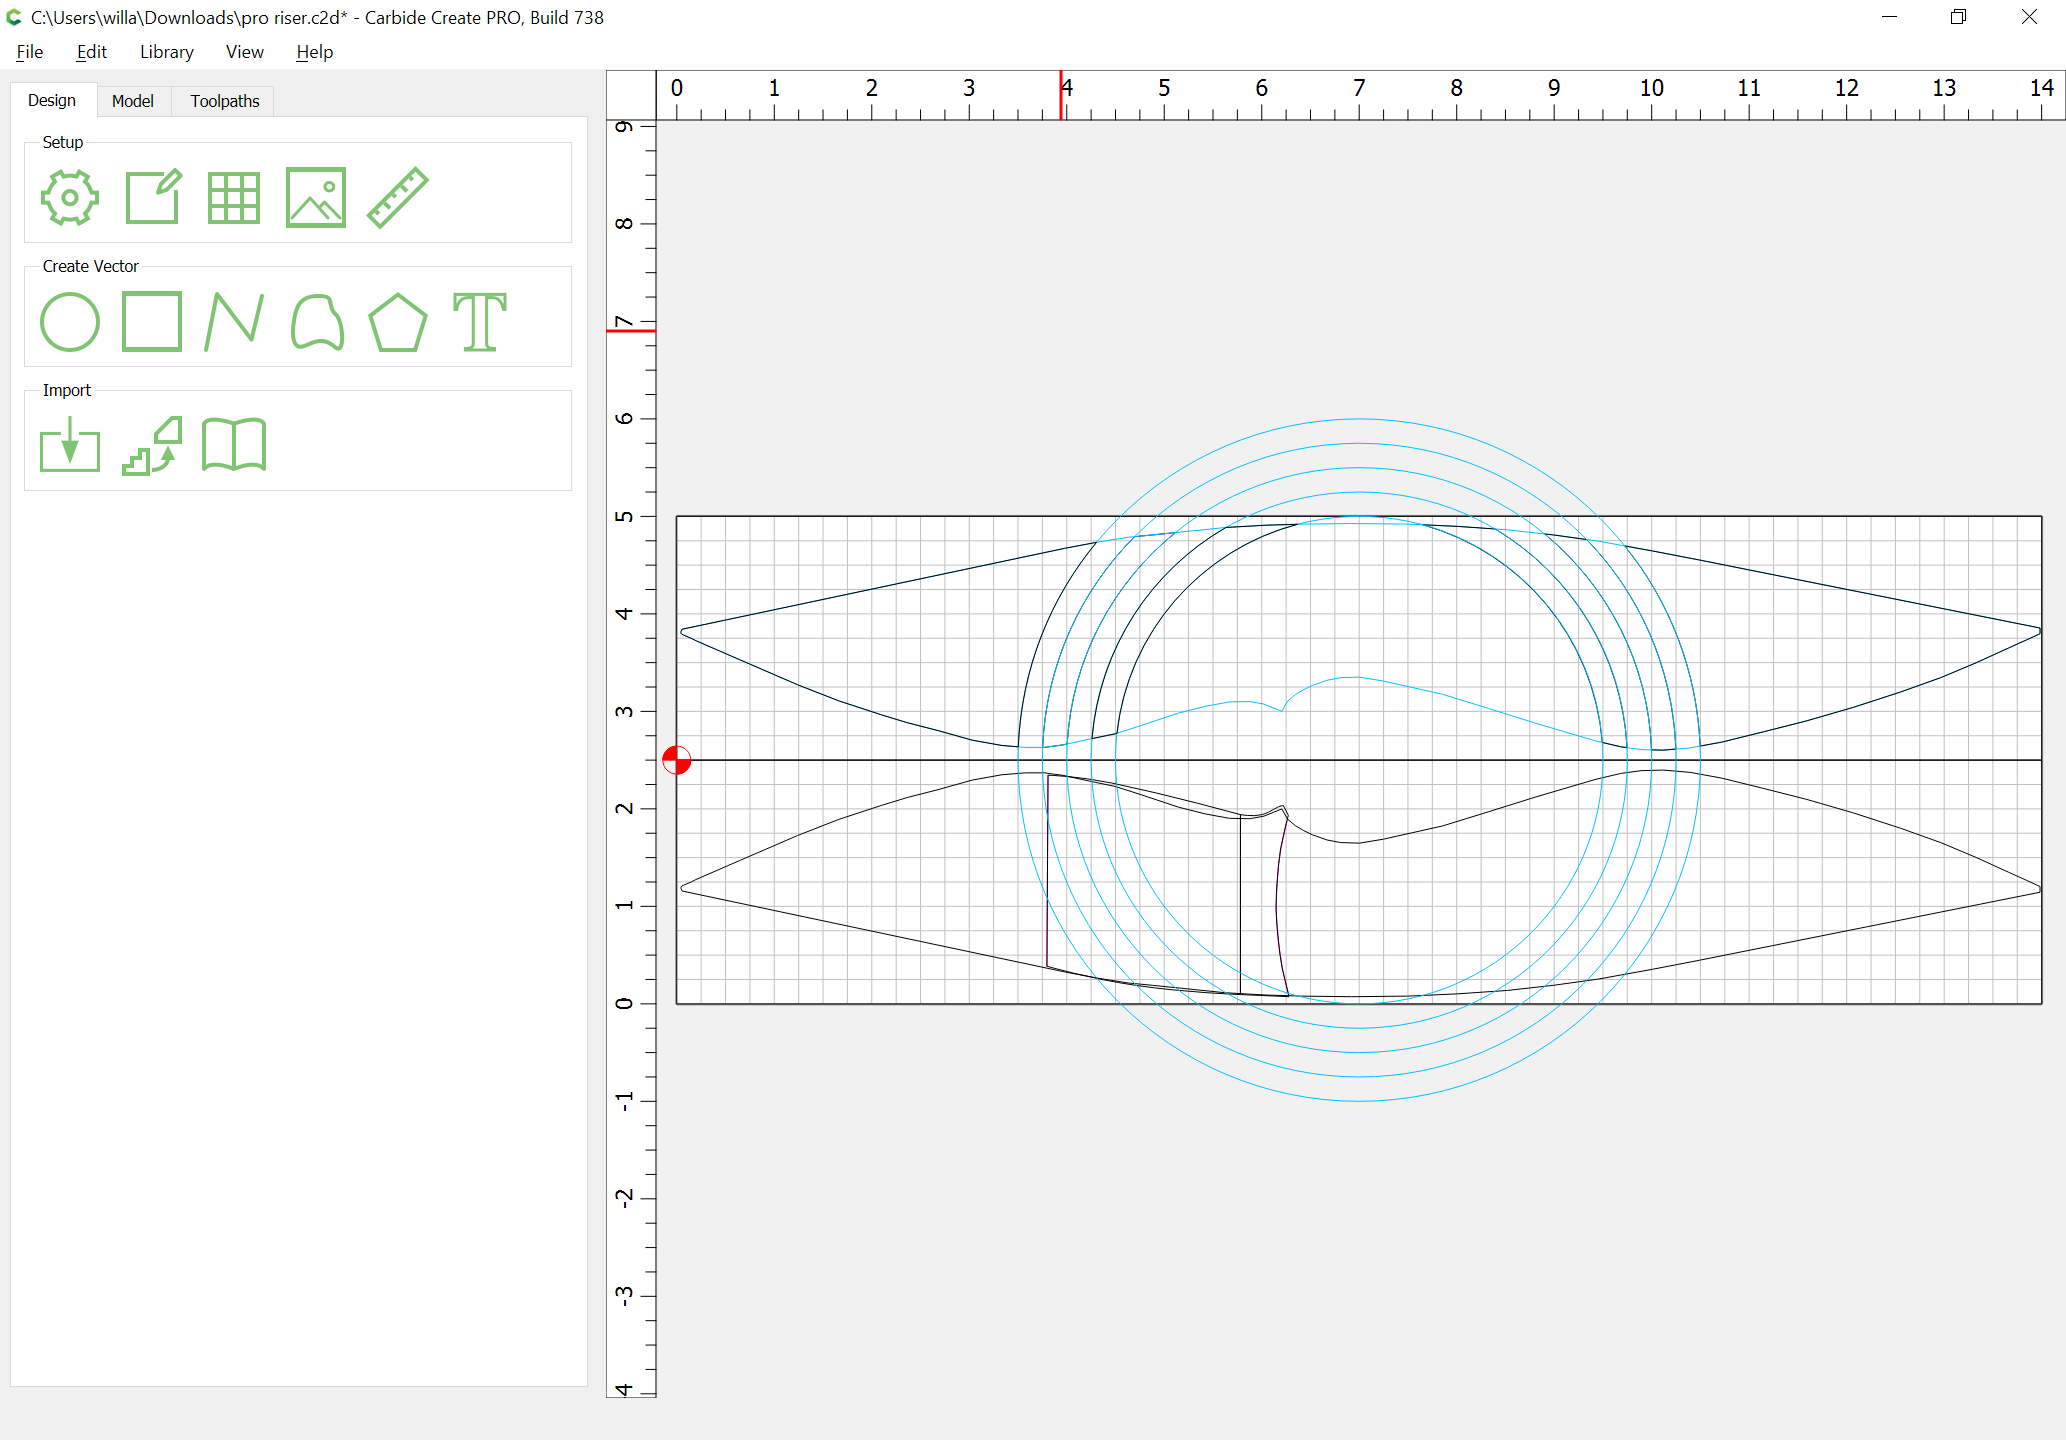
First, I’d do it as a two-sided flip job, and orient things horizontally, w/ both top/bottom in a single file:
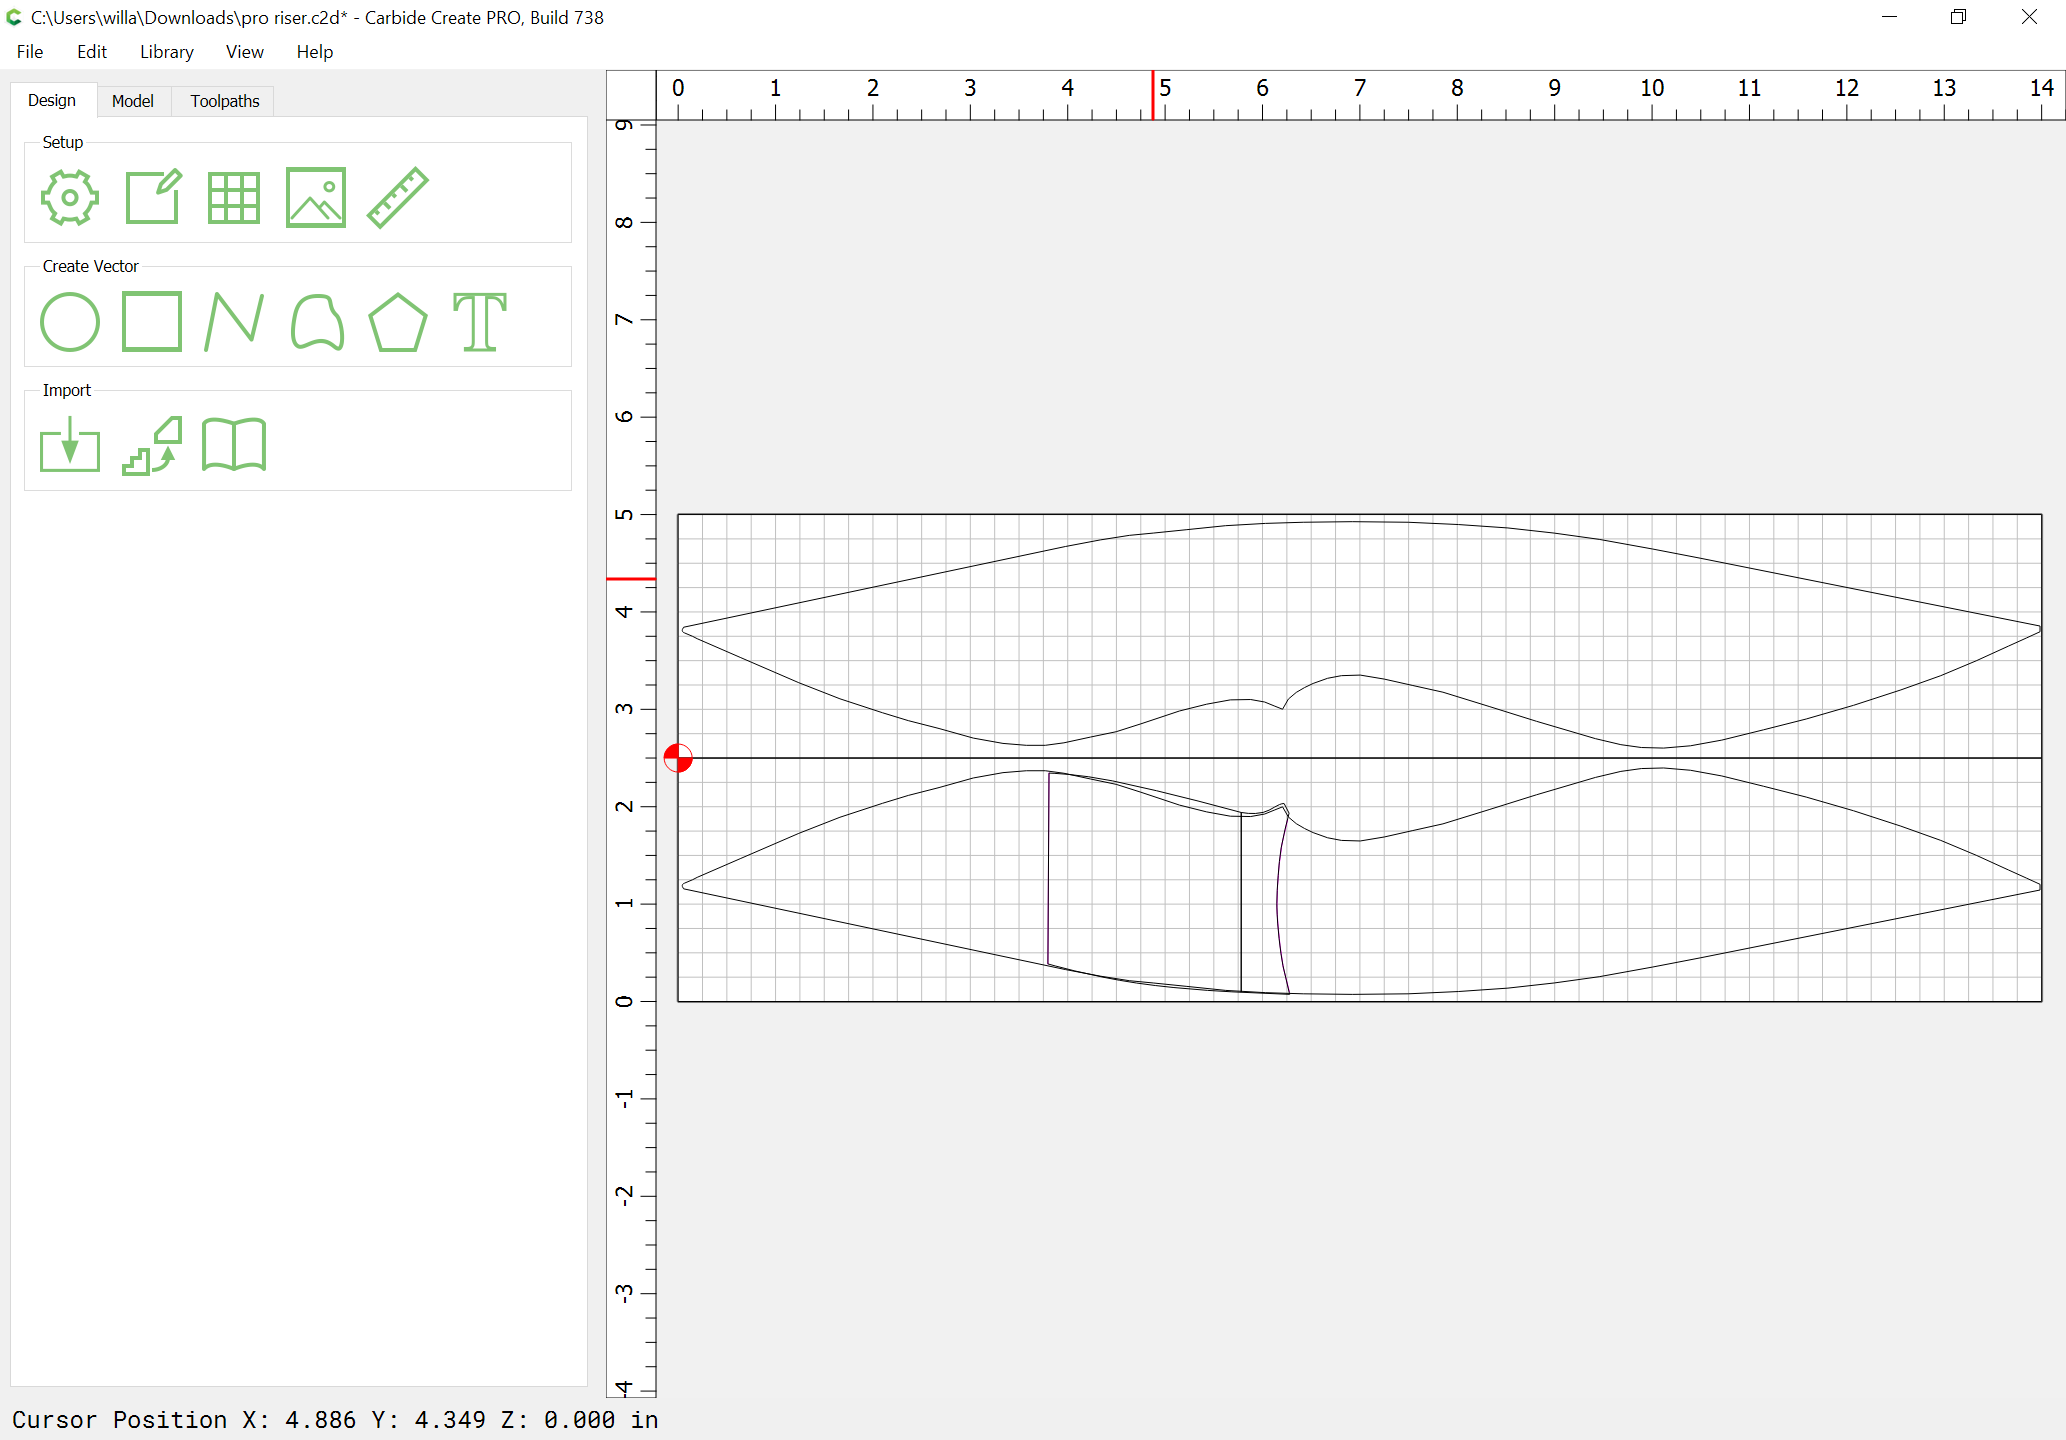
Modeling the right side (for a right-handed archer) is simpler, so let’s start w/ that:
As the topic notes, the difficulty we have here is that we want to have flat surfaces (where the limbs will attach) and rounded surfaces (where one grips the bow).
Subdividing the riser into sections will assist in this:
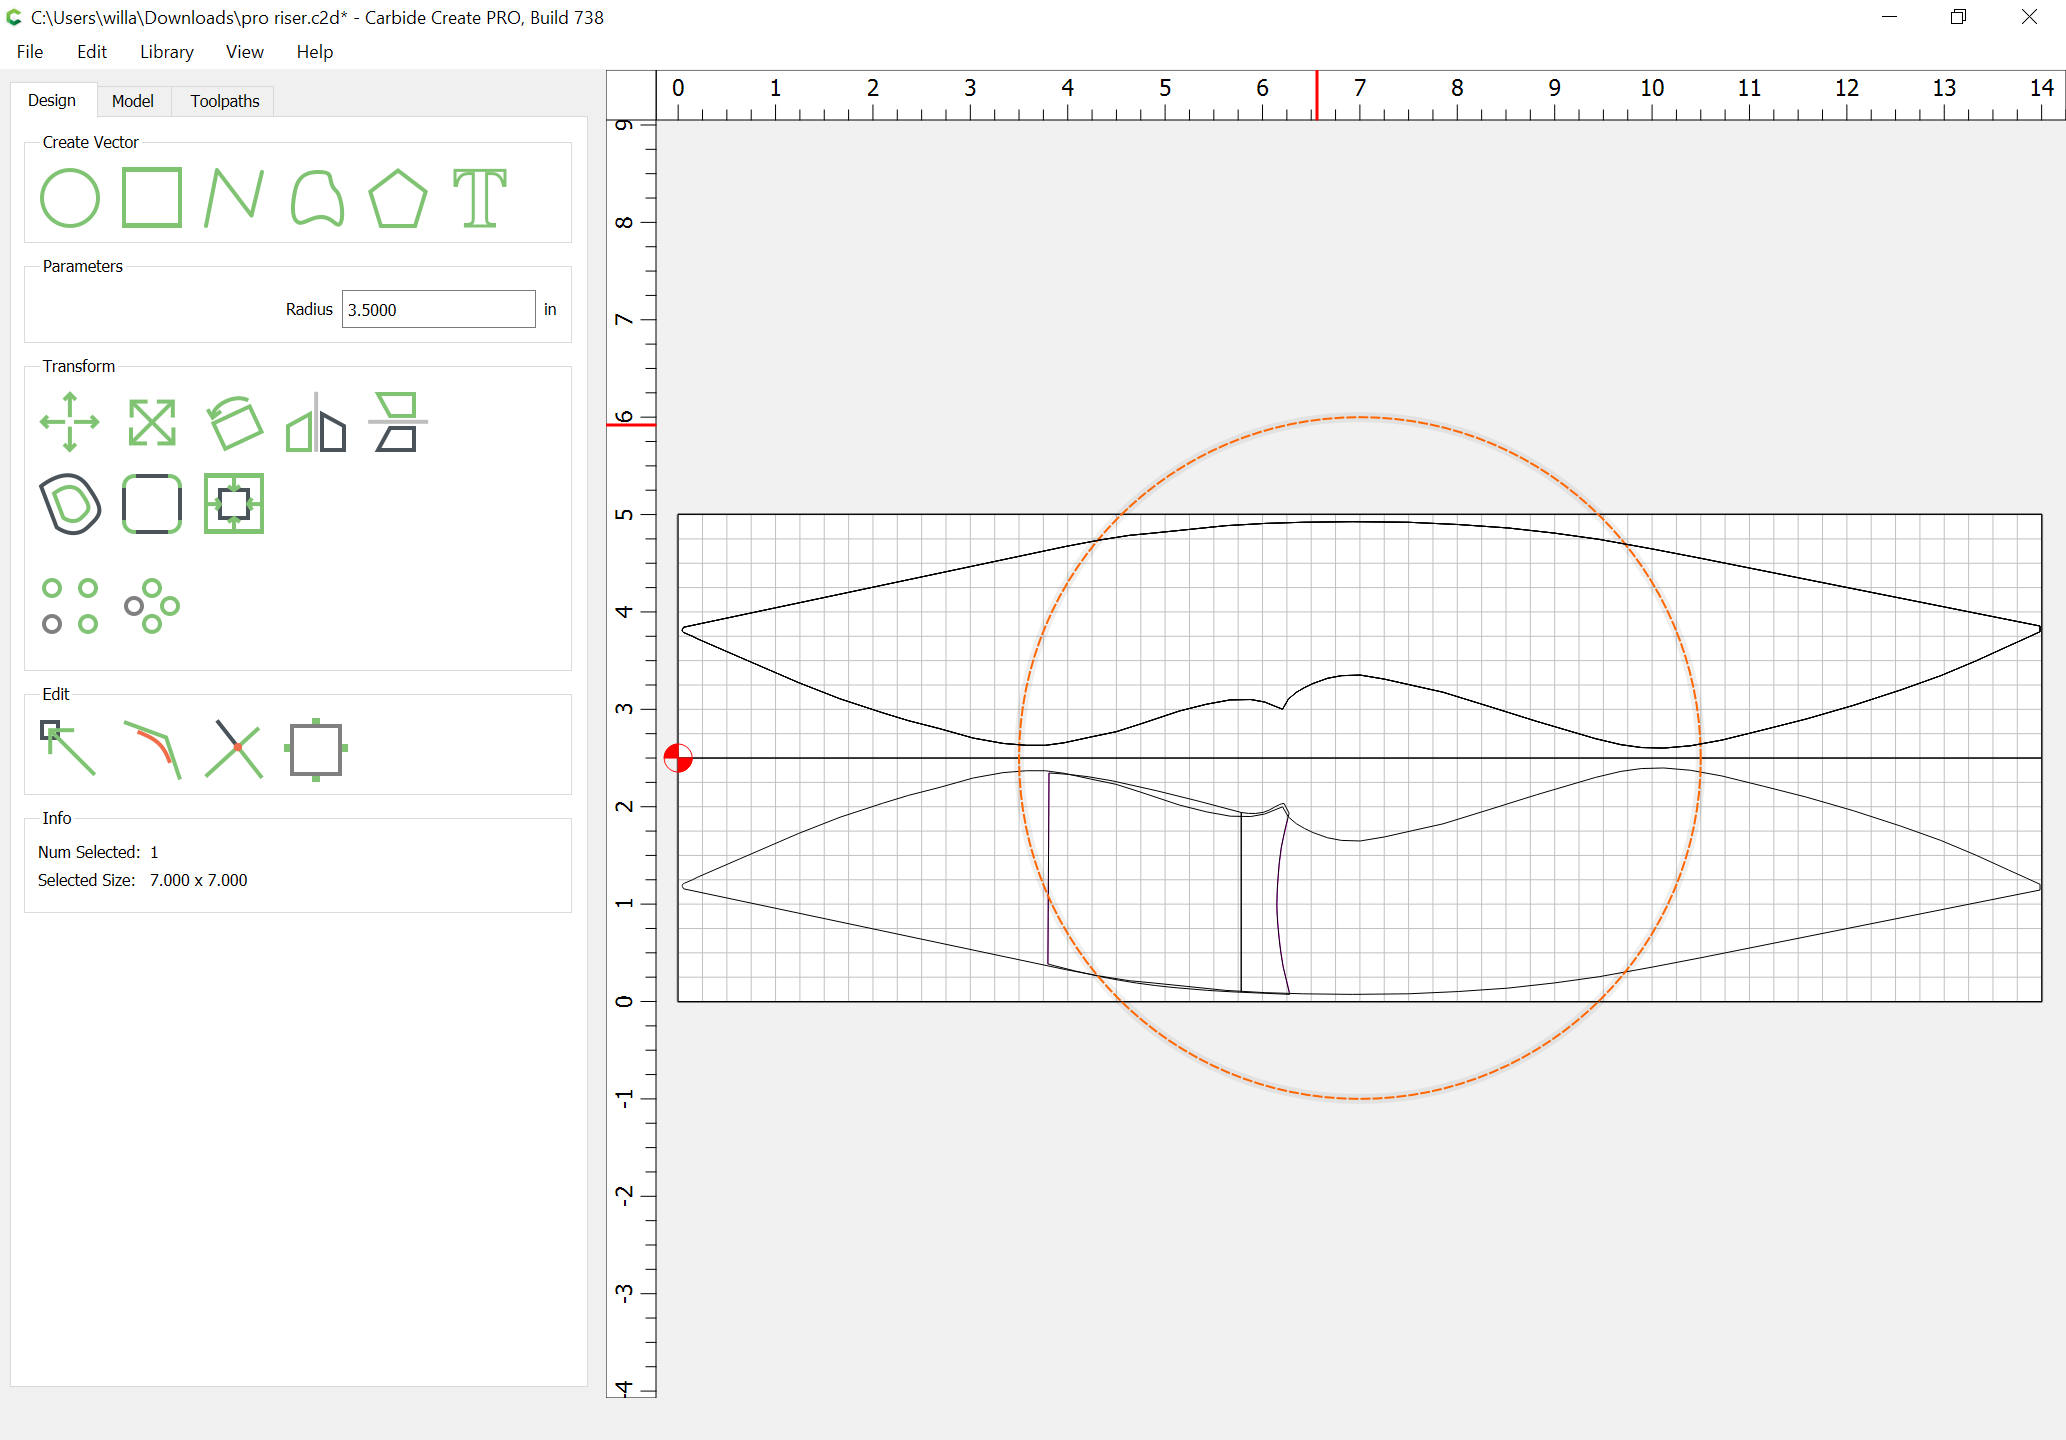
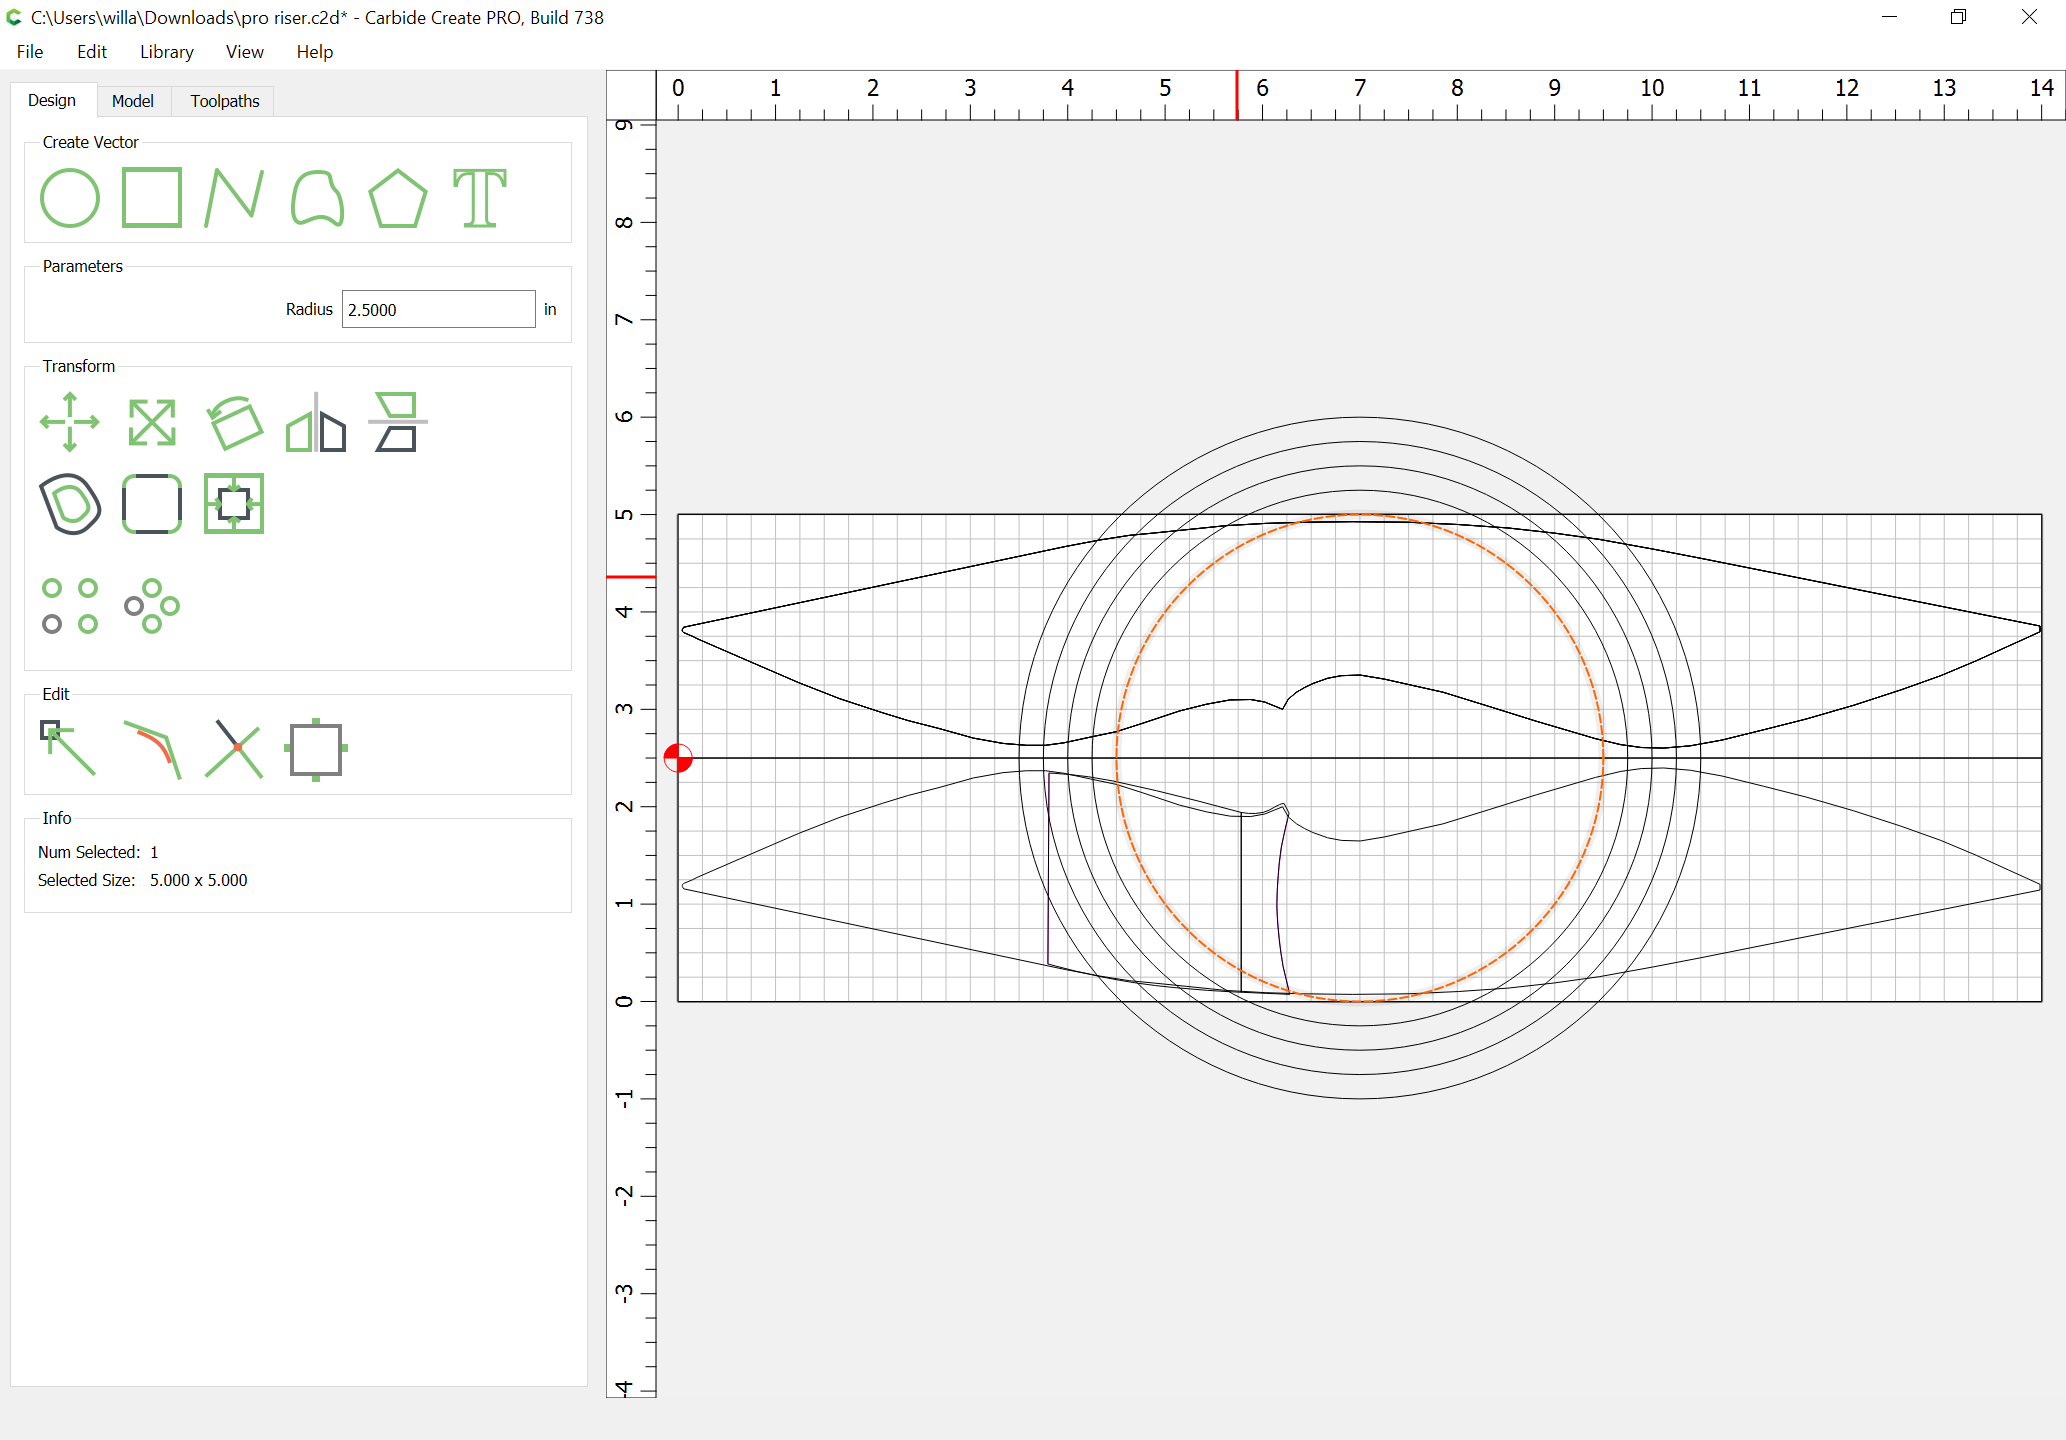
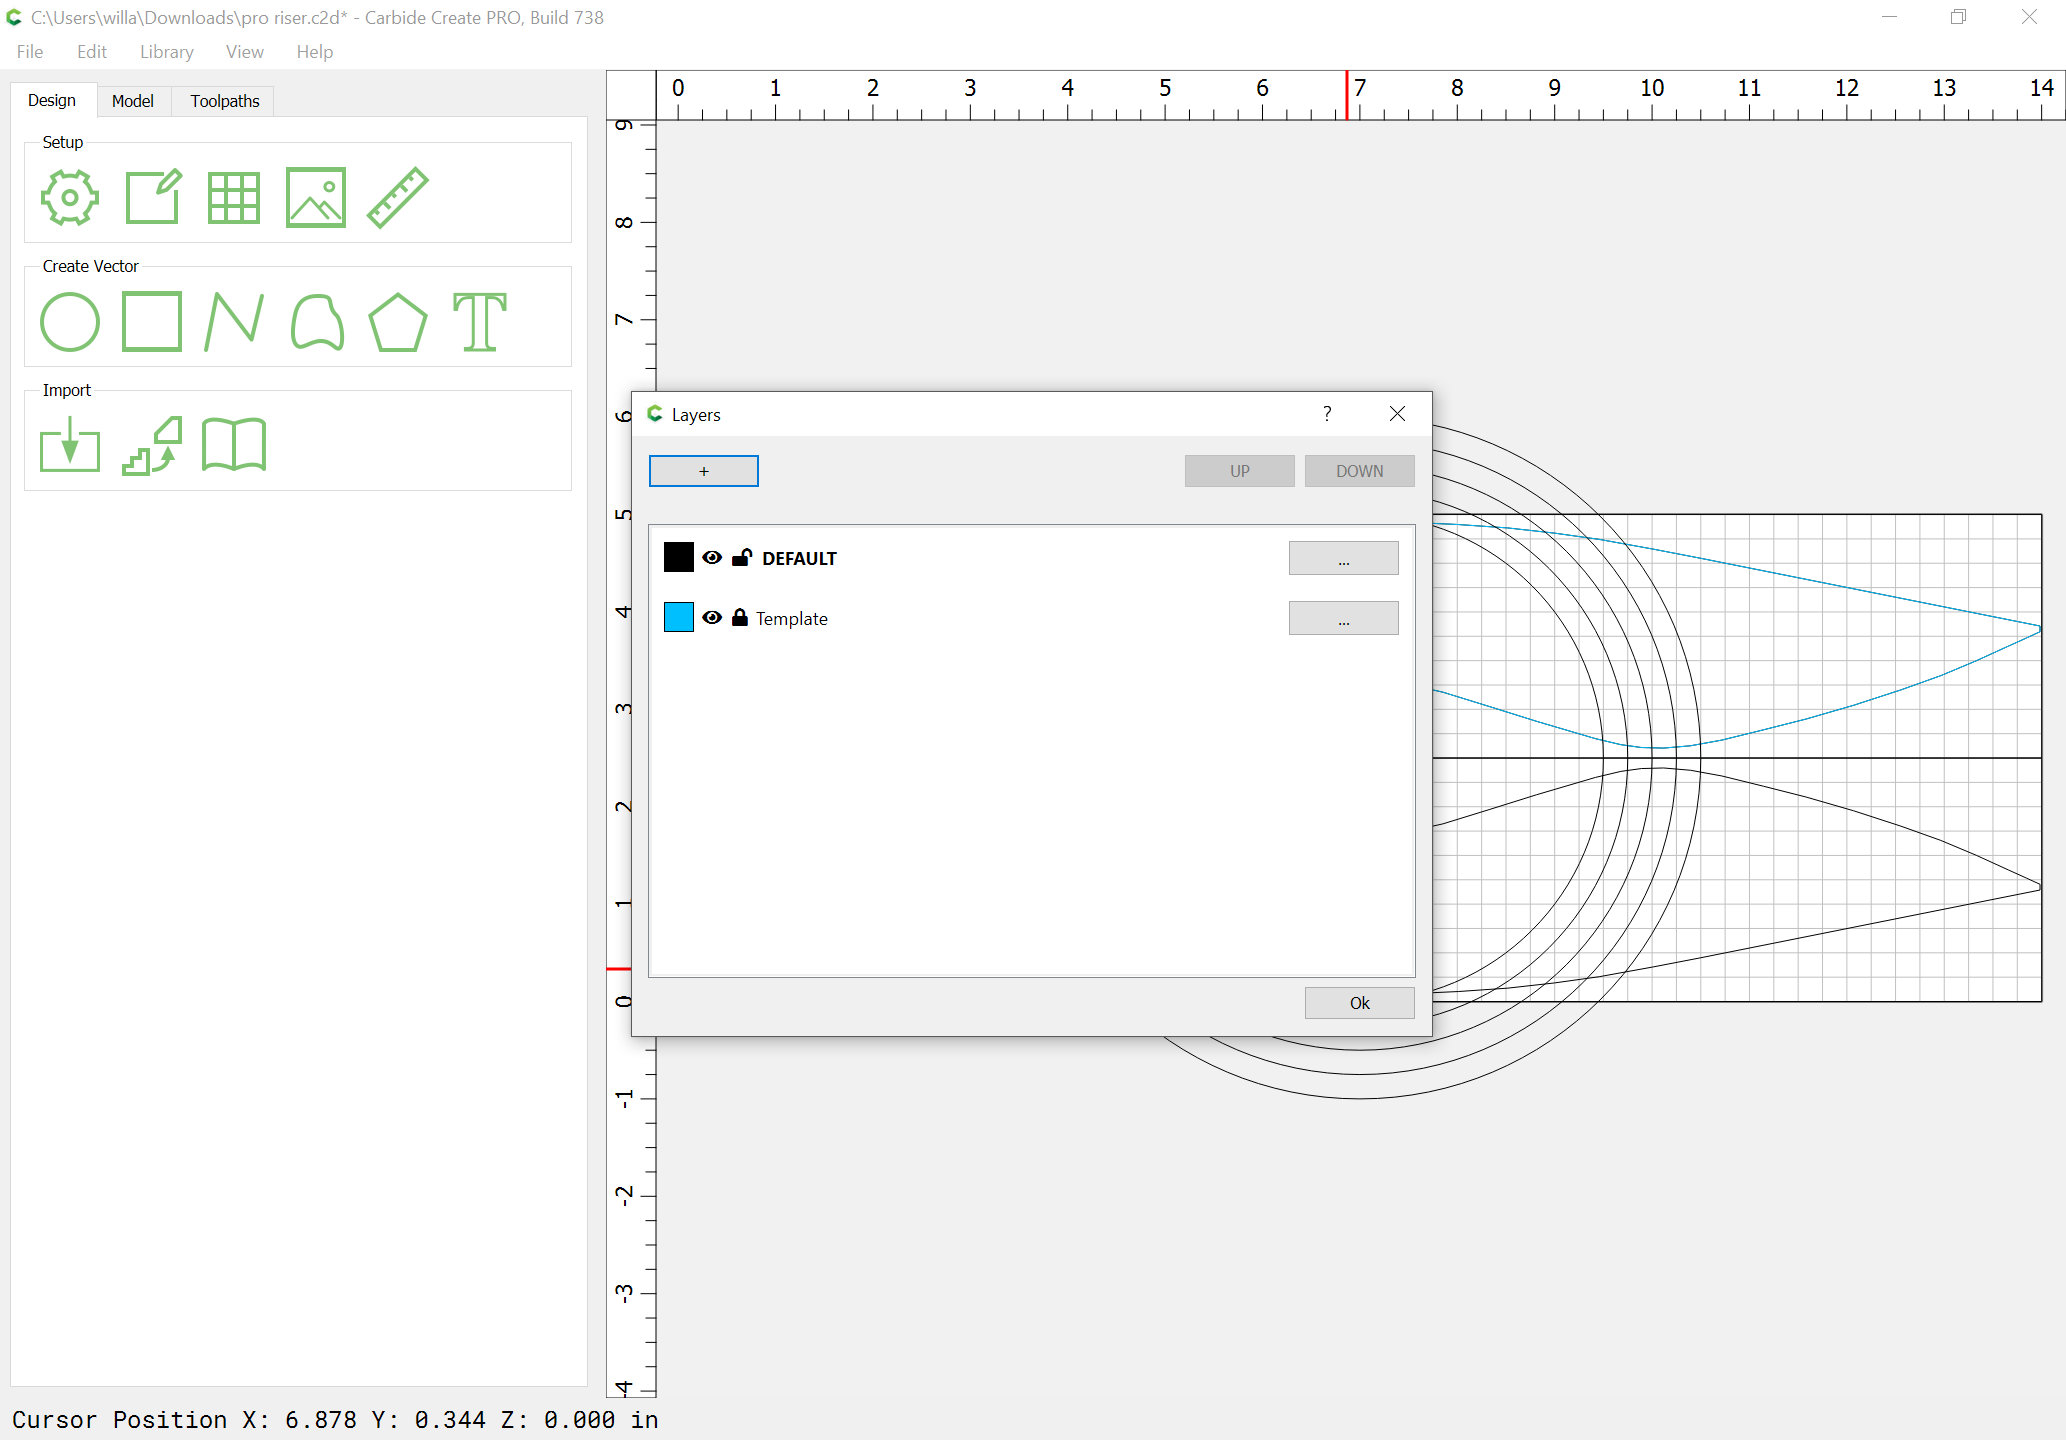
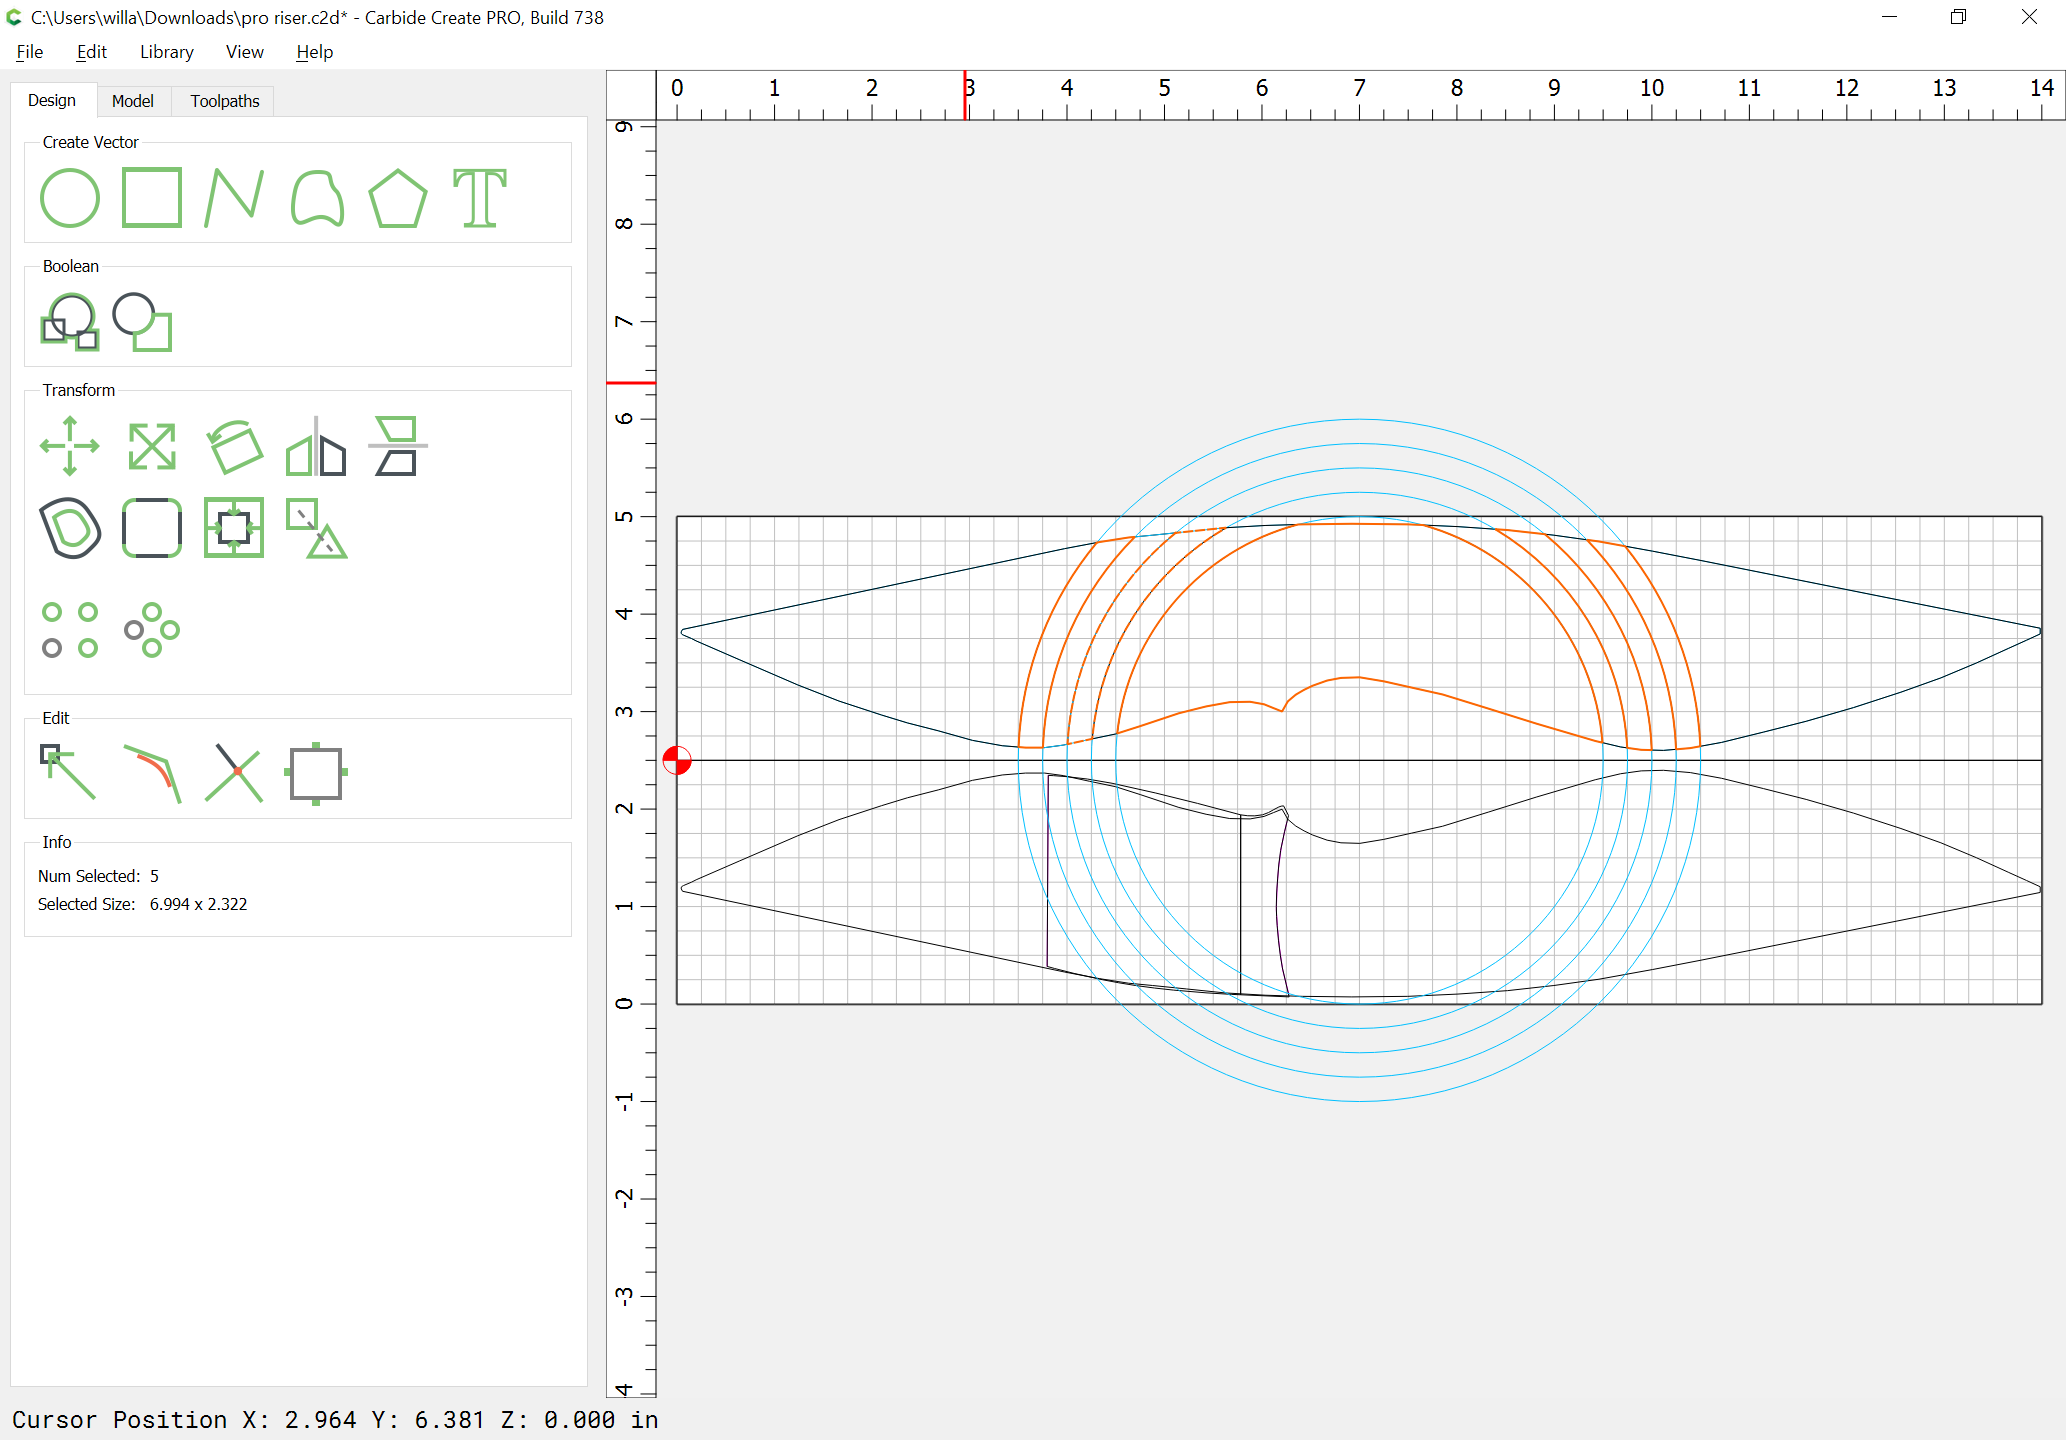
Subdivide things using either Boolean Operations or Trim Vectors — we’ll use the latter, but first make a template layer, move a copy of the riser outline to it, and lock it:
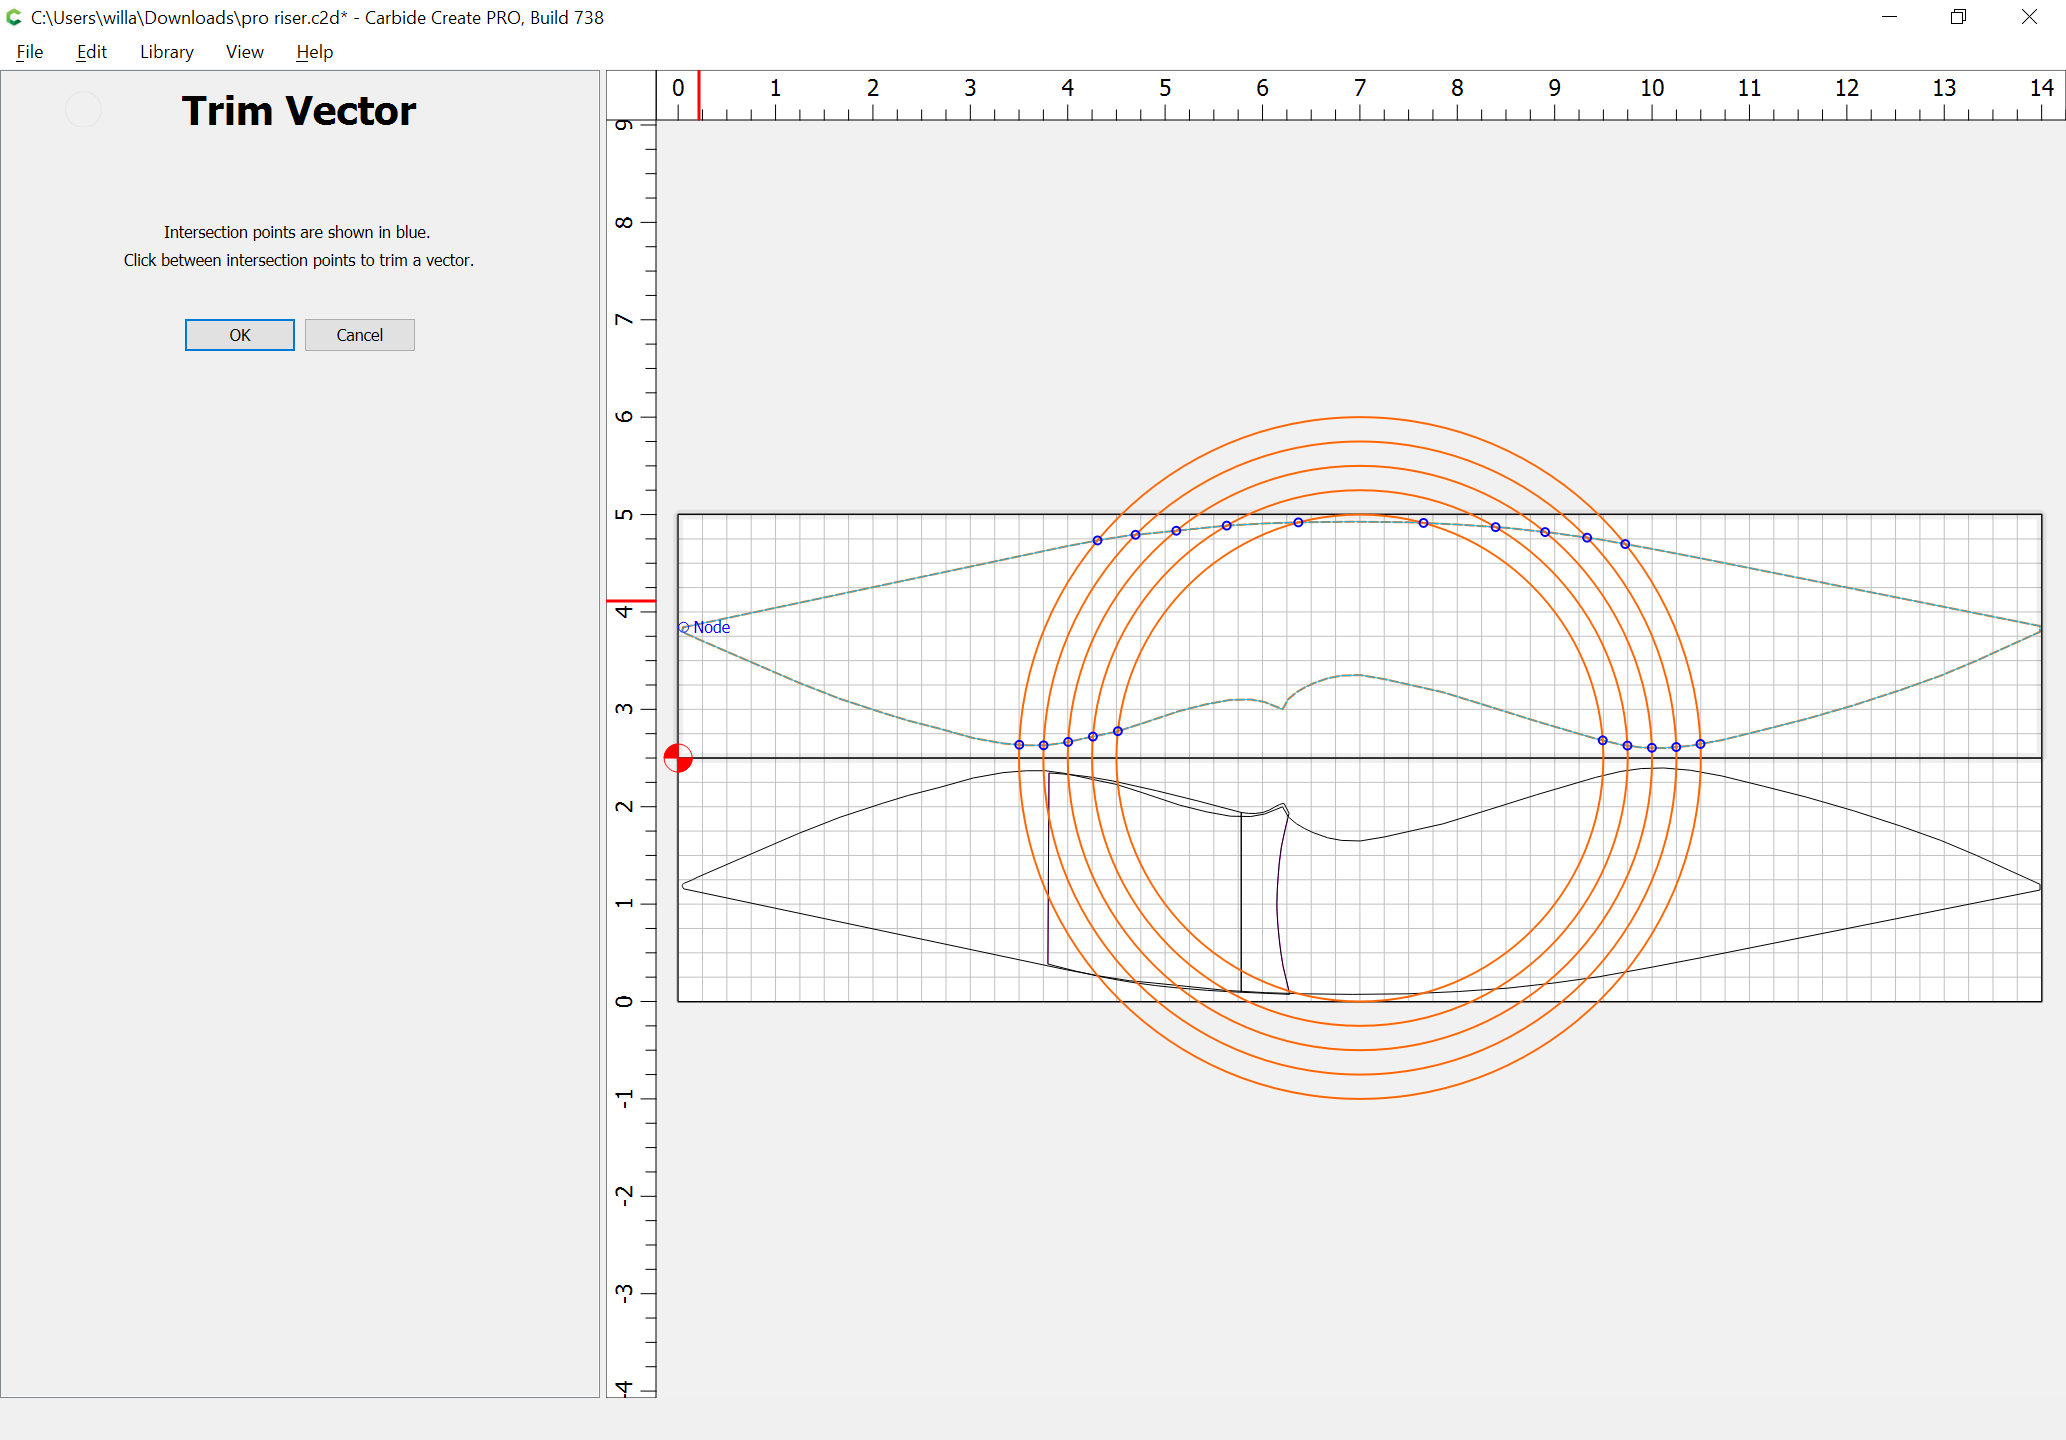
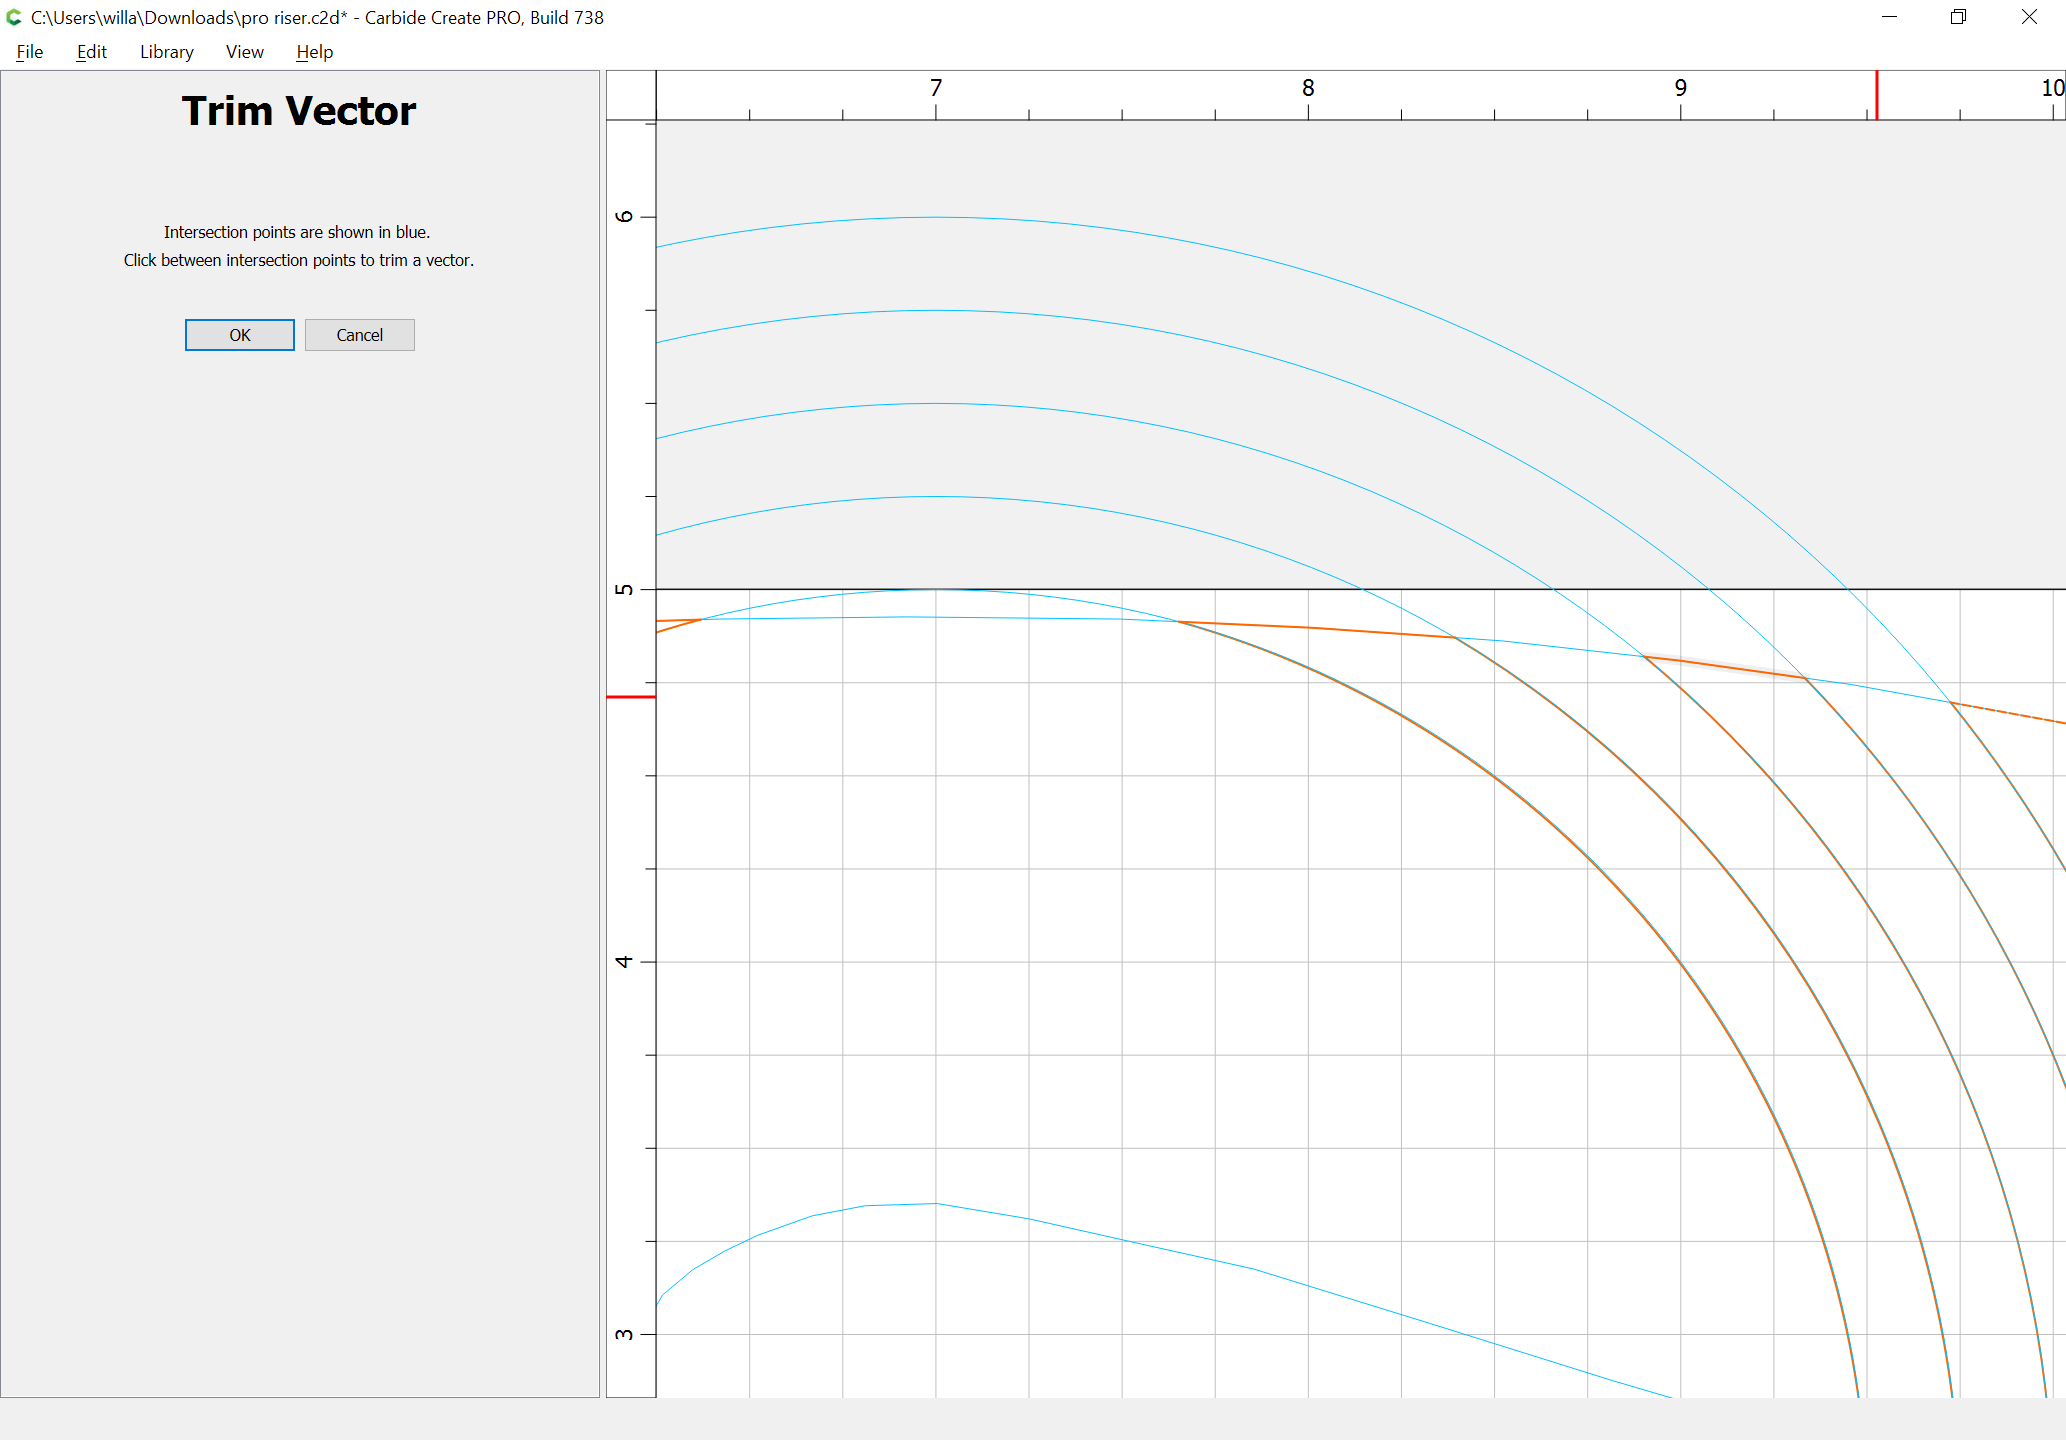
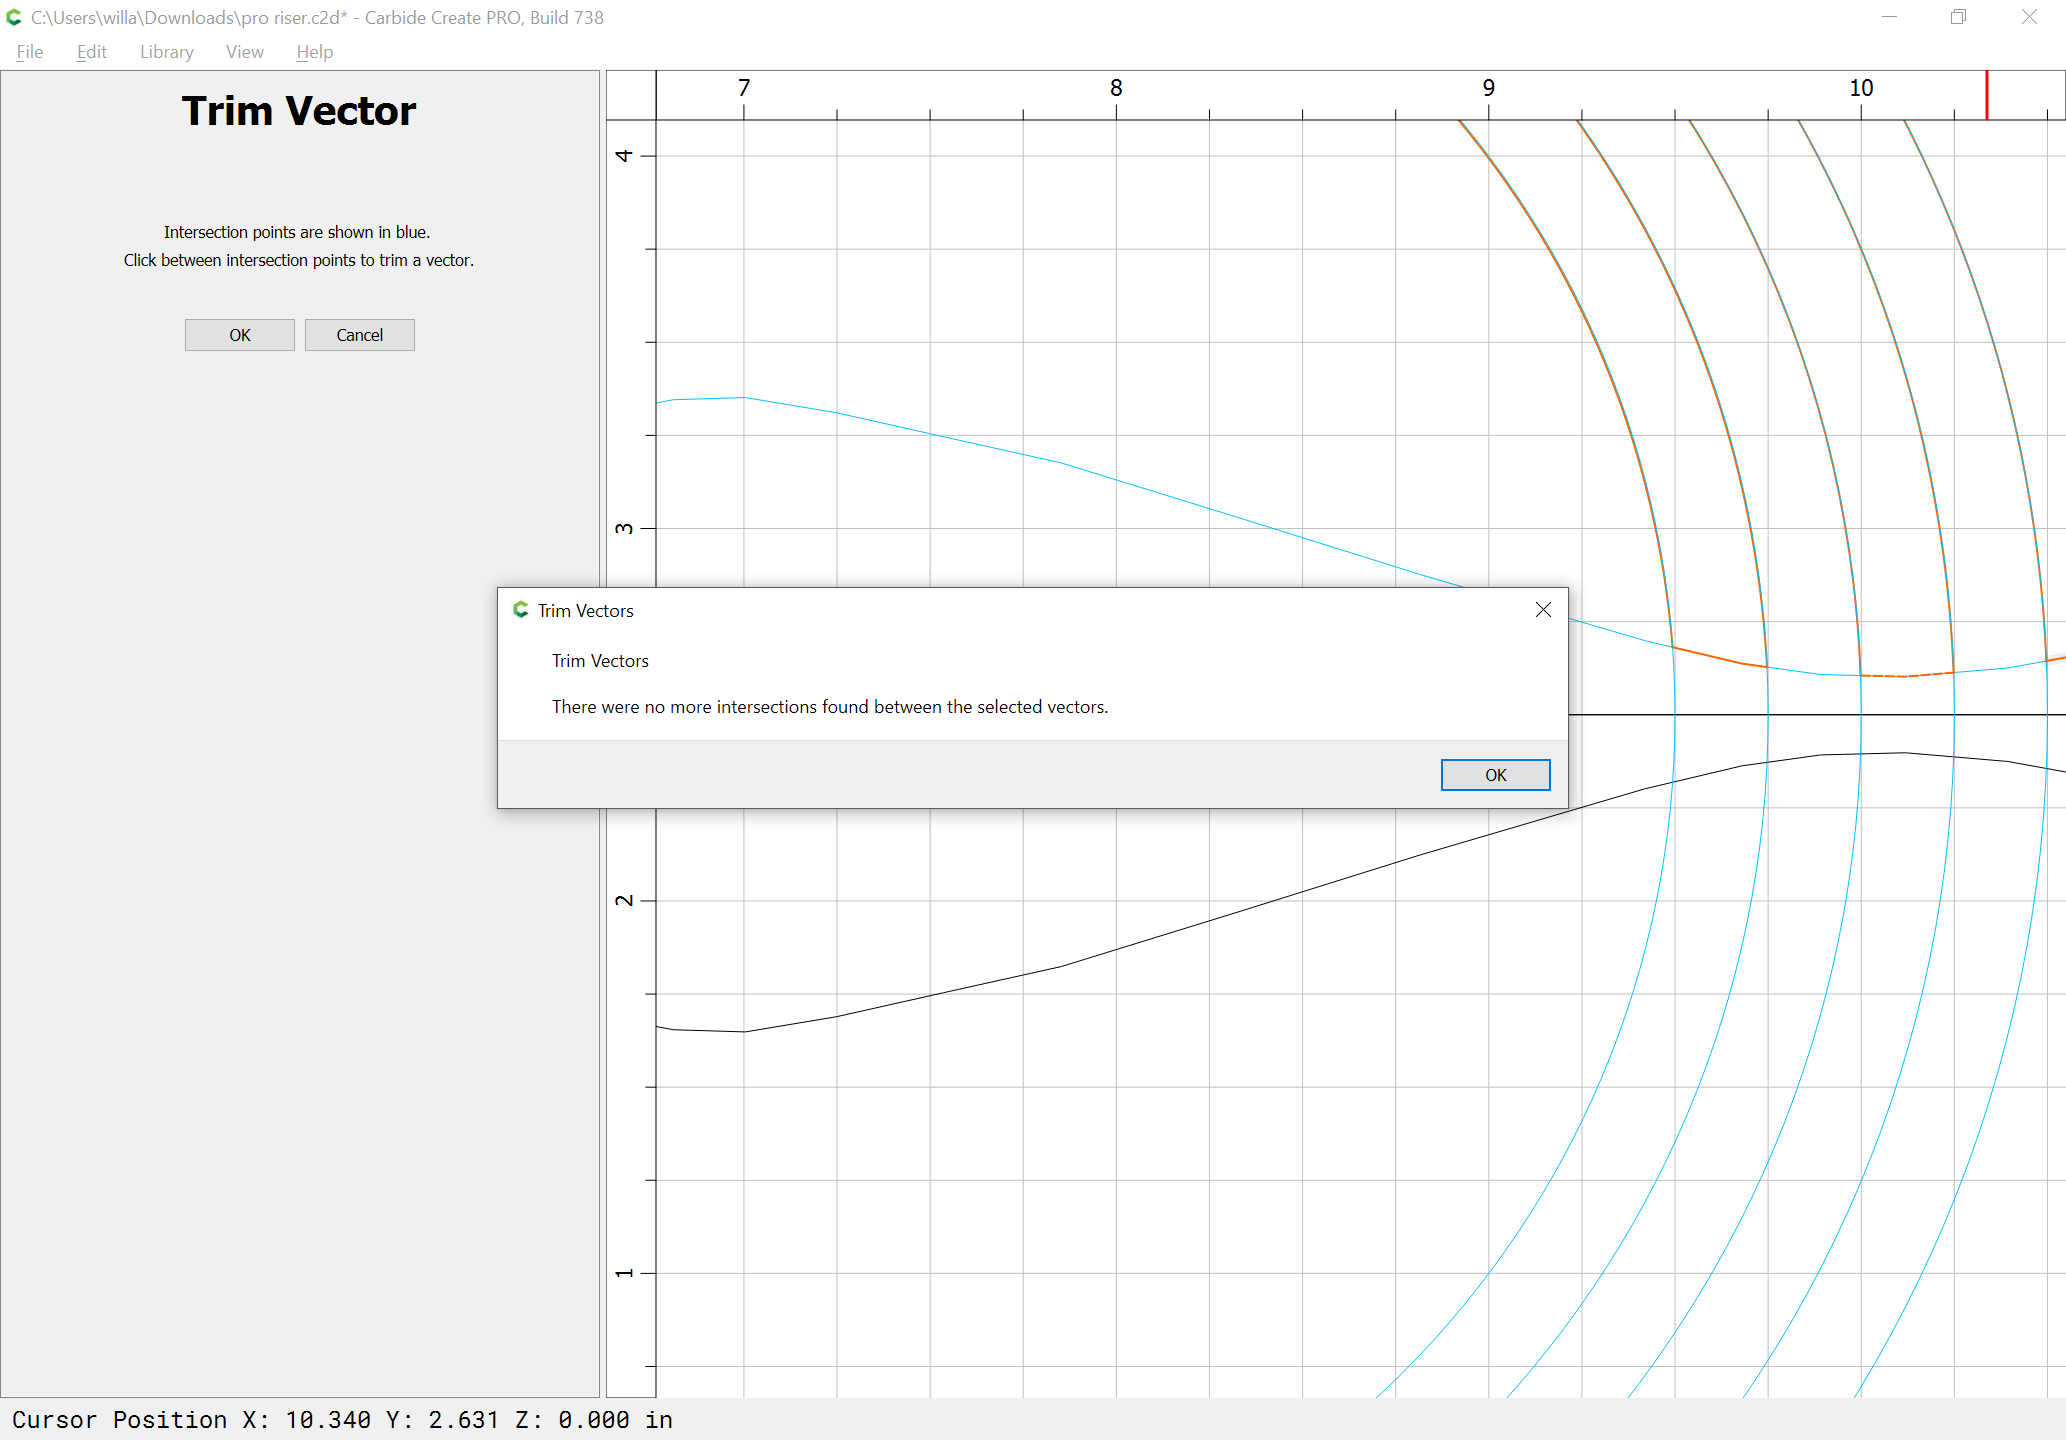
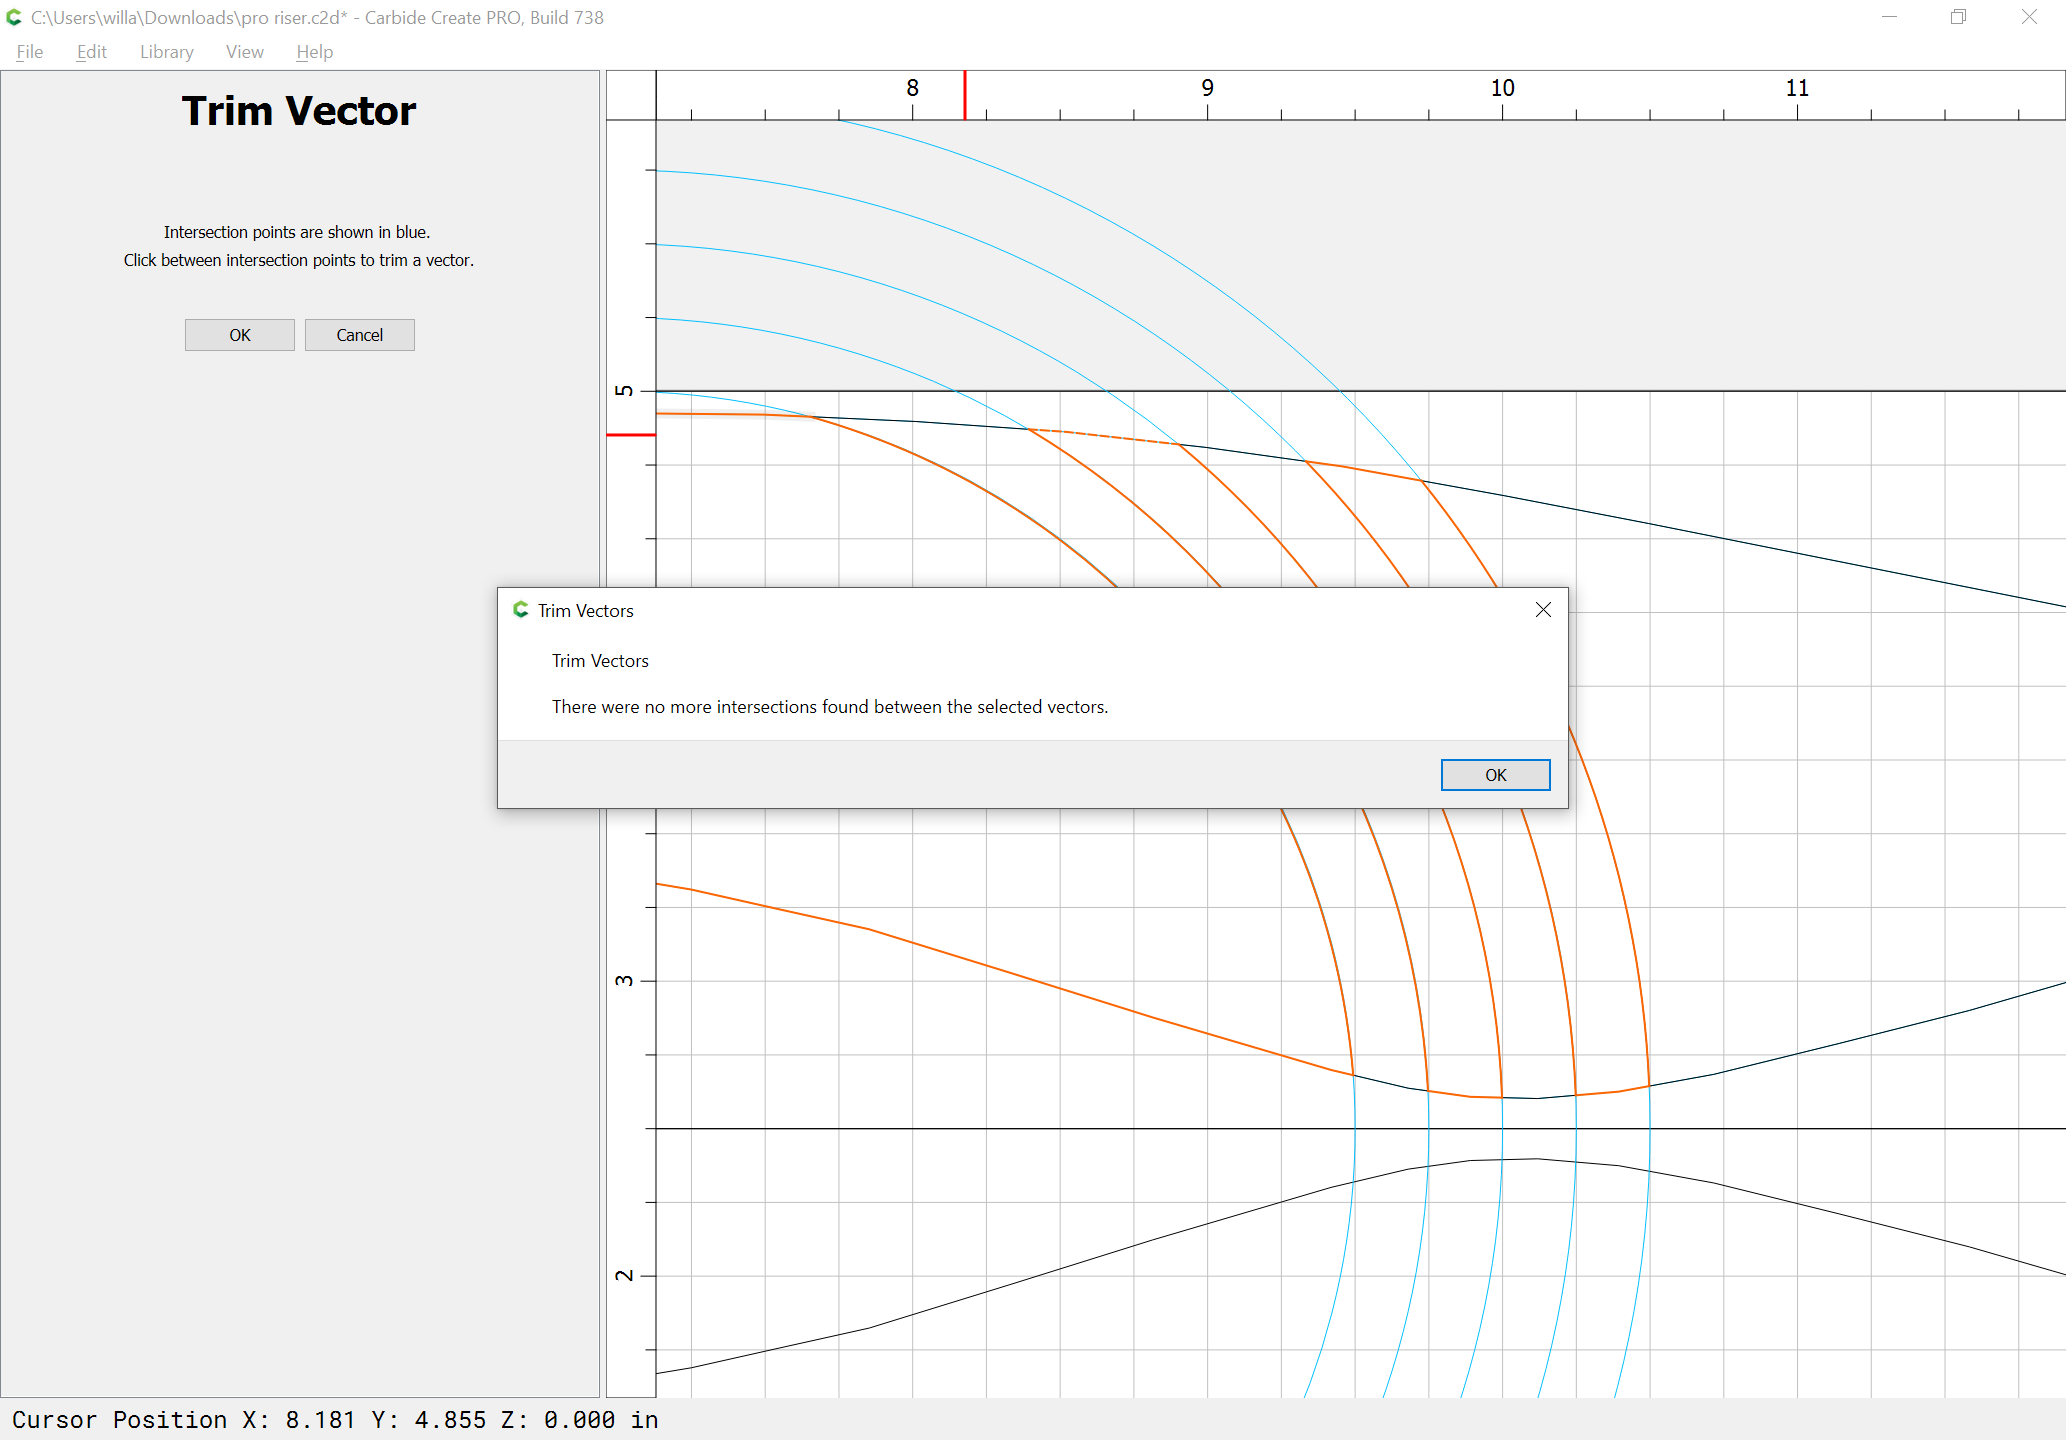
Select everything and use Trim Vectors:
to remove what is not wanted and subdivide into the lines which one wants to work w/:
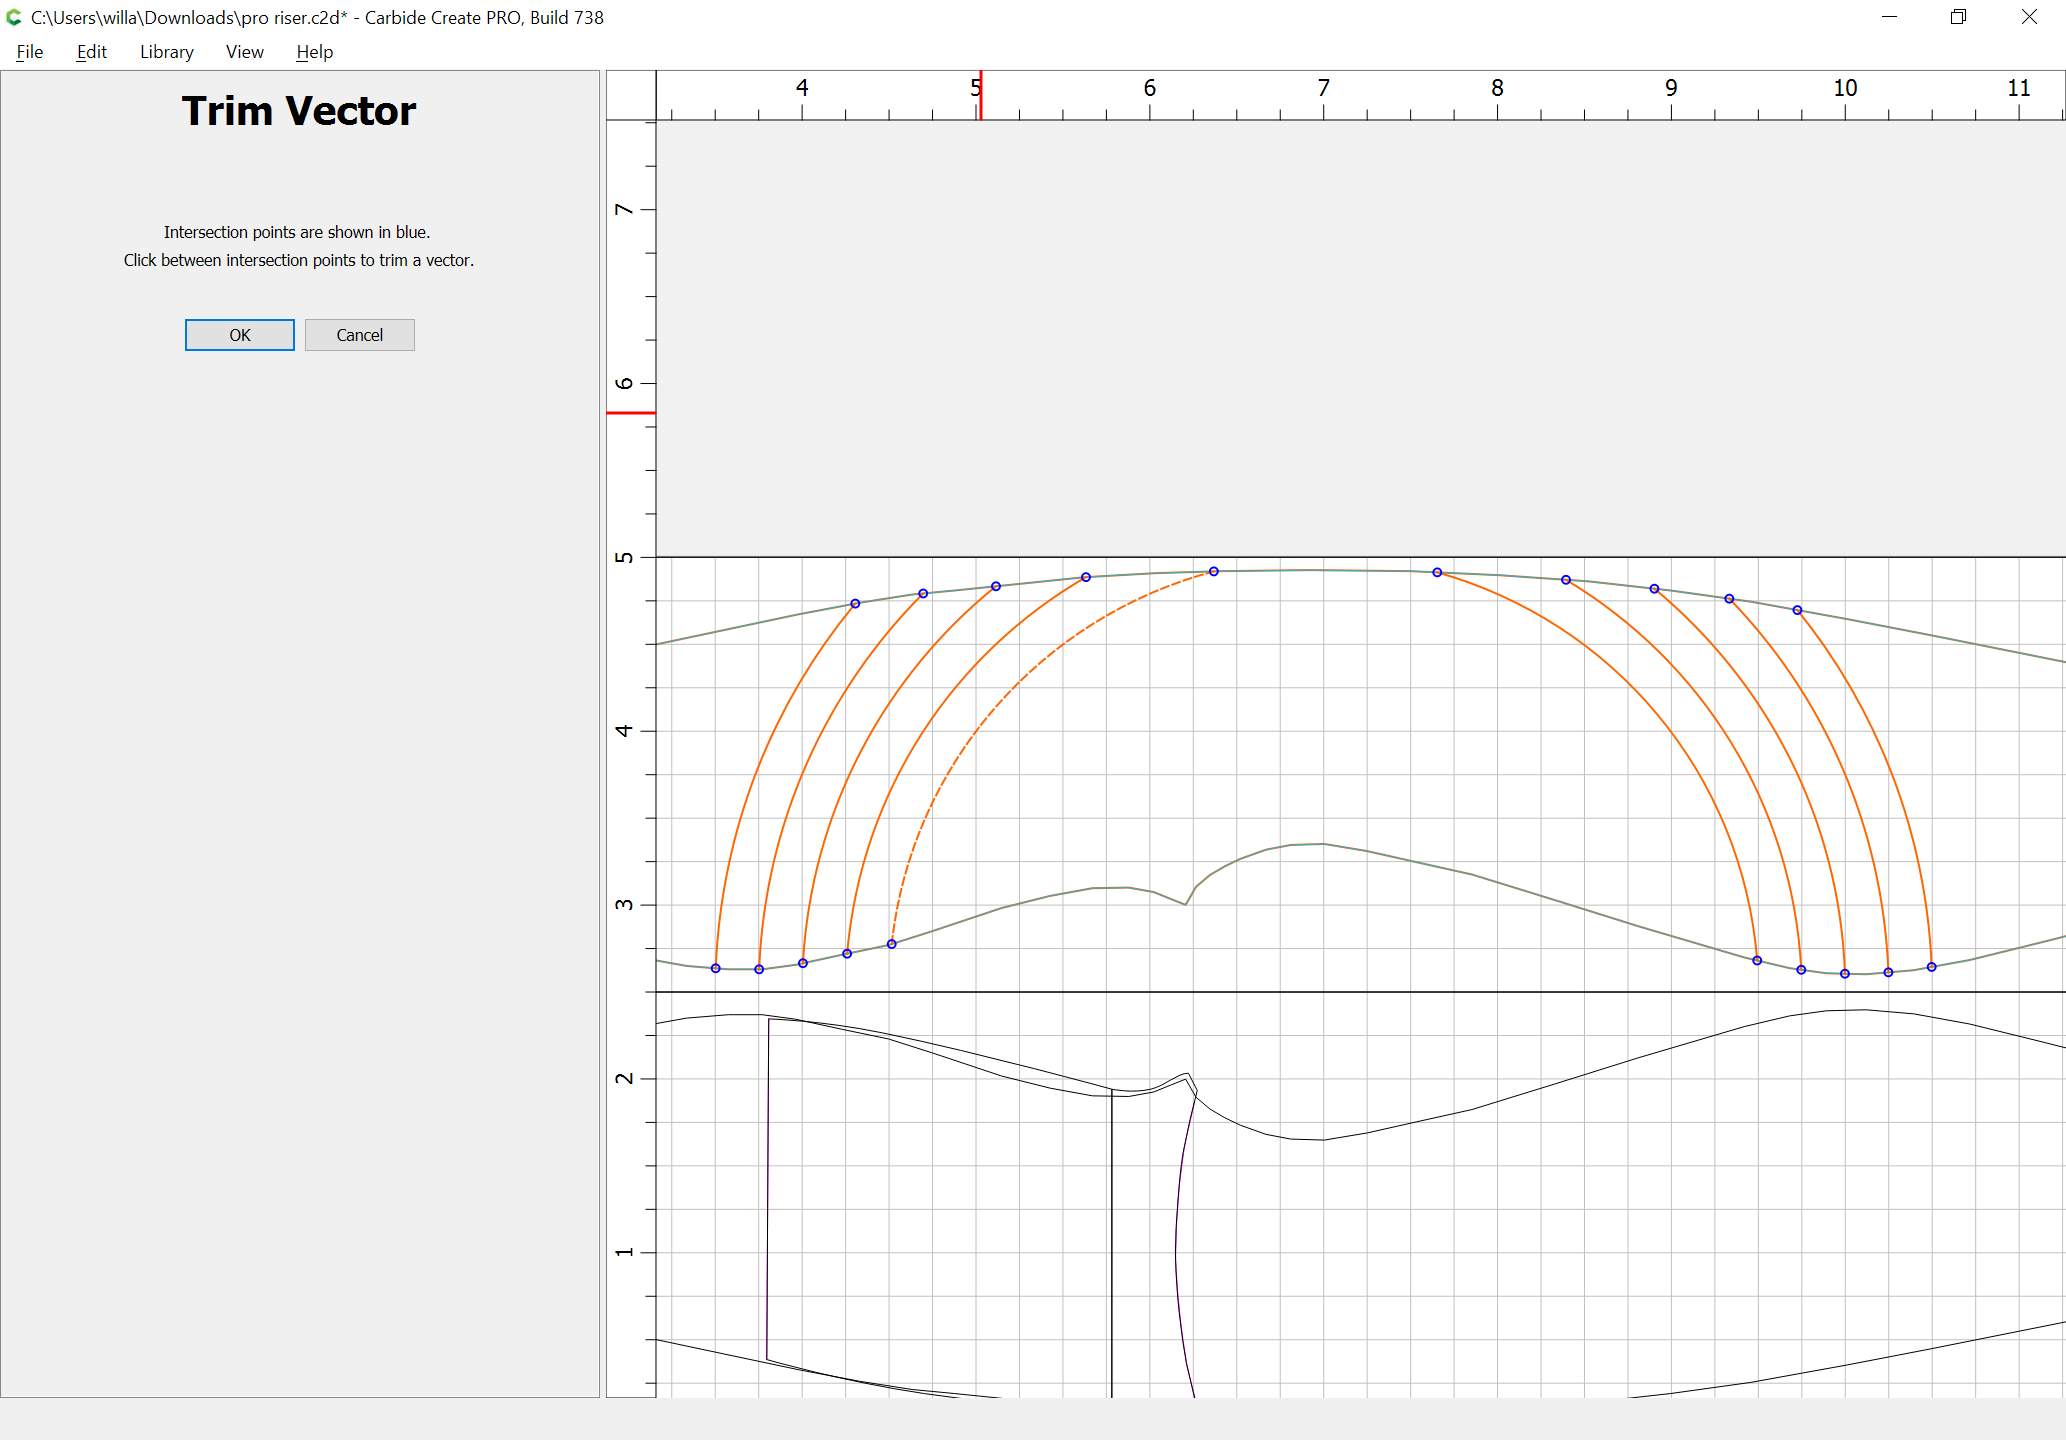
Note that for the riser outline we will need to remove alternating sections, then repeat this w/ a copy from the template (copy the circles to the template as well):

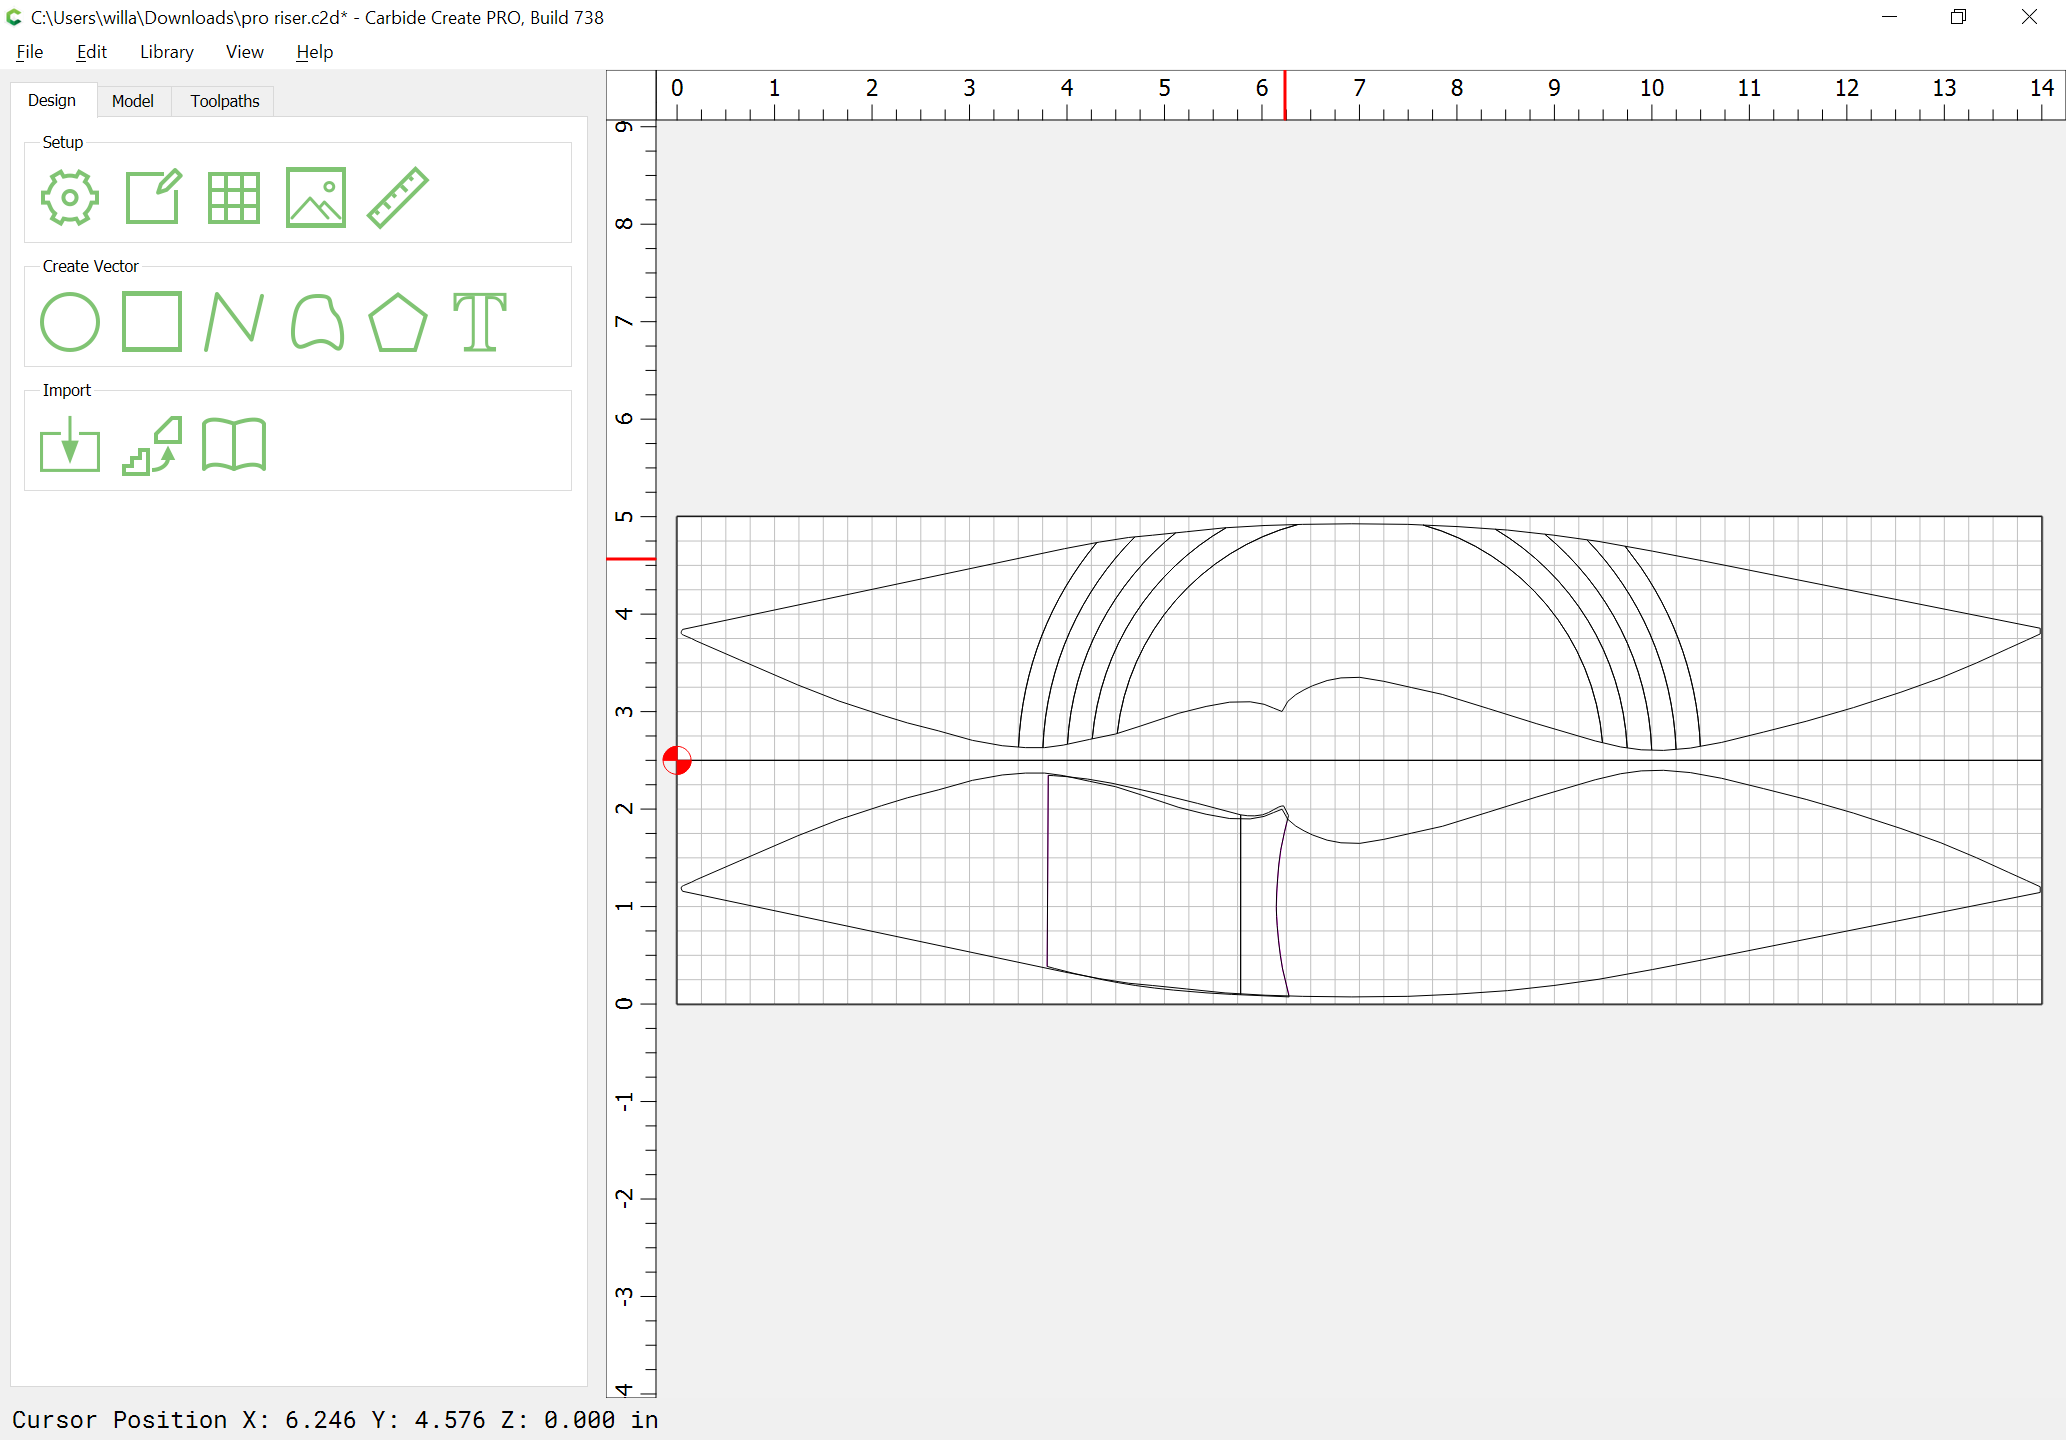
Then use Join Vectors:

At this point, repeat to get the missing sections.
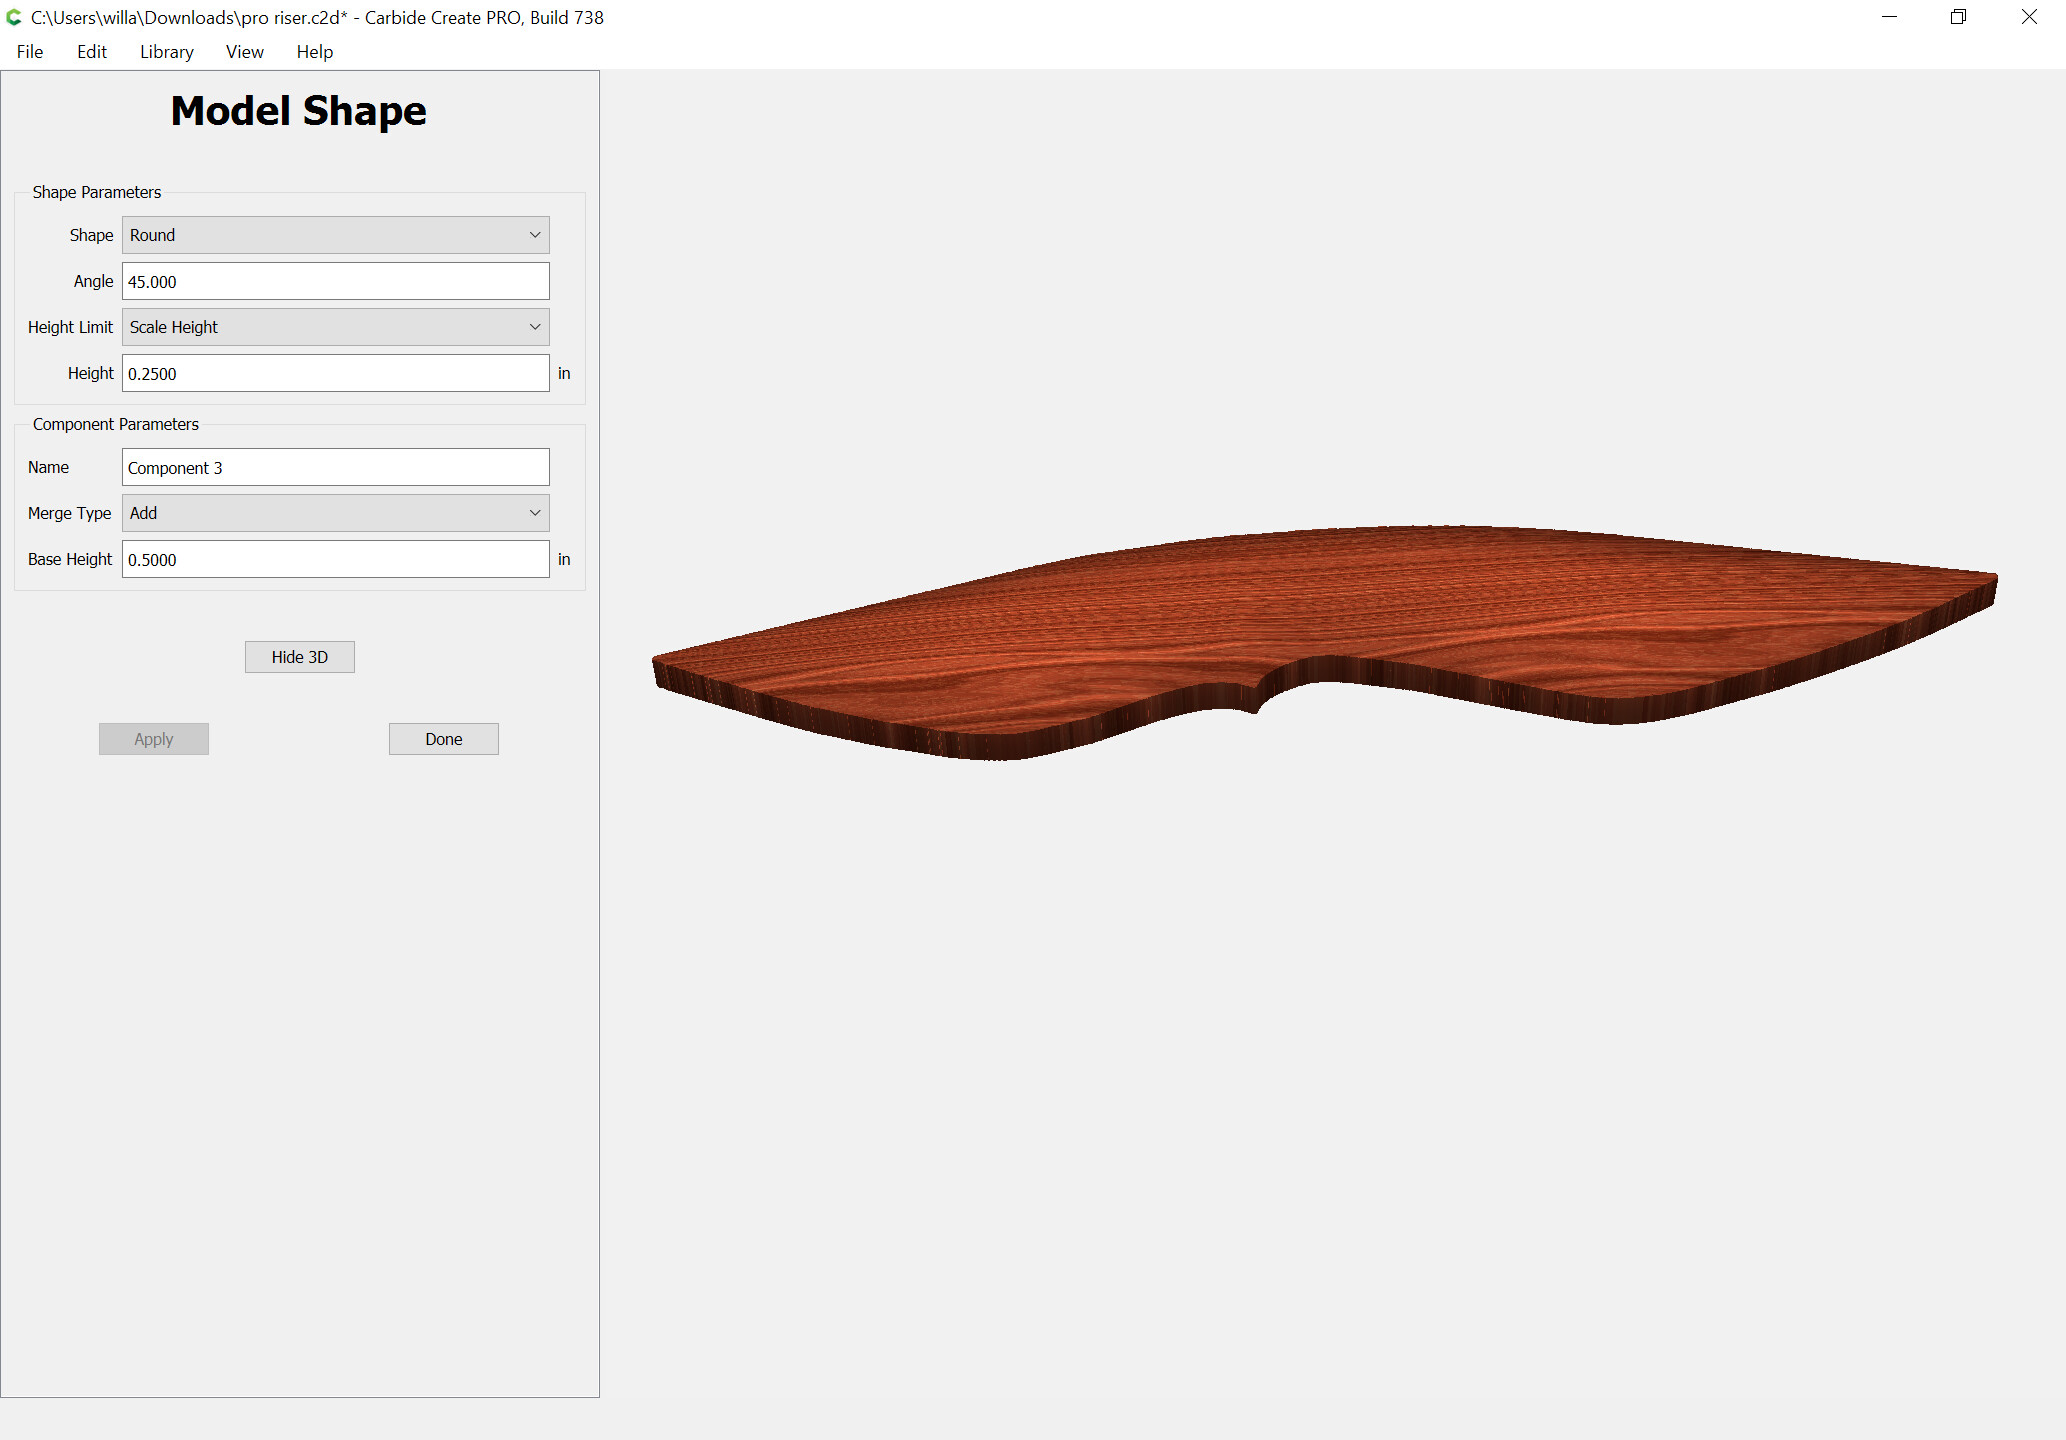
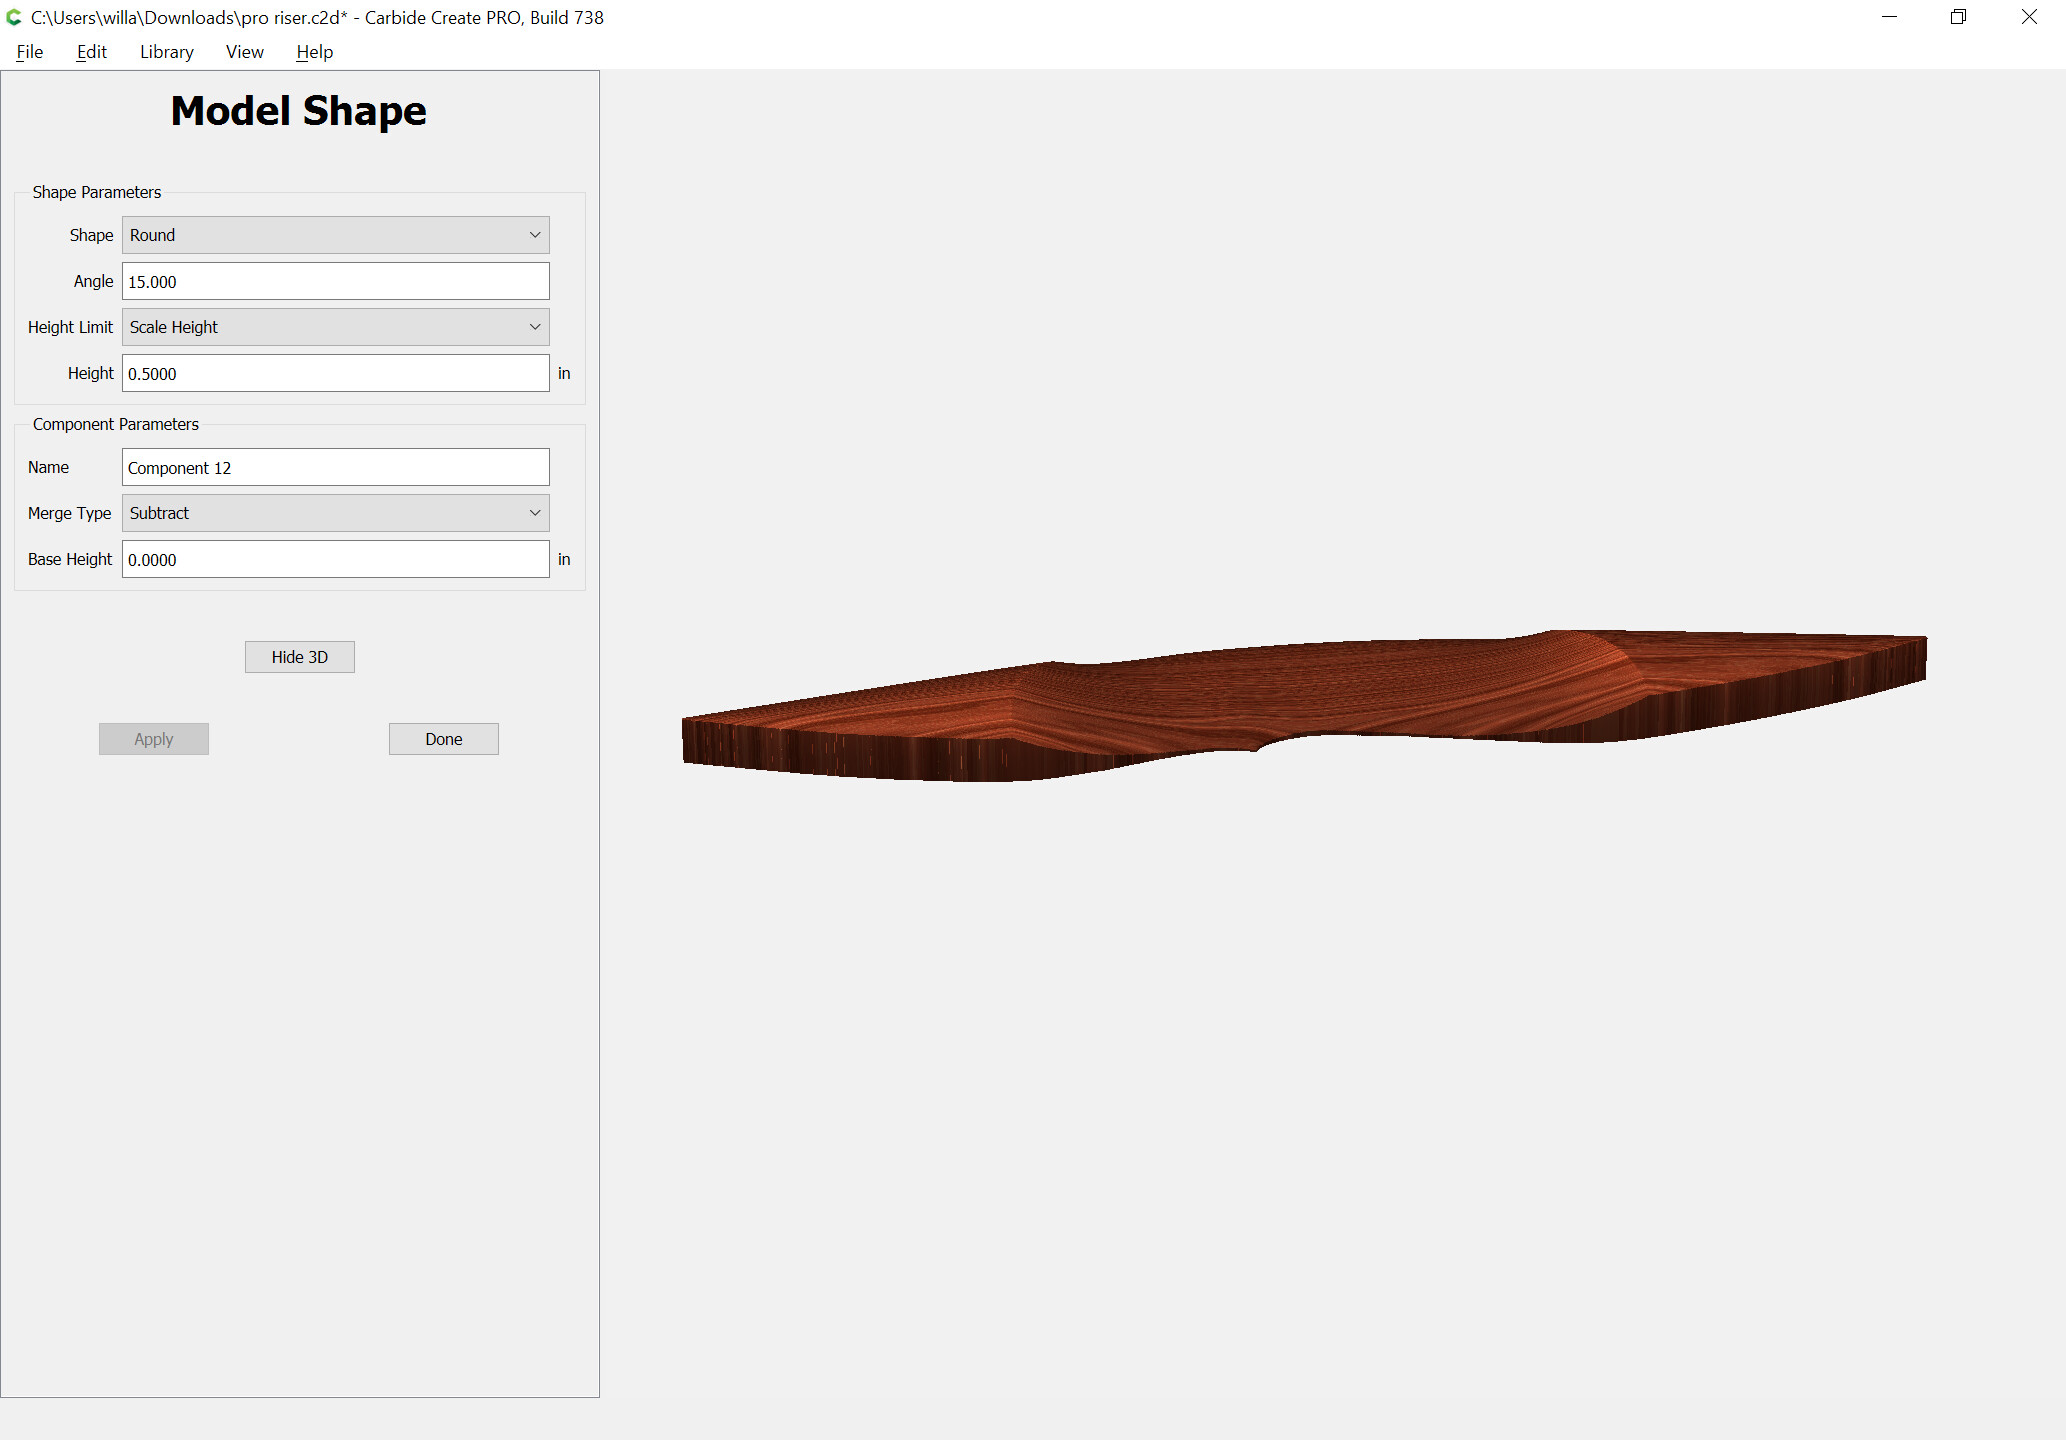
It will now be possible to select each section and assign a different height:
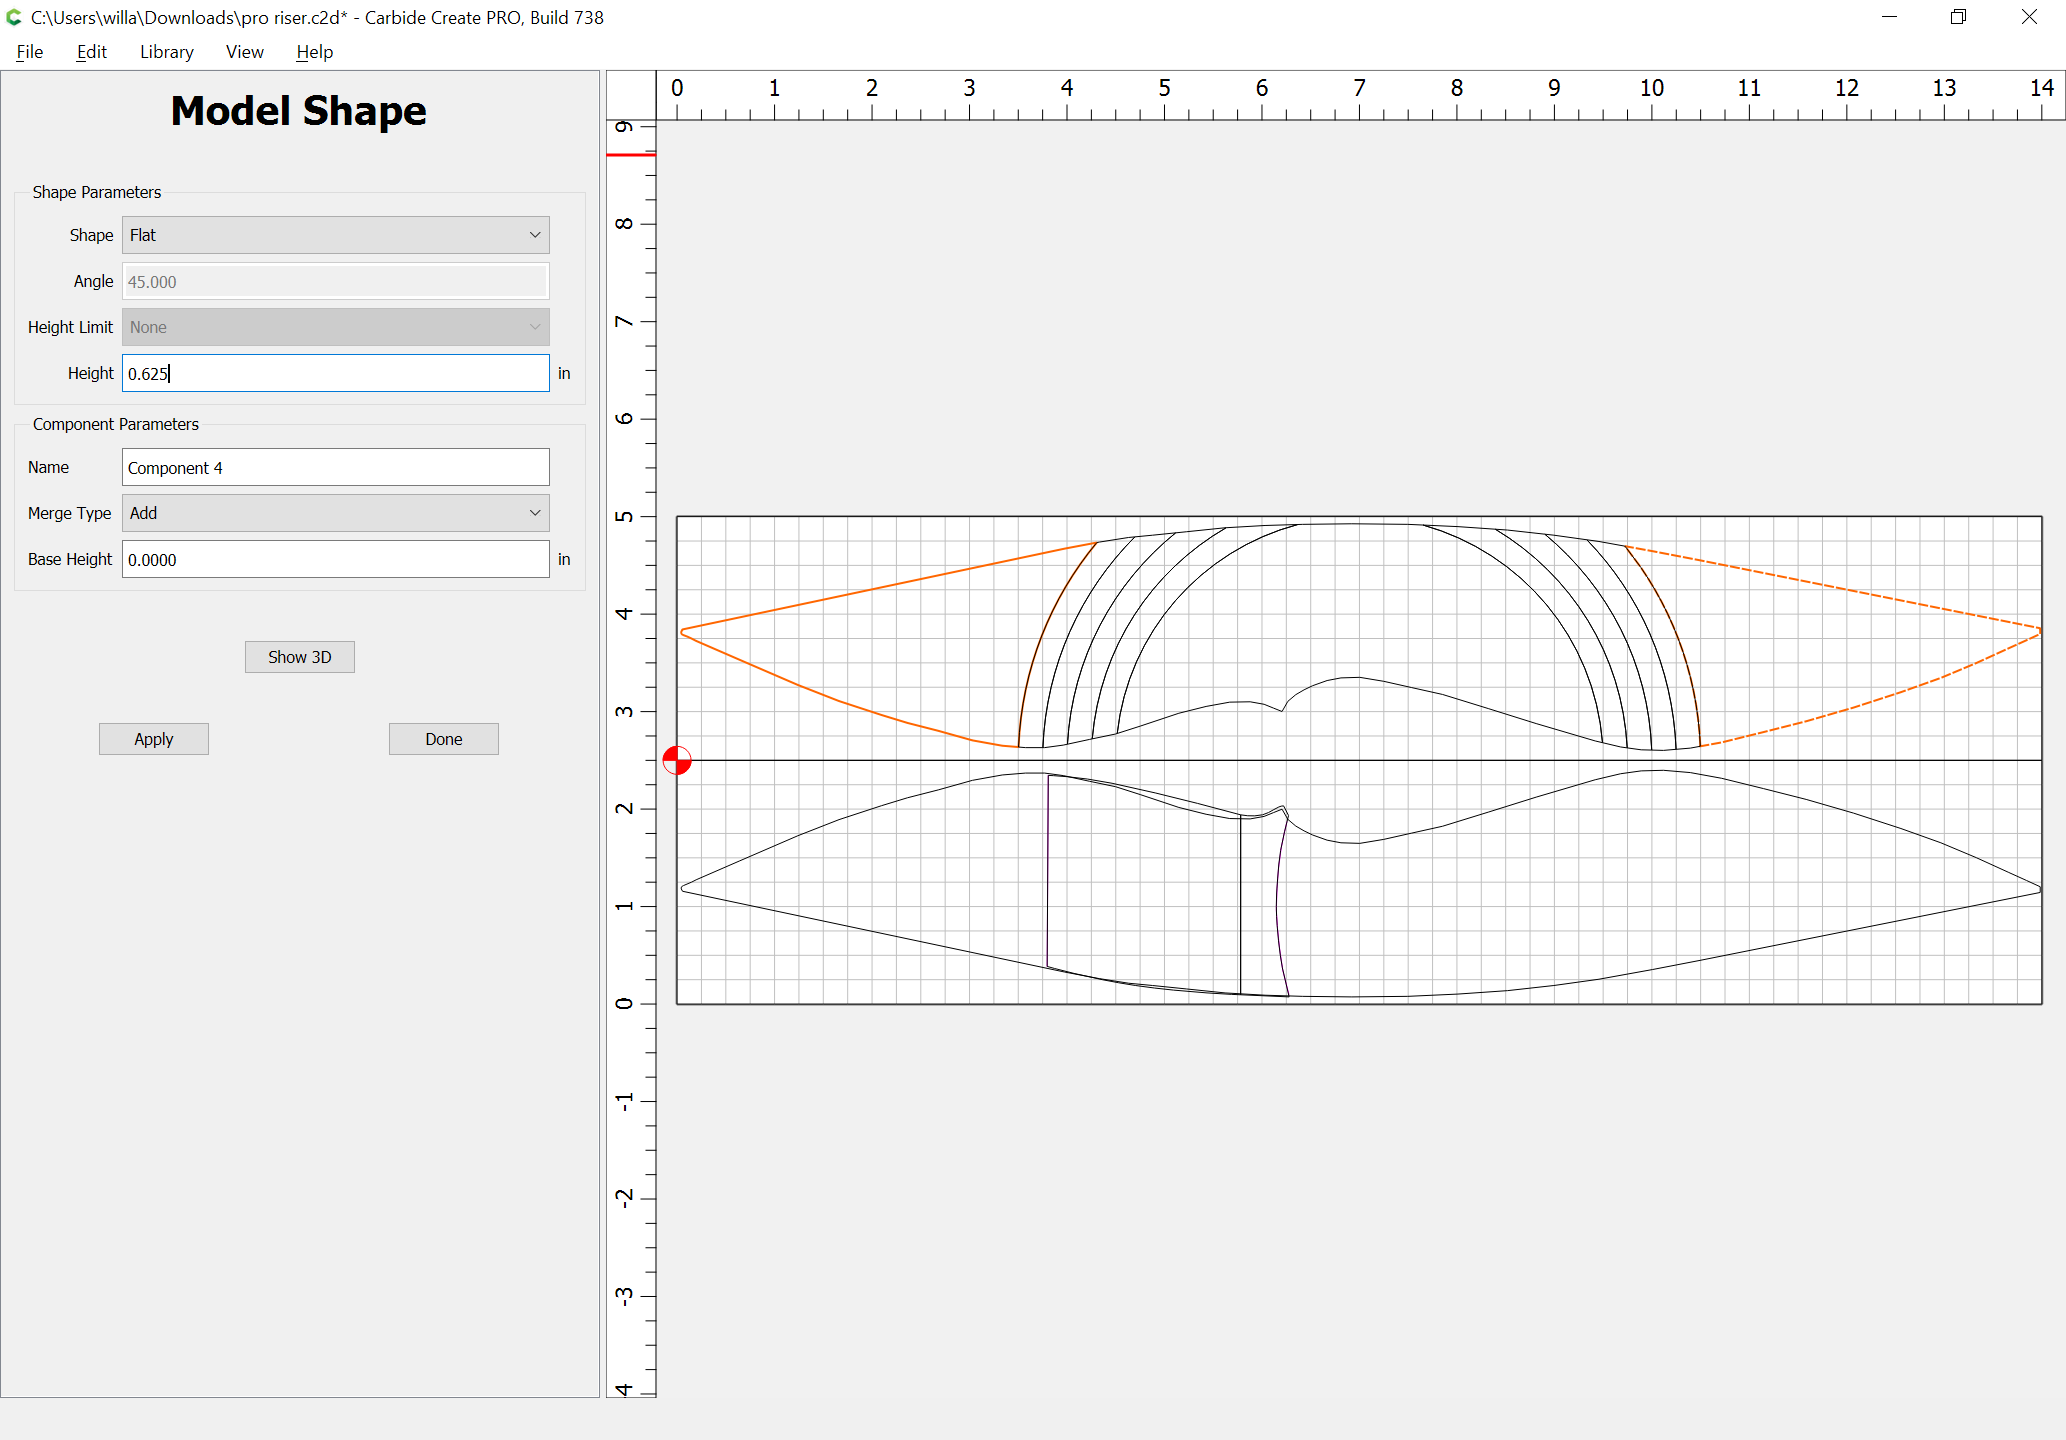
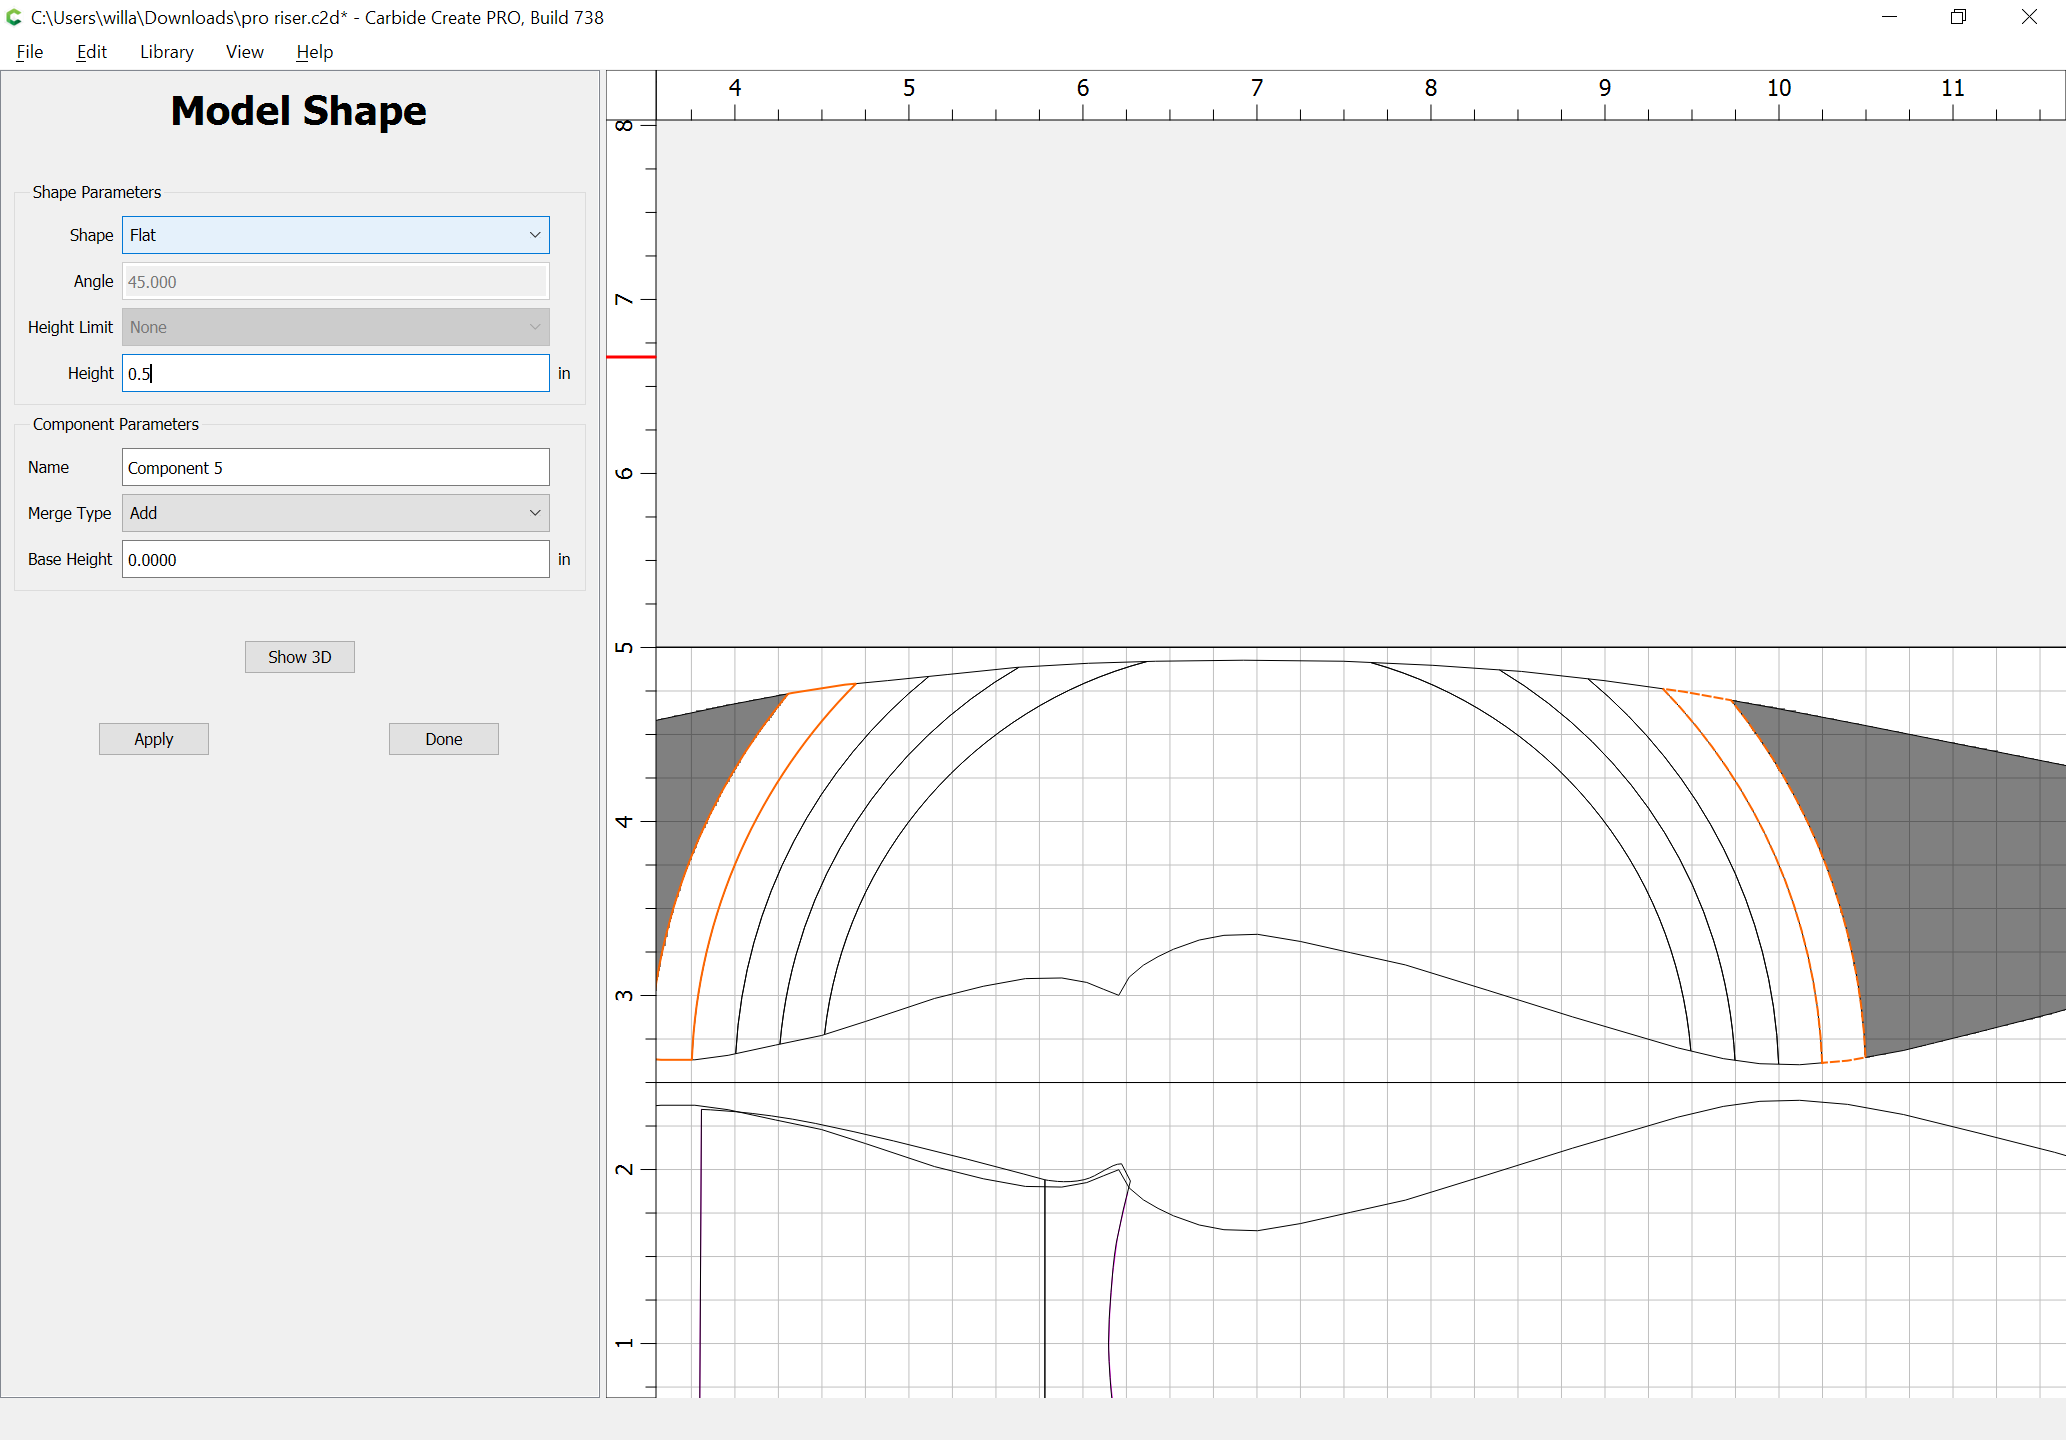

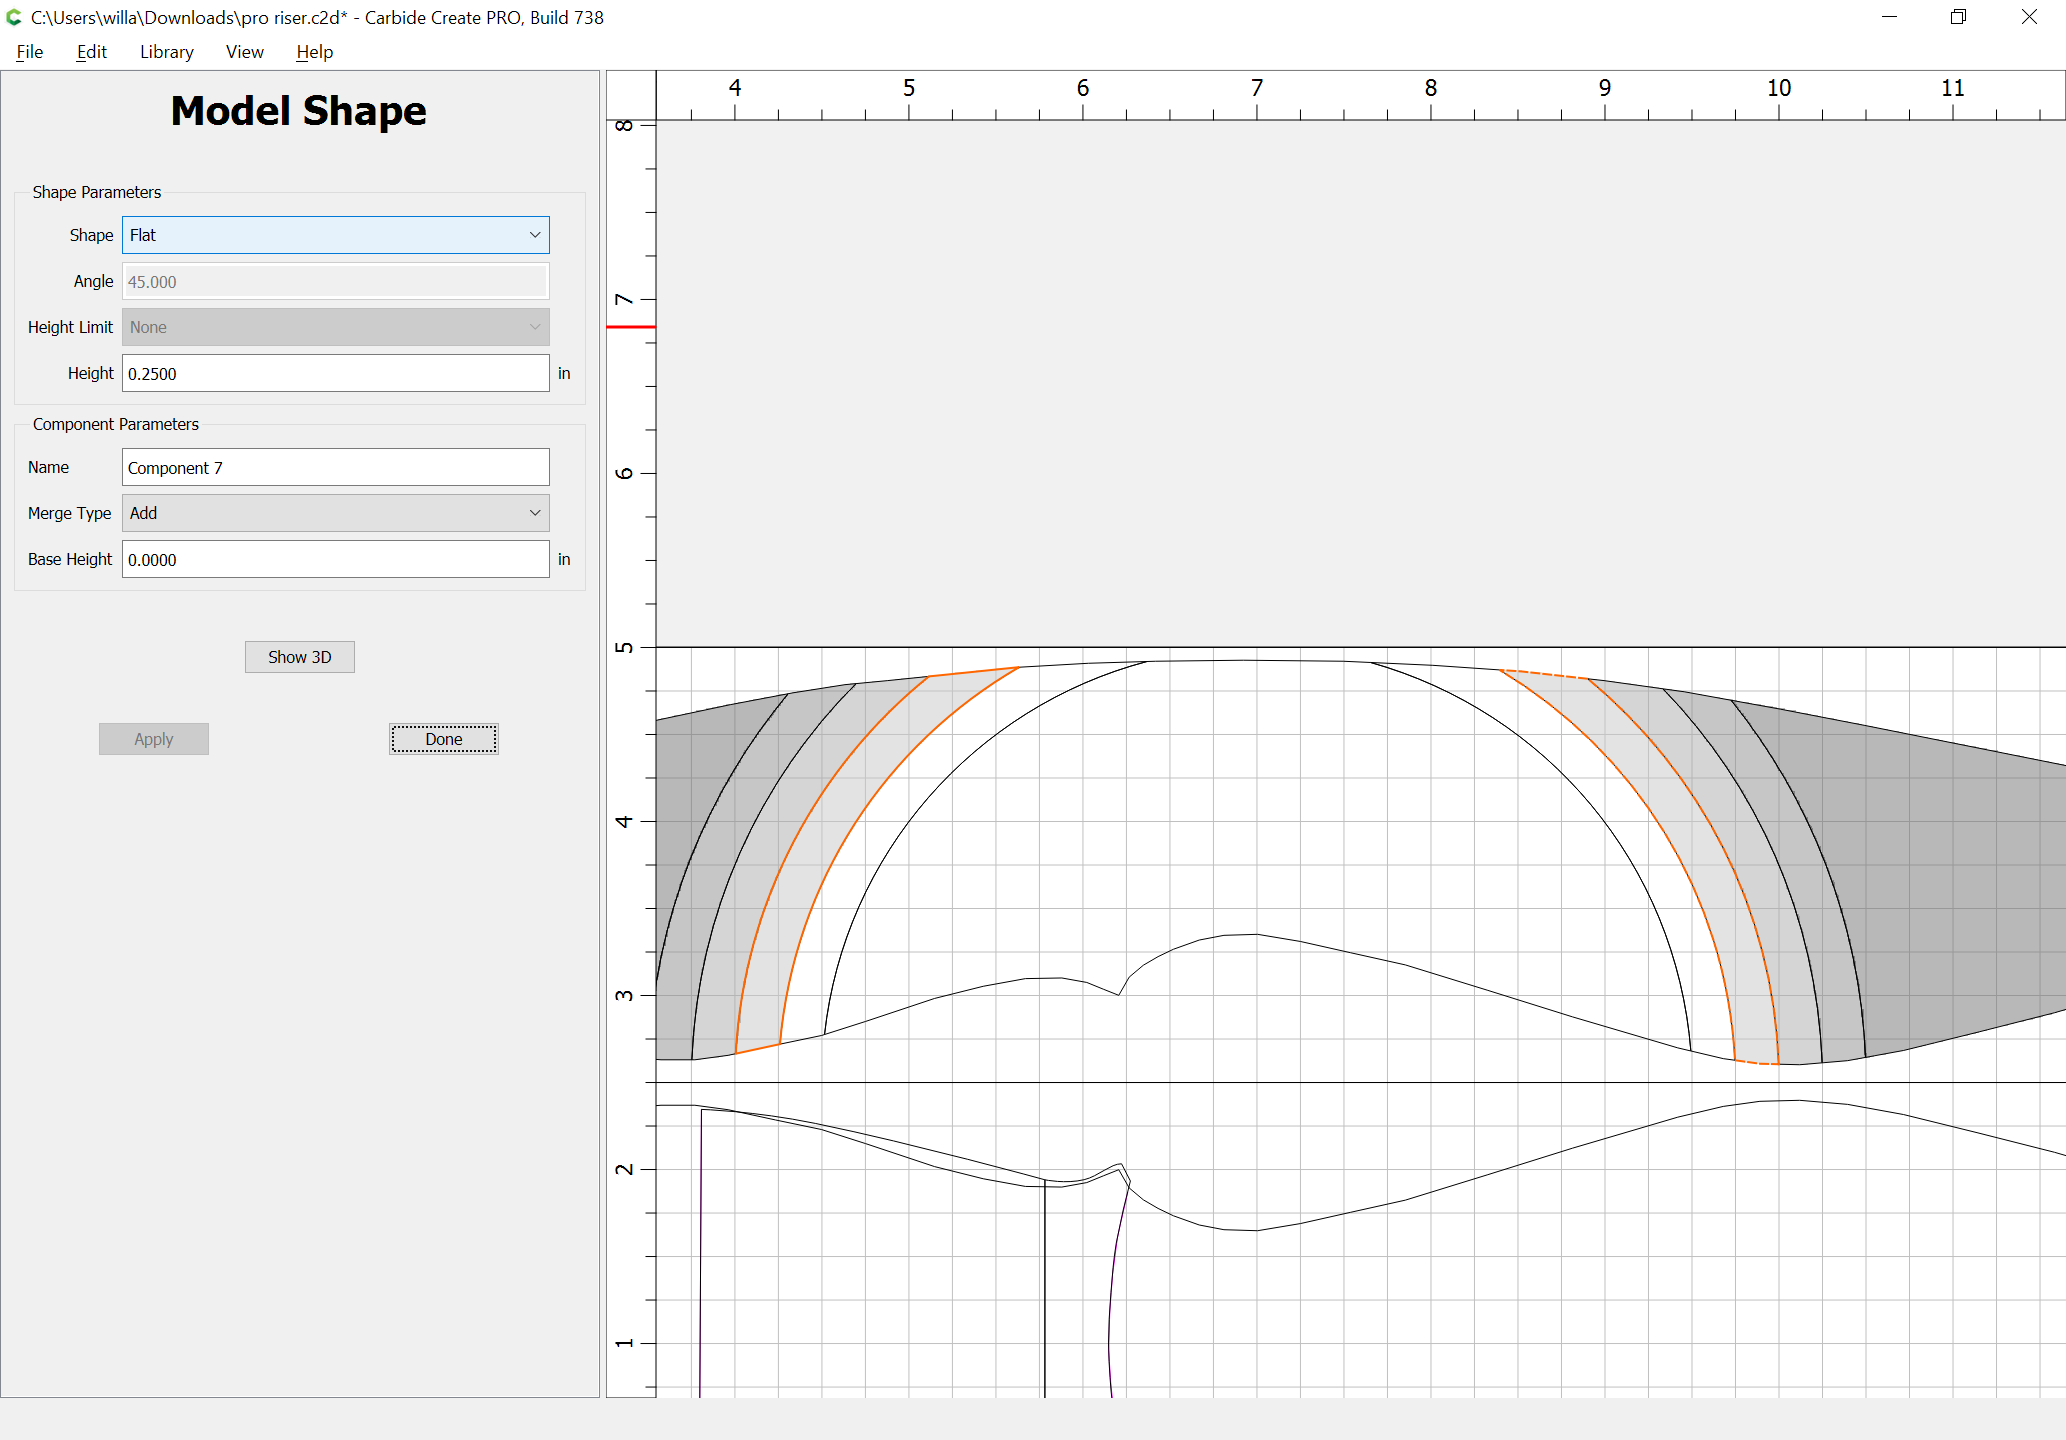
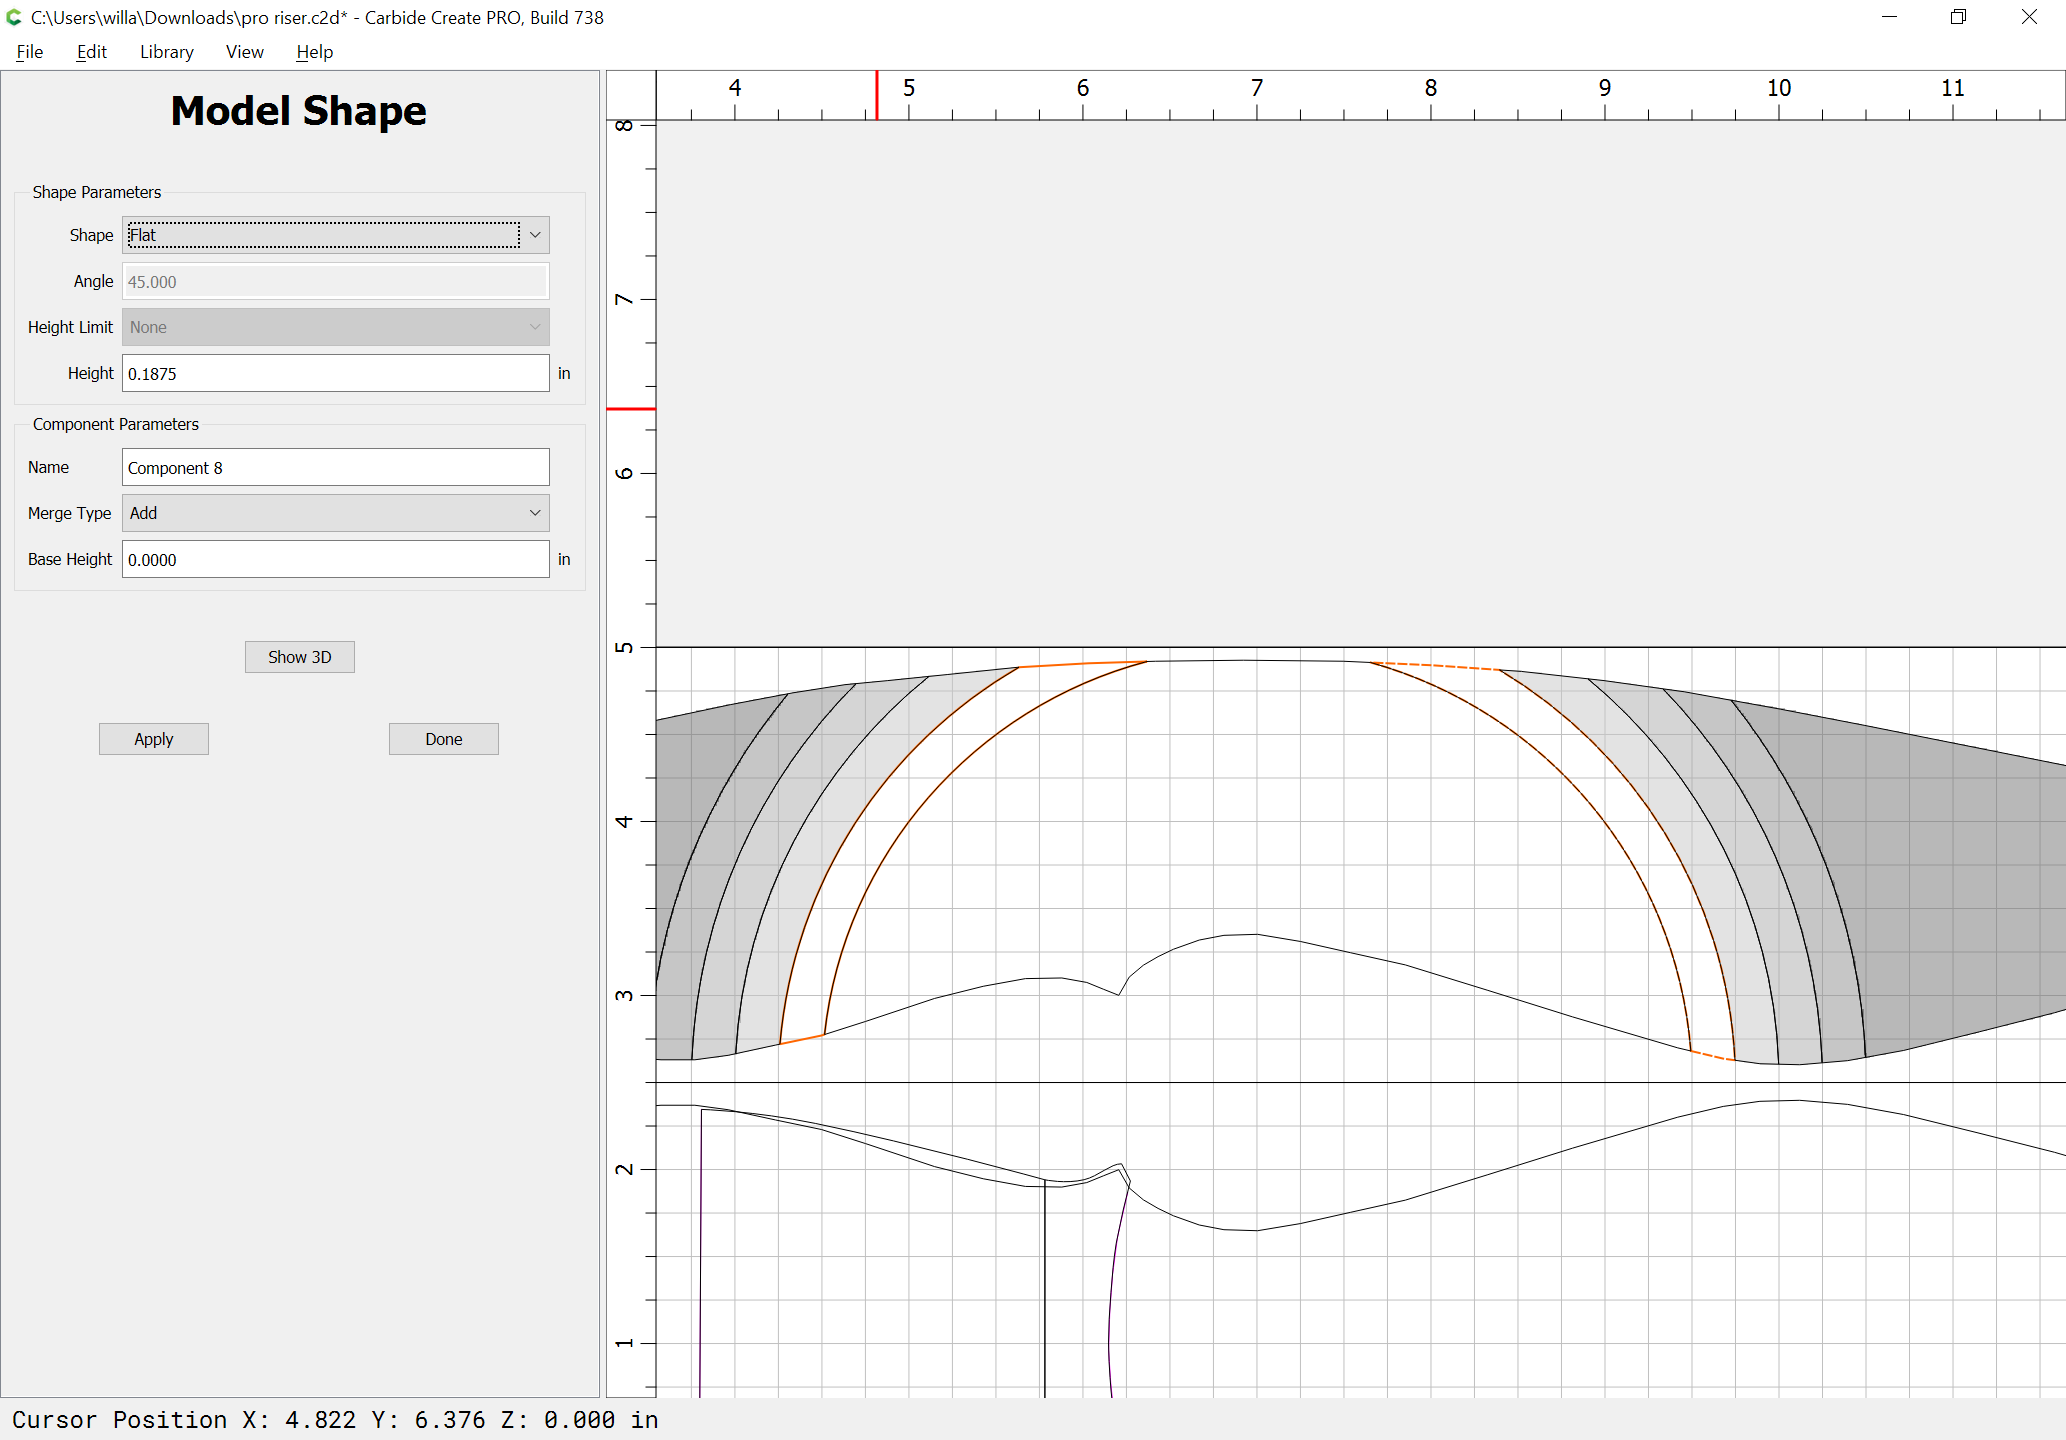
which previews as:
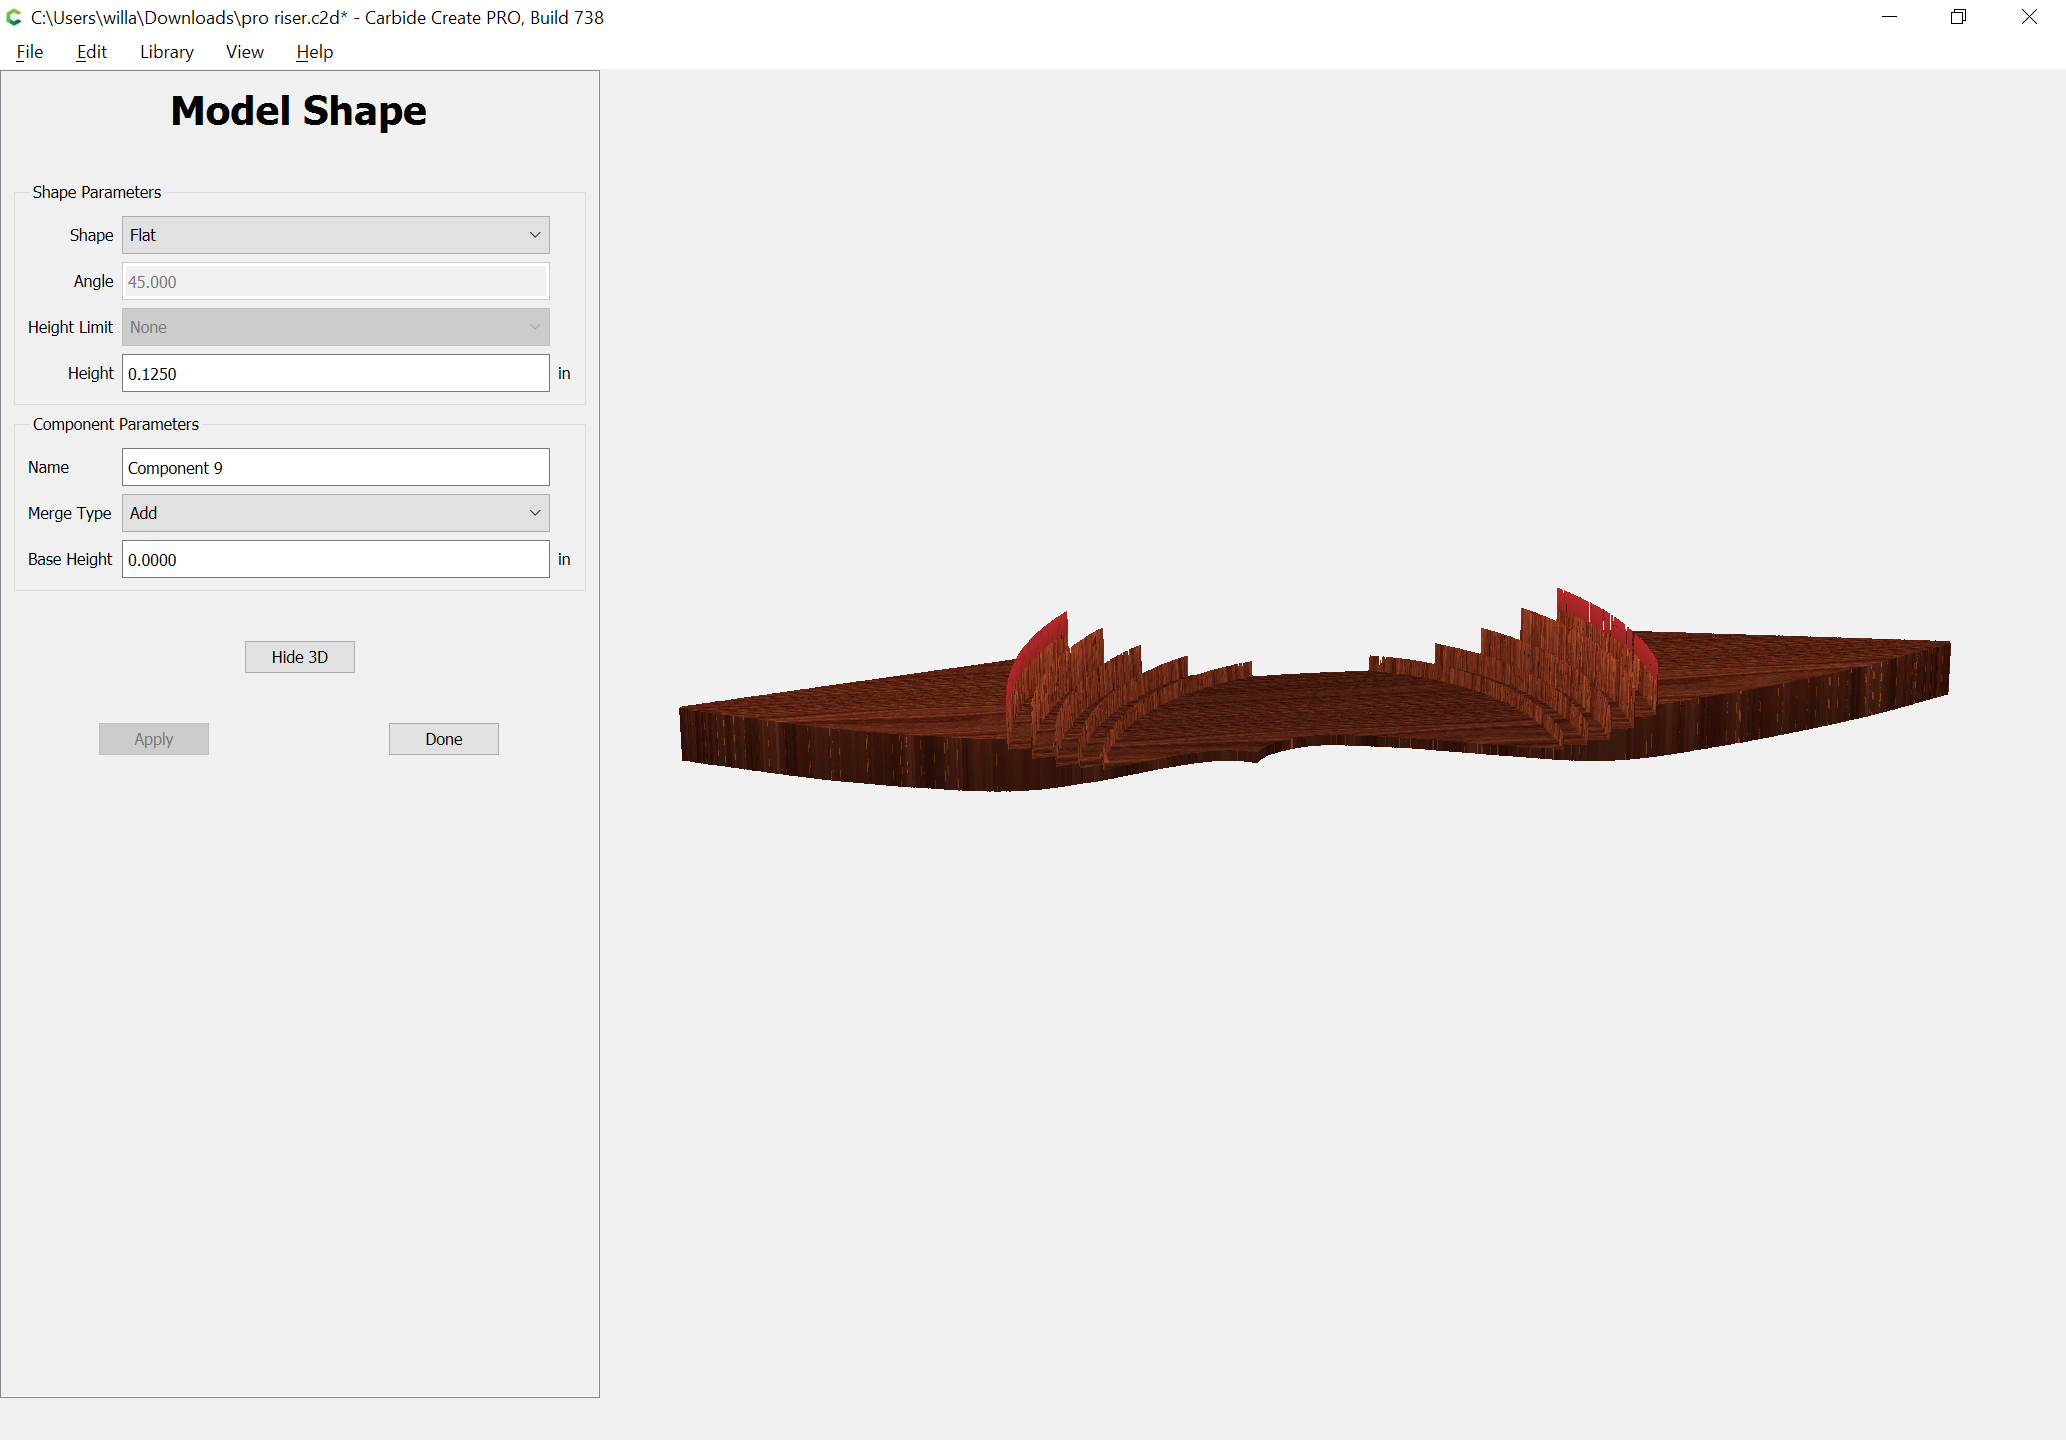
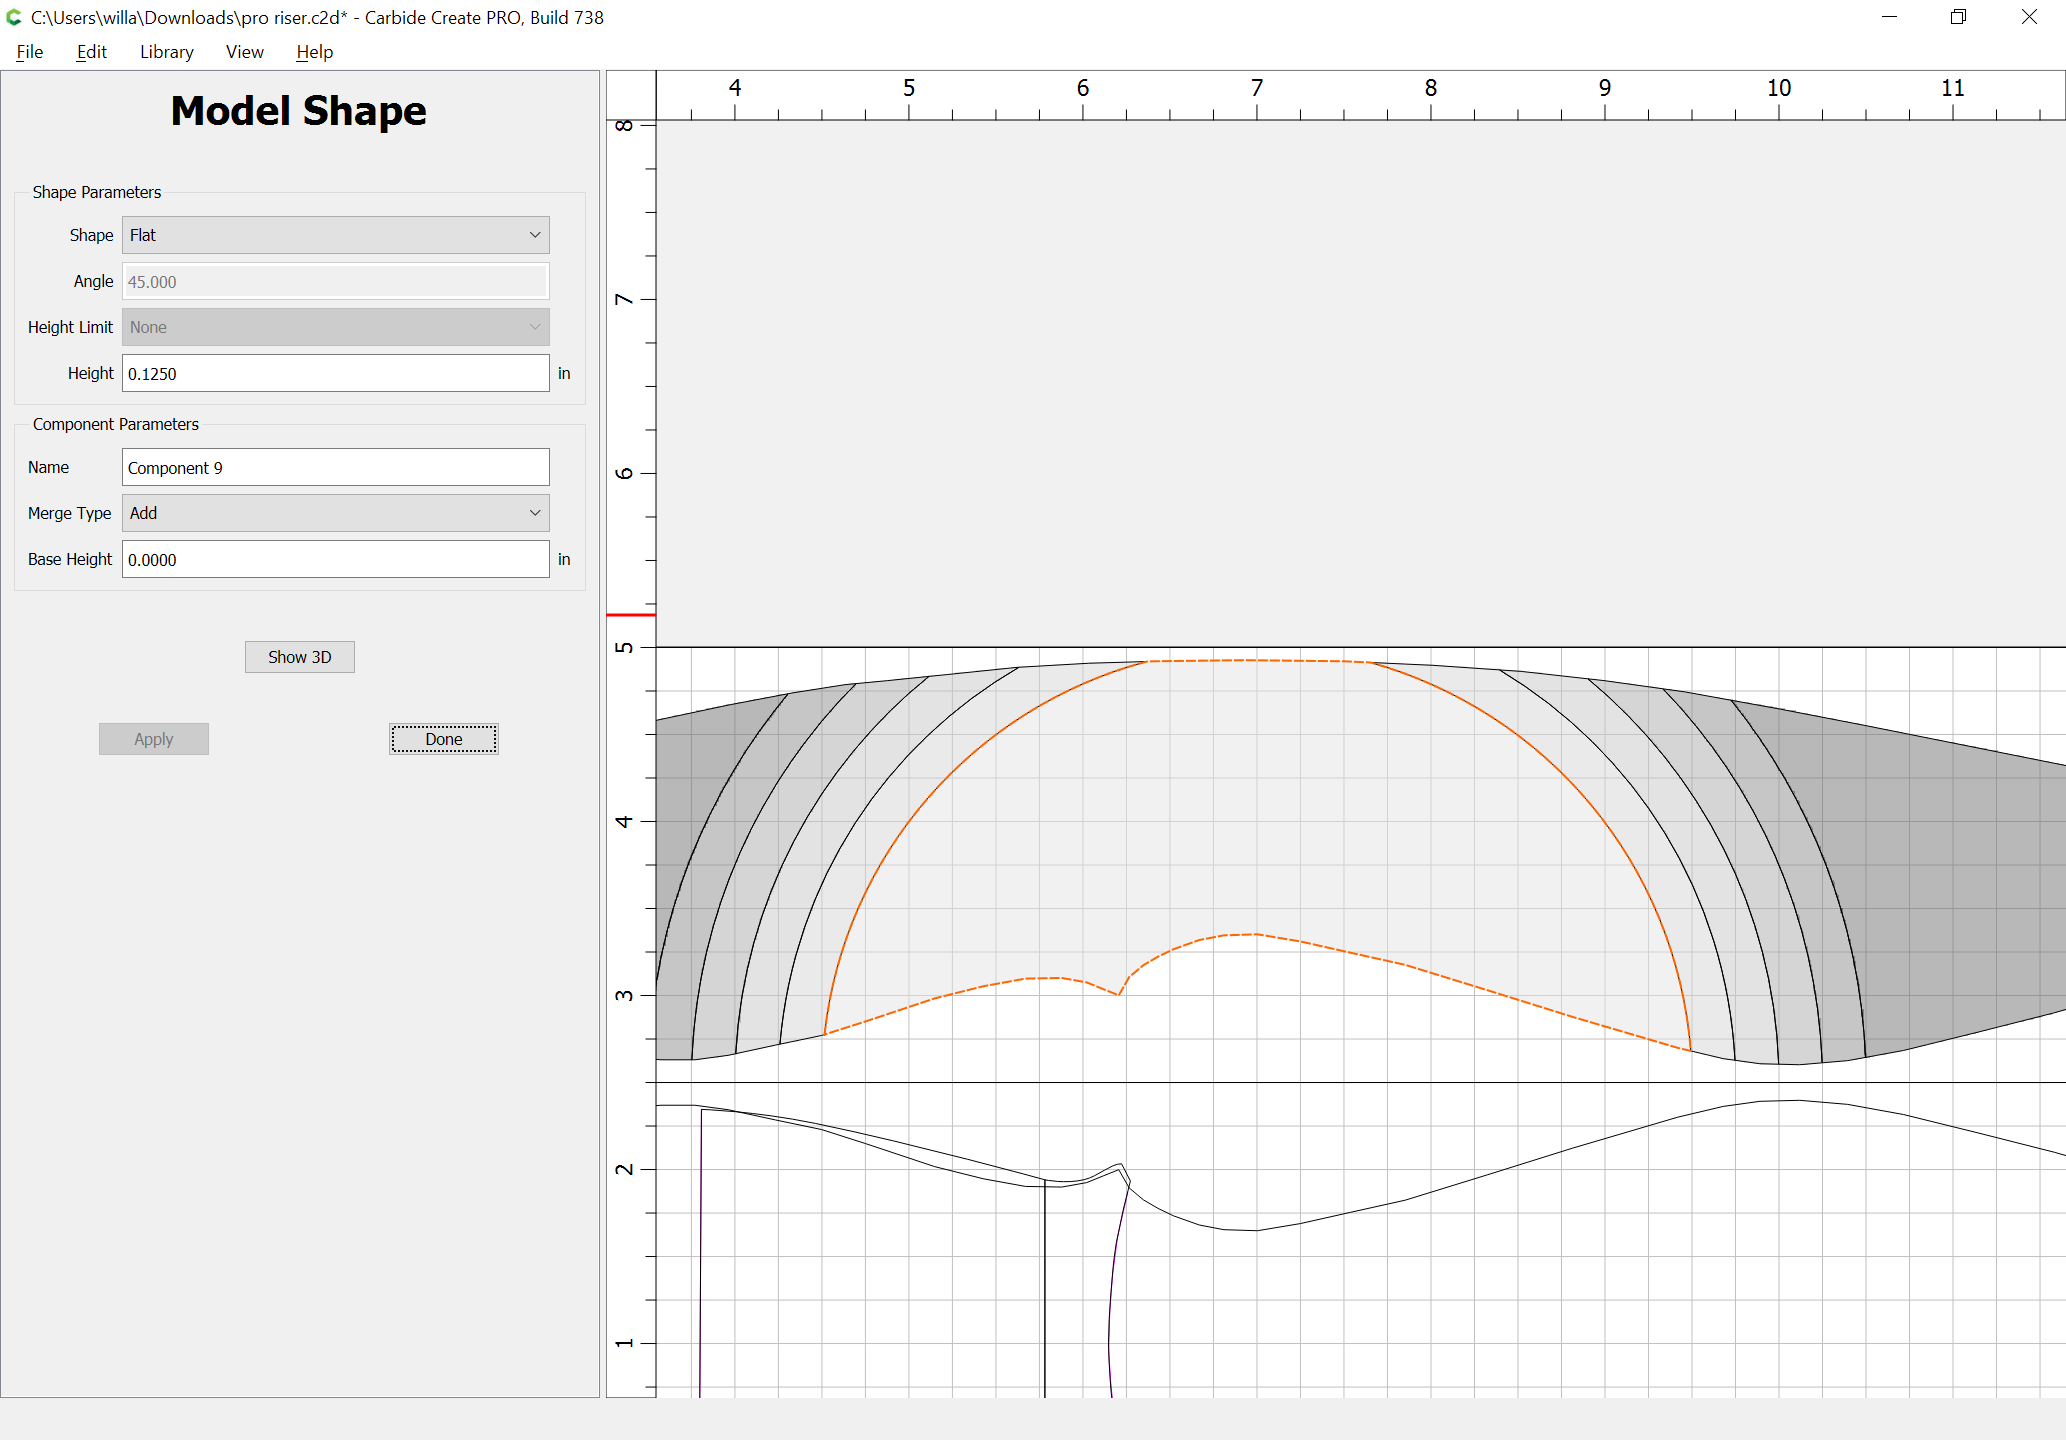
and then may be rounded off by:


Obviously the geometries will need to slightly overlap so as to avoid the artifacting, and the thicknesses be somewhat adjusted, but this should allow one to achieve the desired shape.
1 Like
An alternate technique would be to model things, then take away:
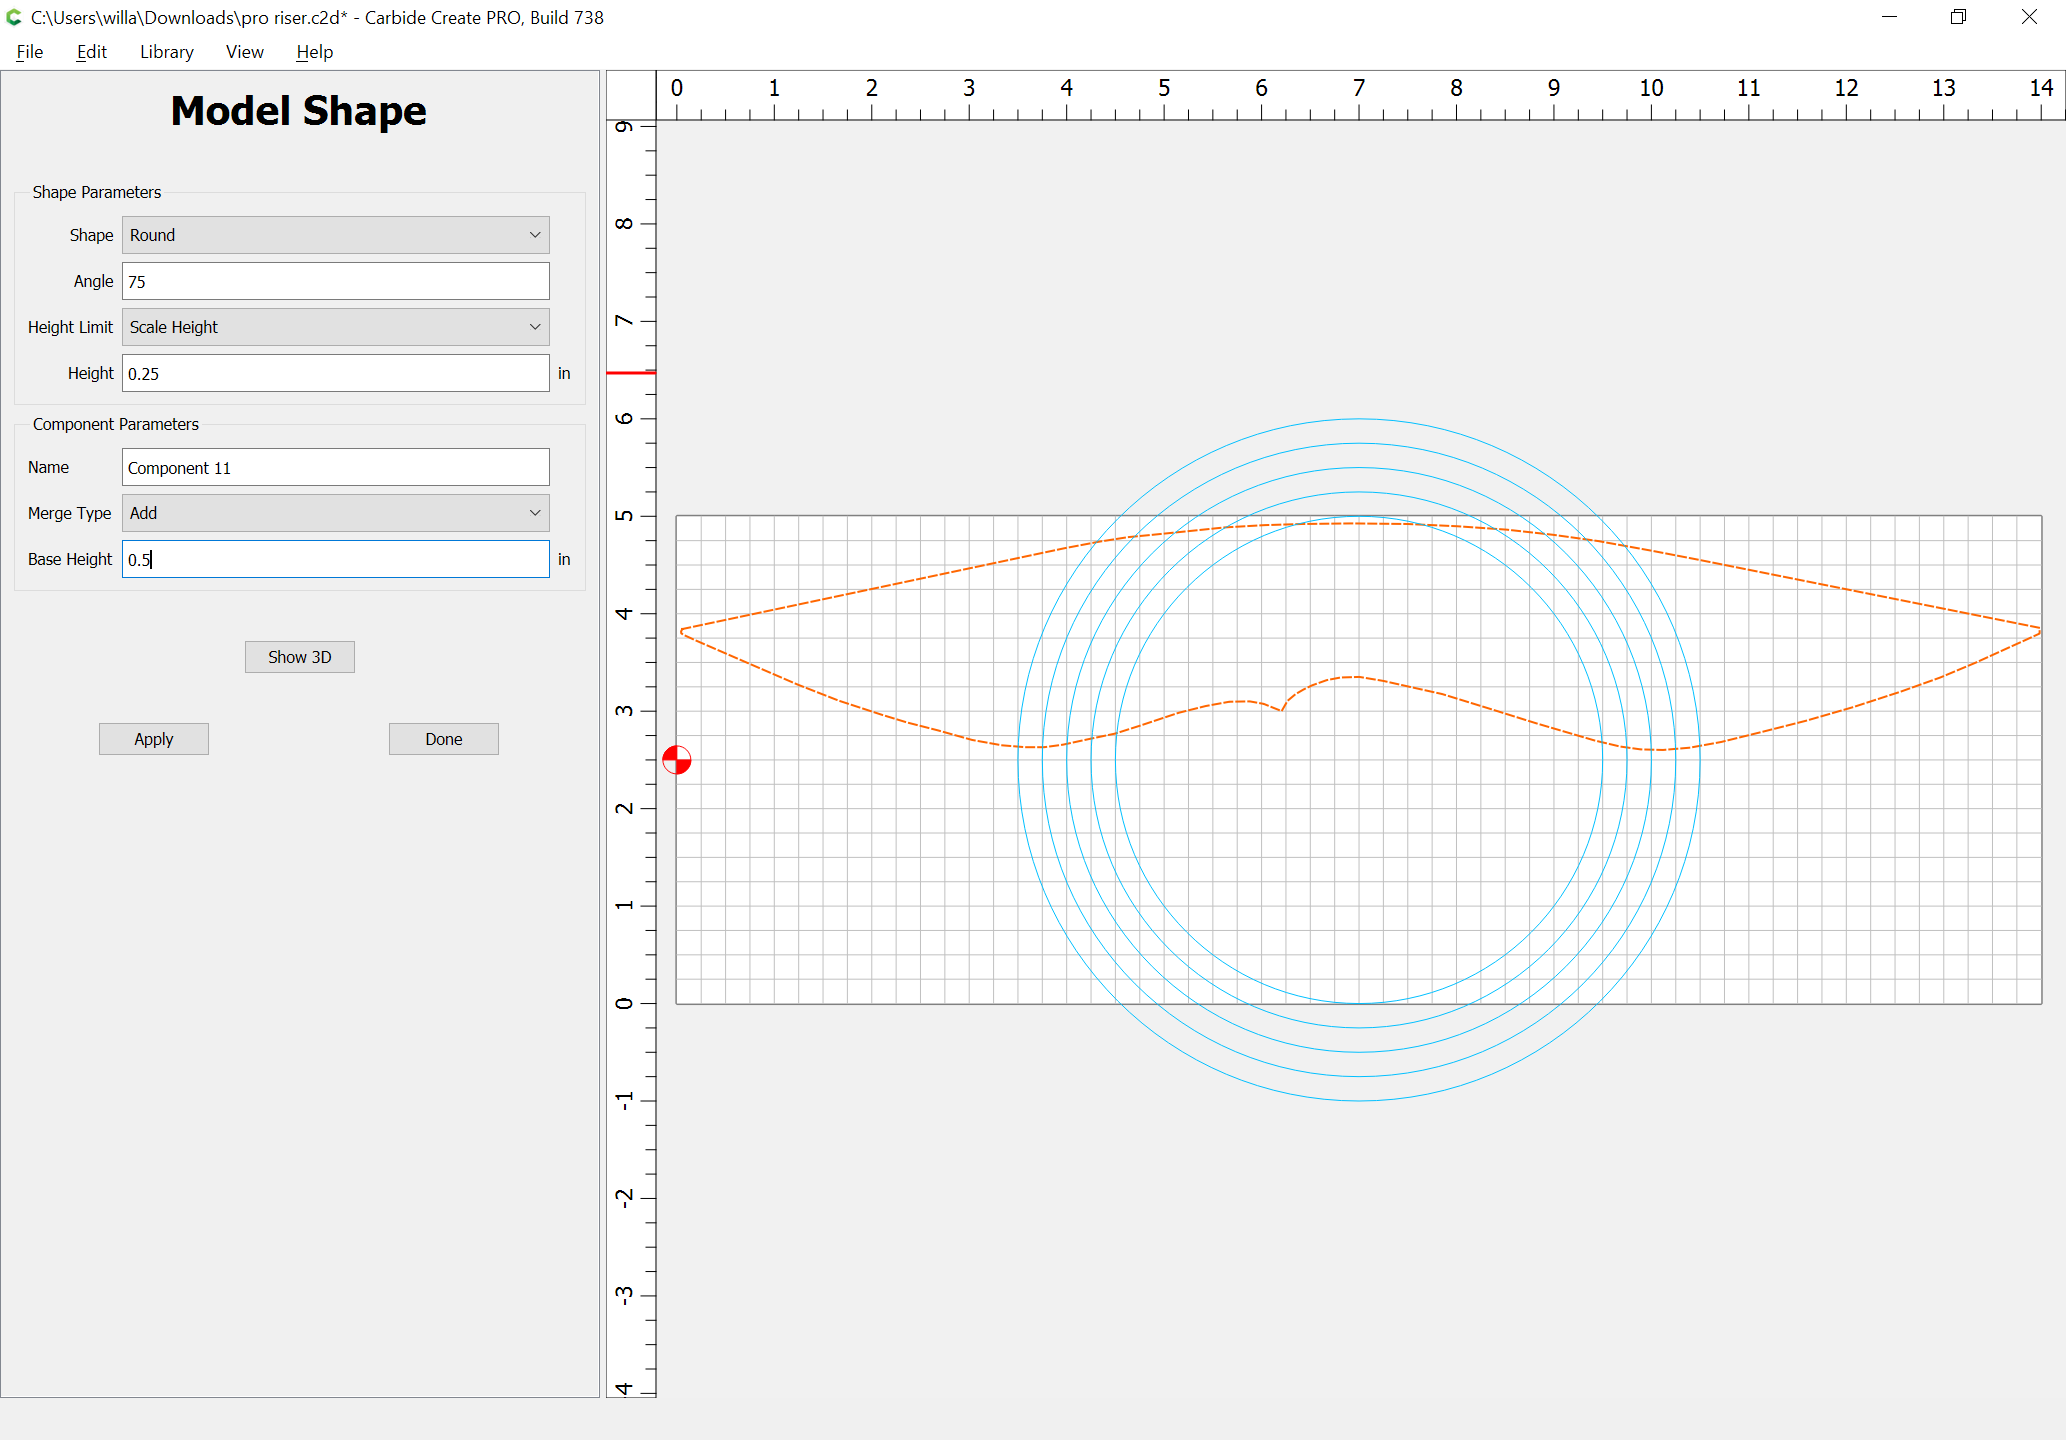
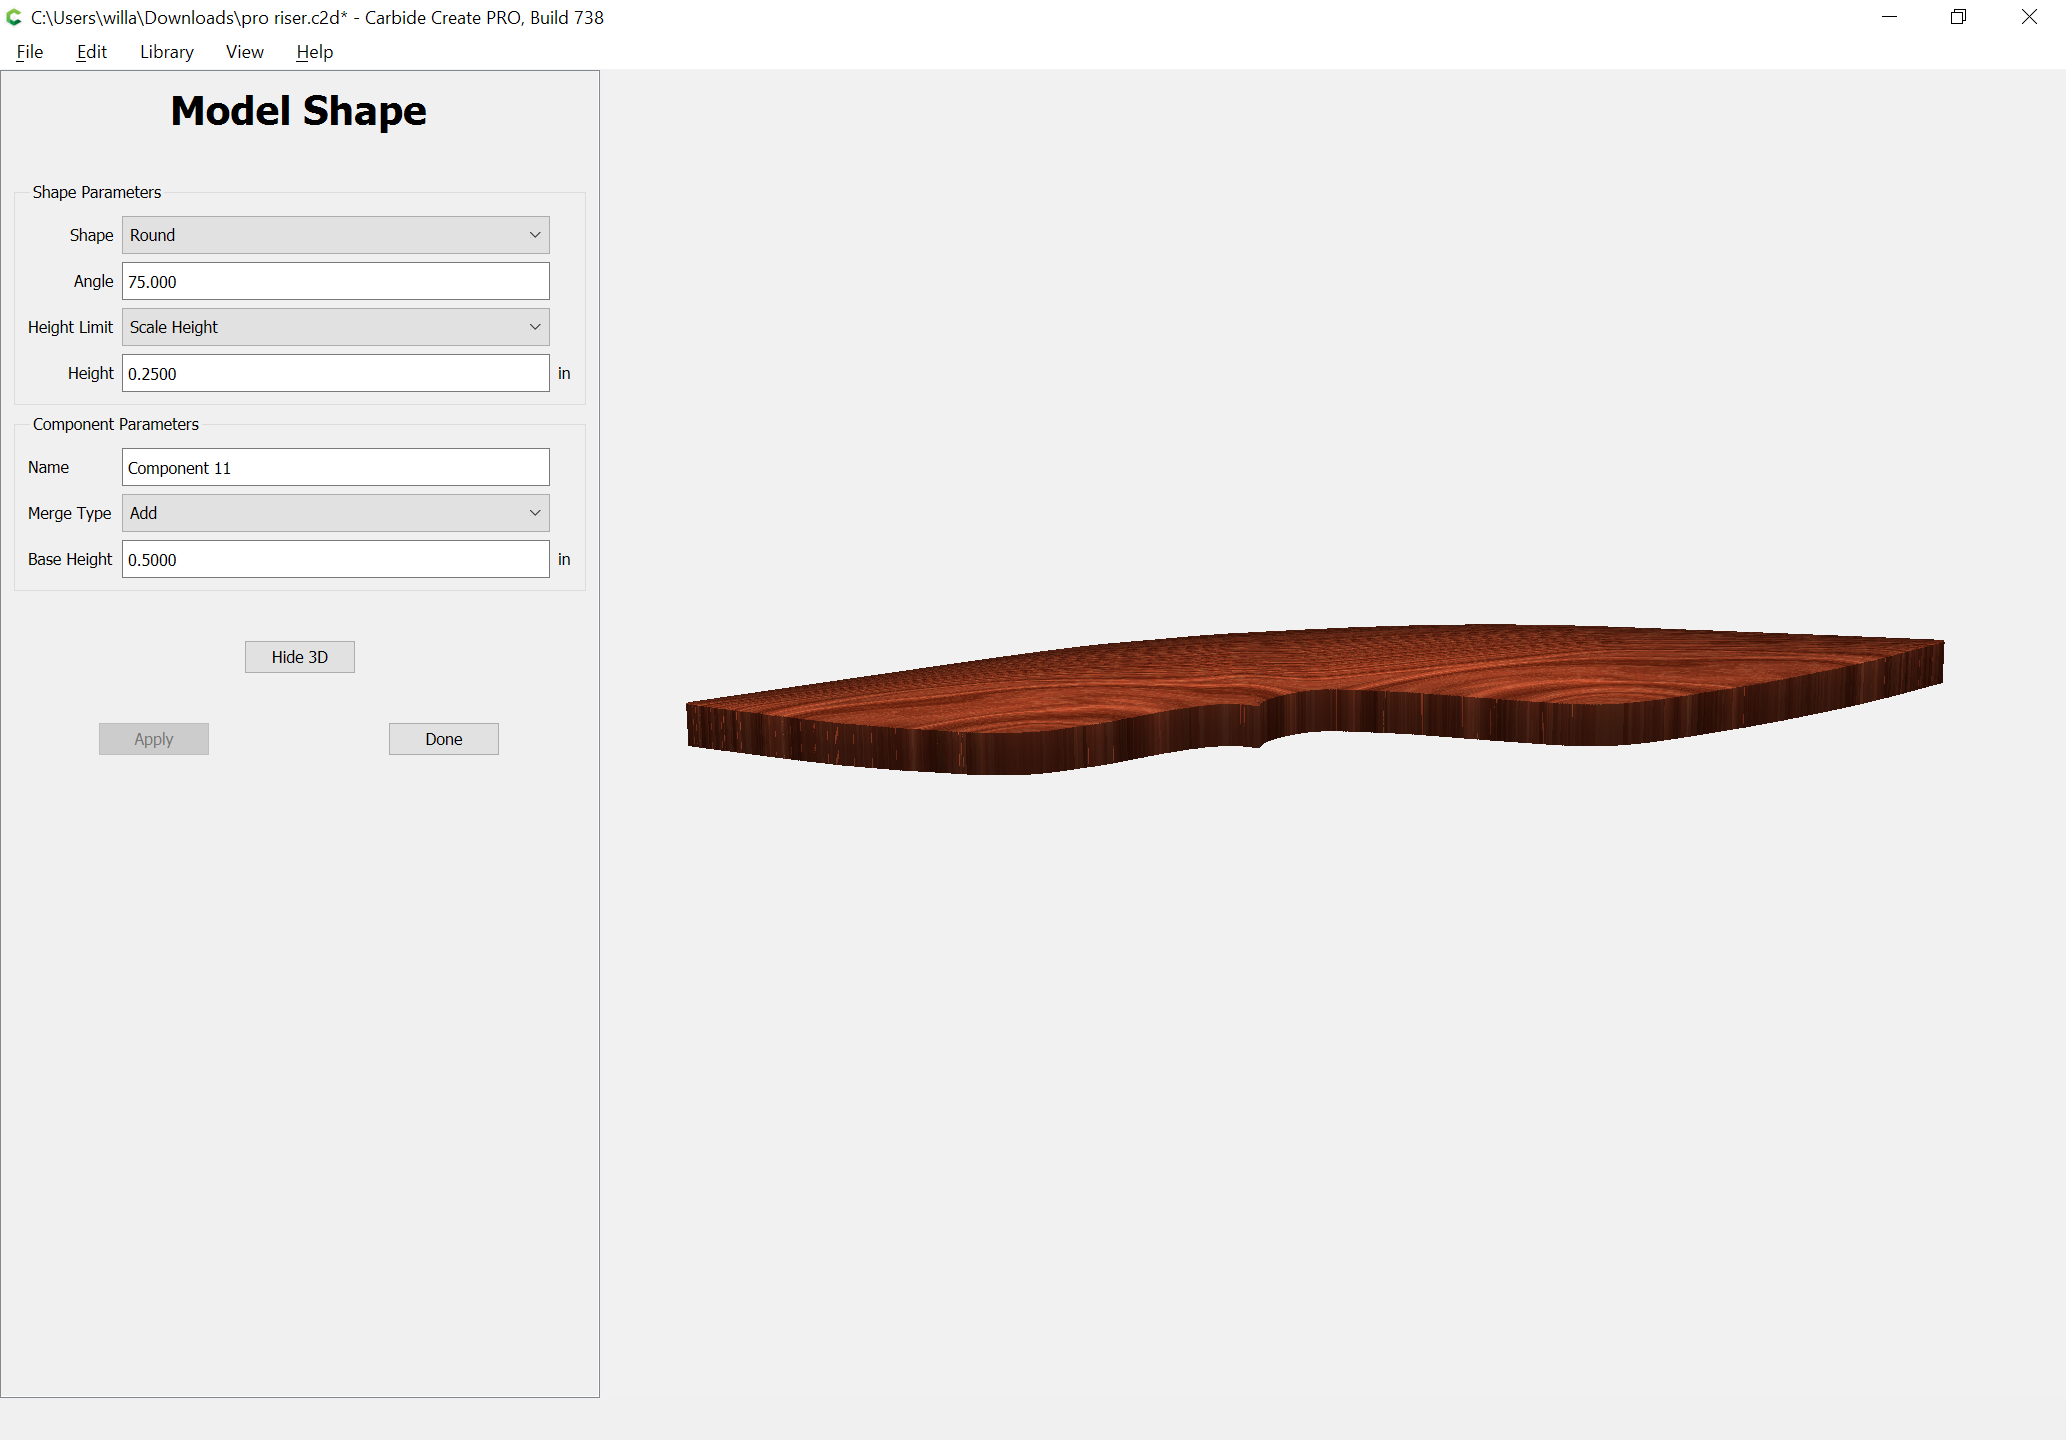
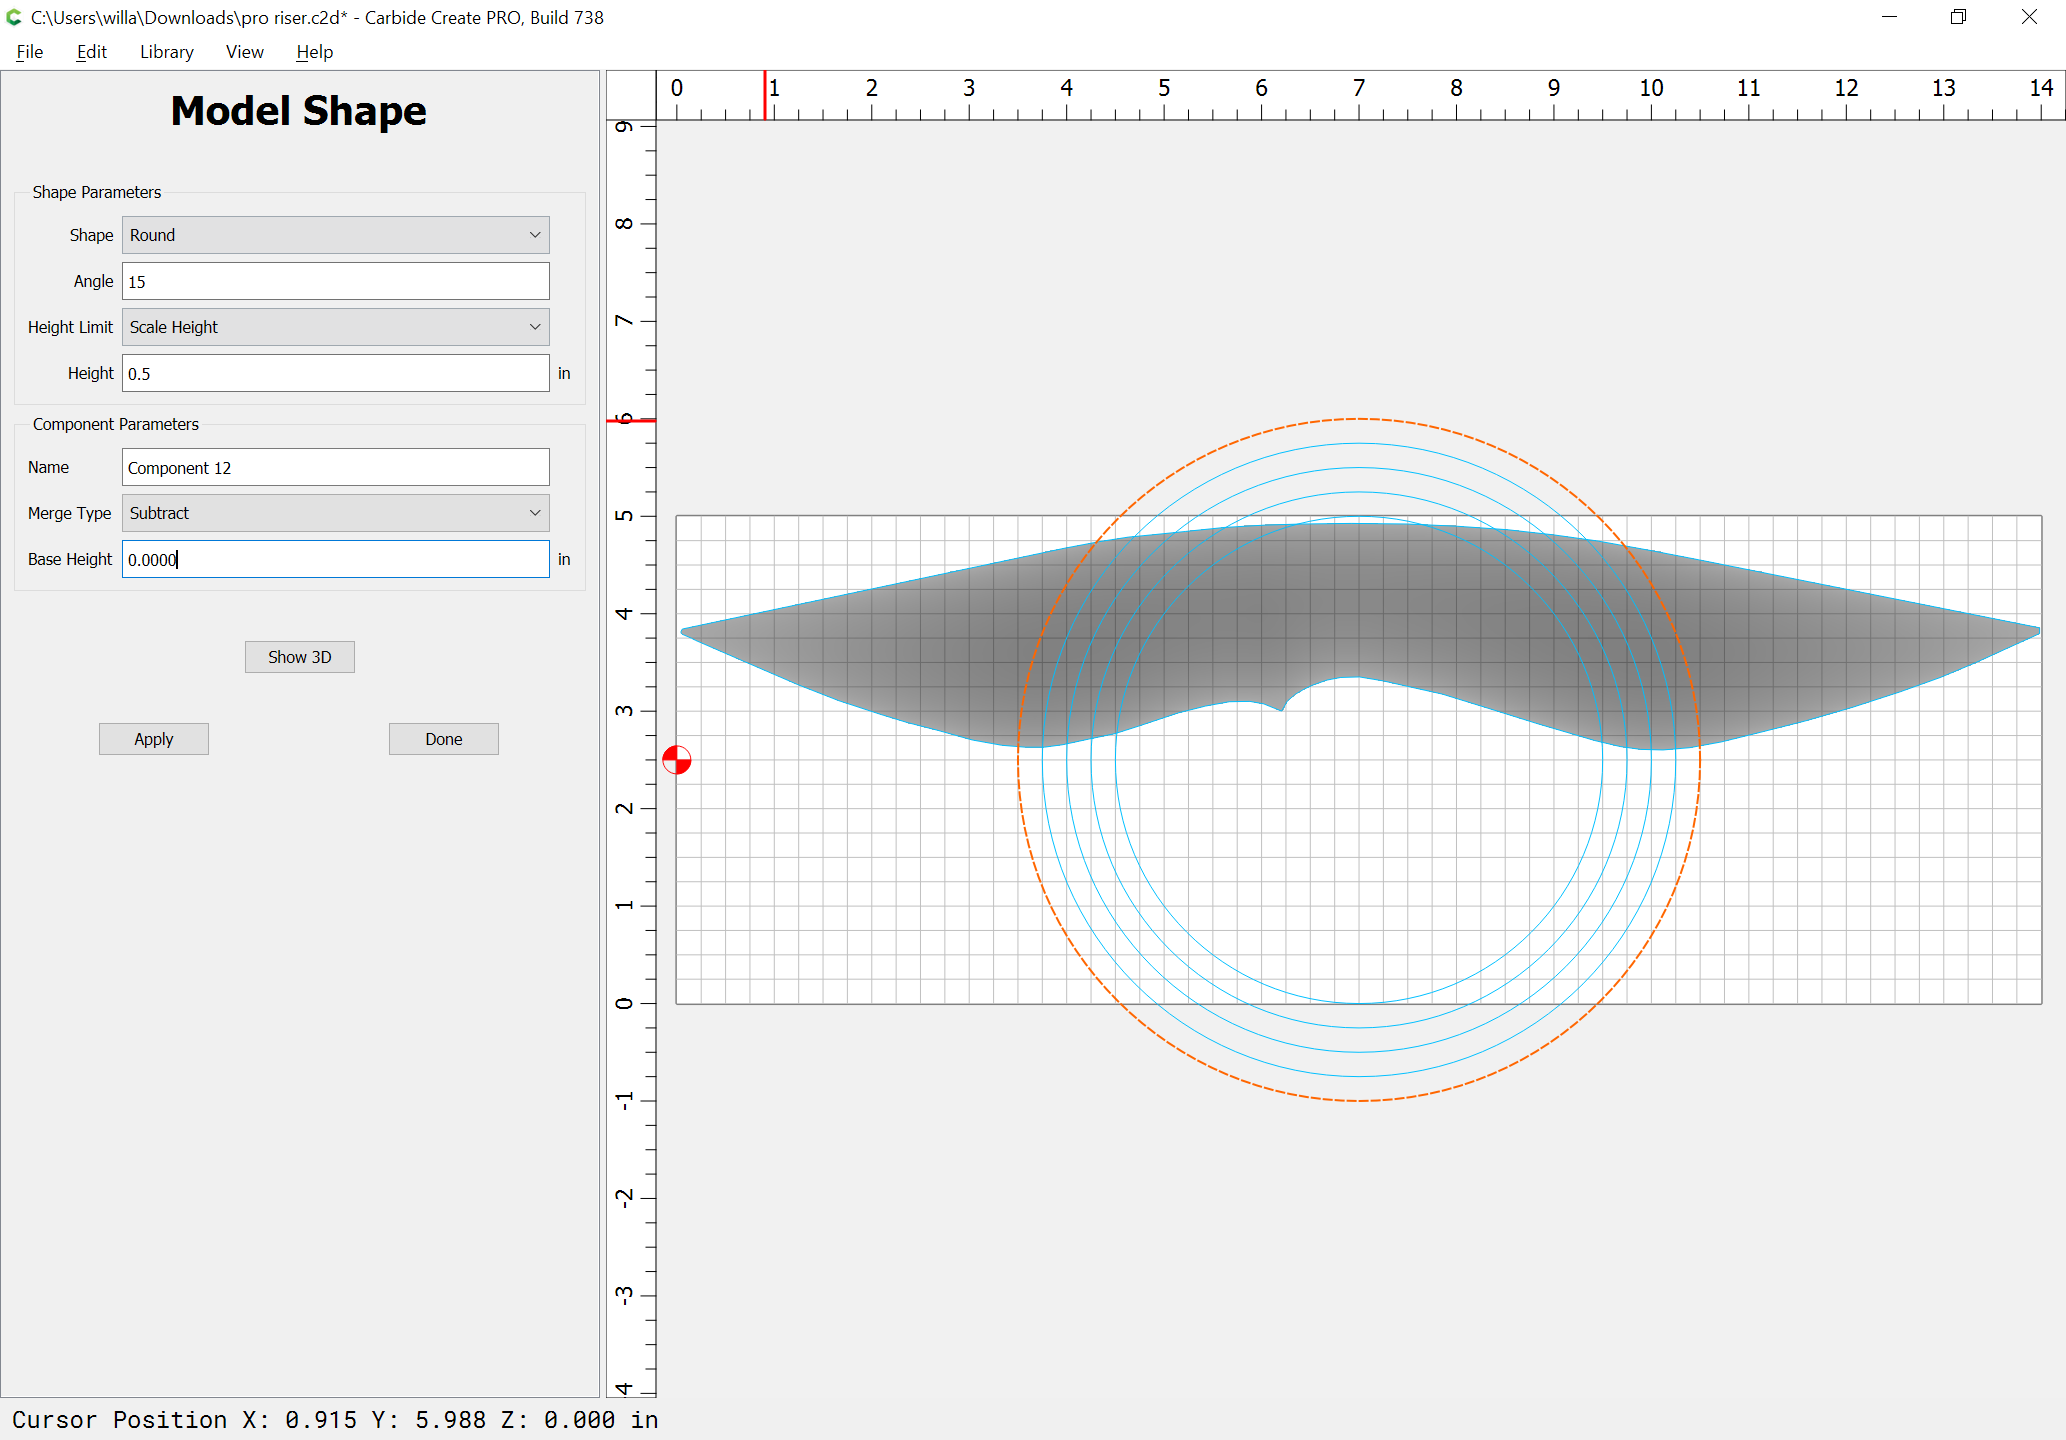
which maybe is a bit more workable, but which would also need some adjustment.
I think maybe I misunderstood. I thought you already had a model. You might want to use some CAD program to design the shape, and then you could import the STL into create pro to run toolpaths.
I personally use Fusion, but that may be a steep learning curve. I can’t speak to other design programs and how easy they’d be to design that shape.
Other programs to consider for modeling this:
- Alibre Atom3D — ob. discl., we sell this.
- Blender
- Shapr3D (if you have an iPad, an Apple Pencil, and are okay w/ monthly payments)
- Moment of Inspiration — this is supposed to be really easy to learn
What information are you starting with? Only the previous physical part? Plans or prints? Some kind of 3D model?
The file you posted only shows a top view (with it laying on the table as in your pictures).
Can you include a front & rear view showing the edges & perhaps a centerline section?
1 Like
All I have is the template and dimensions. I have finished pieces (riser) I can show.
My dimensions are 14” long , 1.750” thick, and 2.5” wide. The center line is the center of both tips as far as the shelf it’s.750” above middle center line and .985” deep.

1 Like
The black line at the top of the clear template is where the transition ends and becomes the same height as the rest of the riser.