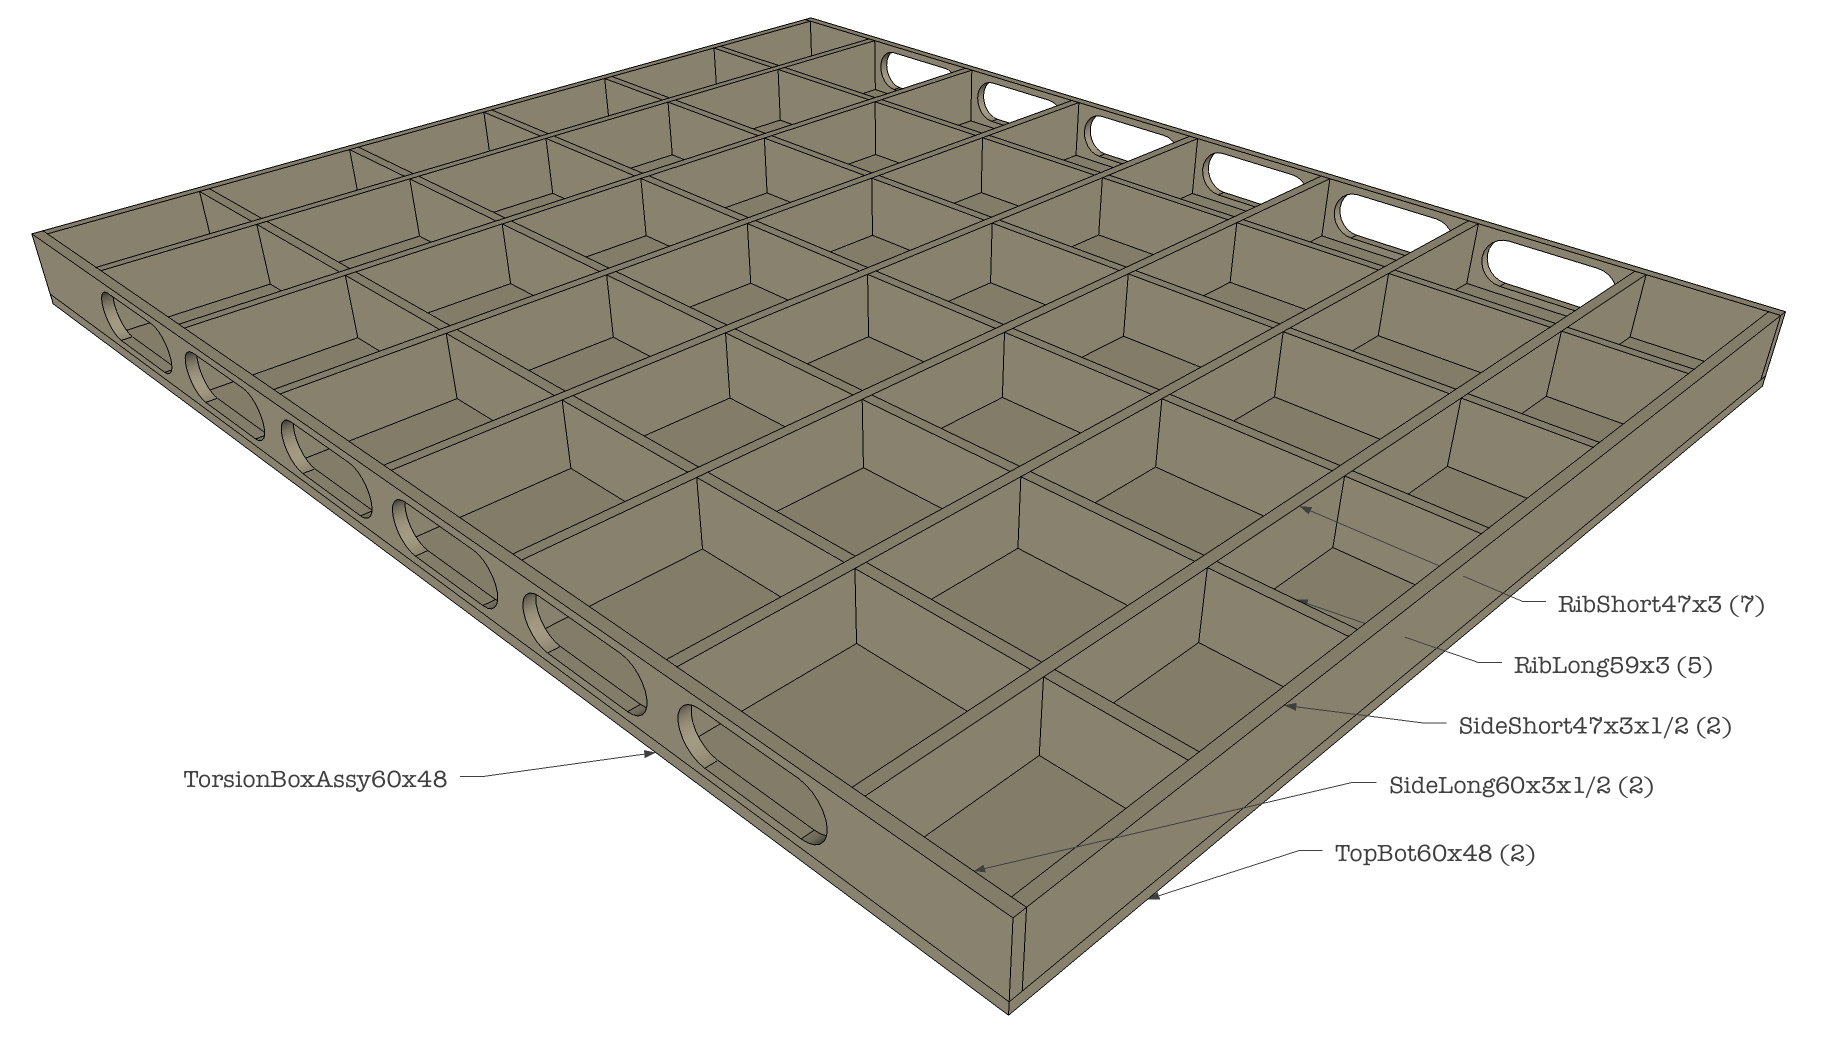
I bought the material to make a torsion box for the top of my table for my XXL. I will make half lap joints on the inside for the matrix to construct the torsion box. I will use pocket screws to secure the pieces on the bottom side and just glue on t he top skin.
My question to this forum is what do you think would be the optimum thickness of a torsion box that is 48 inches by 48 inches with a Shapeoko 3 XXL on top of it. Additionally what do you think would be the optimum spacing of the interior matrix of the torsion box. I was thinking approximately 12 inches making 3 pieces across and 3 pieces top to bottom. All would be half lapped together and pocket screwed to the perimeter of the torsion box and to the bottom skin.
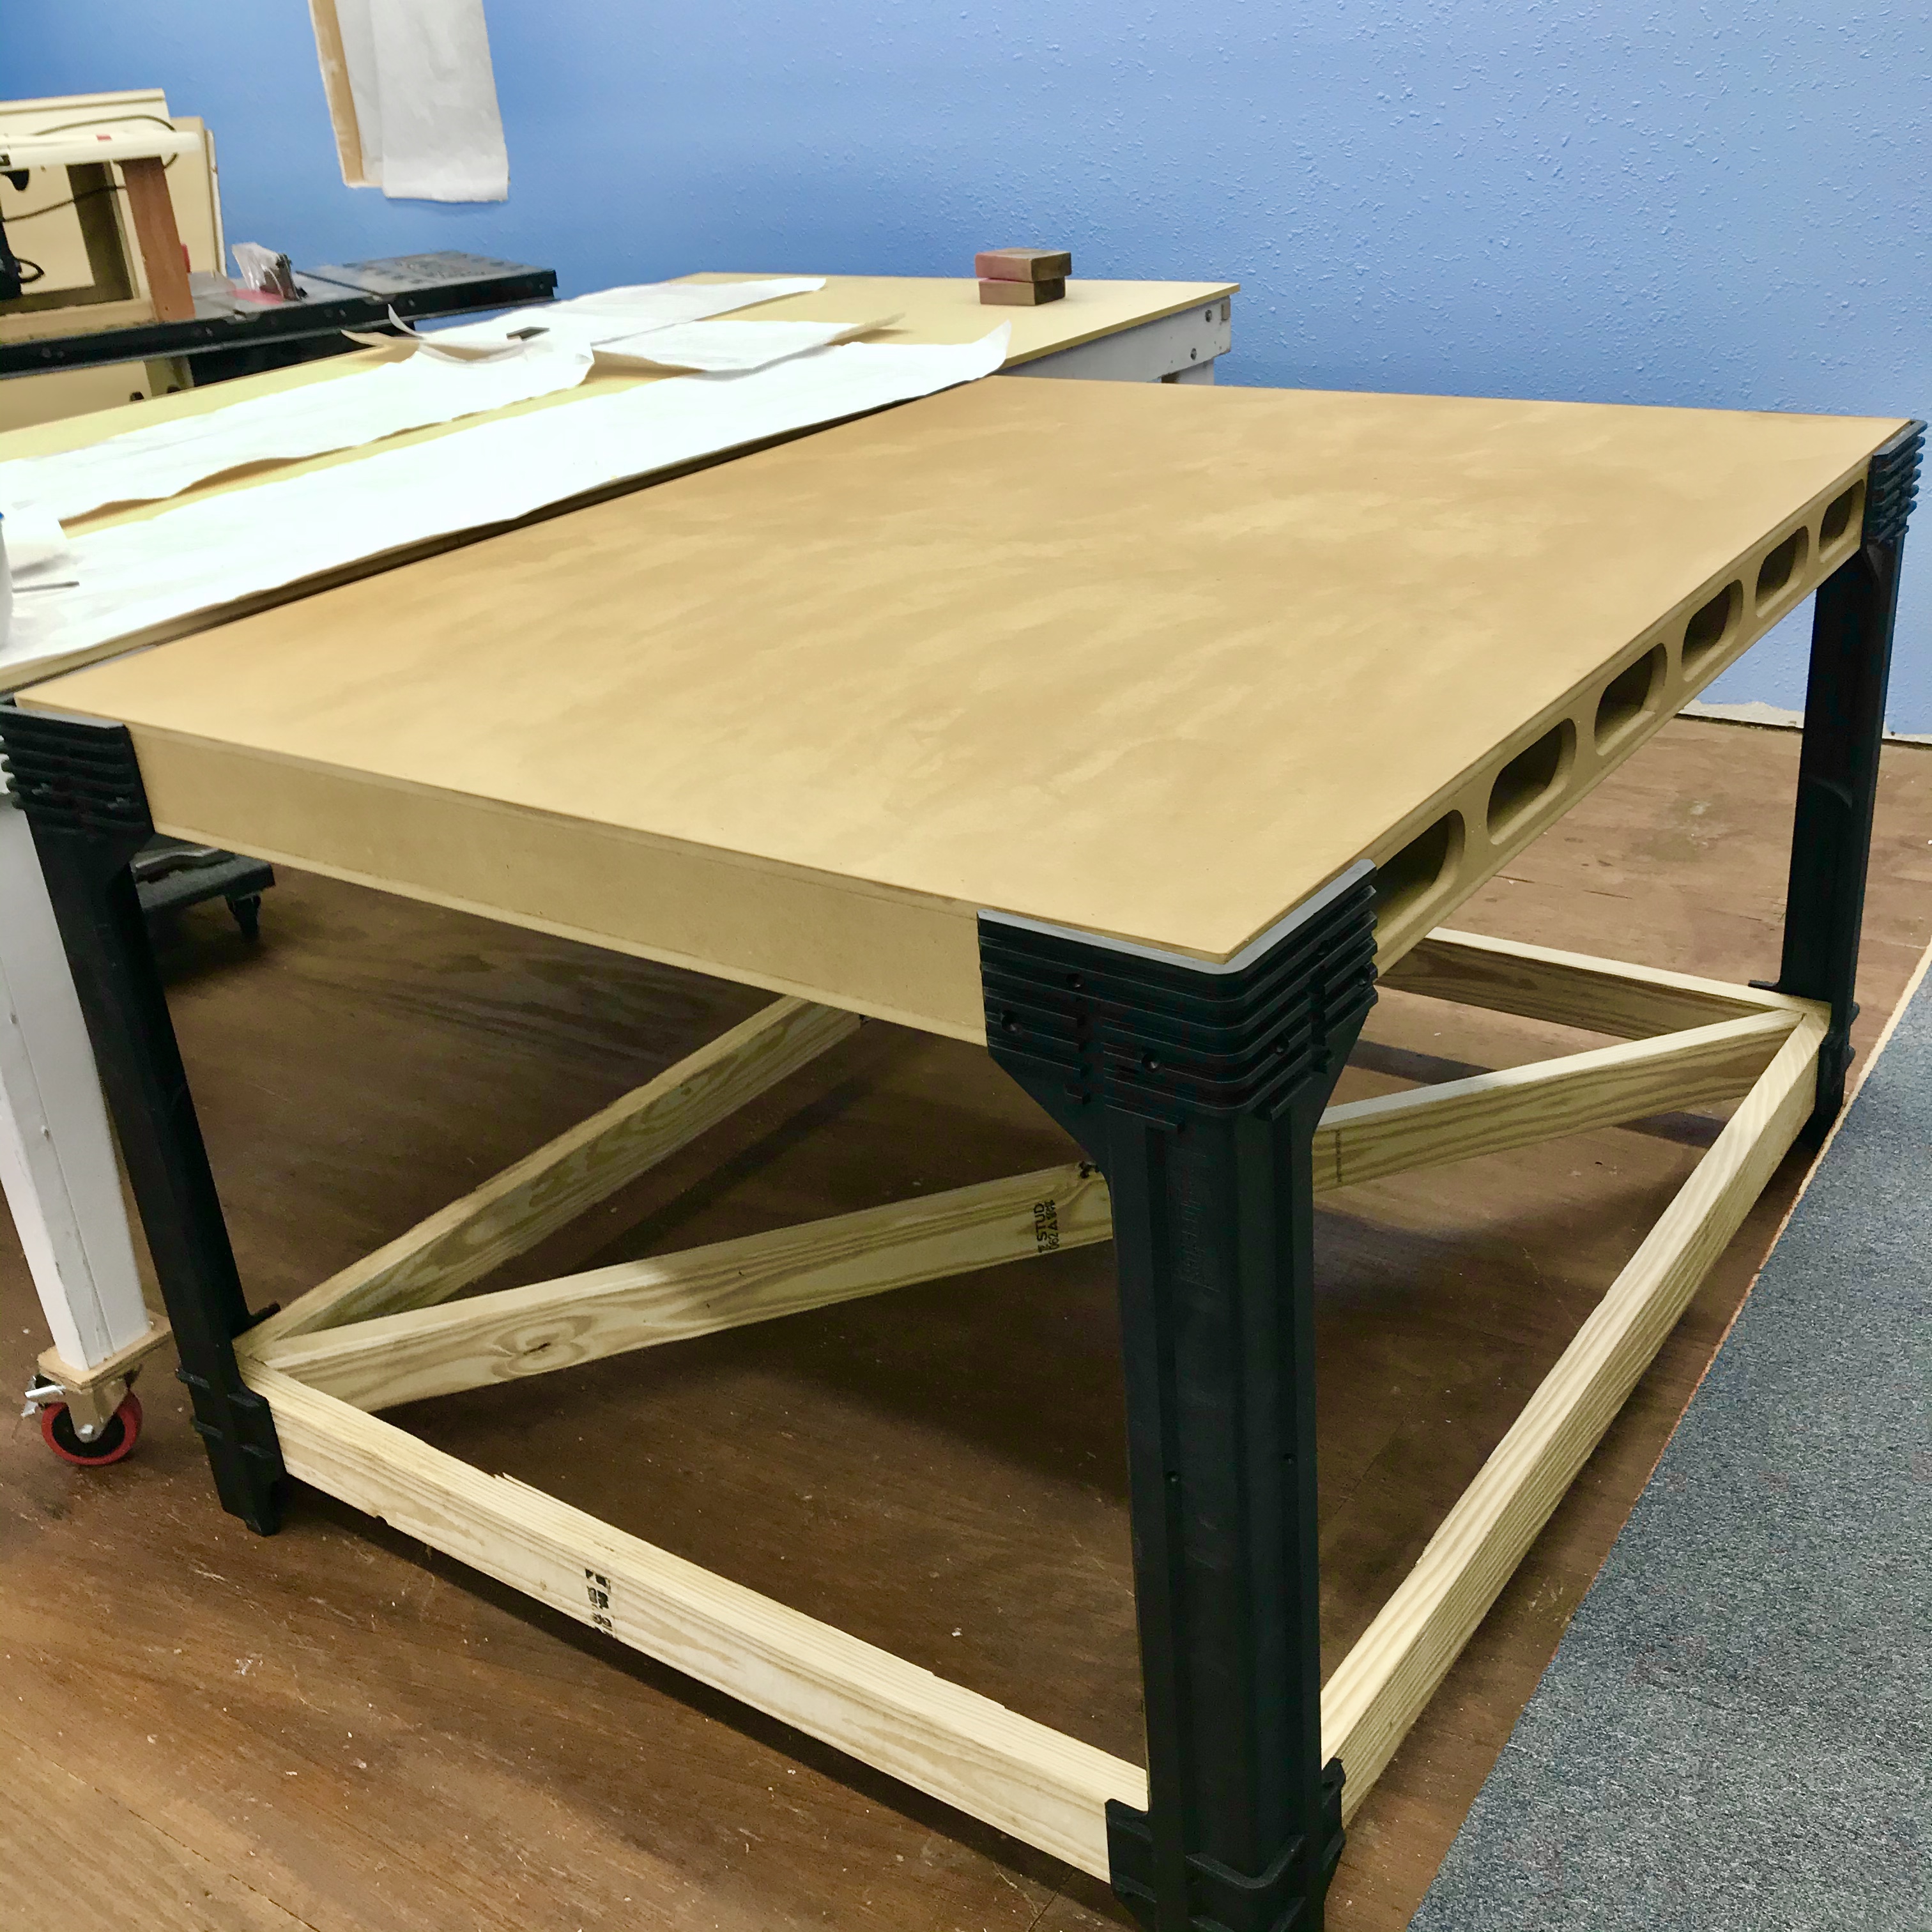
My current top is two pieces of 3/4 inch plywood one laid on top of the other. My base is 4x4 posts with 2x8 apron that is pocket screwed to the posts. I will make some pocket screw holes along the top inside of the apron to attach the torsion box to the apron.
As far as the overall thickness of the torsion box, I would just be spitballing it here based on what I’ve seen others do and the results they obtained, I would say about 4 1/4 in. That actually would also make it fairly simple by using either 1x4 or 2x4 construction with half inch sheets on top and bottom.
This of course depends on how heavy you want this thing to actually be. Just my two cents worth based on what I’ve seen. I don’t have one of my own.
I didn’t put any fasteners at the half-lap joints; just glue. The top and bottom only had a few small brads to lock the grid to it while the glue was drying.
Tex, What made you go with an 8" spacing on your grid? Ikea makes all their tables with torsion box but they use cardboard inside instead of wood. Their tables are not holding up a Shapeoko but I am trying to figure out the optimal spacing for my grid.
I see that you had long grid pieces and short. I was thinking of my grid as the same length for both directions and putting half laps in to secure them together (with glue) and make construction simpler because the grid would be self supporting and squaring.
Why did you skeletonize the sides? Was it ascetics or function?
Guy, I made mine 4x5 ft. Because I needed that extra space on one side for accessories. Glad I did it, too. MDF was cheap.
I settled on the grid size so I had more glue surface for the 1/2” MDF. While I didn’t need to hold up much weight from the Shapeoko, I was thinking that something else might be on there in the future. The weight adds some stability, too.
The side cutouts have come in handy for quick storage (still want to make tiny drawers to fit in there.) Will suggested the holes could be used to fit a clamp in. I haven’t tried that yet.
The half-lap joints worked real fine during assembly. That’s one good thing about MDF; the dimensions. I used a pin on my miter gauge to get consistent positions for the lap cuts. Absolutely fitted perfectly.
I cut the half-laps with a dado blade. I used a box joint type of indexing. The first cut is marked, measured and cut. Then a prearranged bar is place in the miter gauge attachment at the 8" distance. I moved the first cut over that bar to index the next cut and so on. I could cut 3 or 4 boards at a time by clamping them in place.
EDIT: I keep forgetting to mention the one great advantage to building a table like this.
The ability to turn it over and get a brand new table top!
I have made torsion boxes before and put tempered hard board on top to protect the surface. After assemblying the box I put poplar trim around the box tall enough to make the hard board level with the poplar and trapped so it would stay put. All that this is for is the Shapeoko I will not put a hard board top on.
I was going to use mdf but Lowes mdf was very ratty. I picked up two sheets of 3/4 maple ply. When I got them home one is straight as an arrow the other is warped. I will return the warped one and get another that is straight. The warped one would most likely work but fot $66.00 a sheet Lowes can replace it. It will be a few days before I can return there is a winter polar vortex for the next couple of days so I dont want to get it wet.
I think I will make the grid 3.5" with 1.5" of skin making 5 inch height. Since this is not a work bench I will not cover with tempered hardboard. I will put down 3/4 inch ridgid foam under Shapeoko to support base. Will remove leveling feet.
Guy, are you keeping your original 12" grid spacing? Since you’re using 3/4" plywood, that certainly would be a good spacing. Use LOTS of glue on the grid edges.
A lot of the forces on a torsion box are where the grid meets the top and bottom, but you already know that.
Not to hijack the conversation, but why do you need a torsion box at all? My XXL is supported on 4 adjustable feet, one at each corner. I made my table out of 3/4" MDF supported by a 2x4 frame.
I’ve built and used torsion boxes in the past for other projects, but I just don’t see what benefit there is to it in this application. You don’t need a perfectly flat table; you have adjustable feet. You aren’t saving weight, not with all the internal webbing. But lots of guys build them. What am I missing?
I currently have a base that is 4x4 posts with a 2x8 apron. On top of that are two 4x4 sheets of plywood. My XXL was sagging in the middle so I placed a piece of 3/4 inch plywood in the middle.
I want a torsion box to stabilize the Shapeoko by removing the leveling feet and placing a 3/4 inch piece of rigid foam under the Shapeoko.
The torsion box ensures a stable platform for my Shapeoko to sit on with no flexing anywhere on the surface. The current plywood is stable but I have high and low spots on my baseboard and spoilboard so I want to make sure I have a dead flat base to set my Shapeoko on.
Plus it is fun to make things that you want. I think it will improve my setup but really there is no quantifiable way to prove I made an improvement or made it worse. LOL