You’ve survived this long without one so I‘m not sure if you have multiple tool changes in each of your projects, but I’m a fan of the BitSetter. The Z-plus and BitSetter combo will add a confidence boosting amount of repeatability and precision as well as save time not having to load single tool gcode.
When you place the order please put a note in that you have an older system which has 6mm pulleys and you’ll need a set — I believe they’ve been removed from newer kits.
The Maintenance Kit and Z-Plus w/ board should bring you up-to-date with the current machines — the only differences will be:
M3 belt anchors
plates won’t have as many PEM nuts, so hardware will have additional nuts and so forth
EDIT: except for the electronics control board and enclosure as pointed out by @gdon_2003
Agree the accessories are nice, esp. the pair of the BitSetter and BitRunner if one is doing jobs with multiple tools.
I know the inductive limit switch kit will be out in a short while. Also a possible consideration. I have Luke’s kit I got with his HDZ and have loved it on my 2015 machine
Thx, When i look at the bitrunner I see that when ordered with a new board, it also comes with a new enclosure. I’m planning on just ordering the new board to be able to run the Zplus, and use it with the old enclosure that has the open top and bottom (I do close it with 3d printed parts) wil I have any issue here?
I have a Summer of 2016 machine and I upgraded to the BitSetter. I ordered the BitSetter with the 6 pin connector to solder on because I have a current board but it did not have the 6 pin connector on the board it only had the holes. The newer boards come with 6 pin connector and the new cover. Because I ordered the upgrade with the BitSetter I got a new cover. I did not order the whole new board which has everything you need plus a new cover.
I really like the BitZero, BitRunner and BitSetter. All three of these upgrades make the Shapeoko a very user friendly CNC. I have also upgraded to the 3.2 HDZ and that is fantastic. I still use my Dewalt Router and have not upgraded to a spindle because the Dewalt works well and so far the work I do does not justify the upgrade. I am waiting for the inductive switches but technically I could live without them. Since I have upgraded everything else I will get the switches when they become available.
I’m in the middle of the upgrade, but I’m stuck as the proximity switches are missing in the KIT. So my tip is check for kit completeness before you take apart your machine
I also had some parts double, so lets say quality control in Carbide’s logistics can be improved.
With regard to the 6 to 9 mm belt change, I just had to reuse the old 3mm mounting clips, but they fit fine as the belt holes are already 9 mm.
Question; the old electronics was mounted with some heat paste directly on the aluminium extrusion, with a little piece of kapton tape in between. Am I correct that I need to leave this kapton tape in place (just wipe of the paste) and stick the new board on?
Back in 2017 I would have said “yes” because of this, this, and doing the same on mine. I am unclear what C3D recommends nowadays, so until @WillAdams sees this, you could shoot an email to support to confirm. Regardless, I think you’ll need to put a small amount of heat paste between the board and extrusion for optimal heat dissipation, before reassembling.
When I upgraded to the BitRunner I ordered the connector to solder on and mine came with the new cover with a hole in the front end to let the 6 pin connector come out. The instructions I got did not address the large heat sink that the original board came on. I had to remove the large heat sink to fit the cover on and asked the question on the forum and got a few responses. The board came with some tape that I put on the back of the board. If I remember there were some standoffs that you put between the Y rail and the board then screwed in some screws to hold the board in place and then the cover.
Someone up above said Carbide3d is bad at not putting all the parts in kits. I agree with that statement and so far every upgrade I have gotten either had missing parts or the instructions were incomplete. I have said before I love my Shapeoko, the upgrades, Customer Service and mostly the software but their upgrade instructions suck. I was a System Support Engineer, basically Field Engineer with Software certifications, so I can fix anything I put my mind to. I have always figured out a solution but many of the Shapeoko users do not have my experience. That said the upgrade instructions need to be bullet proof so if you can read you can get the job done, even if you dont have an engineering degree.
The “tape” on the back of the new board is I assume the replacement of heatpaste, it was already installed on the board. My remaining question is do I remove the kapton tape (at least I assume thats what it is) from the original heatsink yes or no?
The original cover bolted on approximately the middle of each side. The new cover has the mounting holes offset on each side lining up with the large heat sink holes. On mine with a lack of instructions I removed the heat sink.
So I received the new homing swithes that where missing in my Zplus kit, and I ran into a few new issues. Some caused by lack of documentation, some because the nice people of Carbide managed to also mess up the shipment that should have gotten me the missing parts. In stead of shipping the missing drag chain kit they send another switch mounting kit, of which I now have 3 ok firstworldproblems, but annoying.
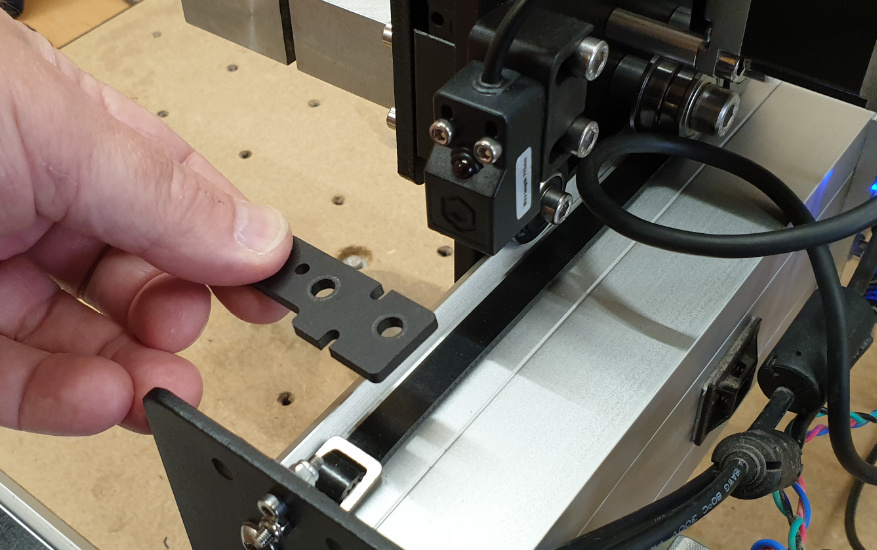
I assume one of the drag chain brackets is the trigger for X axis proximity switch. As i miss the bracket the machine crashed into the side… can someone share a picture and dimensions of this bracket, so I can make something up for now so I don’t have to wait another week for a package…) so a picture like this;
And finally, the Y mounting bracket does not fit on the old 2016 shapeoko, you need to file off a bit of plastic to get clearance from the vwheel, and use longer bolts with nuts (the ones from the old mechanical switch brackets fit ok.
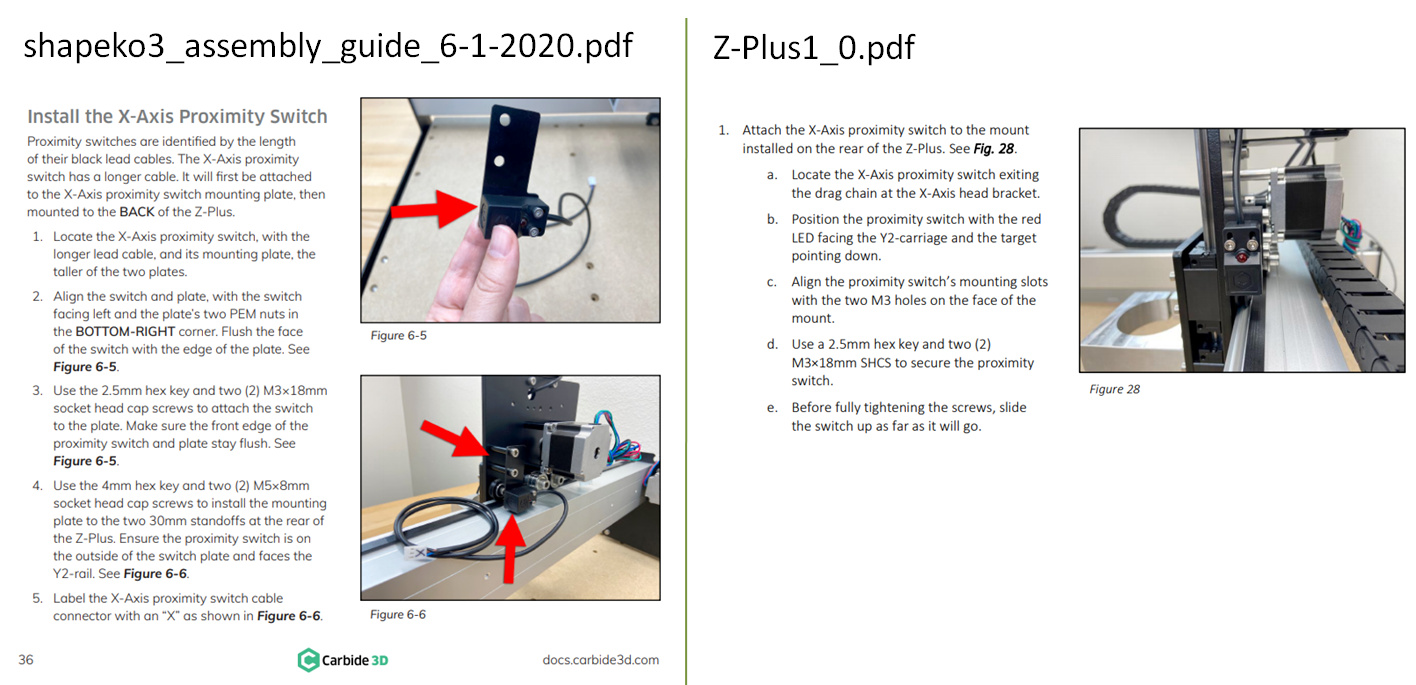
Just to show the comparison, The X axis proximity switch mount has totally changed between the "shapeoko installation guide from early this year, and the Zplus installation guide.
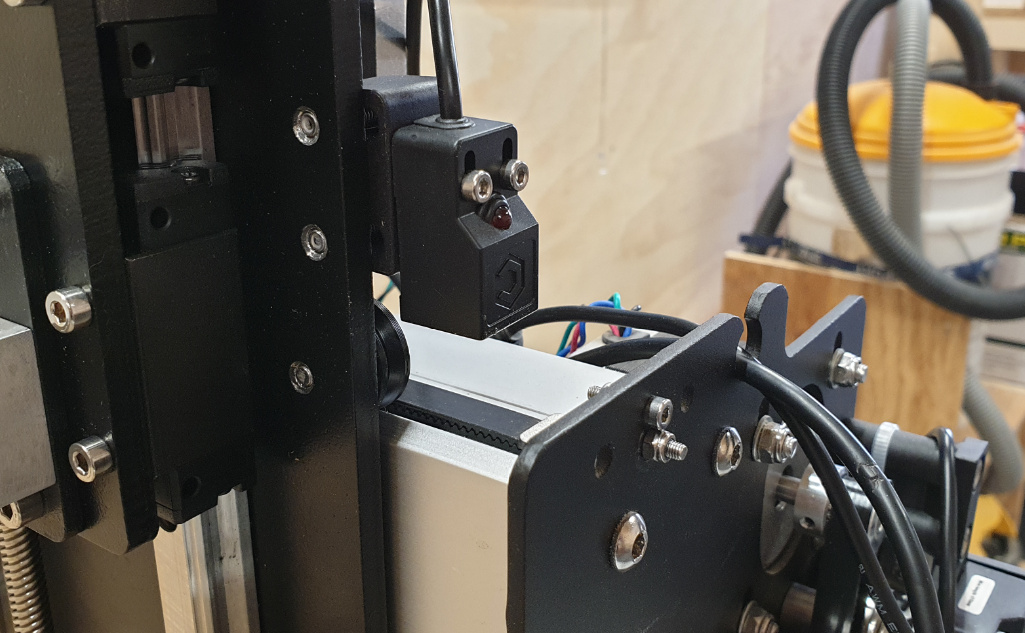
I just upgraded to the z+ – My X & Y trigger on the end plates, not the drag chain bracket (and the drag chain mounts to the other side of the X anyway…) It looks very similar to the image you posted. The sensor should be very close to the end plate - mine is just 1-2 mm above.
Did you place a scrap of metal under the sensor to see if the (dim) LED turns on - that can confirm the switch is functioning. The “Pull off clear” is likely that you’re not able to hold the piece still enough for it to confirm it’s measurement.
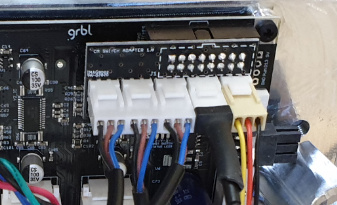
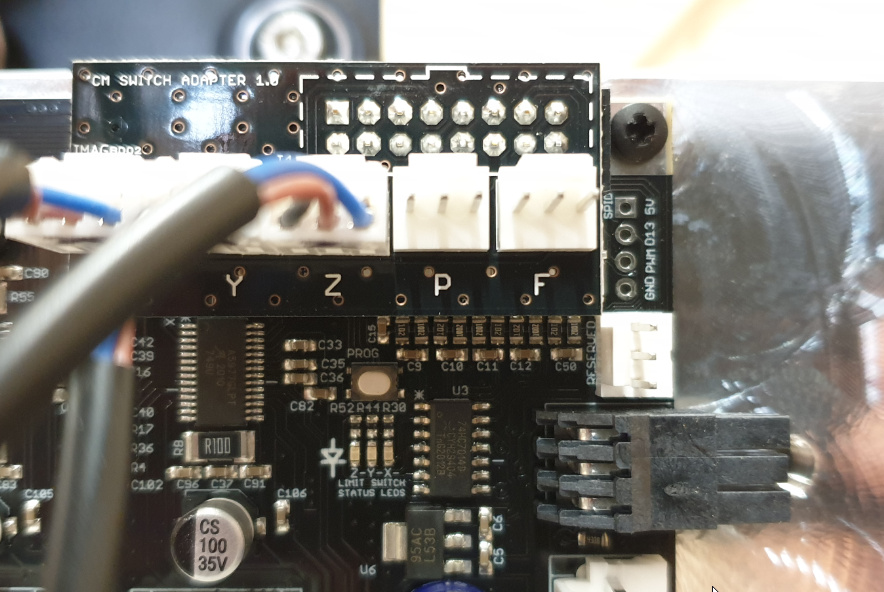
Also F is for Feed Hold. The board no longer has a place to power a fan as they are no longer needed. However, everyone I’ve seen has a metal bracket that the board uses as a heatsink… I’d contact support about their recommendation there…
I agree with @Biologyben. Your X Proximity switch is too high (even though you pushed it all the way up as the instructions told you to do). Mine crashed after upgrading too. So I lowered it to within 1/8" of the end plate and it works fine. [edited to include picture}