when you say “does not fit”… can you be more specific
not the whole thing will go in, only half of it will go into the pocket
Yes, I couldn’t even get the parts to insert. Your instructions are very clear, but somehow my execution seems to cause me to have trouble. I am trying to get 0.1" to insert.
@iantyndall I’m a little unclear on the operations you listed above. Are you doing both the Start Depth adjustment and resetting the Z to 12.54? What do you mean “Run the vee carve on the second line”? You might want to set the Max Depth slightly larger as well so you have a little gap for glue and whatnot to escape.
No I am sorry.
I created two lines of text for my test. One line was based on setting the start depth of 0.1 and the second method was based on fenrus excellent instructions. The second method requires stopping the instructions and resetting the Z height.
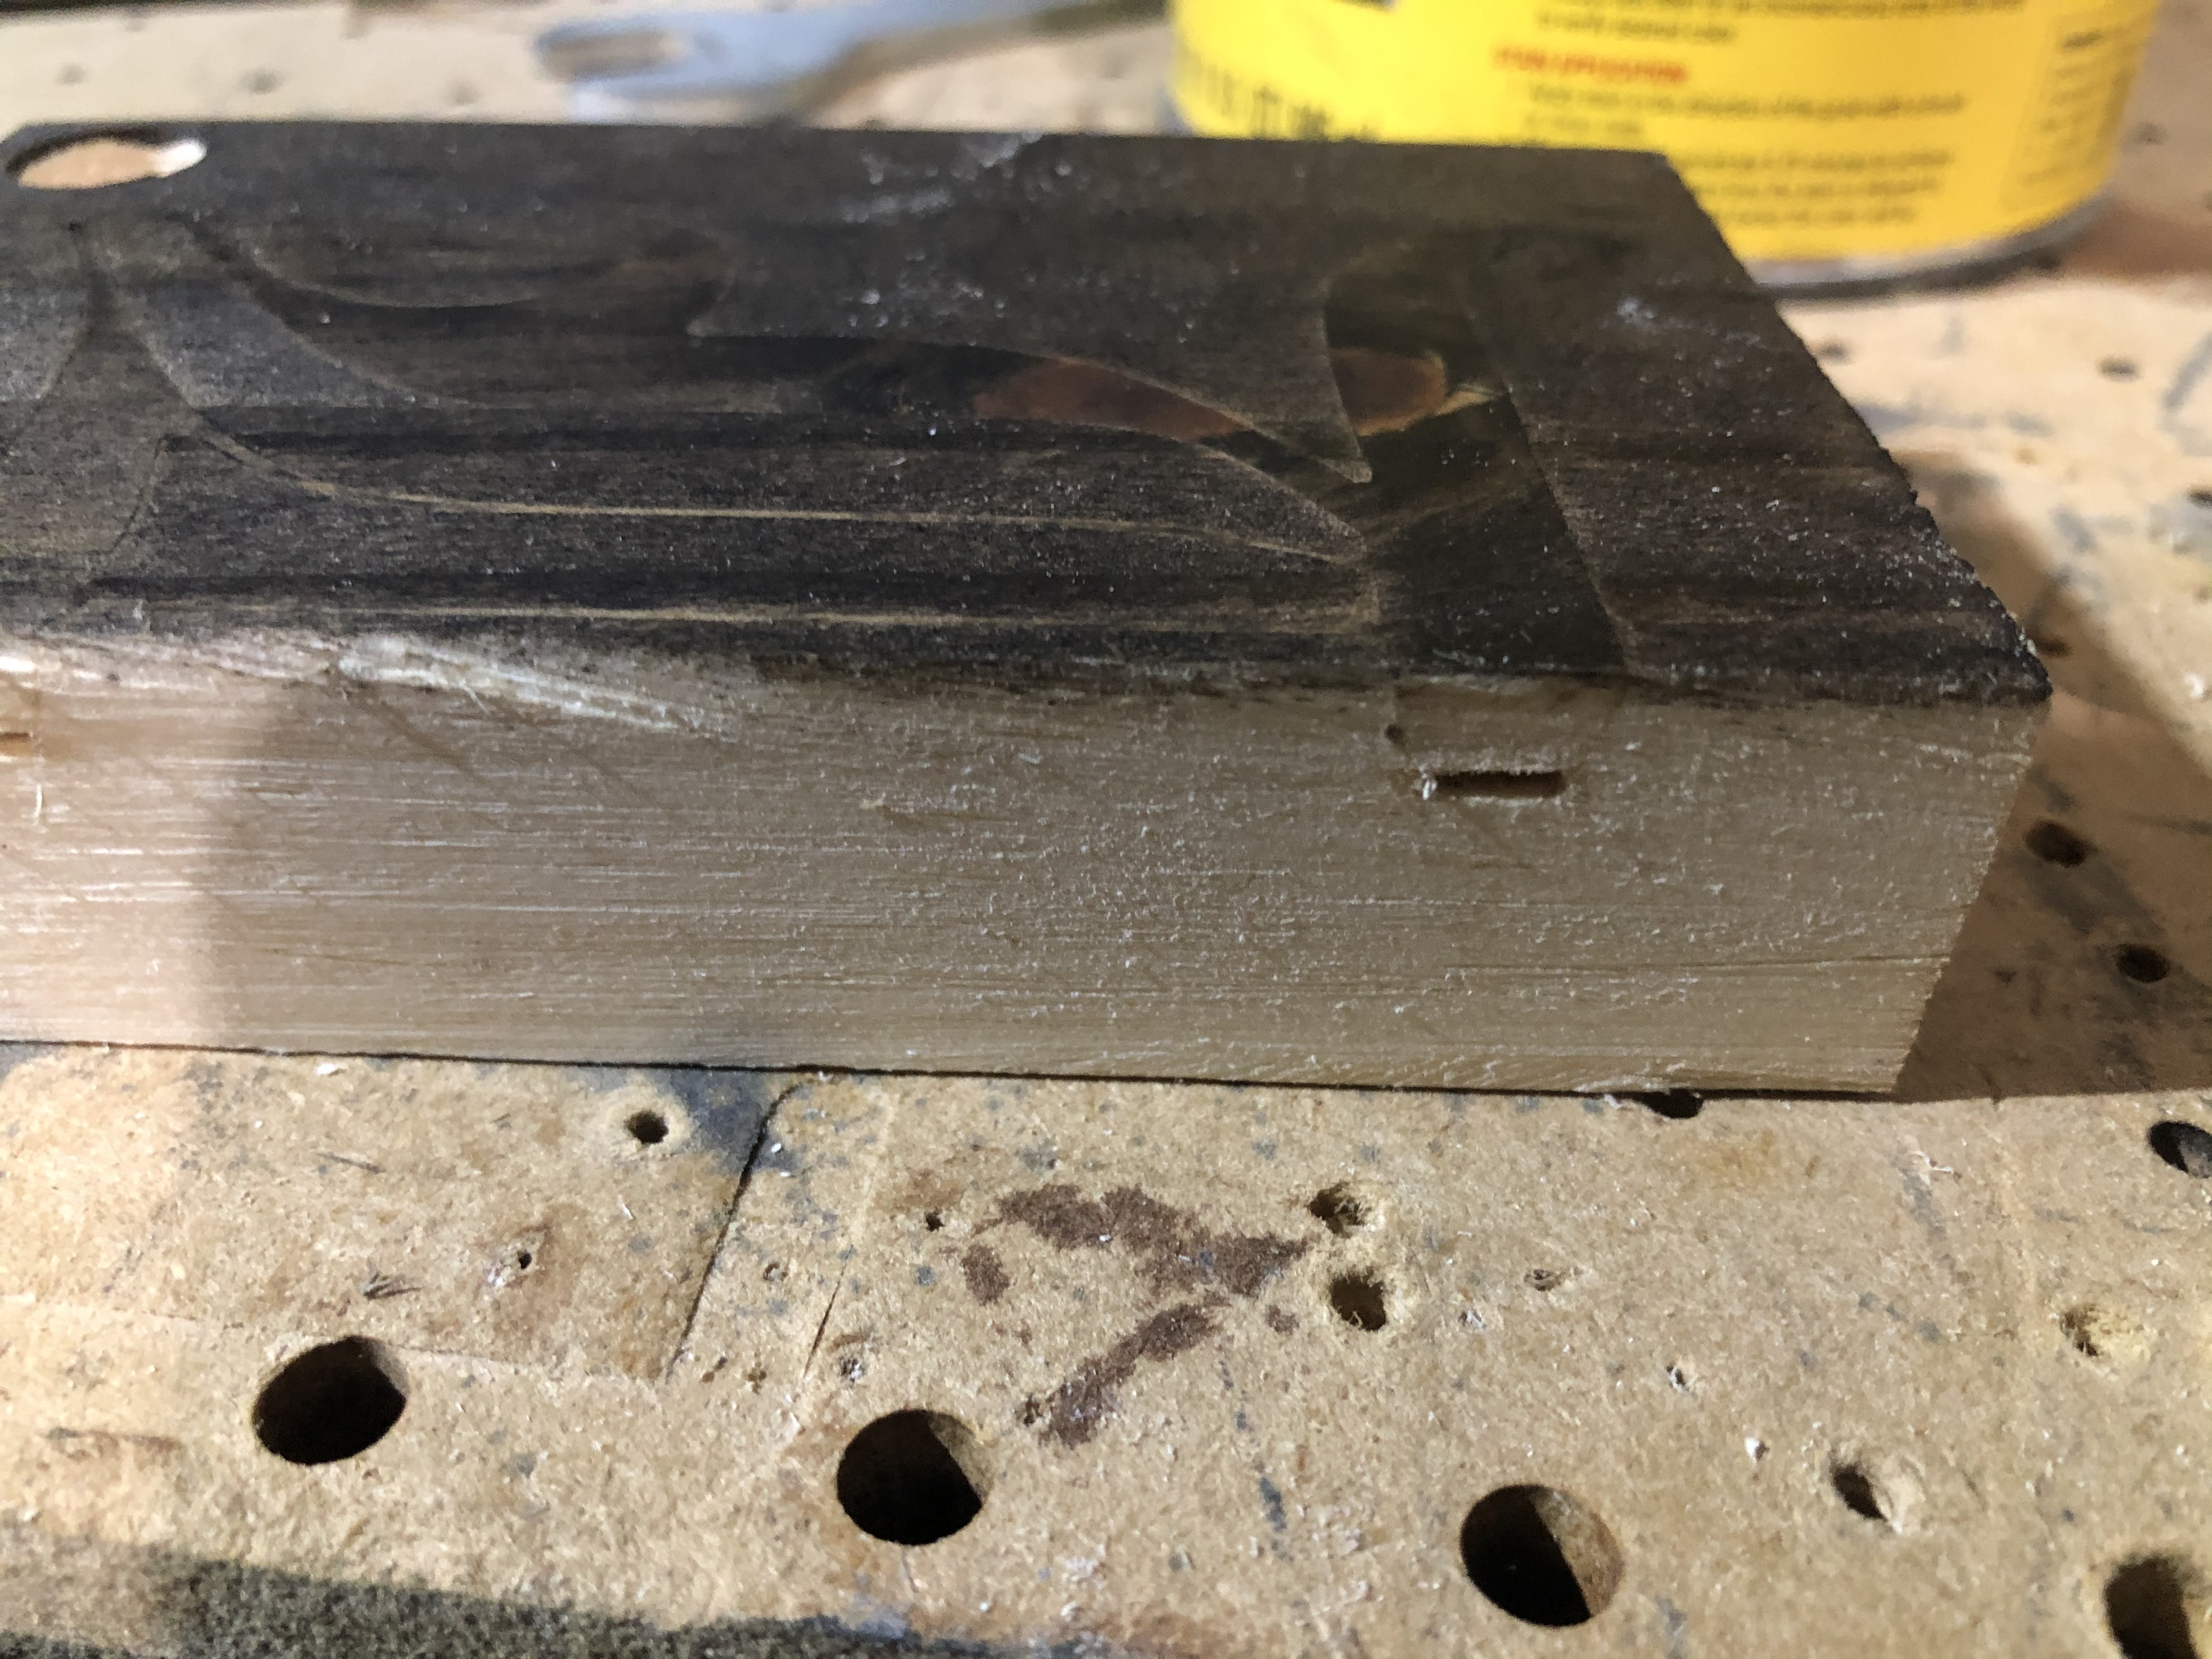
Wanted to thank everyone for your insights… It took awhile but the light bulb finally went off. I did a quick test this afternoon and was happy with the results! Super tight fit and nice small glue Gap at the bottom. The pics are just scrap pine I had laying around so I put a little stain on it to see if it would help differentiate the wood and then I cut it in half in order to check the gap. Perfect! Thanks everyone I would have been struggling forever! BTW I used a 30 degree vbit and 1/8" endmill for the pocket.
1 Like
@iantyndall Which of the lines above is which? I’m thinking the one on the right looks closer to being what you want.
Yes, the one on the right was achieved by setting the starting depth to 0.1
But that one still didn’t fit into the pocket? If not, I’m not sure what else to try. Maybe more clarification and pictures of the process.
Dan thanks for all the help… things are working better but I have another question. Setting the start depth to .20 as in your example causes the bit to plunge deep on the first cut to get to that start depth and then it uses the depth per pass setting after the initial pocket clearing pass. This is extremely hard on my poor little 1/8" endmill especially when cleaning out hardwood. Am I doing something wrong?
this is why I suggest roughing first…
You’re right. That would be the behavior. You could do as @fenrus suggests and “rough” it first by doing the cut without setting the start depth low first. Basically have two tool paths you run. Does that make sense? You could do the rough by running the path with a high z zero first too. This would be similar to the other method where you adjust the zero deeper later.
I had been trying to do roughing passes last night and every time my depths would be all over the place and it was really frustrating me to the point I gave up. I just typed up this whole long description of every toolpath, measurement and detail for you but it got me thinking. I went out to the shop and started re-measuring everything and it turns out I had just changed out my waste board the other day and now I have a .15 crown in the one spot where I was working last night so I must have something stuck under the board that is throwing off my numbers off. I feel like a smuck. I will be taking off my waste board to investigate today. Sorry for wasting your time!!
3 Likes
No problem. If it were a waste of my time, I wouldn’t have even responded.  Sometimes talking something through us all that is needed to work something out in your mind. I hope you find what is causing the issue.
1 Like
I’ve used this method a couple times with very good results. Great tutorial and a lot of great commentary here. The one thing I’m going to add to the process is a “No Offset” toolpath on the inlay before changing the Z. That should match the contours exactly and remove a good bit of the material that would otherwise be hogged out on the first pass. I’m using a Nomad, so spindle power is a limiting factor for me.
4 Likes
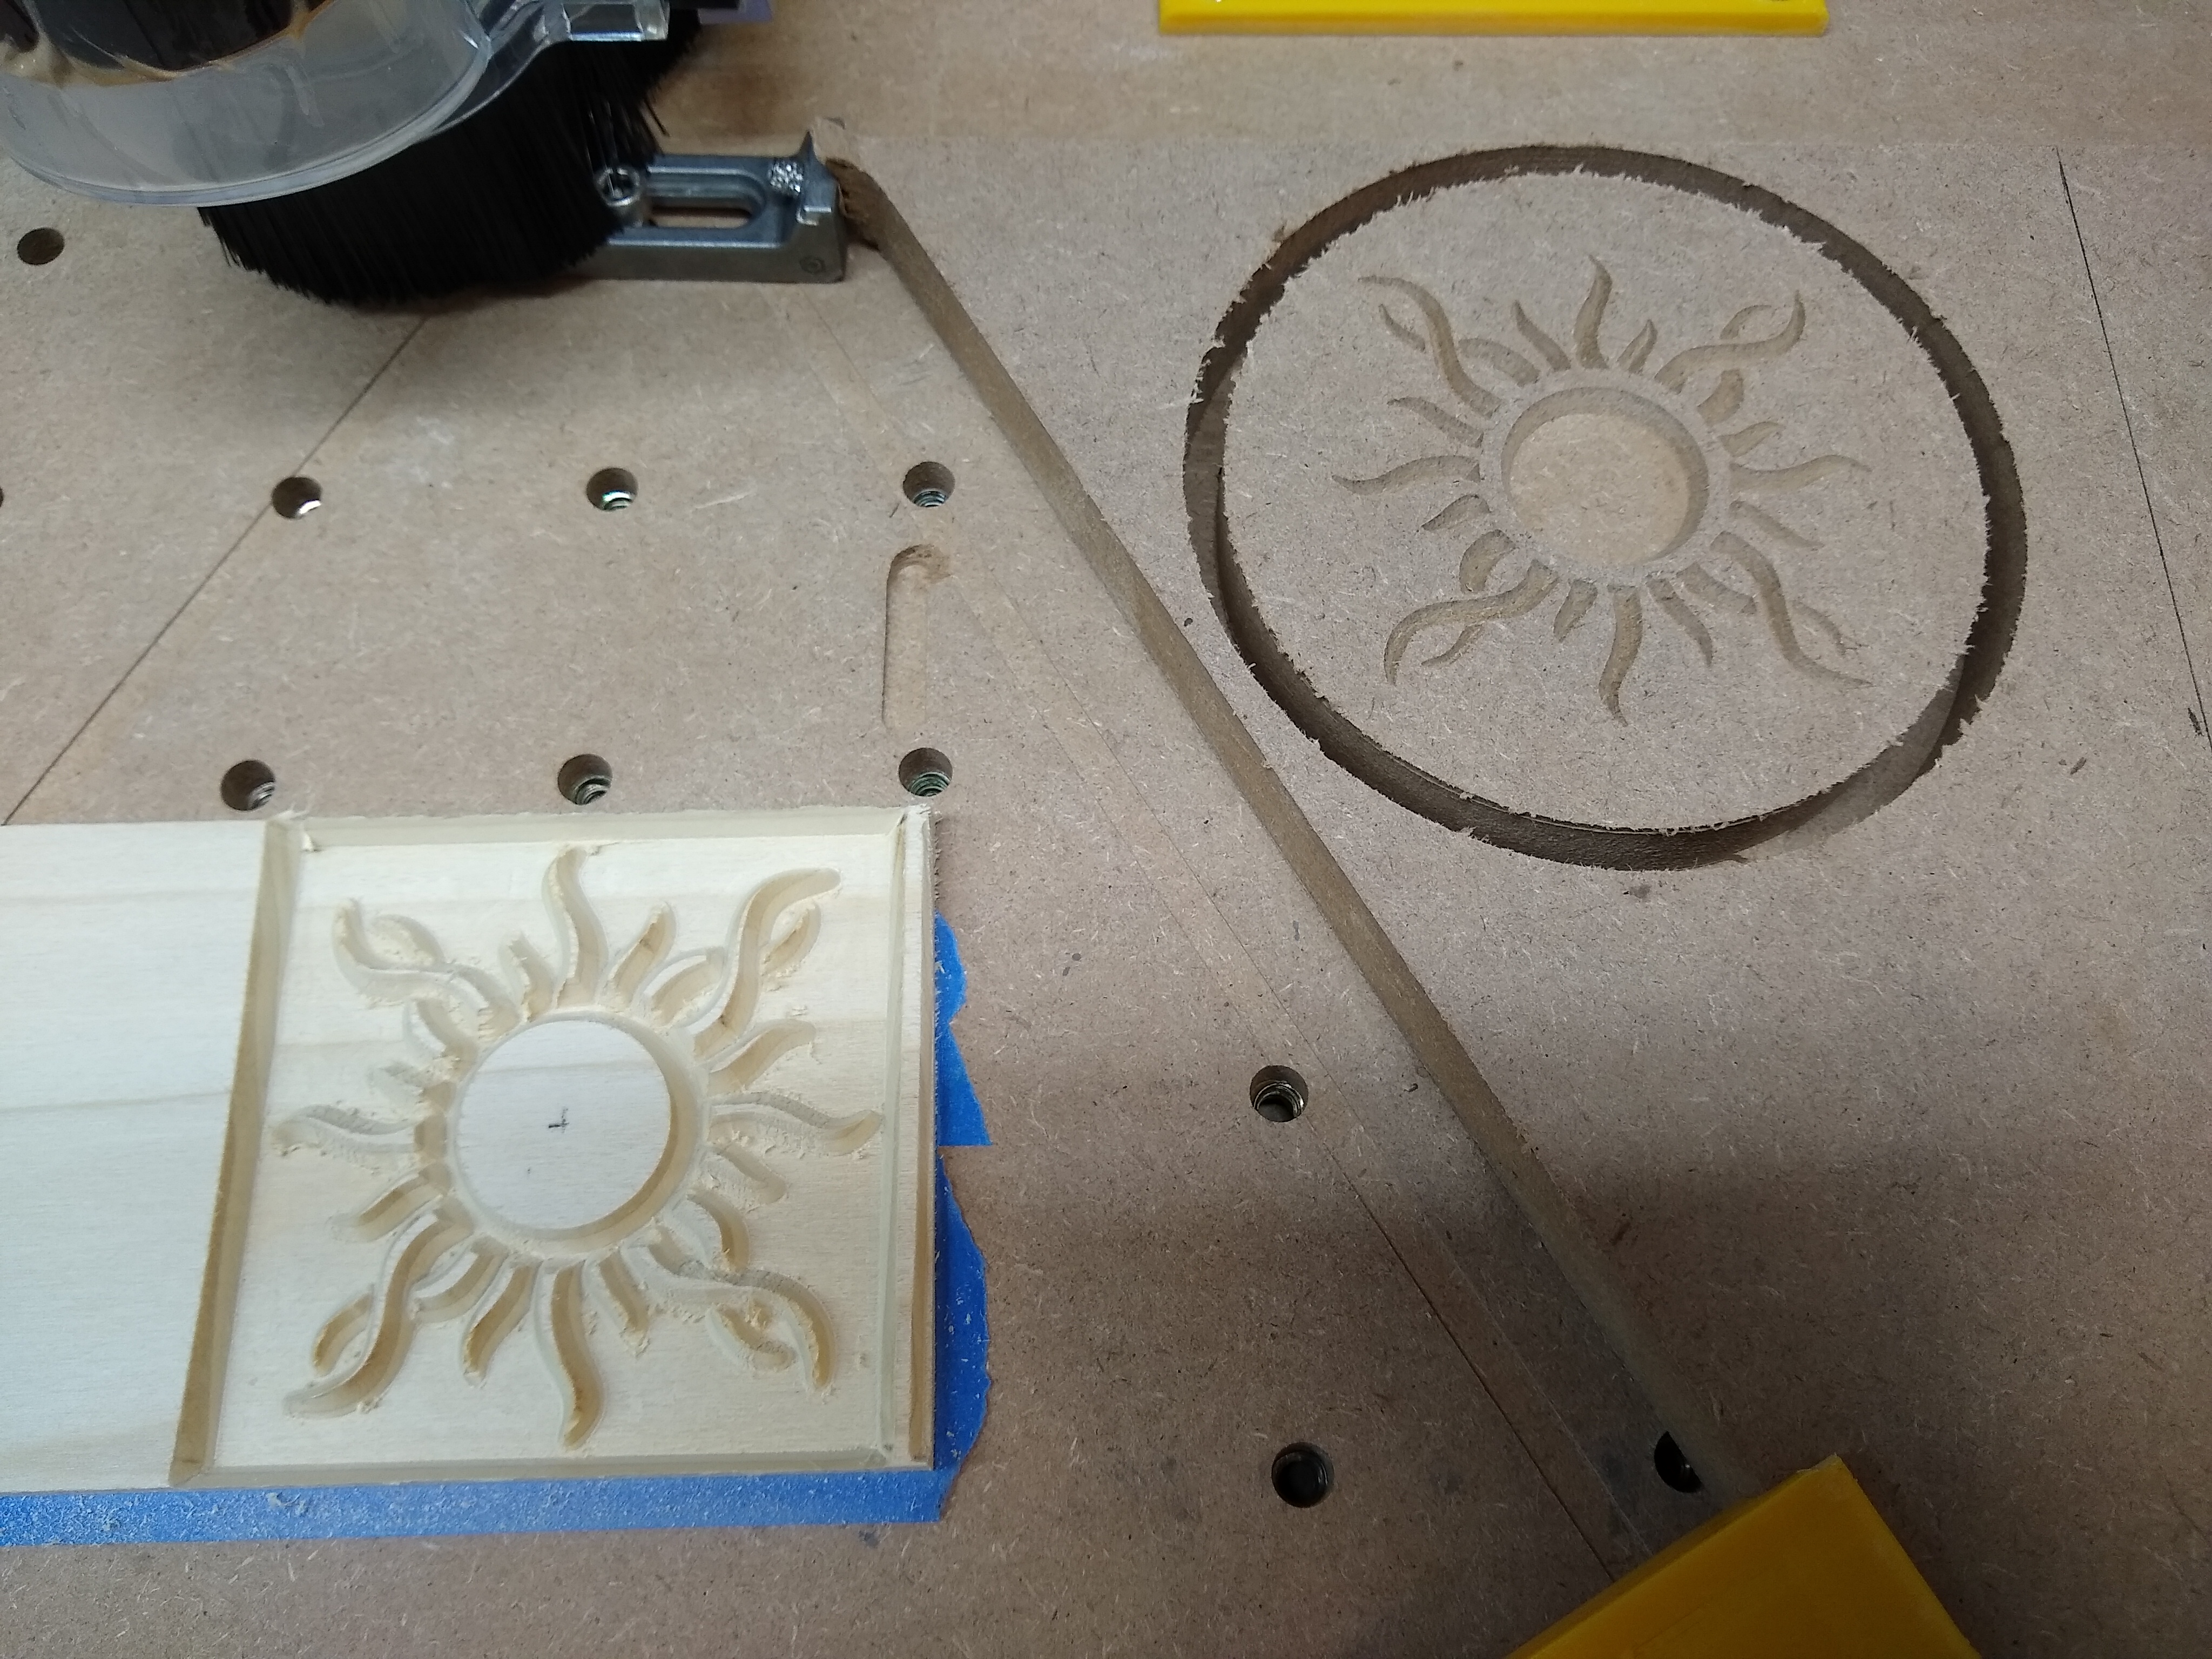
I’ve just tried an inlay using CC 5.14 Pro’s advance VCarves, but with doing two separate advance vcarves for the top/plug. I saw this in a post from @ColdCoffee in a thread started by @Julien My first inlay project One starting at 0 depth with a max depth of 0.1 in. for the initial clearing out and then another starting at 0.1 in with a max depth of 0.2 in. for the final depth. This is with the base cut starting at 0 with a max depth set to 0.15 in.
InlayTestTop.c2d (129.2 KB) InlayTestBottom.c2d (125.1 KB)
While this takes longer to cut from the above method, it’s a little more brainless while performing the actual cuts. In the photos, the base is MDF and the top is very brittle 1/4 in. popular. It did not cut well and some pieces chipped off… But it was good enough for the proof of concept.
After being glued and sanded:
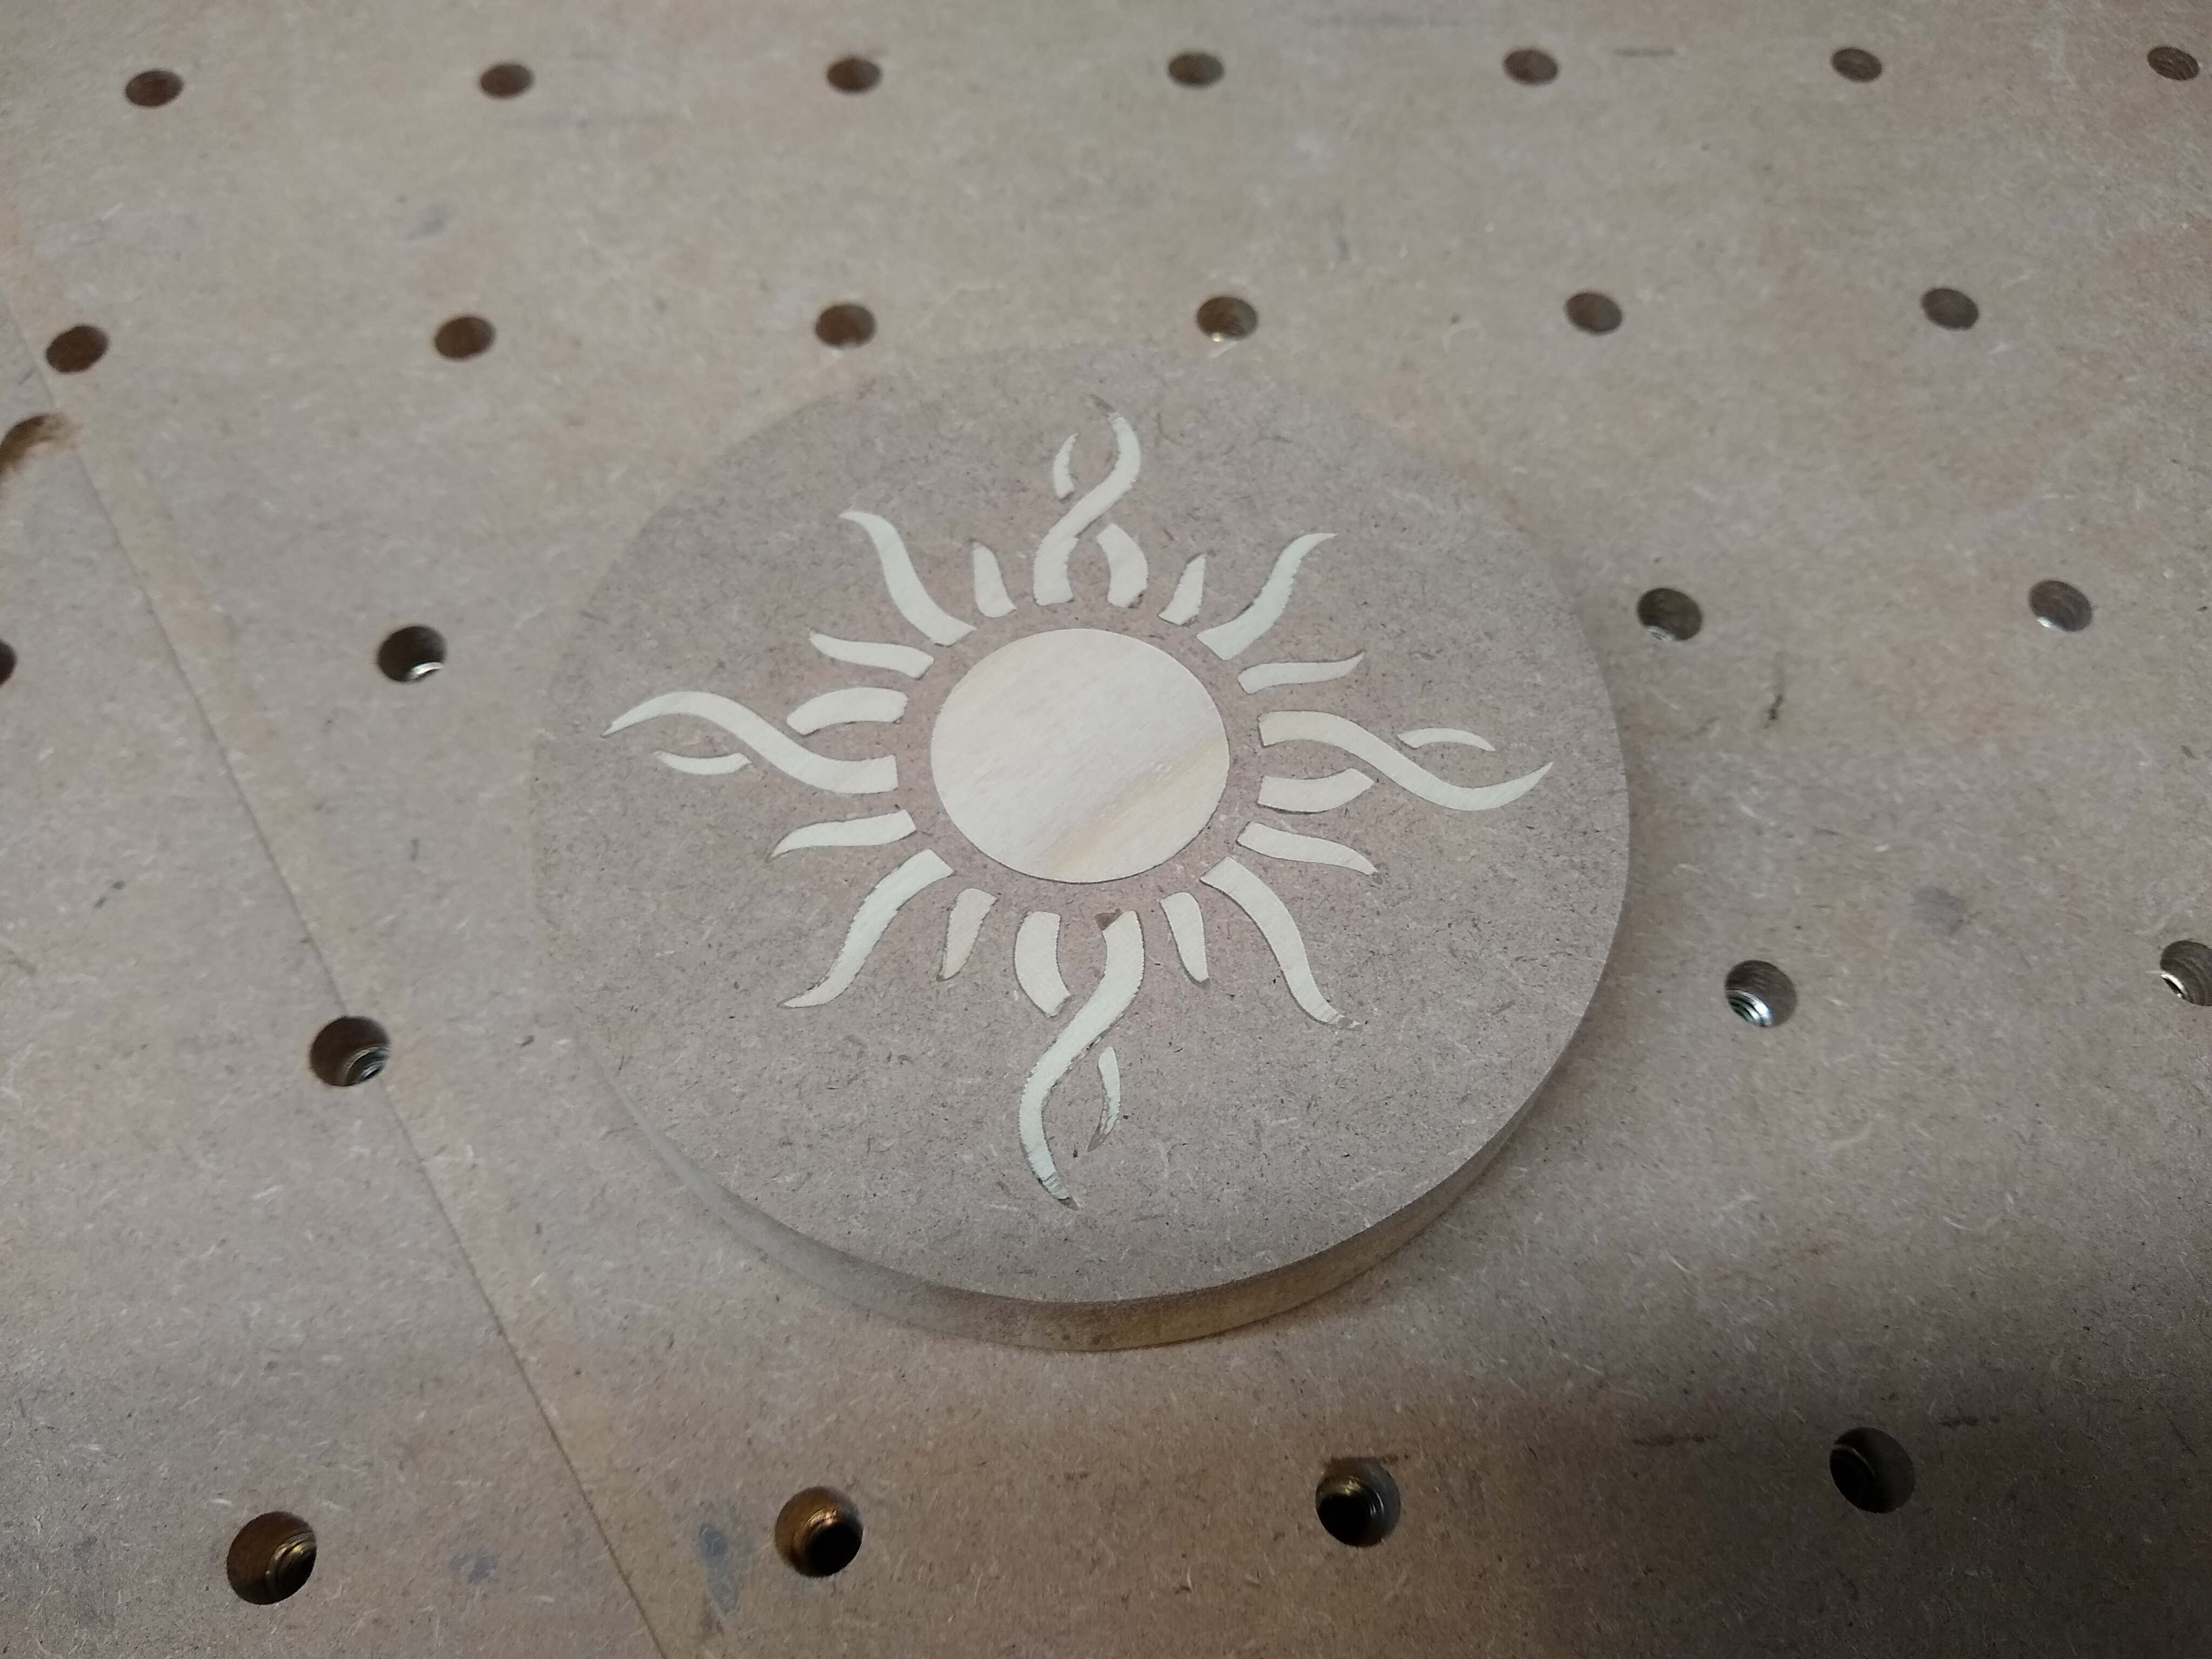
It would be really nice if the top didn’t chip…
So… Did I get lucky, or should this method work OK all of the time?
5 Likes
This method is working for me but I have only done 3 inlays so far. I’m going to experiment with different vCarve bit angles, to see if a v30 or v45 bit does better (as compared to v60) on small details.
Regarding tiny chipout flaws, I suggest saving a small amount of sawdust from when your plug was being cut. Mix that with some wood glue (to get the color to match) and use it to fill in those gaps, then sand flat. It’s not perfect, but it works pretty good.
4 Likes
for me, 30 does much better
2 Likes
Awesome Steve! I’ve been making some epoxy coasters recently and would very much like to try this design, but want to ask you if that’s ok first? Is this your design and in the public domain?
Hi Mike,
Yes… The sun design is a public domain design (not mine and easily found on the internet…) that I converted to vectors and imported into CC. Feel free to use it at your own risk!
2 Likes
I am finally getting around to making some of these for some of this years christmas gifts. Tried it with a 90 degree bit last night and it did not work well. I think I’ve got the workflow down, so after I get some 30 degree v bits I’m going to hopefully have some good results.
I’m going for some family name signs made out of a combo of walnut and birds eye maple. If they turn out ok I’ll post some pictures of them.
1 Like