Yeah nice, is 3/8 tooling a realistic option now? does the nema23 help with that?
It was before with the Makita but I’m sure a 2.2kw watercooled would also fit pretty well.
The real question is how much load we can put on the frame now that the drive system is on par.
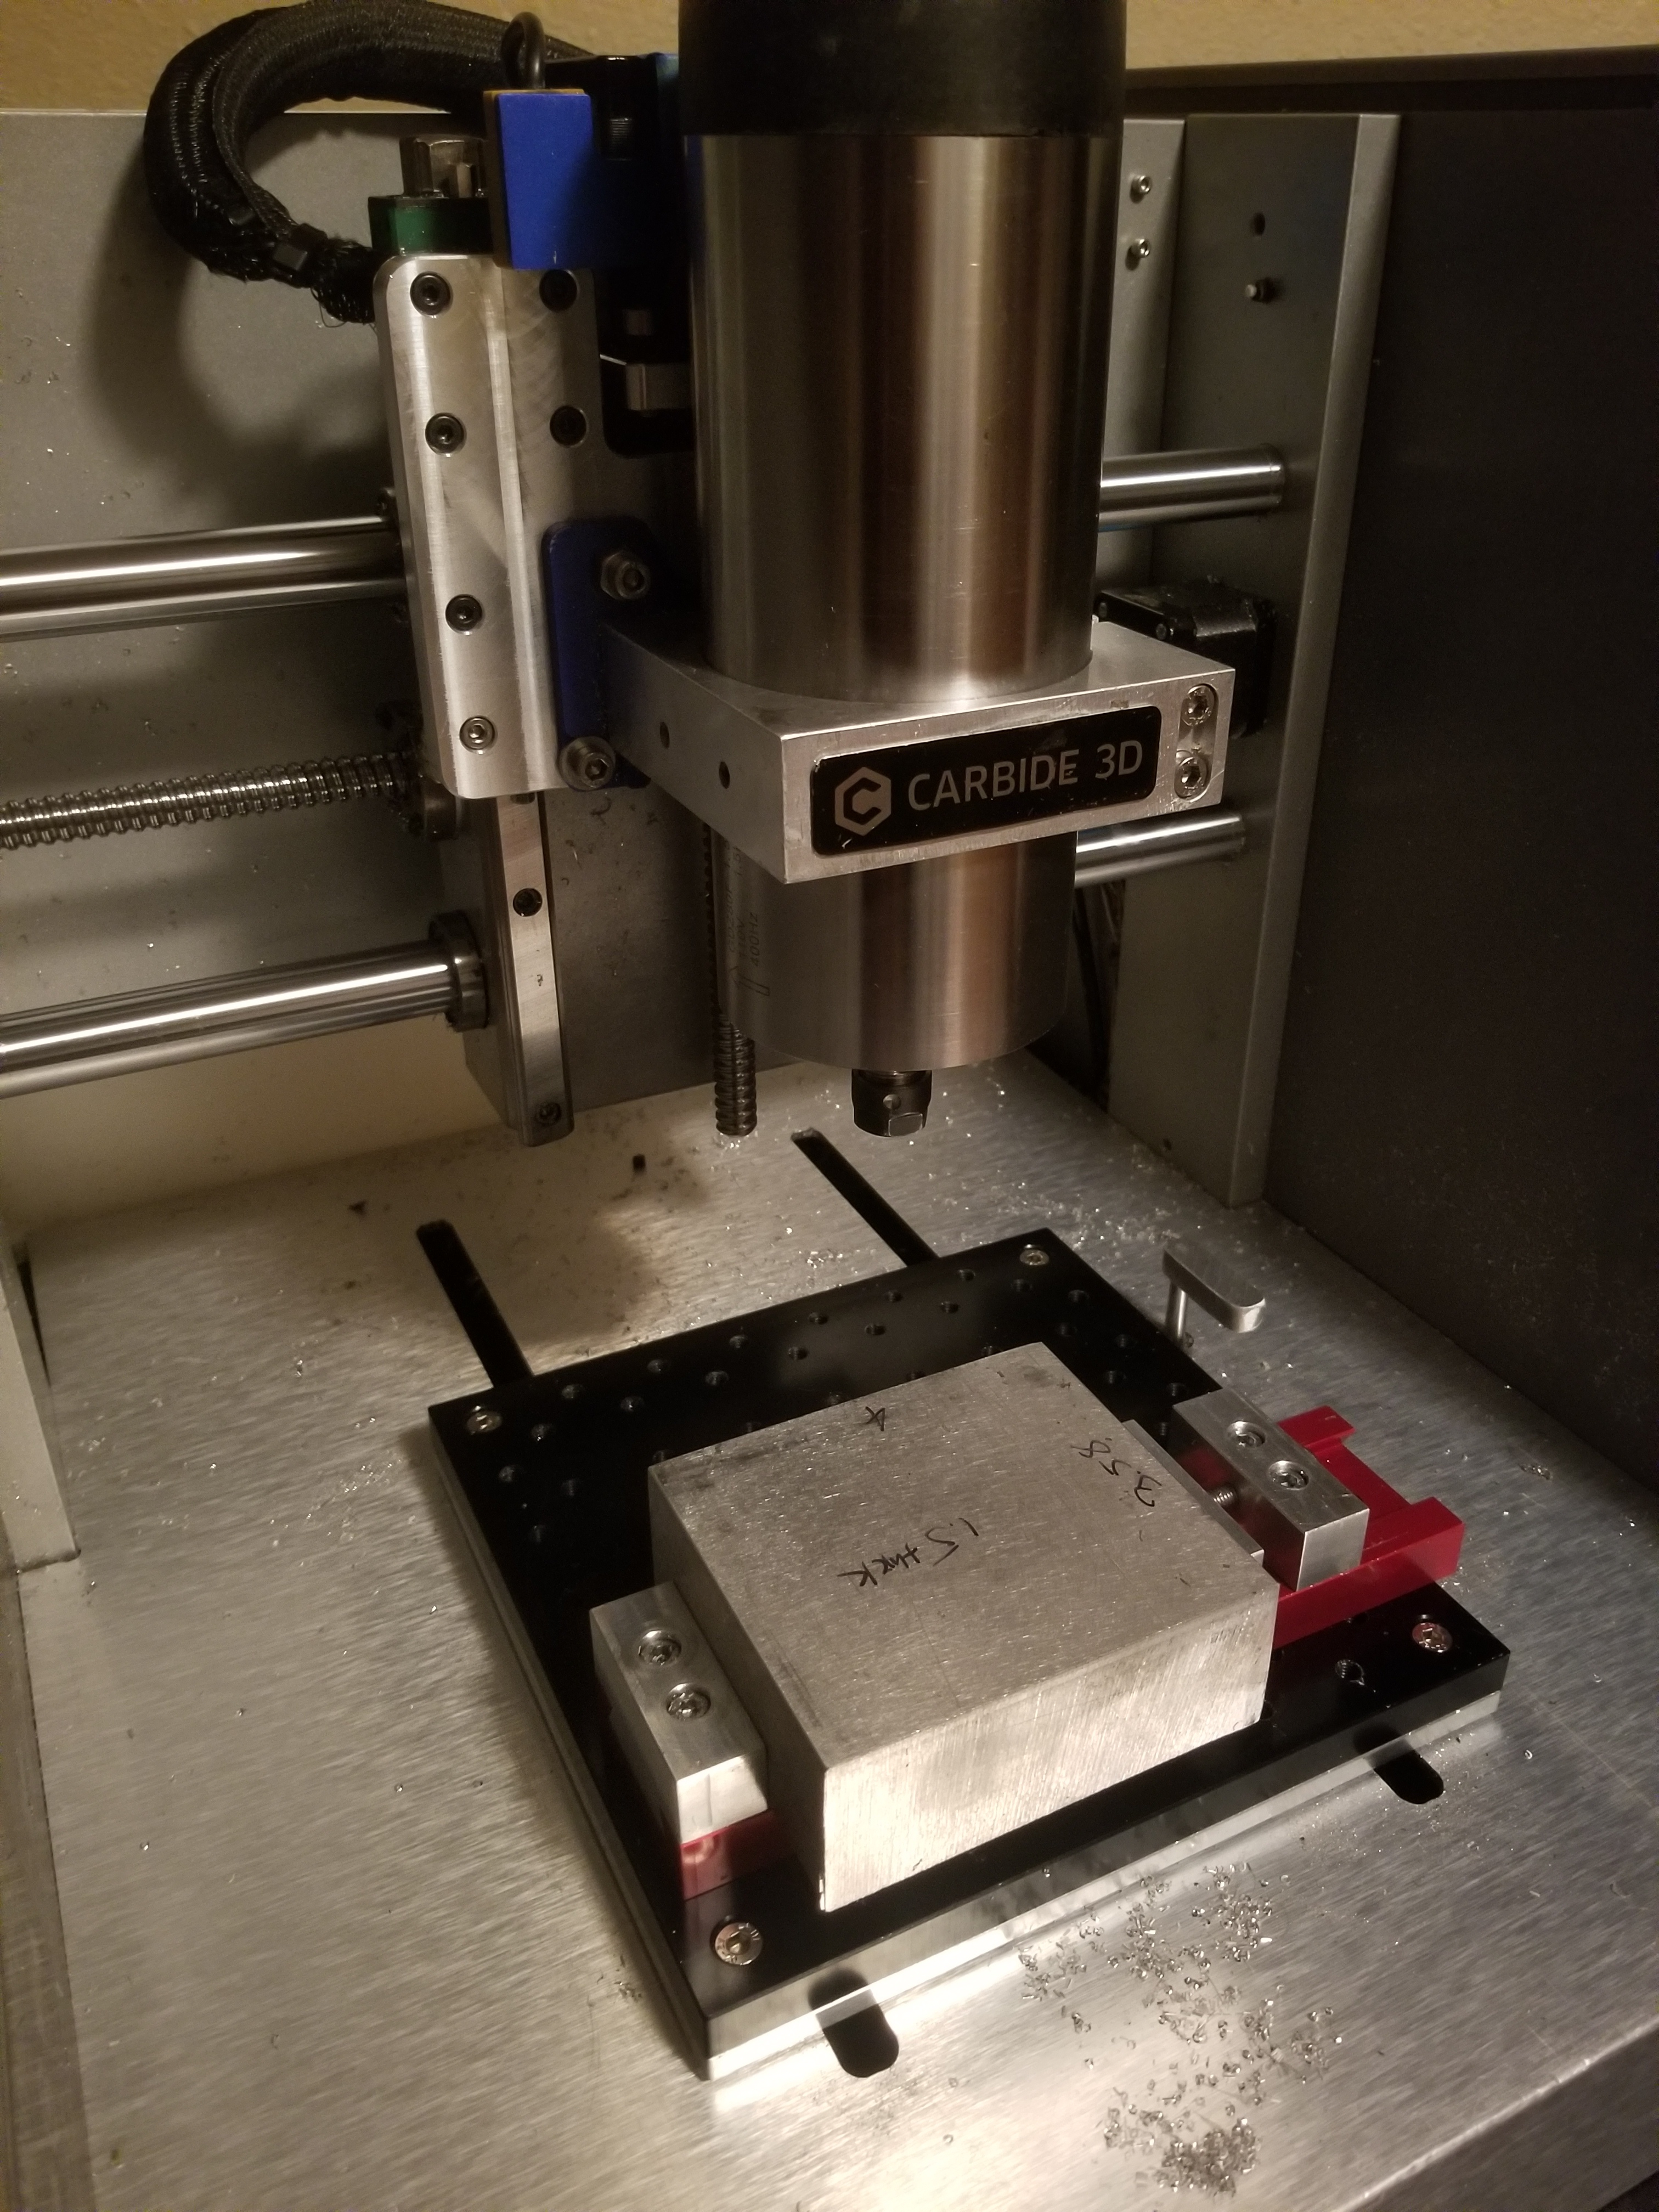
Since the Nomad and S3 use the same controller I thought it would be a “free” upgrade to just use a 23. That stepper is rated at 2.8amps but even running at 2, it has quite a bit more tq than the 17s.
1 Like
When C3D announced the Nomad was being totally redesigned I didn’t at first realize they were referring to this thread…
RMW
2 Likes
Hahaha, once you start looking at the Nomads frame and internals you’ll see how well its put together. Carbide3d has done a wonderful job designing this machine and I’m sure the new Nomad 3 is going to be a breath of fresh air.
I’m just bolting on some mods to see how far you can yet stay within the concrete parameters and utilize stock-ish workflow.
Linear this…ball that… maybe add 2140% more spindle power. Its Nomads making Nomads. It’s the dream.
6 Likes
Nobody chooses an engine with a weak block or head for tuning, you start with something solid.
3 Likes
9 Likes
Not gonna lie, I’m a little nervous. I get about 0.004 deflection at the spindle with a good amount of force by hand. Adaptive depth will tell but I’ll probably run in the 6ish pounds of force, hopefully.
A little bit of that is from the modified spindle mount, it’s not much better than a wet noodle.
Anyway. Tossed a little bit of aluminum for some testing. Its clamped in the vise combined with a superglue tape setup. We’ll also see how tolerances matter on curves. After testing I’ll run another set of plates and proximity brackets. They are set to switch on vertical surfaces so less of a chip interference problem.
8 Likes
I look forward to seeing the results.
Looking at the C3D/Nomad vice makes me think the Saunders mod vice would suit the nomad really well, a lot of guys have designed and made their own and they seem to offer a lot more purchase than the C3D one
1 Like
To be fair, at the stock power level, it provides perfectly adequate clamping.
I was actually just thinking of modifying the jaws to fit some pitbull clamps. Although it would be nice to have a low profile vise that could be aligned with pins.
Yeah I’m sure it does - just having the width of something like the smw one would mean you could take full advantage of almost the whole nomad work area in a low profile vice… Though that can be also be done with tape and CA
I’ve seen a lot of cool low profile vices with mitee bite clamps used in them, would be a cool little project
2 Likes
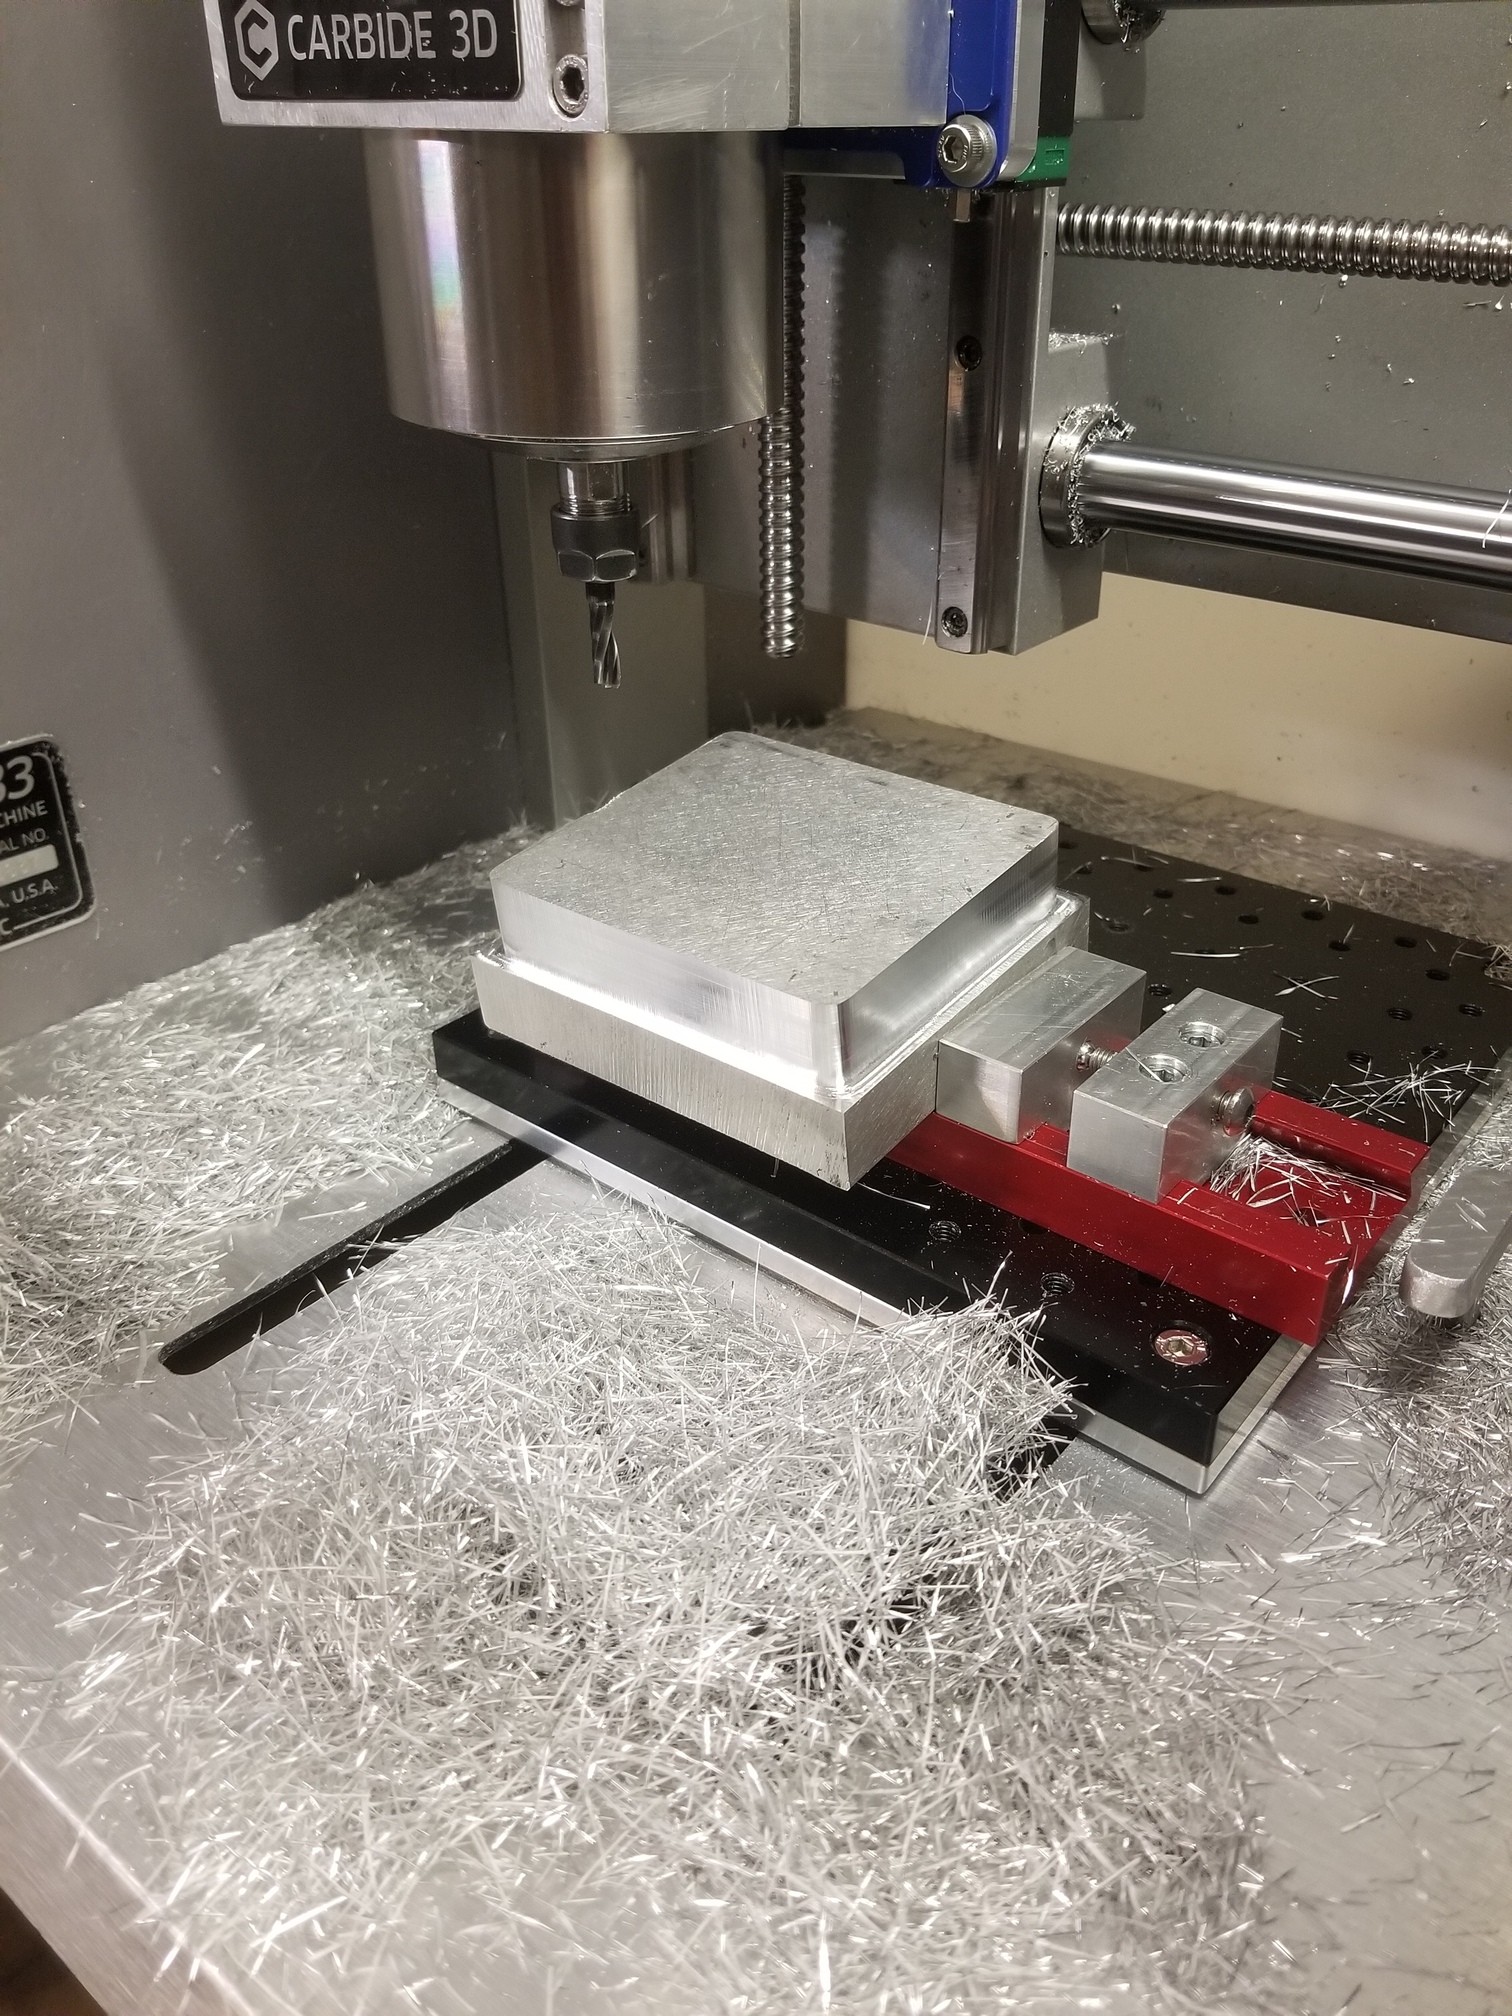
Part pulled on the full depth adaptive and took out an endmill. Took the vise out. Superglue taped right to the deck and re probed.
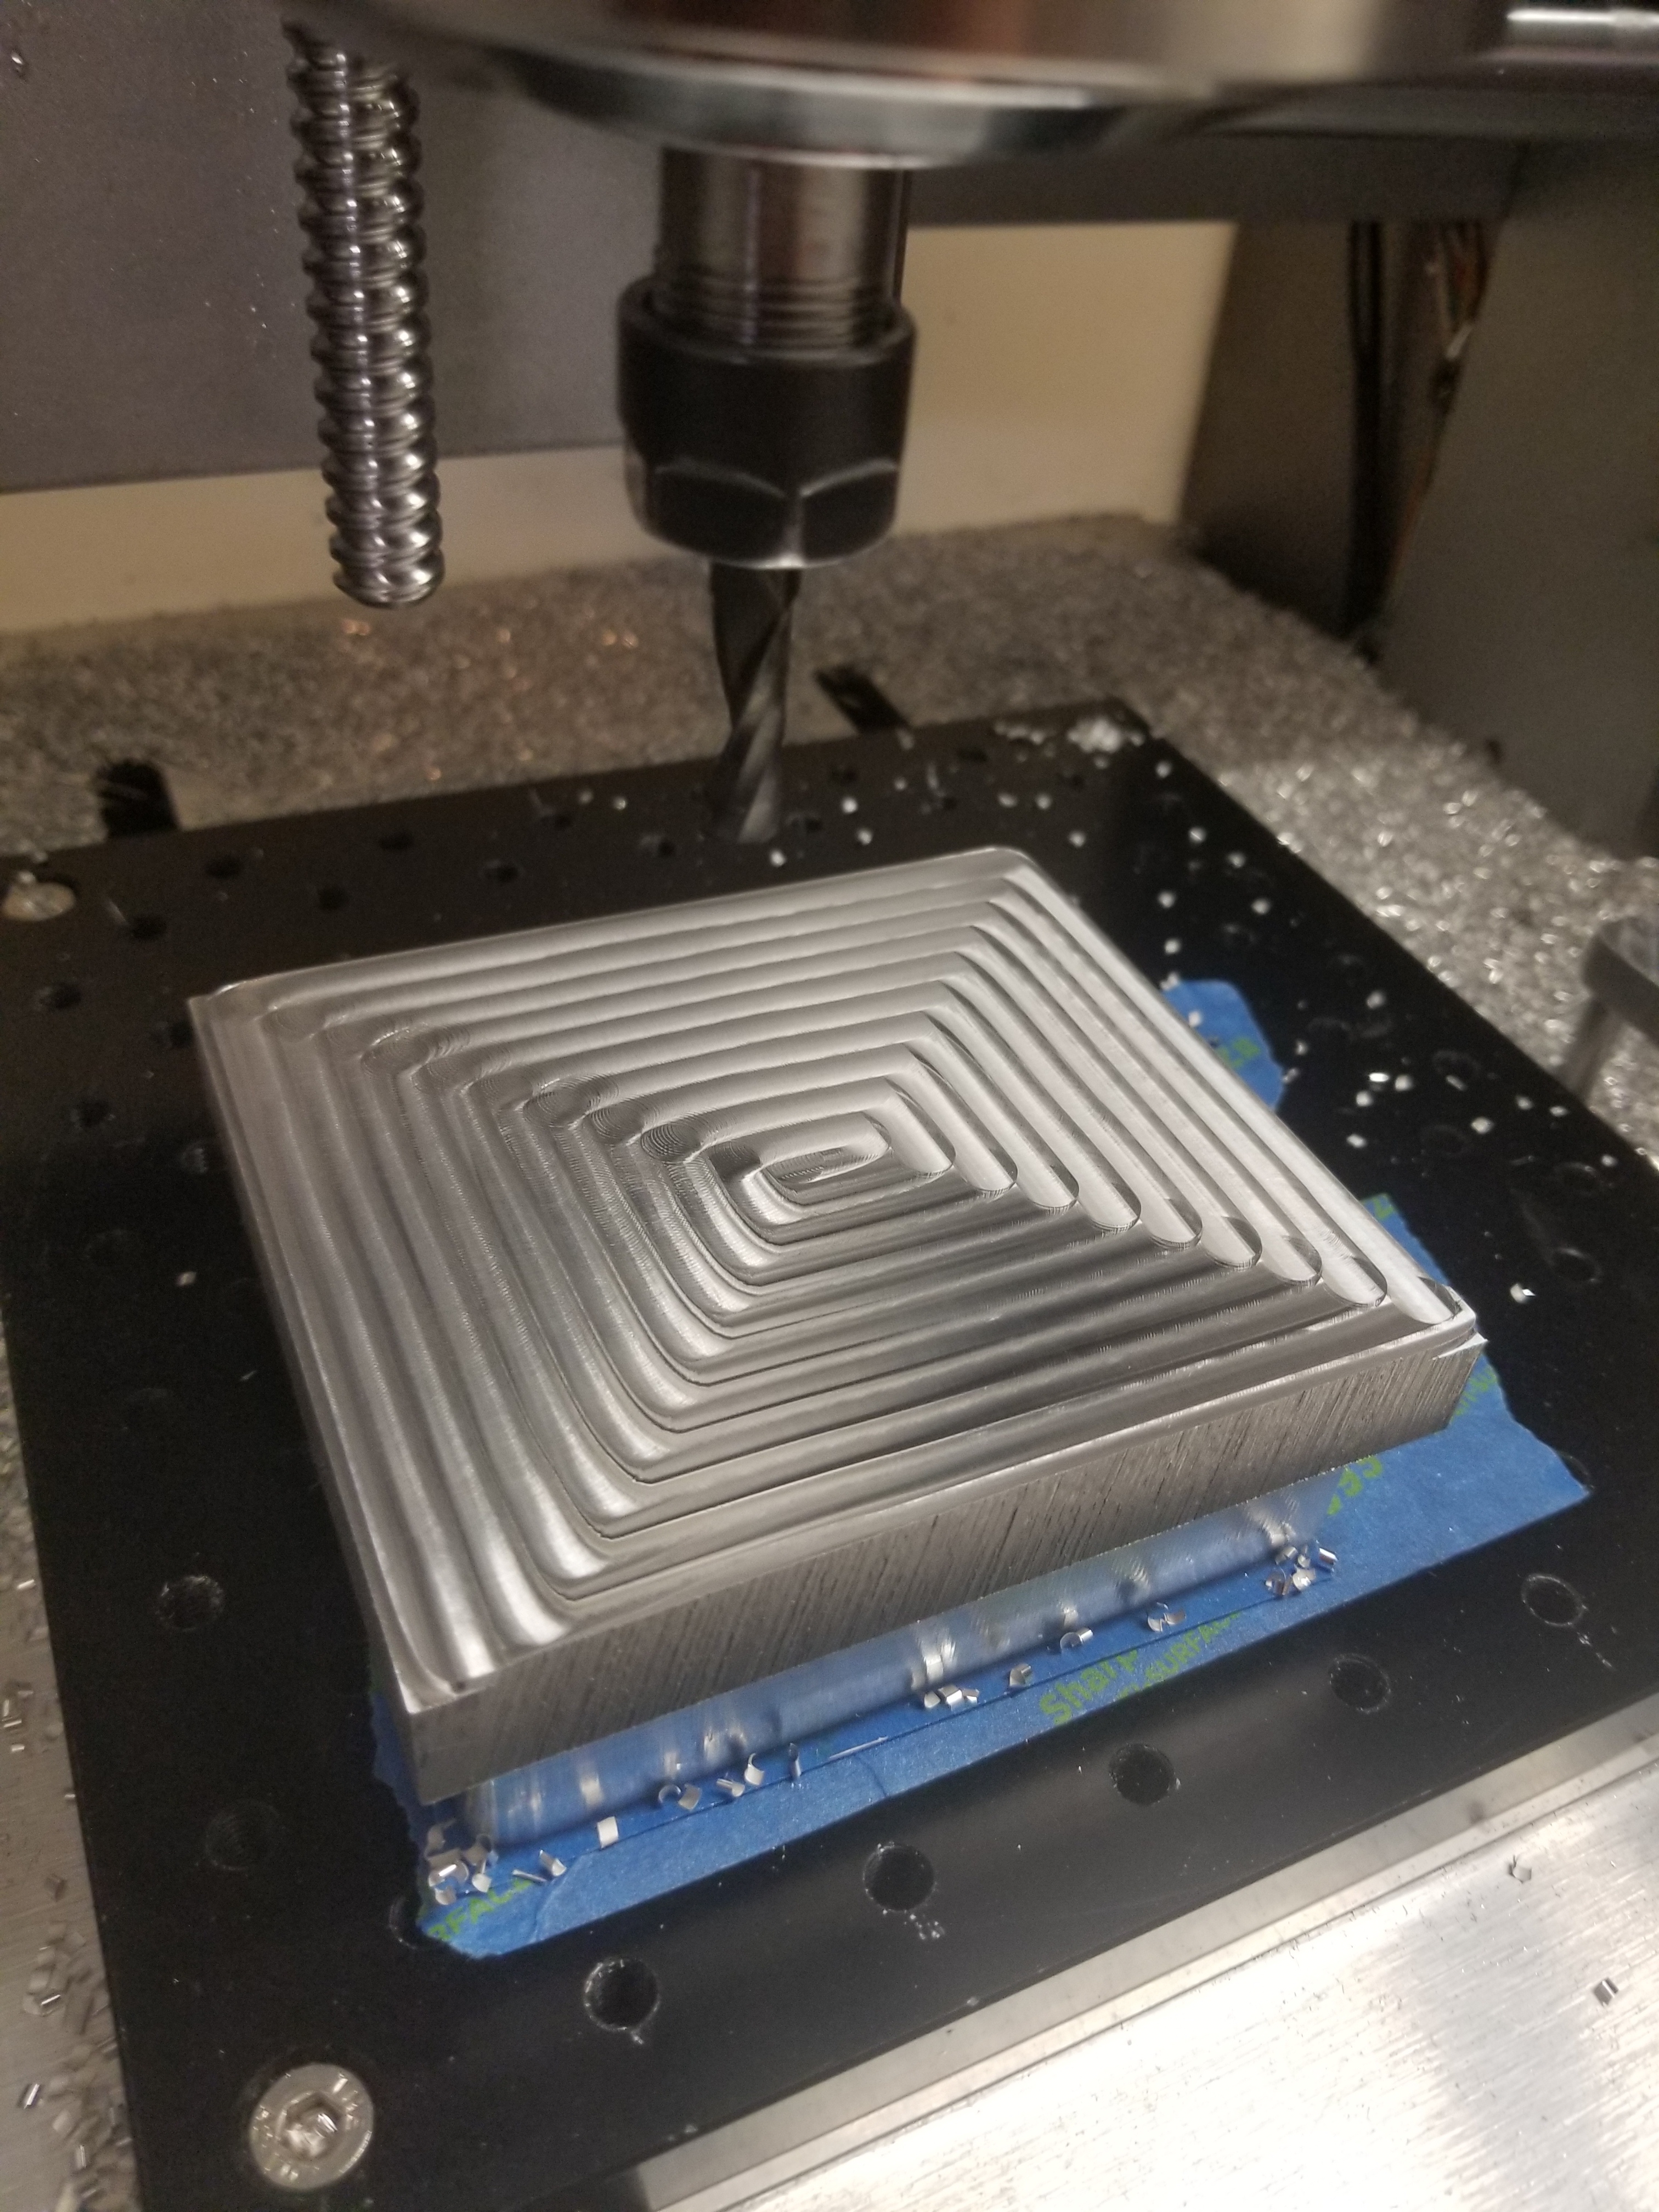
The Nomad still likes low depth and high stepover, 25/67% is magic. 0.65 cubes, around 4lbs of machine force. 24krpm is too low to really do some damage
That finish though, adaptive floor looking beautiful!
13 Likes
Every time I take out that vise I say ‘I should make something better suited for my work’. and then I finish using the vise and put it away - until the next time.
2 Likes
I know exactly how you feel! Winston gave me a few good tips on getting more clamping pressure. Just change out the plastic feet for aluminum.
Here is a Max speed max rpm max endmill test.
Datron 8mm at 36,000 rpm
8 Likes


Hmmm horizontal milling attachment for the Shapeoko…
2 Likes
If you and @RichCournoyer joined forces, I think a black hole (of 4th axis awesomeness) would ensue.
2 Likes
I’ve been waiting to follow in his footsteps on that one, we actually have the same controller. It’s a bit involved and there isn’t a perfect grbl 4th axis post processor yet.
Even with a manual fixture like this, I’m thinking a Fusion post can probably be made that allows you to use tool orientation but stop and tell the user to rotate the A axis instead of driving a stepper. That would allow you to run one program with multiple rotations.
3 Likes
As I’m busy shooting and writing text (VoiceOver stuff) for the How-to Modify a Chinese rotary gearbox… I thought I would show you what I change on the Tormach 4-Axis (Fusion 360) post to use on the GRBL (SuperGerbil) controller:
As Posted: (header)
%
(1001)
(T1 D=3.175 CR=0. - flat end mill)
G90 G54 G64 G50 G17 G40 G80 G94 G91.1 G49
G21 (Metric)
G30
N10(Finish Side 2 R 125 FEM 10 Stock)
T1 G43 H1 M6
S10000 M3 M8
G54
G0 A-90.
G0 X-8.969 Y13.226
As Edited: (With comments ((()))
%
(1001)
(T1 D=3.175 CR=0. - flat end mill)
G90 G54 <------ (((Remove everything after the G54)))
G21 (Metric)
G30
N10(Finish Side 2 R 125 FEM 10 Stock)
T1 M6 ((( Remove G43 H# WhereEVER they appear in the Program, I use a text editor’s Find/Replace to assist)))
S10000 M3 M8
G54
G0 A-90.
G0 X-8.969 Y13.226
THATS IT!!! Pretty easy…which is why I haven’t written a Post yet…but I will.
Now the above works great …Except for CANNED cycles (like deep hole drilling, etc).
For that I do the following: (Sounds worse than it actually is)
Step 1. Post using the Tormach <----(((This give me the rotation info)))
Step 2. Post using the Carbide3D (GRBL) Post <— ((This gives me the non-canned cycle XY and Z information.
Step 3: Remove the canned info from the Tormach Post, paste in the GRBL info. in its place
Really easy to do…but really EASY to screw up IF you are not familiar with GCode.
Ok…back to the video making…
10 Likes