Thanks. I didn’t bother cleaning up the fuzzies since it’s a waste but they would clean up easy.
I am going to analyze the toolpath for that bit and see if I can identify where it first went wrong. Looks like maybe in the handle for the pressure washer nozzle but not sure. There is a lot of odd chatter right there.
No, I use Vectric Vcarve for design.
Seems like the dust collector would do about the same as an air assist but maybe not.
I have done ColorCore before and tried lots of bits and settings. I posted a long thread about that back in October or November.
I tried the recommended O flute bits and low RPM with high feed rate. I found that the venerable #102 from Carbide 3D gave me the best surface. I use 8000rpm and something like 60 feed rate. I know that bucks conventional wisdom but it provides a smoother surface.
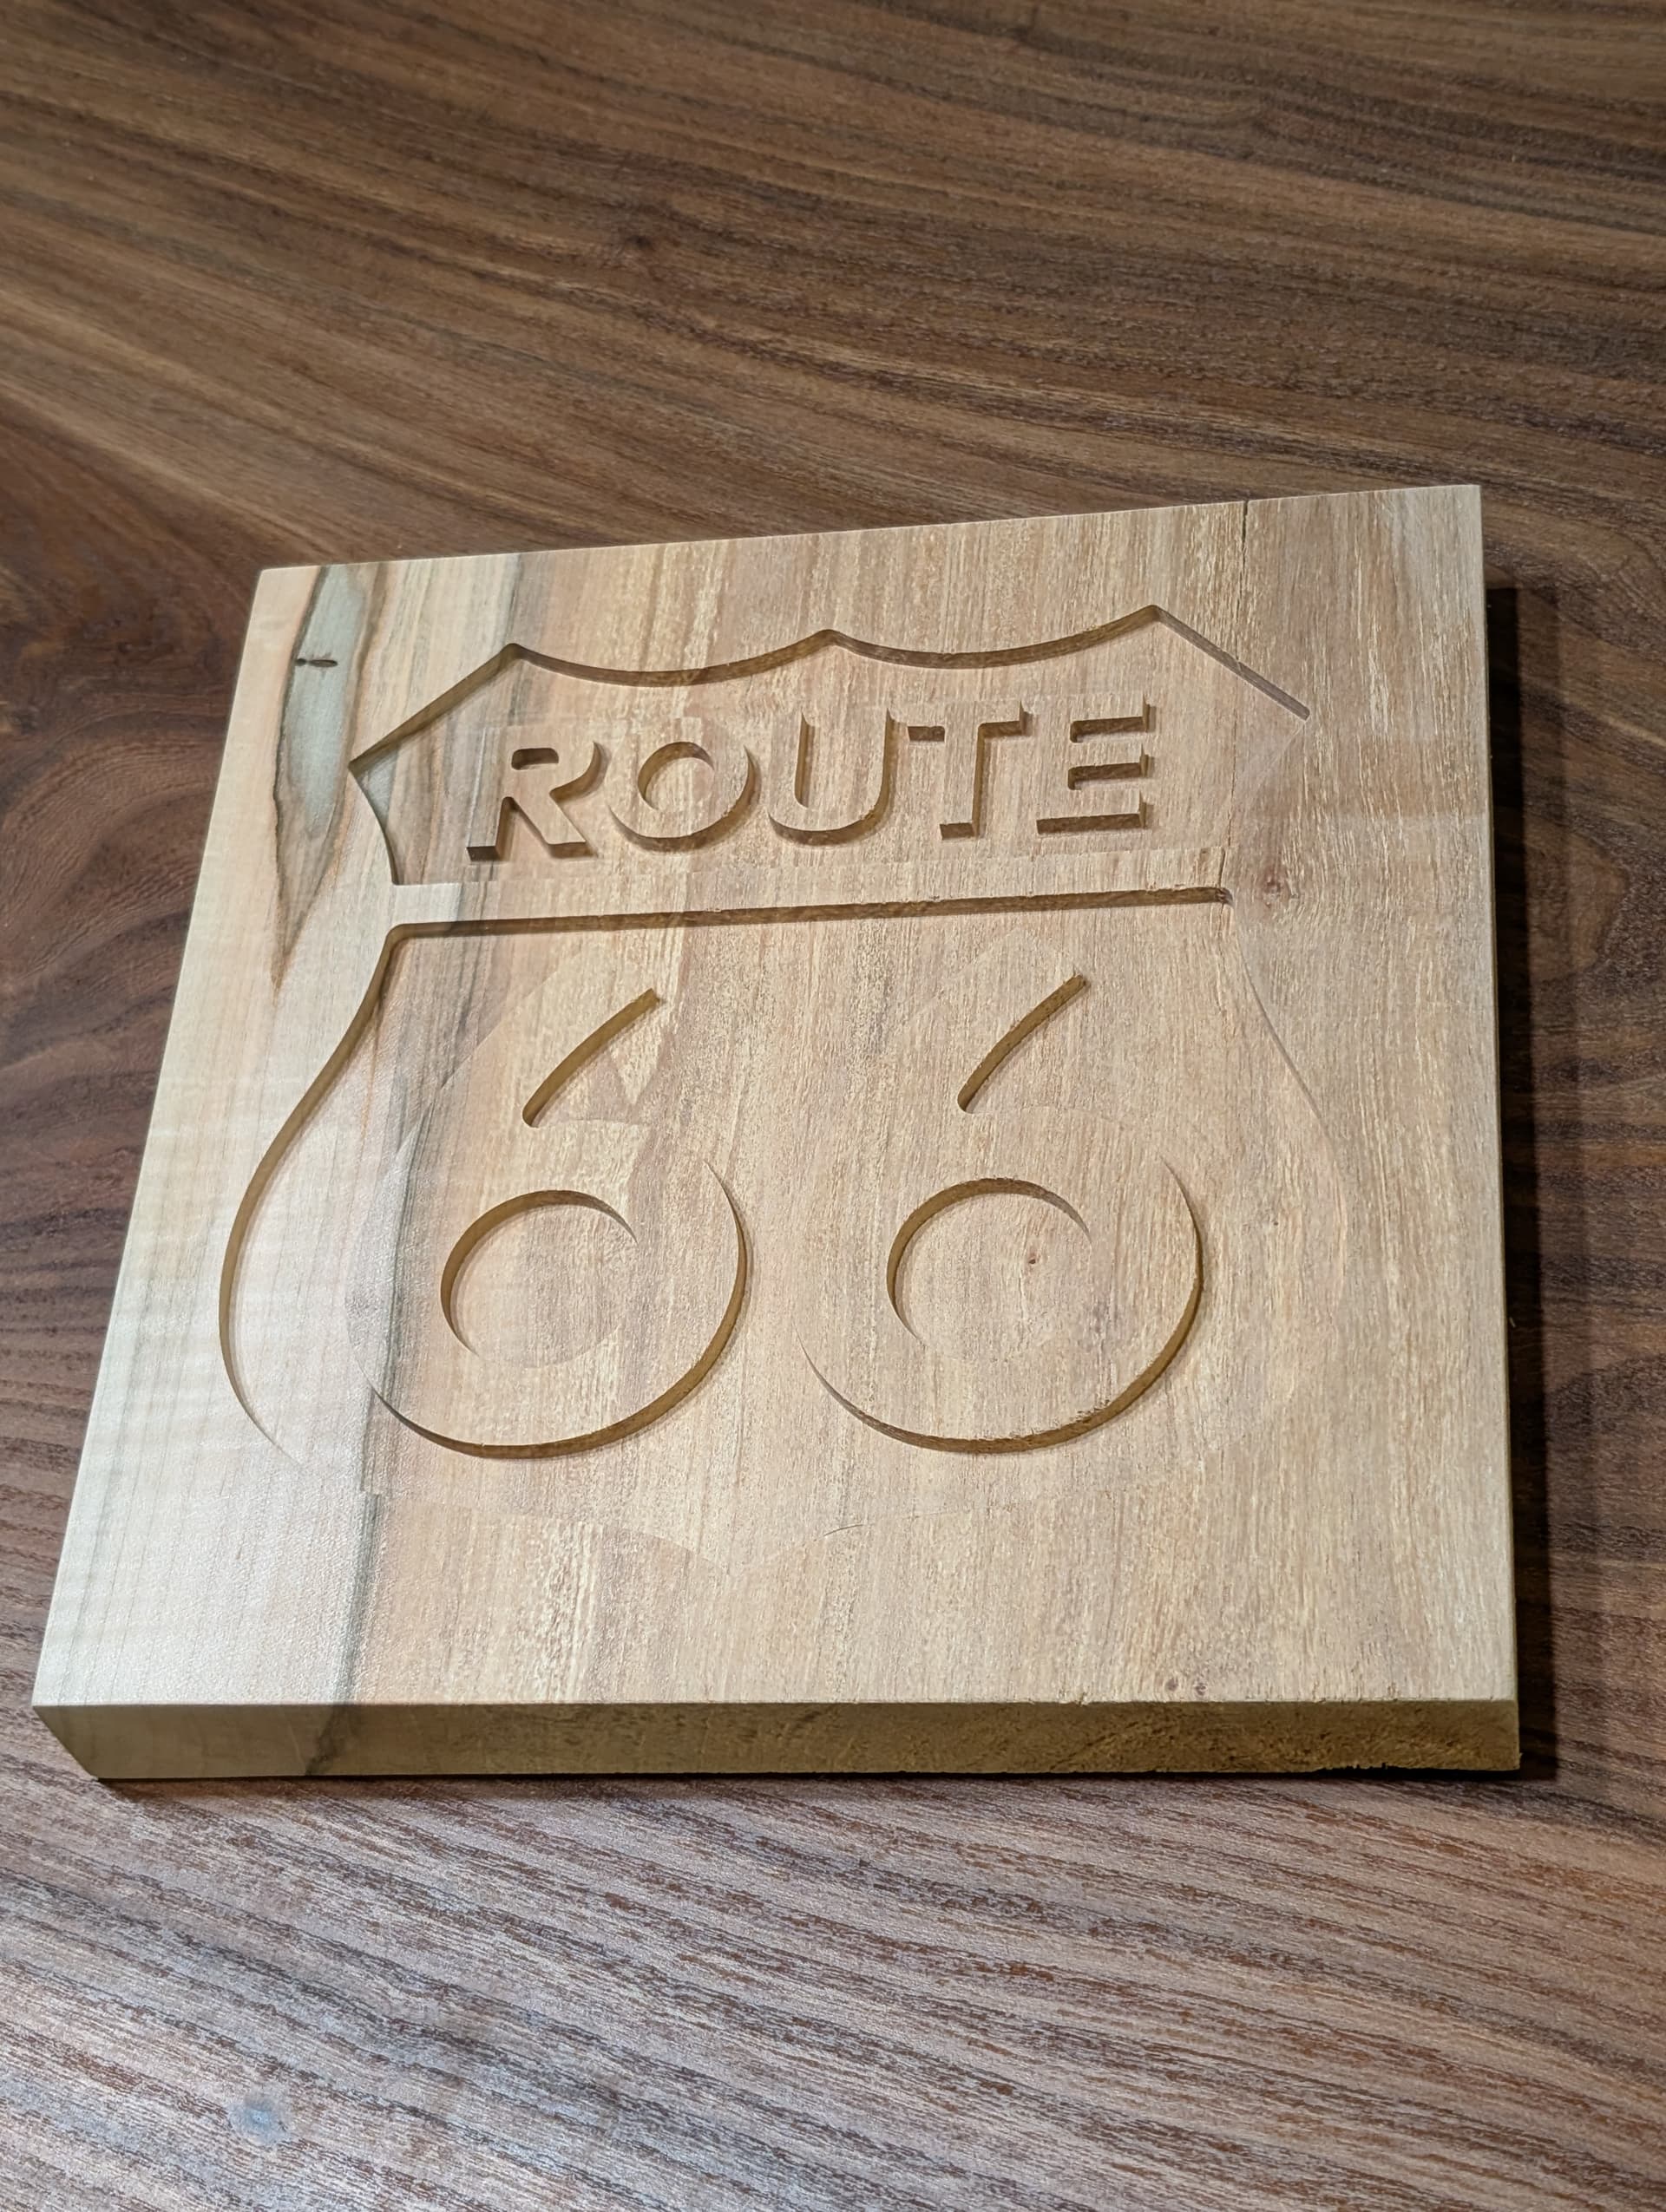
After owning the machine for a few months, I finally got around to flattening the spoilboard and found there was a pretty measurable difference between different areas of the workspace. Then made this piece out of some scrap. It’s about 10" x 10. Had to clean up the lettering with a small 1mm bit but it turned out really nice.
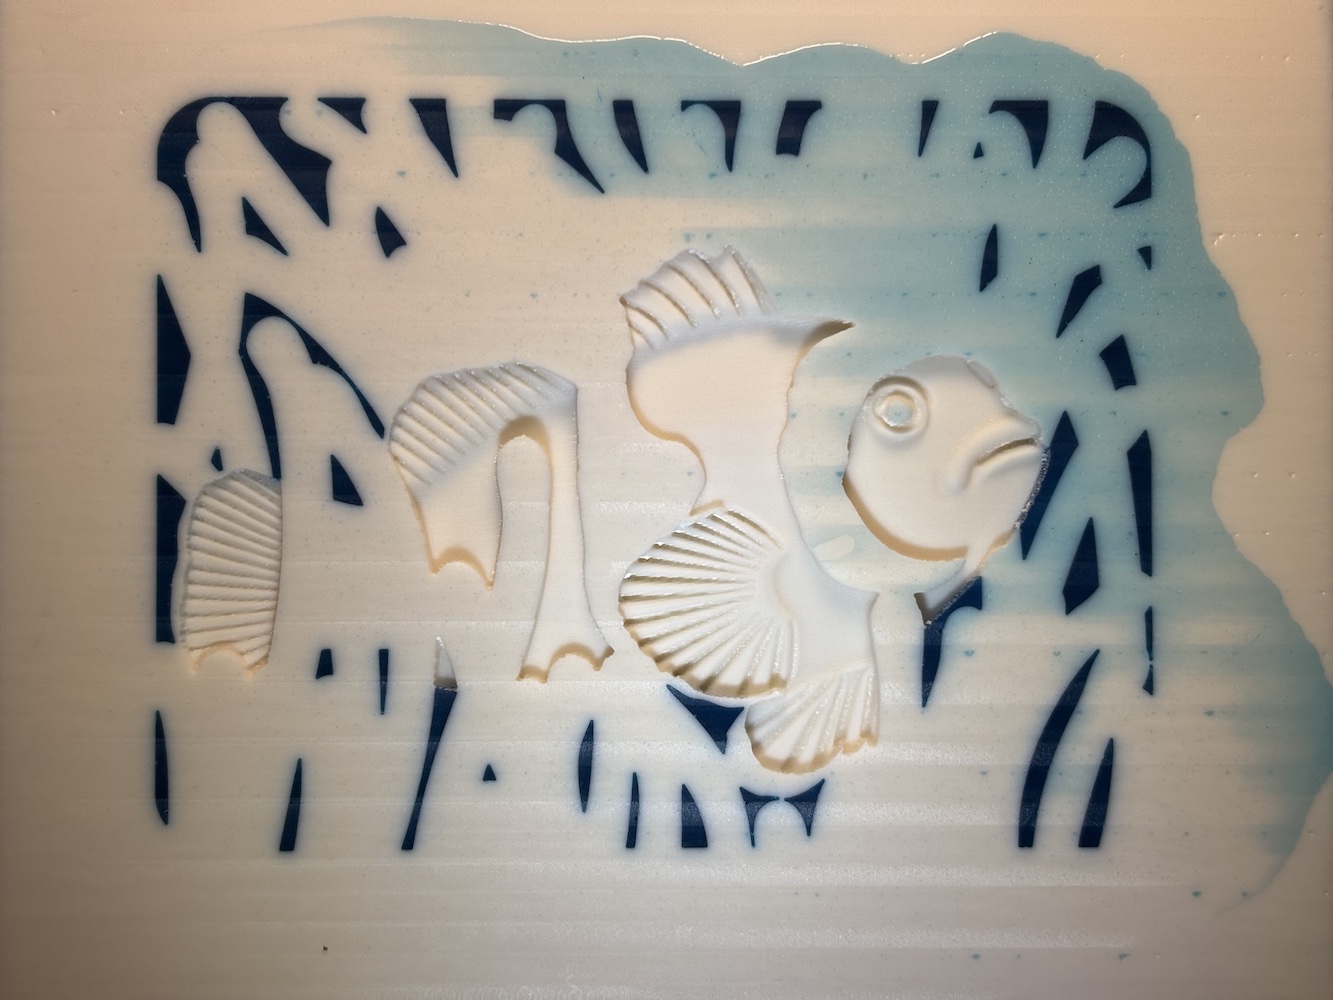
This is about 65 mm high, will be cutout and inlaid into a box. It’s a new medium for me. This is done is several steps, by color, each taking a day including time for the epoxy resin to set. Some steps are simple pocket cuts such as the white and black. The black was done before the white such that the black pockets could be cut fat enough for a bit but the white overlaps so the lines end up thin.
The orange and blue are done another way. They are 3D carved into the substrate:
So the details in the orange are due to differing depths of the semitransparent epoxy. This is tricky as it is dependent on the depth of the cuts as well as the density of colorant in the resin. The heightmaps were created by hand in Affinity Designer.
The engraving is such that the deeper parts are darker which matches reality. But this means that angled light will cast shadows opposite reality. I experimented with filling a simple pocket outline with the colored epoxy, carving a positive relief and filling with clear epoxy but this was unsatisfactory due to edge interactions with adjacent features.
Thanks. I use a faux ivory sheet from Masecraft, a polyester resin I believe. This stuff mills and engraves like a charm as long as you don’t feed too fast with larger bits where it may chip. You can see that on the outside of the fish border, not important there as it will be cut way.
It holds pretty good detail, I’m experimenting with it for cameos.
(The oval within her face was isolated for a finer finish pass, can’t do that I guess!)
Absolutely wild but now I’ve just come to expect that from your work
I’ve still got some of that fake ivory from testing in Engraving inconsistency
Did you ever get to the bottom of that?
Side note: I’ve also got a bunch of tagua nuts which are apparently a nice ivory substitute for deeper 3d carvings. I’ll send you a bag if you promise to post what you make out of em
Thanks! The engraving inconsistency, to the best of my testing endeavors, was due to a slight bit of play in the graver holder. I started compensating in my design by slightly moving ends of lines. And, of course, now that I’ve got that settled, am on to something else with its own set of conundrums.
I’ll pass on the nuts, I got a stash of my own from 45 years ago. I’ve only used them a few times, once to inlay hops on a friends guitar neck, another for pine cones on my nephews box… Very nervous prospect cutting them on bandsaw but still have all my fingers.
A freind gave me a coaster and asked if I could make a trivit for her daughter in law. It’s her favorite hangout when she goes south to escape our cold Canadian winters. Apparently the walls inside are covered with pictures of peoples dead dogs… hers included.
It’s 9"x9" hard maple, contour cut with a 30° V bit, 1.5mm deep and finished with butcher block conditioner.
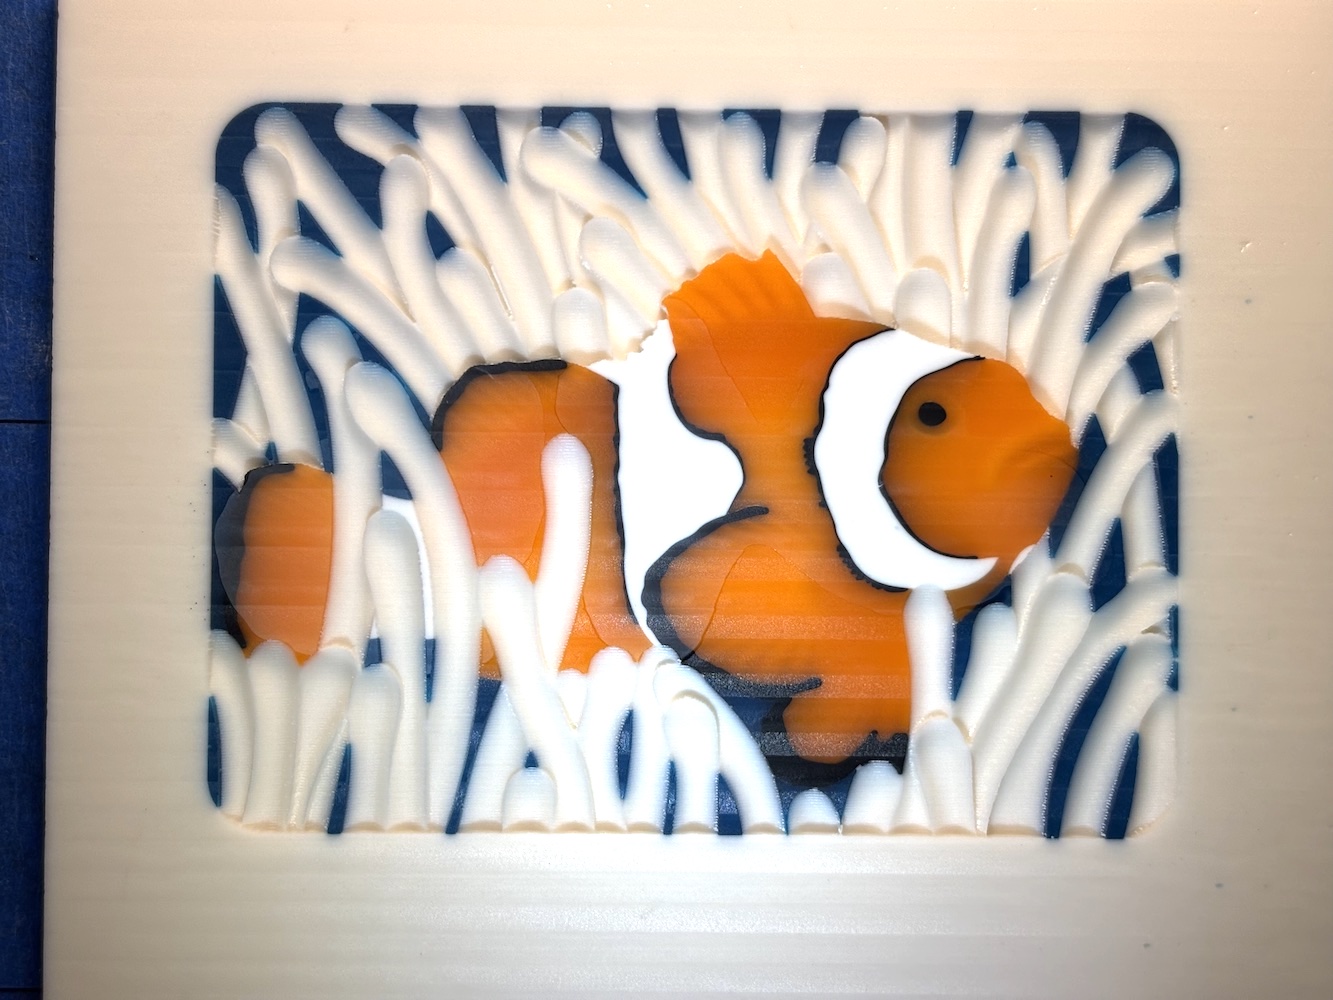
Thanks. I should have mentioned the target max depth was 2.0 mm. I should have grabbed a pic with a single light at an angle other than above or below. The anemone takes on different appearances as the light angle changes.
Thanks! The piece is 85 mm x 65 mm. It was designed on Affinity Designer (iPad) including the heightmaps. All tool paths and gcode were created with CC Pro.
Here’s a link to the substrate material (it comes in different thicknesses):
I crafted a spacer block for my wife’s MacBook port replicator. The original spacer had a lip that prevented the computer lid from closing properly. A couple of years ago, I modeled and replicated the part in Fusion360, then used a resin printer to produce it. Recently, the part broke, so we needed a replacement. Since I had a sheet of HDPE available, I decided to test my Shapeoko 3XXL for milling the small piece. The process turned out to be highly successful.