I was heavily influenced by the cut rocket file Kevin shared. That helped for my depth of cut. Disabled my bitsetter and manually set Z height with a piece of paper
Thanks guys. I have not viewed it. I’ll have a look and try again!
1 Like
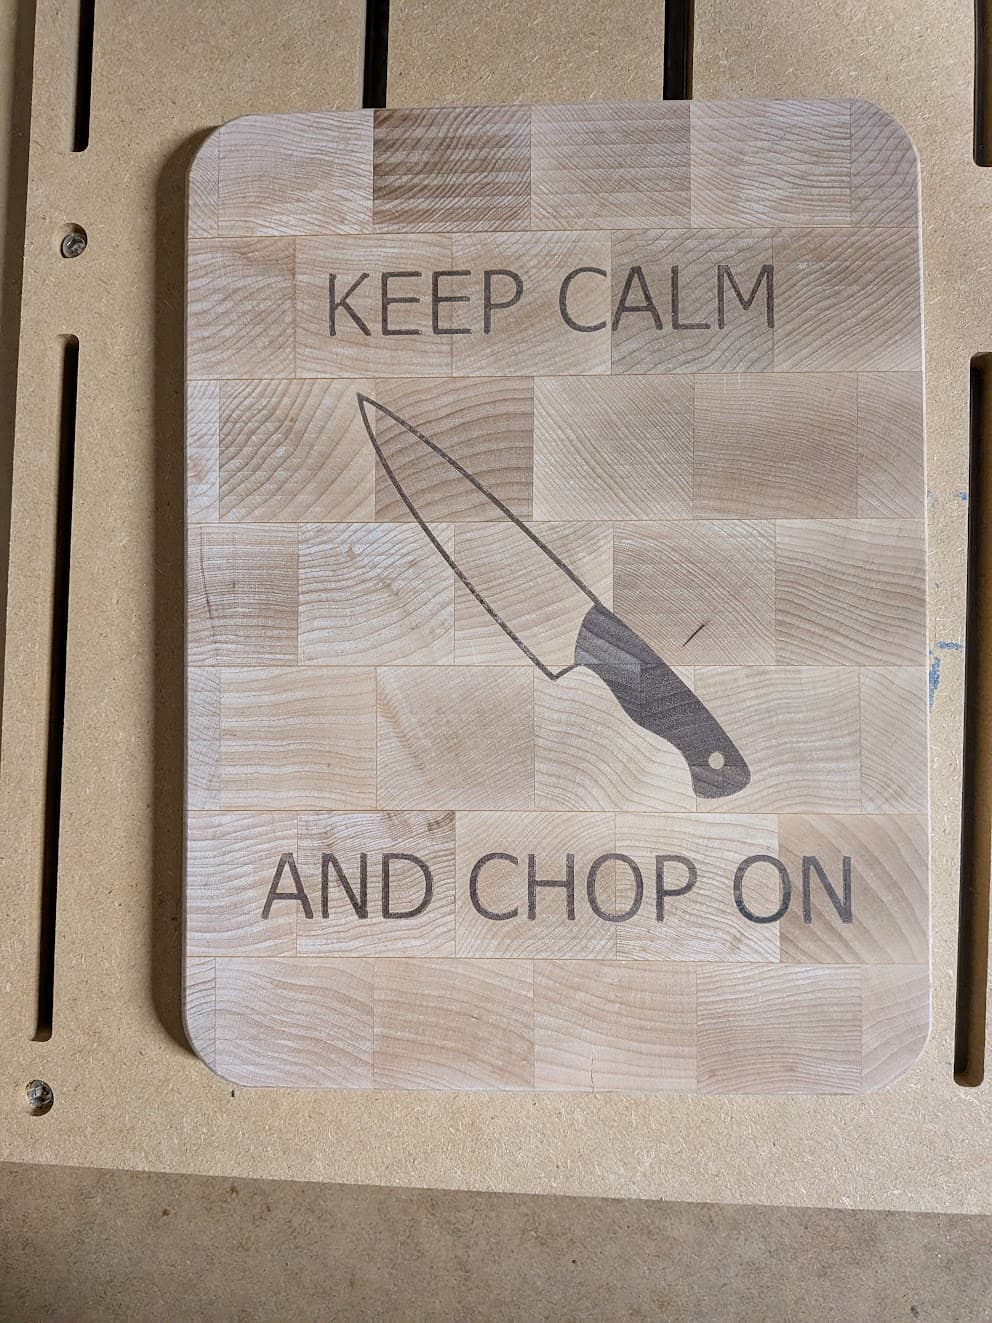
I did my first inlay with the kit from Cutting it Close. It was also my first trial with Carbide Create.
The base board is maple and started out at 1 1/2 inches thick.
At first, I used a 15 degree bit instead of the 30 degree bit I used in the Carbide Create file and had to surface out my mistake. I had taken the board off the machine and couldn’t line it up correctly again. There went 8 mm.
I used the Carbide3d webpage to convert the c2d toolpaths to gcode so I could send them with CNCjs. I had a strange error with CNCjs – for some reason I could not zero the bits with the usual macro (this had been working on the first few jobs). I zeroed it manually and then found that the V bit was 6.9 mm too deep. So I surfaced that off and finished the job and ran the “clearing” bit portion 6.9 mm deeper that the original.
It worked. Here’s the board after 80 and 120 grit with the orbital sander:
And here’s the board after quite a few rub-downs with mineral oil. The pot, corn starch and peanut powder proved to be an effective cat barrier.
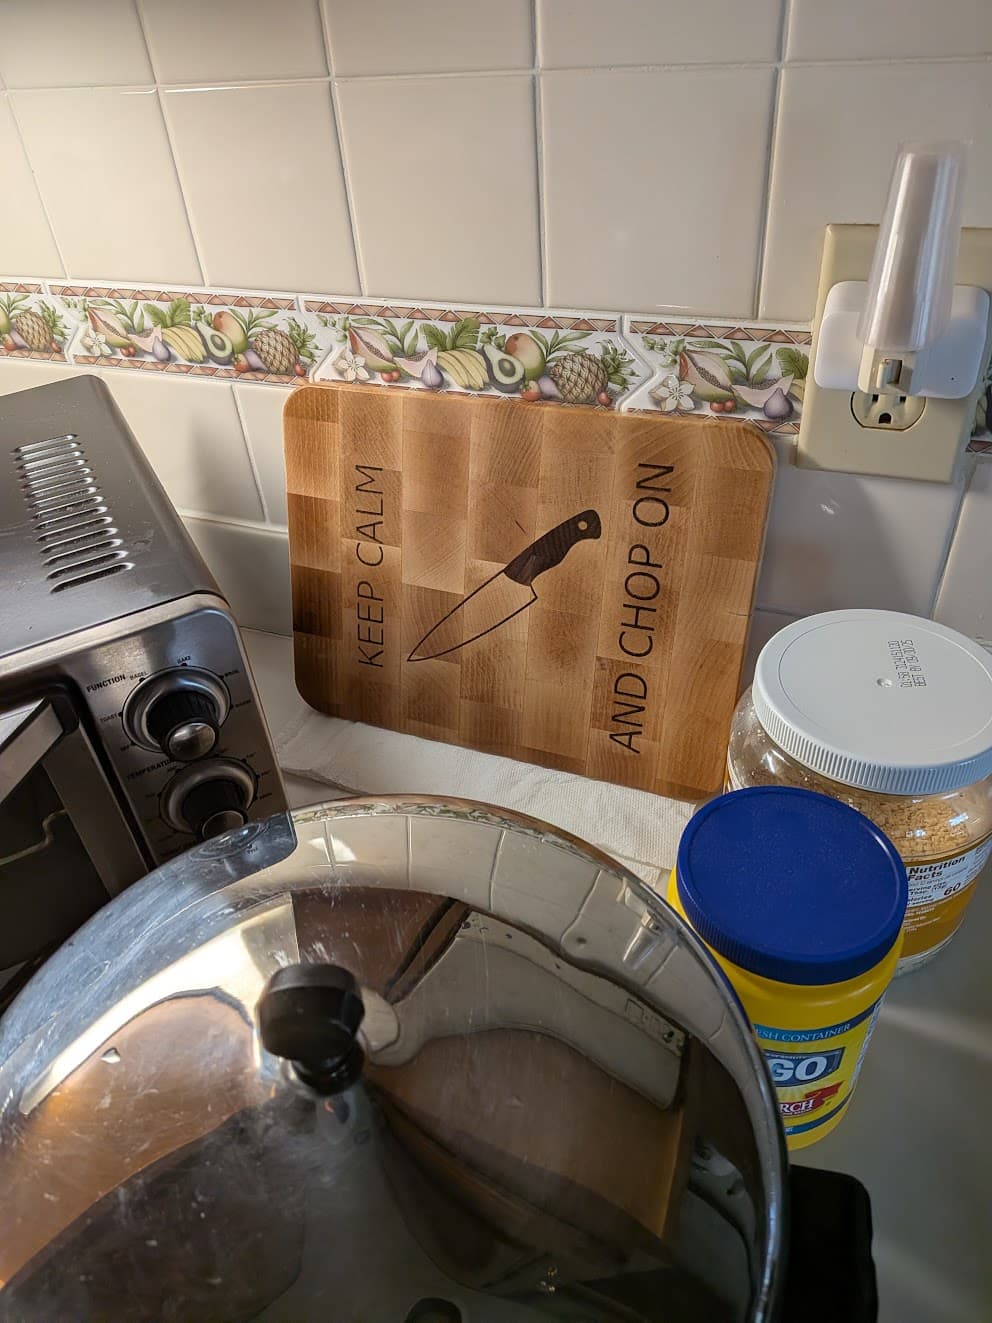
The joke is not my own, it’s all over the Internet. I do hope my sister laughs and does not groan.
I had hoped to deliver a cutting board that was a chunky 1 1/2 inches thick but I think that this might be more manageable and will fit better in a dish drying rack.
Corners were done with a 3d printed template and a template bit for my router.
17 Likes
I love it! So meaningful. I didn’t know about Lightburn, will check it out. Thank you
Haha fantastic groaner!
I love the preserved natural edges! Well done
1 Like
looks great. Spray Paint? what did you use to cover it with?
I love this! Great job and project.
Inspired by this post: How to do this secret box on a CNC? - #28 by WillAdams
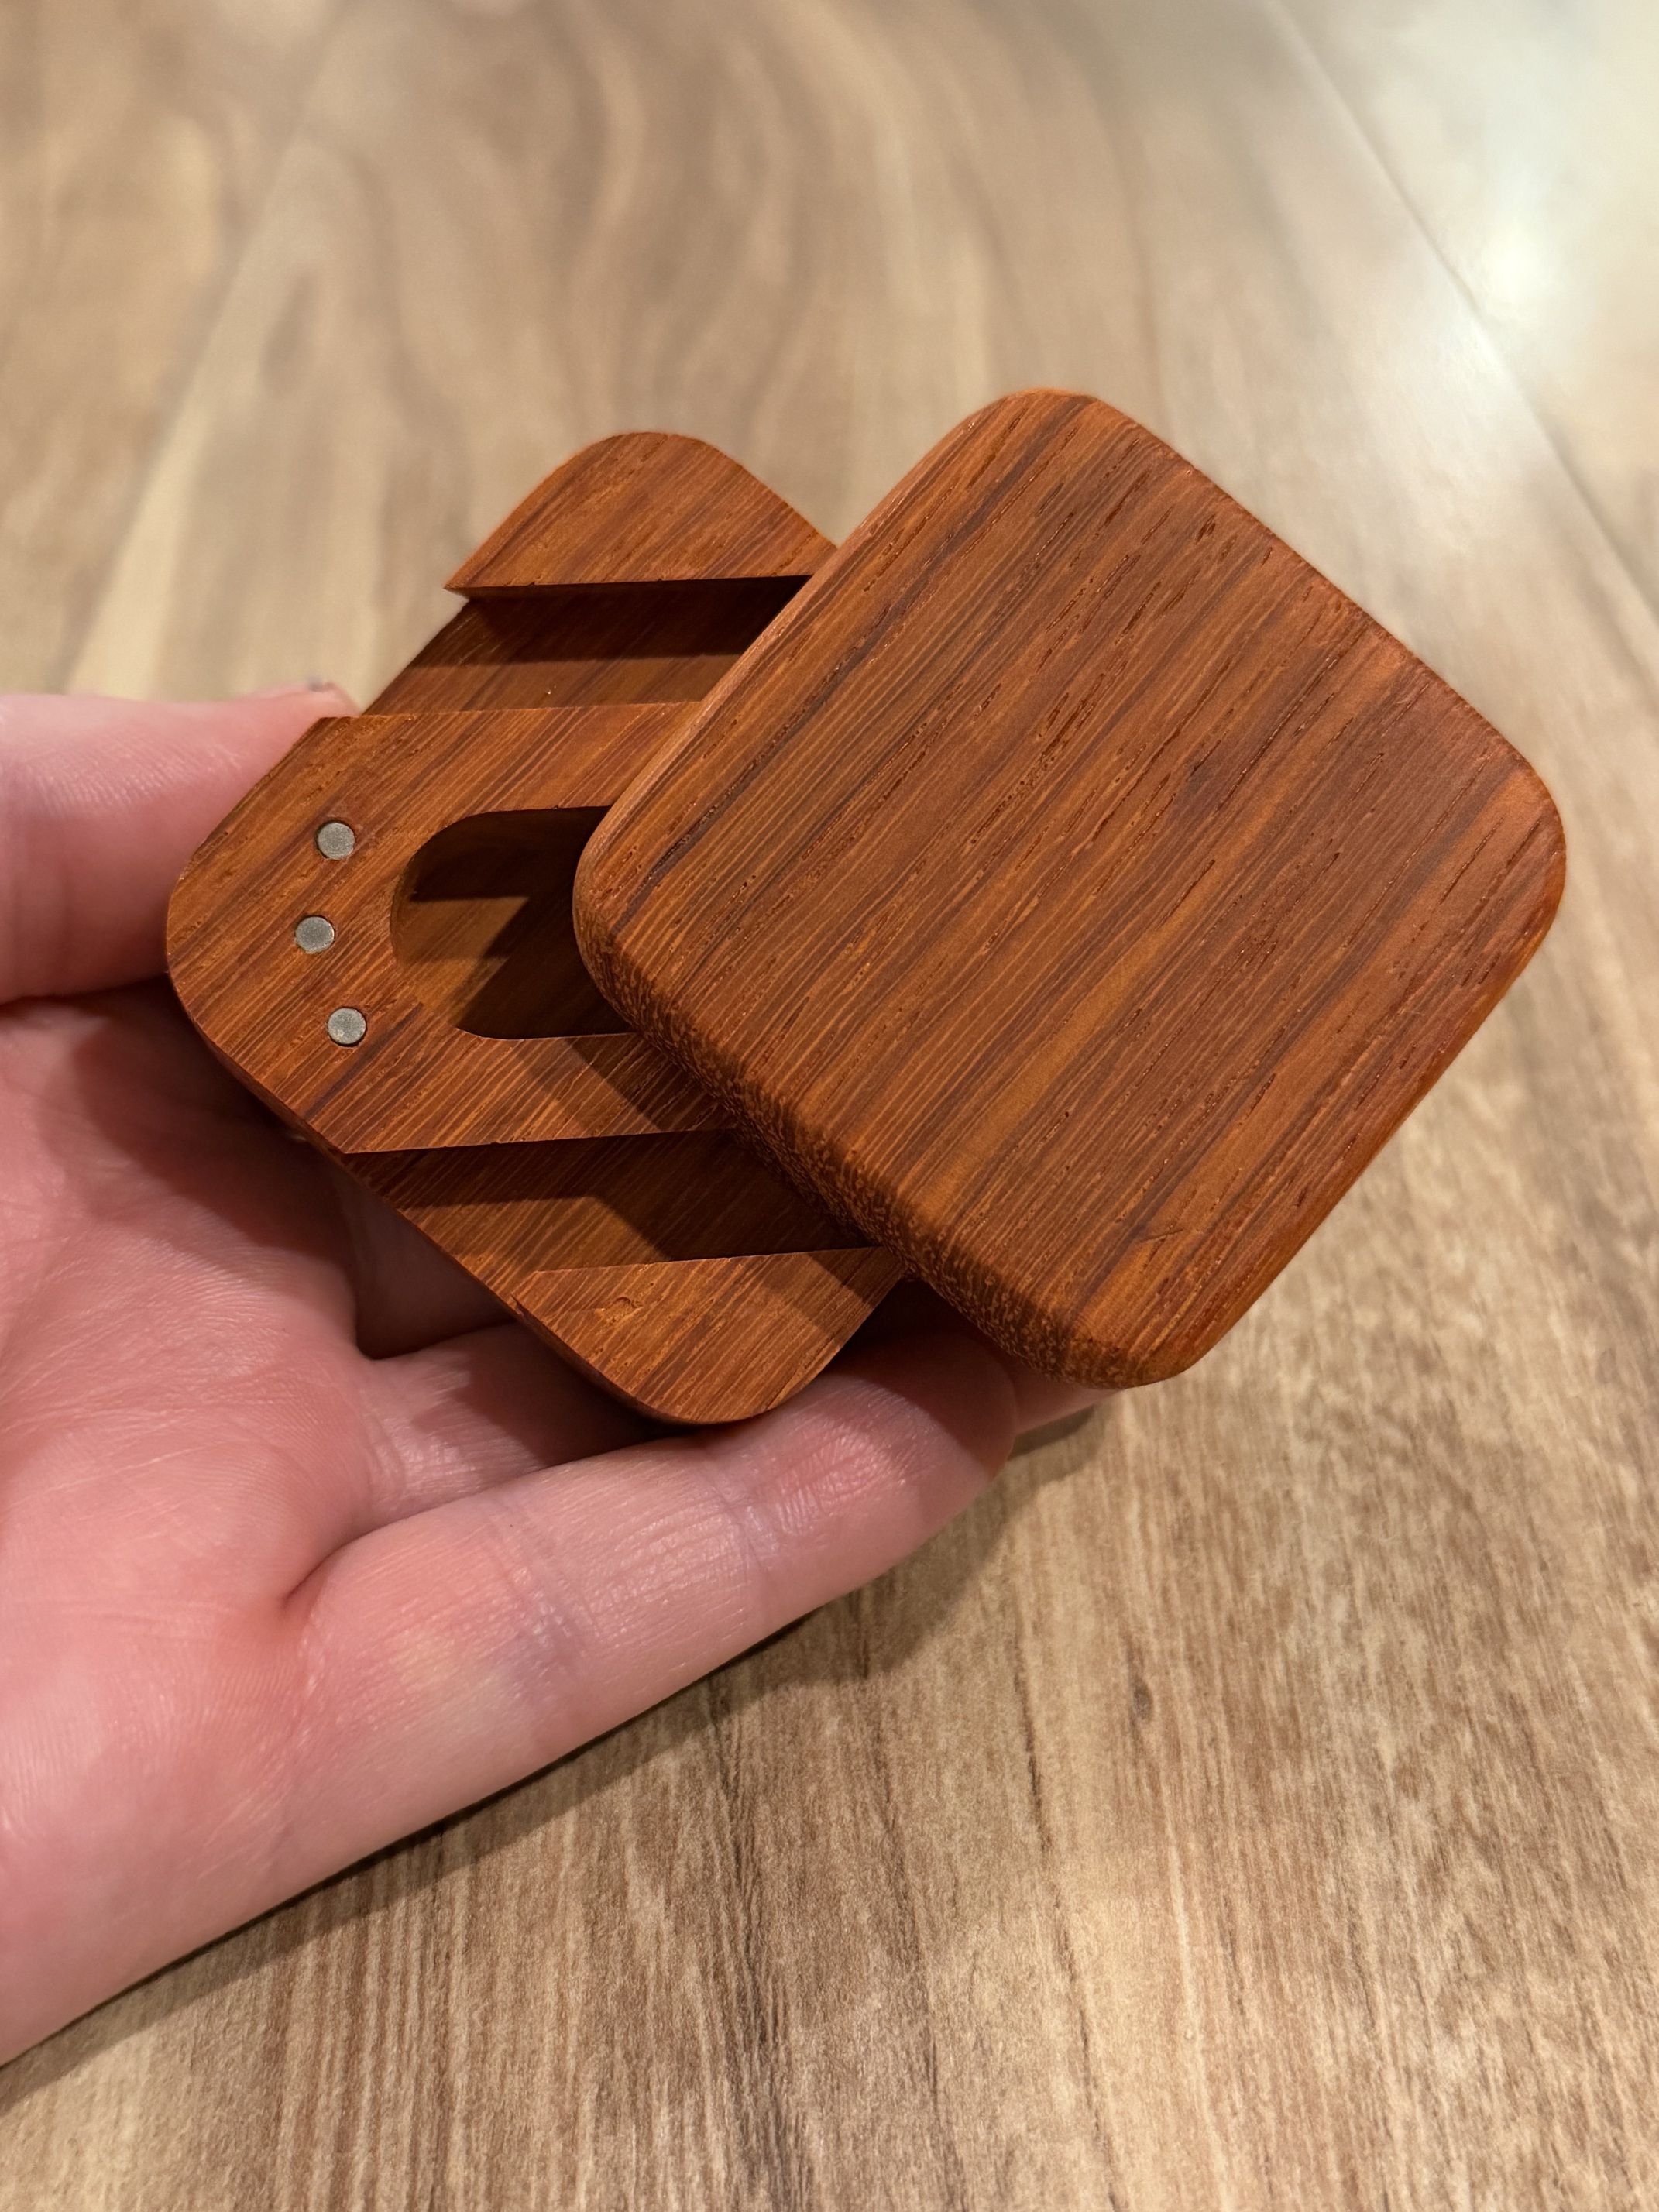
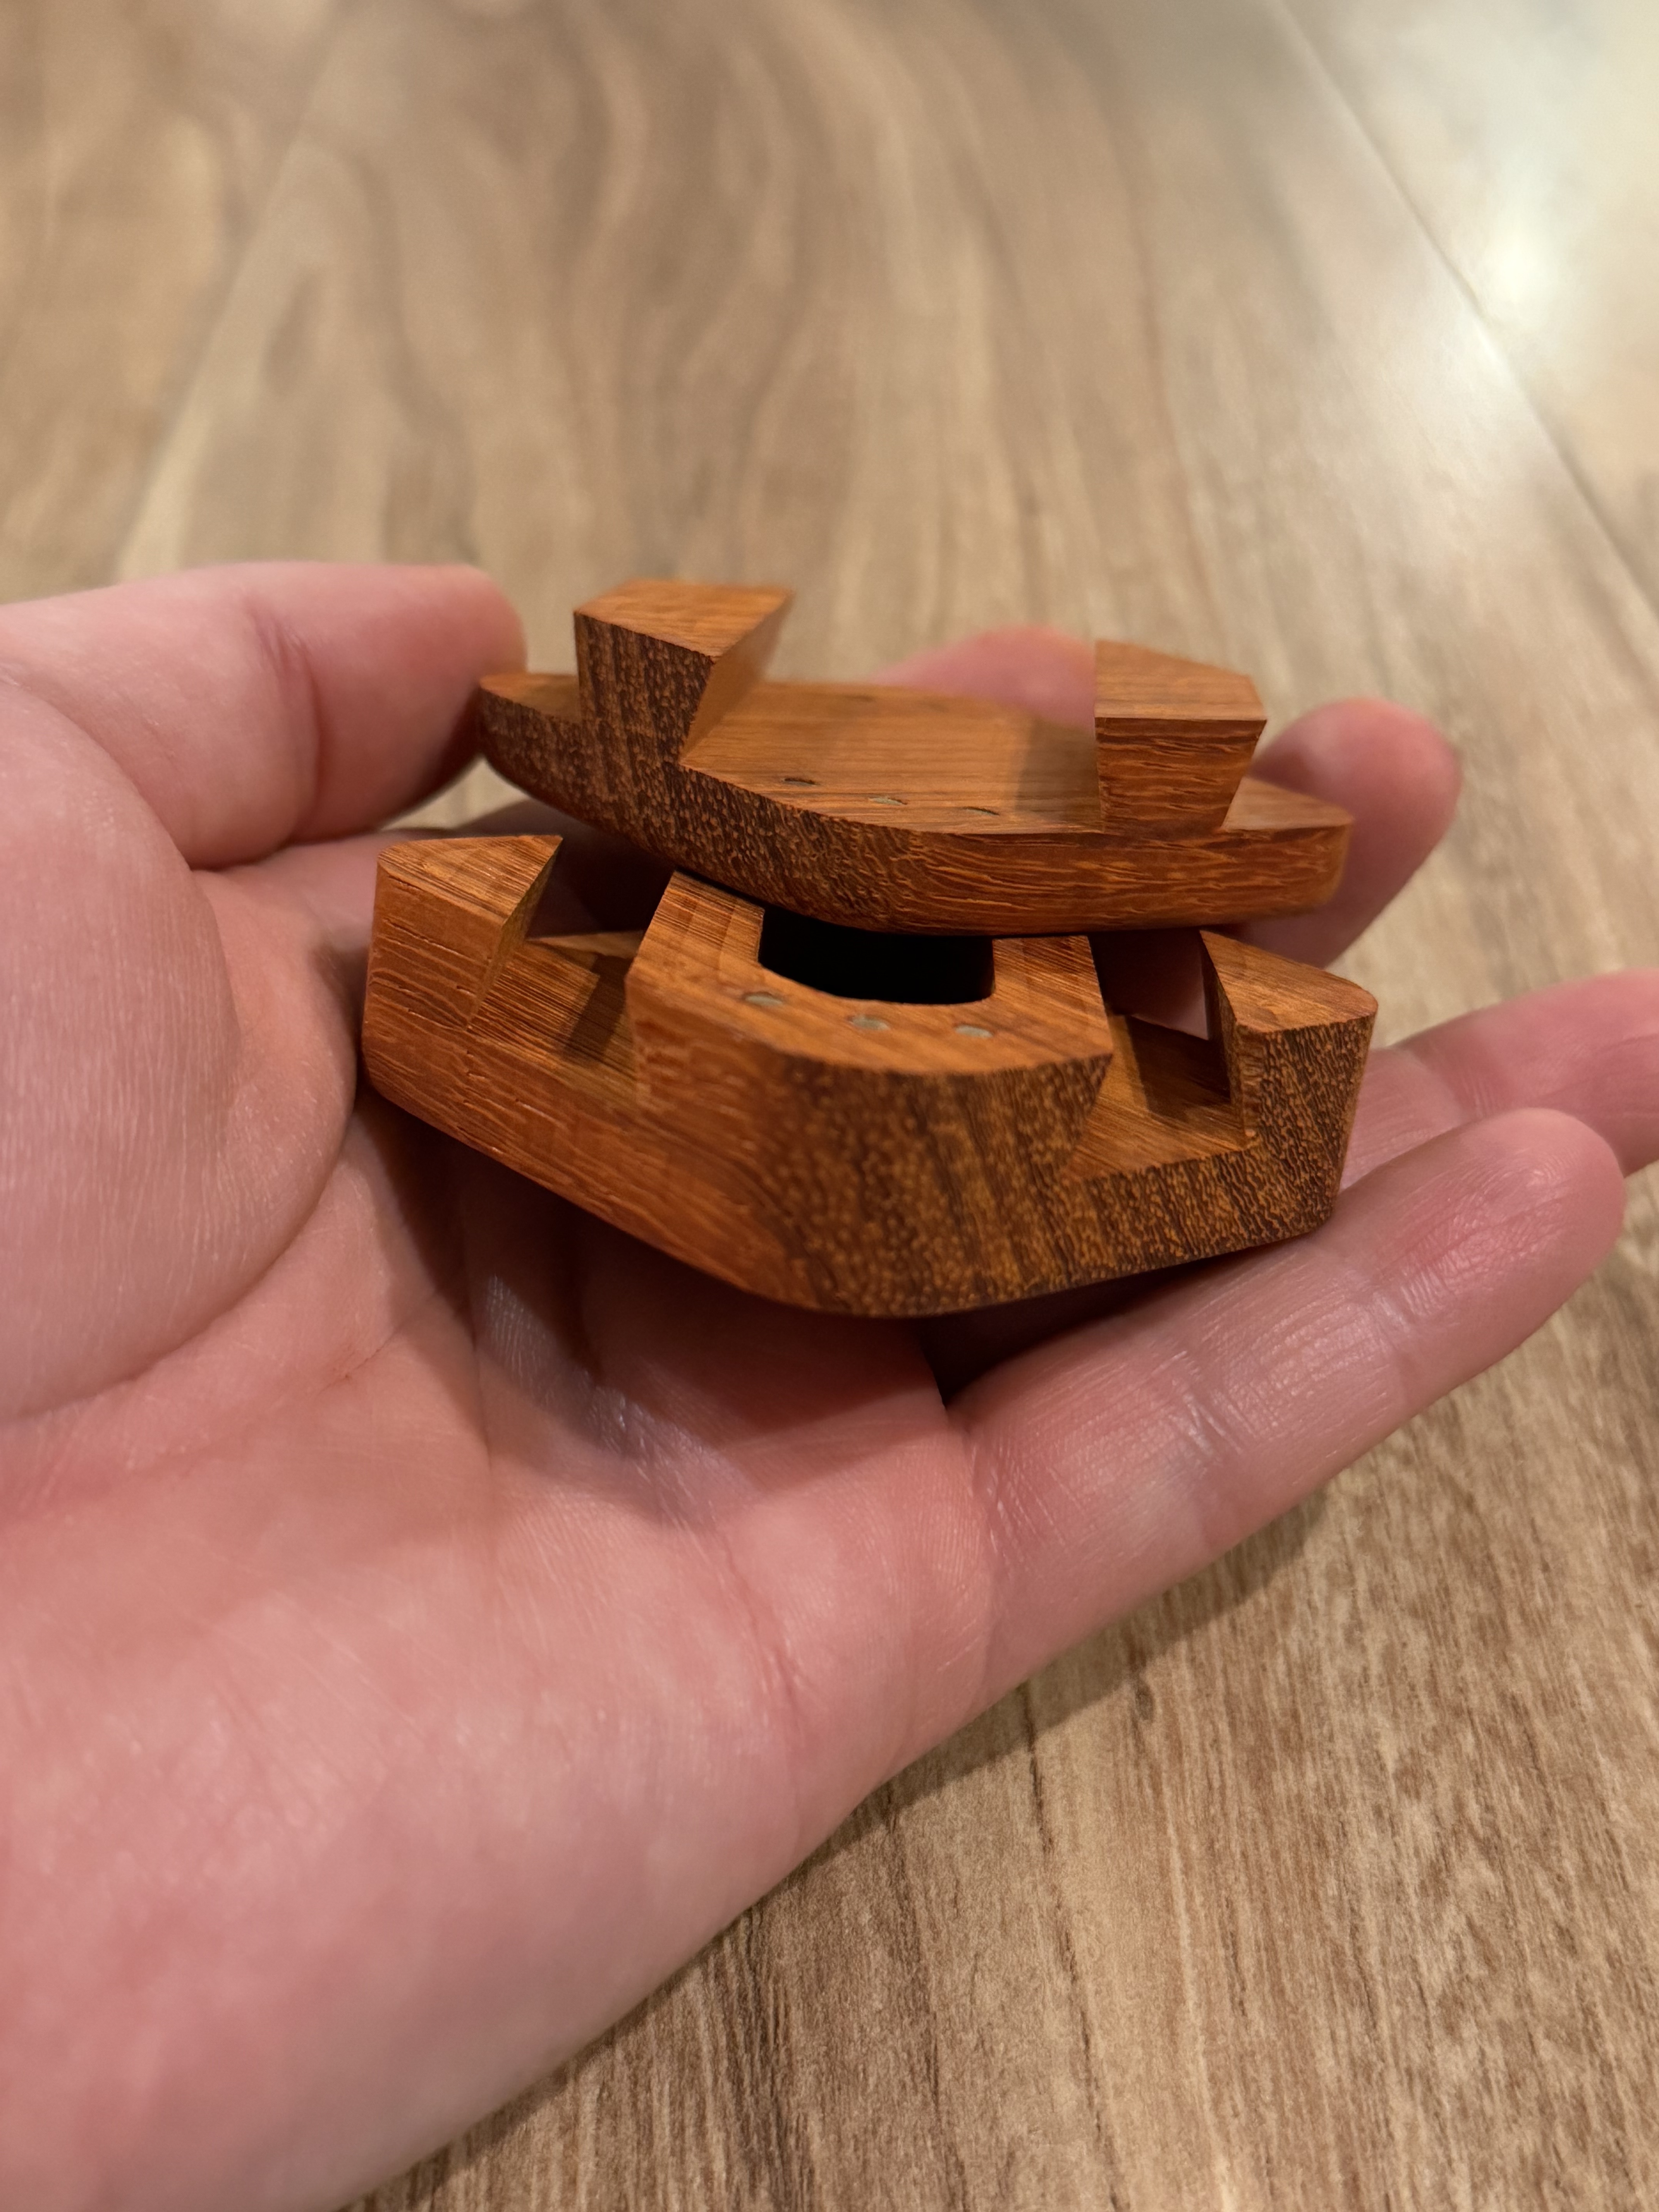
The wife requested nice little gift boxes for the items she’s giving out this year. I decided on the impossible dovetail box.
Just testing with some scrap pieces, the results are pretty decent! There are definitely some tool path tricks that could be implemented to prevent the bit of blow out at the ends of the dovetails. Plenty to improve on ![]()
(It’s all done parametrically in fusion 360 so different configurations will be trivial. It’s going to be good fun running through ideas ![]() )
)
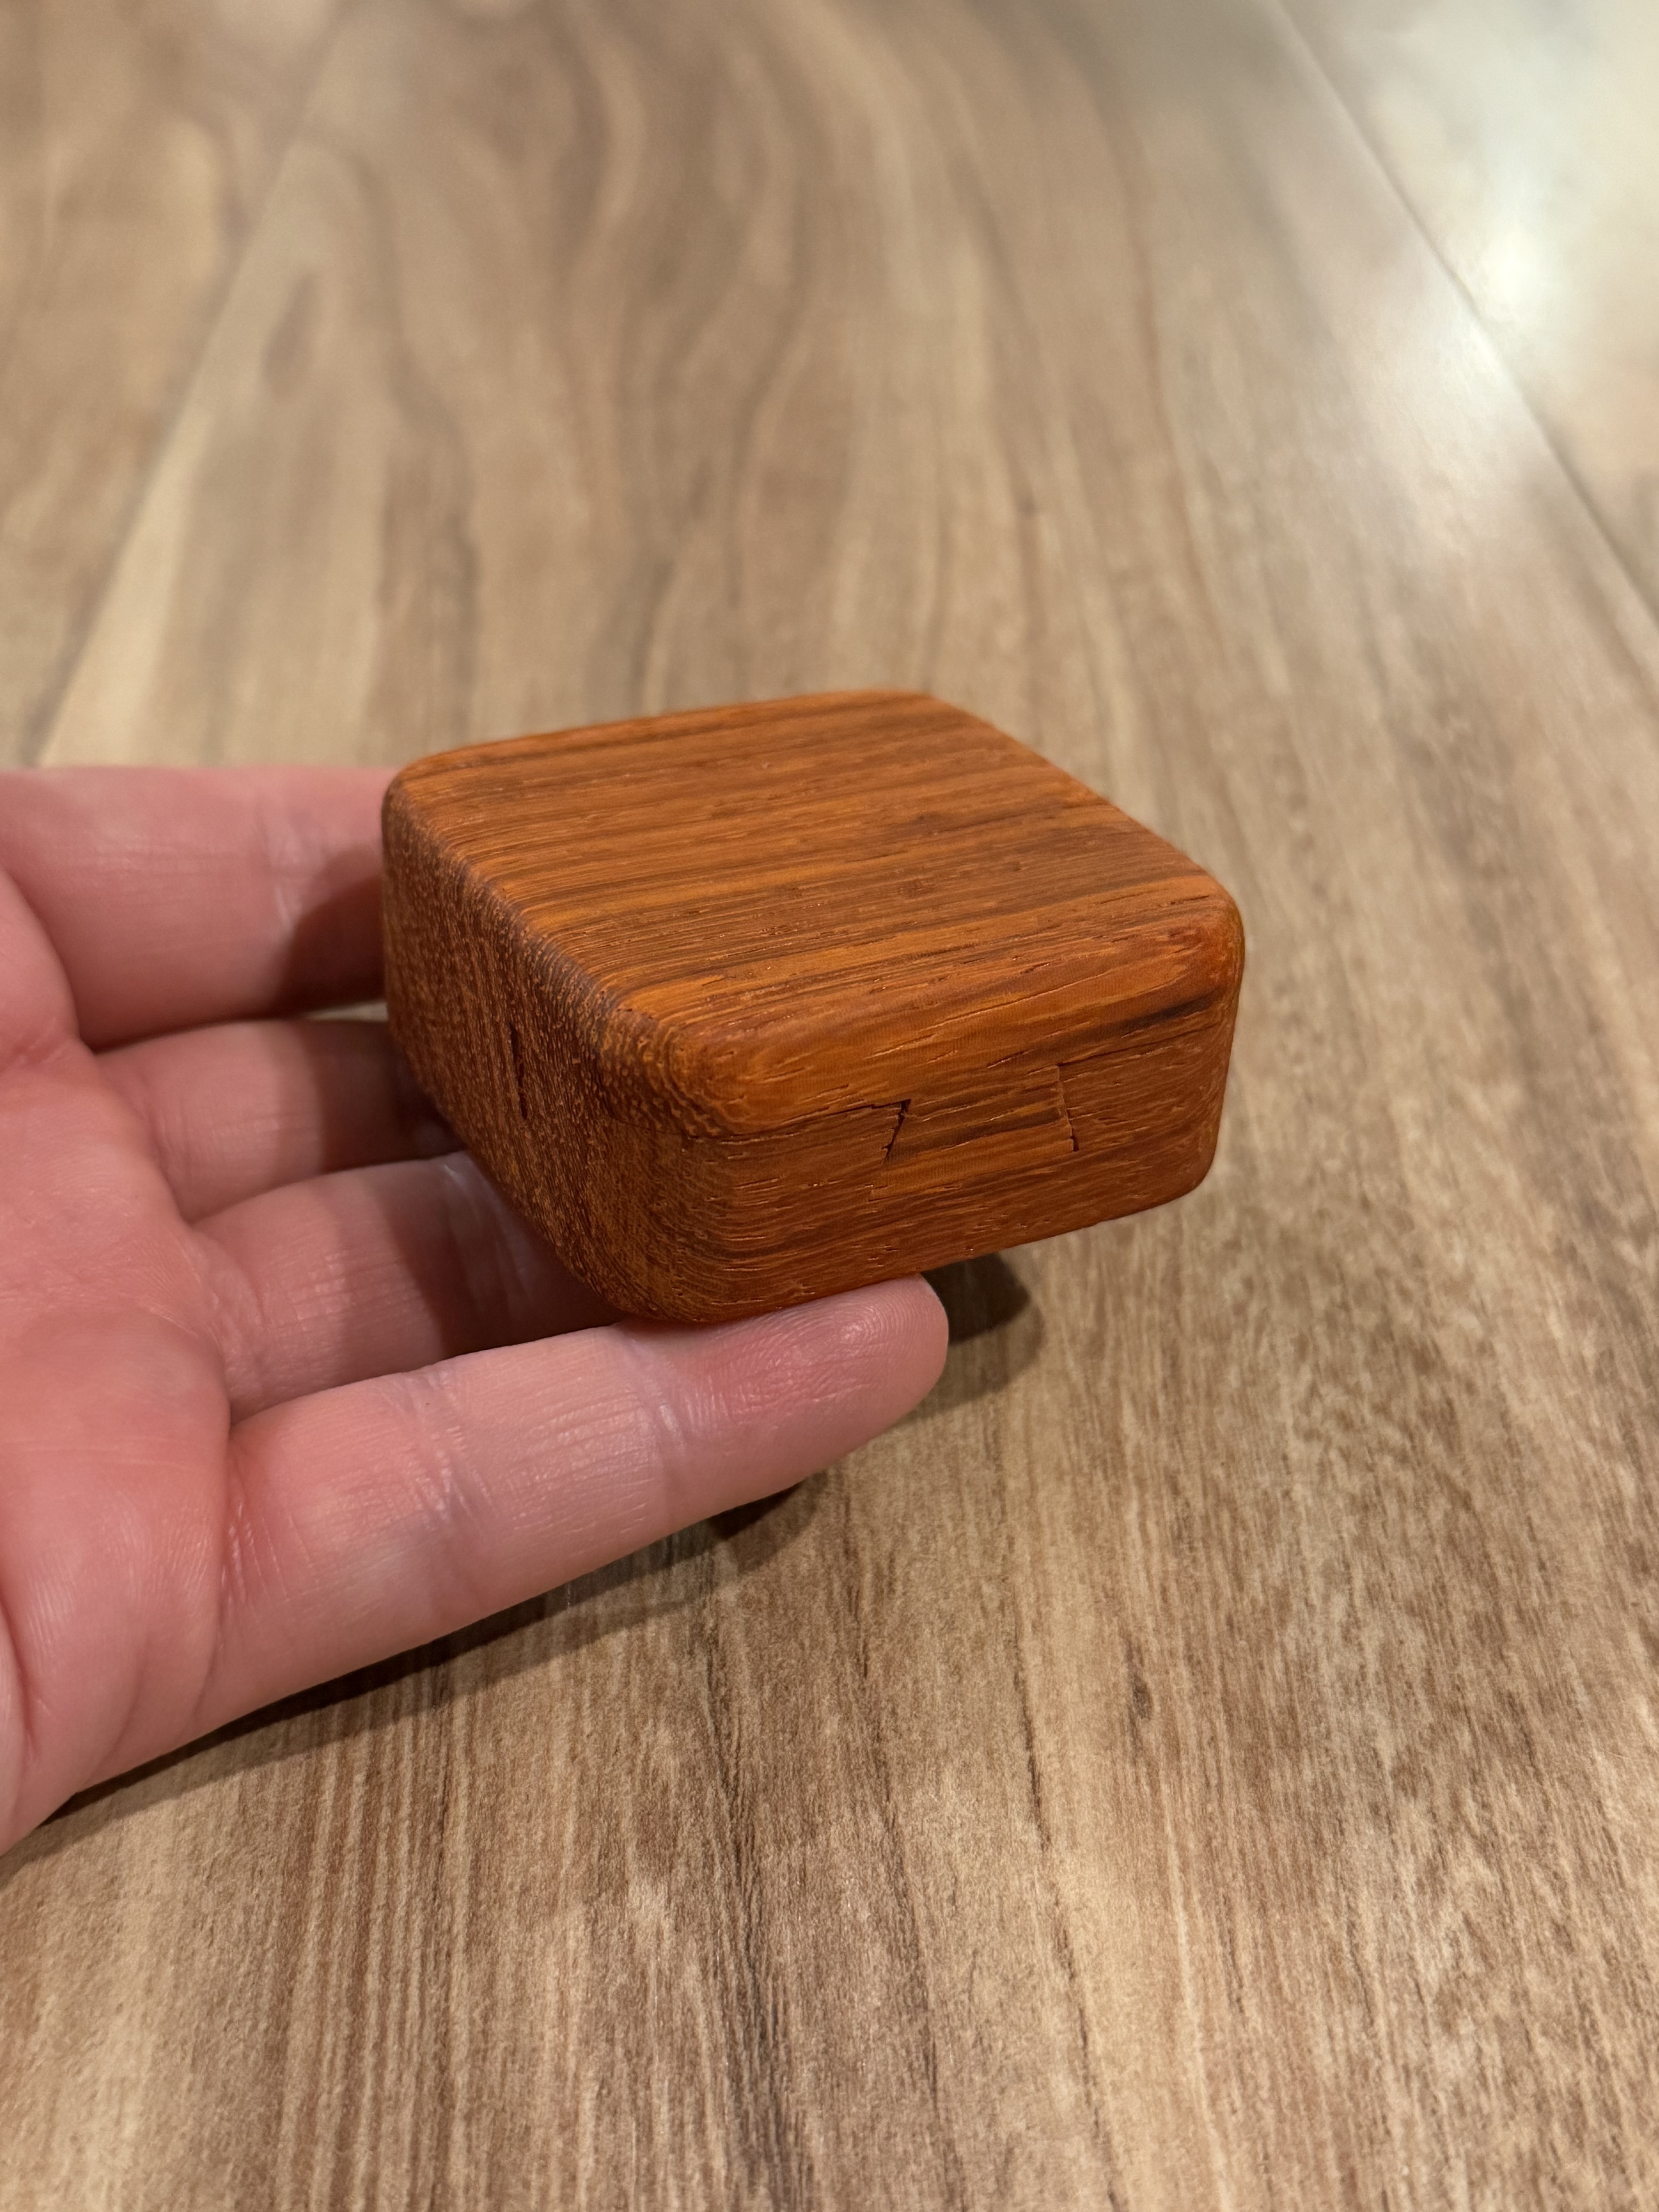
First time using a dovetail in the CNC. Went much smoother than I expected, it’ll be a mainstay for sure.
Oh and the top is just screaming to be a canvas for some inlay work. Coming soon to a gallery post ![]()
21 Likes
Depending on the diameter of the dovetail bit, especially on the larger ones you can run a contour path with a square end mill to rough out material that makes it easier on the actual dovetail bit on a final pass.
As for blowout or chip out you can also make the box slightly larger and then trim it down and remove the chip out on the edges.
3 Likes
One trick, since you get to program the toolpaths, is to run the bit into the exit end of the dovetail before doing the full dovetail from the entry end. Used to do that with a router table all the time.
BTW, you need more magnetism! Make it really hard to get open! ![]()
1 Like
For folks who are curious on how to lay out such a box, see:
(scroll down far enough and there are files, and magnet holes)
2 Likes
Nice, that’s exactly what I had in mind to try next. It’s reassuring to hear that it works well from someone with real experience ![]()
That would be funny and I was also thinking of throwing a ball bearing in there somewhere to lock it in place unless it’s held in a certain orientation. Cheap attempt at a puzzle box element ![]()
Unfortunately this particular box is for someone with one hand so I figured we’d make it “reasonable”…if only so she doesn’t destroy the thing getting to her real gift.
Definitely going to make some devilish additions to a couple of these boxes though ![]()
@Redlander this was done with a 0.5” diameter dovetail. I had just enough room to rough the center with a 0.25” square before running the dovetail through ![]()
(Do people just run the dovetail through without clearing first!? That seems terrifying ![]() )
)
I’ll keep in mind the trick of making it bigger and trimming it down. Cleaning up with careful application of razor sharp hand tools seems useful for tricky grains like olive wood…I think anyway…I’m still getting used to the medium ![]()
1 Like
Yes, some folks do not clear some material prior to running a dovetail thru material. Sometimes it’s not avoidable and the cuts can be made. It’s just harder on the spindle/router and bits long term, lots of extra heat buildup.
You can use hand tools, I was referring to the cnc for trimming things up. Just have to be careful on your clamping however. Easier on larger pieces on the cnc, easier on smaller pieces with hand tools.
1 Like
Ah that makes sense, I’ll be trying that out for sure. I suppose it’ll entail an additional tool change but that’s a small price to pay (especially if it scales well to multiple boxes in the same run)
On another note, second op is going to be pretty convenient considering there’s a built in dovetail to hold the material firmly ![]()
Just need to mock up a dovetail clamp.
I need to find a good source for those fancy self centering screws for all the jigs I want to make ![]()
1 Like
My daughter has taken up pottery, so to facilitate her marking her pieces, cutting a set of pottery stamps in acrylic:
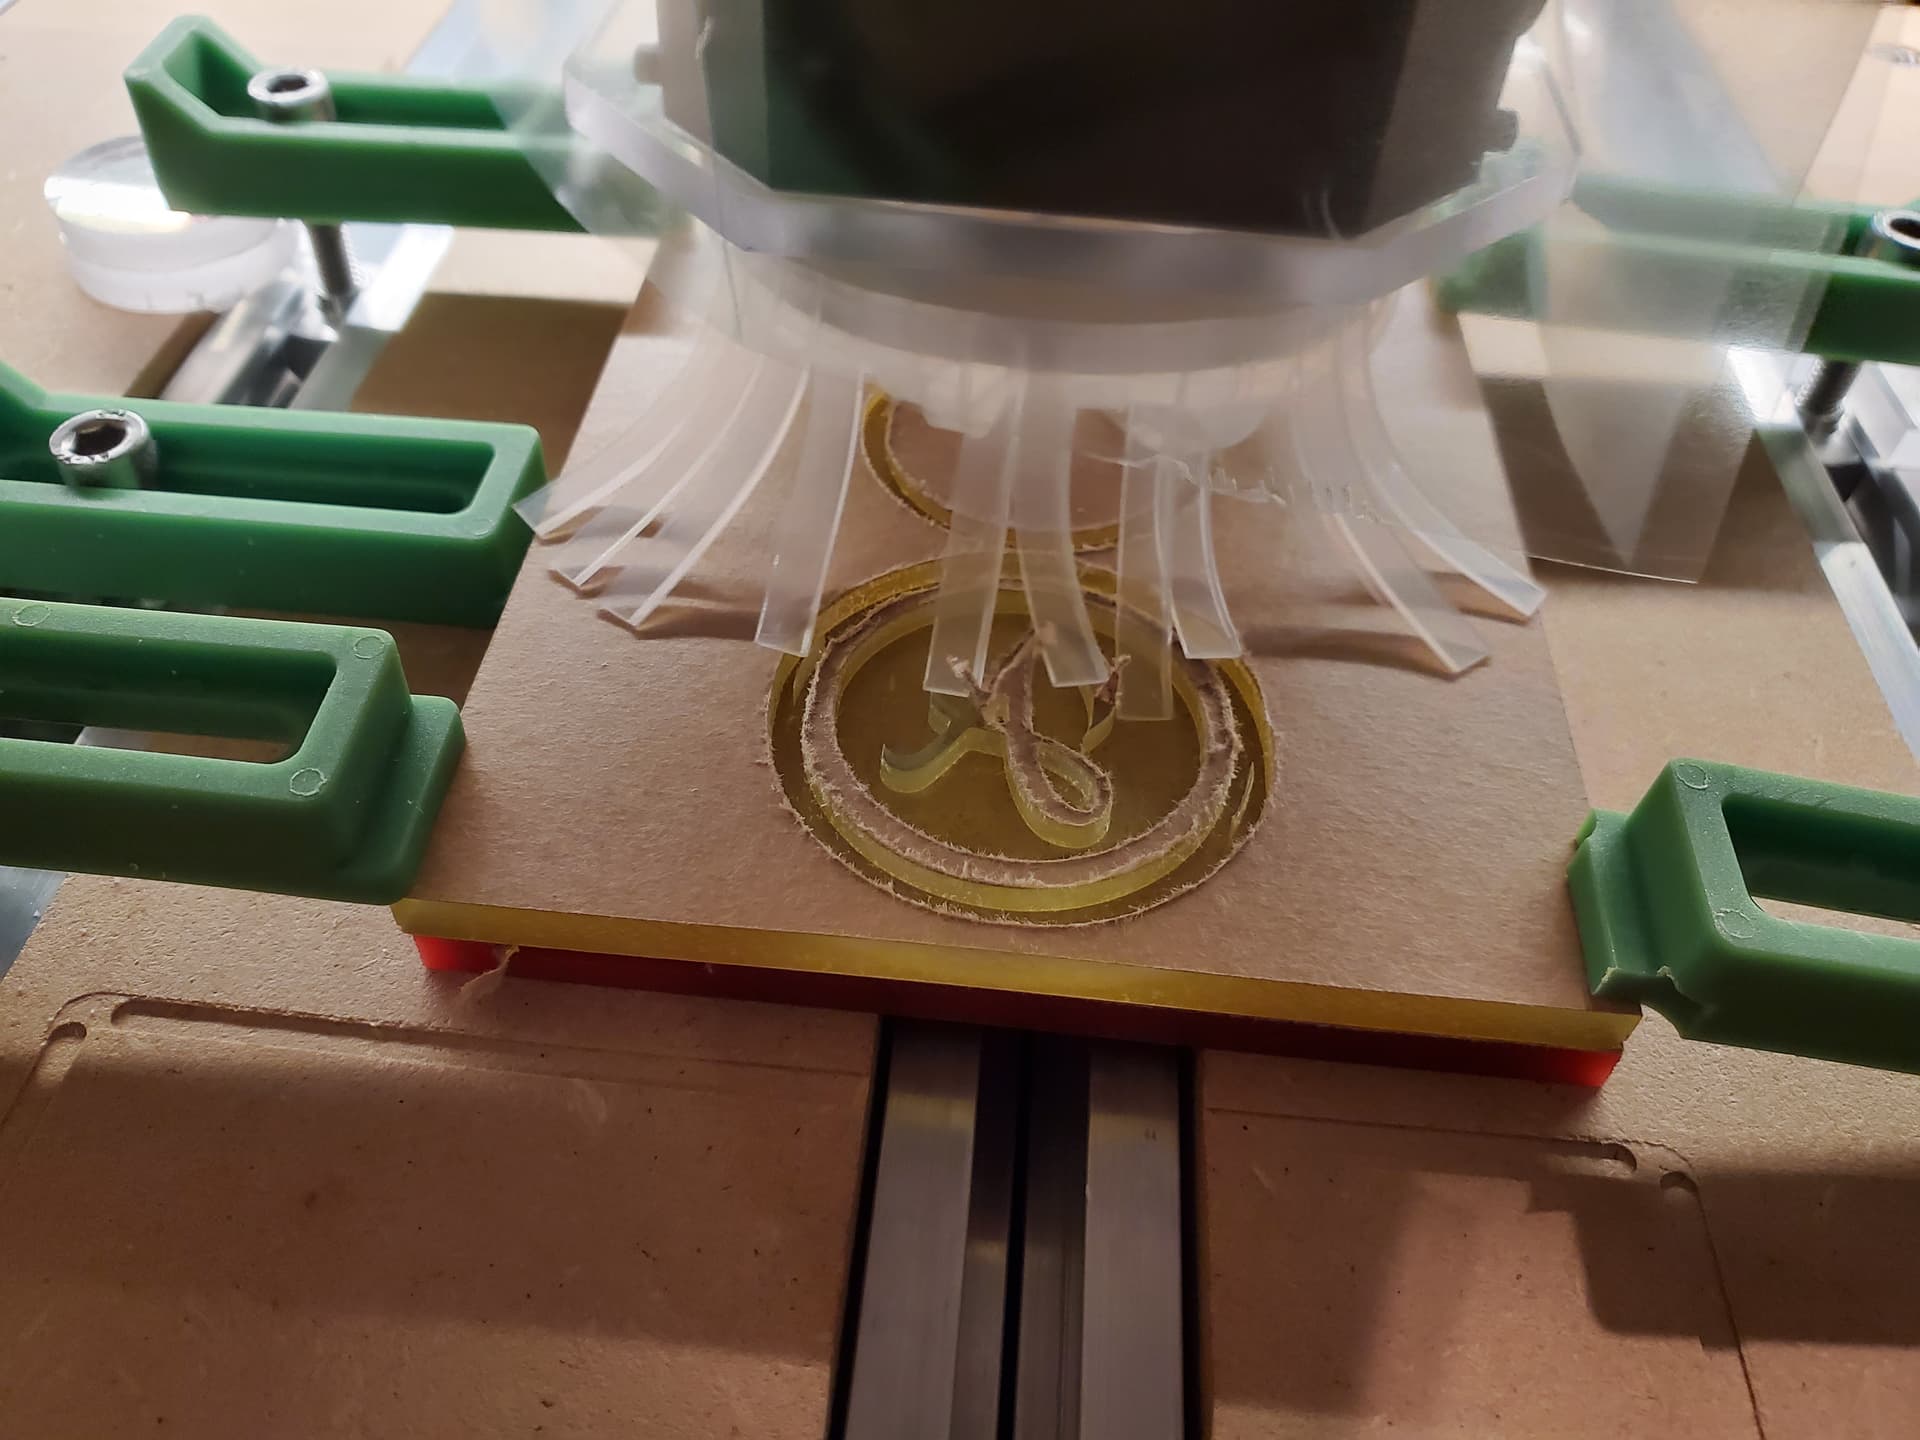
two-sided job, the flip will cut 5mm holes at the center for an M6 tap (bought a bottoming tap to finish due to the shallowness of the hole), then will cut a handle from a piece of maple dowel, center drill it for a nylon M6 bolt, and will also fabricate a button end for the handle out of red acrylic, then I’ll have to make a case.
16 Likes
I was wondering how that turned out, it looks great.
Would there be any benefit in drafting the walls or is the clay soft enough that it just doesn’t matter much?
Also looking forward to seeing the rest of the build. The case could be a good candidate for some veneer inlay ![]()
(And I’m not just saying that because I’m doing veneer work and want to see more good examples ![]() )
)
We will see.
The flip didn’t go well (a bit off-center) and I should have left more material uncut on each side — the hole broke through into the design.
I believe that the clay will be soft enough, and the impression shallow enough that no draft is needed.
I’m going to present this first effort as a proof-of-concept prototype and if it works, will source some thicker acrylic (if transparency is warranted) or in Delrin (if opaque black is workable).
The handle wants an end-cap and some sanding (gouged the sides of the dowel when clamping/drilling) — we’ll have to see what we have time for in terms of a case.
3 Likes