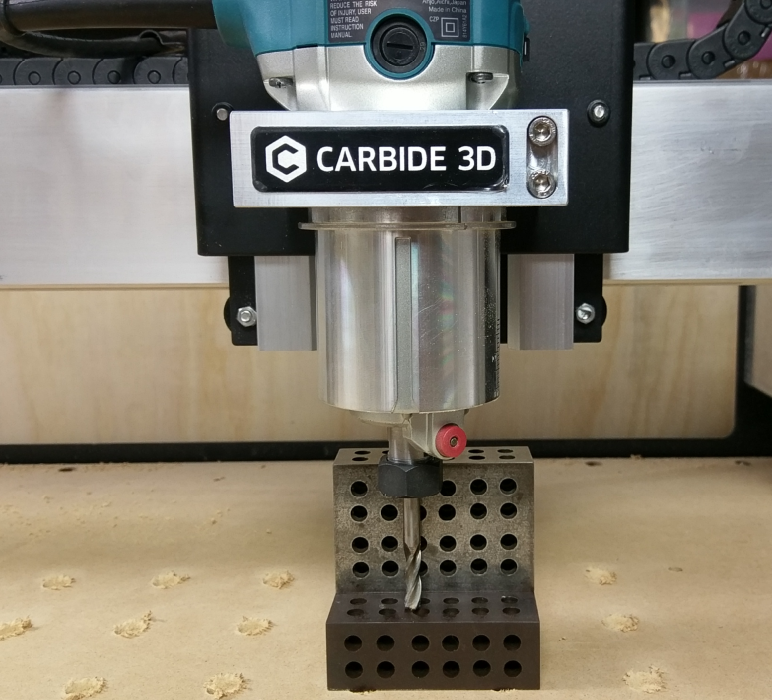
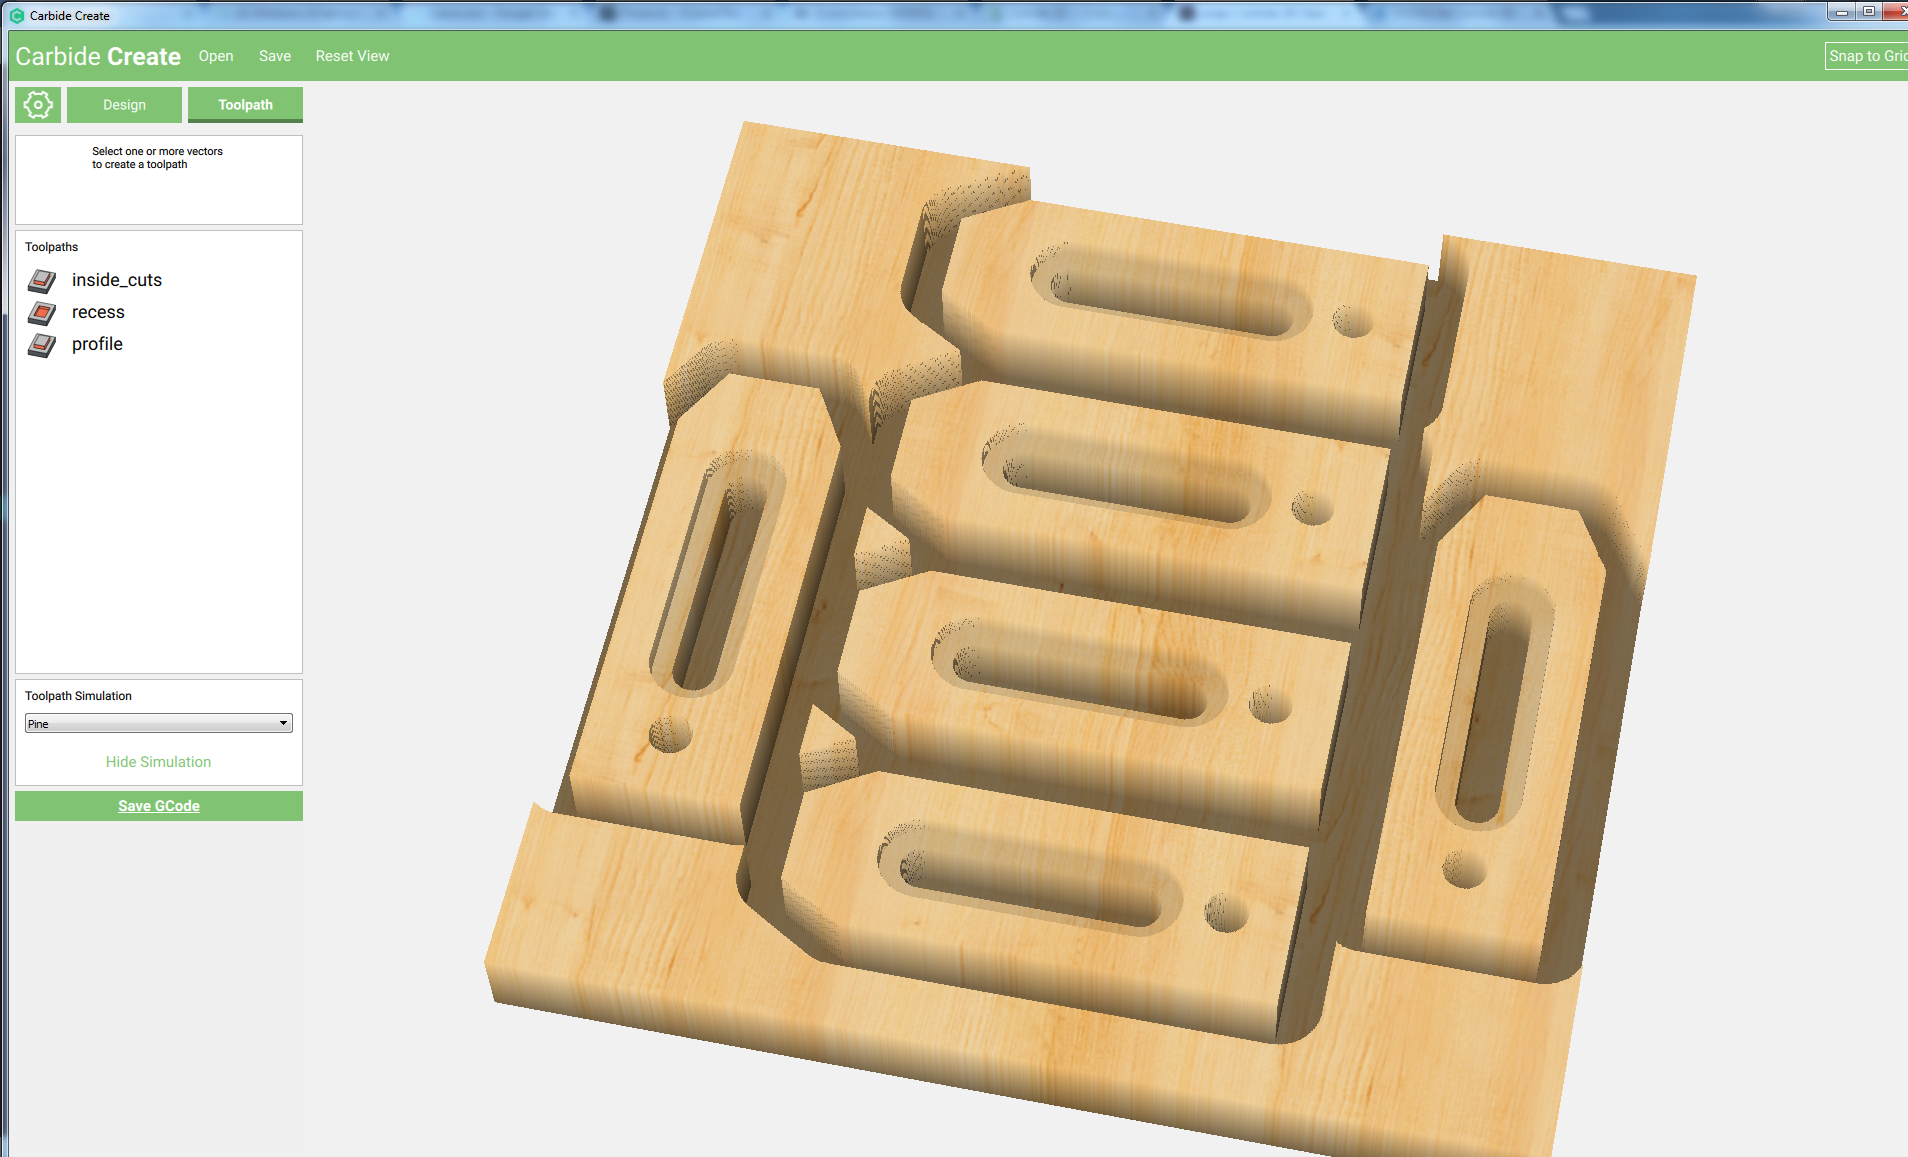
Heres a few helpful Carbide Create files:
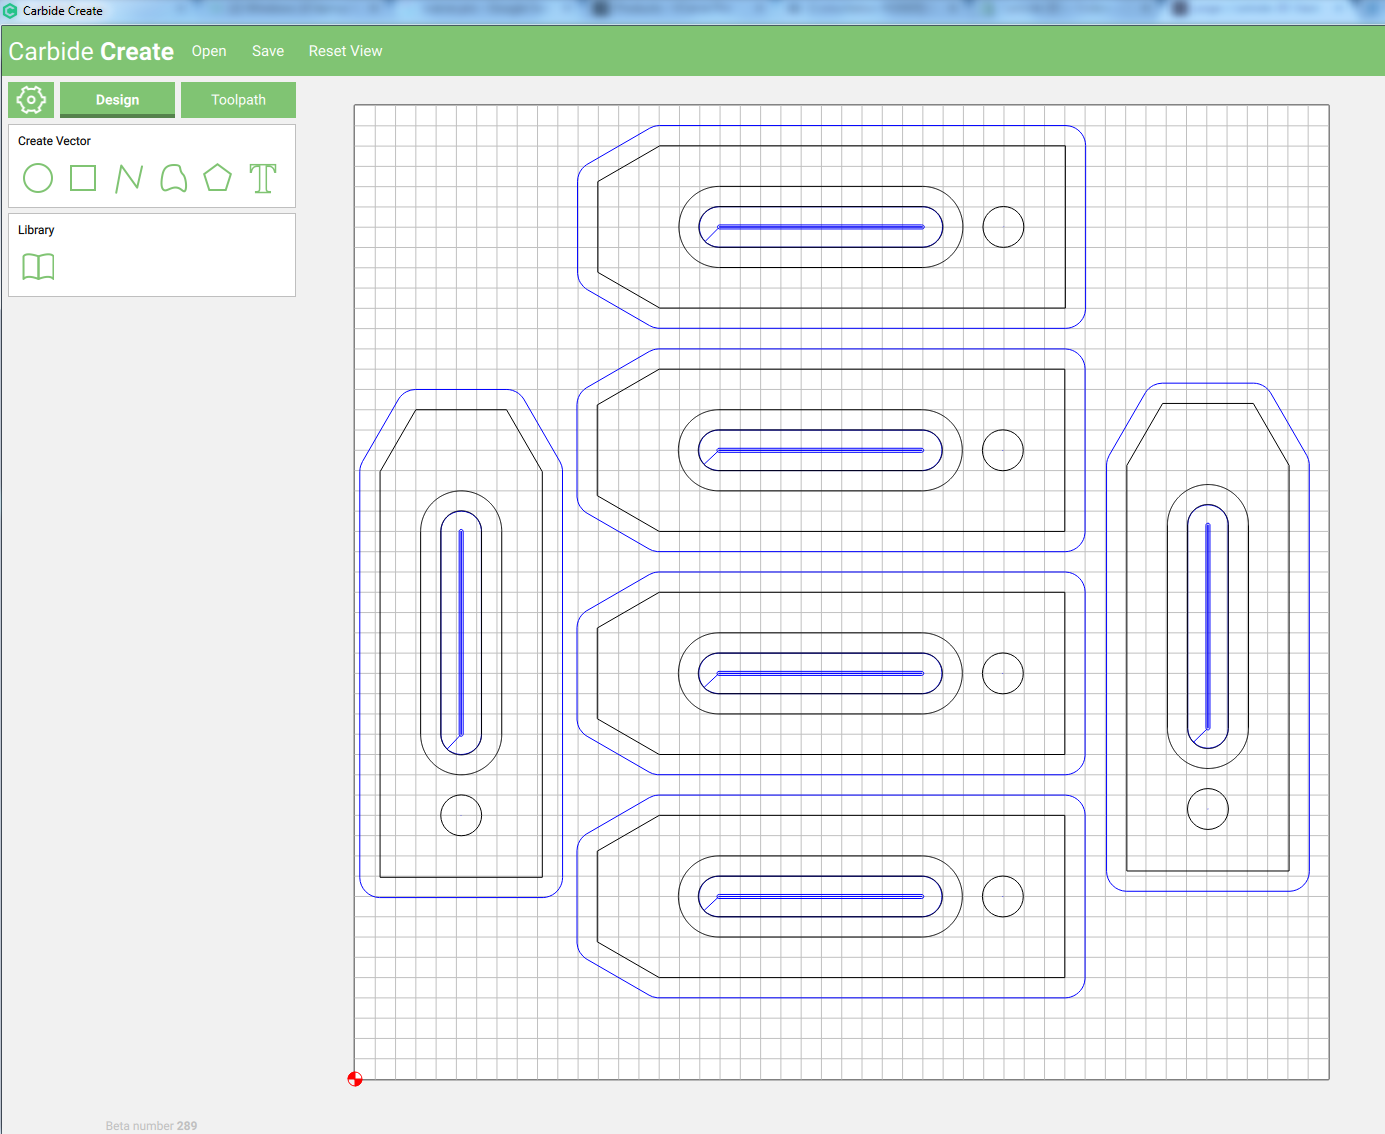
Work holding Clamps and a threaded insert grid pattern (with recesses) for the XL and XXL Shapeoko machines.
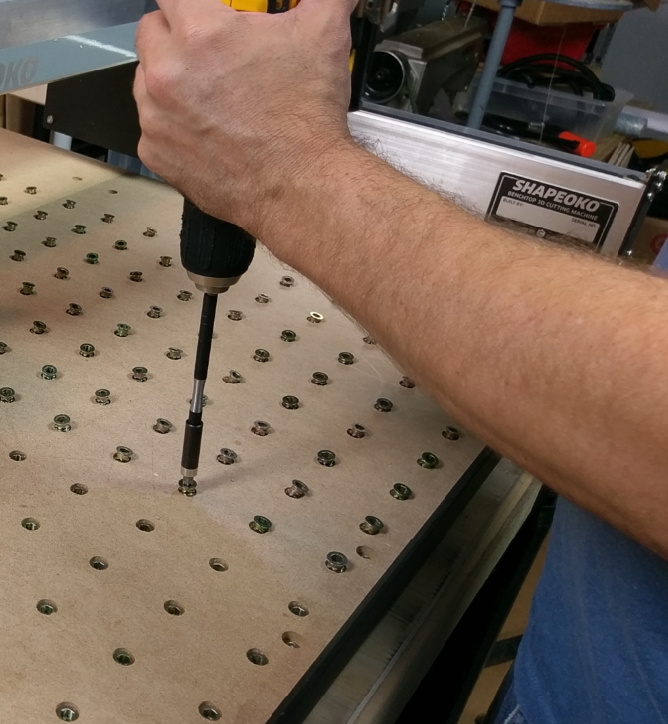
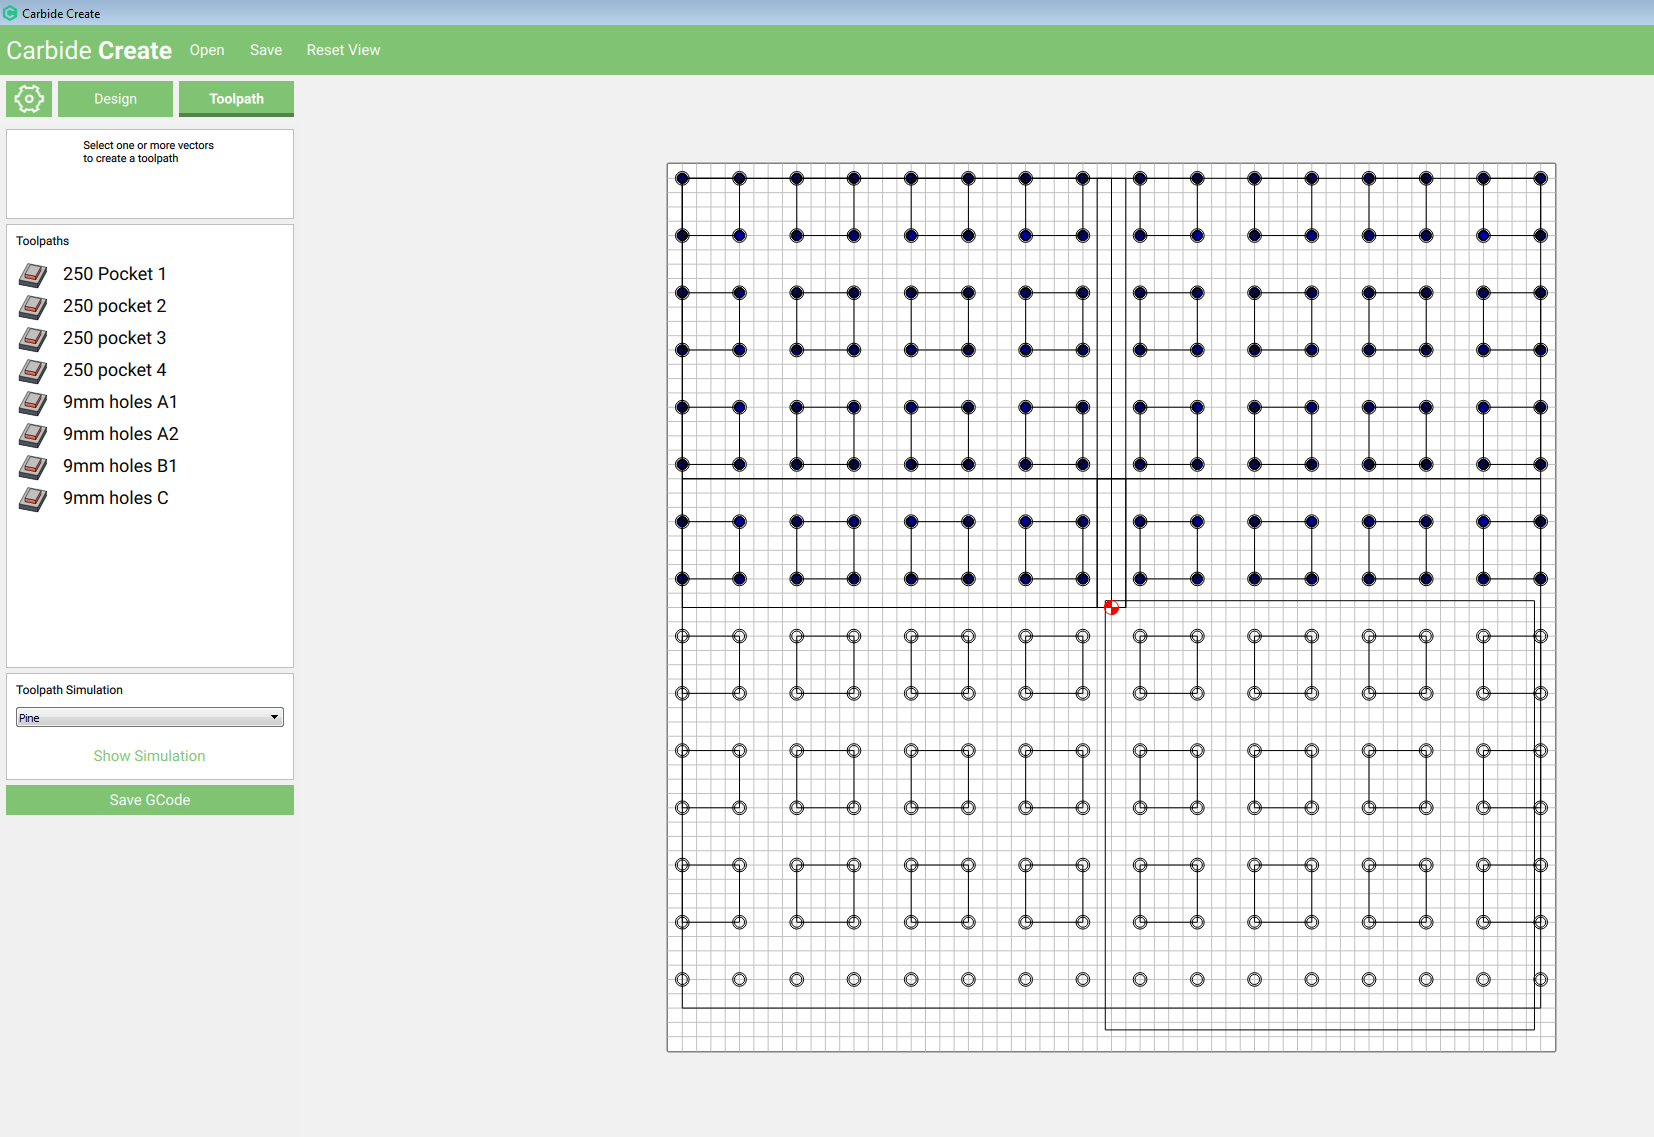
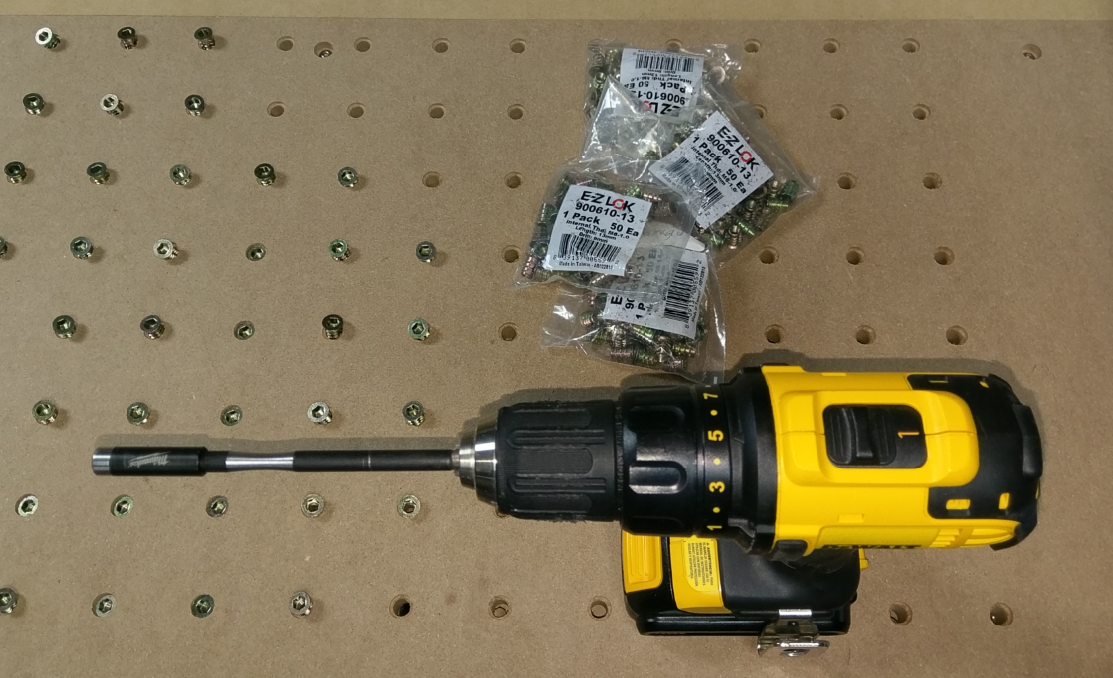
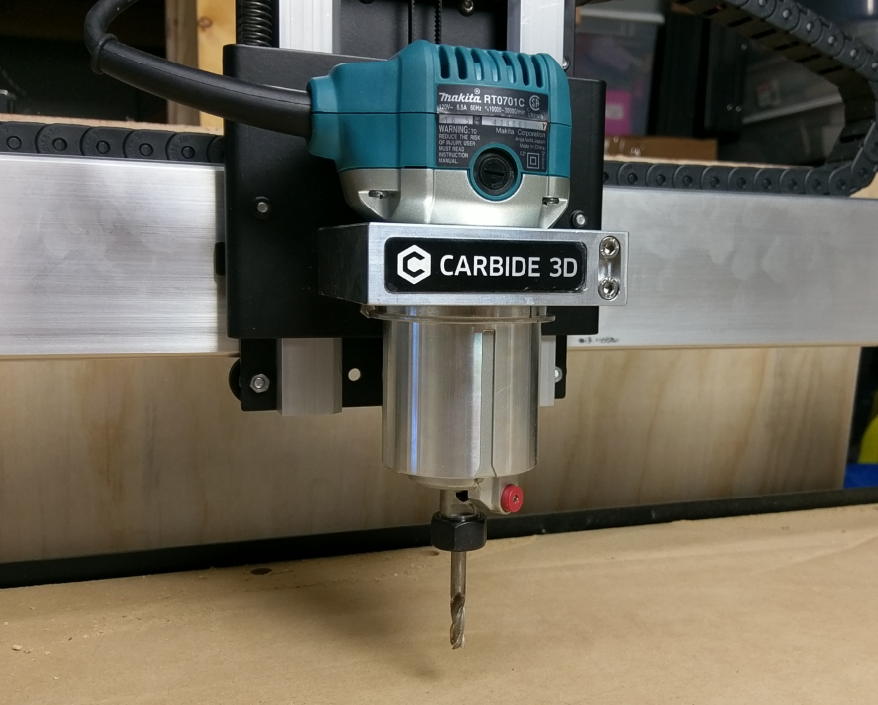
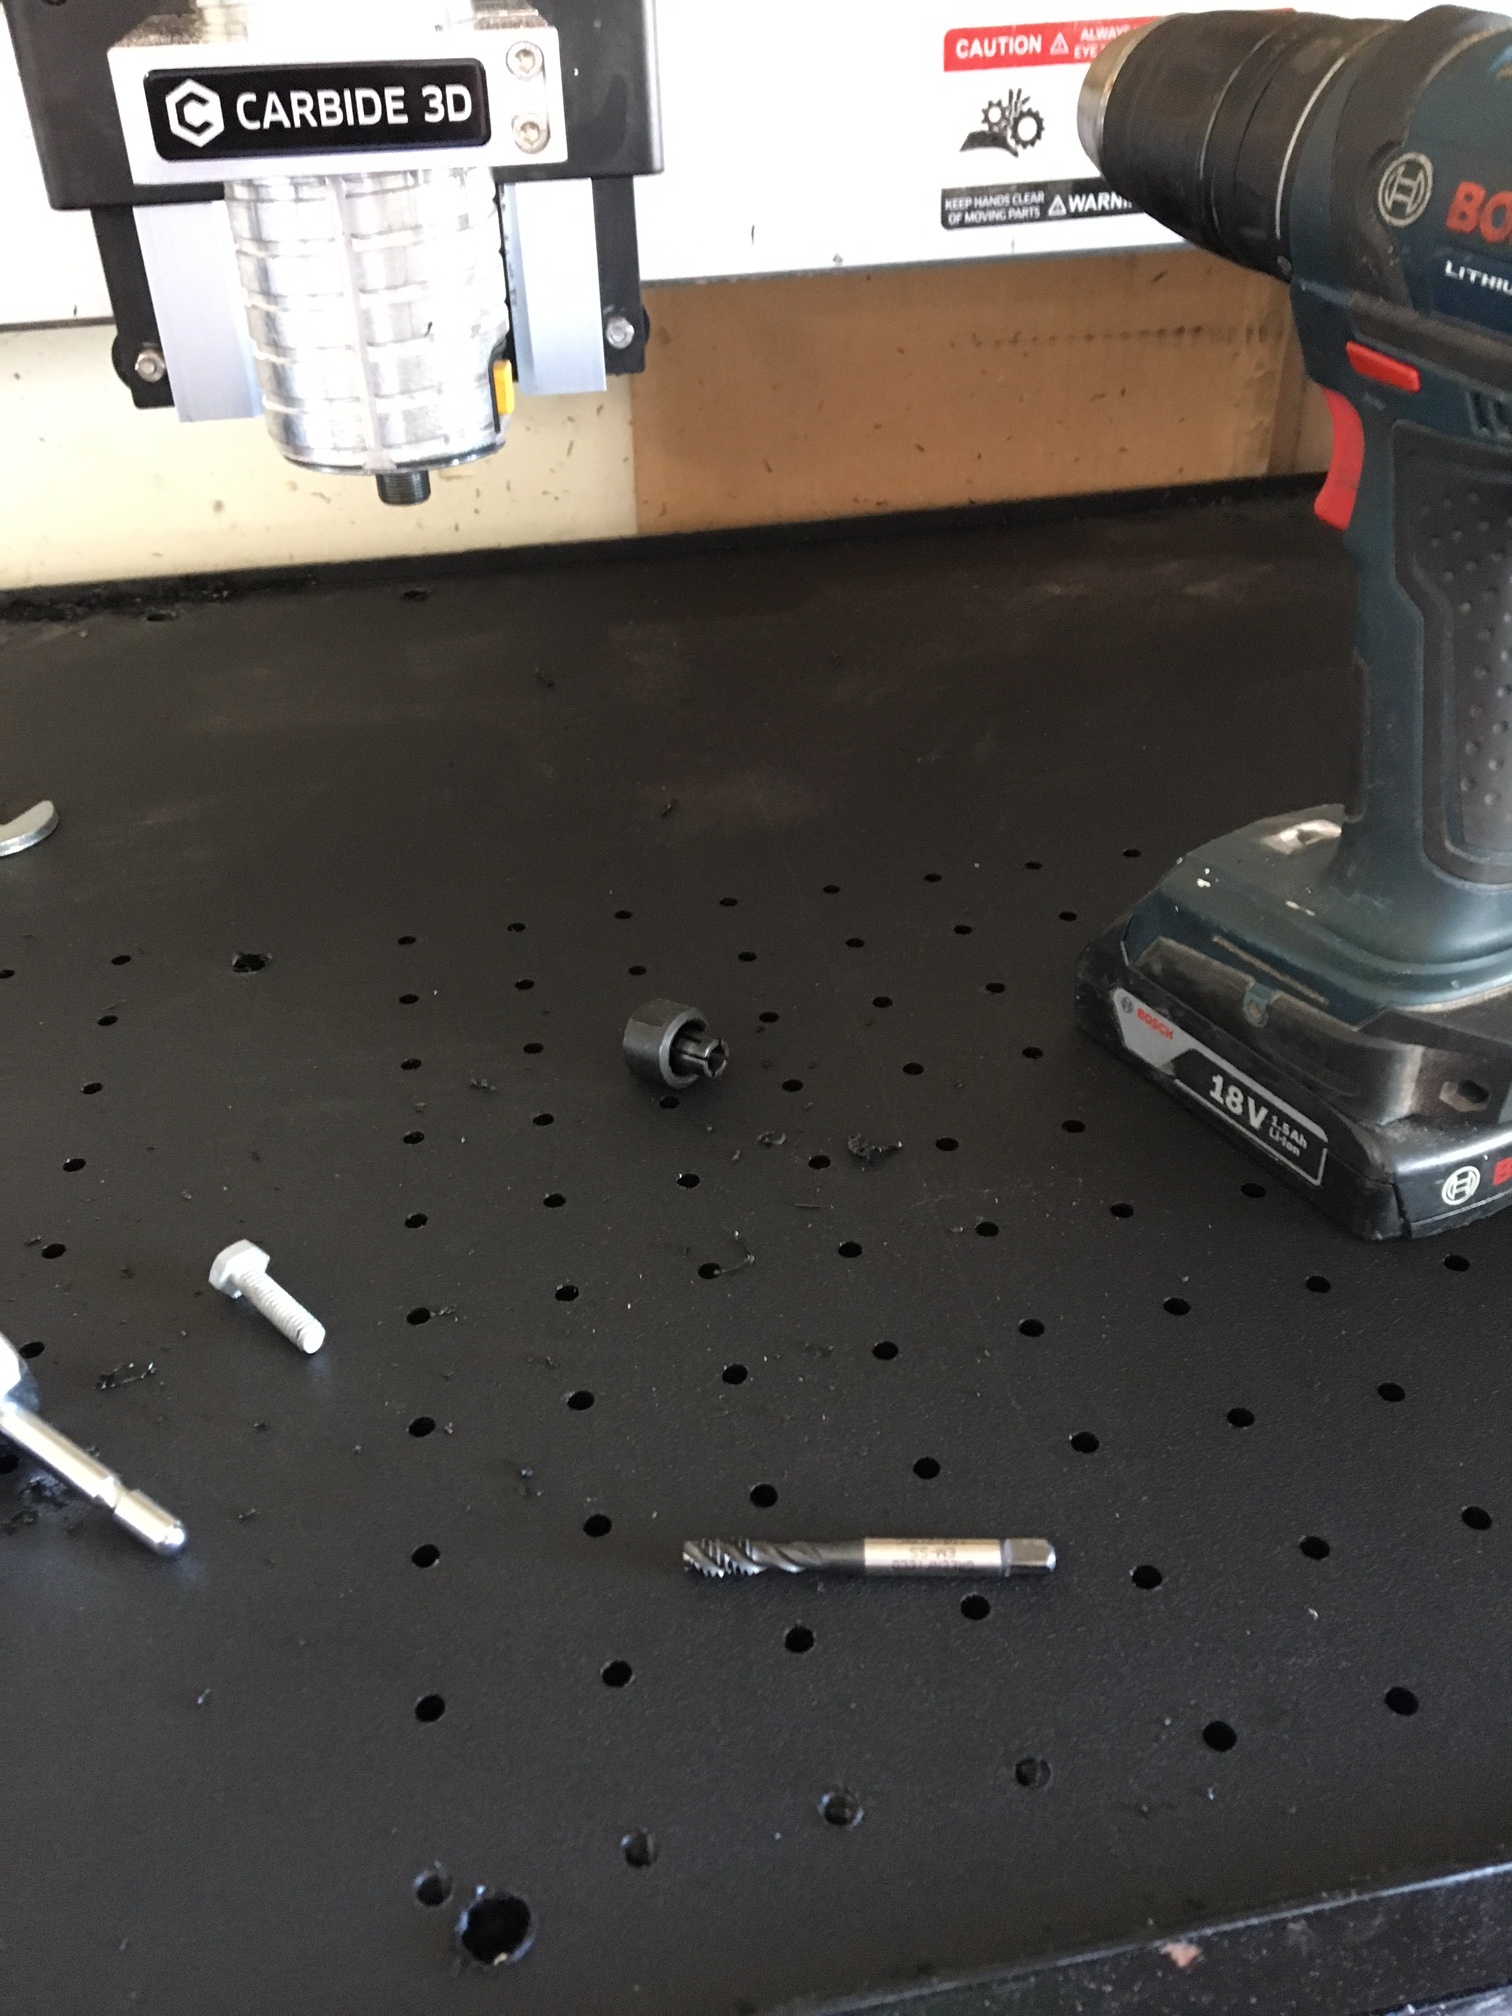
I was able to use the Makita router to cut the bed grid by flipping the collar upside down, which lets the router sit about .25" lower. By leaving the tool hanging out of the collet 1.75" you can get .65" deep into the wasteboard - just enough to drive the threaded inserts into the stock wasteboard.
As always, test your perimeter and extents before walking away for a coffee re-fill.
FYI: I made 2 separate grid files, one for the front and one for the back- I got tired of clicking circles so when I got half way through the job, I saved the file and then shifted the pattern to the front of the bed and saved it as “Front”
First time users; please check your Max Z depth twice! Be careful not to drive the Z carriage to low ( it will slip on the belt)
Shouldn’t the clamps all be oriented the same way? If you cut them from wood, some of them are going to be prone to snapping across the grain. The first thing I cut on my Nomad was the clamp set, and I failed to realize that the grain in my cheap bamboo flooring ran the same way in all three layers. “Oh, snap.”
(fortunately it snapped while testing outside the machine…)
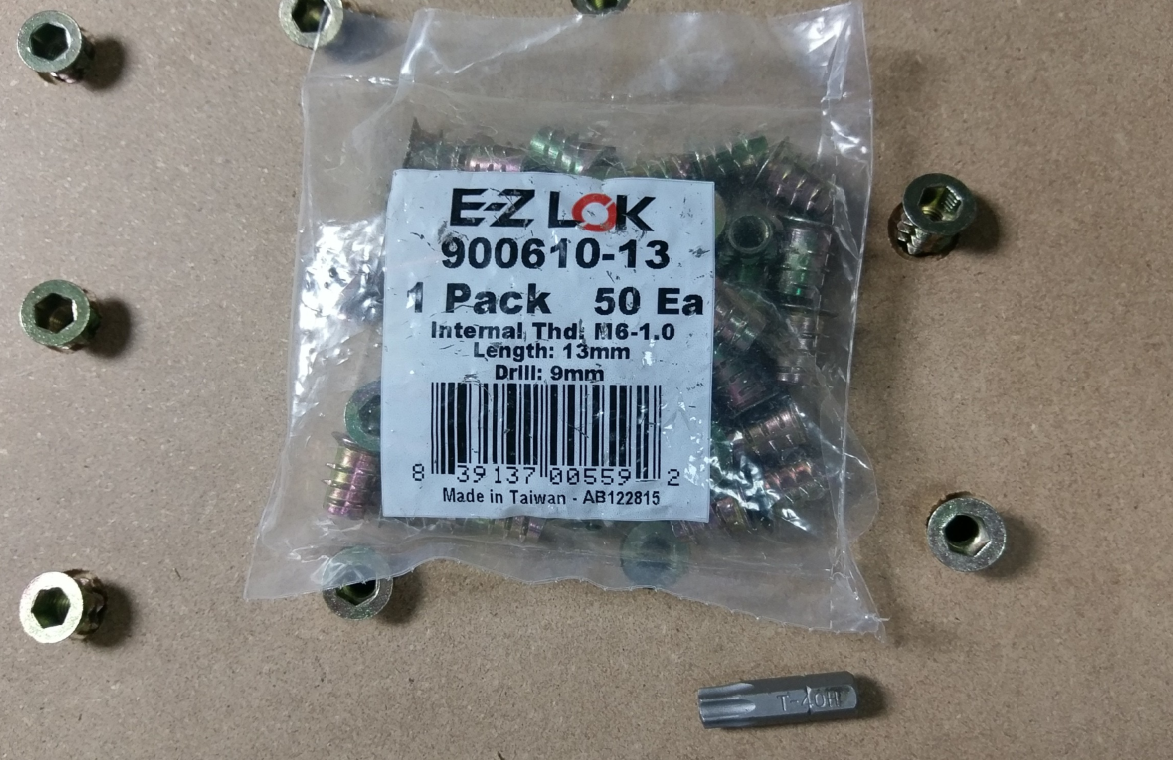
I would get the flanged inserts if I were you. I purchased non-flanged, and every single one I put in bubbles my wasteboard slightly. I increased the size of the hole beyond what they recommend, still bubbles it.
I believe these are the ones Winston Moy used with success.
I found some Metric M6-13mm through Amazon, because I have a box of M6 hex head screws already.
There is also a company ZORO that seams to have a very affordable offer:
Zoro is the cheapest hardware store I know of. But you have to word your searches just right.
They list things funny sometimes. Makes sense to their computers, no sense to a human.
Jim,
I took a different approach. I used t-nuts. Using 3/4 Mdf as my waste board I machined a through hole and a counter sink hole. Inserted the t-nuts, then flipped the Mdf over. I then resurfaced the top. This has two advantages… Th nuts won’t pull out or mushroom the Mdf, and I can resurface several more times before getting close to the nuts.
Is it possible to assemble my new XXL with the waste board flipped upside down, so I can put my threaded inserts in, then when completed flip them both right side up. With a thru holes for access.
Thank you
You’ll need a rather long endmill to accomplish that — there’s only so much travel which the machine has, and the shorter Z-axis spindle carriage plate means that there isn’t as much reach on the newer machines.
If you have a suitably long endmill, you might need to remove one of the springs also.
That said, I think it’s just much easier to instead buy a suitably large piece of MDF, use transfer punches and a drill to create a one-piece wasteboard to be part of the machine, then use the two piece ones as a spoilboard — you could stack them, and then flip the stack to make the cutting easier to manage.
The XL and XXL pretty much need to have a spoilboard, and maybe an intermediate layer as well.
That’s a good idea about removing one of the springs, because when I did the grid, that you donated for us, my z would skip toward the bottom of the hole, but wasn’t at the total limit of travel.
The only thing I could figure was the springs were pulling too hard at that point.
Yes, but the XL and XXL are taller, and have unmeasured height compared to an SO3 — you’re not really losing anything, and the machine will work better.
I just upgraded my XL wasteboad to 1" starboard HDPE. I created a patten and drilled it using the SO3, then spiral tapped it with a drill. It came out better than I imagined.