I was wondering if somebody could assist me in getting more detail from CC pro. The setup was set to high resolution and material Height was 22mm. Basically I started with creating a border in design. In modeling I imported a JPEG file. I then selected shape to create the stock material from the border. Both the stock and imported JPEG file height where set to 10 MM. In Tool-path I did a 3-D rough and finishing Path using a 102 double fluted bit for both the 3D rough and finishing paths. The results were that it did not provide the detail I was expecting. It seems that the bit did not cut deep enough into the material. Any suggestions in regards to cc or bits to be used will greatly be appreciated. I have attached the cc file for your review.
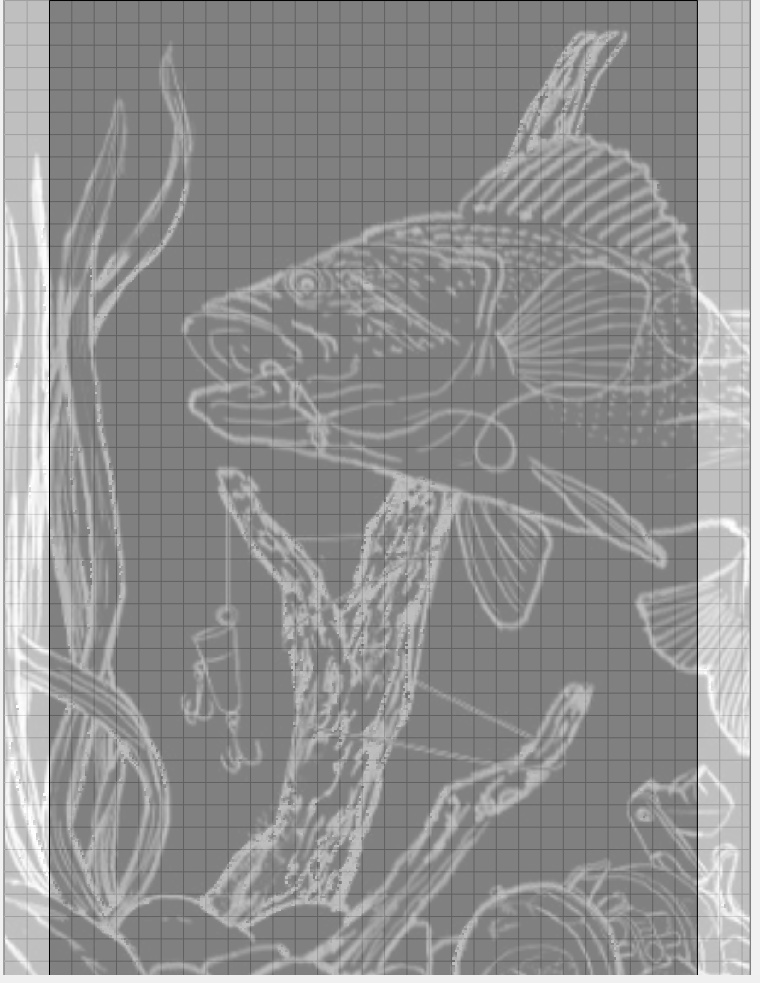
If you were to carve this using CC Pro with enough detail, you would end up with a mostly flat surface (everywhere the image is grey) with little “bumps” (where the white lines are). Is this your intent ? If you want to make this into a 3D carve of a fish, you will need a 3D model that can then be rendered into a greyscale heightmap, it’s a completely different game.
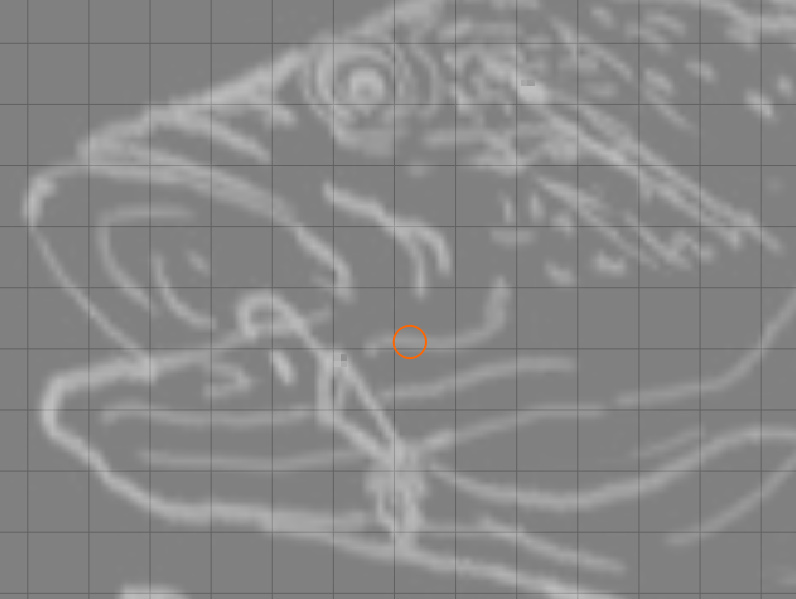
Second, given the dimensions of that piece, a 1/8" endmill is too large. Here’s the representation of a 1/8" endmill (orange circle) compared to the width of the features you are trying to carve:
Lastly, you used the same square endmill (#102) for both roughing and finishing, which cannot work at least not on a detailed model like this: for finishing you will want a cutter that can go in the small spots that the roughing could not do.
Assuming you would get the heightmap part fixed, the best approach for intricate 3D carvings is to use a regular square endmill for roughing only, and then use a tapered endmill with small tip diameter for finishing, it’s just like using a really tiny endmill, but it infinitely more sturdy so you can run it faster, which is required because a finishing pass using a small stepover typically takes a couple of hours.
I ordered (4) spiral tapered ball-nose bits. I’m not sure how correlate these sizes with the cutter #.
3 17515R0.2538 1/4" ???
3.17515R0538 1/2" ???
D3.17515R0.75 3/4" ???
D3.17515R1.0 1" ???
Also, how do you go about determining which is the best bit to use for the finishing
That R0,5 helps as a good start point but when I go to CC and do a tool change I’m presented with 4 cutter # (101, 111, 121 and 202). Which one do I select for the R0.5?
Thanks
John
(45ipm is VERY conservative… usually I end up running at 60ipm, but I do that with the buttons in carbide motion so that I start slow and then speed up, rather than just start fast)
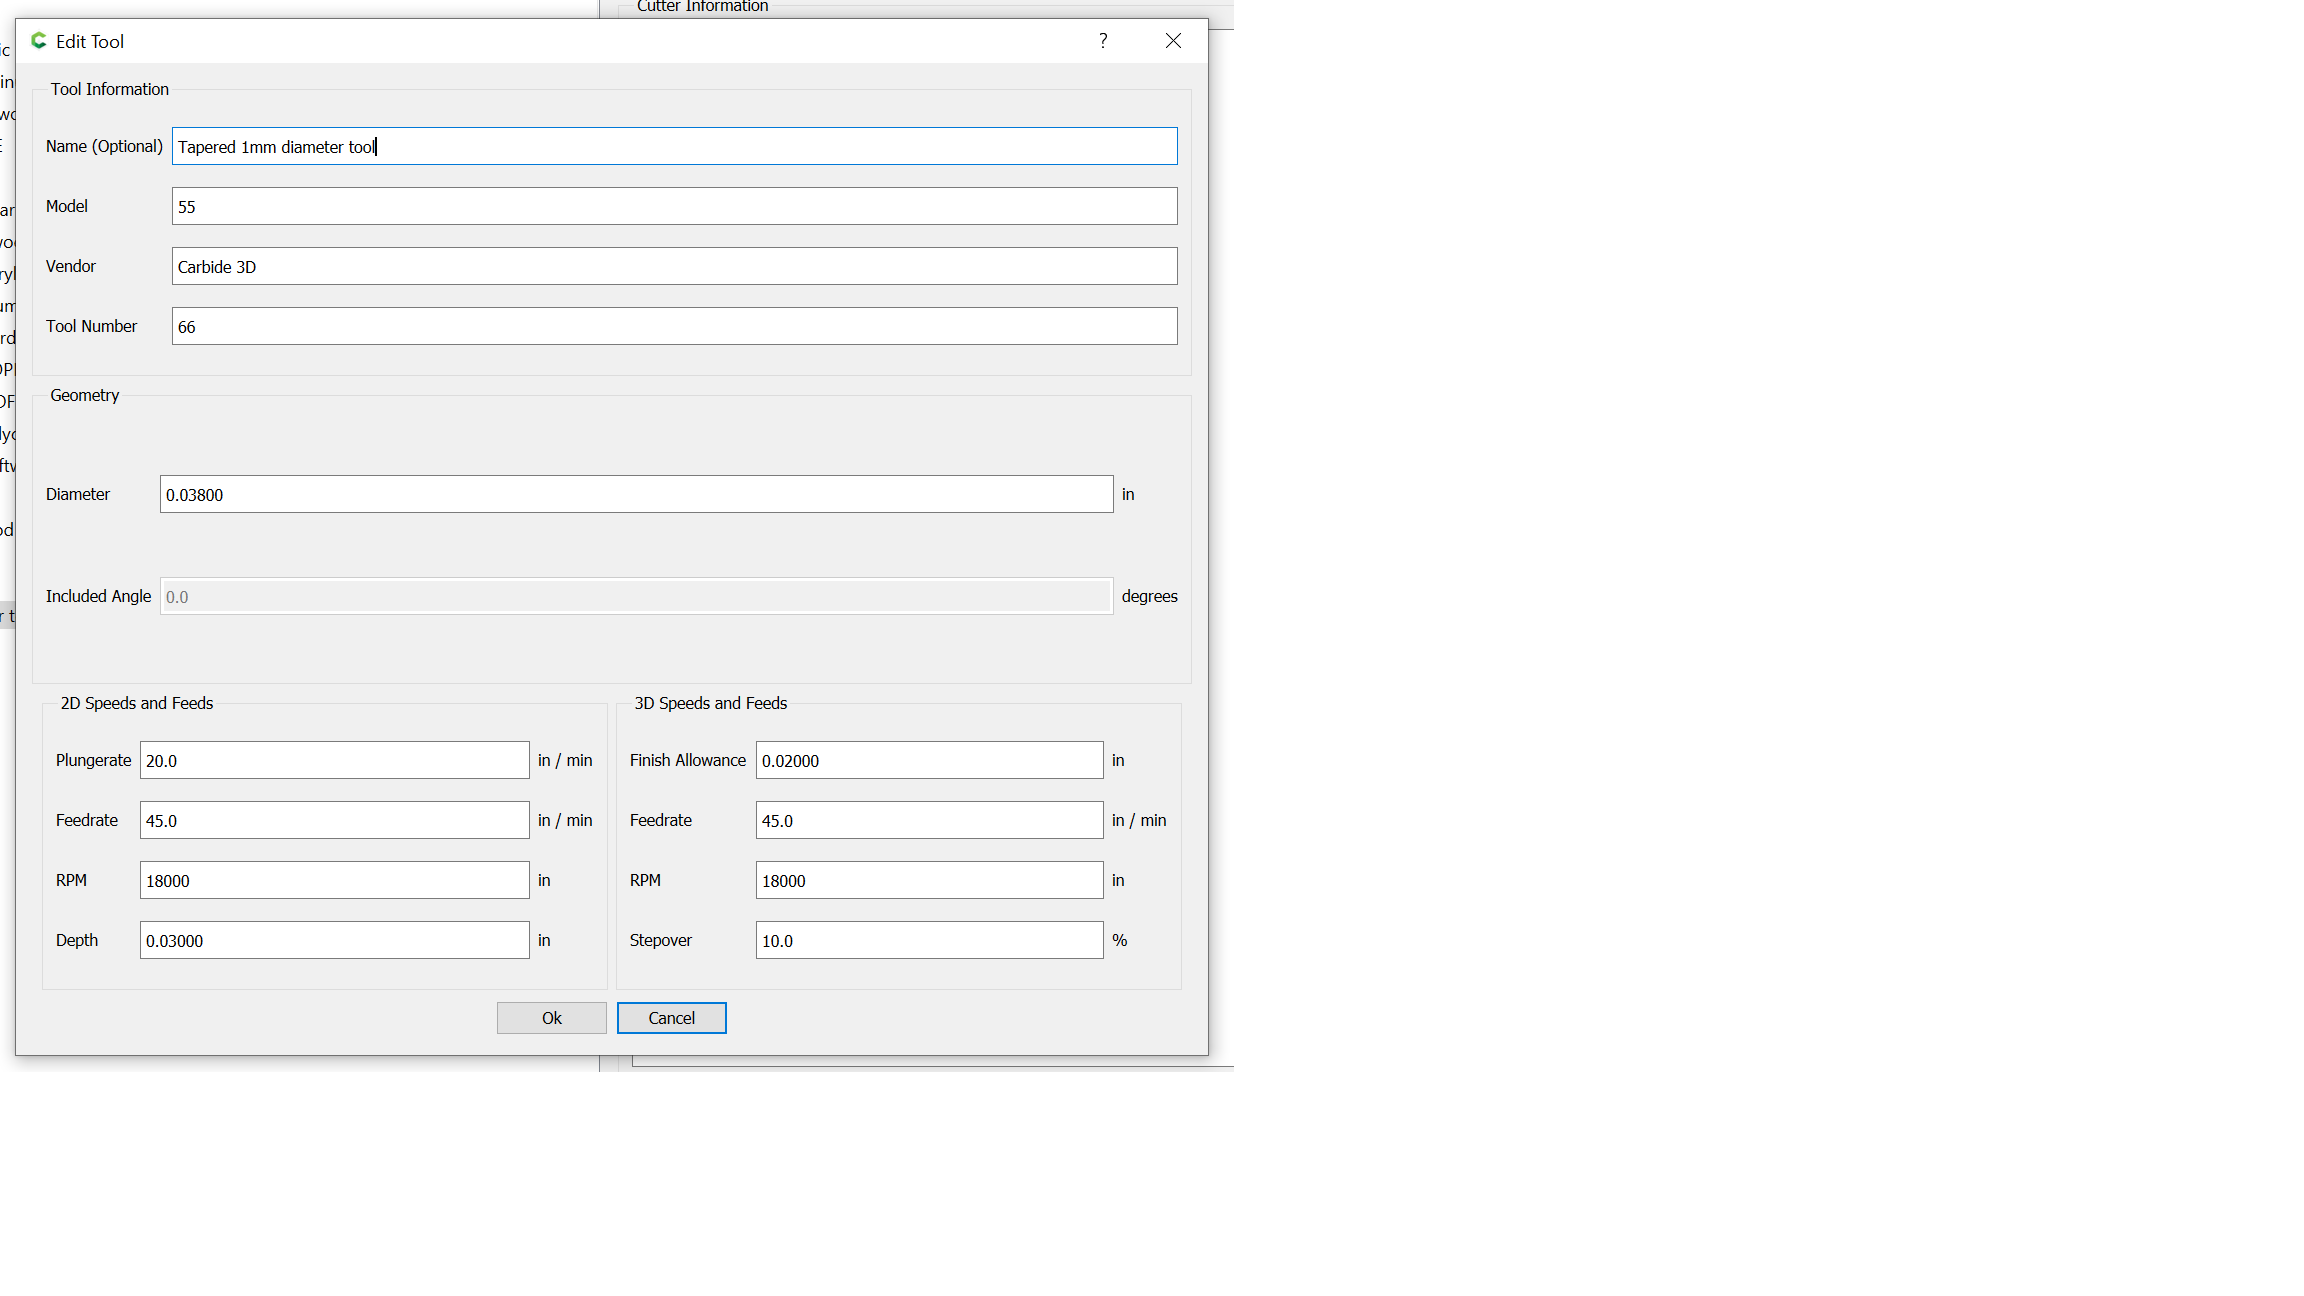
Can I use this New Tool for the other ball-nose that I purchases or do I need to create one tool for each of them. If so, what needs to be changed in the additional tools being defined. One more question why do you refer to this as a 1mm Diameter tool.
Thanks again for your input
John
yes each separate diameter needs it’s own tool in the definition, since it has fundamentally a different shape. Carbide Create needs to know this shape in order to calculate the cut paths (which is interesting in mathematical sense but otherwise be glad the computer does it for you… if you are a math kind of guy I can try to explain but if not, won’t bore you with that)