(first I want to plug Easy (or at least straightforward) Terrain Relief Models that post, which is really the do-it-all howto on terrain carving)
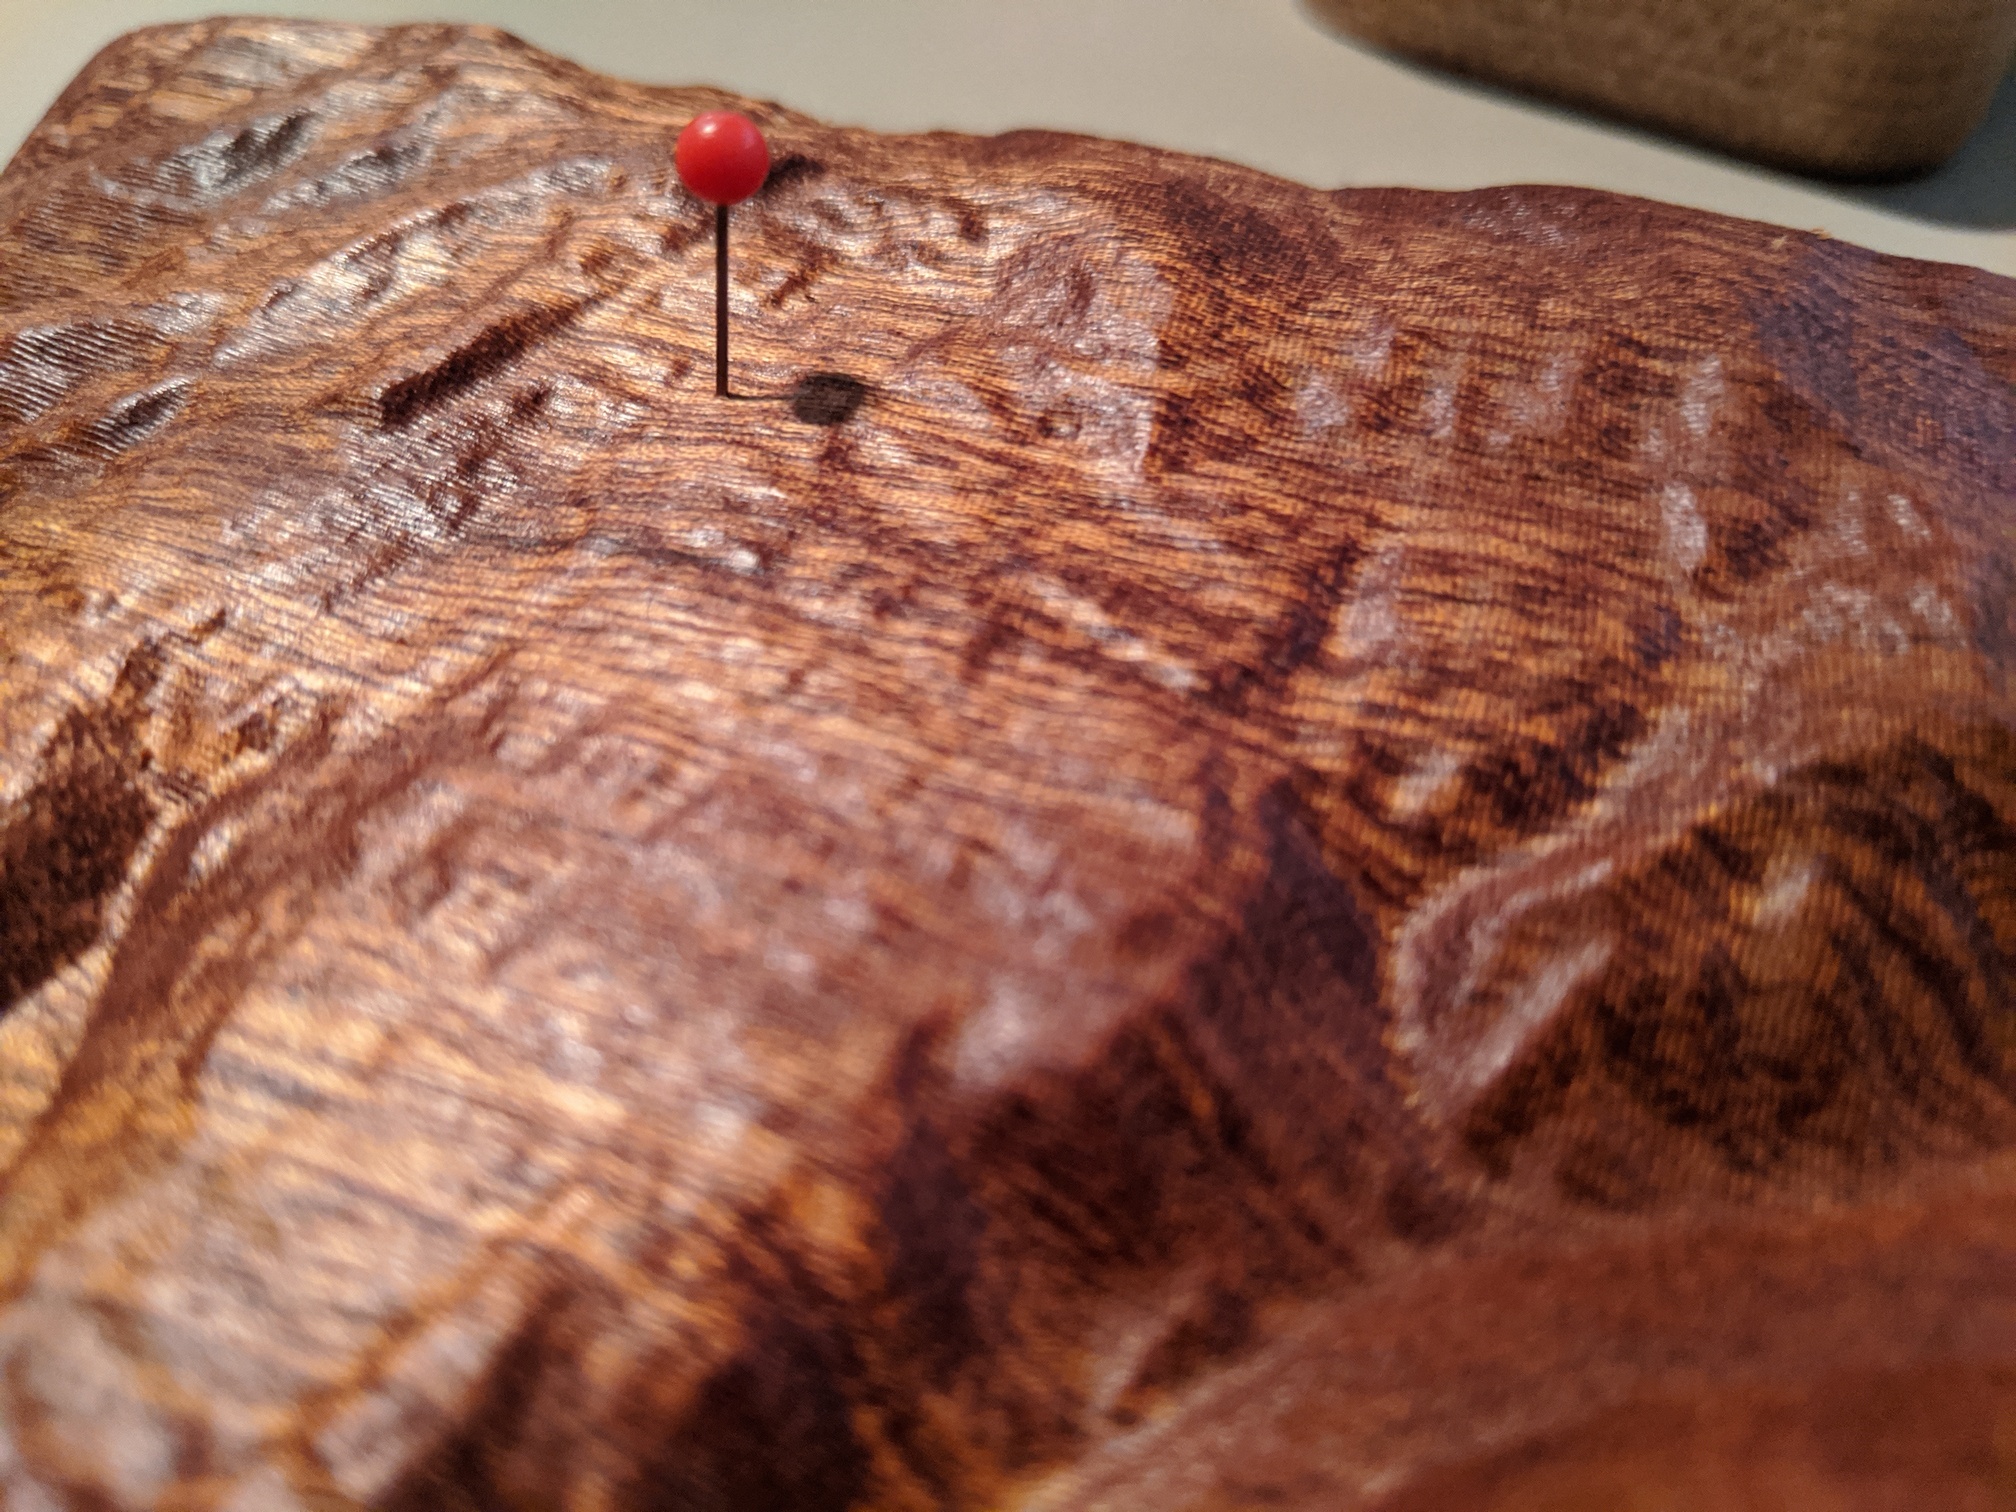
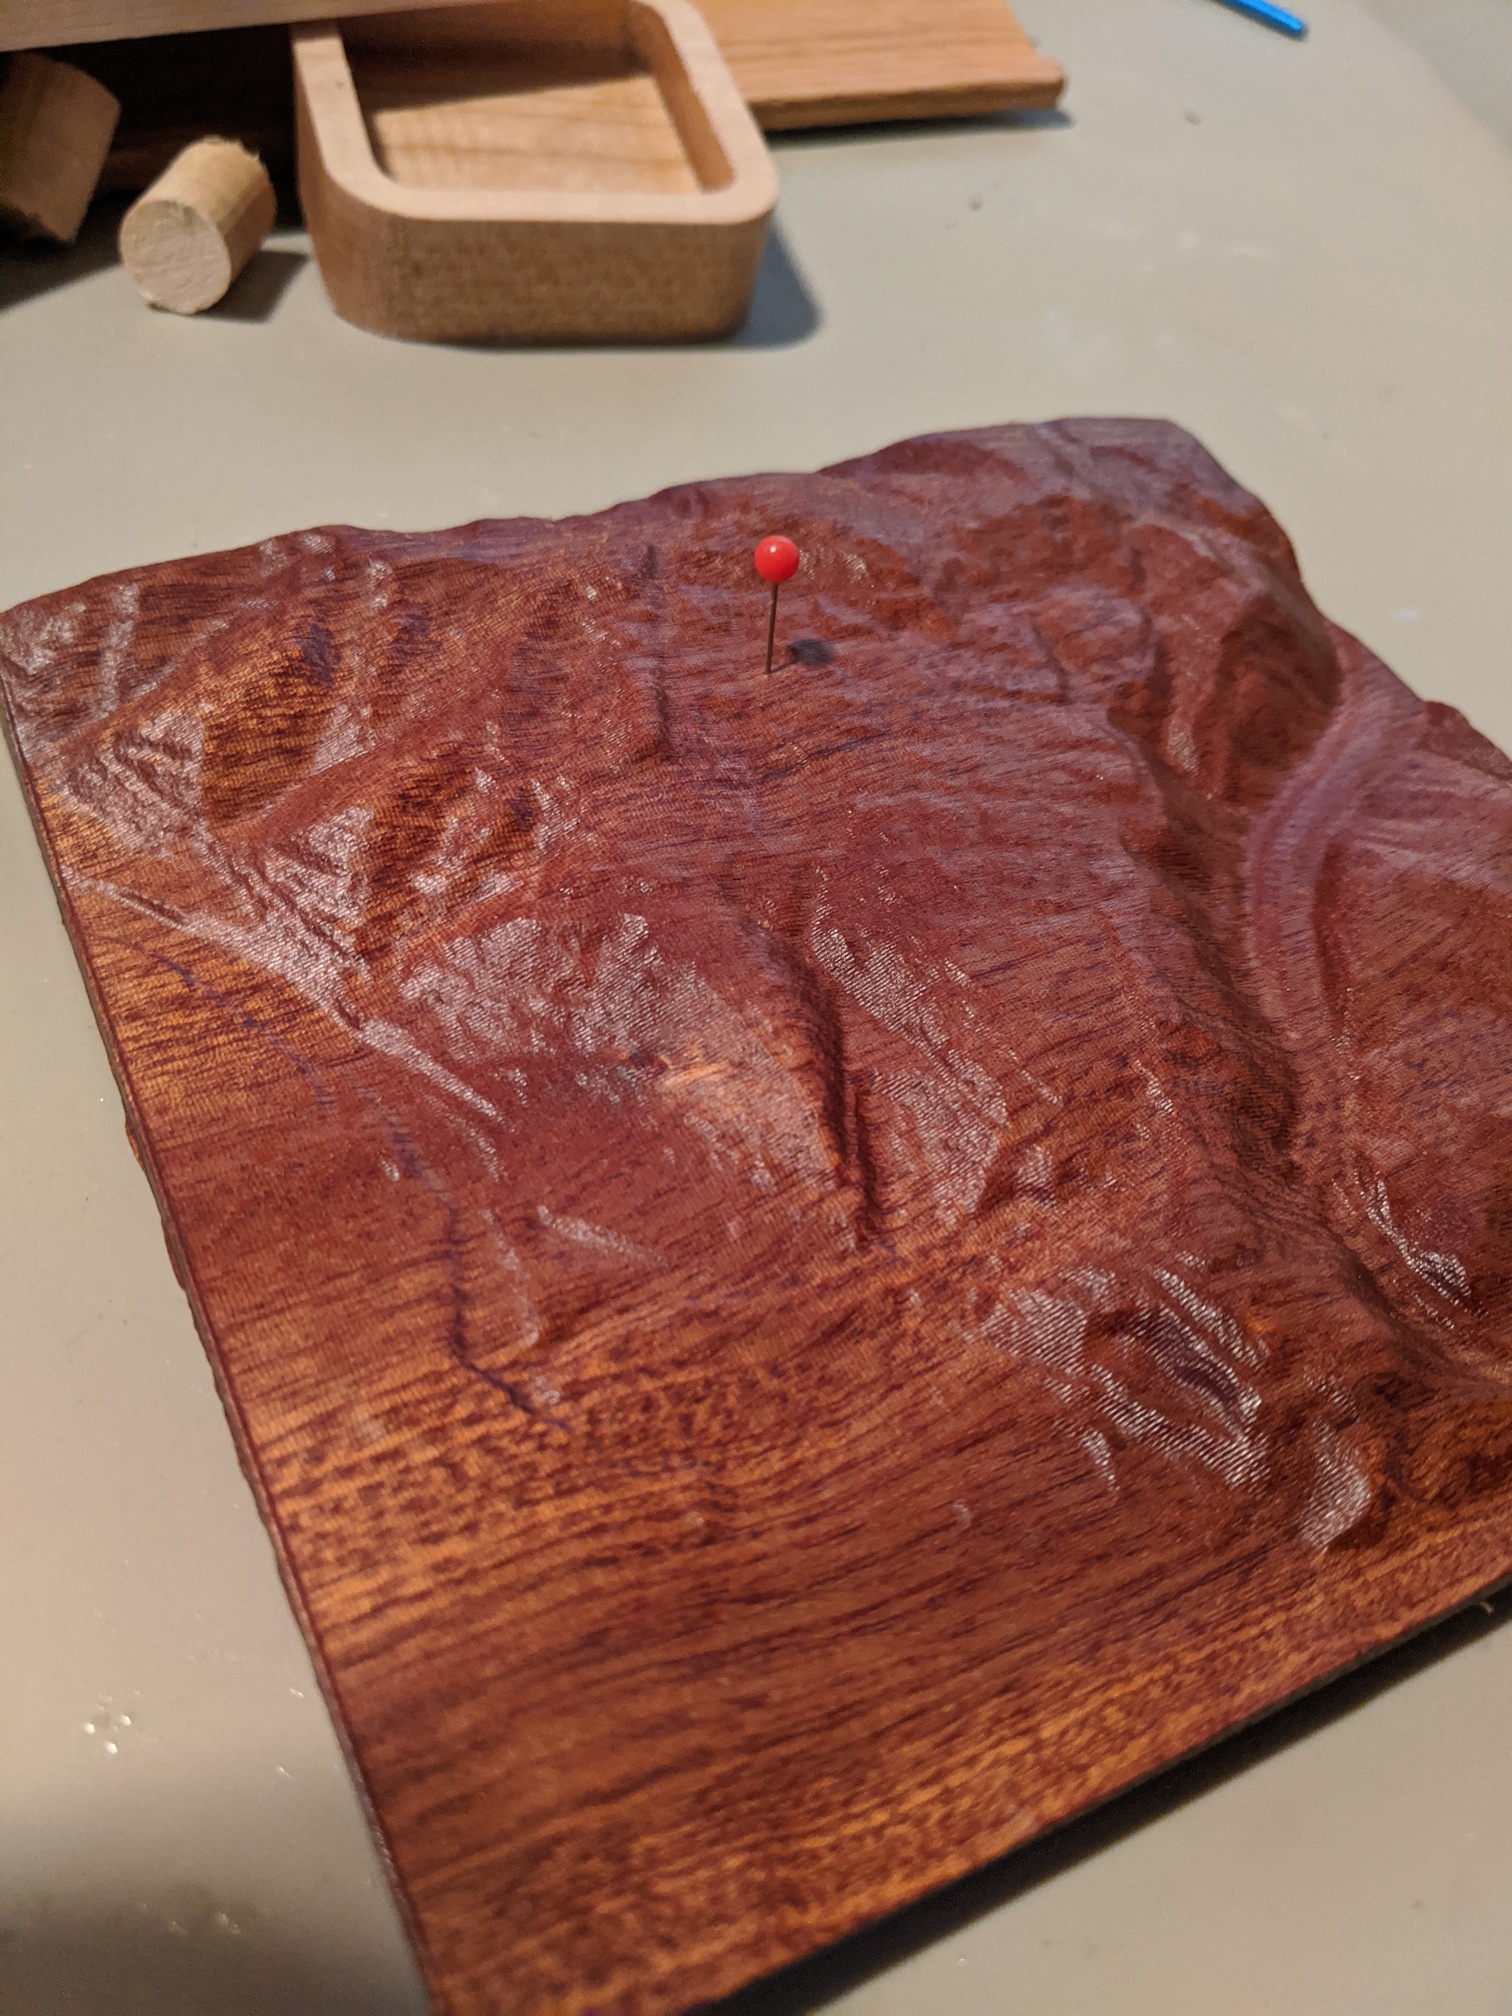
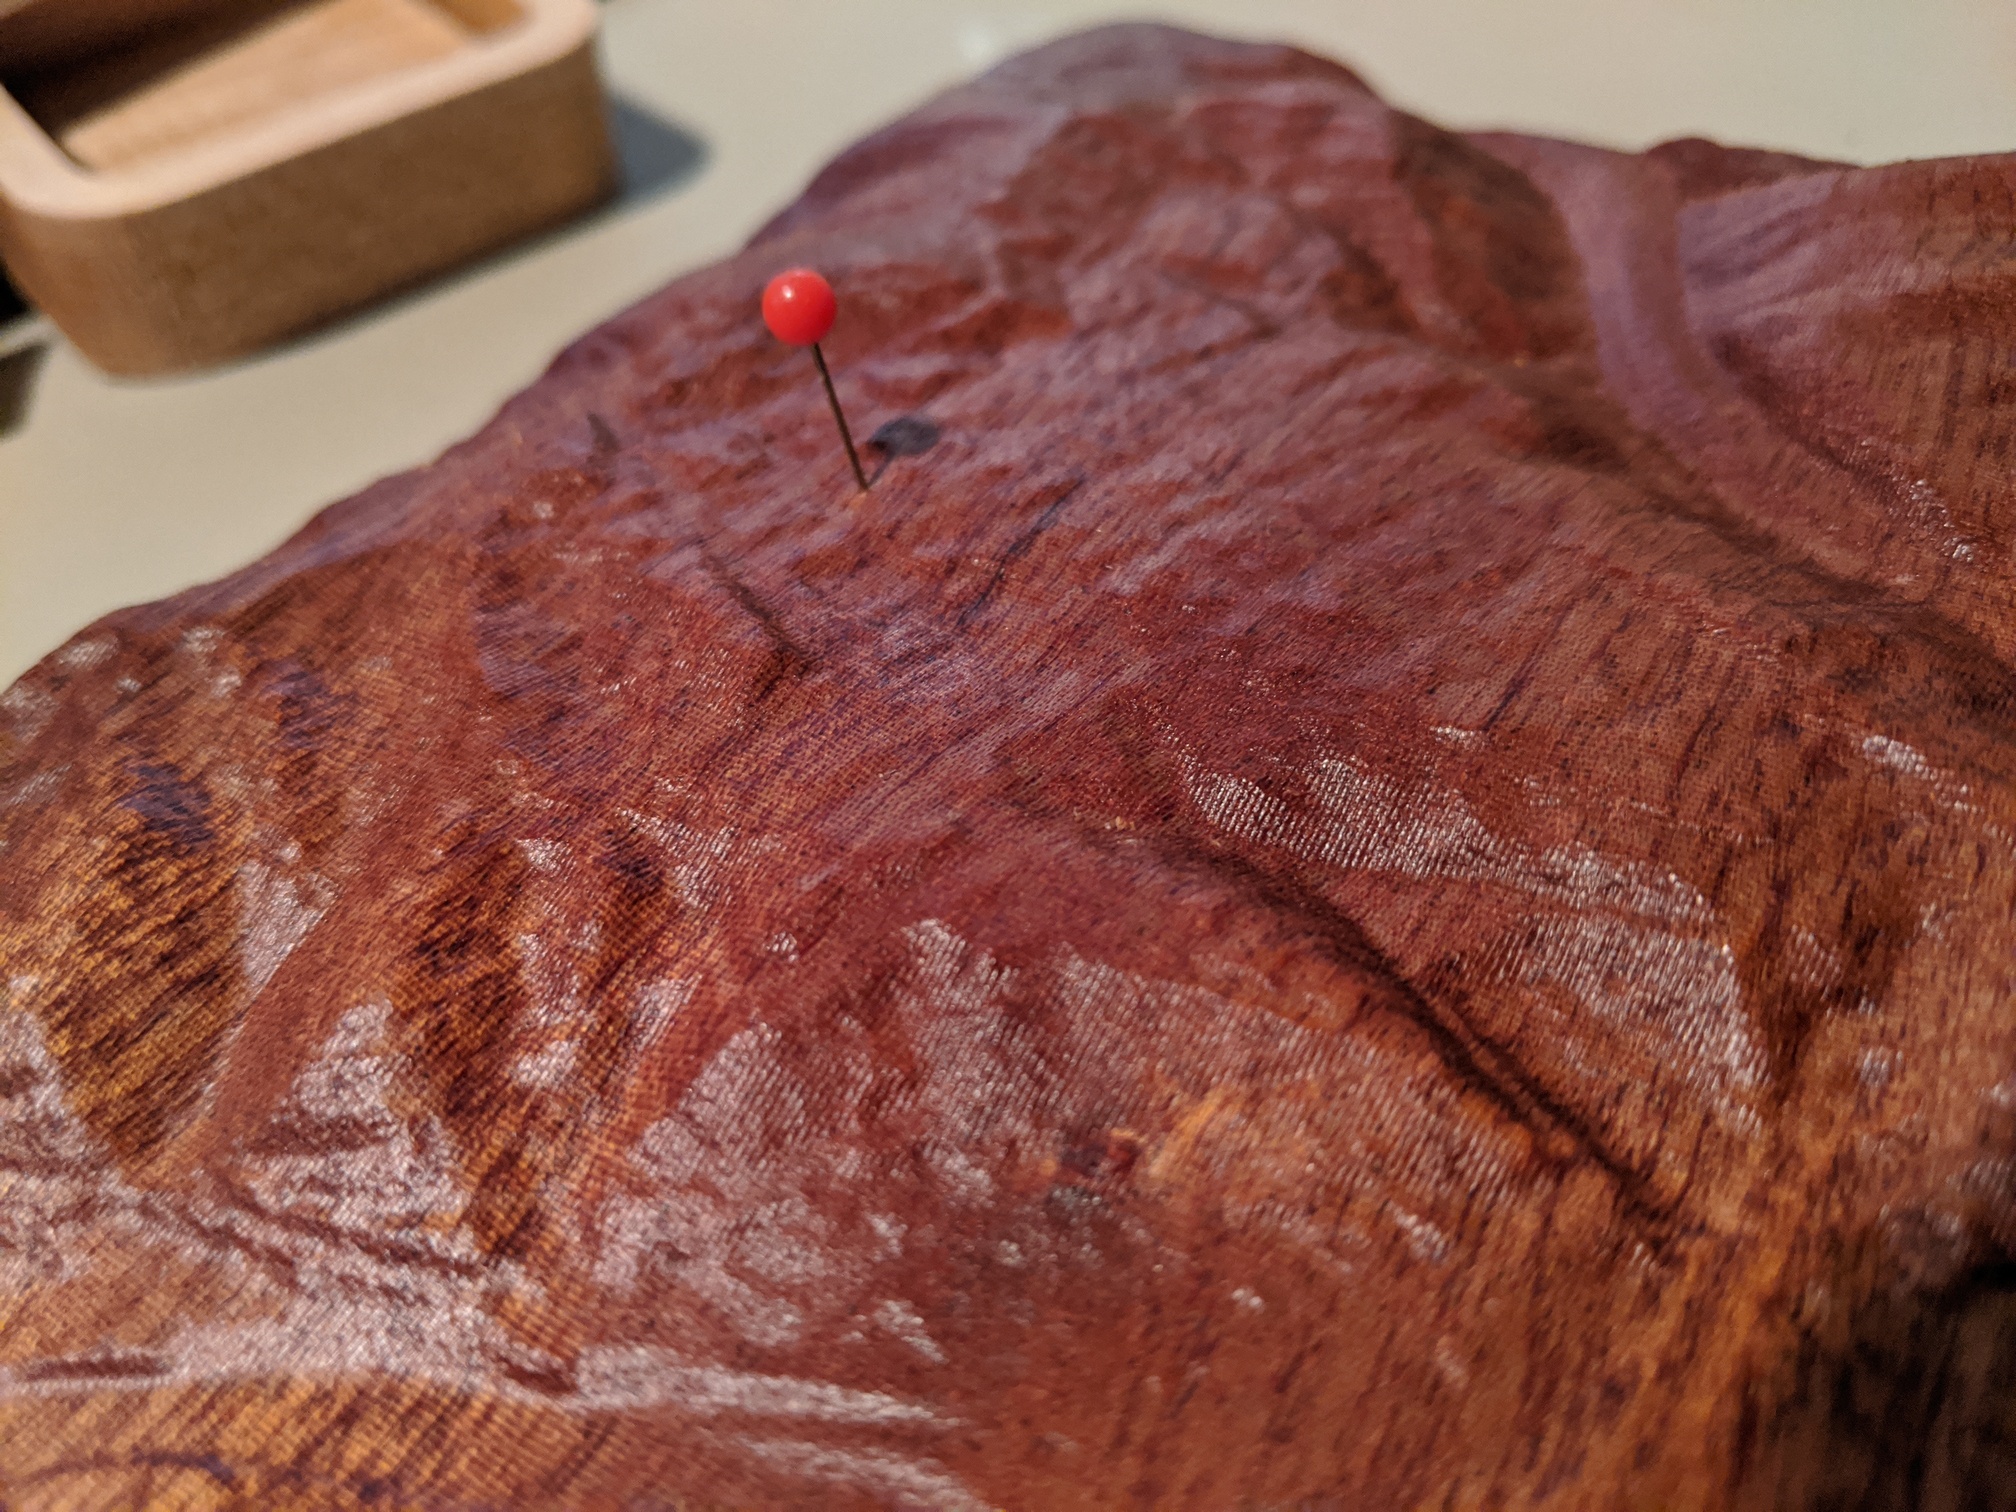
Ever since I clicked the order button on the Carbide3D shop website for my 3XL, one of the things I’ve wanted to make a terrain cut of the area I live in with a big “you are here” pin. I’m quite pleased with the result, you can even see (if you look in the right light) the house blocks and roads in the neighborhood and the cut came out without artifacts and took almost 2 hours total (still with what some here will consider conservative F&S settings)
First the analogue side of the house for those who aren’t interested in the digital side:
The design is 5.3" x 5" x 0.75" carved out of a scrap/end piece of mahogany.
I opted for 2 roughing passes and 1 finish pass with the following bits / F&S
1/4" inch downcut straight endmill (#251 equivalent), at 50 ipm and a 0.05" depth of cut with 0.1mm stock to leave in the left-to-right direction
1/8" inch downcut straight endmill (#102 equivalent), at 45 ipm with 0.1mm stock to leave in rest machining (single pass) mode, in the up-and-down direction
1mm (0.5mm radius) tapered ball nose endmill, at 50ipm in a single finishing pass with a 0.18mm stepover in the left-to-right direction
Total time of the cut was roughly 2 hours, and the Bitsetter has been awesome… after the roughing pass there’s not really a good place to re-zero for the new bits if I hadn’t had that piece of equipment.
I finished the wood with a bit of walnut oil and then put in a small pin at the right spot.
Now the digital side:
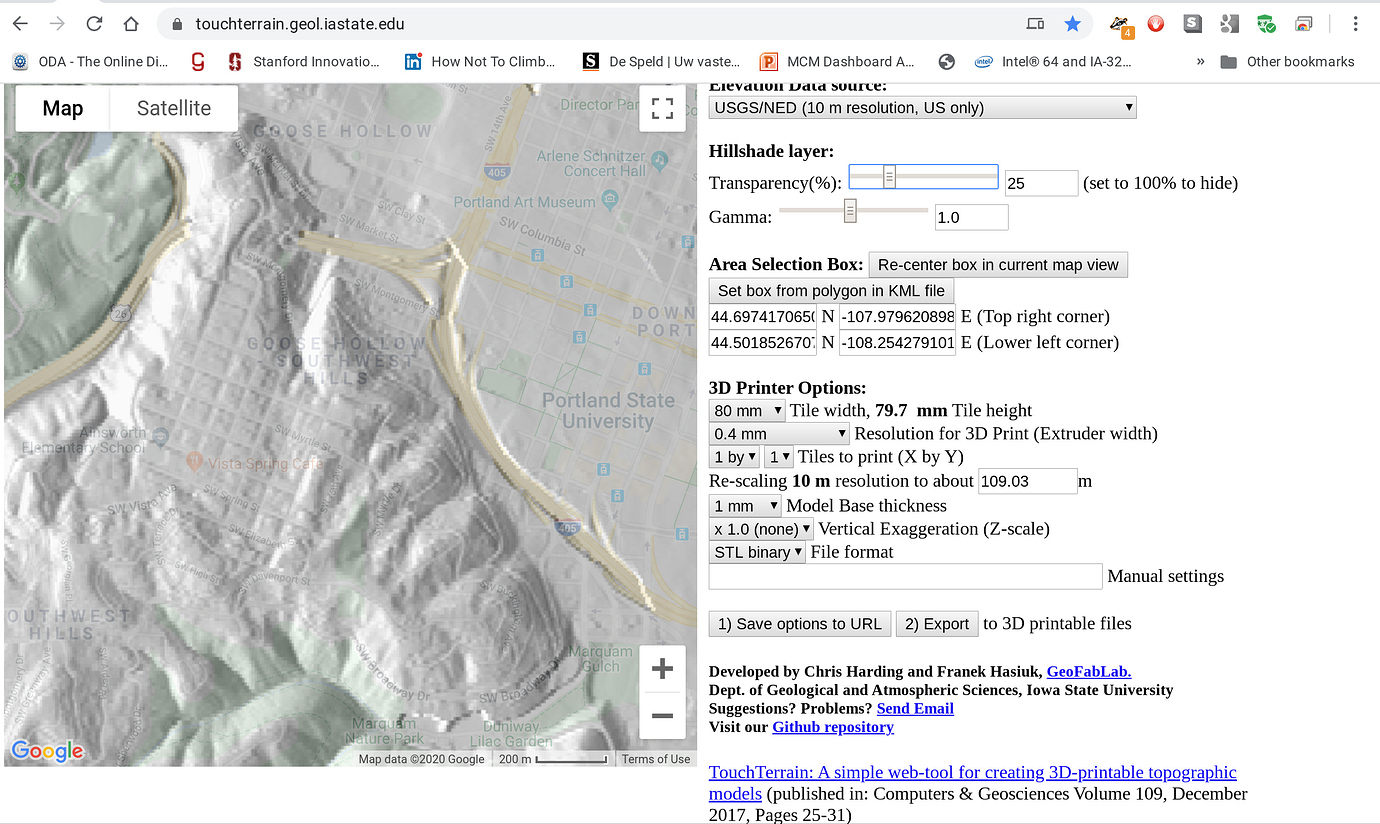
Since the article I quoted at the top, life has gotten a littler easier. The website https://touchterrain.geol.iastate.edu/ does a lot of the gnarly format conversions for you. All you do is find the place you’re interested in, get the square drawn around it, set the finest detail possible and … click there’s a nice STL file.
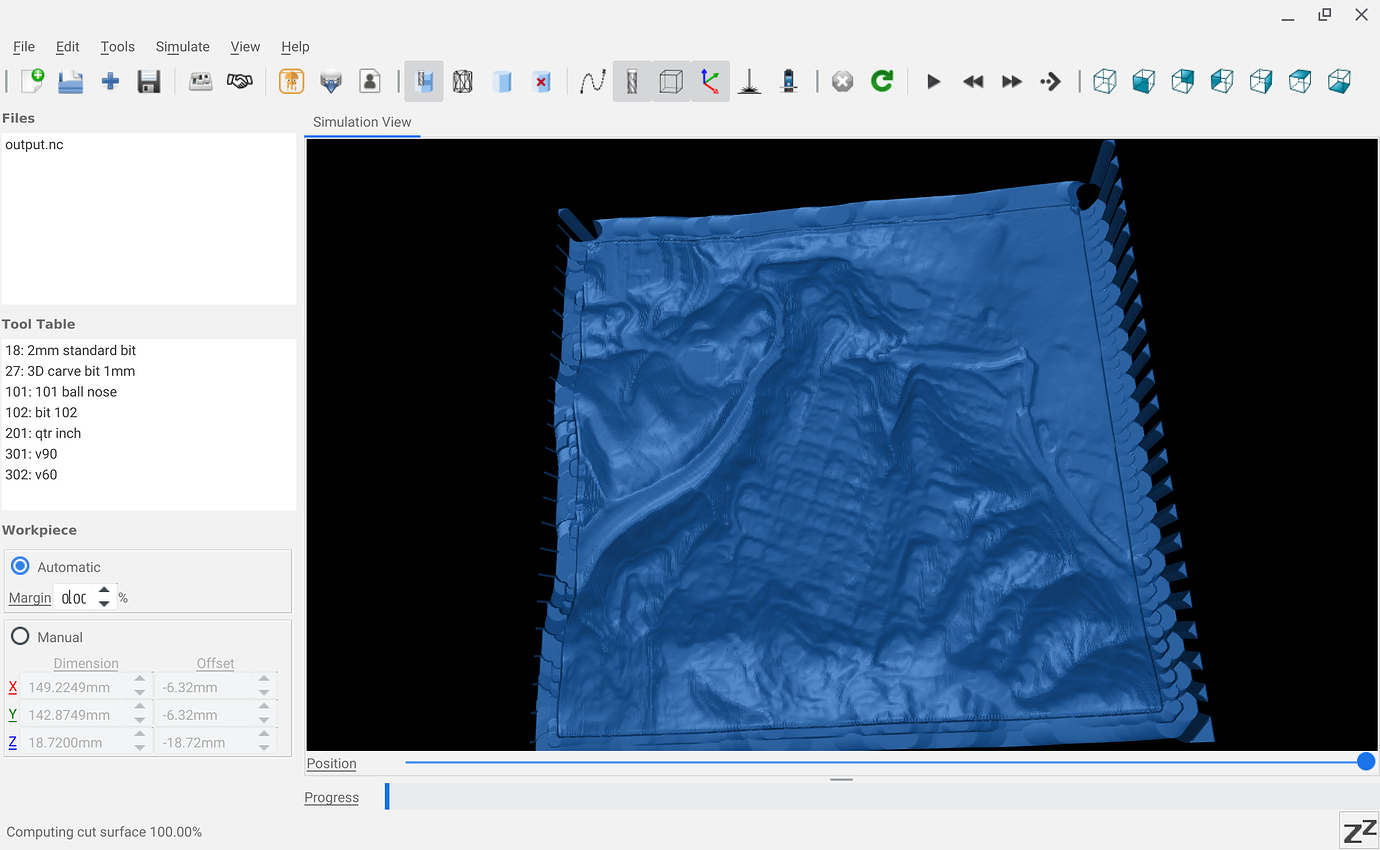
I then used my hobby software project “Toolpath” (https://github.com/fenrus75/FenrusCNCtools/tree/master/toolpath/doc) to convert this STL to gcode:
toolpath --cutout 0.75in -t 201 -t 102 -t 27 --stock-to-leave 0.1mm geodata.stl
where bit 27 is the custom entry in the CC library for the 1mm tapered ball nose.
A minute or so later a 16Mb gcode file comes out, that looks like this when viewed in camotics:
Loaded into Carbide Motion, an 2 hours later:

The files are a bit big so just URLs in order to not break the forum:
http://git.fenrus.org/tmp/geo.stl (30Mb)
http://git.fenrus.org/tmp/output.nc (16Mb)