Thanks, @Julien and the Carbide team for prompting me to take on this long standing idea!
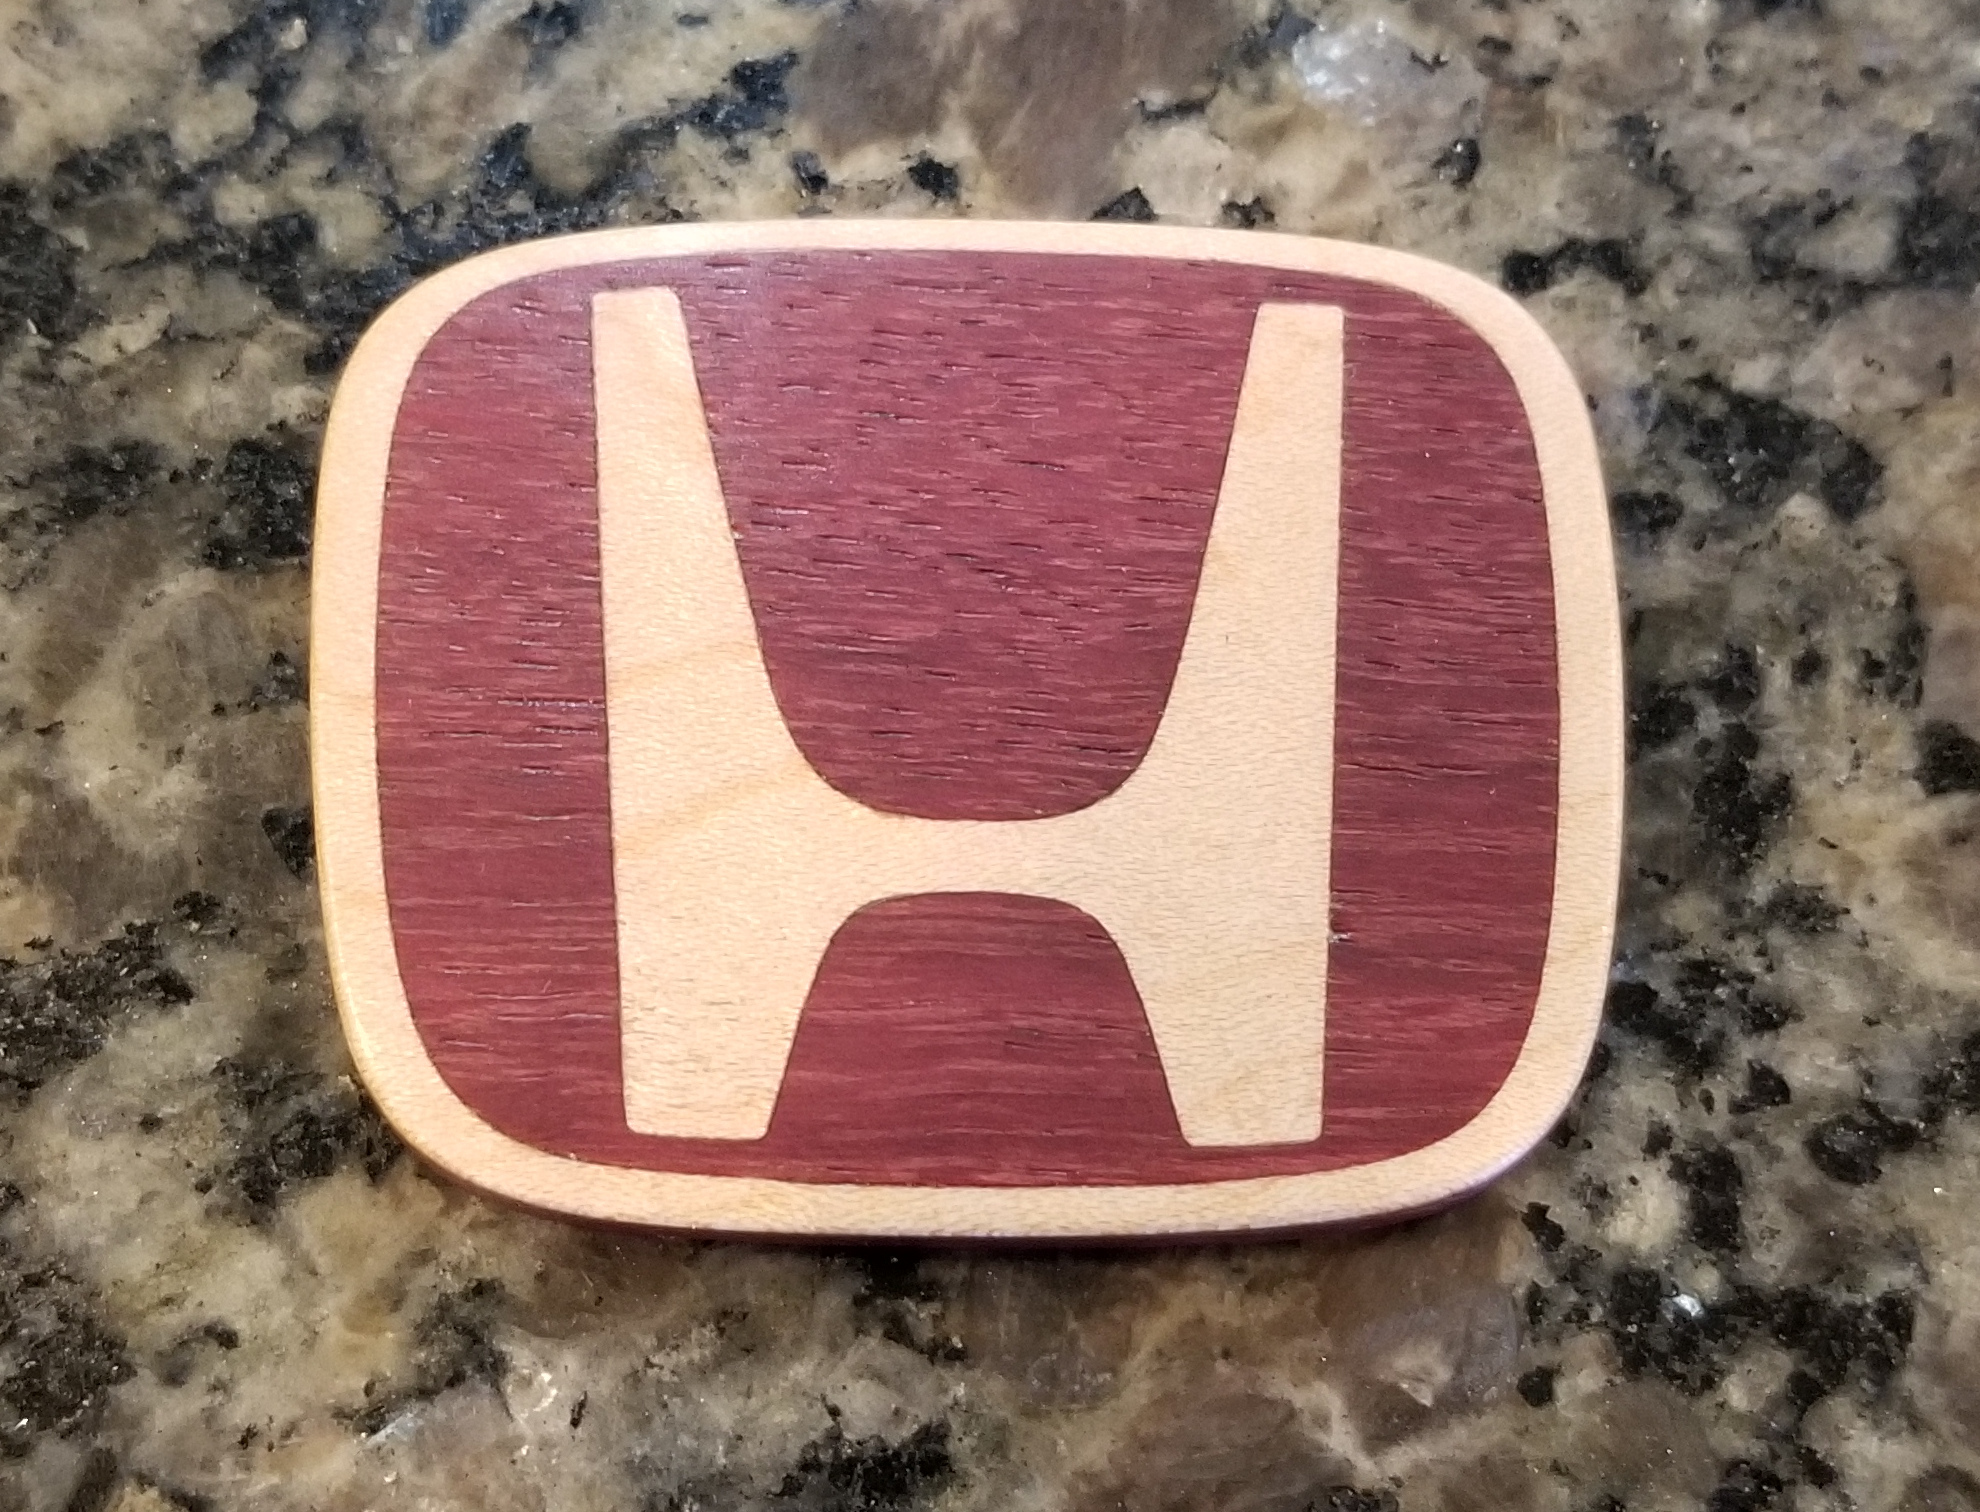
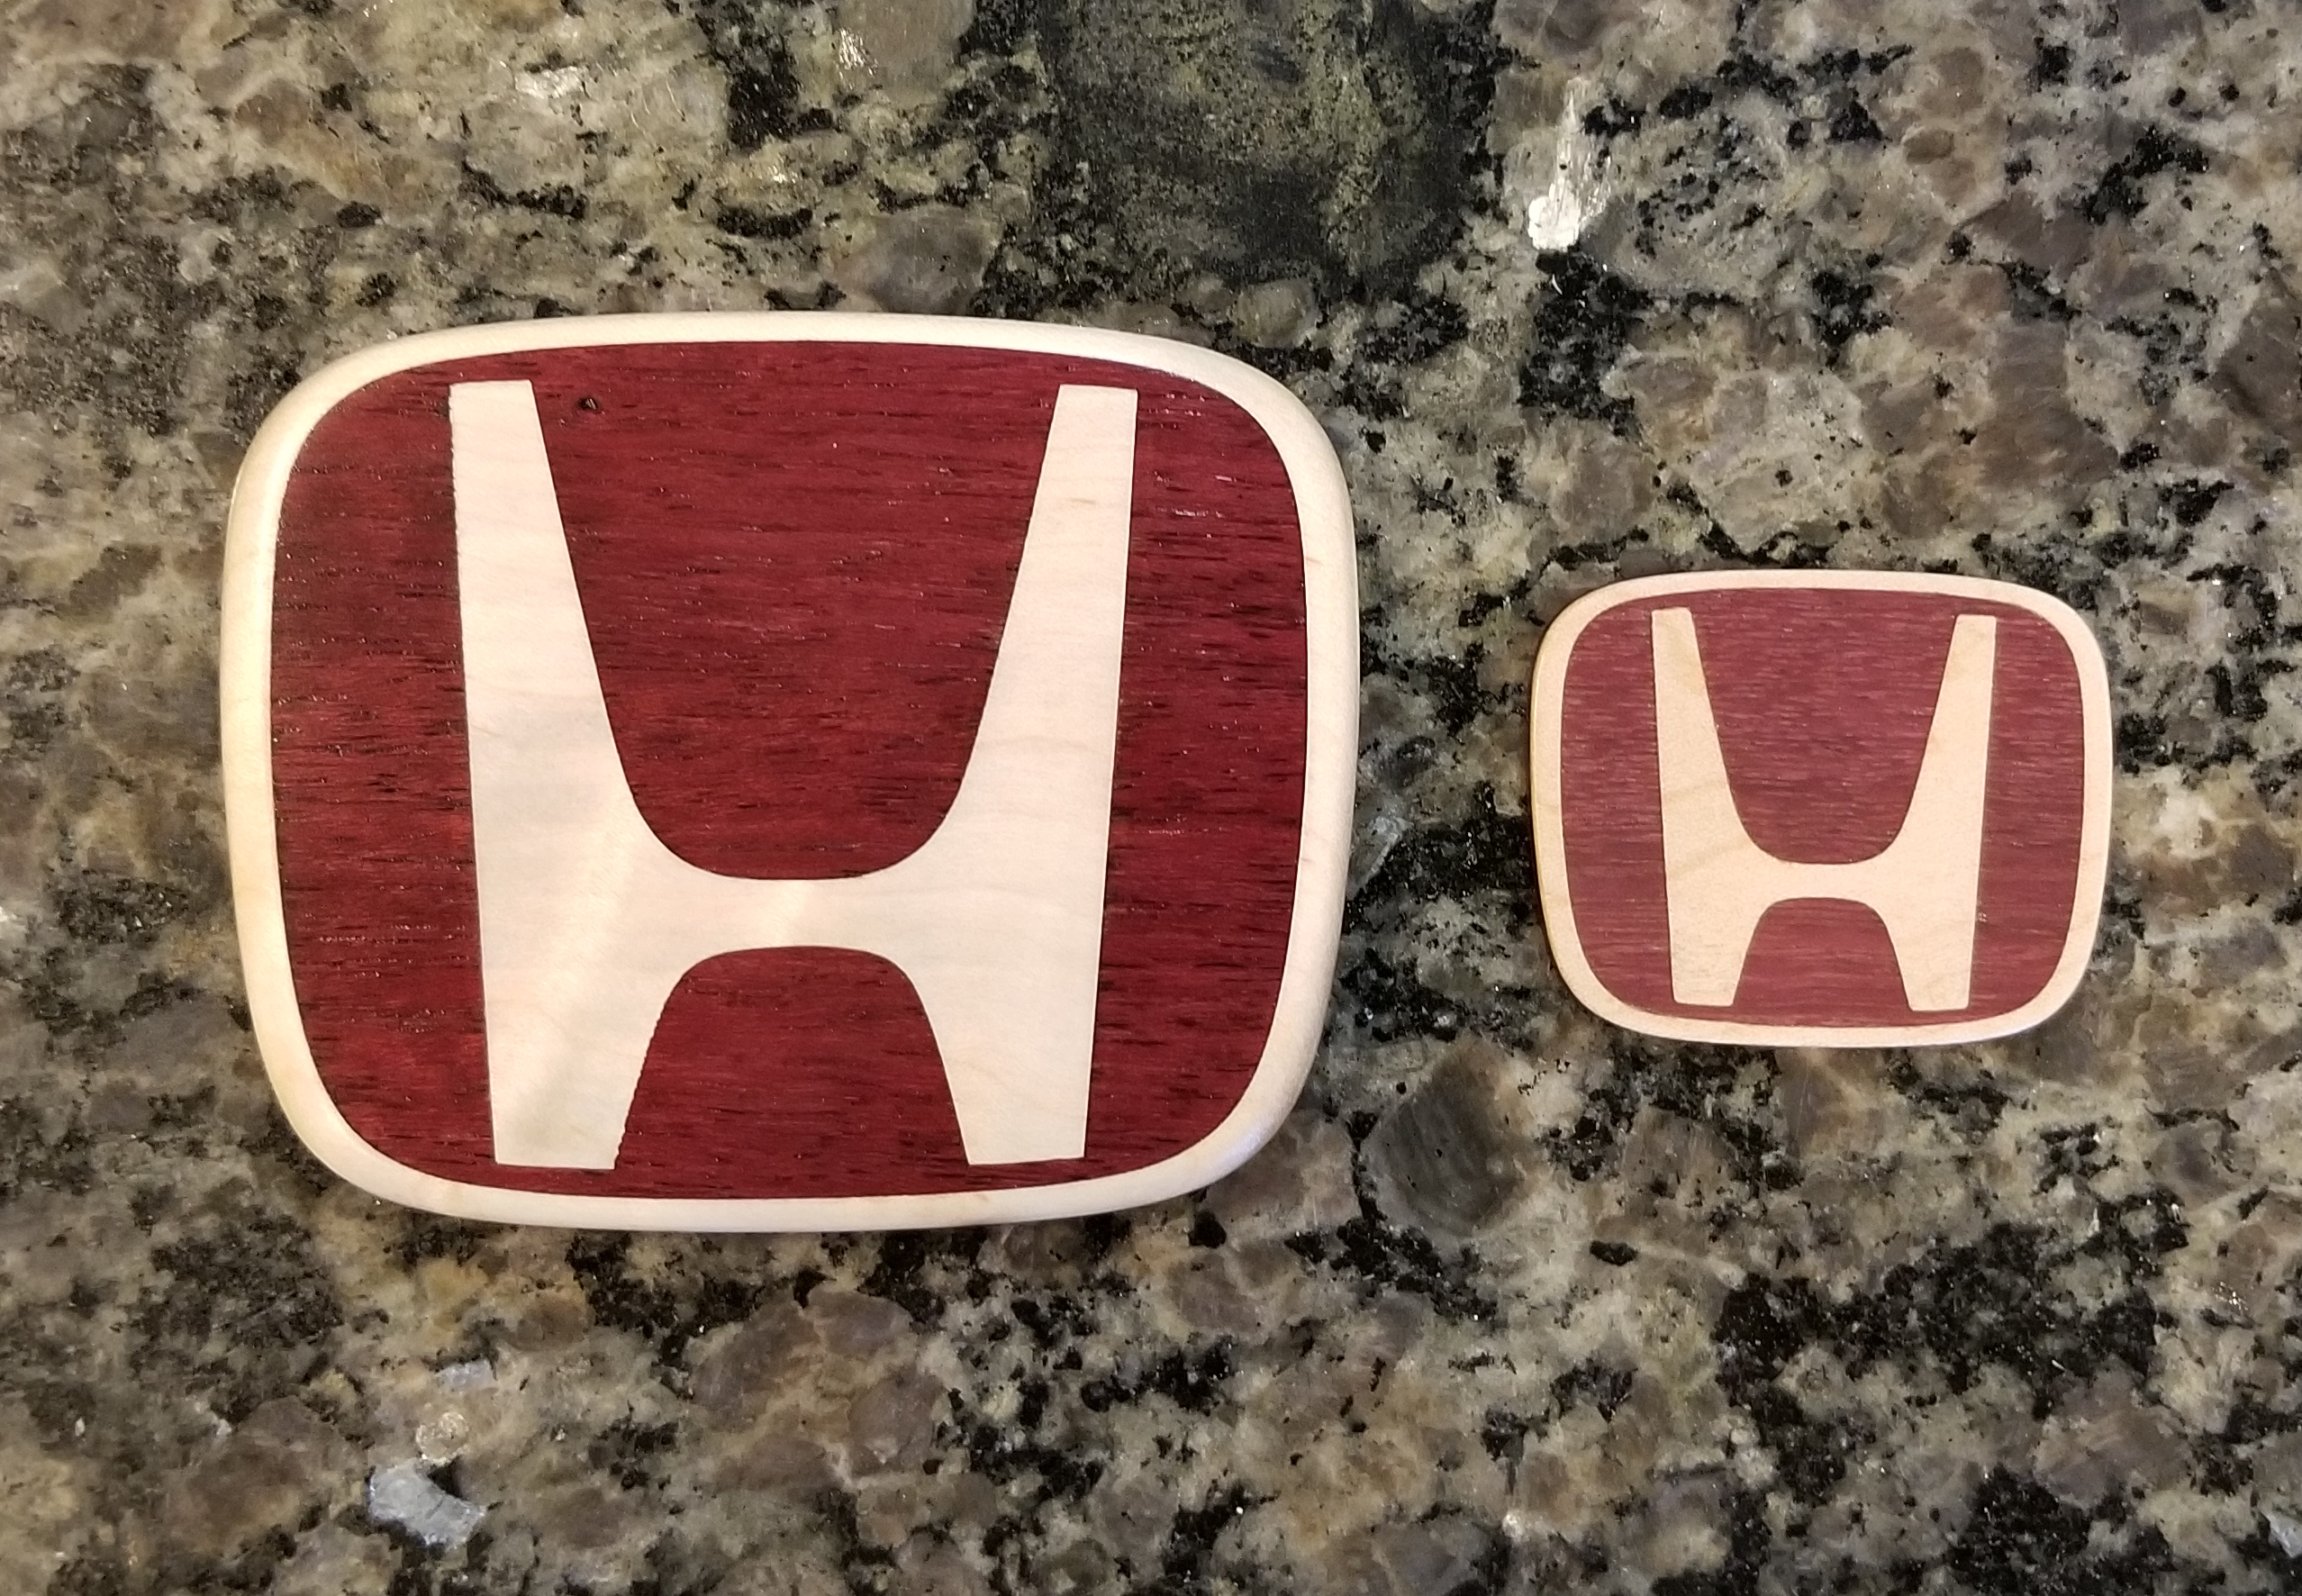
For quick background on the idea, when I first got my S3 about 1.5yrs ago, one of my early projects was a Honda badge for my steering wheel (this is ~2in wide x 1.6in tall):
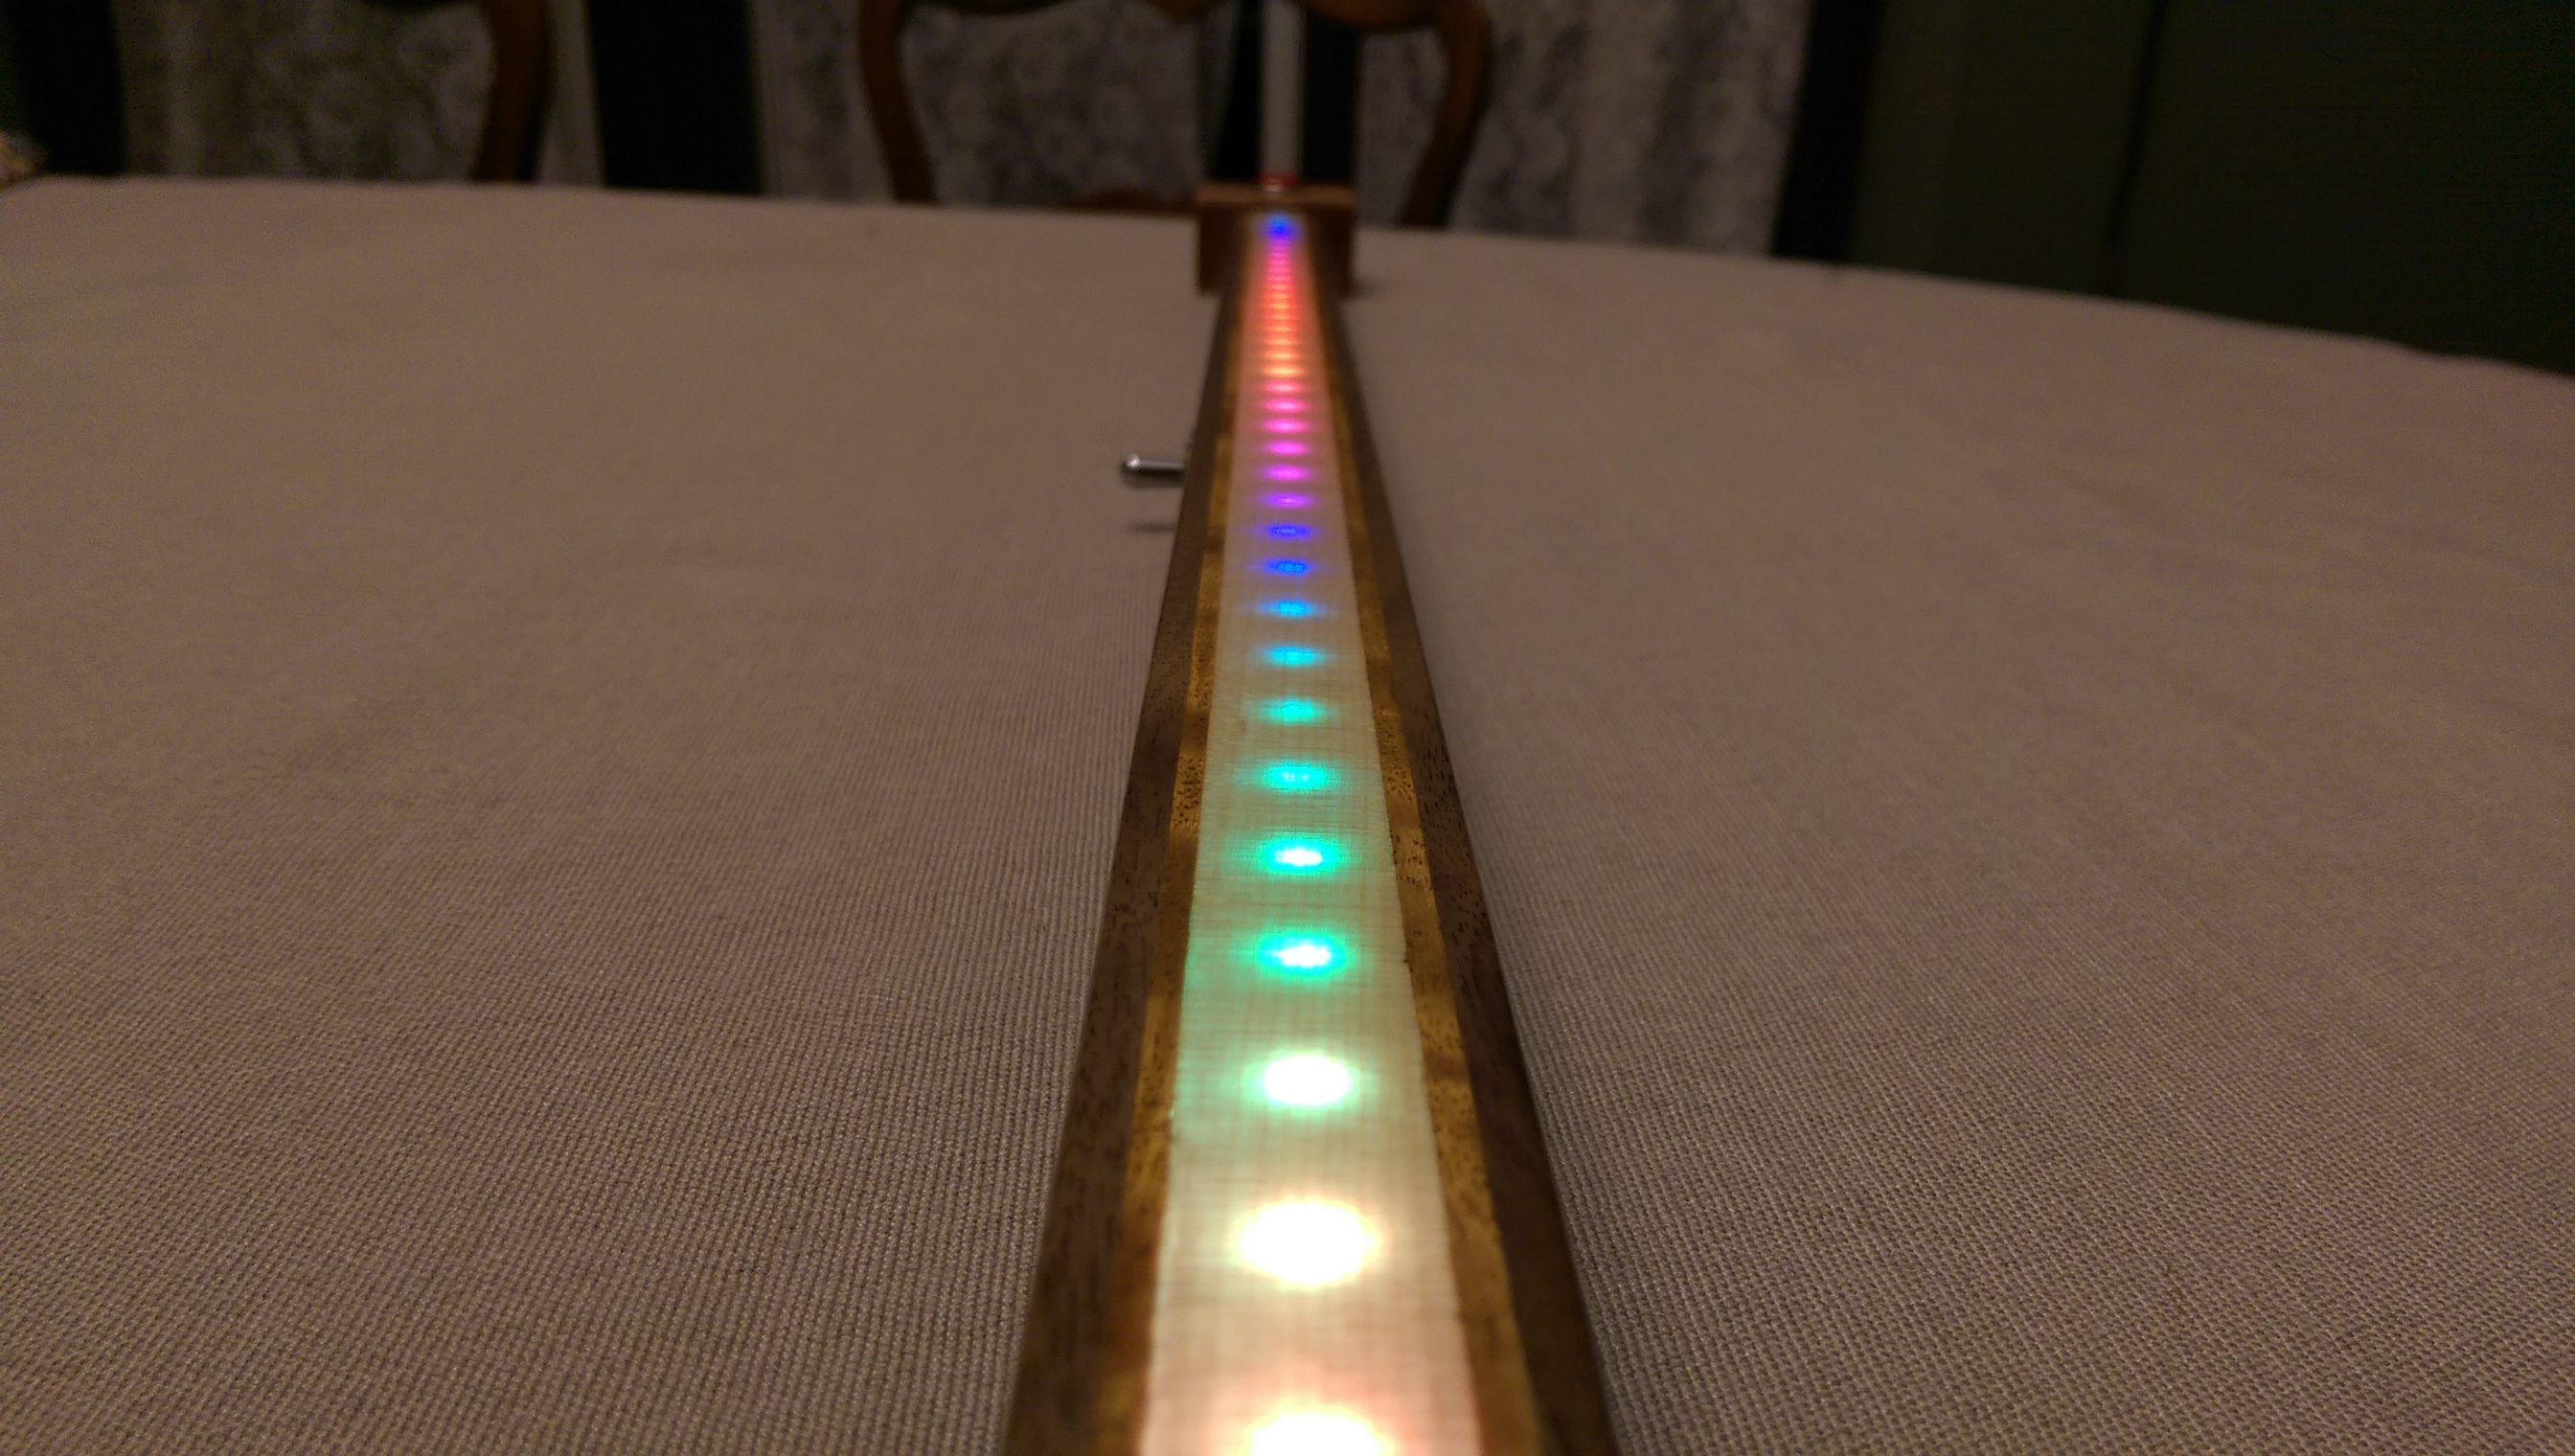
Long ago, I was inspired by this 1D pong creation and made my own for my nephew. Early in the build, I wondered “could you make wood thin enough that it looks like wood normally, but would let light through it?” Turns out, yes, yes you can:
So, I present the brain child of these two concepts: a gorgeous, wood-by-day, eyecatcher-by-night Honda badge:
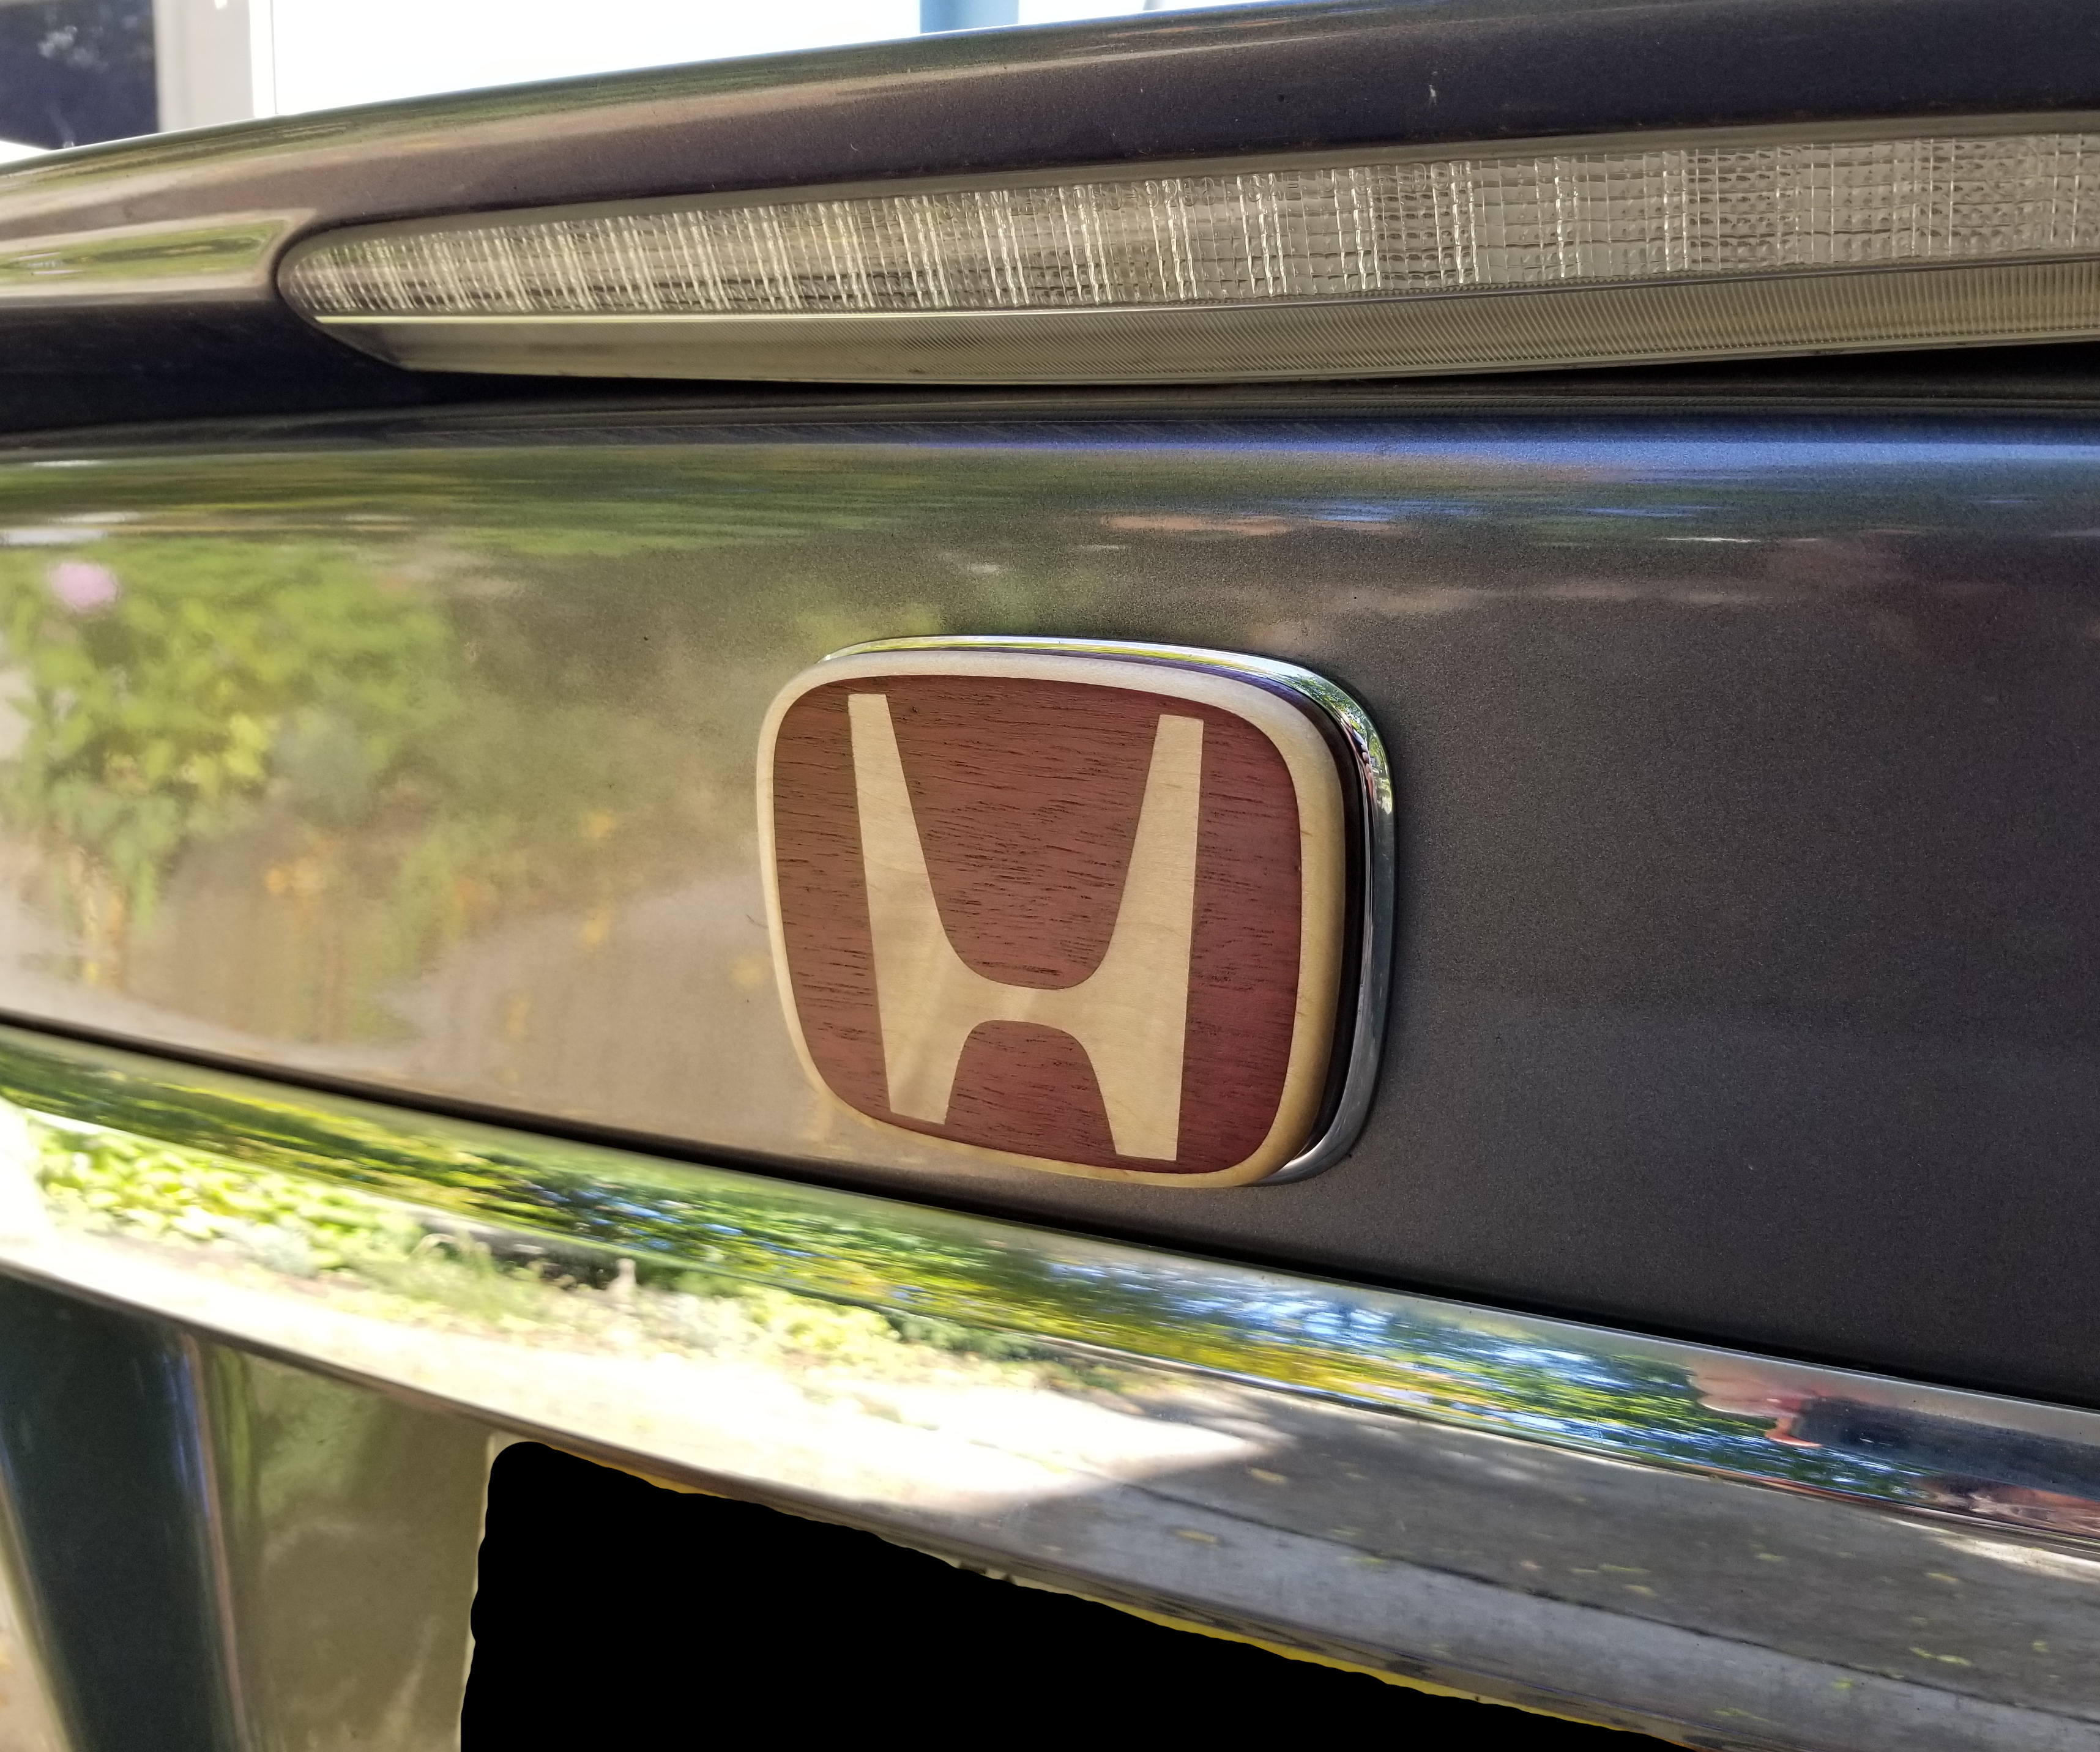
Just a regular 'ol purpleheart and maple Honda badge?
Or is it?
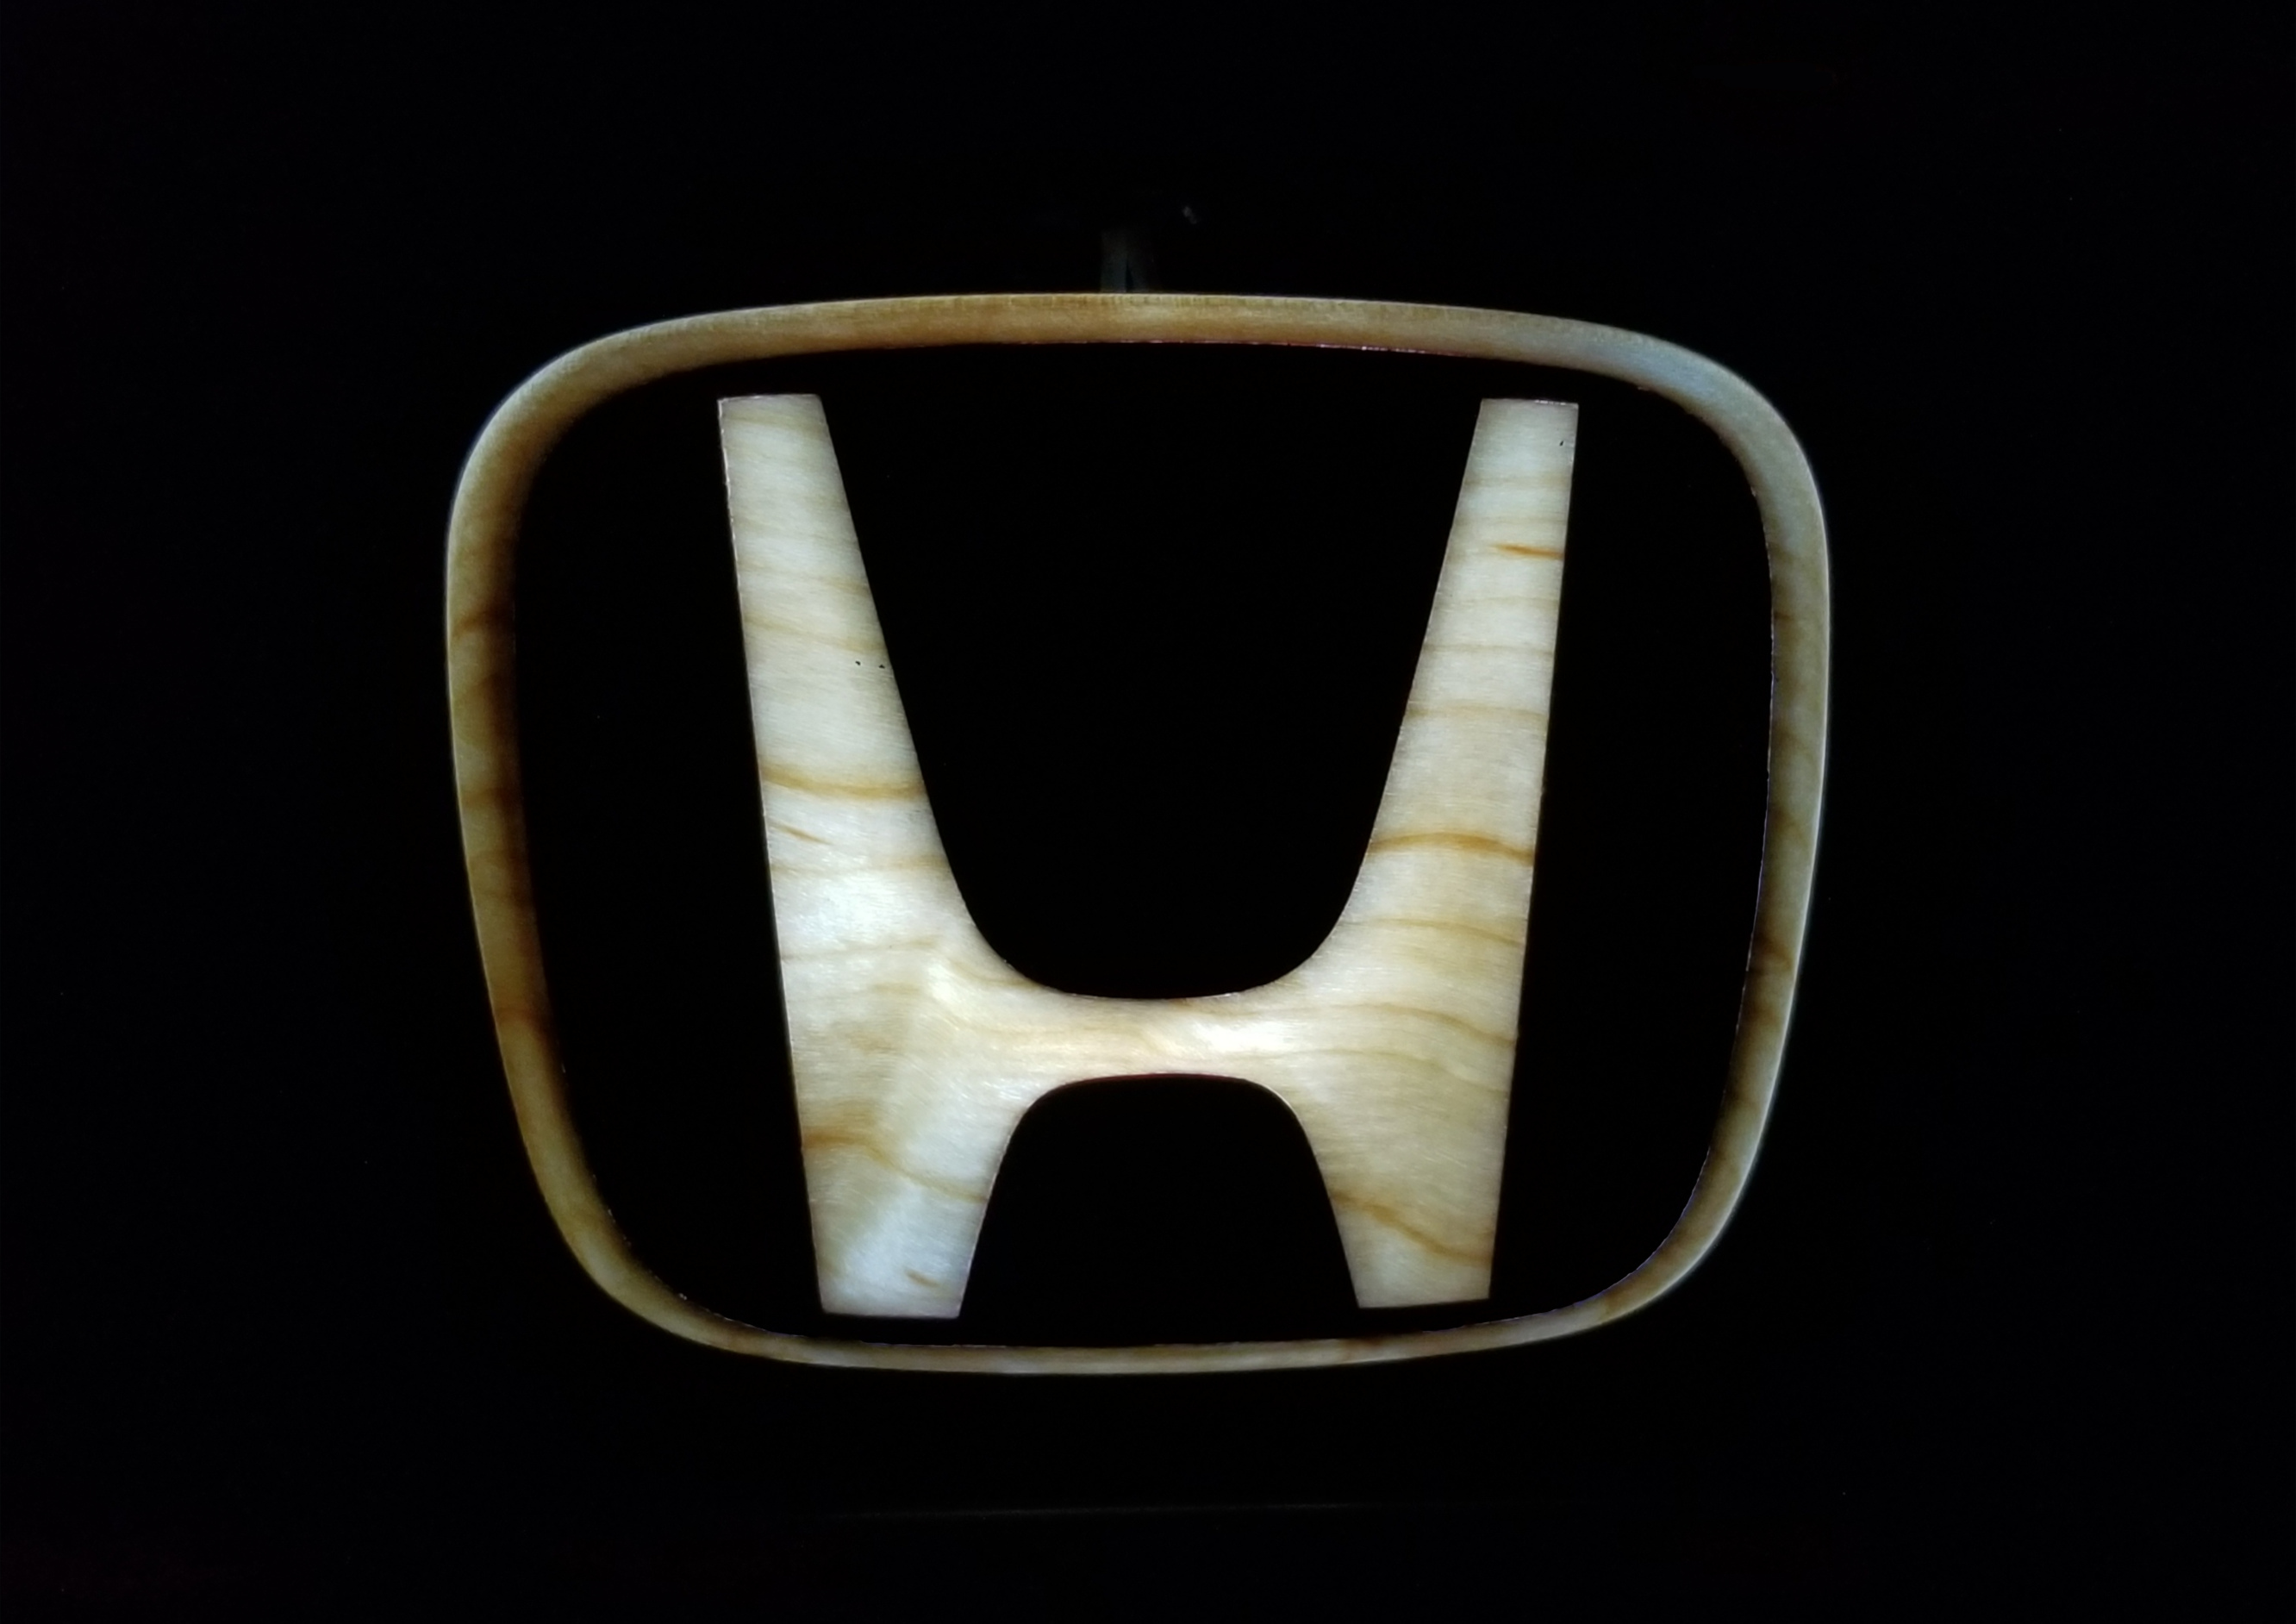
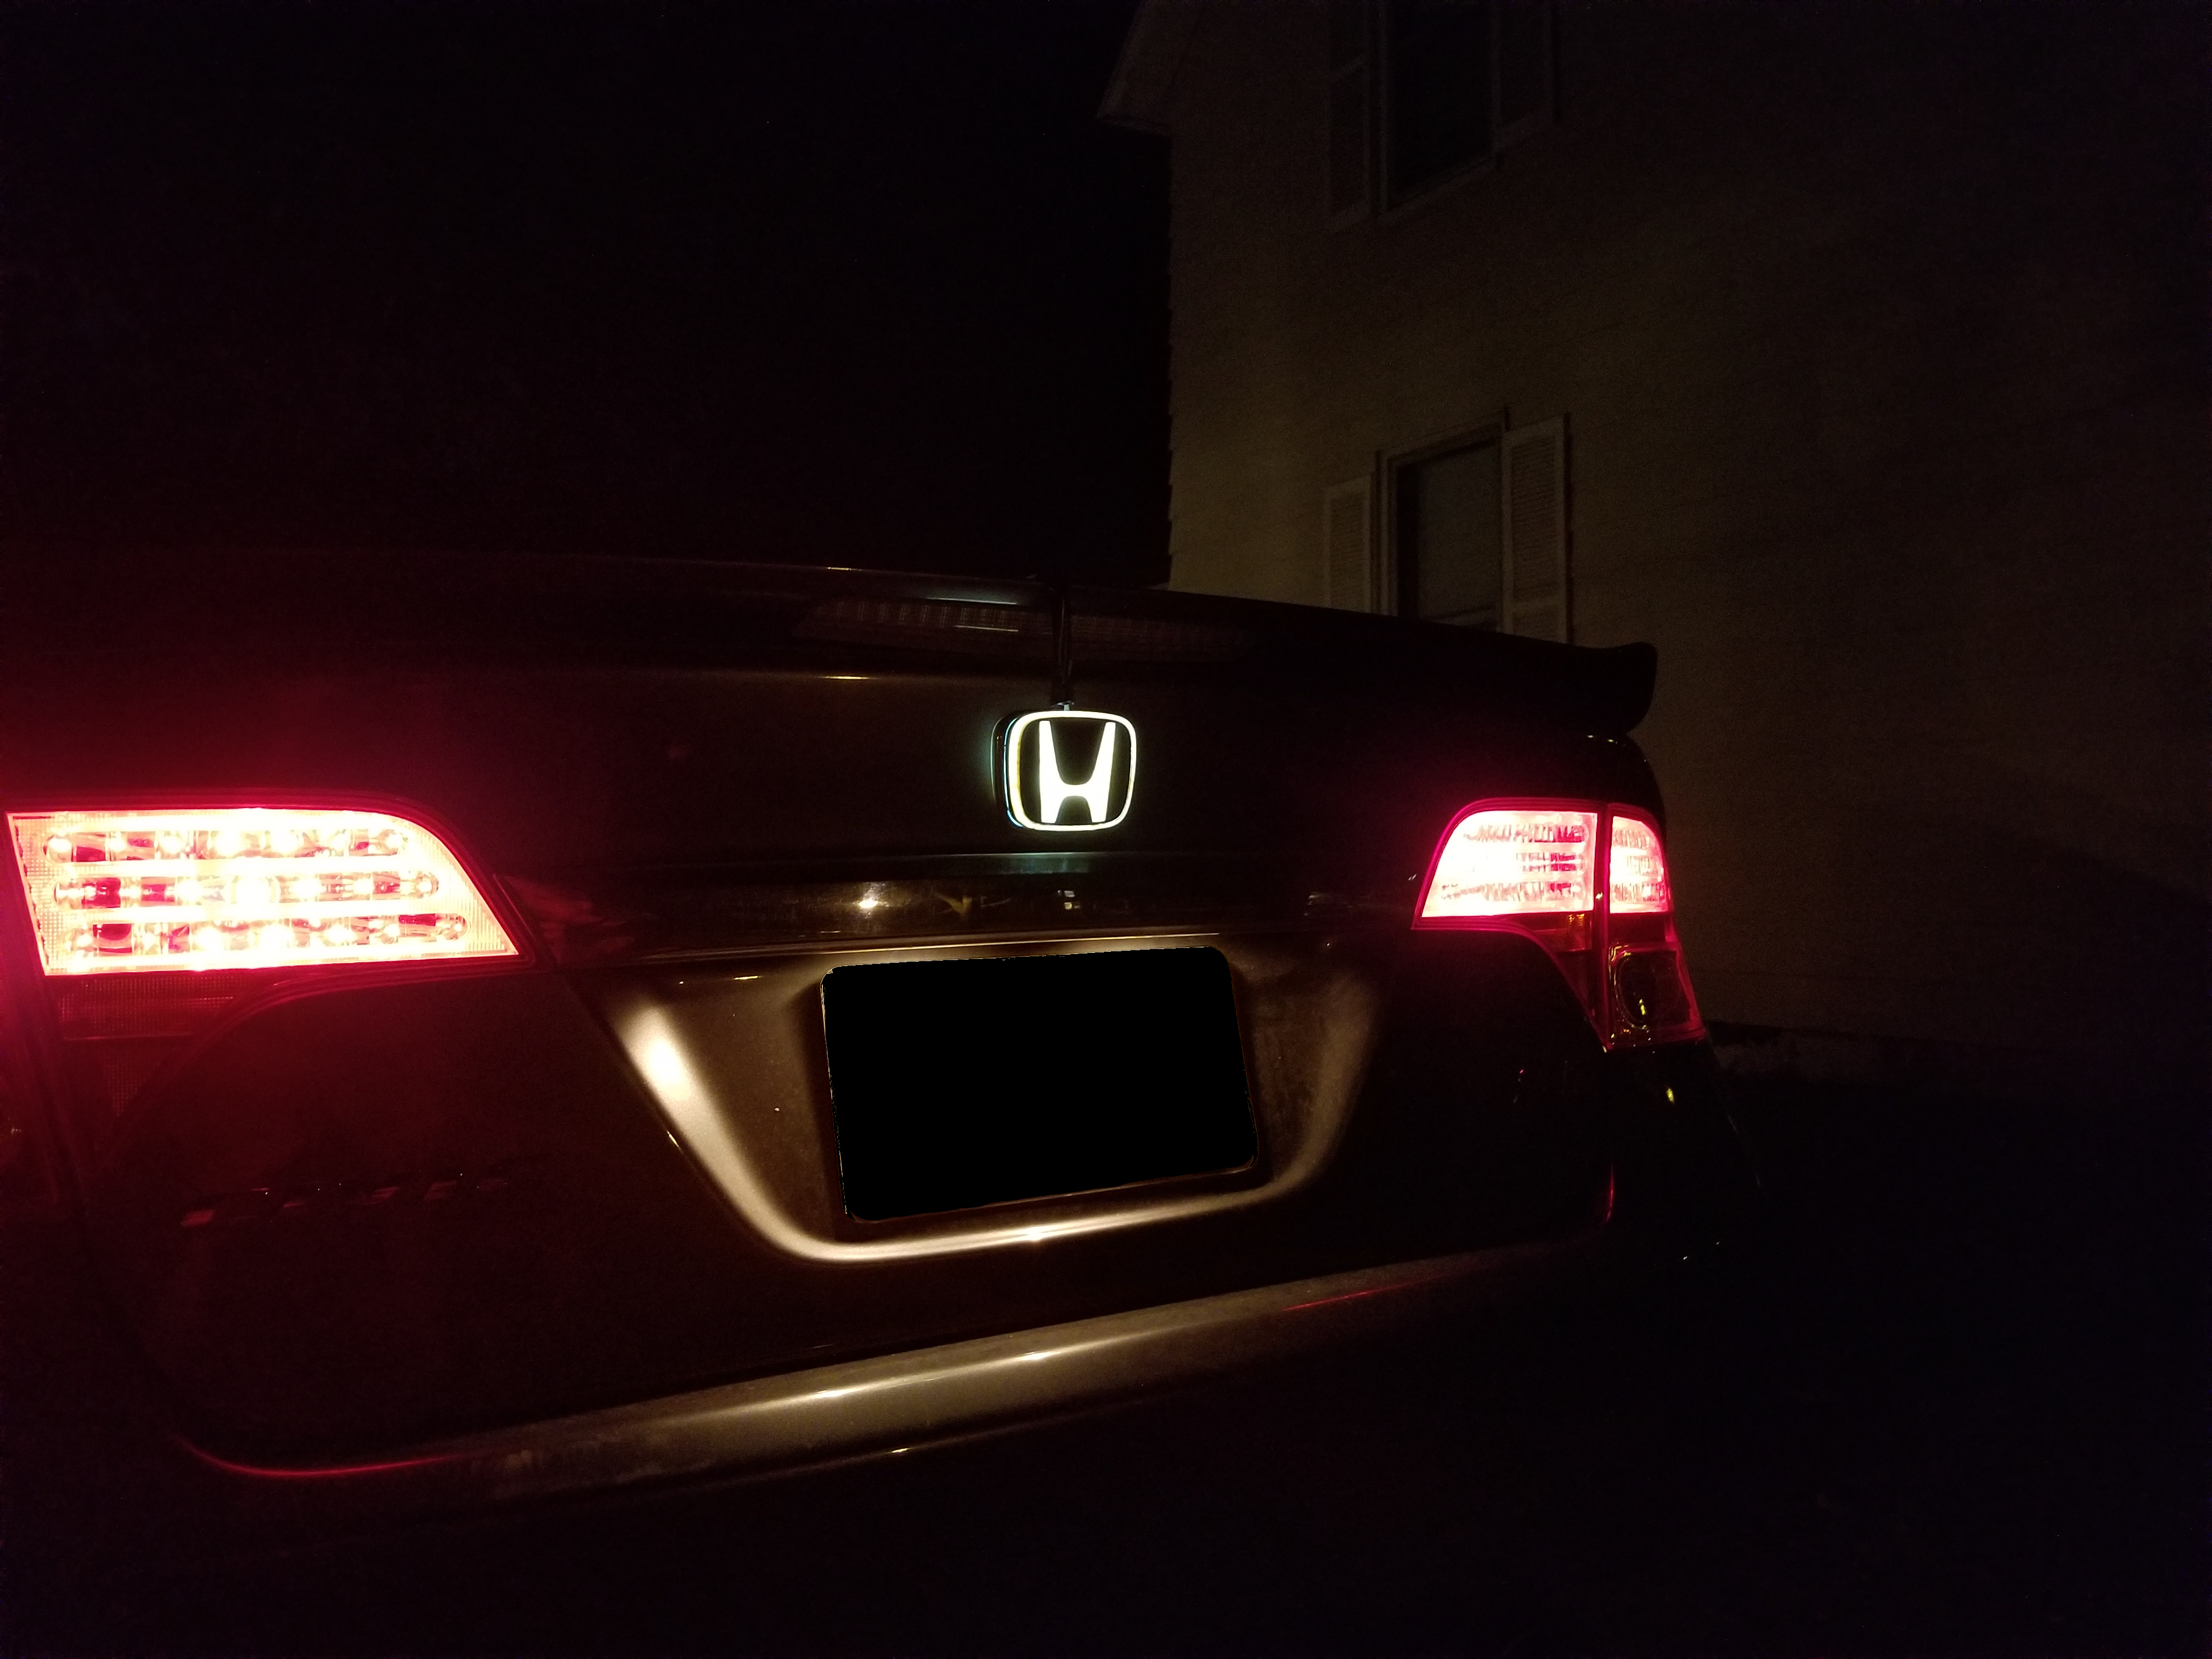
I was going to actually install this, but a) ran out of time as I’m leaving to go camping in ~1hr in northern MN and b) think I learned enough to make some tweaks for a final version. In these mockups, the badge is just taped to my current badge, but the nighttime demo really is hooked into my tail lights, which was my goal in using a 12V LED for the light source (it’s a dome light retrofit)!
Here’s proof, with my son locking/unlocking my car to show it off 
I’ve never done one of these contests before and don’t know the appetite folks have for gory details, so I put the full log of annotated build pics on imgur for those interested.
For the quick and dirty, the badge is a wooden shell, backfilled with epoxy. I used a small amount of white pearl powder to make the epoxy diffuse just behind the H and ring. Then I lined the entire thing with mirror film to give me the best shot of getting the light bouncing around from a point source to evenly illuminate everything.

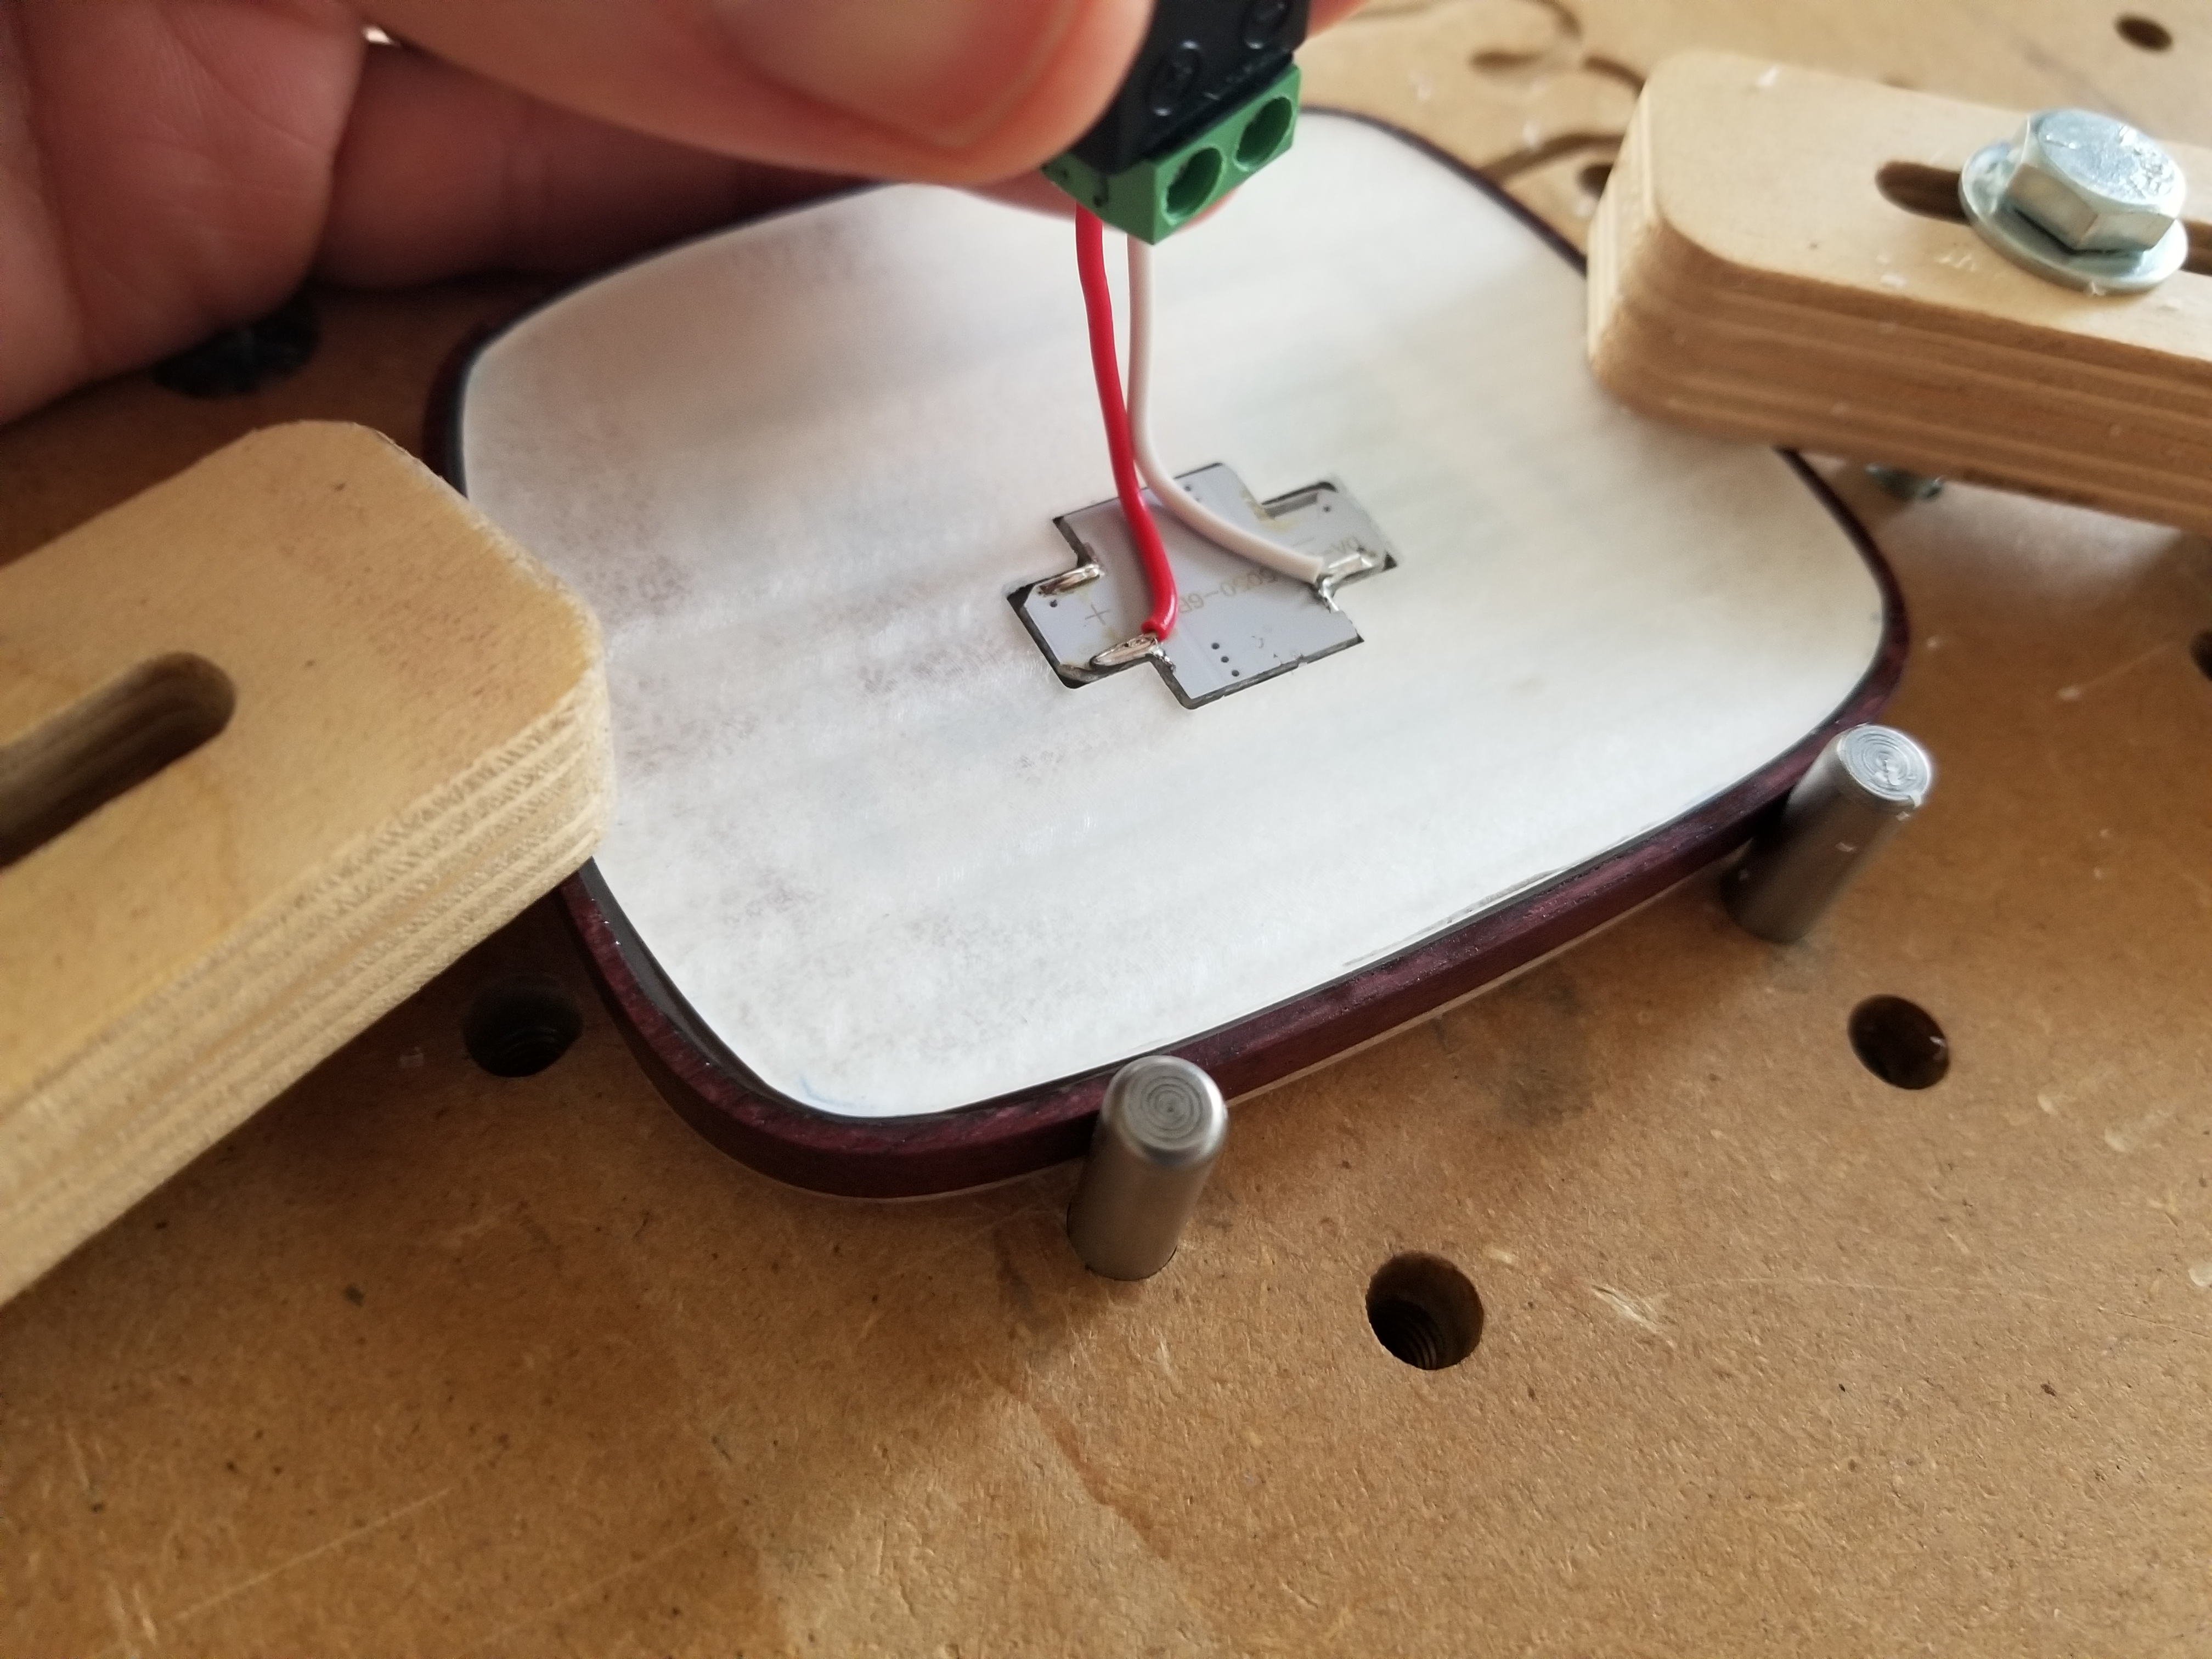
I machined a backplate from acrylic for the back, which is also lined with mirror film, and then machined a pocket for my LED light (mirror film is down in this pic, you’re seeing the machined back of the acrylic).
I learned a lot, and am happy to answer questions on what I’d do differently. I consider this version as exceeding my expectations (really did not expect it to look so darn cool at night, and though my light would be too weak and get dwarfed by the tail lights). That said, I have enough tweaks in mind that this will live on as a nightlight in my son’s room.

I hope to outfit the front/back with these one day, and I love that it matches my steering wheel emblem so nicely!
For a quick summary of some thoughts/lessons learned:
- I used curly maple which I thought was really pretty, but the swirling grain creates end-grain-like sections in certain places, which put some unusually bright spots in a few places. I’d use something more straight/consistent/dense grained (maybe just “normal” maple)
- I flipped the piece and was actually blown away by how consistent everything looked. Two pins is something I wanted to try on the last contest and man, it just worked great. I re-located a total of 3 times, expecting something to go wrong and it worked a treat
- I’d possibly round the corners of the positive inlay, as despite chiseling, I think those sharp H corners gave me woes
- now that I figured out how to diffuse the epoxy, I could have backfilled the whole thing in one shot. When I machined the top contour, there was only a 3mm layer against the H and ring. When I pried it up, the purpleheart “shell” shattered in a few places. I just about rage cried, but then just moved on to supergluing humpty dumpty back together
- I’d love feedback on my perhaps odd CAD/CAM method, where I have a few versions of the part in the same file. I would roll the design forward/backward depending on what I wanted to machine (for example a shell and cut to create the inlays, but later suppressing those to use them for the 3d contour and full-depth profile). Not sure what others do here, but changing the design isn’t great as I have to regenerate all paths after
- did my first loft in Fusion 360 to make that outer rounded contour. Using a radius would have rounded it in a way that didn’t match the outer logo ring, so I lofted the actual profiles together which I thought turned out cool
- I debated how to CNC the mirror film, possibly with a v bit, but ran out of time. Ideally I wouldn’t have a back plate at all. Thinking I’d embed the back mirror film in the final pour/float on top and machine right through it? Might also embed threaded receivers to hold the LED down while still being removable? Or drill/tap the LED? Point being, the back has room for improvement and I didn’t get to that final mile of optimization.
Here’s the project on cutrocket and another link to the full build pics in case it was missed above.
Disclaimer: I generally don’t know what I’m doing in CAM world, so I end up with pretty Frankenstein-ish models, setups and operations. If it’s in there, I probably used it at some point.
Final disclaimer: the legality of this is not clear to me. To the original post’s comment about sharing vectors… the no-nos appear to be representing something that’s not a Honda as a Honda by labeling/badging and/or selling it as though it’s made by Honda. I’m doing neither, and there’s plenty of precedent for aftermarket badges that I doubt are from Honda (like this and this). To play it safe: limit to your own car and don’t sell these.