I couldn’t be happier with the outcome of challenge #12, especially considering I had “jigsaw puzzles” in mind but wrote “puzzles”, which led to a much more diverse set of entries than I had imagined.
Moving on to challenge #13, this time the theme is: Lamps
A while ago I had a “lamp” phase and machined all sorts of prototypes, one of which happened to have an appropriate WAF and earned its place in the living room:
Hopefully you’ll have fun making something that is both interesting to machine and useful.
The rules for this 13th challenge are:
submit your entry in this thread:
the project must made on a Shapeoko or Nomad.
the project must match the lamp theme (when in doubt, PM me)
you can’t re-submit a project that already won a prize in an earlier challenge (very special rule for @neilferreri or he would probably win again with his awesome butterfly lamp )
you must include pics of the finished piece.
you must include the design file (so watch out for any licensed vectors you might use, that might not be shareable)
tell us about your mistakes, tips and tricks, etc…
posting your project to CutRocket will get you a +2 bonus on the vote tally.
you can post multiple entries if you want.
timeline:
deadline is set to Sept 27th, midnight PST (= ~3 weeks incl. 3 week-ends)
there will then be 7 days for voting.
voting will be open to legit community members only, and the jury reserves the right to remove votes from “outsiders”, and will also break any tie.
If you’re a newbie, don’t hesitate to participate, remember there’s Jury’s prize up for grabs and that’s largely independent of the votes. Have fun machining (and shining a new light on the community challenge!)
Oh man. I actually thought I had posted this here before - it’s totally a lamp…glow-y…thing. IT COUNTS.
I did post to reddit at least…
Cue flashback time-y wime-y shimmer! WooOooOOoOoOoo
…
[it’s a month after Christmas and I still had failed to give my best friend a gift…]
…
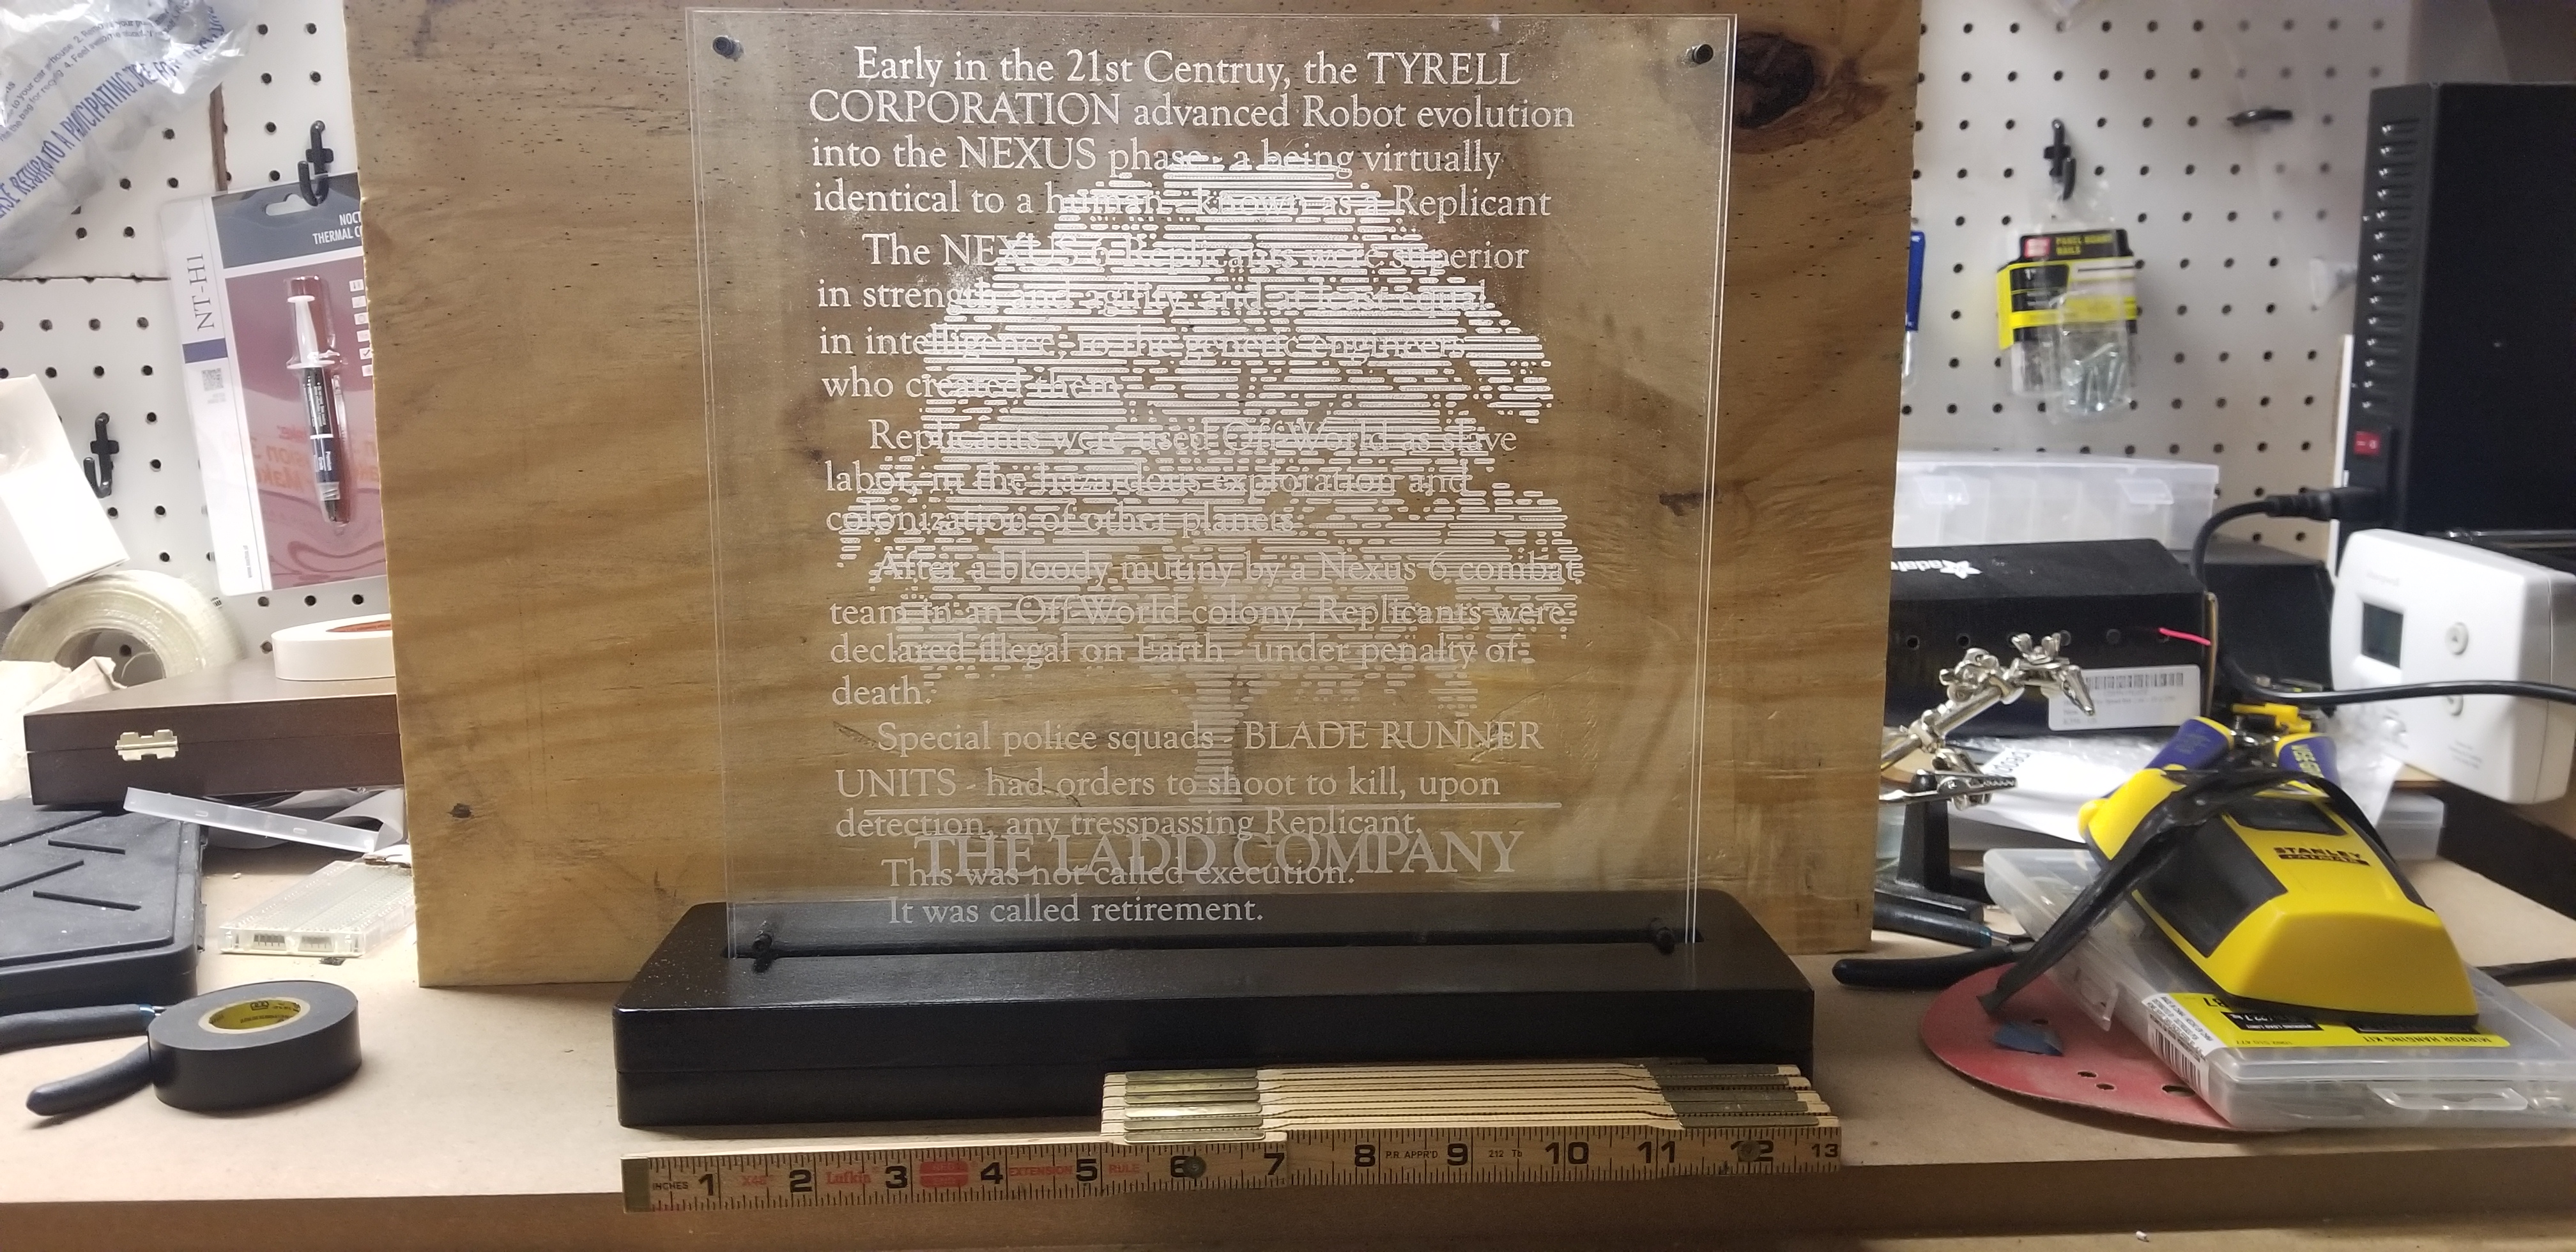
Every year, a friend and I exchange themed Christmas gifts. In an attempt to actually MAKE the gift this year, I wanted to try to make some art. The theme was iconic movie intros and since one of my friend’s favorite movies is Blade Runner, why not go with the production company logo and the introductory crawl.
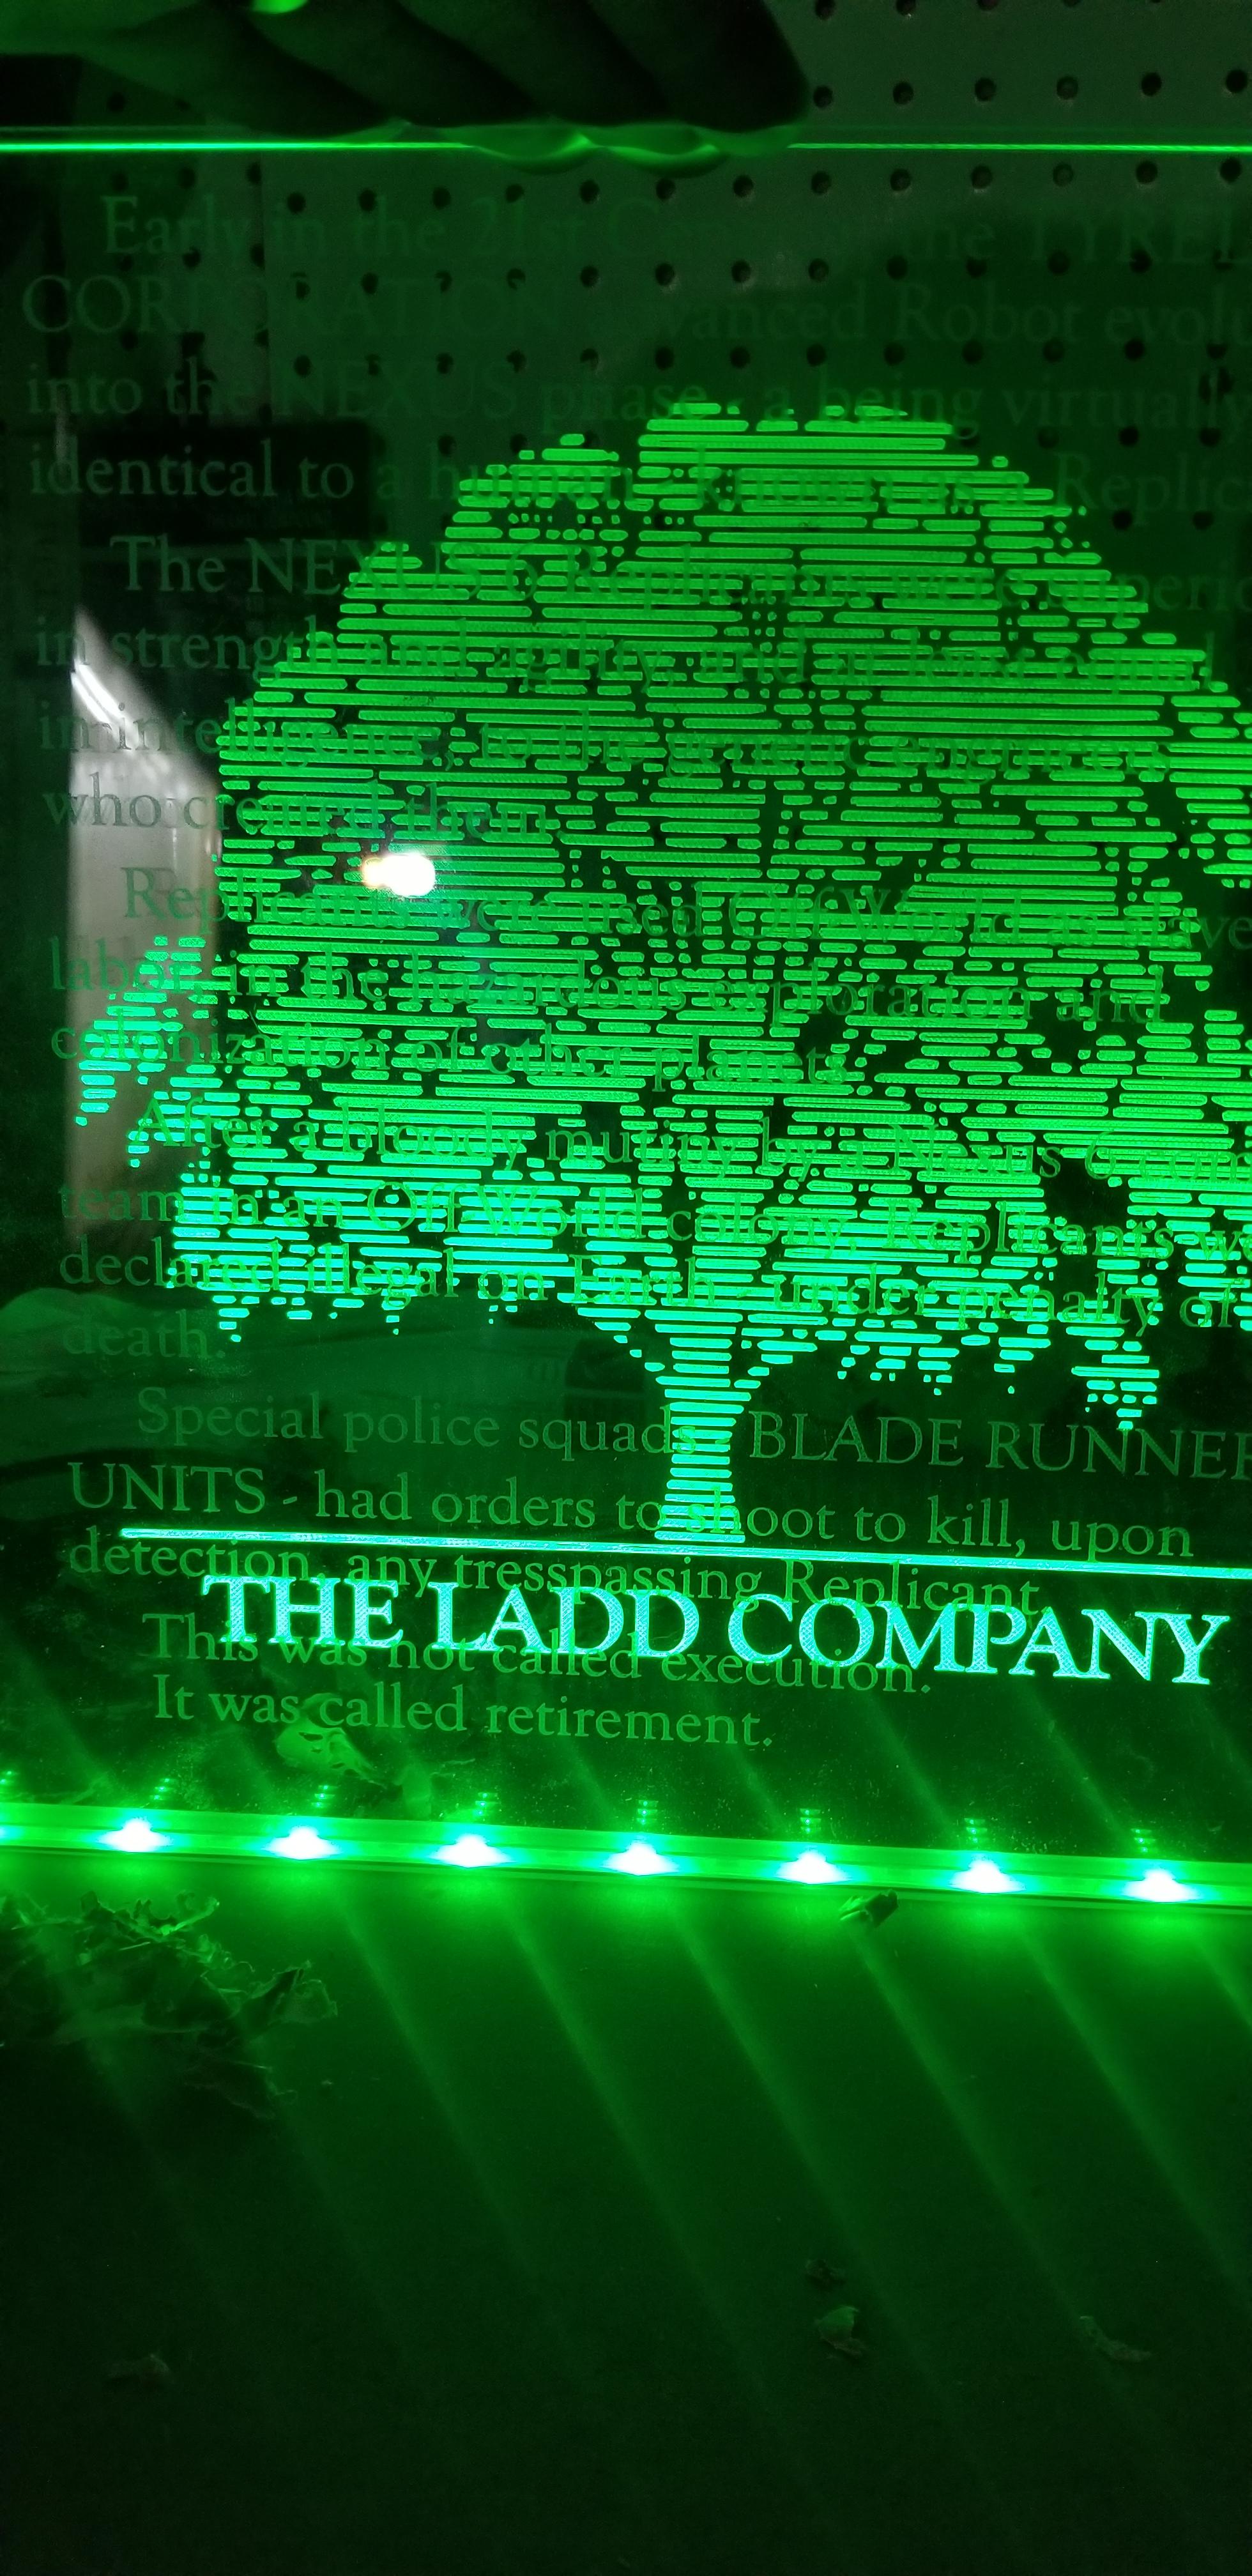
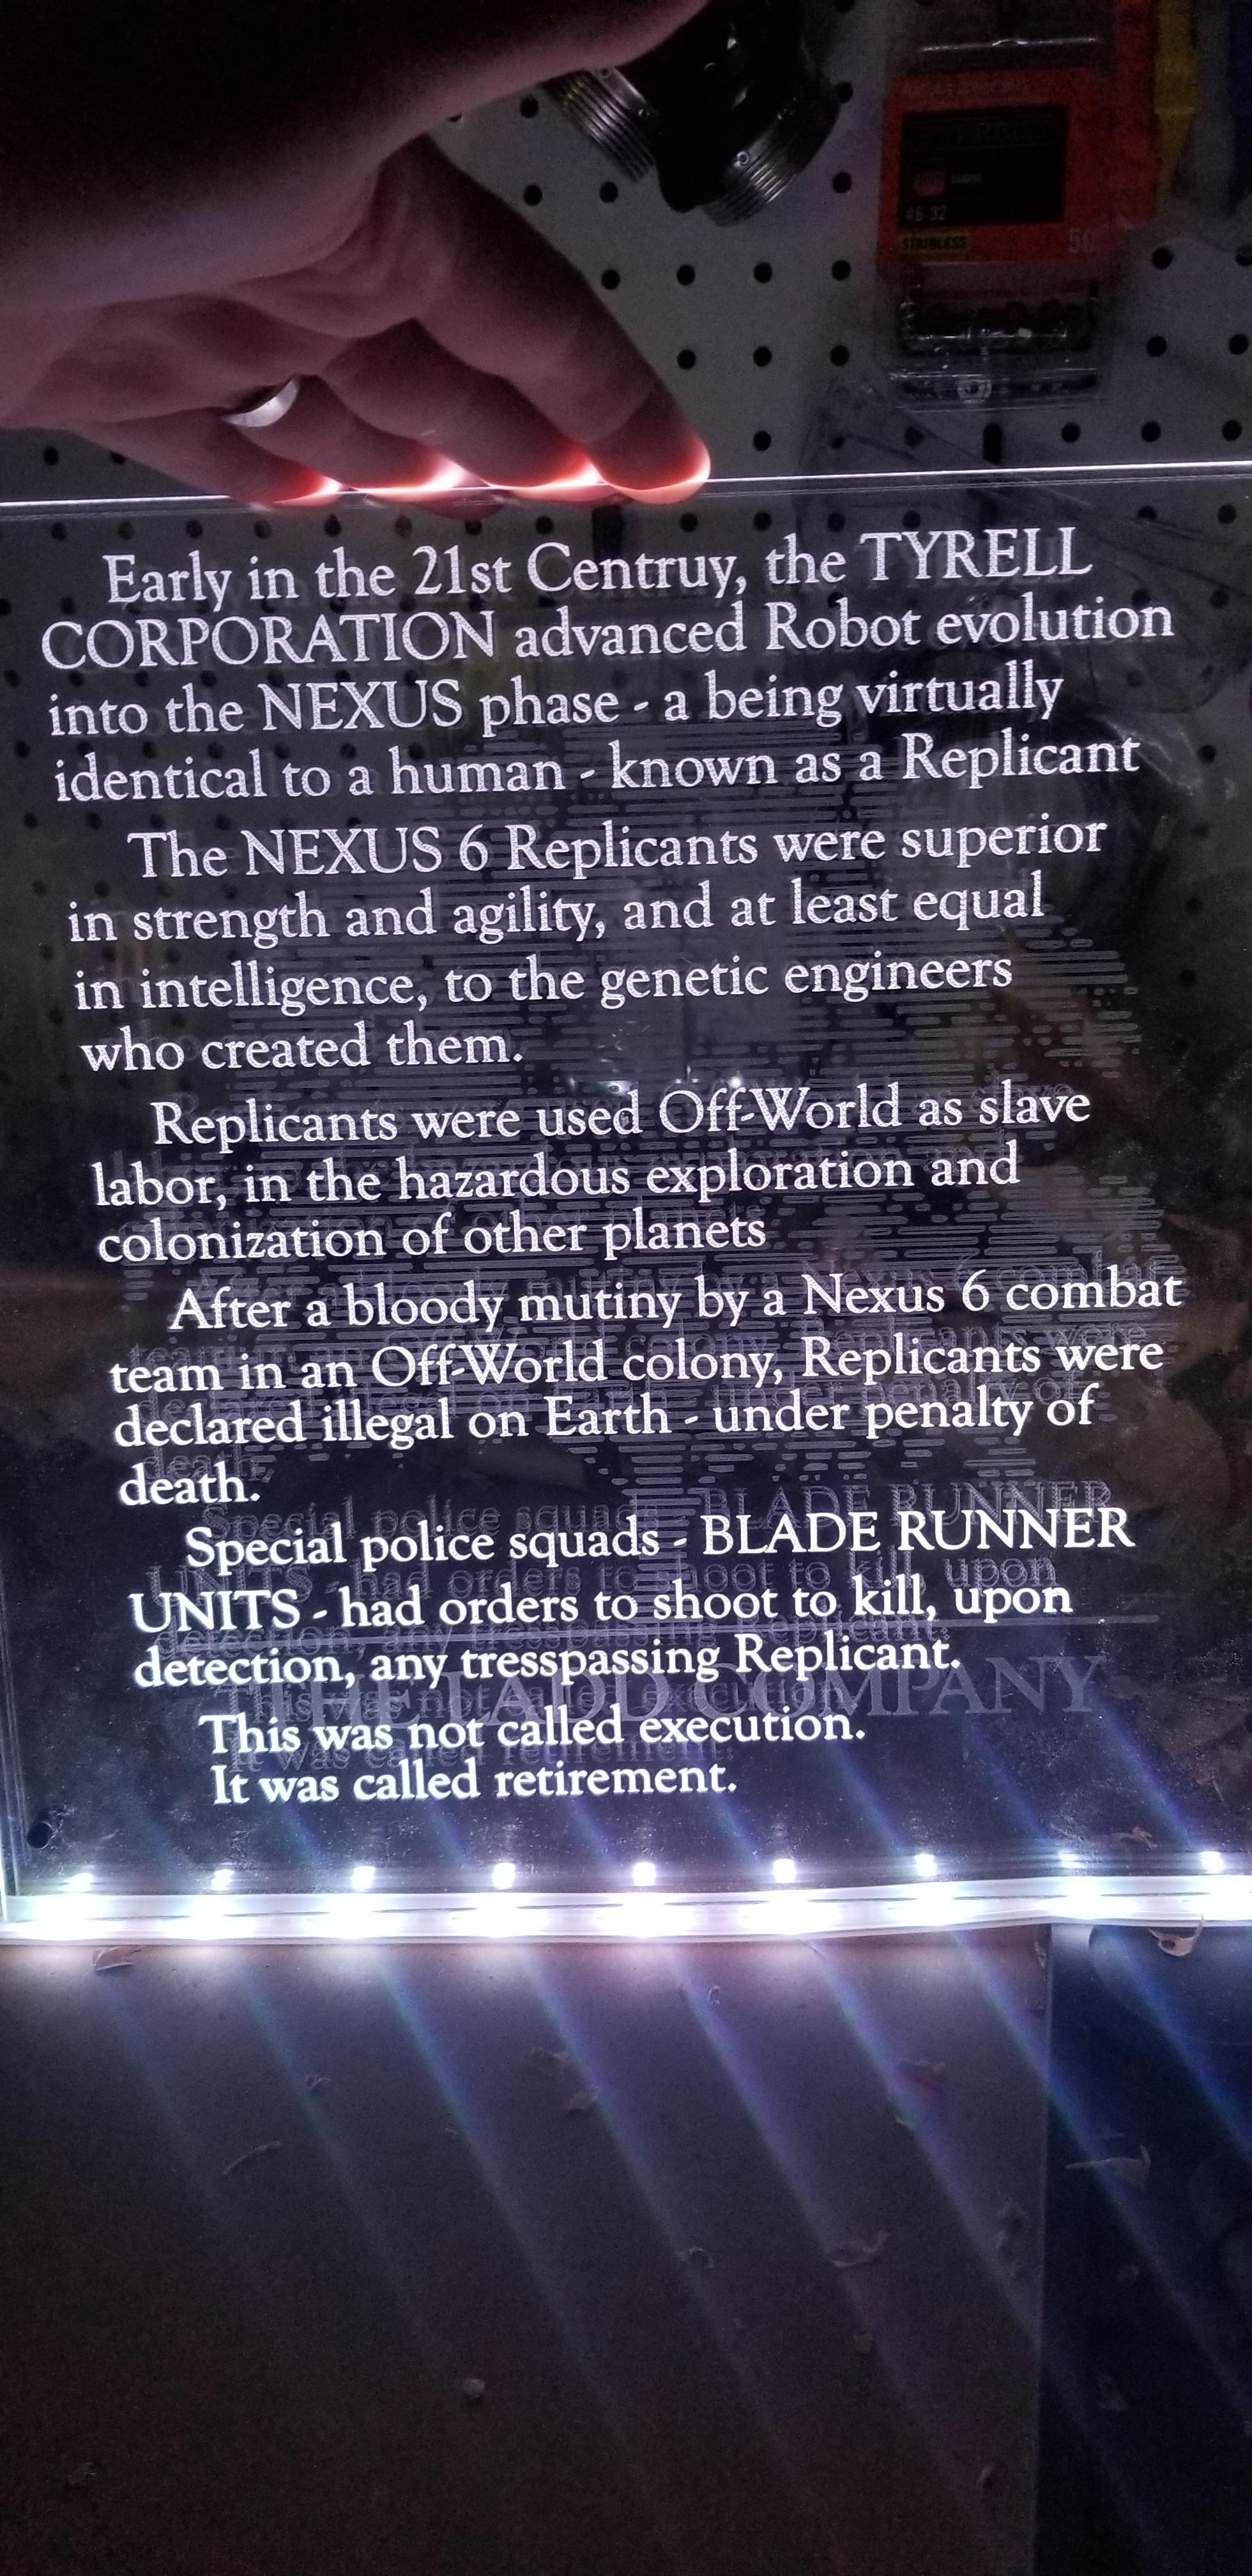
This is a two panel effect that phases back and forth. The Ladd Company Logo is a bright green tree image and the text is white. Technically, I should have additional panels for the red text that is supposed to be present, but… I need to work on keeping complexity down.
Part list:
12" x 12" 6mm cast acrylic - Professional Plastics Co. (x2)
Metro Mini microcontroller - Adafruit (x1)
30 Led NeoPixel - Adafruit (1 meter, only 18 LEDs used)
4700 uF capacitor - Adafruit (x2)
470 ohm resistor - junk box (x1)
Red, Black, Green hook-up wire 22AWG - somewhere (maybe 1’ each)
Female DC Power adapter
MDF or other 15" x 5" x 0 . 75" wood stock - scrap pile (2x)
Satin Black spray paint - craft store (enough for 3-ish coats)
M3x16 bolt (x4)
M3 nut (x12… I used them as spacers. Sue me.)
Electrical tape (to snug the slot up after sanding too much)
5V 2A power supply
Also, I picked up a DDE from ebay for like $30usd and relied on standard 1/4" and 1/8" endmills from C3D.
The acrylic panels sit roughly 0.75" into the base. After assembly, I realized that I should have either accounted for more of the panel sitting inside the base or more supporting material inside the base - as of now, it is almost a pencil case… Additionally, the bolts were meant to sit in some notches on either side. Somehow I messed up my measurements when doing the CAD so it’s off by a slight bit… Hence the slight tilt.
The base ends up 14" long by 4" wide and just under 1.5" tall (more like 1.375" due to the lip that was cut into the top and bottom to help join the halves up). Since the acrylic is so tall, I thought the wide base would be necessary.
I was really impressed with how well this lit up on the NeoPixels. Before I had removed the protective paper fully, it was surprisingly dim. The pseudo-digital effect of the tree really looks great. Speaking of that paper, it’s really not fun to peel off of small details. It comes off fine, but it is very time consuming.
Like I said, I had originally bought third and fourth panels to do the red highlights for “The LADD Company” and the various keywords in the crawl, but… I’m behind schedule enough.
You’ll notice some light pulses - I had attempted to set some pseudo old-school computer screen flicker via the arduino and it mostly works, but my refresh rates being what they are…it doesn’t get picked up well. More sleep would probably help.
I used a combo of CC and Vectric Aspire here. Thankfully I had a colleague at work that let me use their computer for the Aspire access. Quick Engrave made the acrylic stupidly easy. Sadly, I didn’t bother to optimize ANY of the toolpaths so each panel took a long time… My notes say 16 and 20 hours which… don’t just blindly select a large image or set of paths and expect them to be quick.
The base was designed with CC - very simple friction-fit box. Like I said, think pencil case. Speaking of which, you’ll notice a lack of pictures for the interior… I’m slightly embarrassed by how absolute trash the interior is. I missed a measurement and ended up needing to put a lot of filler in to support the panel - enter scraps of peg board, hot glue, and electrical tape! He’s never gonna look inside, right?
So some of the files exceed the 4MB limit (the text crawl oddly…) so head over to gitlab. Because.
*NOTE: Logo came from wikipedia and I bitmap traced it / cleaned it up. I don’t know know if that lets me share it still though. @Julien - can you advise?
Anyway… Everything was finished up with a hefty coating of black satin spray paint which was clearly to protect the base and totally not disguise the fact that it was MDF.
You need to check the fine print, if it’s from wikipedia it’s probably released under a flavor of a Creative Commons license, with the acronyms (e.g. BY, SA, NC, etc…) telling you what you can and cannot do.
Nice DDB work, and yeah since it emits light it counts (gotta draw the line somewhere, and that should be a simple criterion for everyone)
We never did “well there were three entries, so everybody wins!” so far, that would be refreshing and possibly allow someone with less experience to win (I’m looking at you, newbie lurker waiting for the perfect opportunity to shine with a first post that would also win the challenge!)
@Sherpa: looking forward to seeing what you are up to!
@nlichtenberg be careful what you wish for, you might just get it Do they do the local lockdown thing in Germany ?
I’ve been building this idea in my head for awhile now, community challenge #13 was just the push I needed to get started.
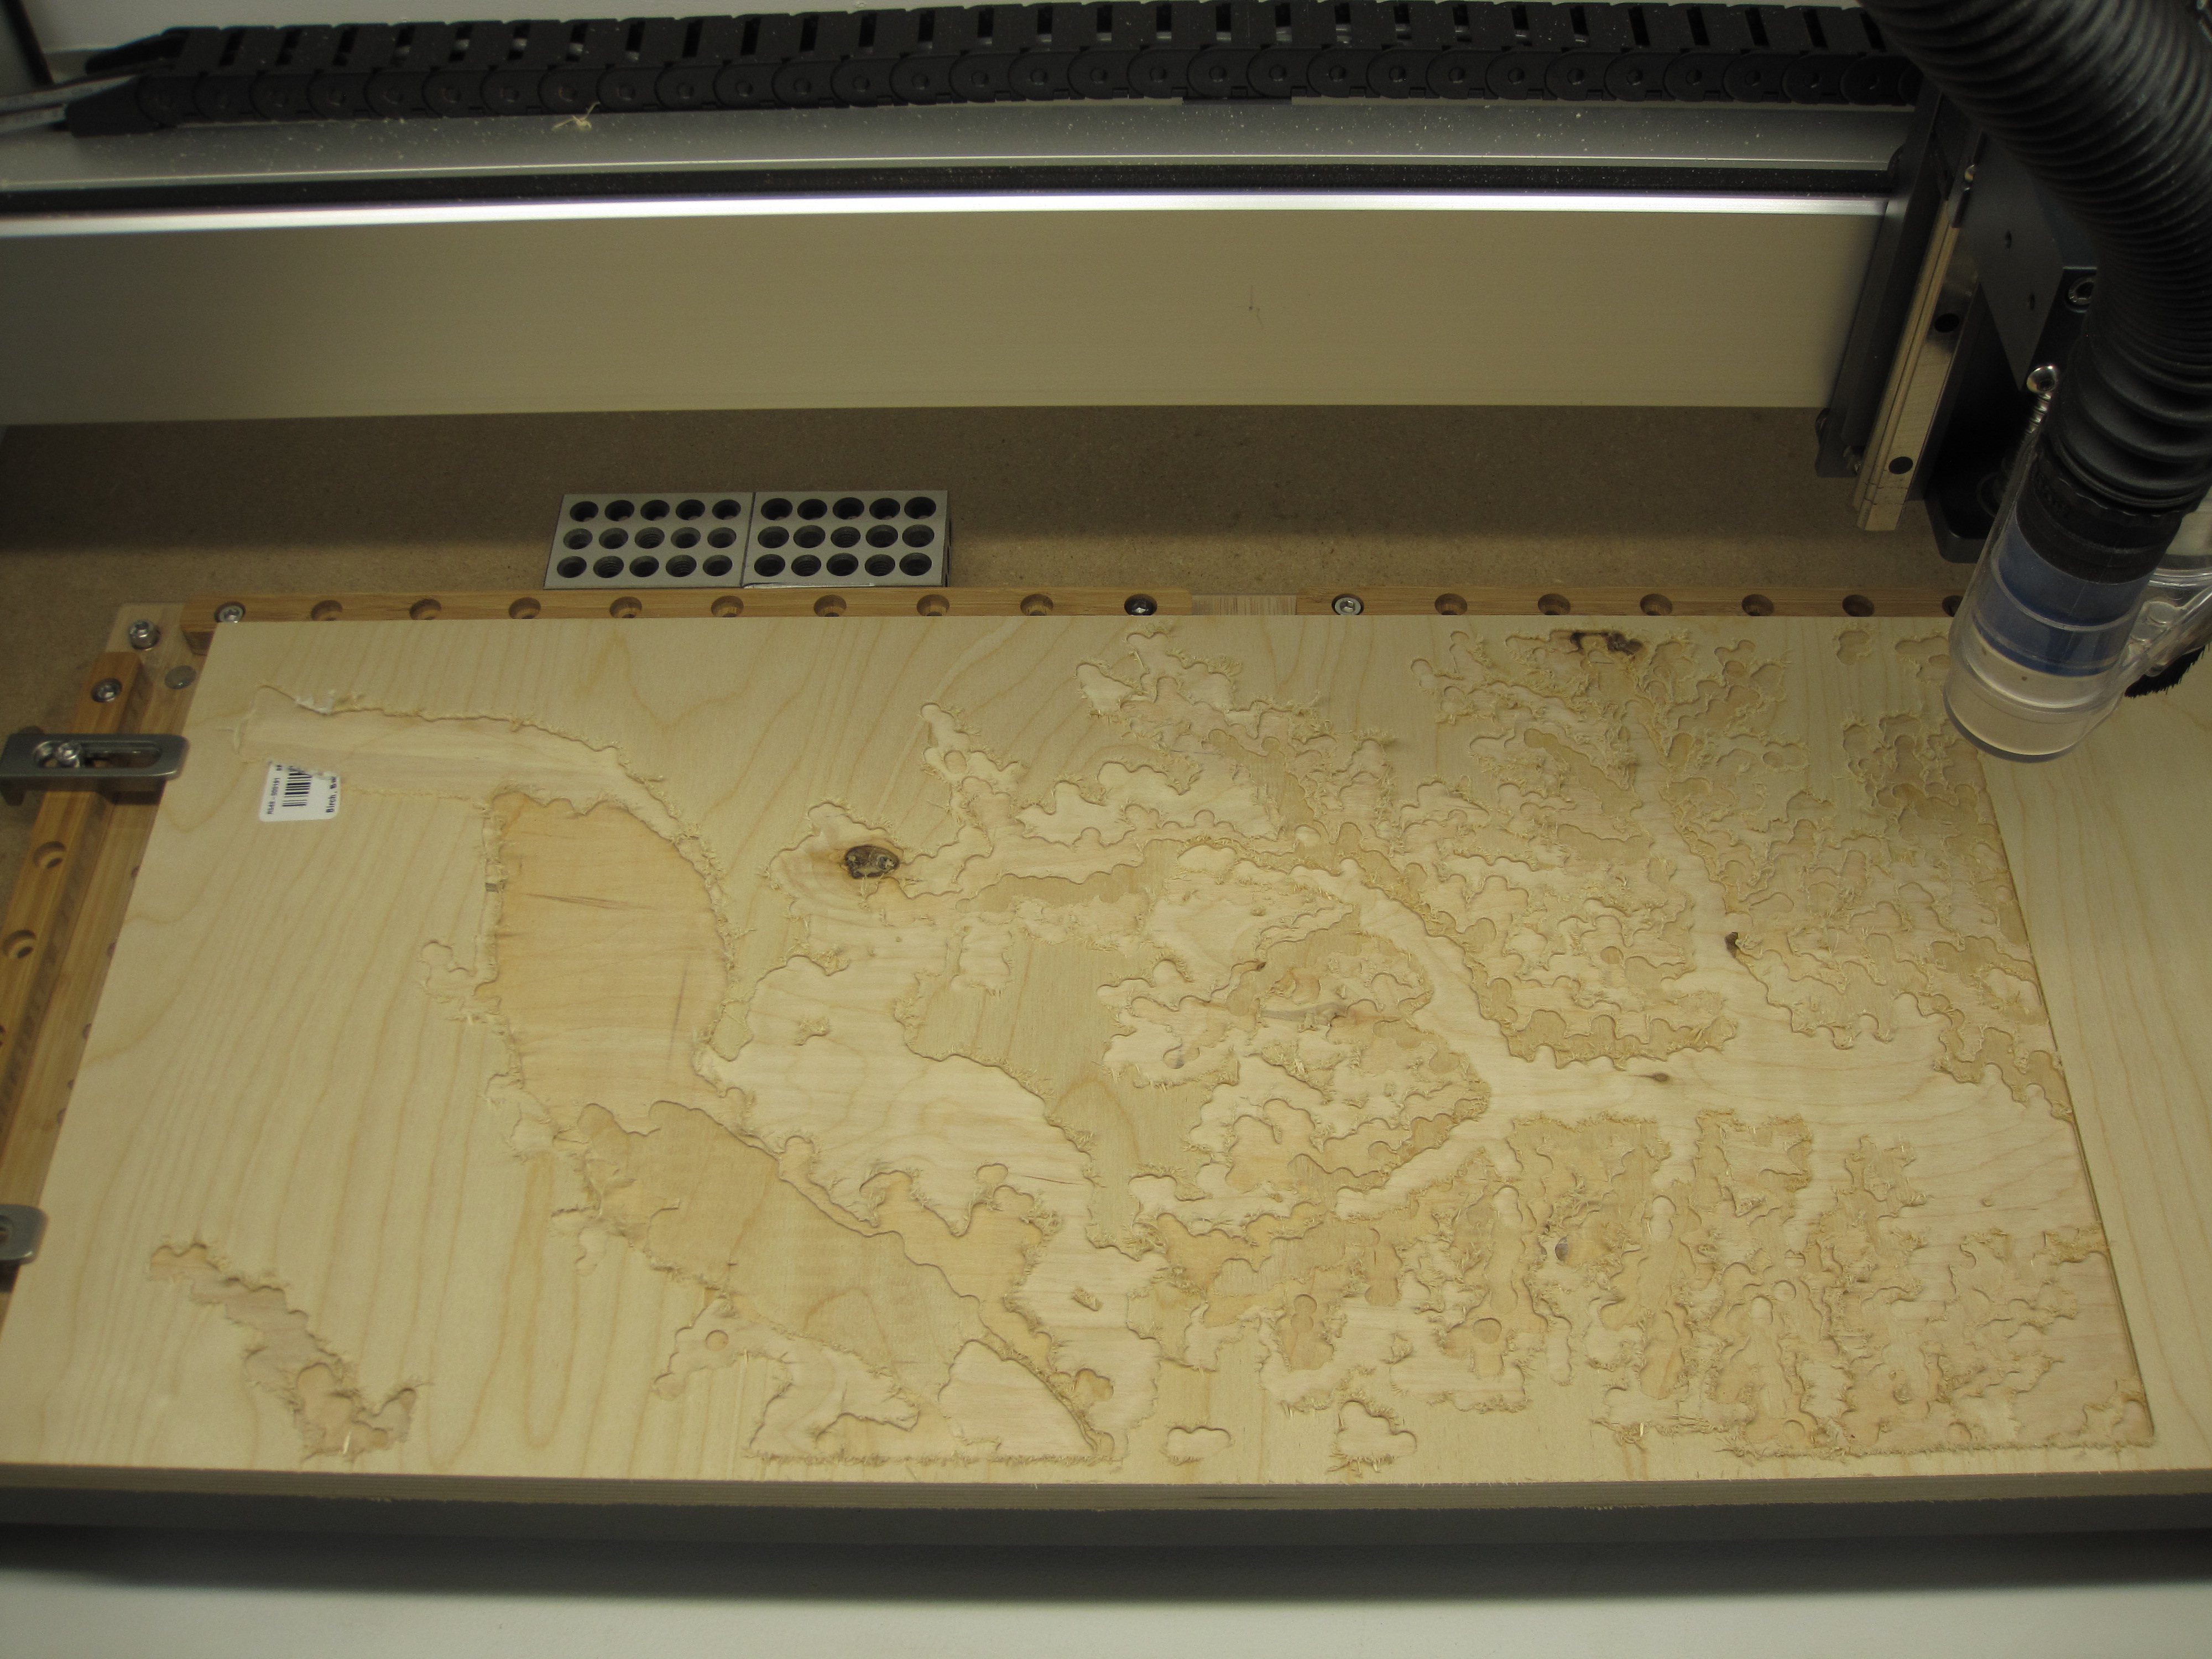
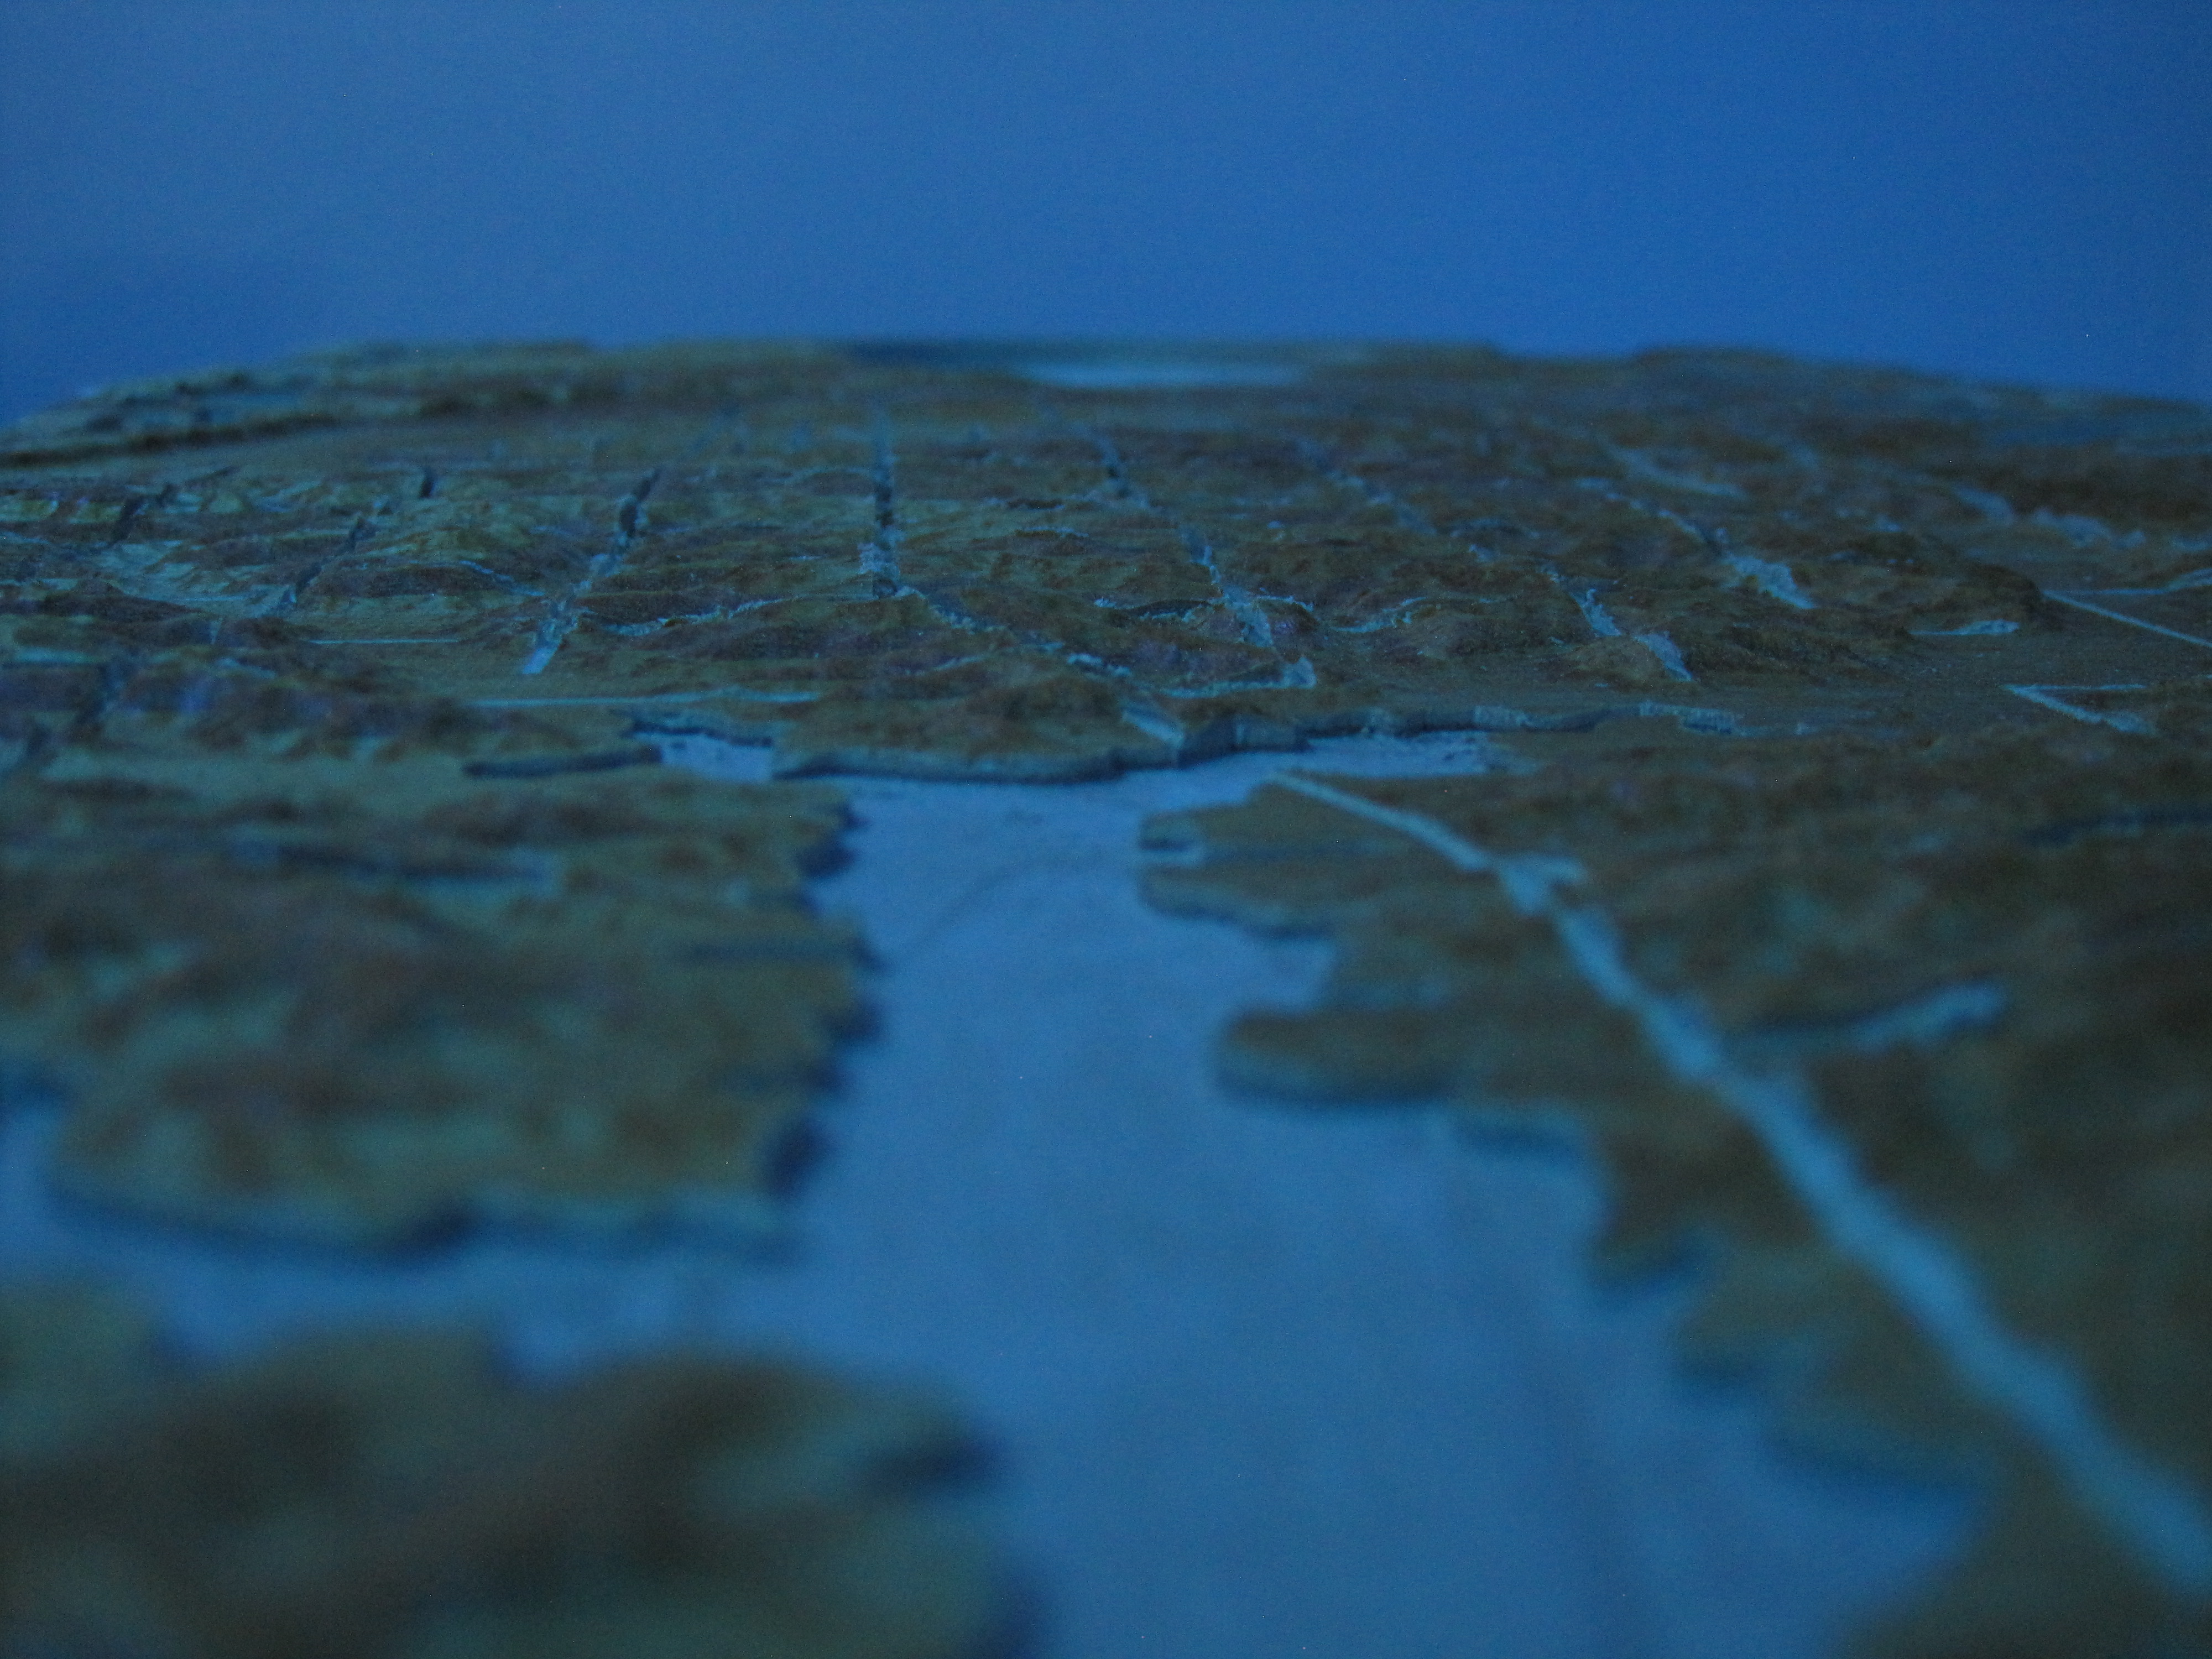
I live in Norman Oklahoma, and ever since seeing Carbide 3D’s demo on how to make a topographic 3D model I’ve had this idea to make a map of my home town.
I started with Tangrams Heatmap which gave me the elevation. I then had to overlay a roadmap of Norman to add the (major) streets. Funny fact, Oklahoma is pretty flat, and the Tangrams heatmap informed me the difference in the highest and lowest points of Norman Oklahoma is 60 feet.
Carbide Create was used to combine this information into a model.
I used the background image feature to put the street map on top of the heightmap. I then pathed each of the major streets (by hand) using the Polyline drawer.
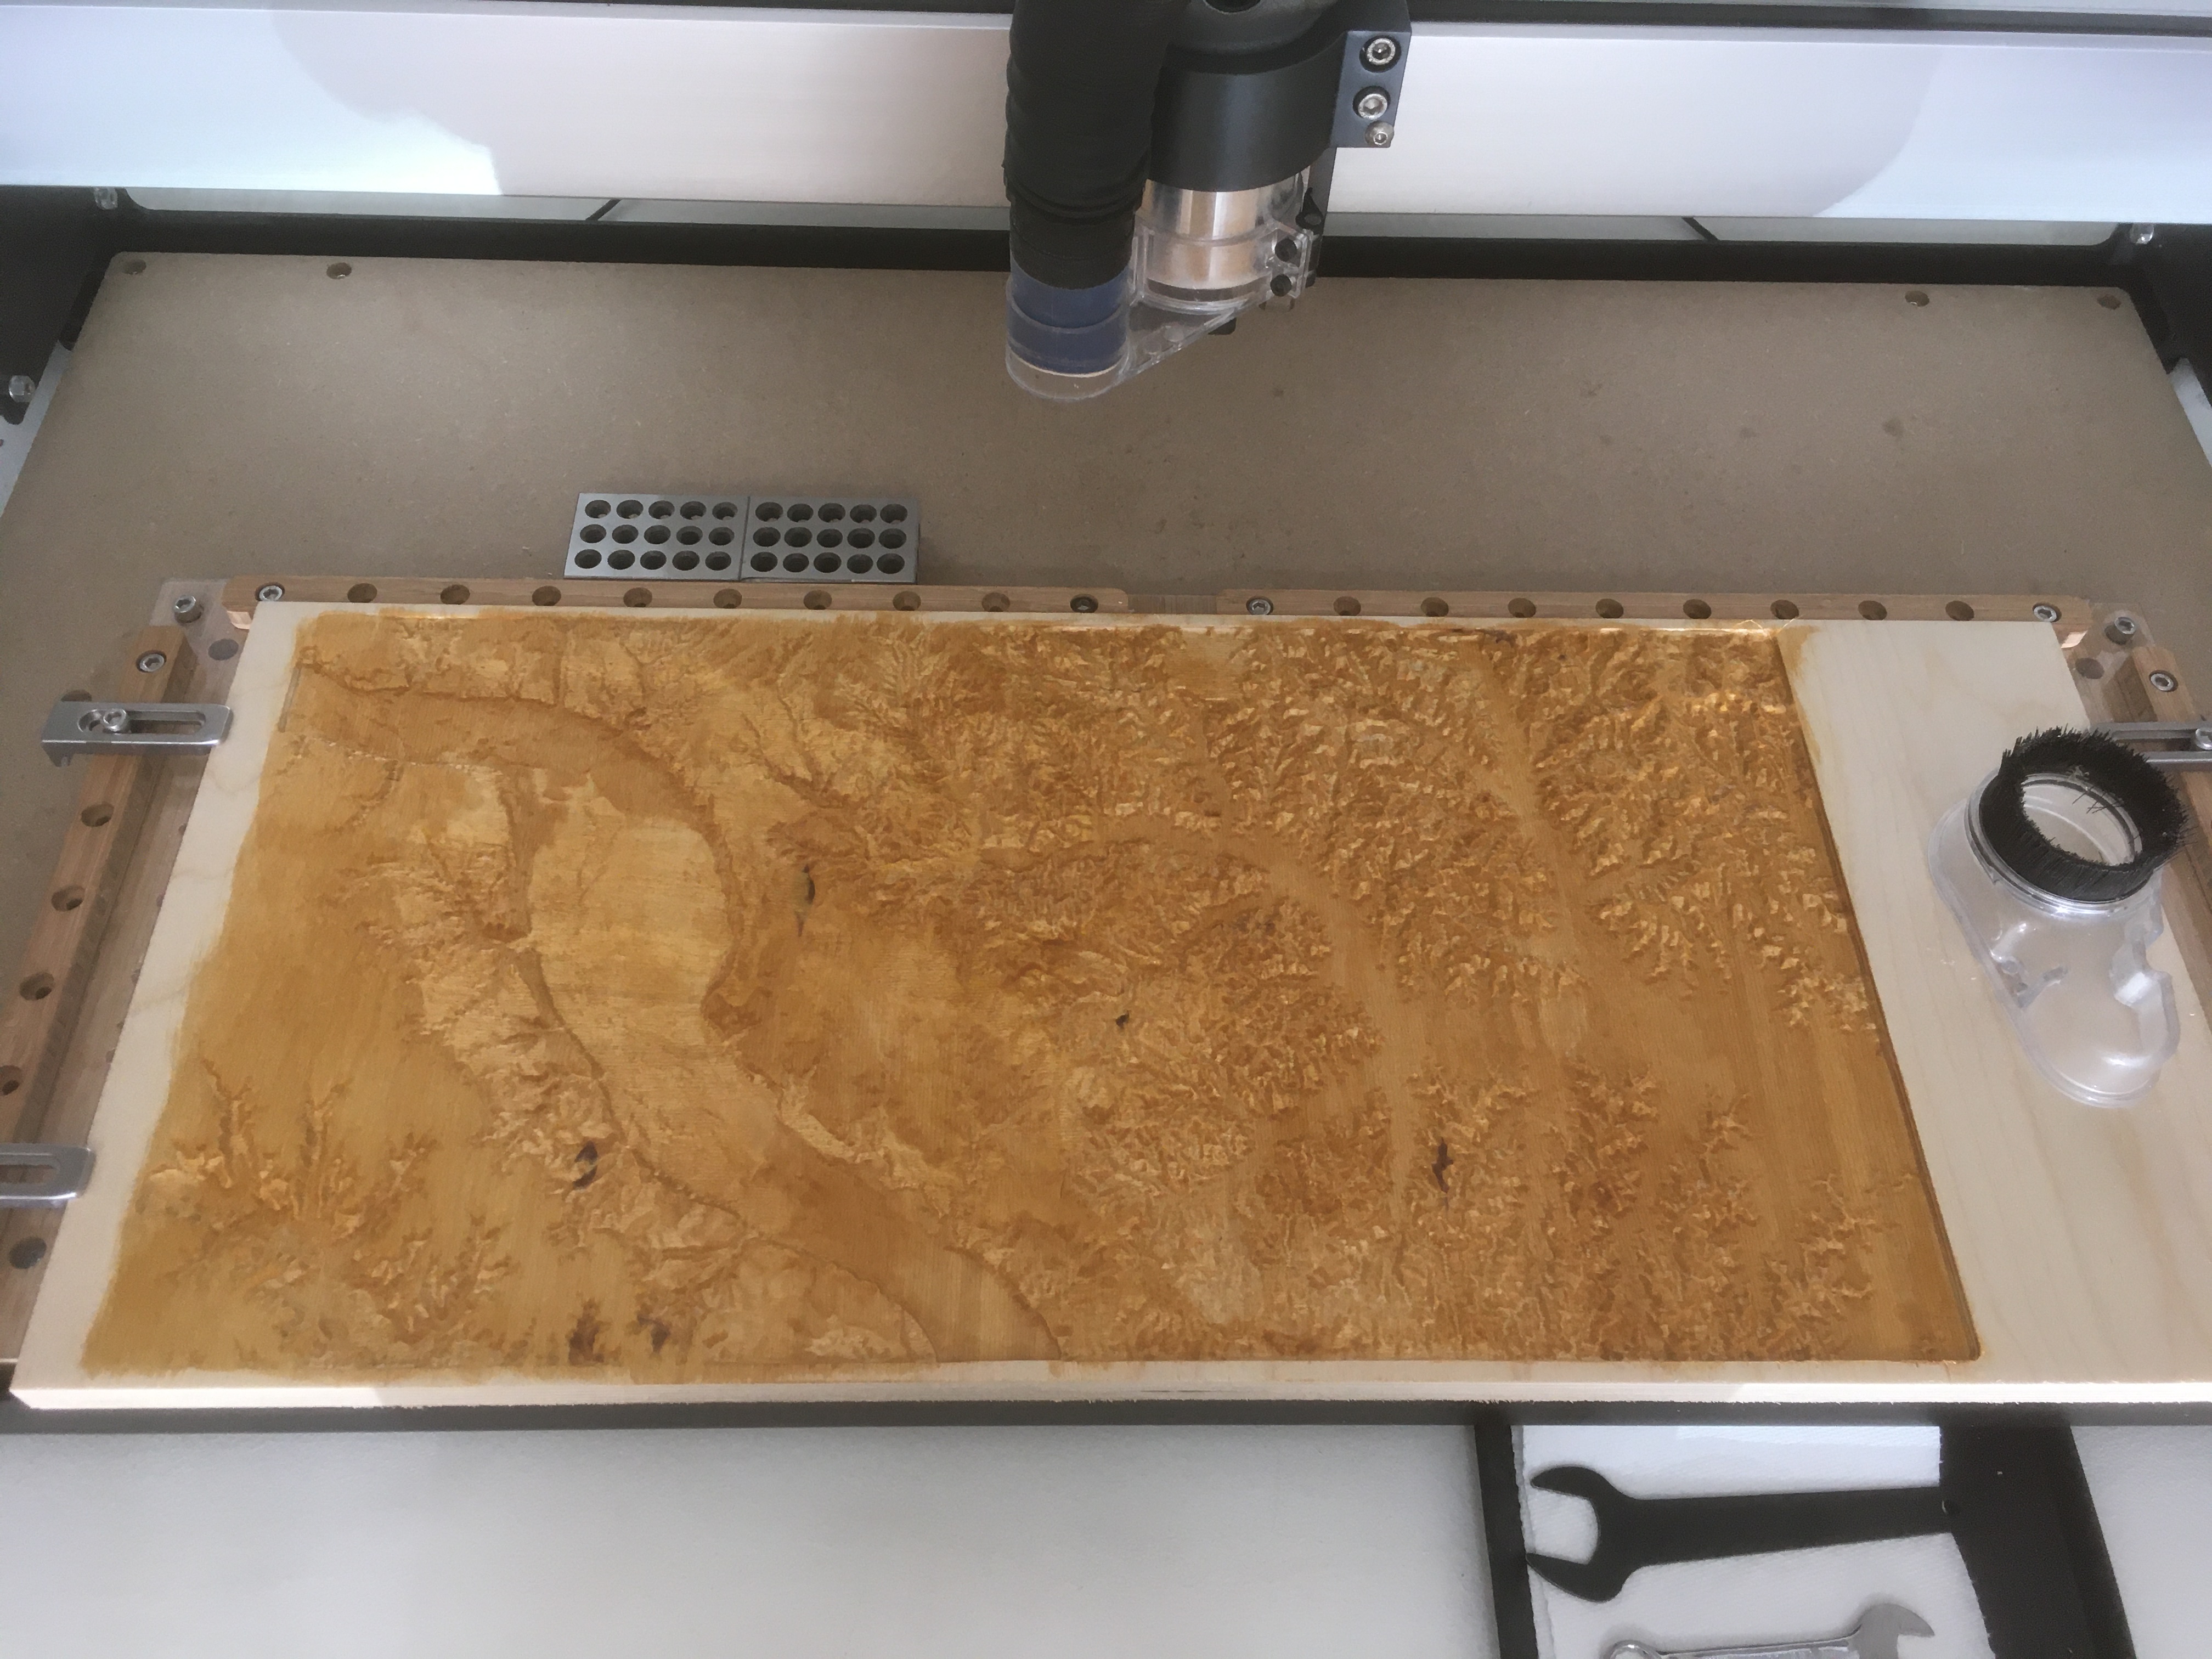
I decided to stain at this point so the rest of the features would stand out when the wood’s natural color was revealed.
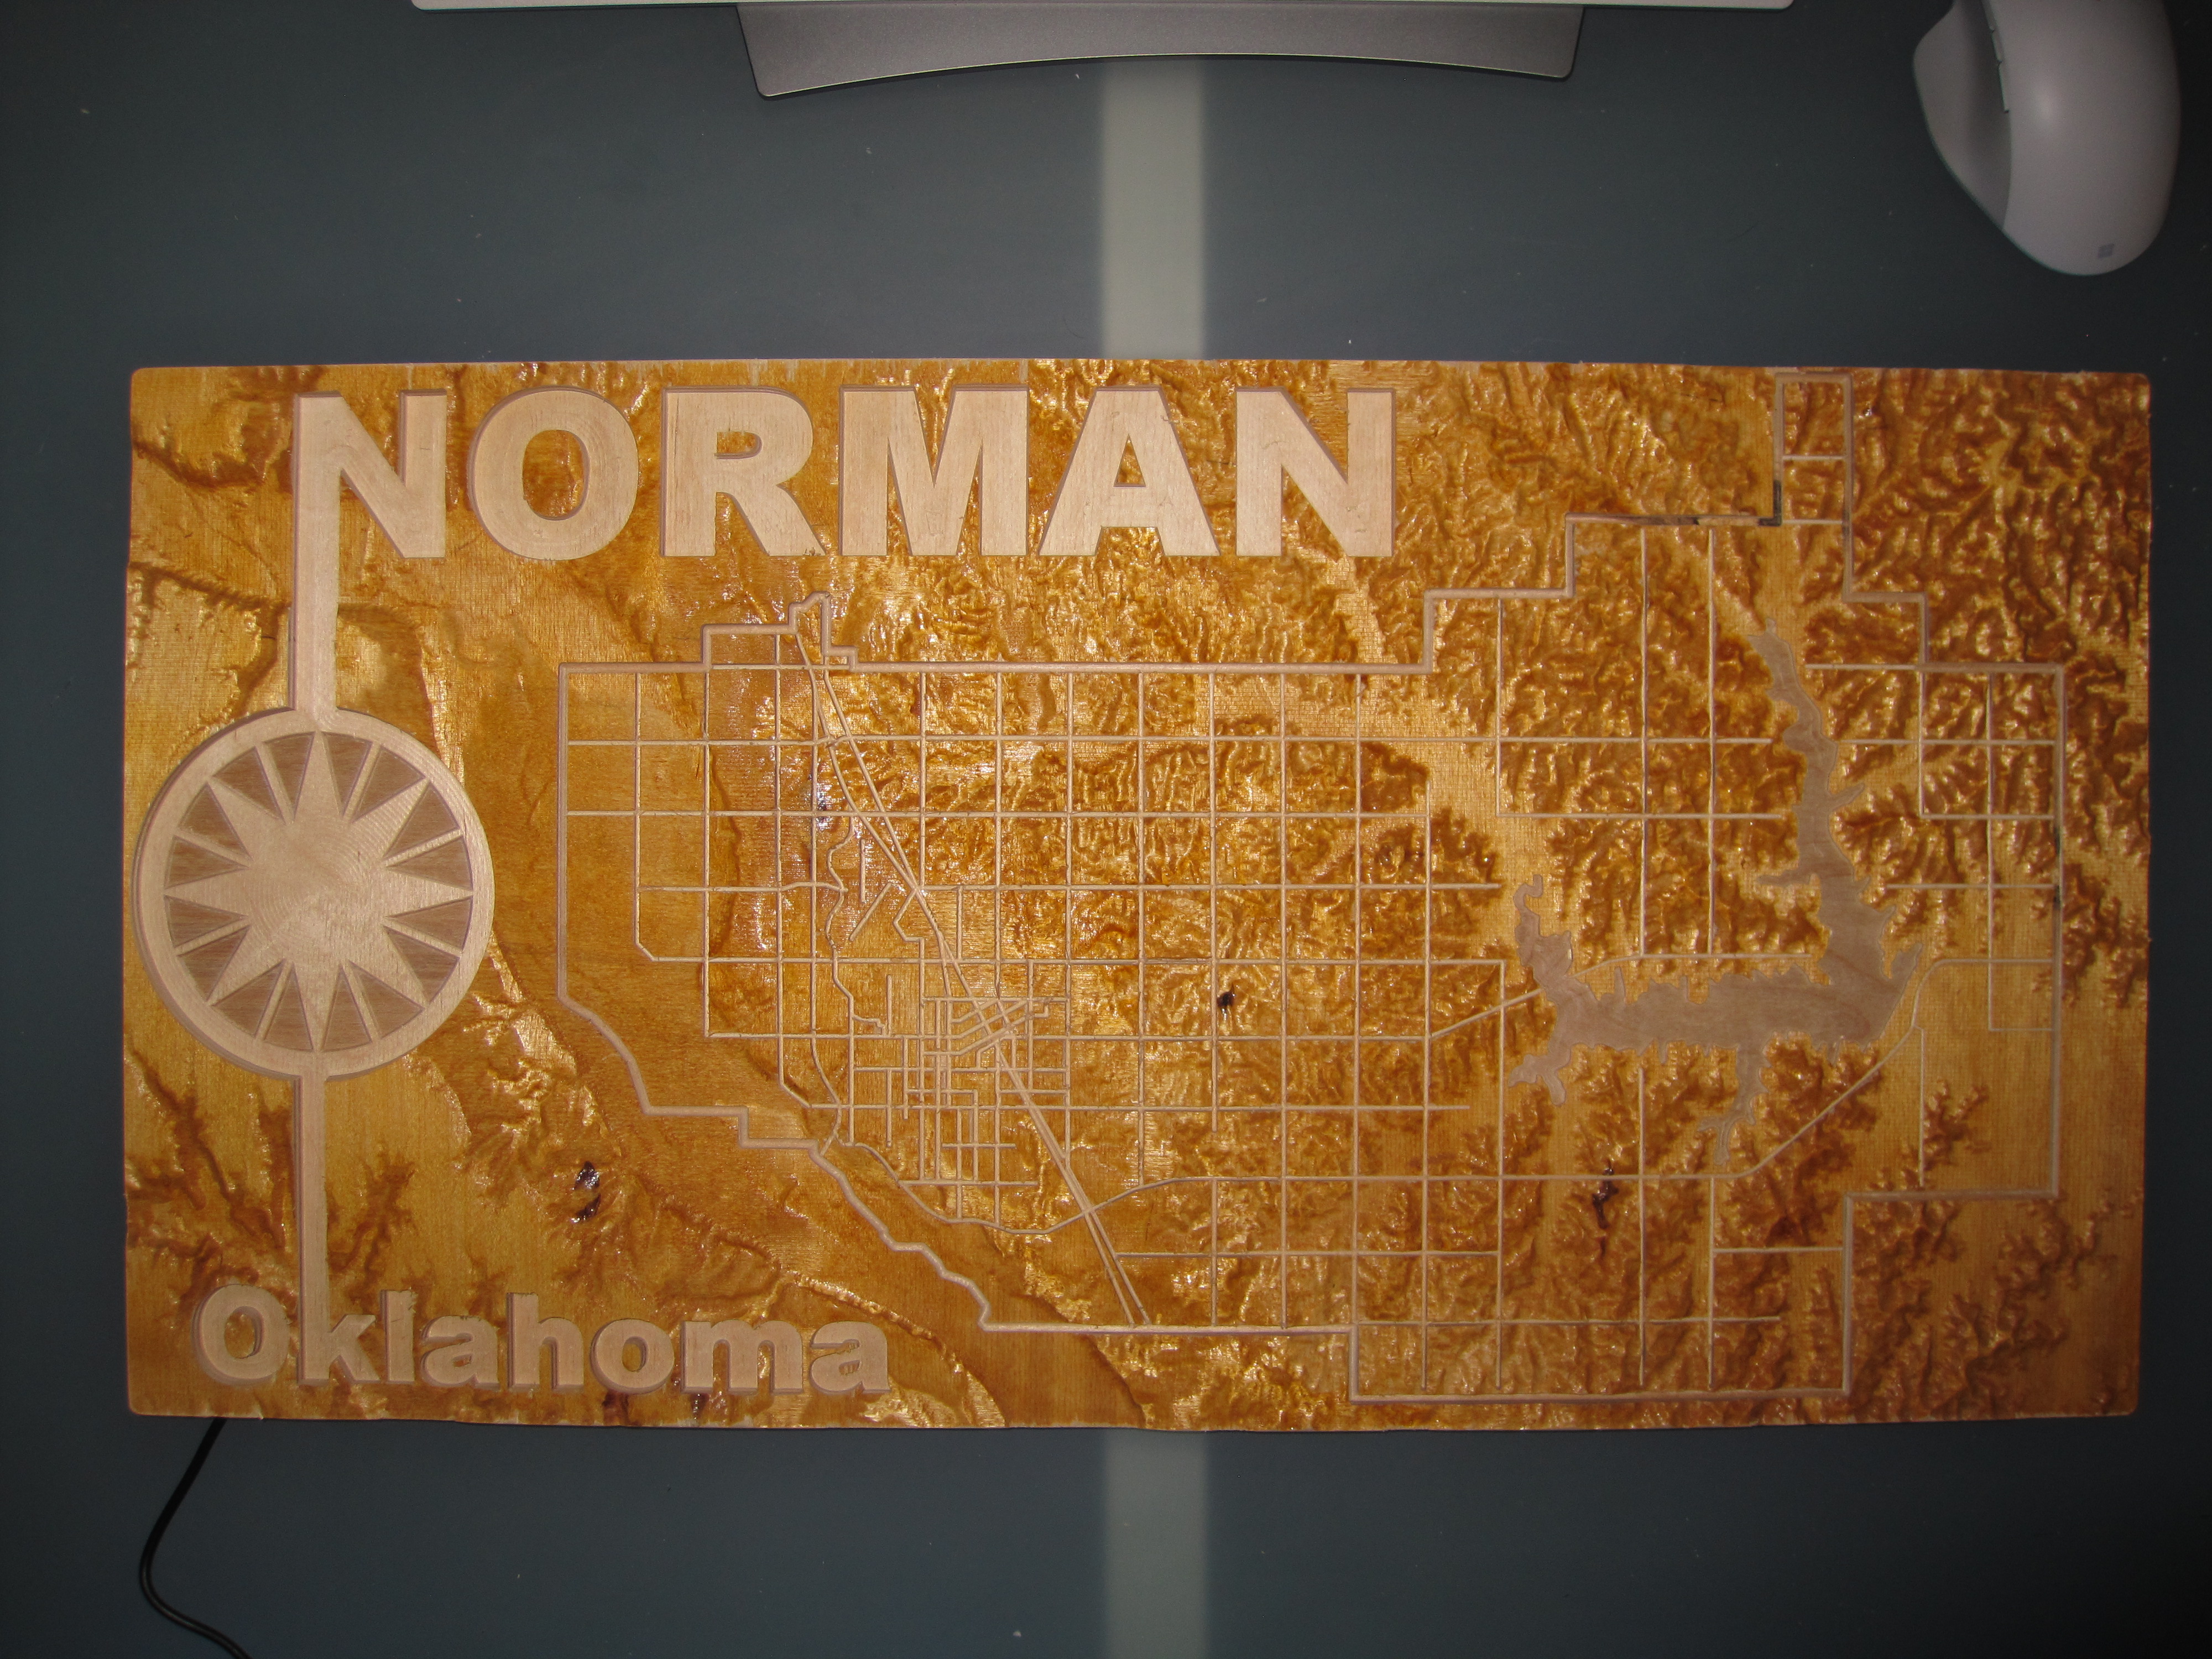
Many hours later, the Shapeoko was done. The final step was to add lights. In the day-dreaming phase of this project I thought about really going overboard with the lighting, but reality was suggesting I just add backlighting.
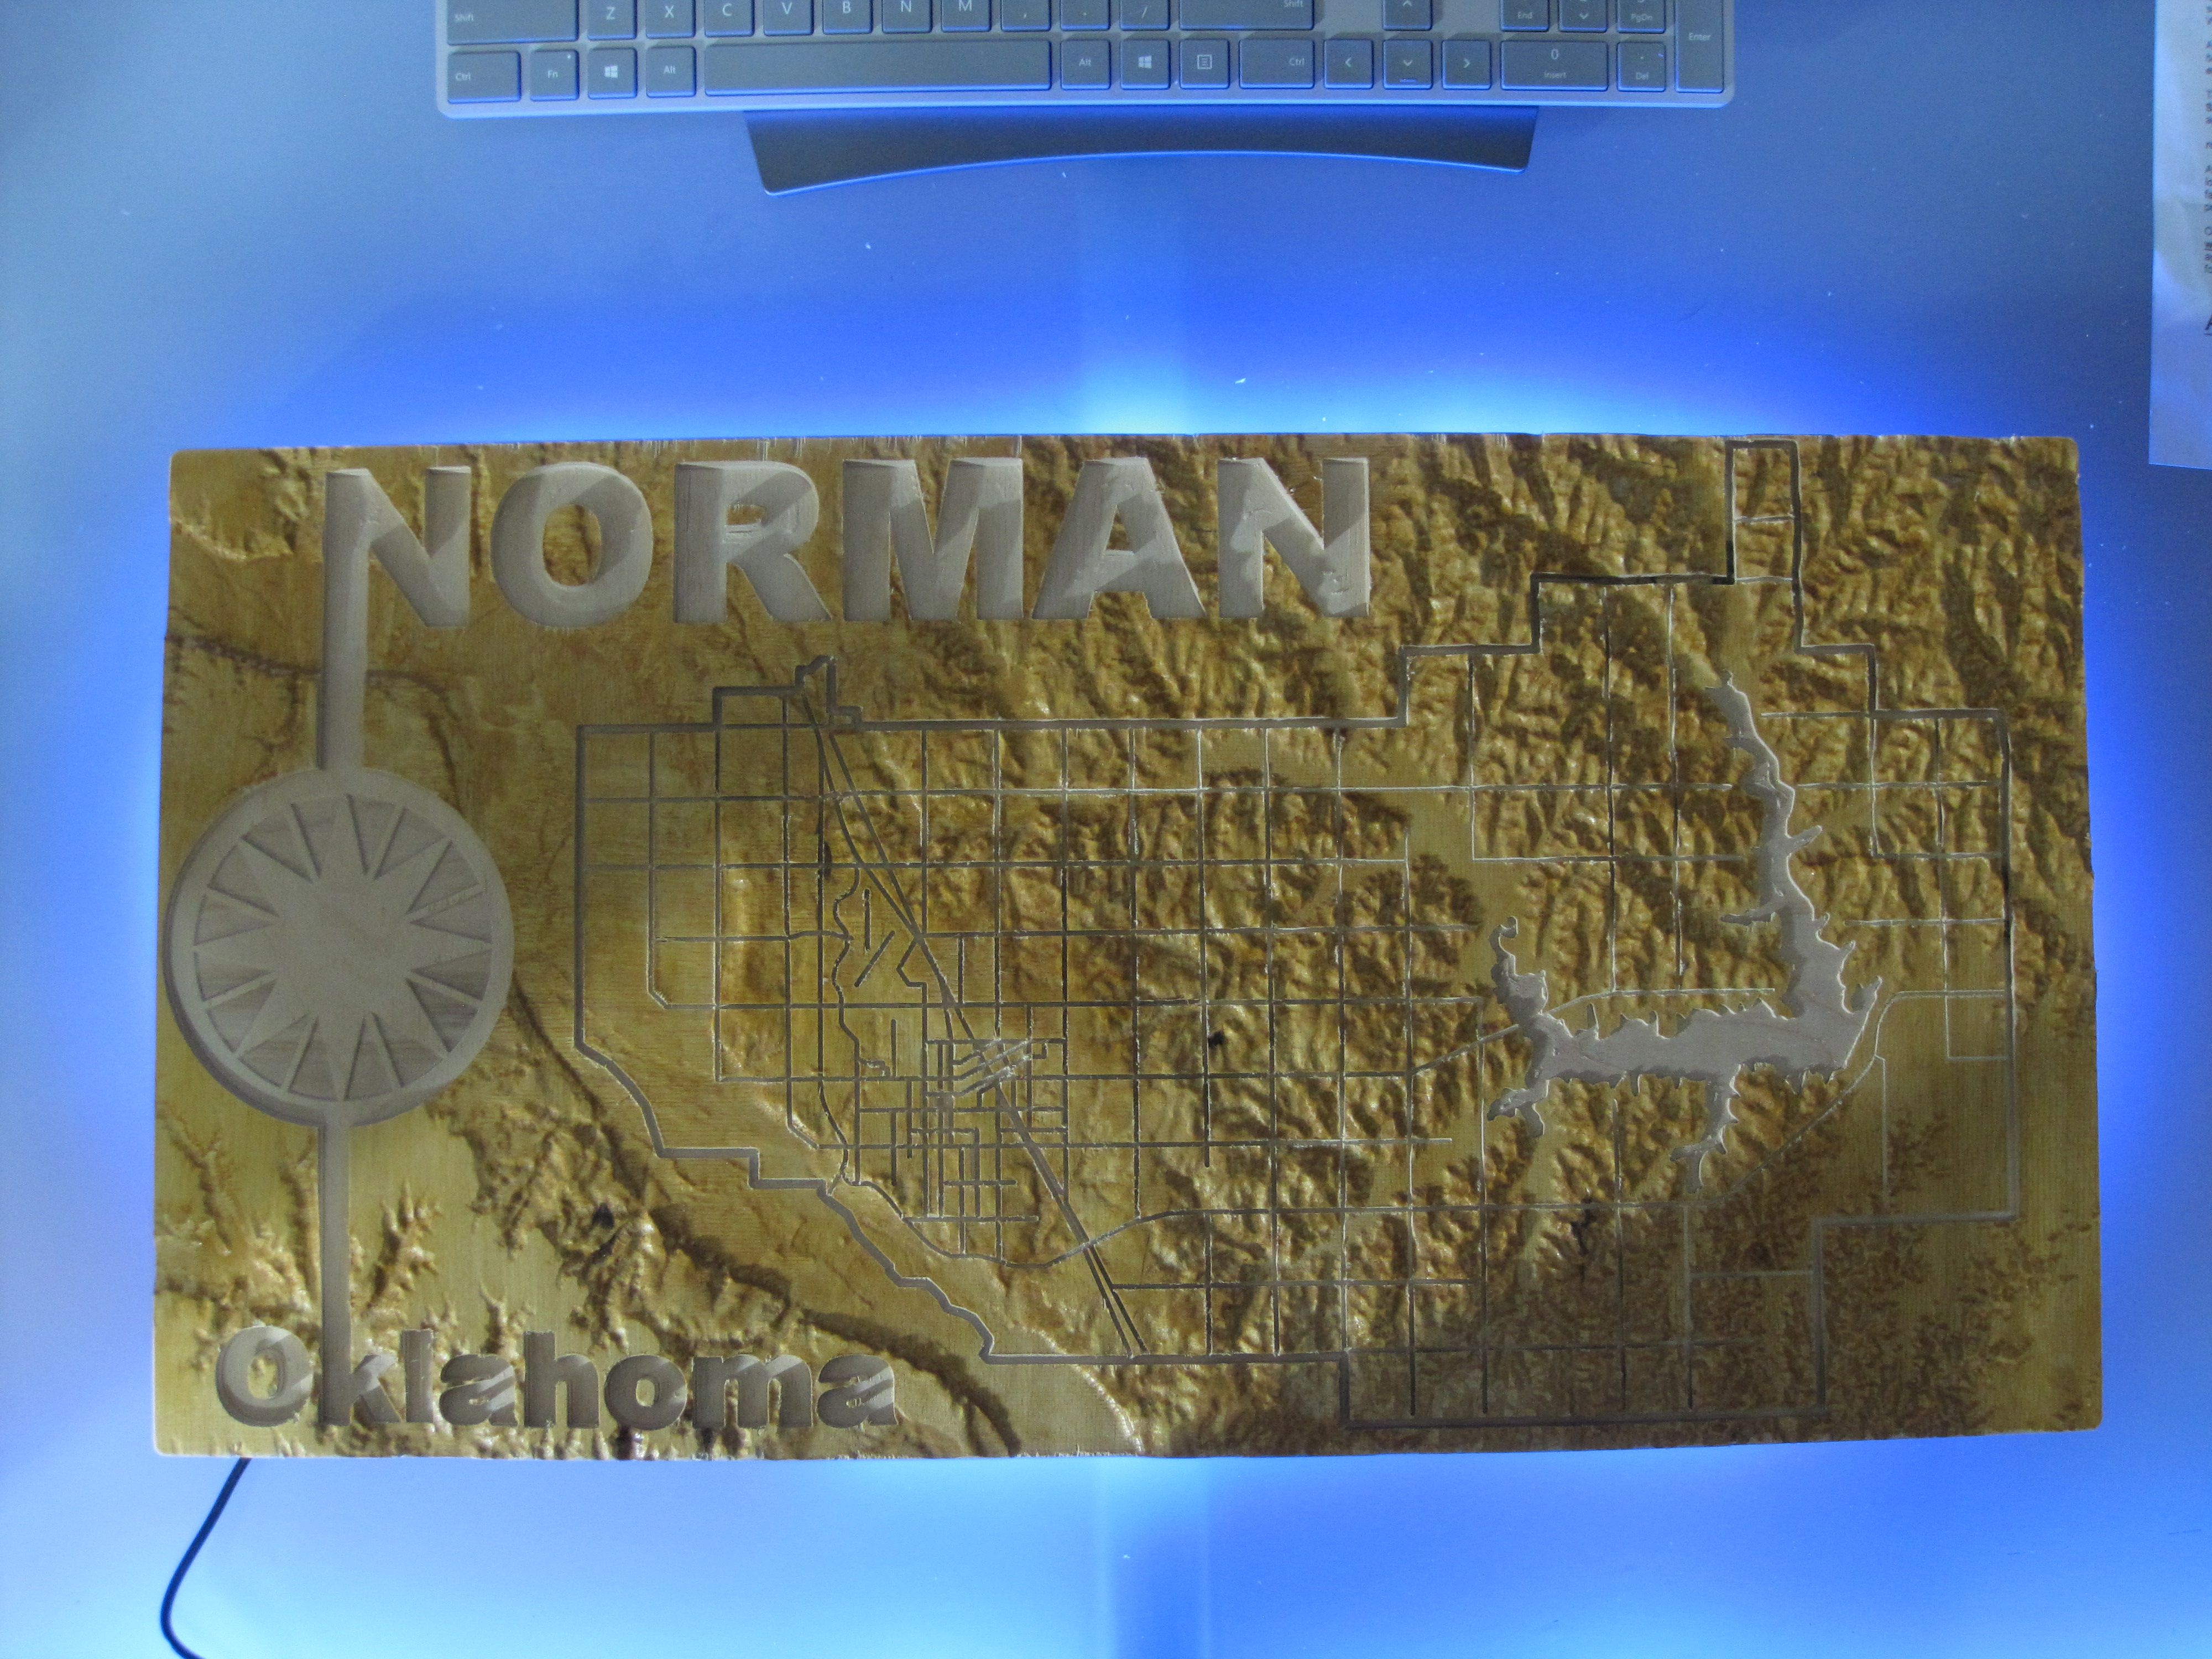
Without a flash, the camera picks up the led backlight. The (unstained) wood in the lake isn’t really blue, maybe I should look into adding some blue tinted stain for the next version.
I really like the golden look with that stain, and carving the streets and letters after the relief was done makes its stand out from other topo maps, very well done ! Have you considered selling such maps locally ? (or donating one to city hall )
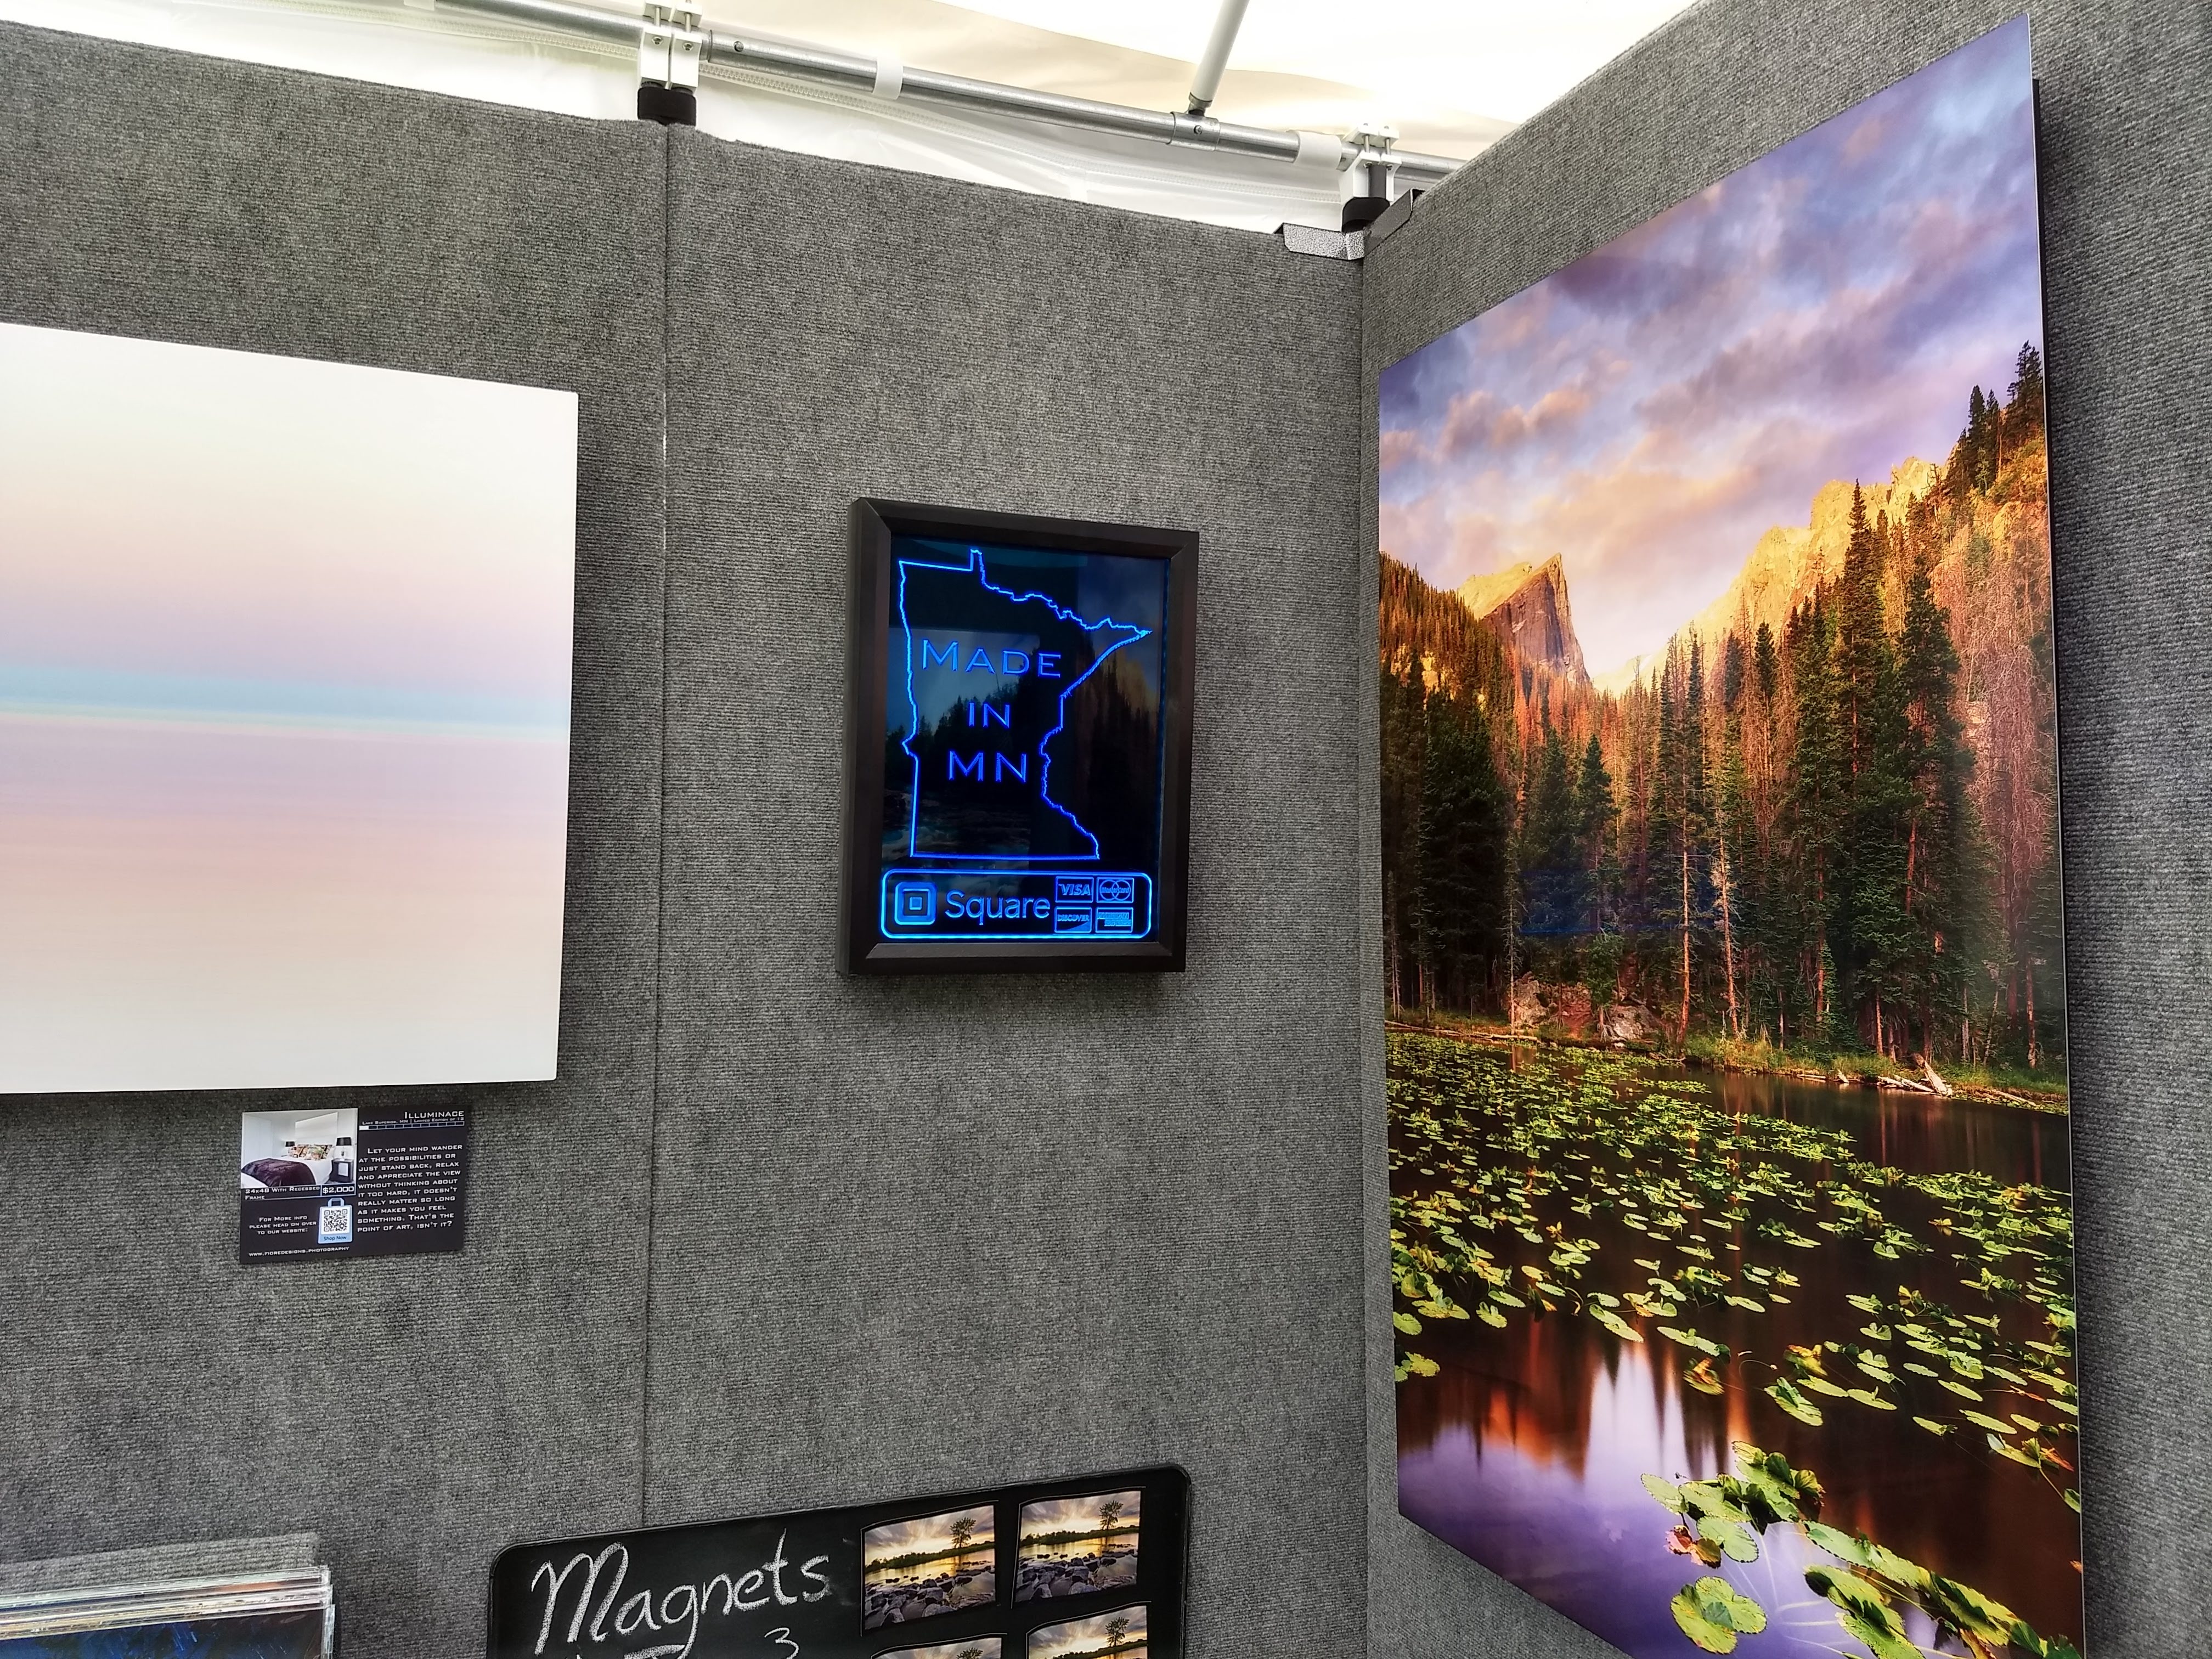
I was originally going to try to make an additional project and post that also but time has gotten away from me. I just had my first and only in-person art show of the year this past weekend due to COVID, hence why I felt the need to finally make this sign. Couple that with an early fall in MN I’ve been pretty busy and haven’t been able to make a real “Lamp” project.
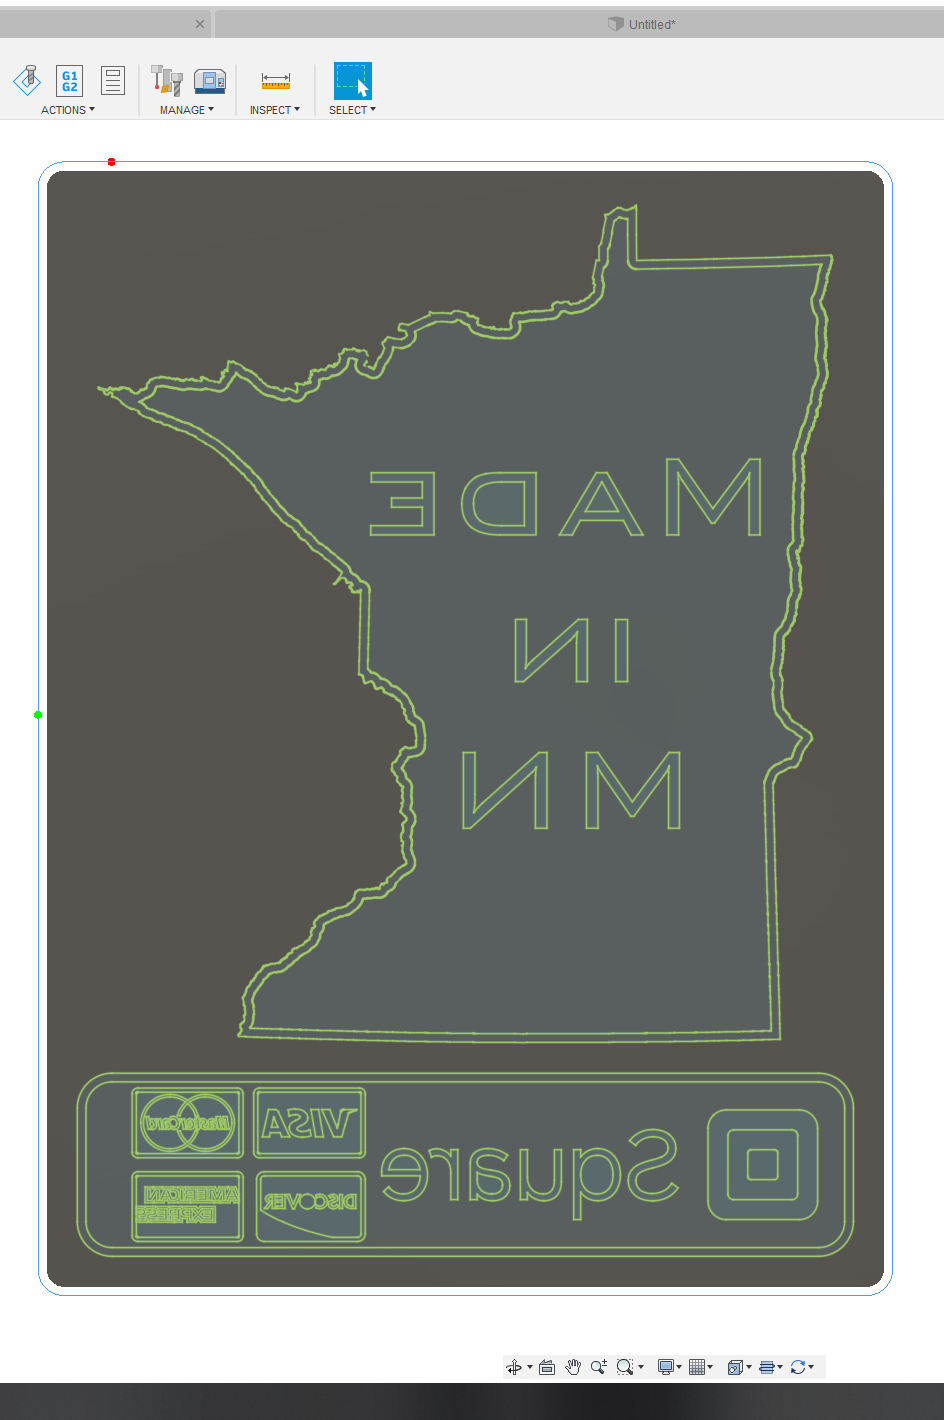
I’ve had the idea to make an edge lit sign that can hang on the walls of my tent/booth at art shows that clearly tells everyone that all prints/products are made in MN, and that I accept credit cards via Square.
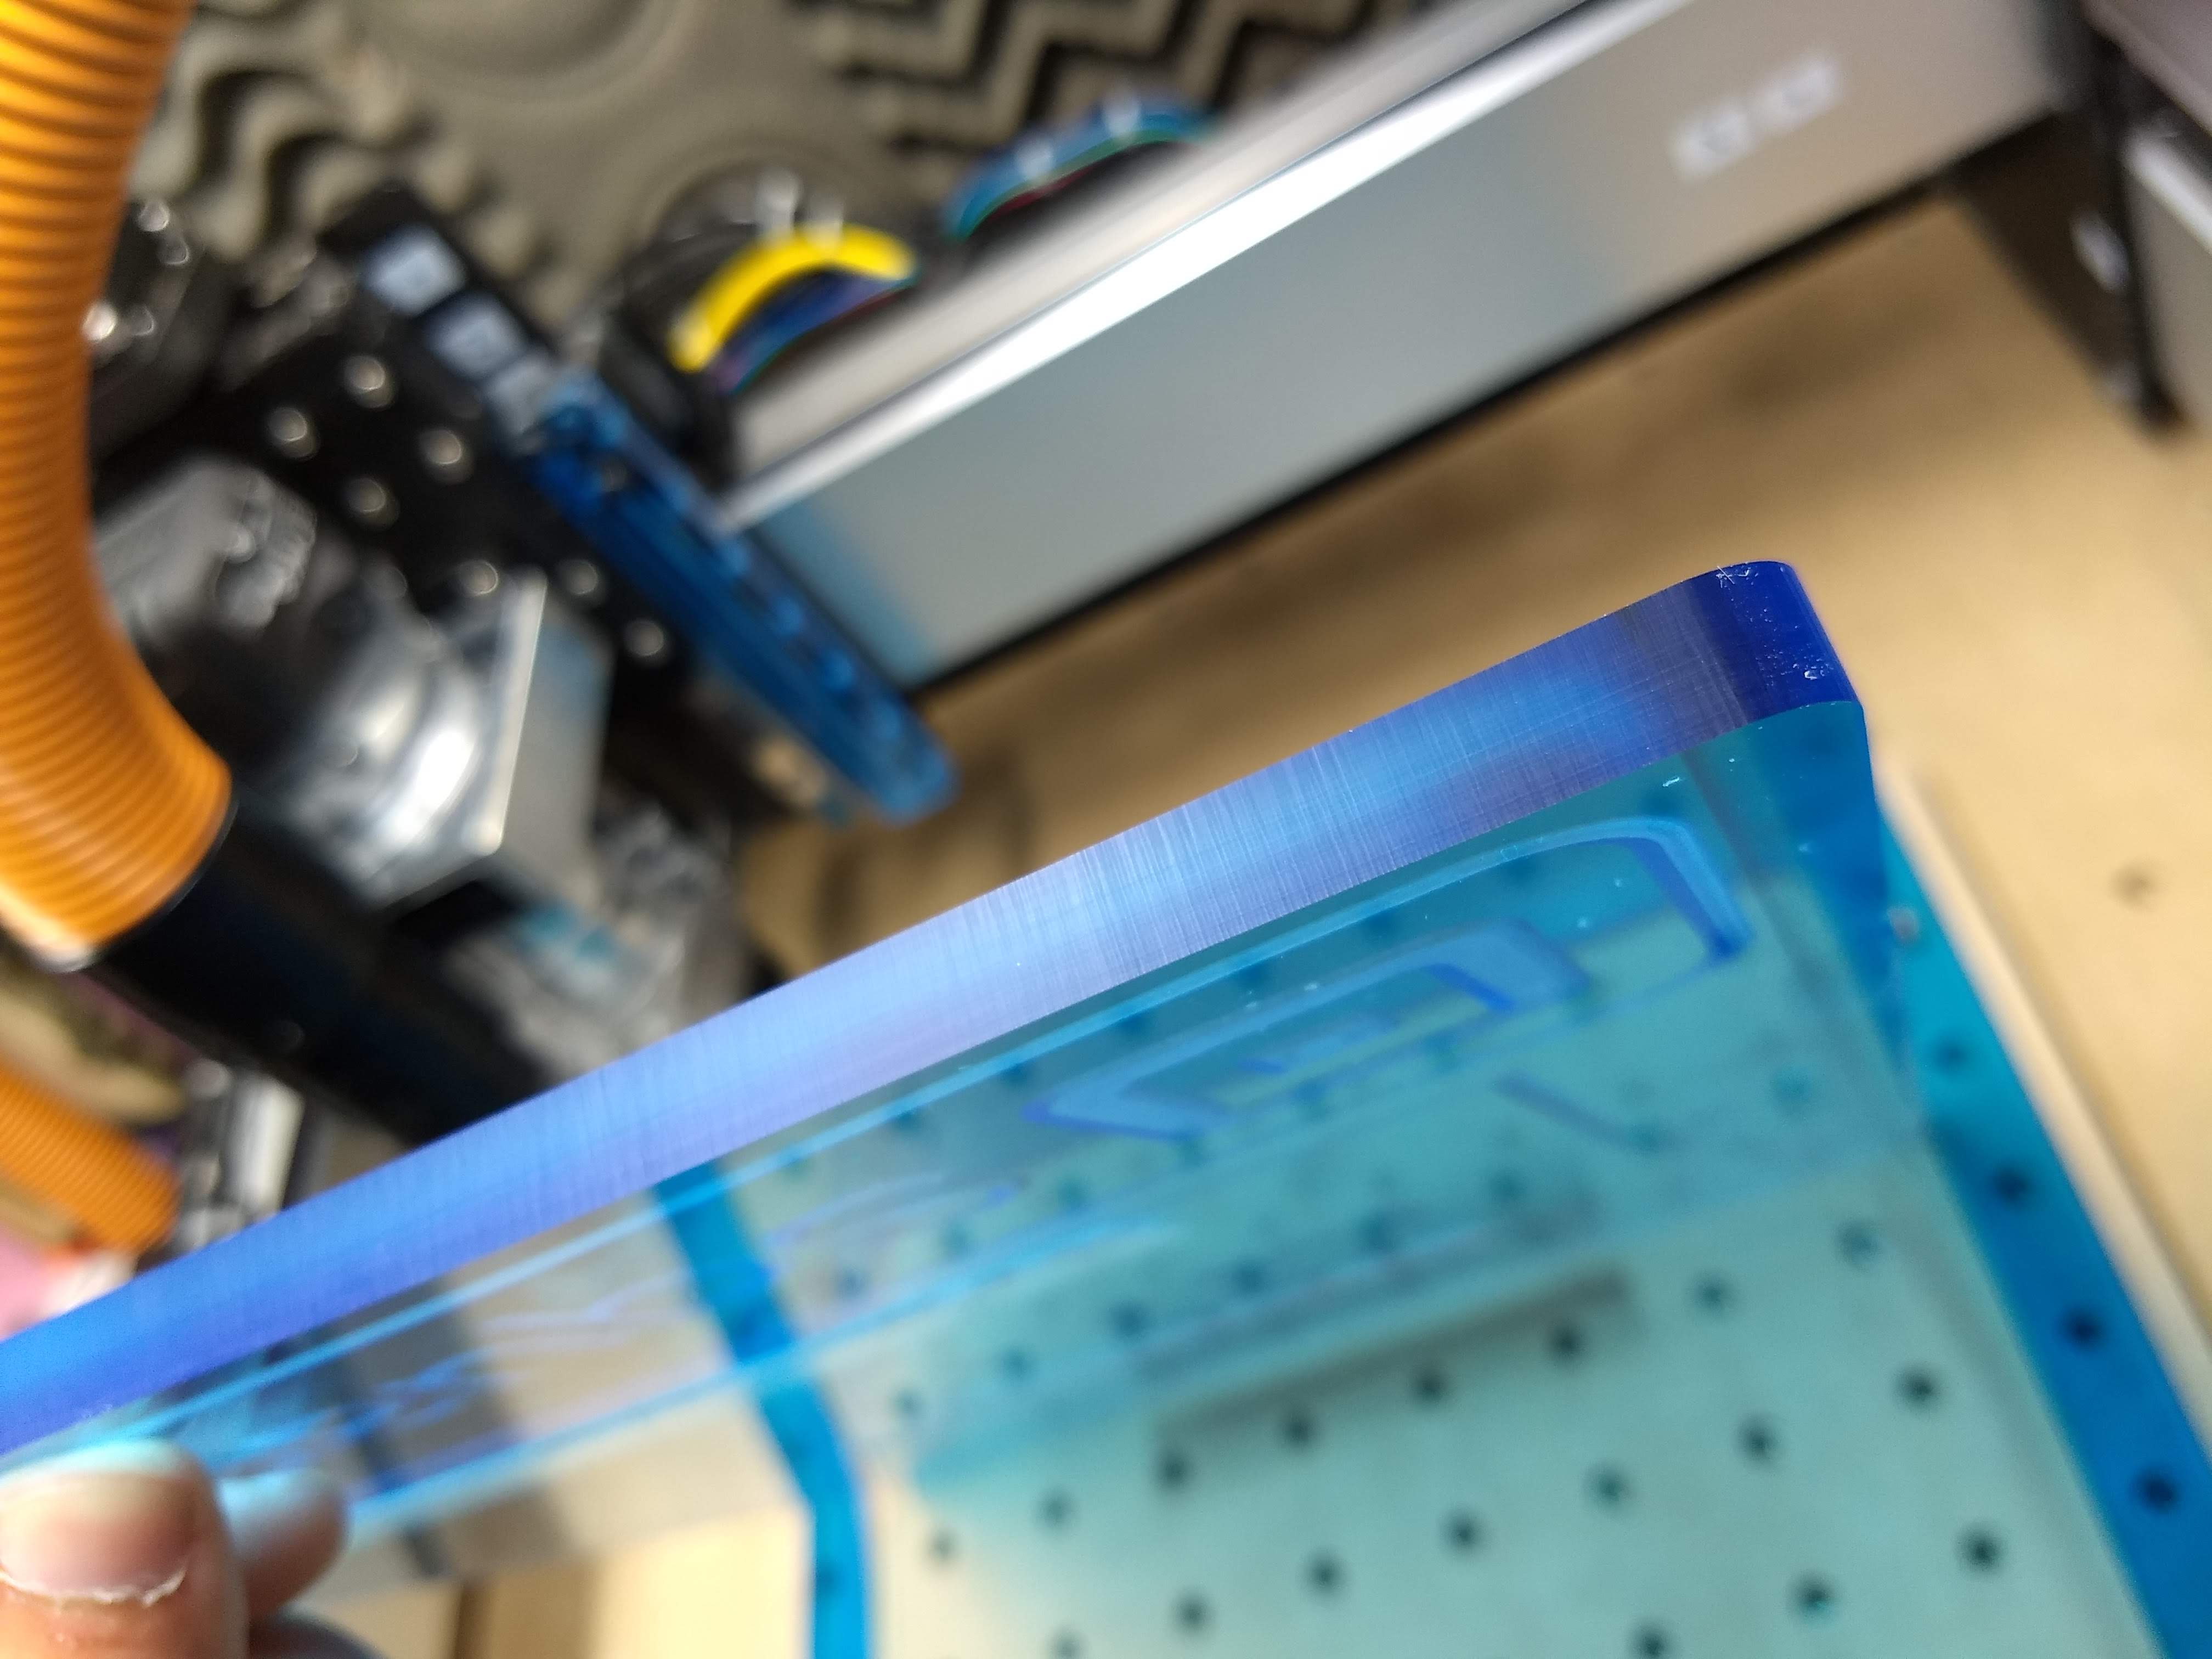
I first started off with a test piece to see if I had the right S/F for acrylic vcarving and a proof of concept.
Then it was just a simple matter of cutting the acrylic, once again cutting went pretty much perfectly. I cut the design on the backside so I had made sure to mirror the image.
Now came the hard part, I had decided it needed a frame since it would be hanging on my wall as opposed to a freestanding display that is just lit from the bottom. I have never made a frame before, I know seems kinda weird that a photographer who sells prints has never made a frame, thats one of the many reasons why I sell metal prints with inset frame. I won’t go into too many details about how I made the frame since it wasnt on the shapeoko but lets just say it took me 3 times before I got satisfactory results.
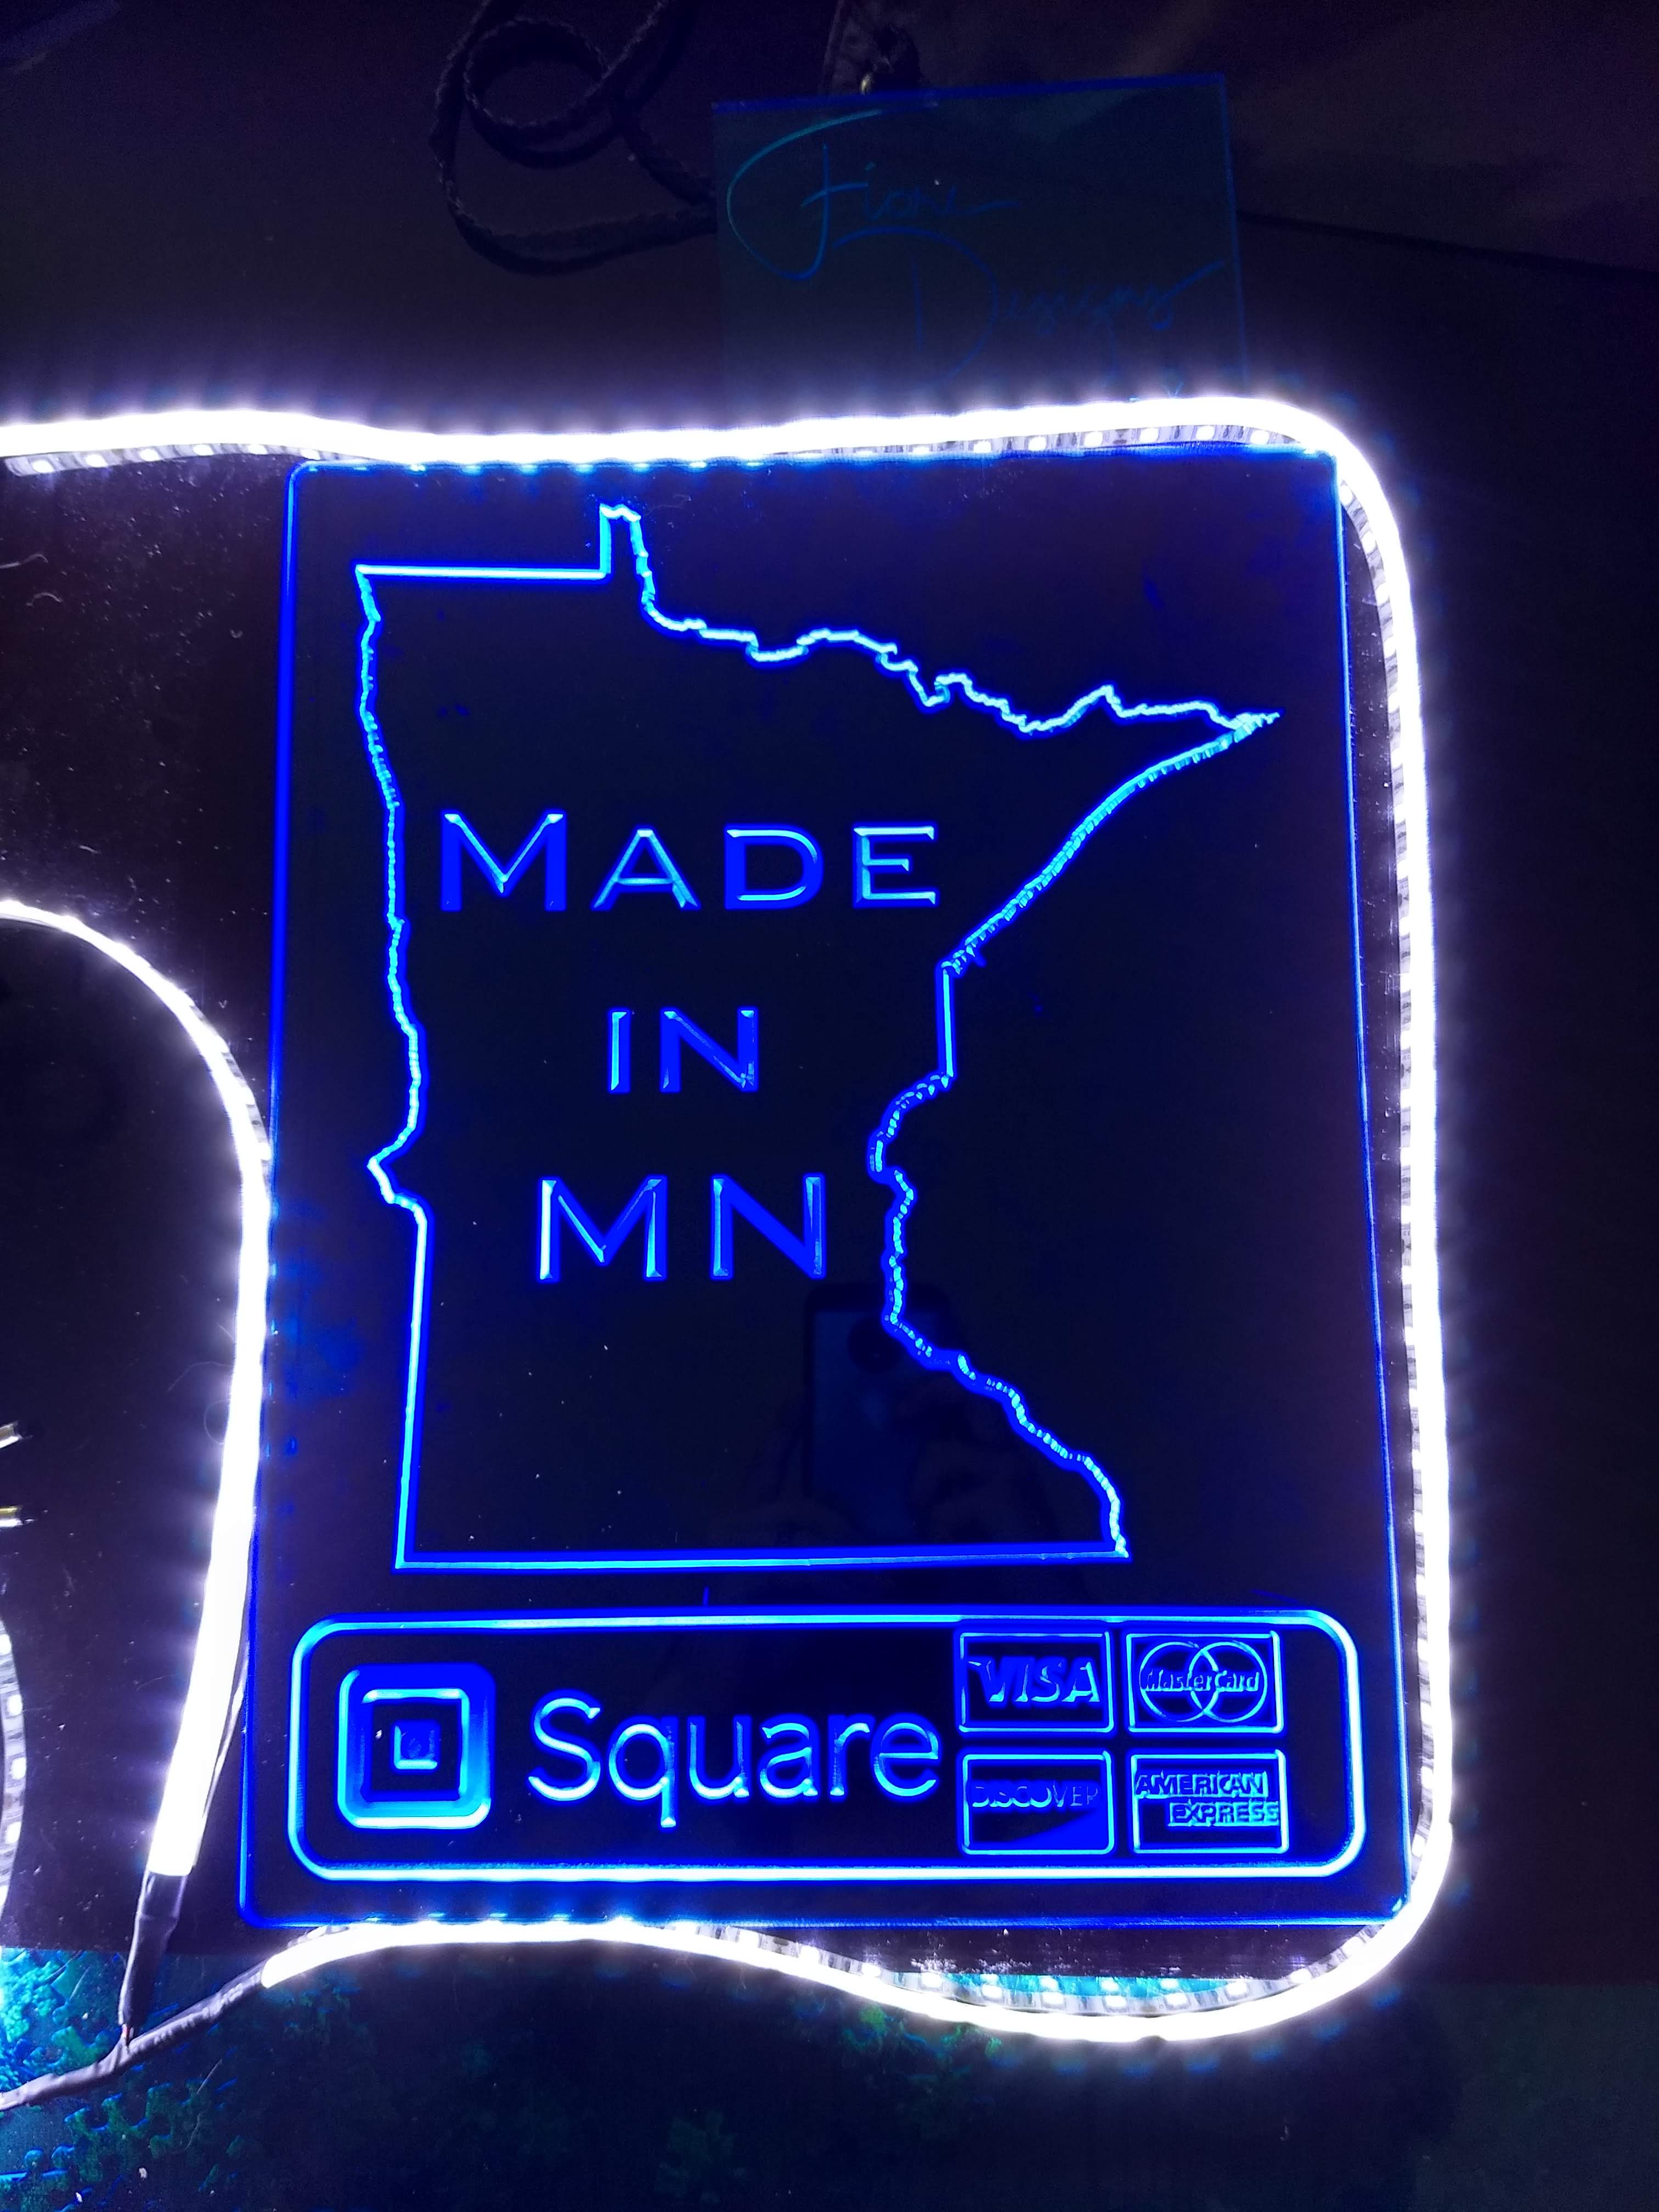
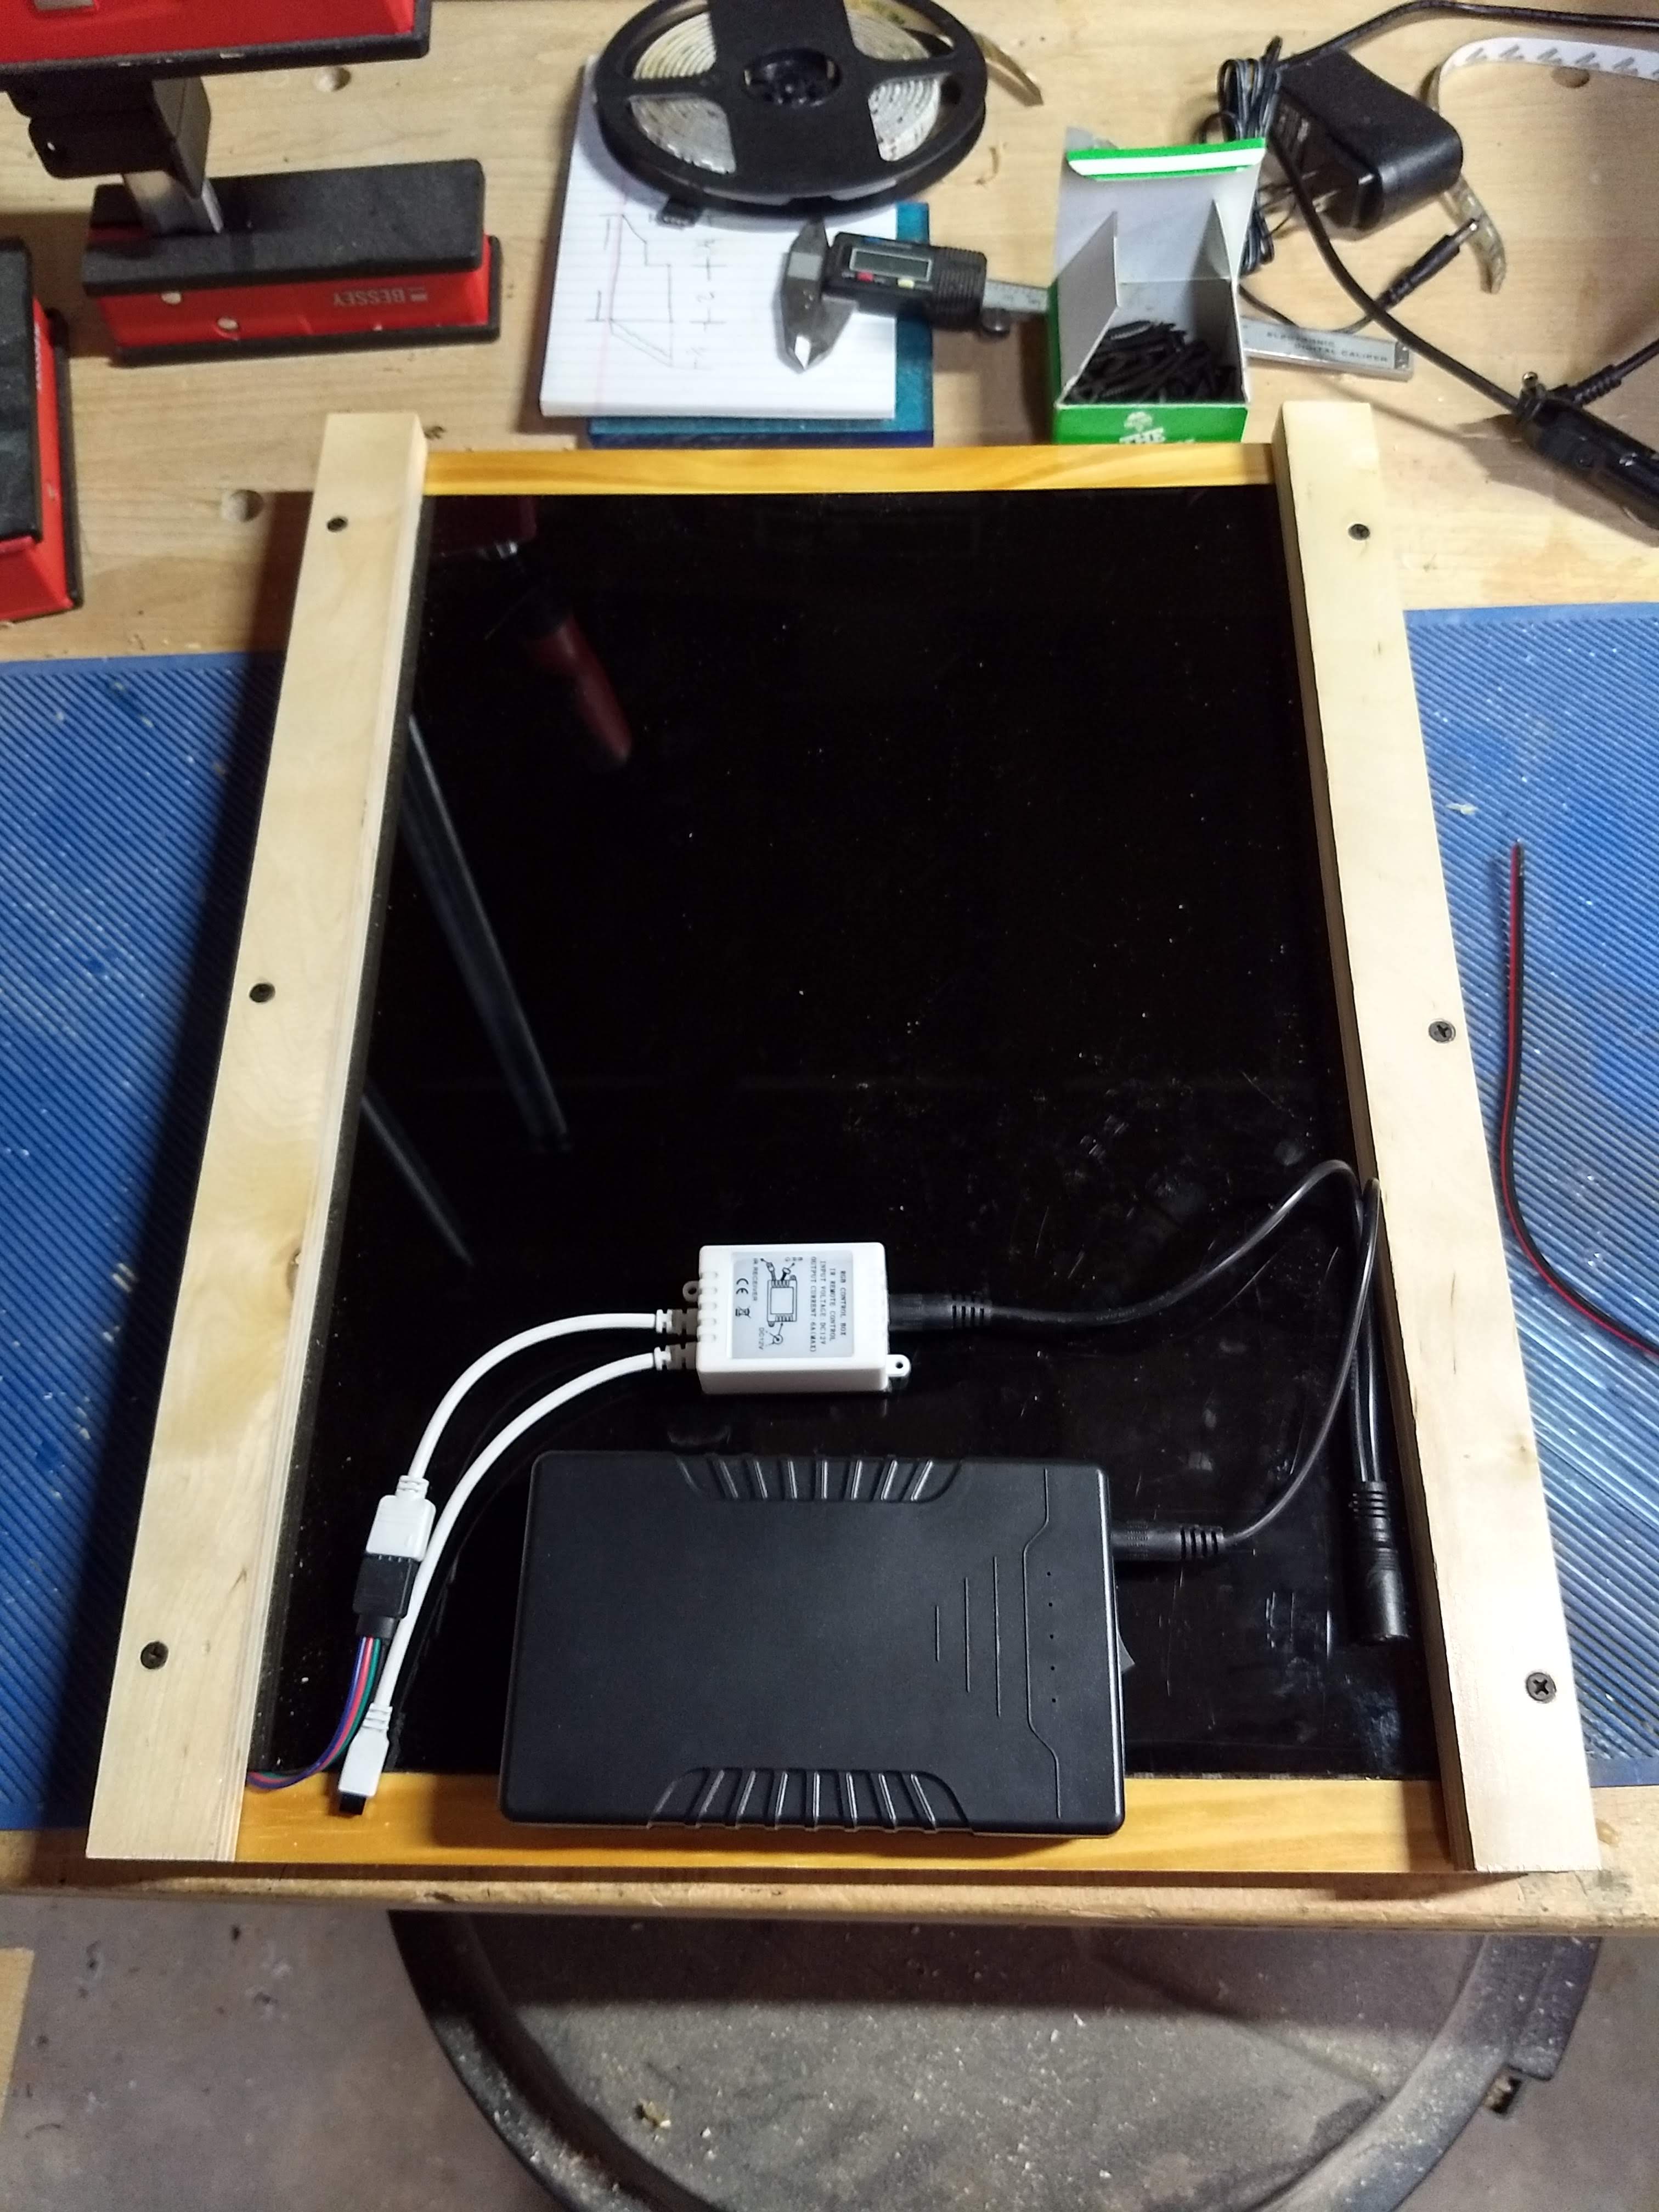
Then I used a piece of black plexi as a solid background and made a couple standoff bars that run down the side. This is where the velcro mounts and gives me the space to mount the battery and LED controller behind the frame.
And finally the finished product in its natural environment! Unfortunately the battery that I had for this only lasted about 6-7 or about an hour short of the full day at the show, so maybe figure a way to conceal/hide a cord that can run to a larger battery that will run all day guaranteed.
Thanks, @Julien and the Carbide team for prompting me to take on this long standing idea!
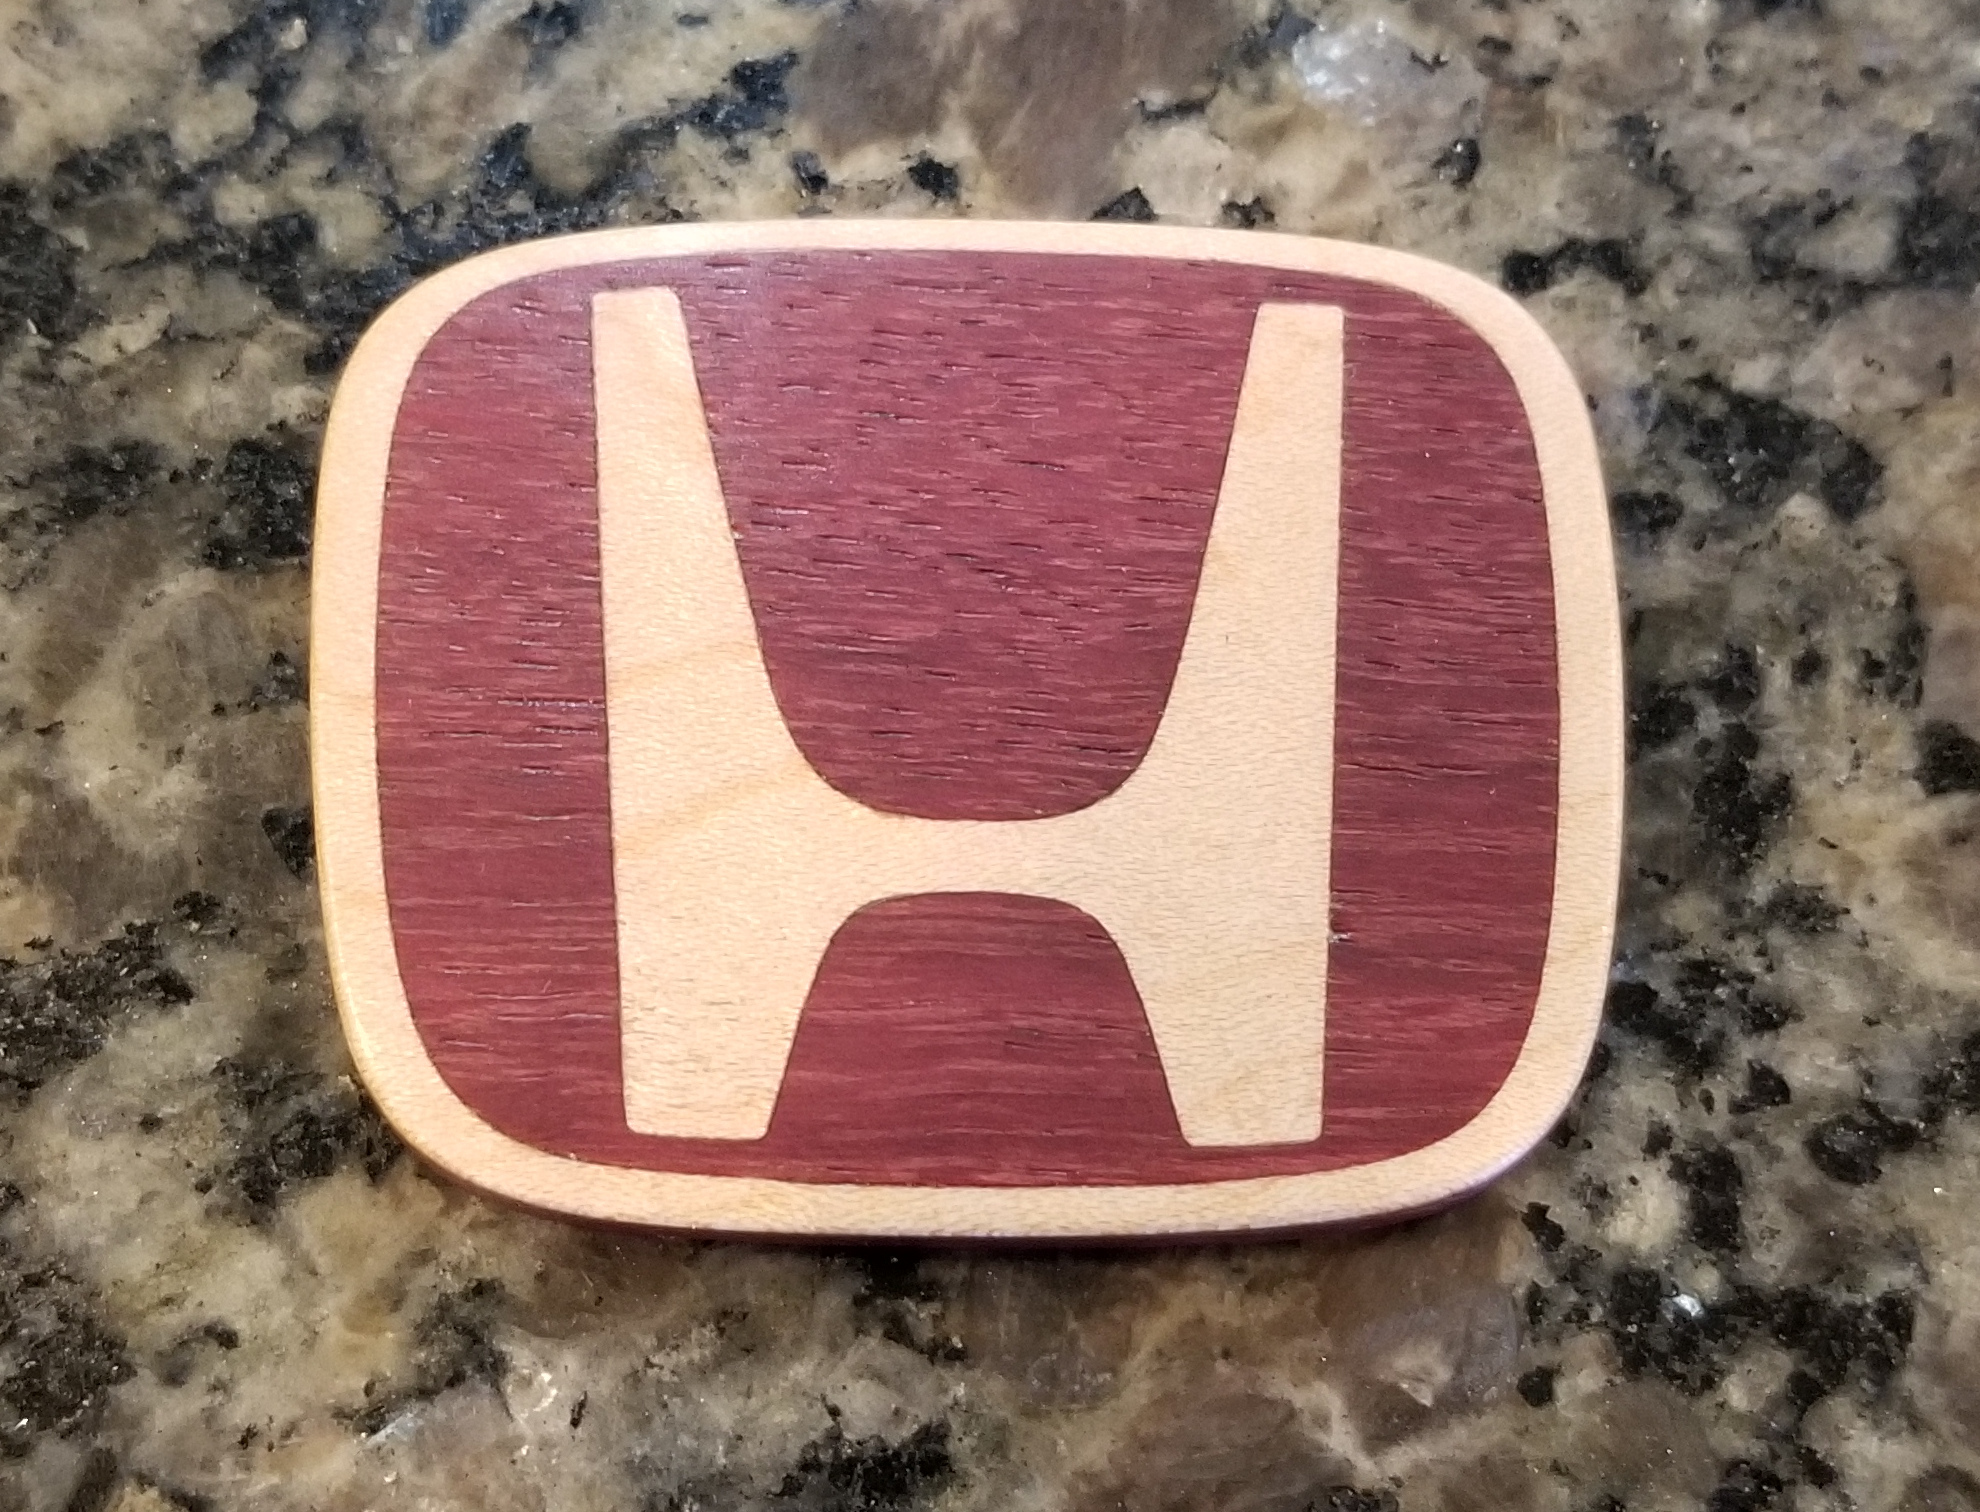
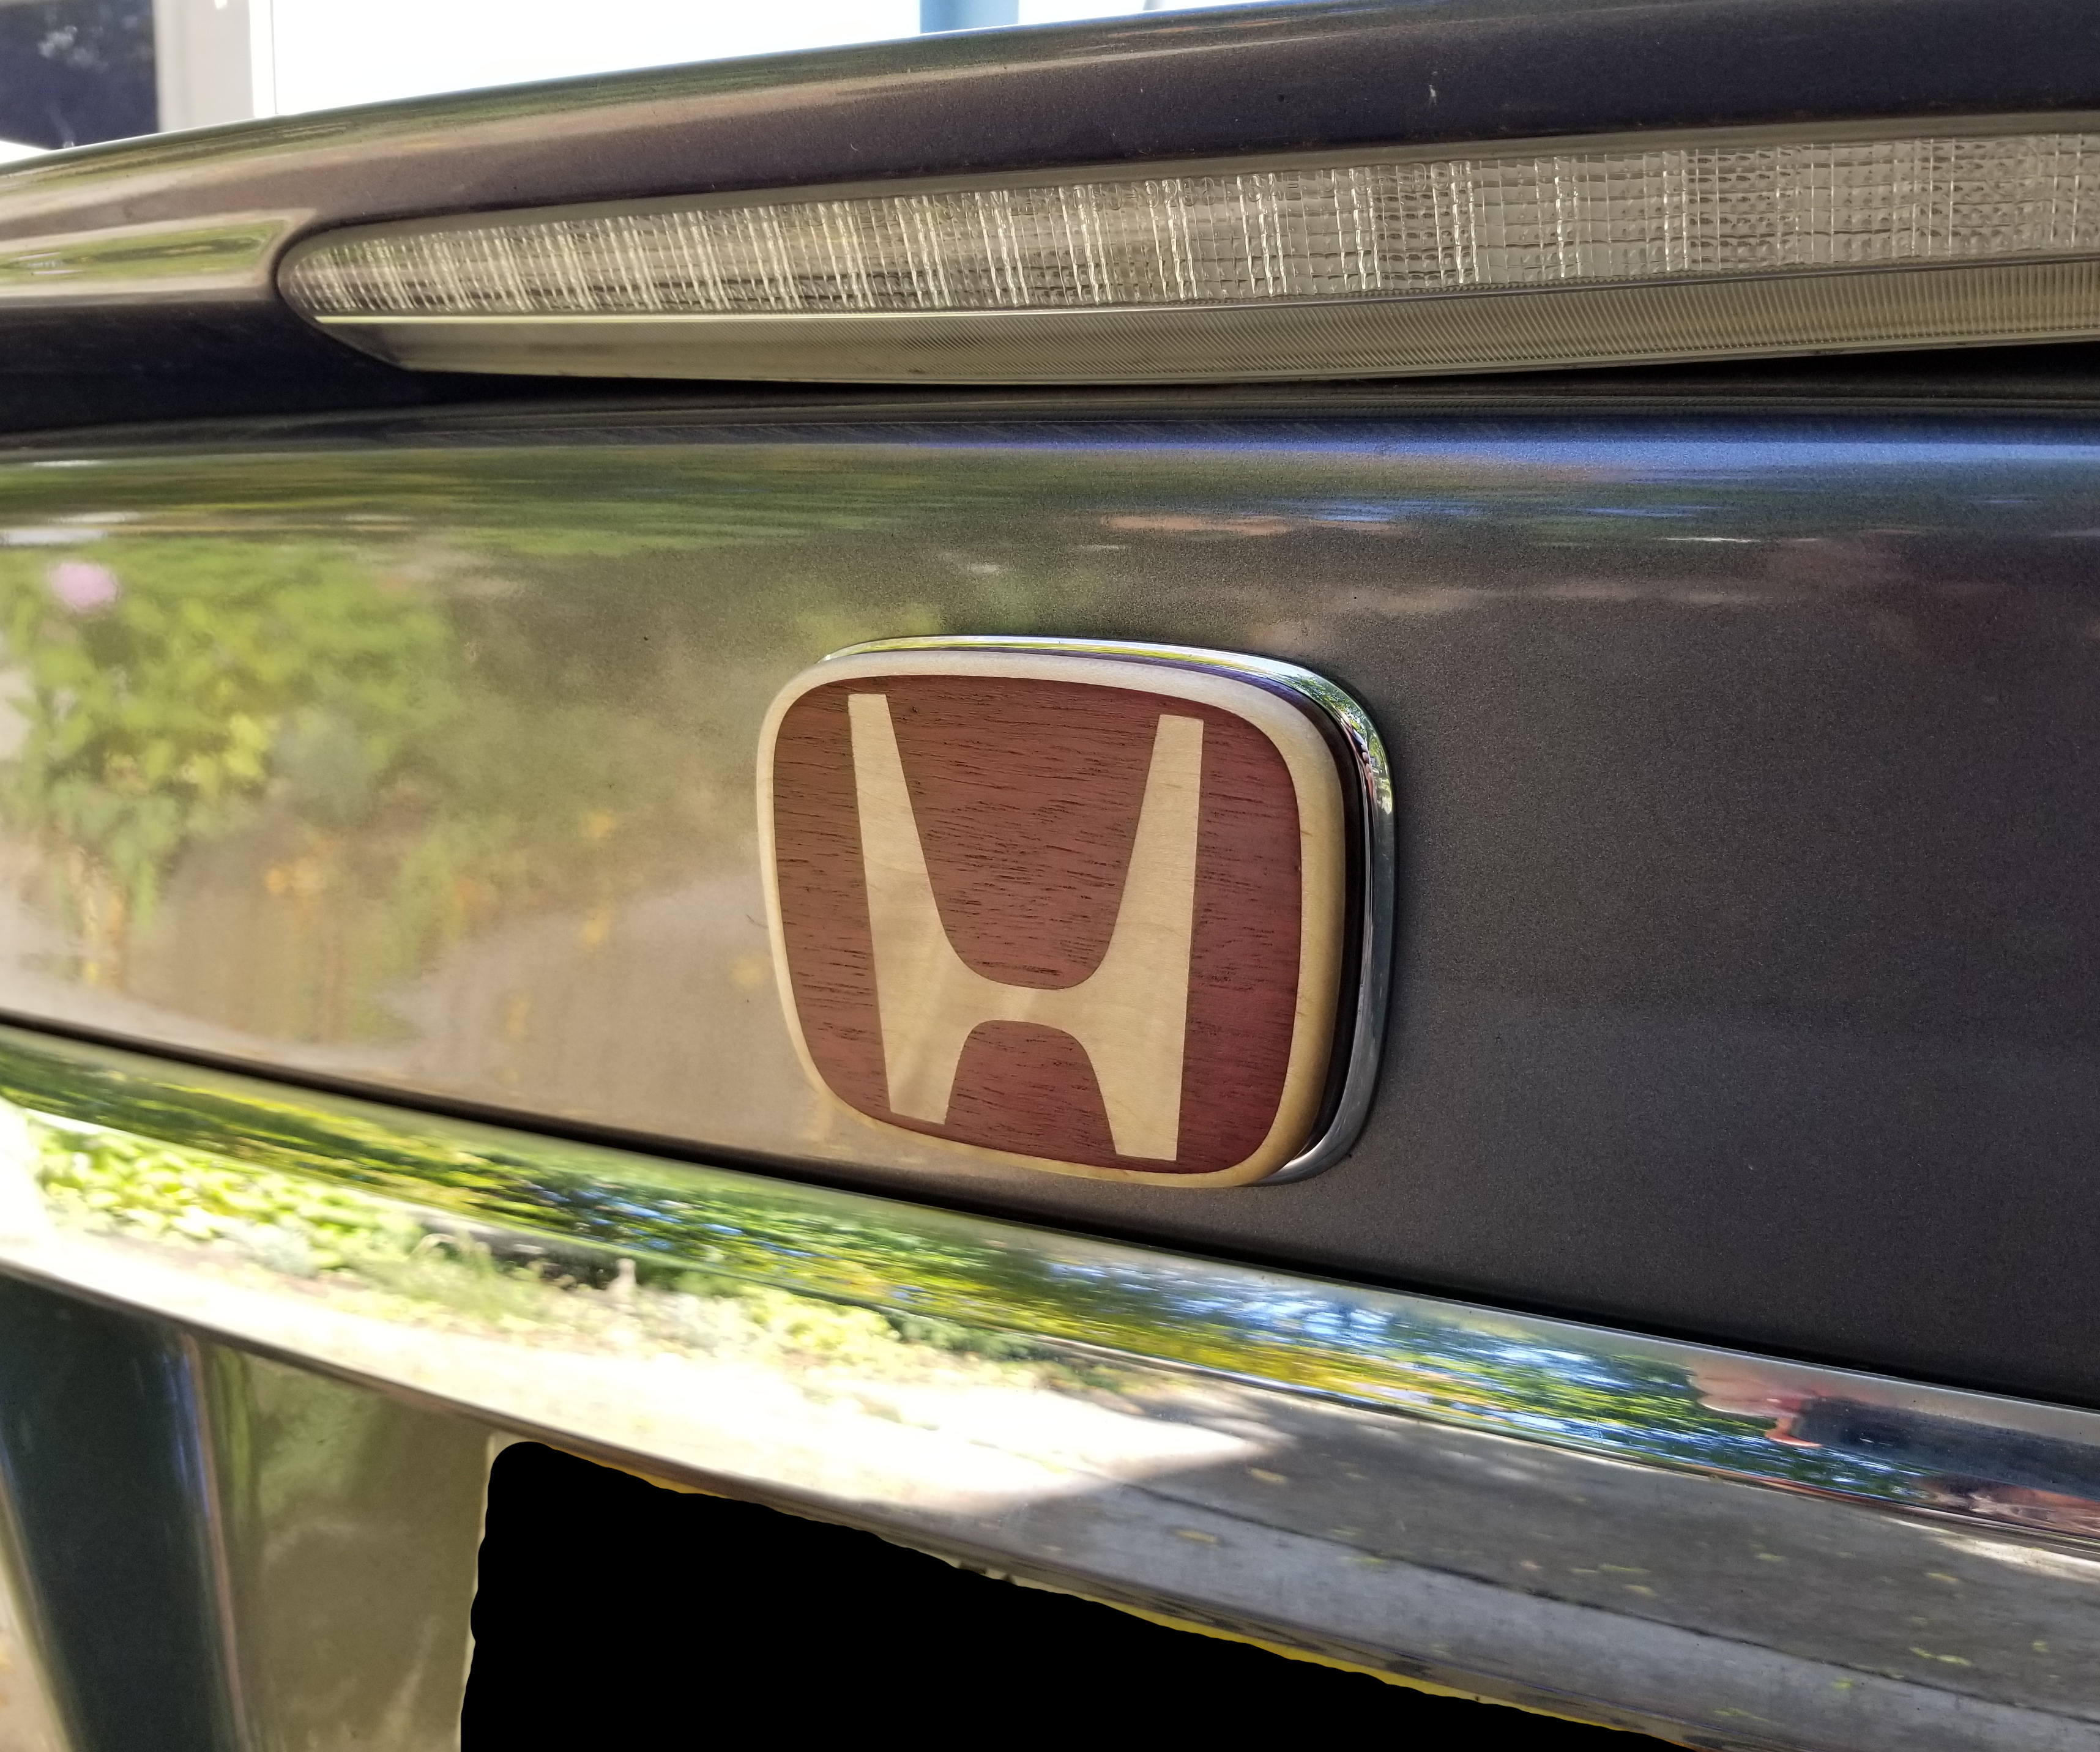
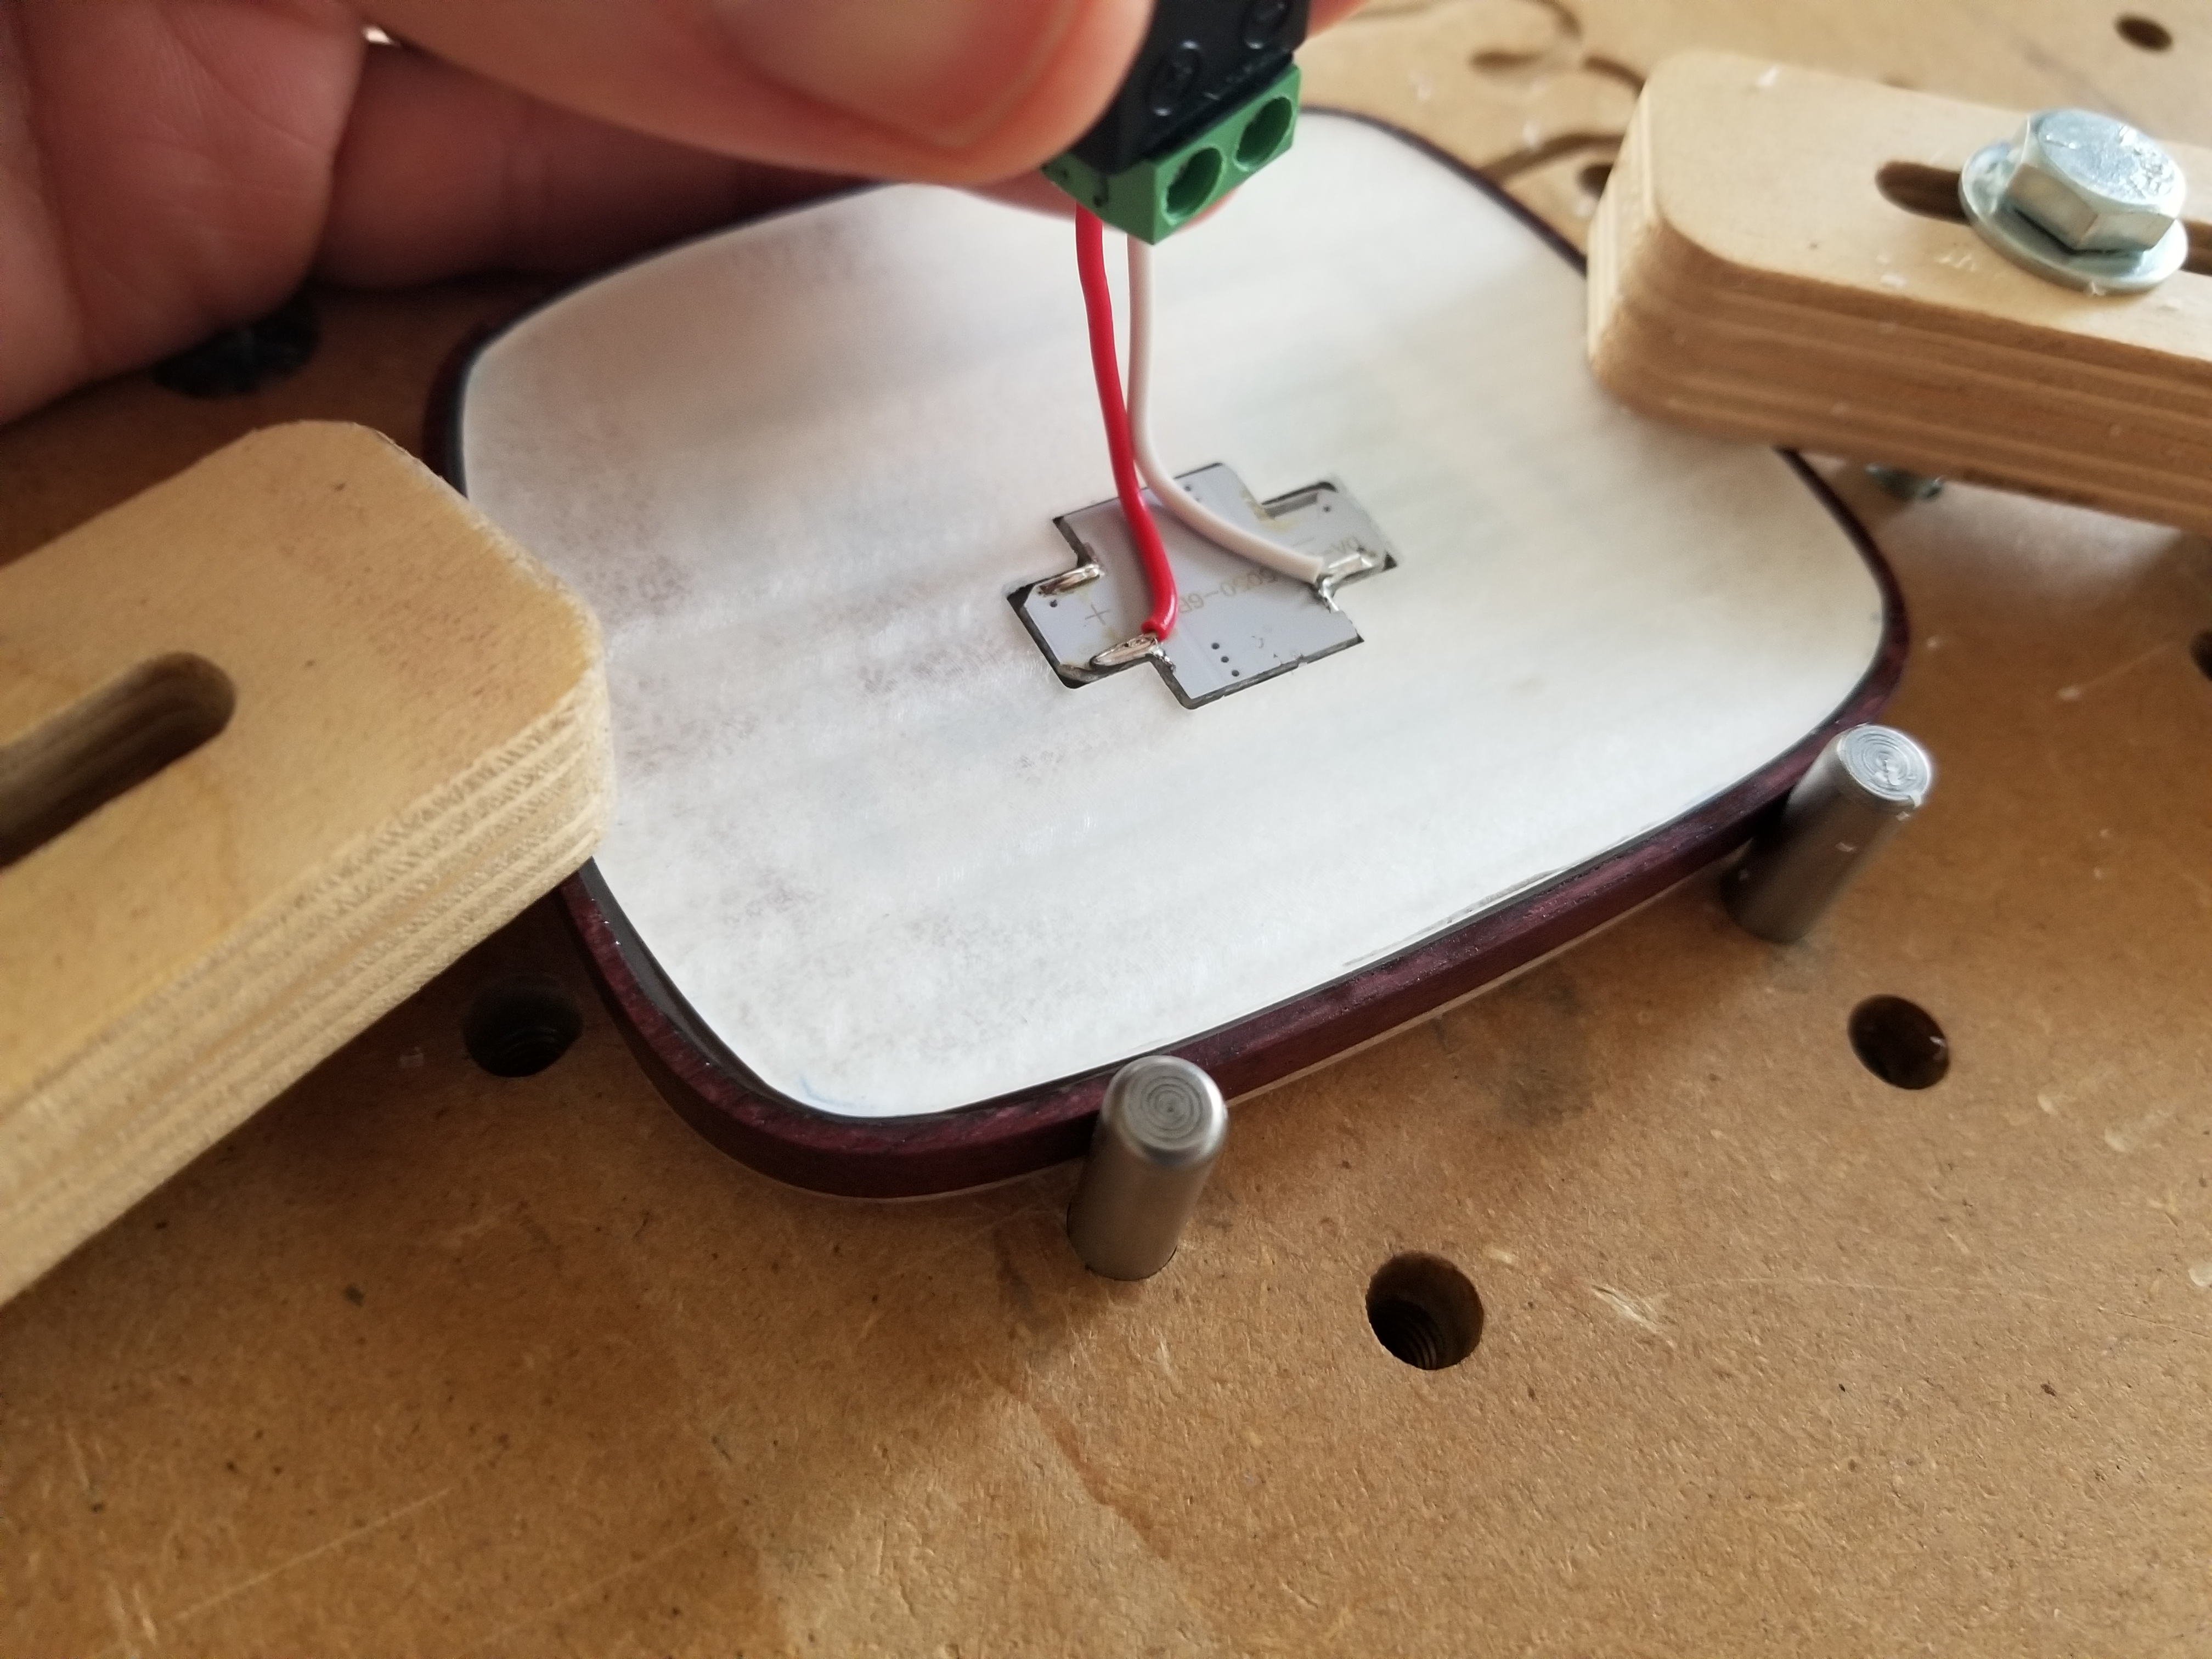
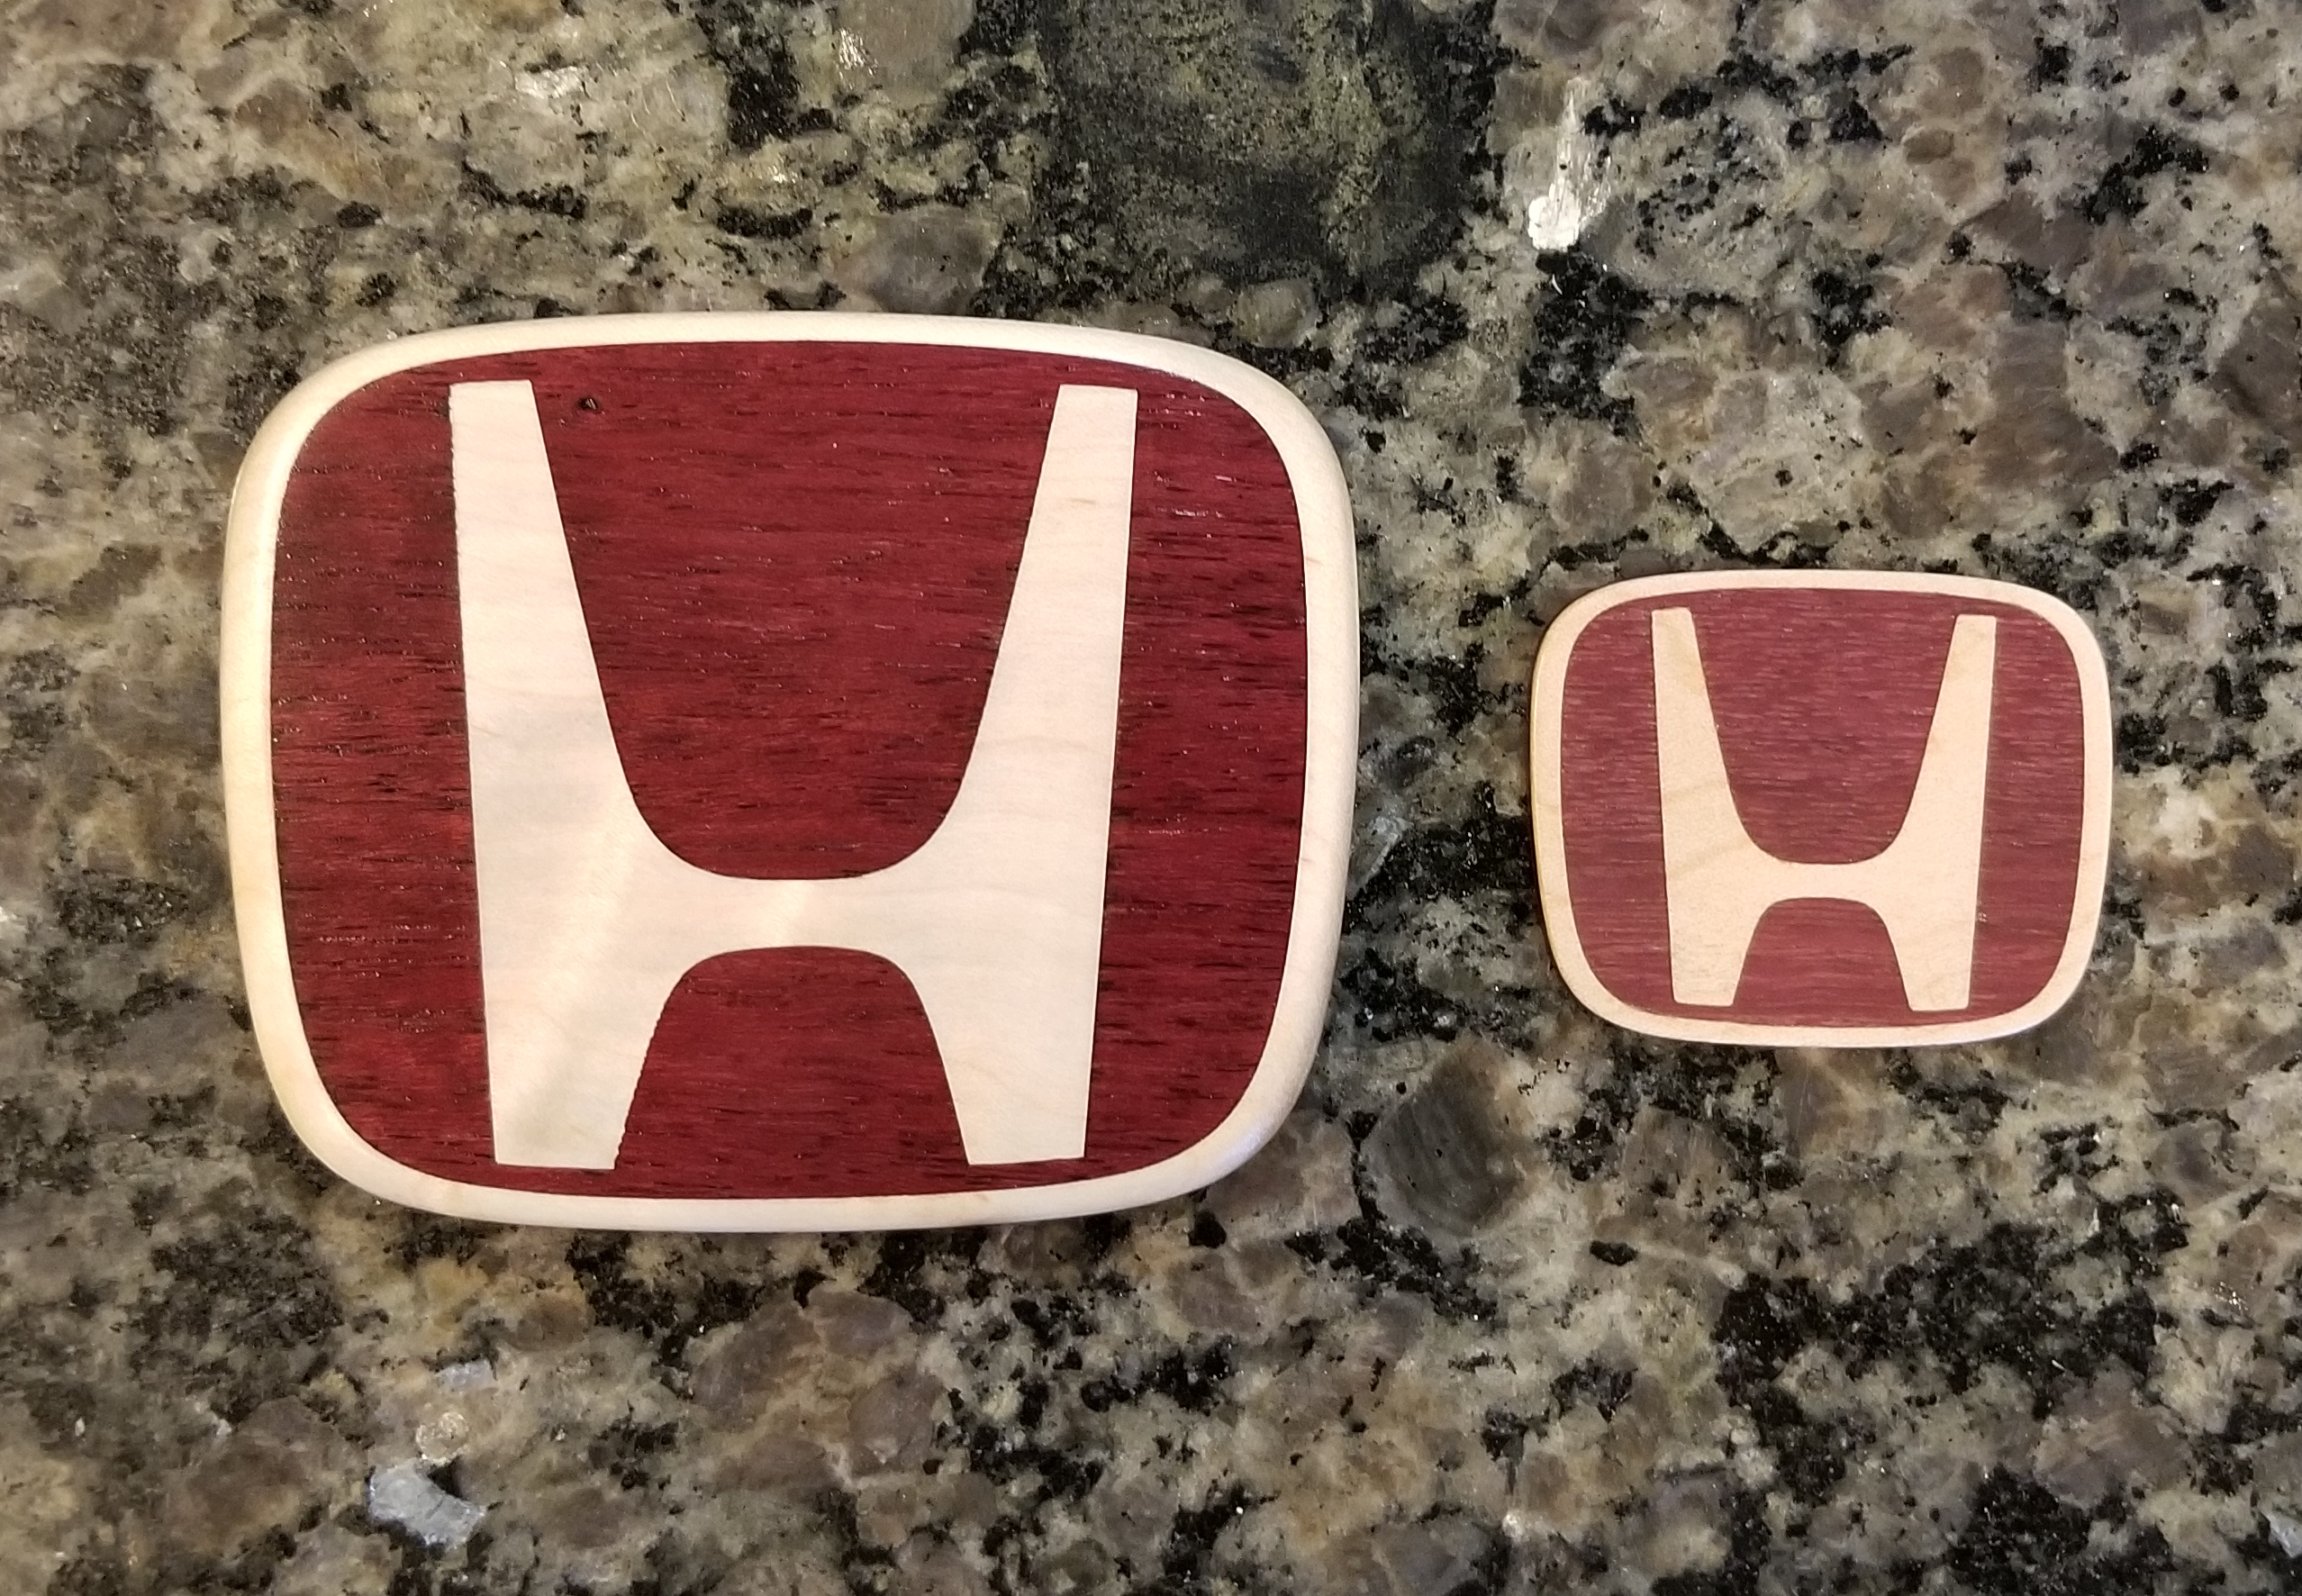
For quick background on the idea, when I first got my S3 about 1.5yrs ago, one of my early projects was a Honda badge for my steering wheel (this is ~2in wide x 1.6in tall):
Long ago, I was inspired by this 1D pong creation and made my own for my nephew. Early in the build, I wondered “could you make wood thin enough that it looks like wood normally, but would let light through it?” Turns out, yes, yes you can:
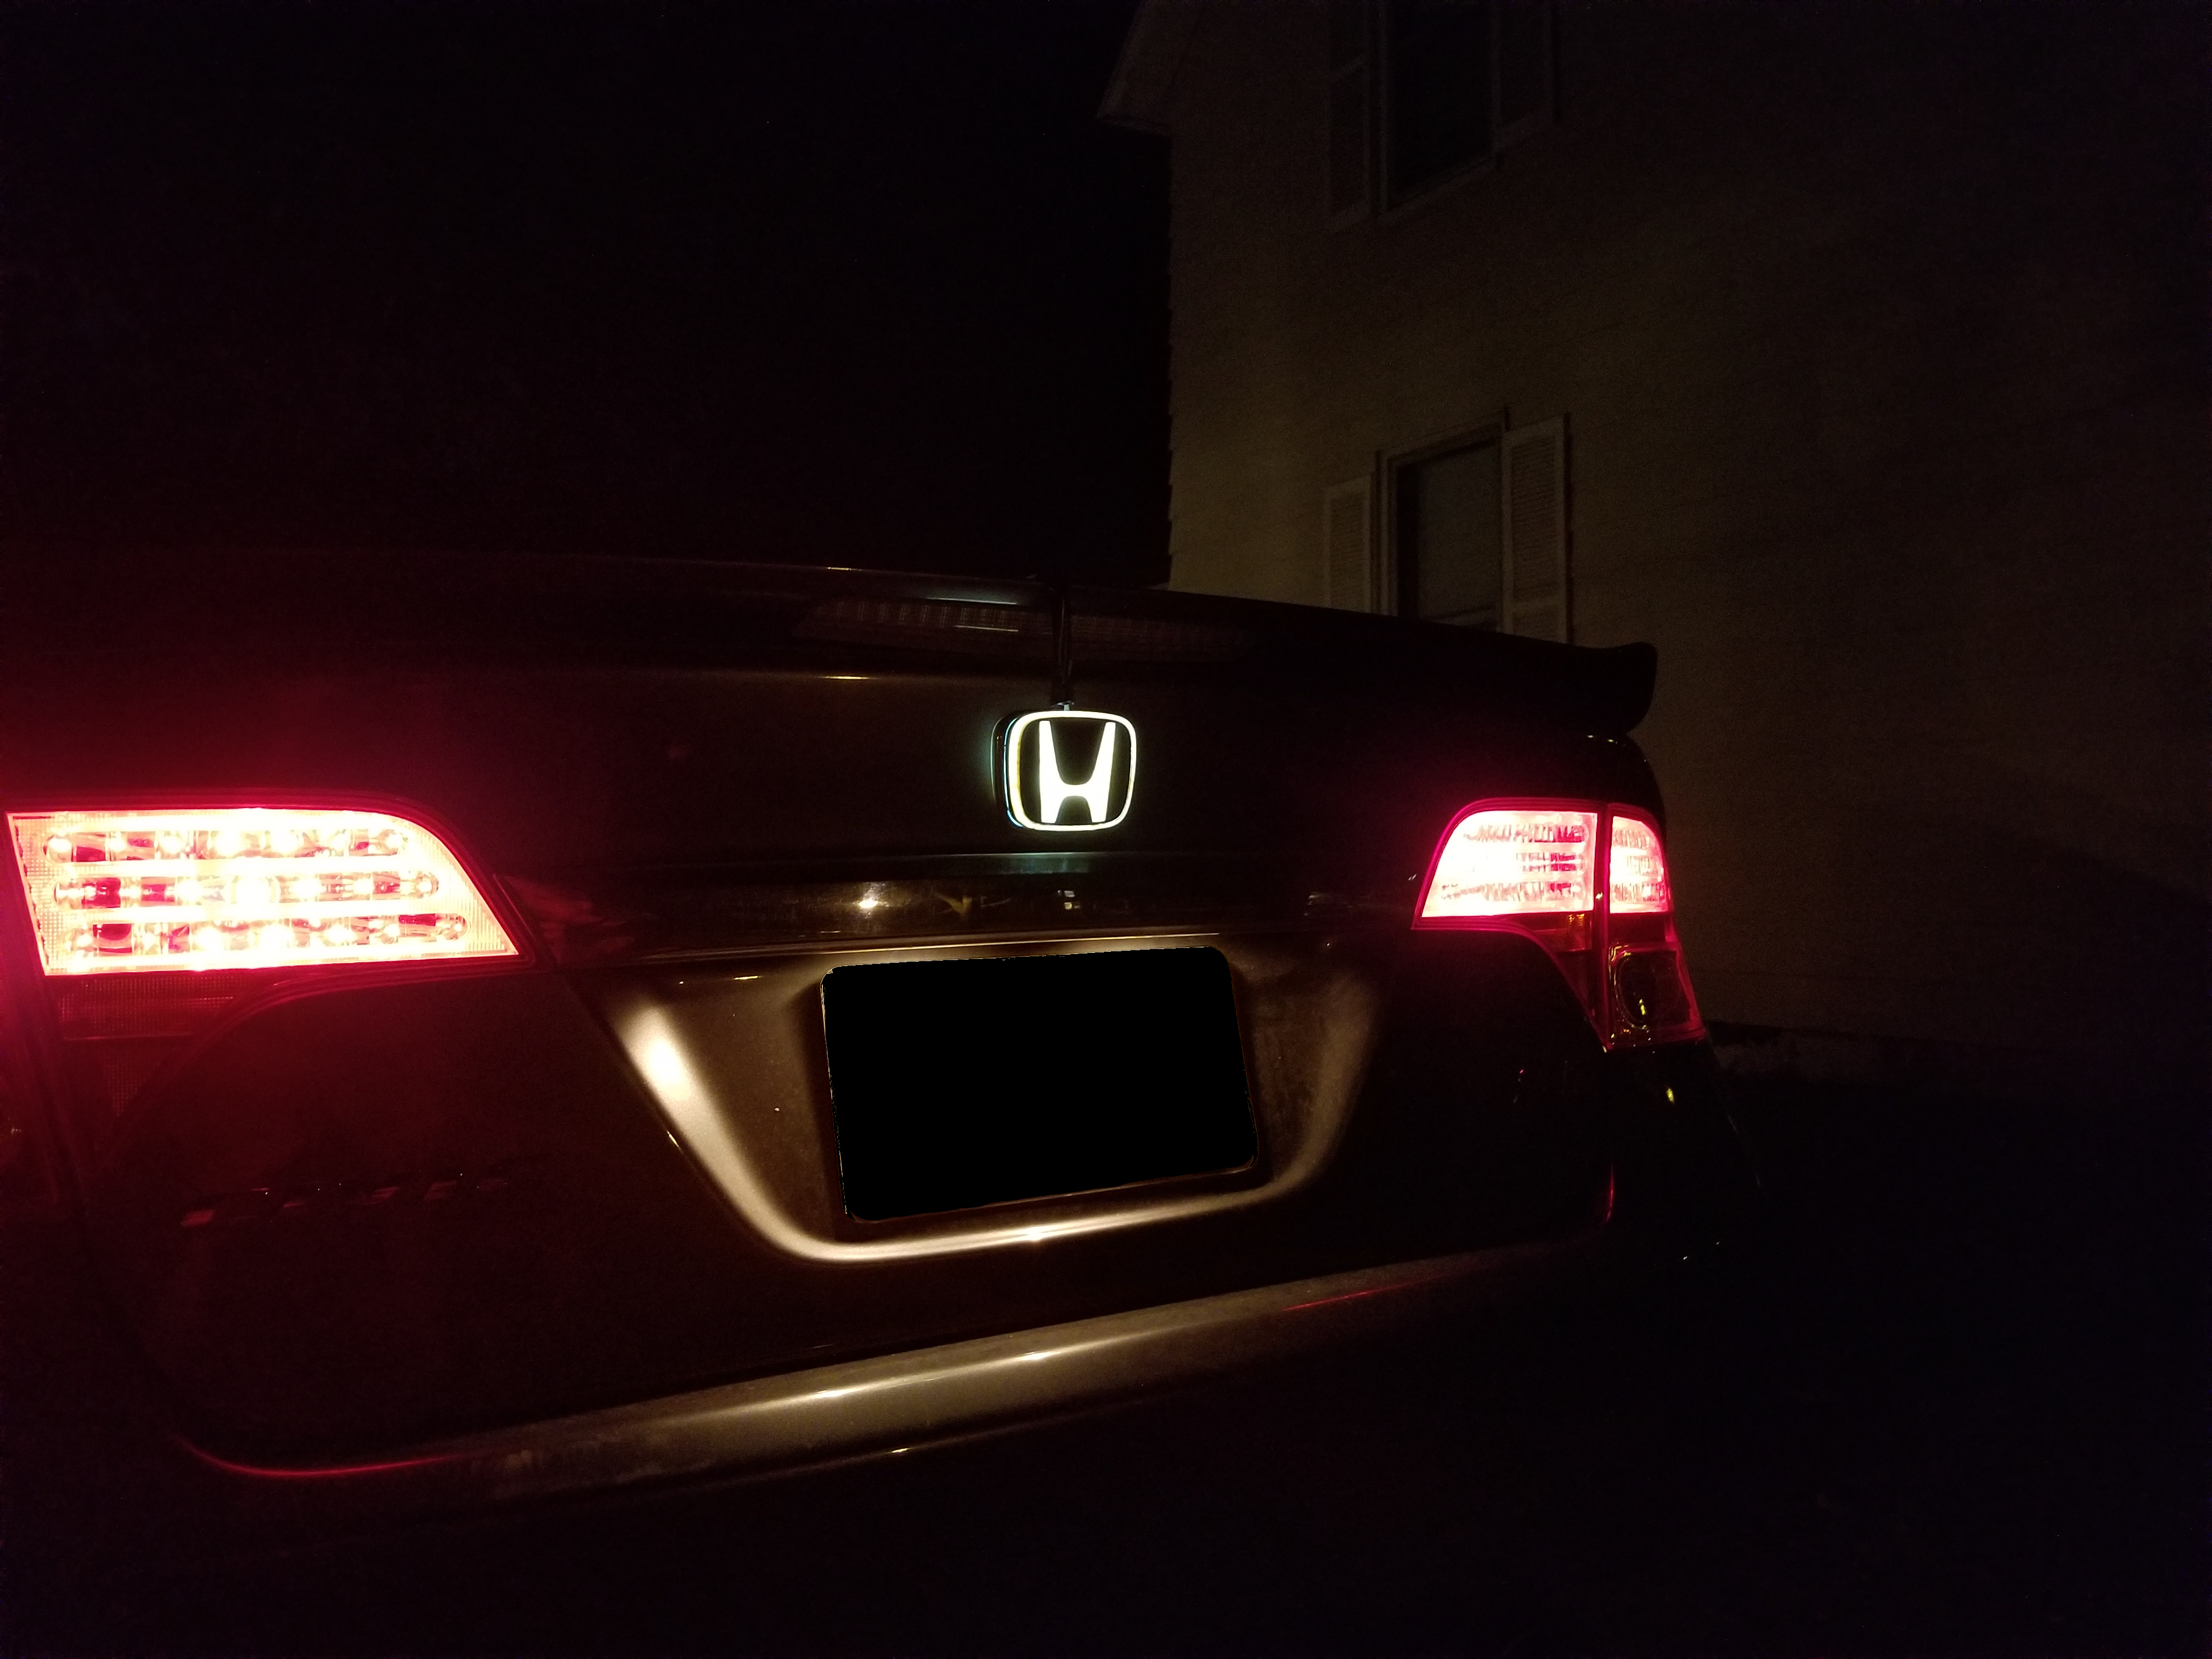
I was going to actually install this, but a) ran out of time as I’m leaving to go camping in ~1hr in northern MN and b) think I learned enough to make some tweaks for a final version. In these mockups, the badge is just taped to my current badge, but the nighttime demo really is hooked into my tail lights, which was my goal in using a 12V LED for the light source (it’s a dome light retrofit)!
Here’s proof, with my son locking/unlocking my car to show it off
I’ve never done one of these contests before and don’t know the appetite folks have for gory details, so I put the full log of annotated build pics on imgur for those interested.
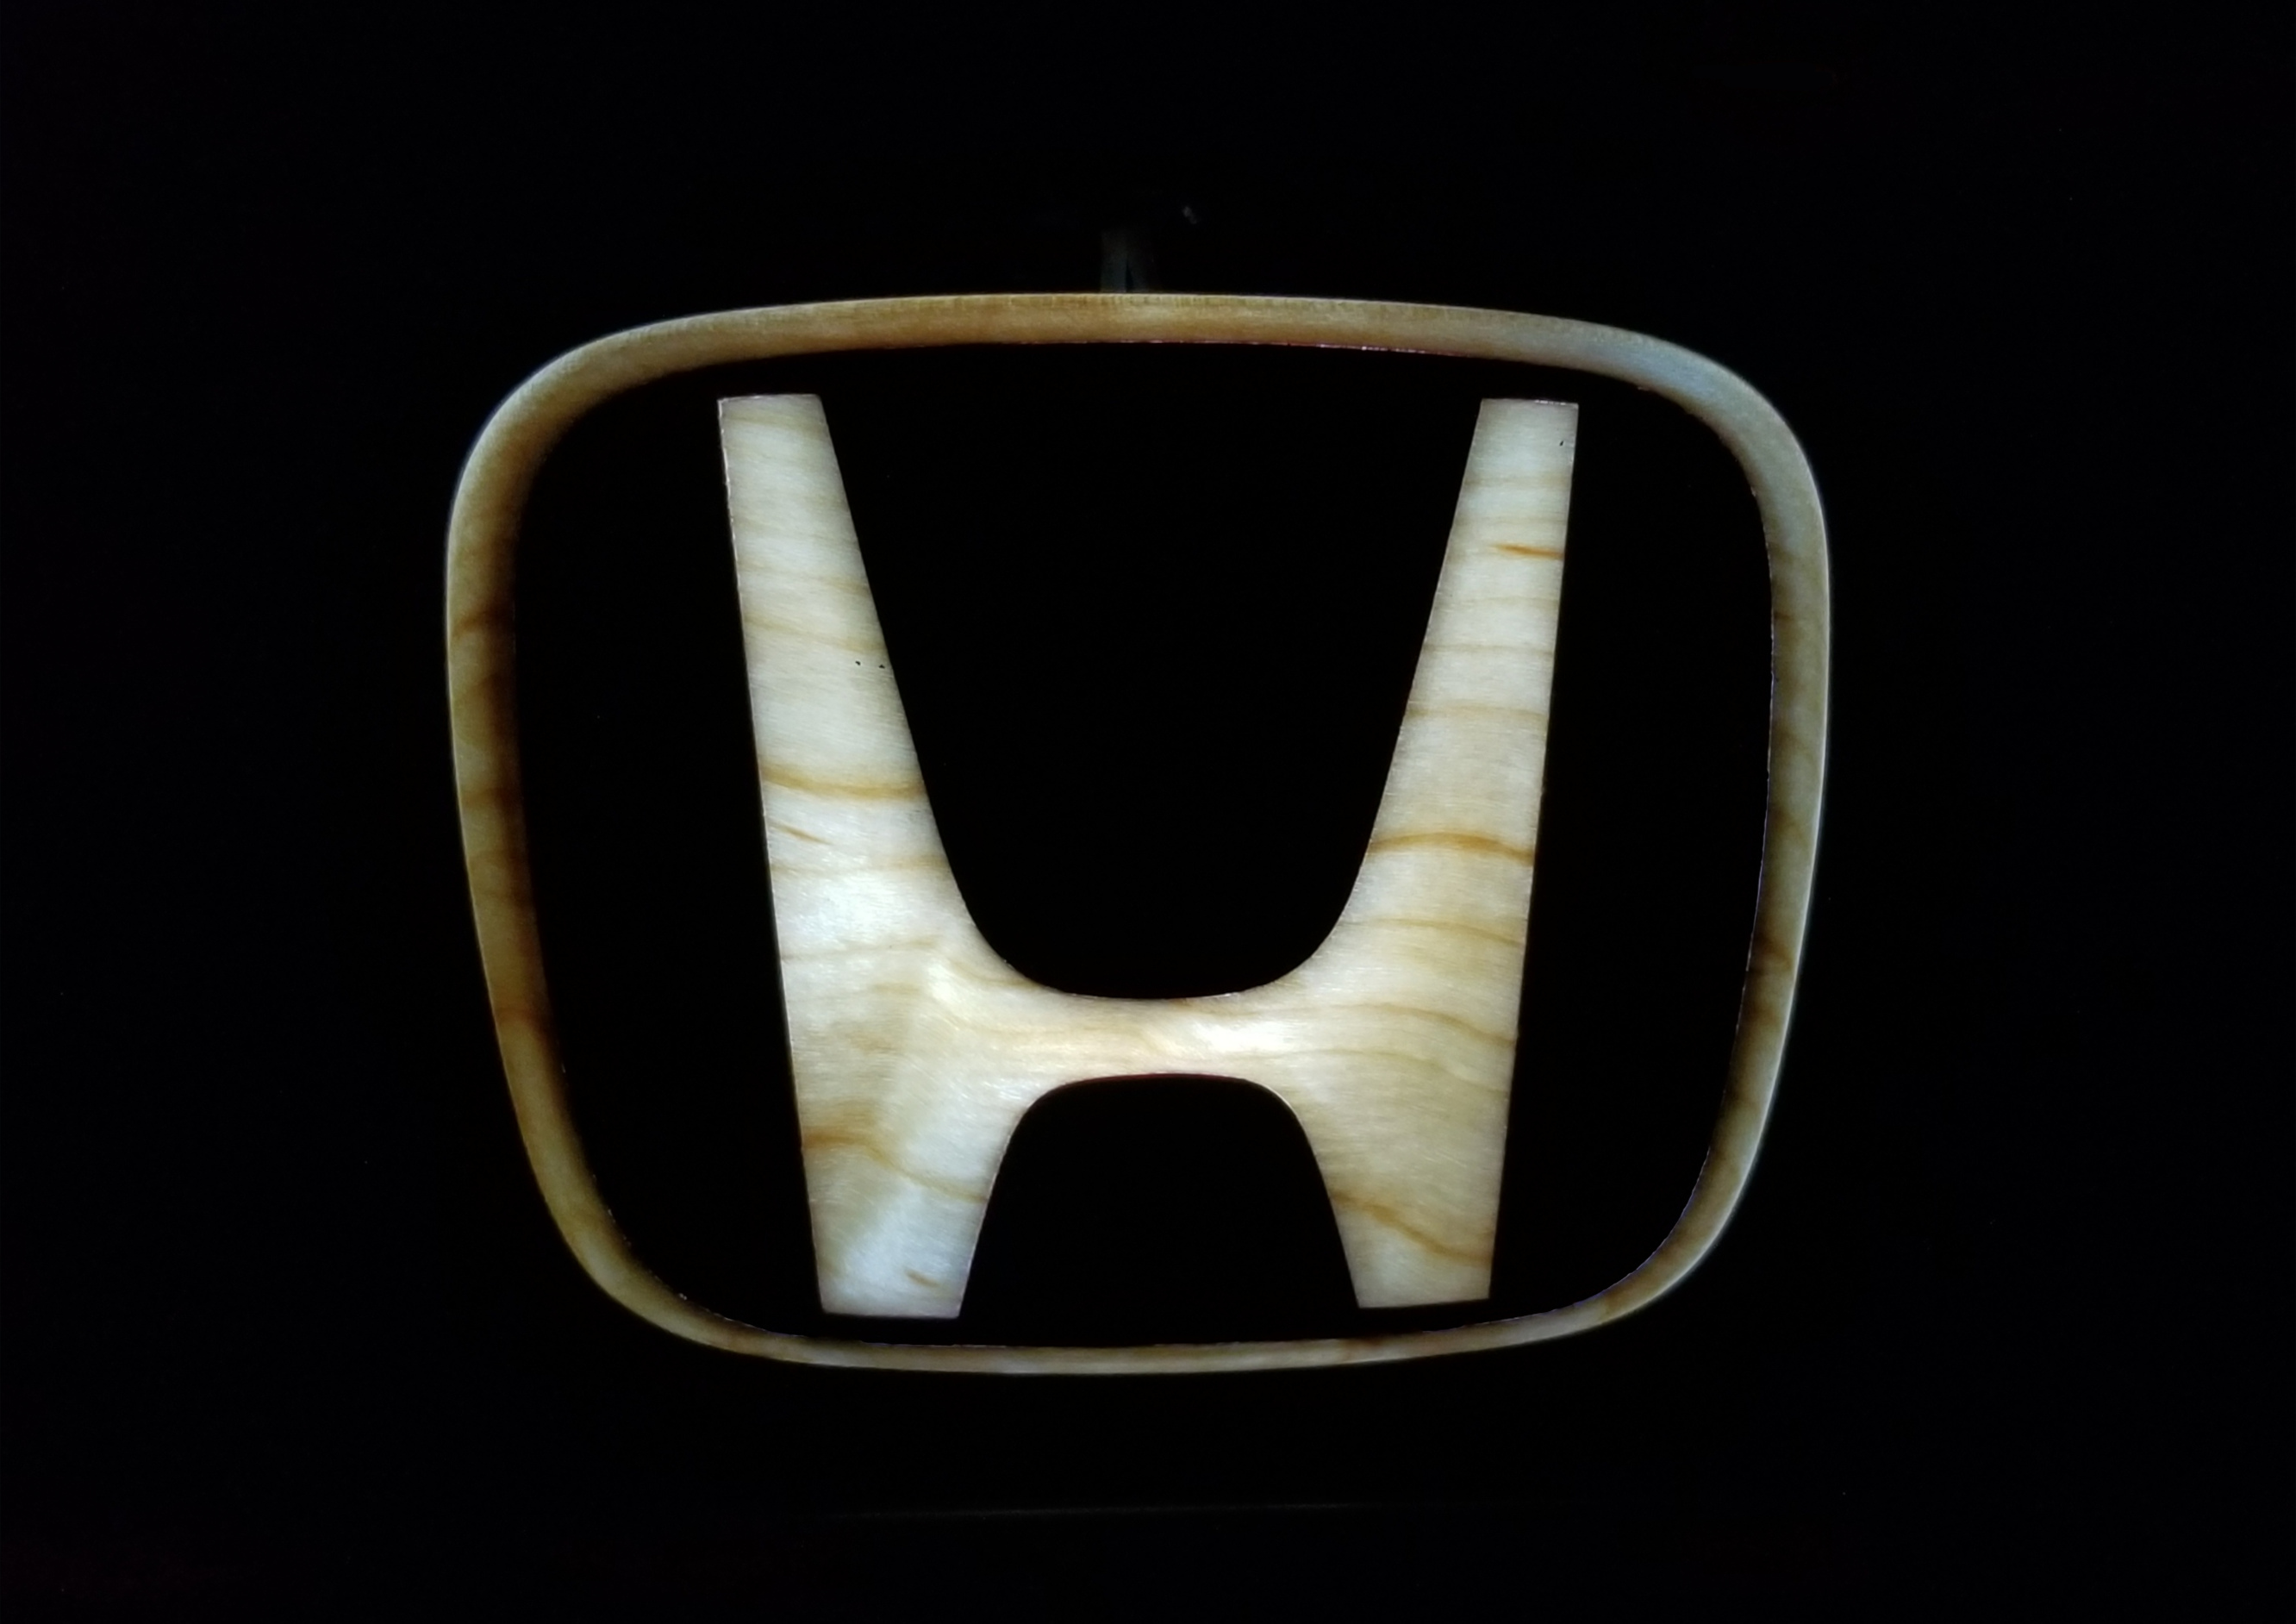
For the quick and dirty, the badge is a wooden shell, backfilled with epoxy. I used a small amount of white pearl powder to make the epoxy diffuse just behind the H and ring. Then I lined the entire thing with mirror film to give me the best shot of getting the light bouncing around from a point source to evenly illuminate everything.
I machined a backplate from acrylic for the back, which is also lined with mirror film, and then machined a pocket for my LED light (mirror film is down in this pic, you’re seeing the machined back of the acrylic).
I learned a lot, and am happy to answer questions on what I’d do differently. I consider this version as exceeding my expectations (really did not expect it to look so darn cool at night, and though my light would be too weak and get dwarfed by the tail lights). That said, I have enough tweaks in mind that this will live on as a nightlight in my son’s room.
For a quick summary of some thoughts/lessons learned:
I used curly maple which I thought was really pretty, but the swirling grain creates end-grain-like sections in certain places, which put some unusually bright spots in a few places. I’d use something more straight/consistent/dense grained (maybe just “normal” maple)
I flipped the piece and was actually blown away by how consistent everything looked. Two pins is something I wanted to try on the last contest and man, it just worked great. I re-located a total of 3 times, expecting something to go wrong and it worked a treat
I’d possibly round the corners of the positive inlay, as despite chiseling, I think those sharp H corners gave me woes
now that I figured out how to diffuse the epoxy, I could have backfilled the whole thing in one shot. When I machined the top contour, there was only a 3mm layer against the H and ring. When I pried it up, the purpleheart “shell” shattered in a few places. I just about rage cried, but then just moved on to supergluing humpty dumpty back together
I’d love feedback on my perhaps odd CAD/CAM method, where I have a few versions of the part in the same file. I would roll the design forward/backward depending on what I wanted to machine (for example a shell and cut to create the inlays, but later suppressing those to use them for the 3d contour and full-depth profile). Not sure what others do here, but changing the design isn’t great as I have to regenerate all paths after
did my first loft in Fusion 360 to make that outer rounded contour. Using a radius would have rounded it in a way that didn’t match the outer logo ring, so I lofted the actual profiles together which I thought turned out cool
I debated how to CNC the mirror film, possibly with a v bit, but ran out of time. Ideally I wouldn’t have a back plate at all. Thinking I’d embed the back mirror film in the final pour/float on top and machine right through it? Might also embed threaded receivers to hold the LED down while still being removable? Or drill/tap the LED? Point being, the back has room for improvement and I didn’t get to that final mile of optimization.
Disclaimer: I generally don’t know what I’m doing in CAM world, so I end up with pretty Frankenstein-ish models, setups and operations. If it’s in there, I probably used it at some point.
Final disclaimer: the legality of this is not clear to me. To the original post’s comment about sharing vectors… the no-nos appear to be representing something that’s not a Honda as a Honda by labeling/badging and/or selling it as though it’s made by Honda. I’m doing neither, and there’s plenty of precedent for aftermarket badges that I doubt are from Honda (like this and this). To play it safe: limit to your own car and don’t sell these.
The show was awesome, plenty of space for everyone to keep there distance if they wanted and whatnot. Saturday sales were slow, but Sunday made up for that. Everyone, artists/organizers/customers, I talked to seemed really happy the event happened.
DESCRIPTION
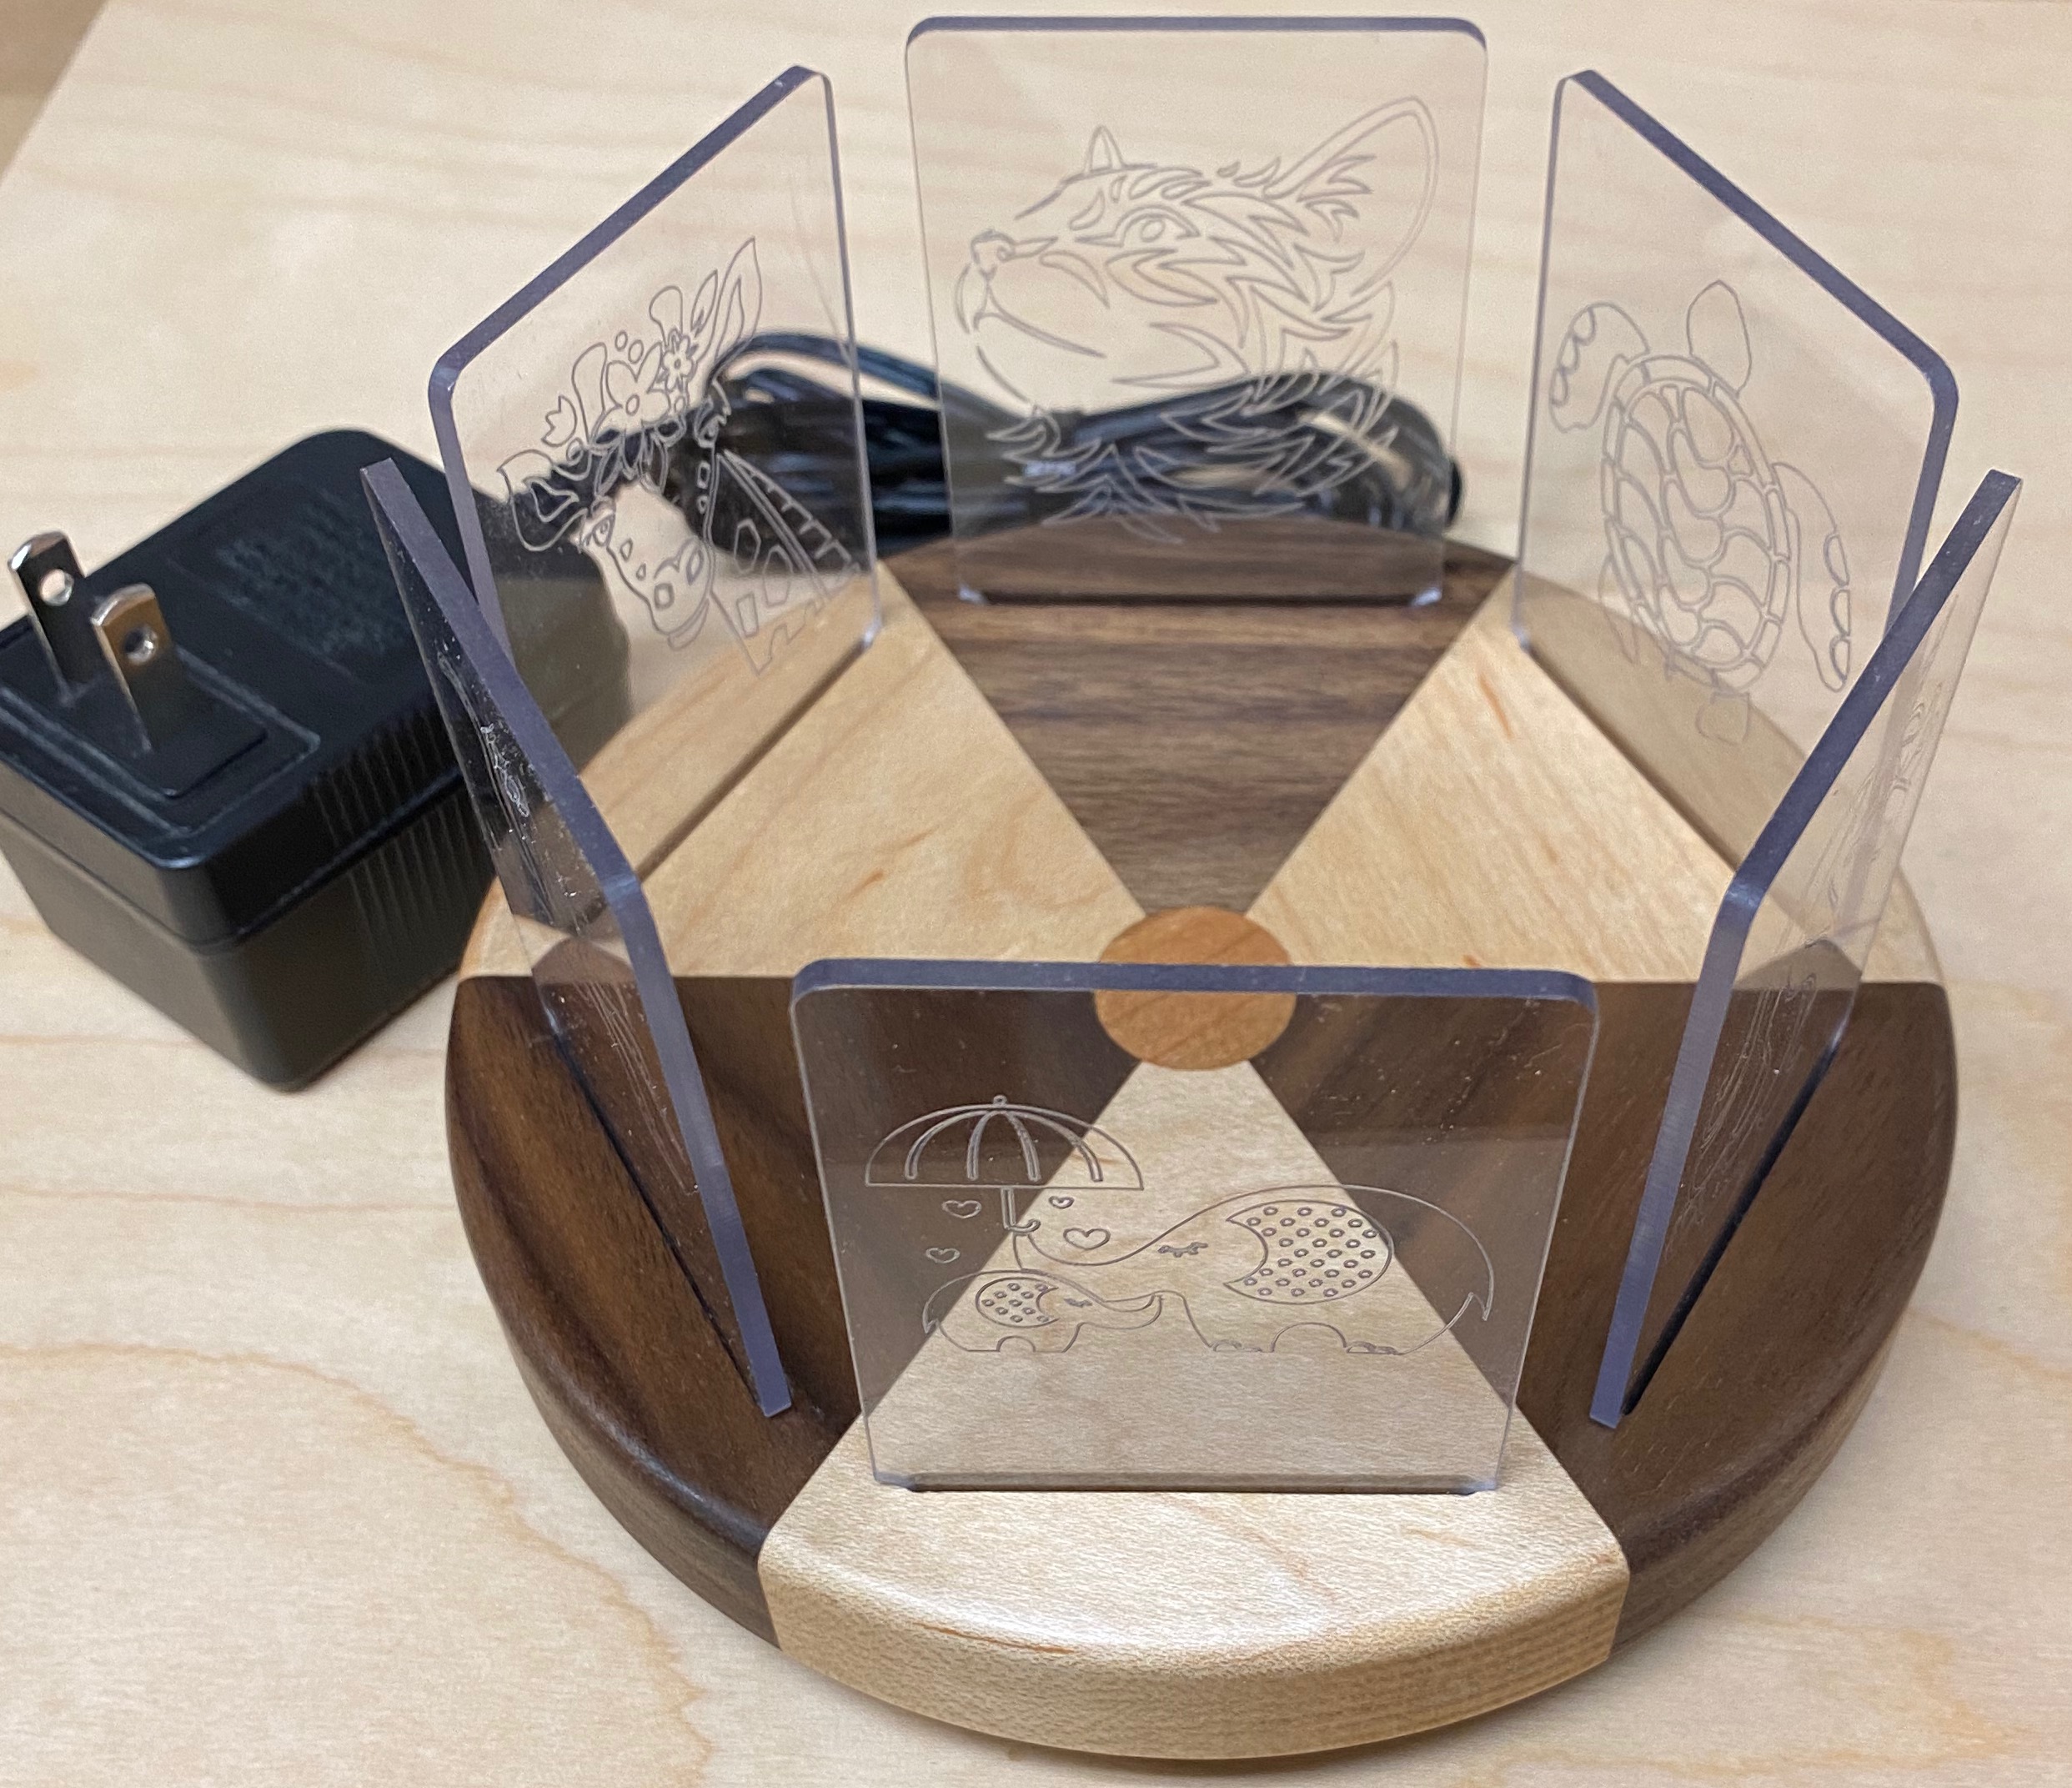
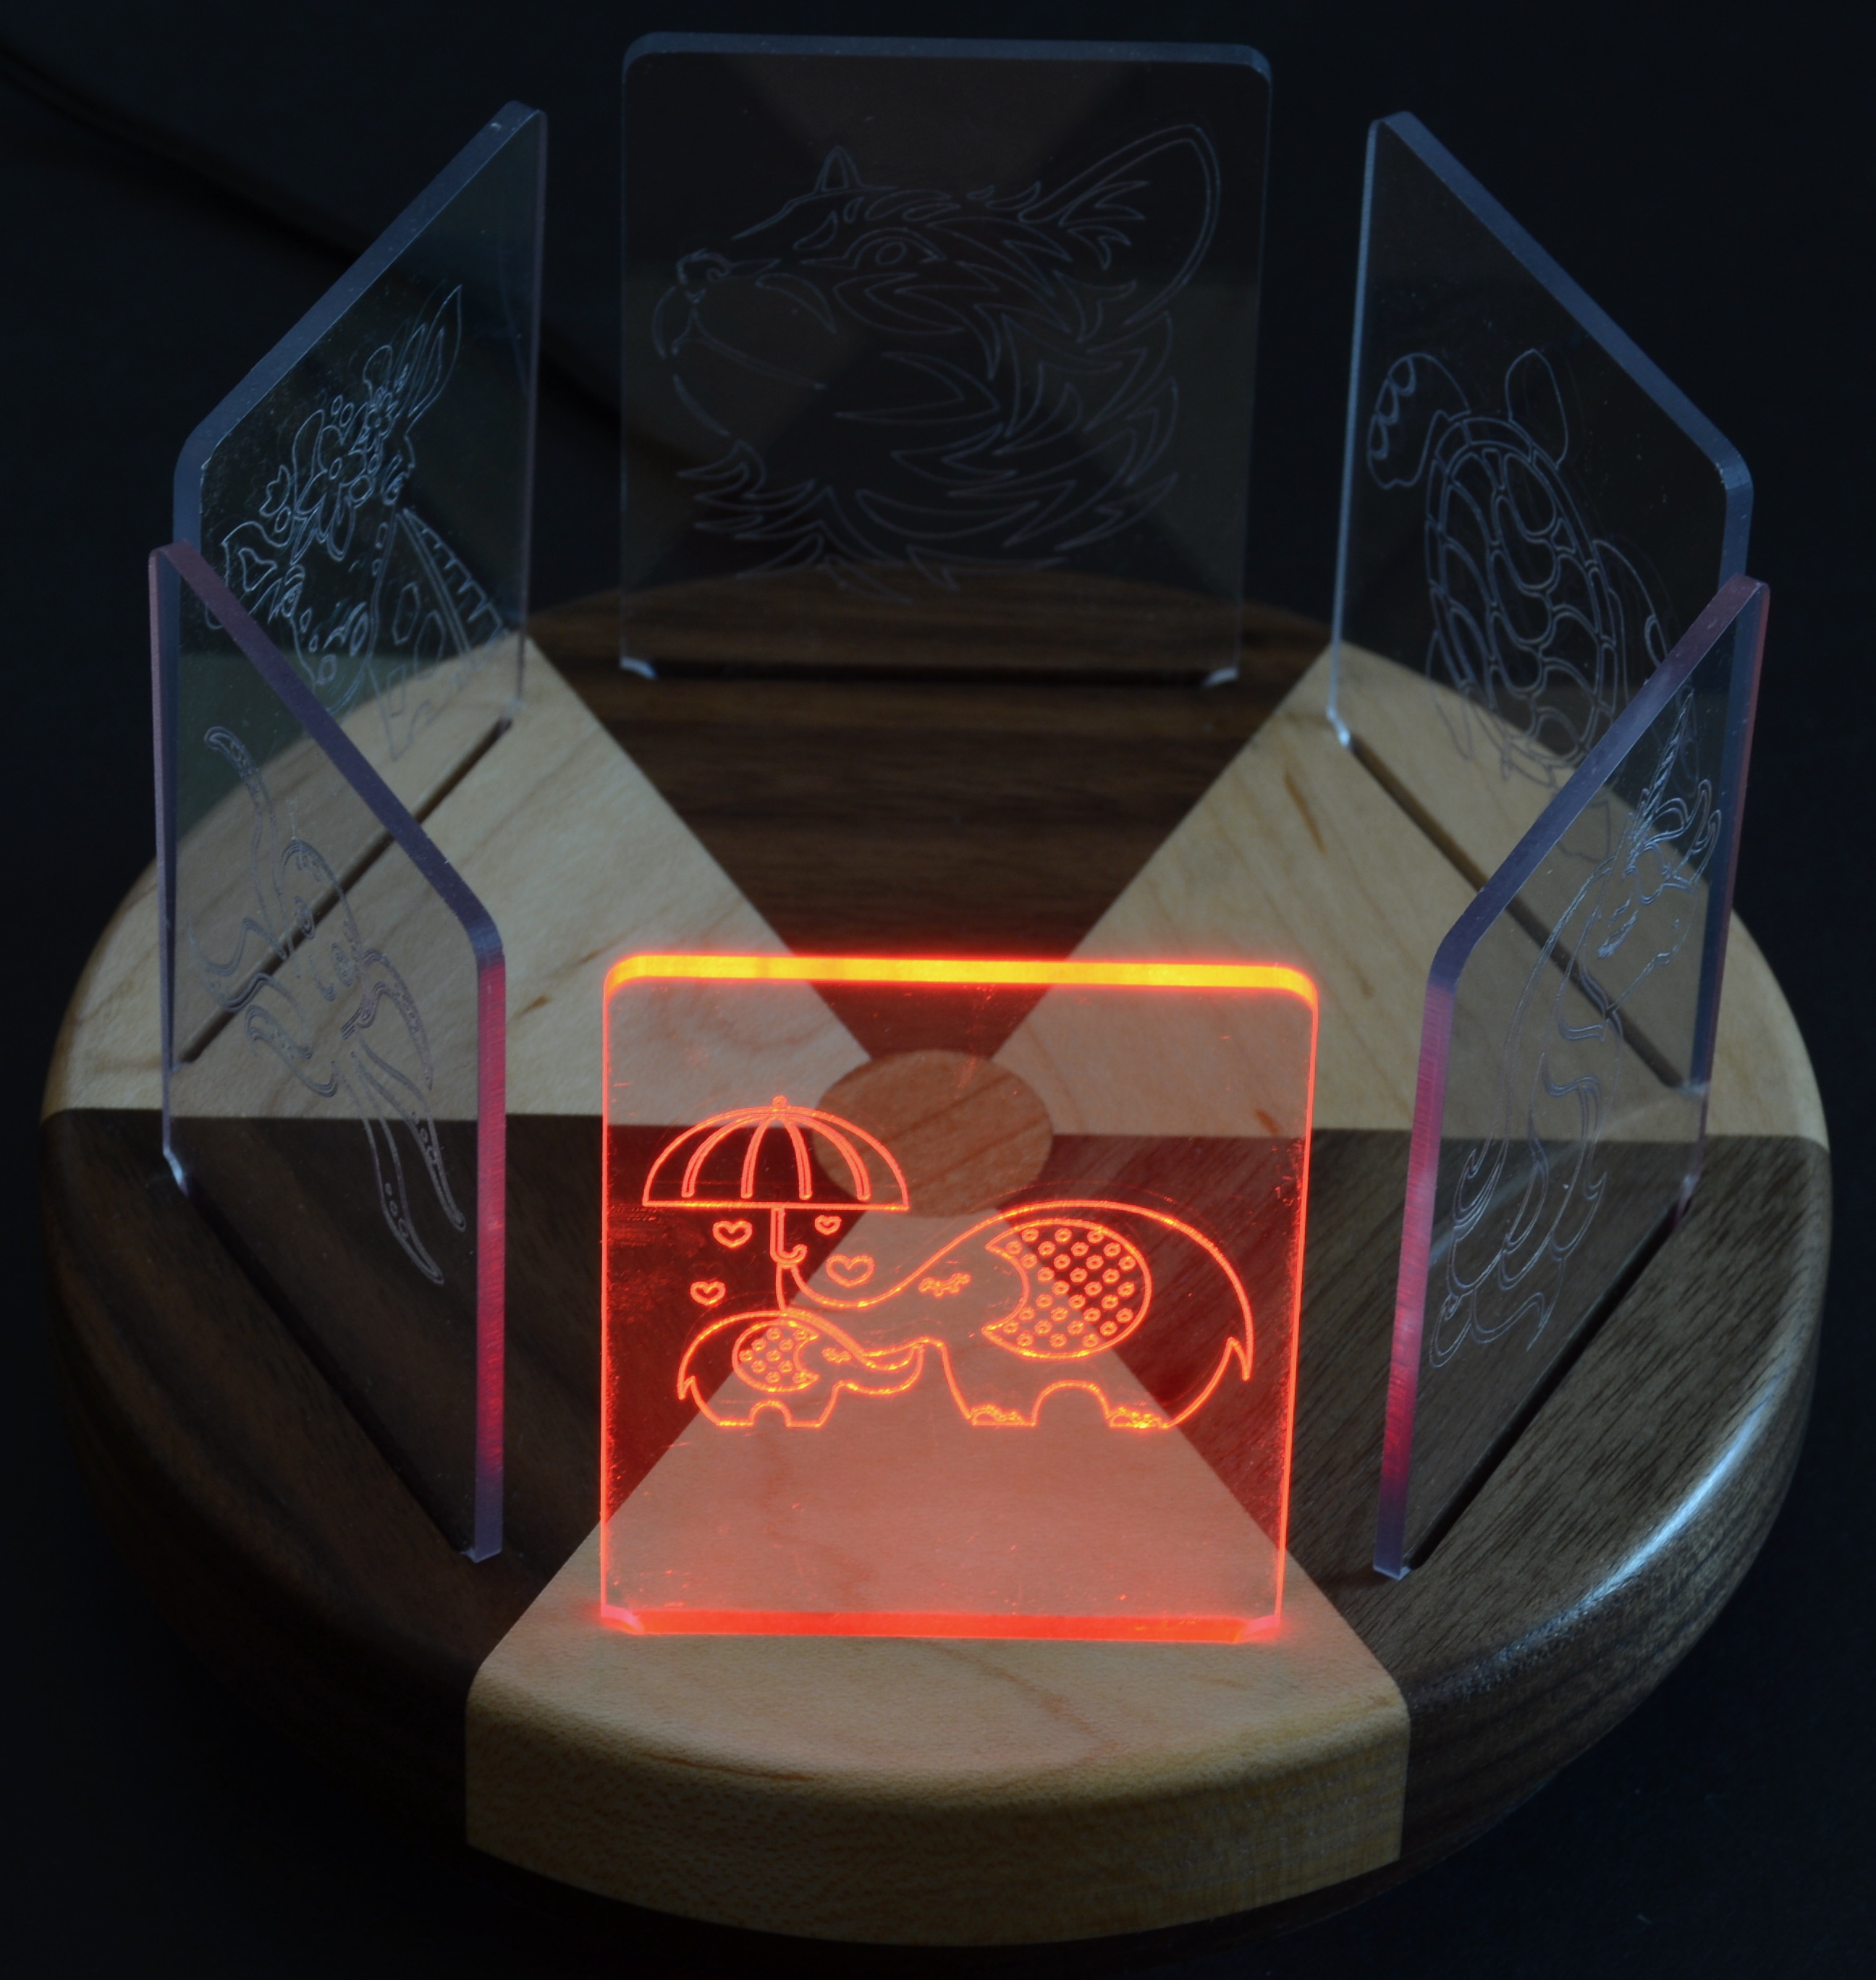
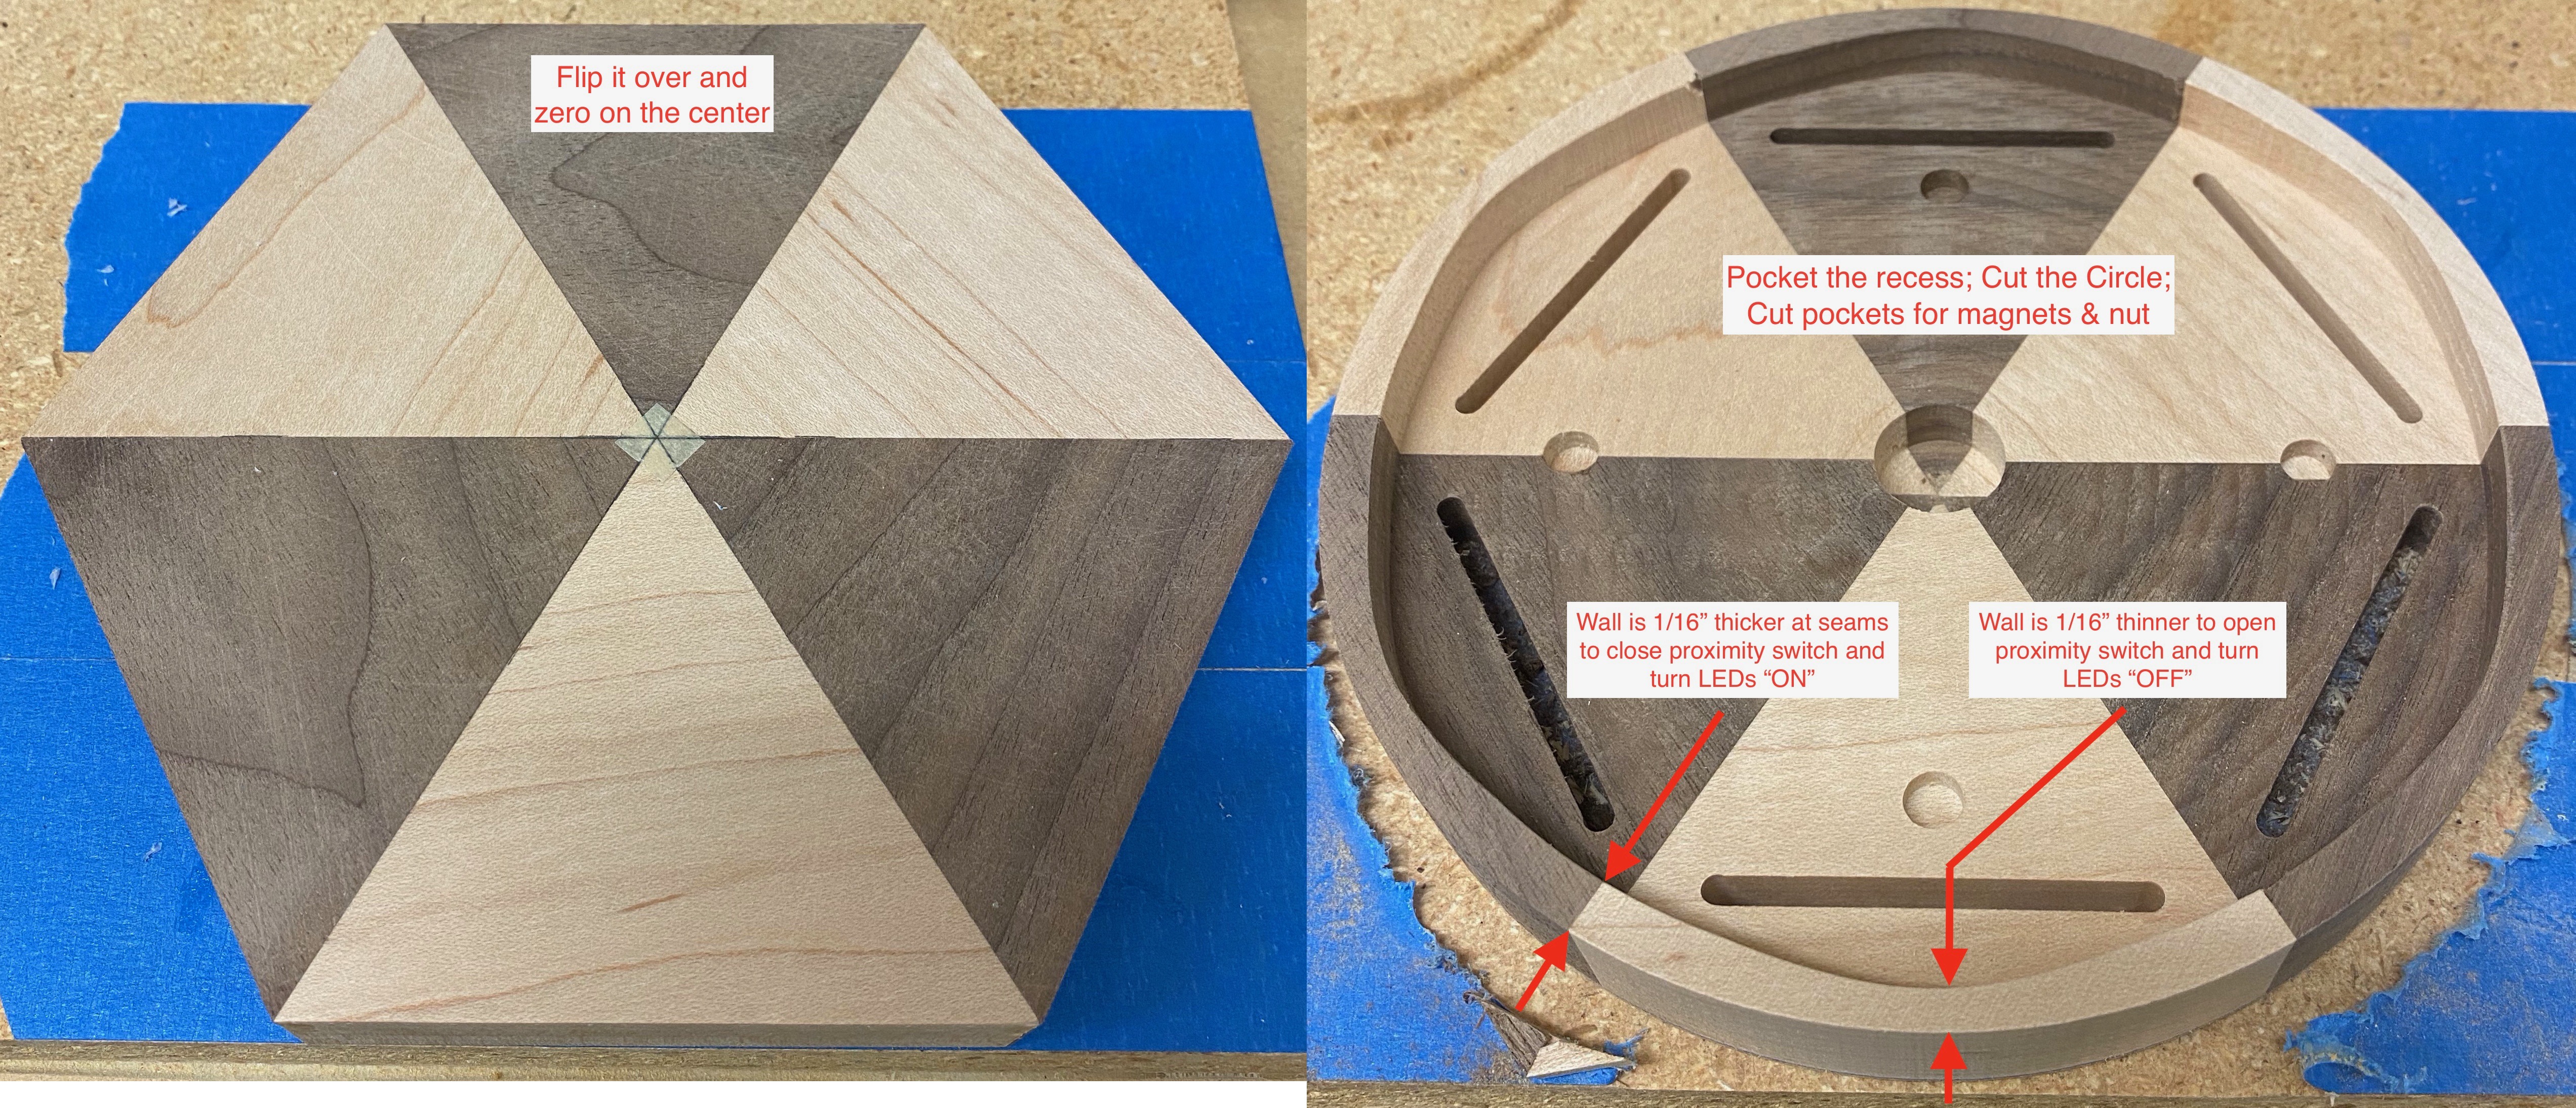
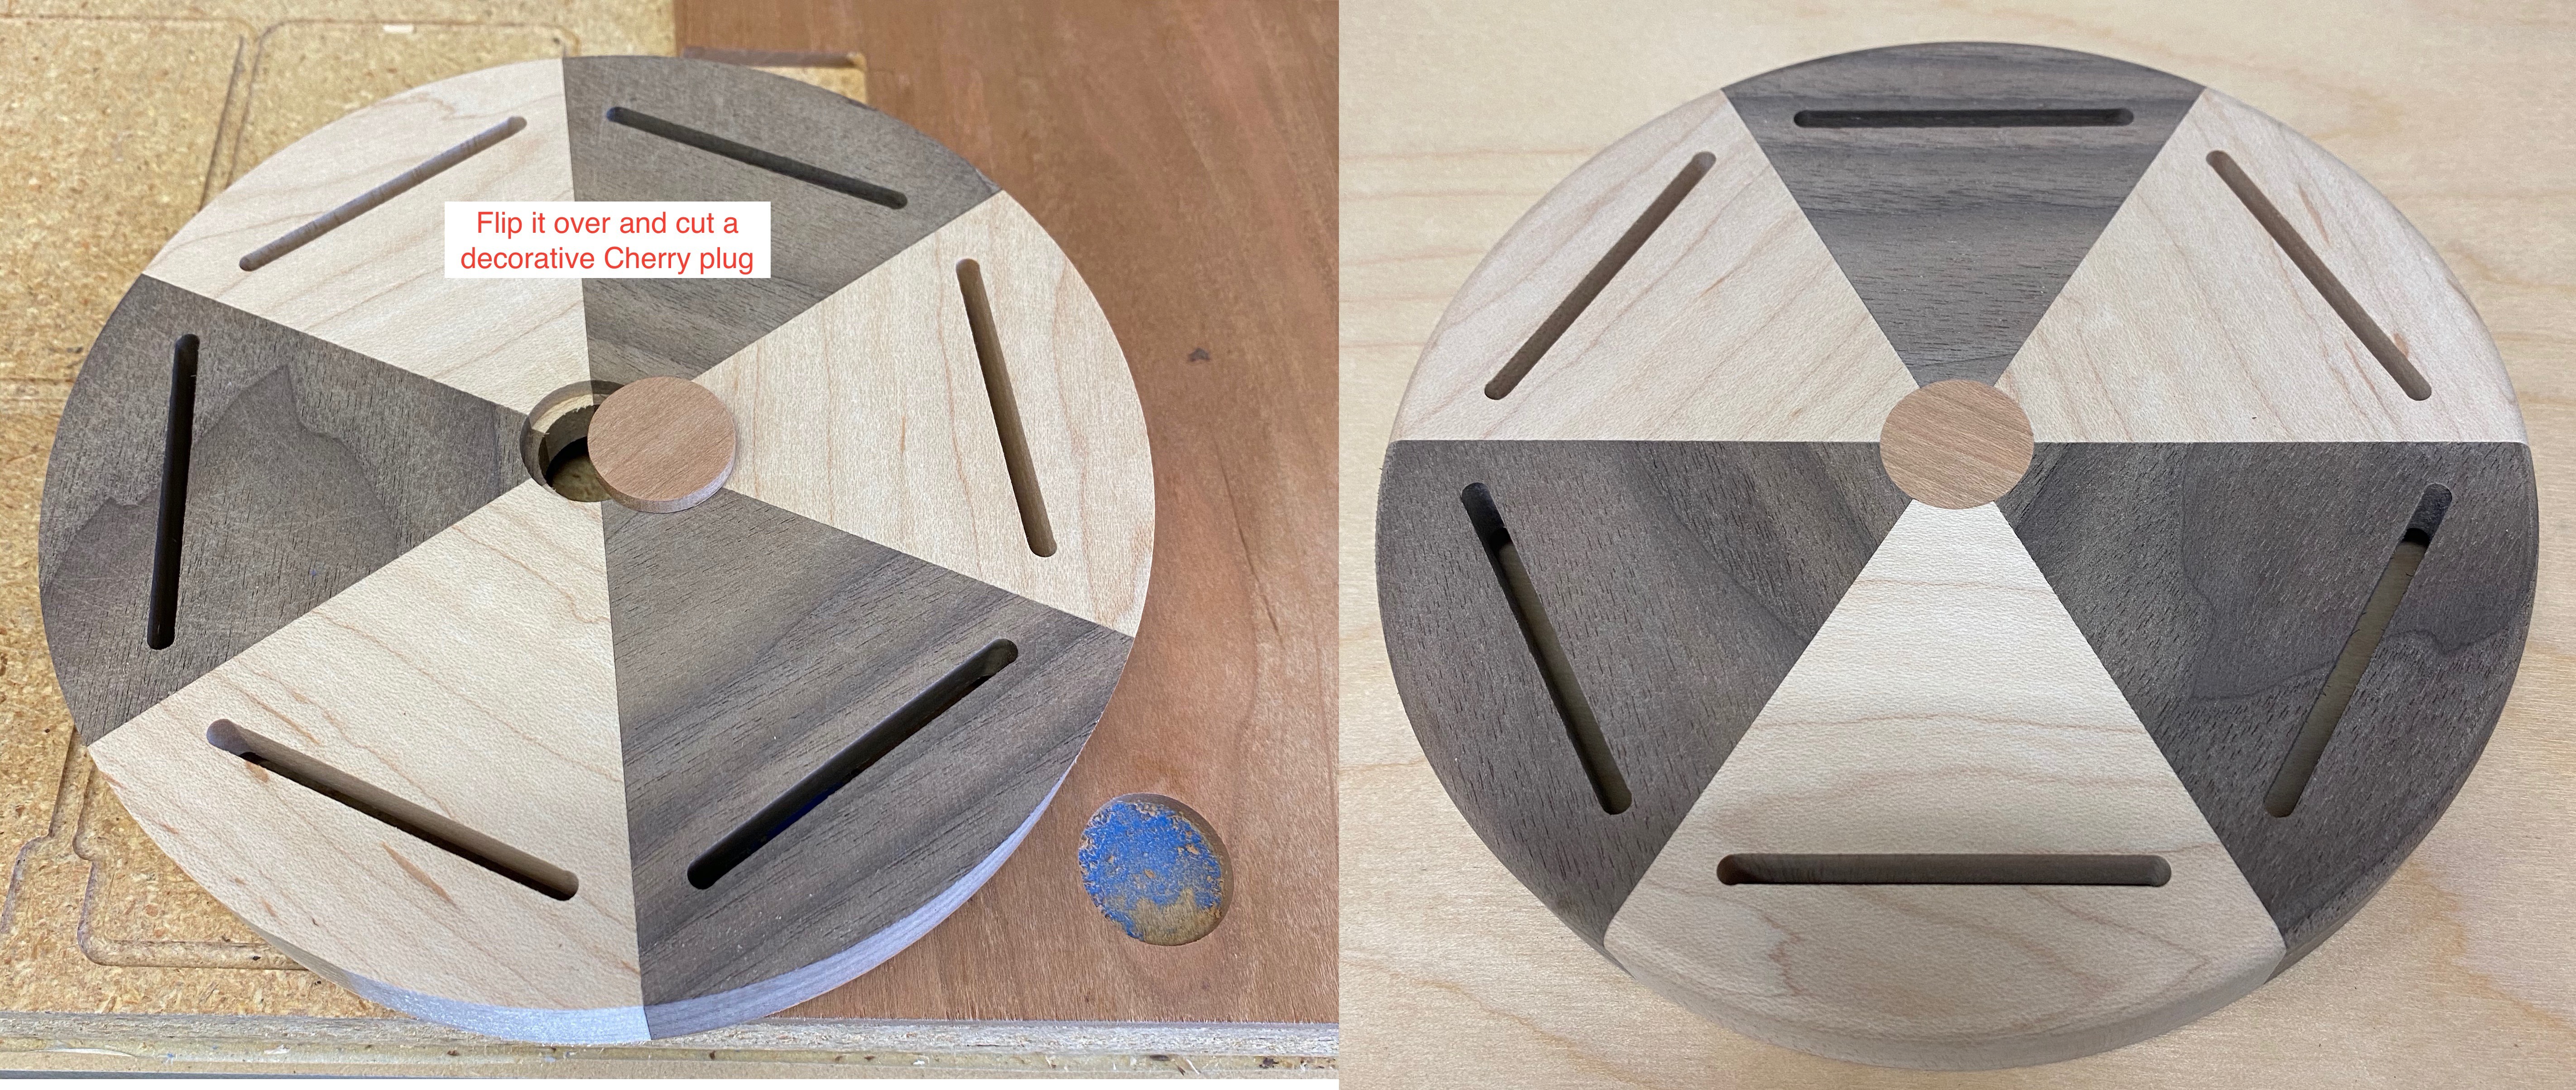
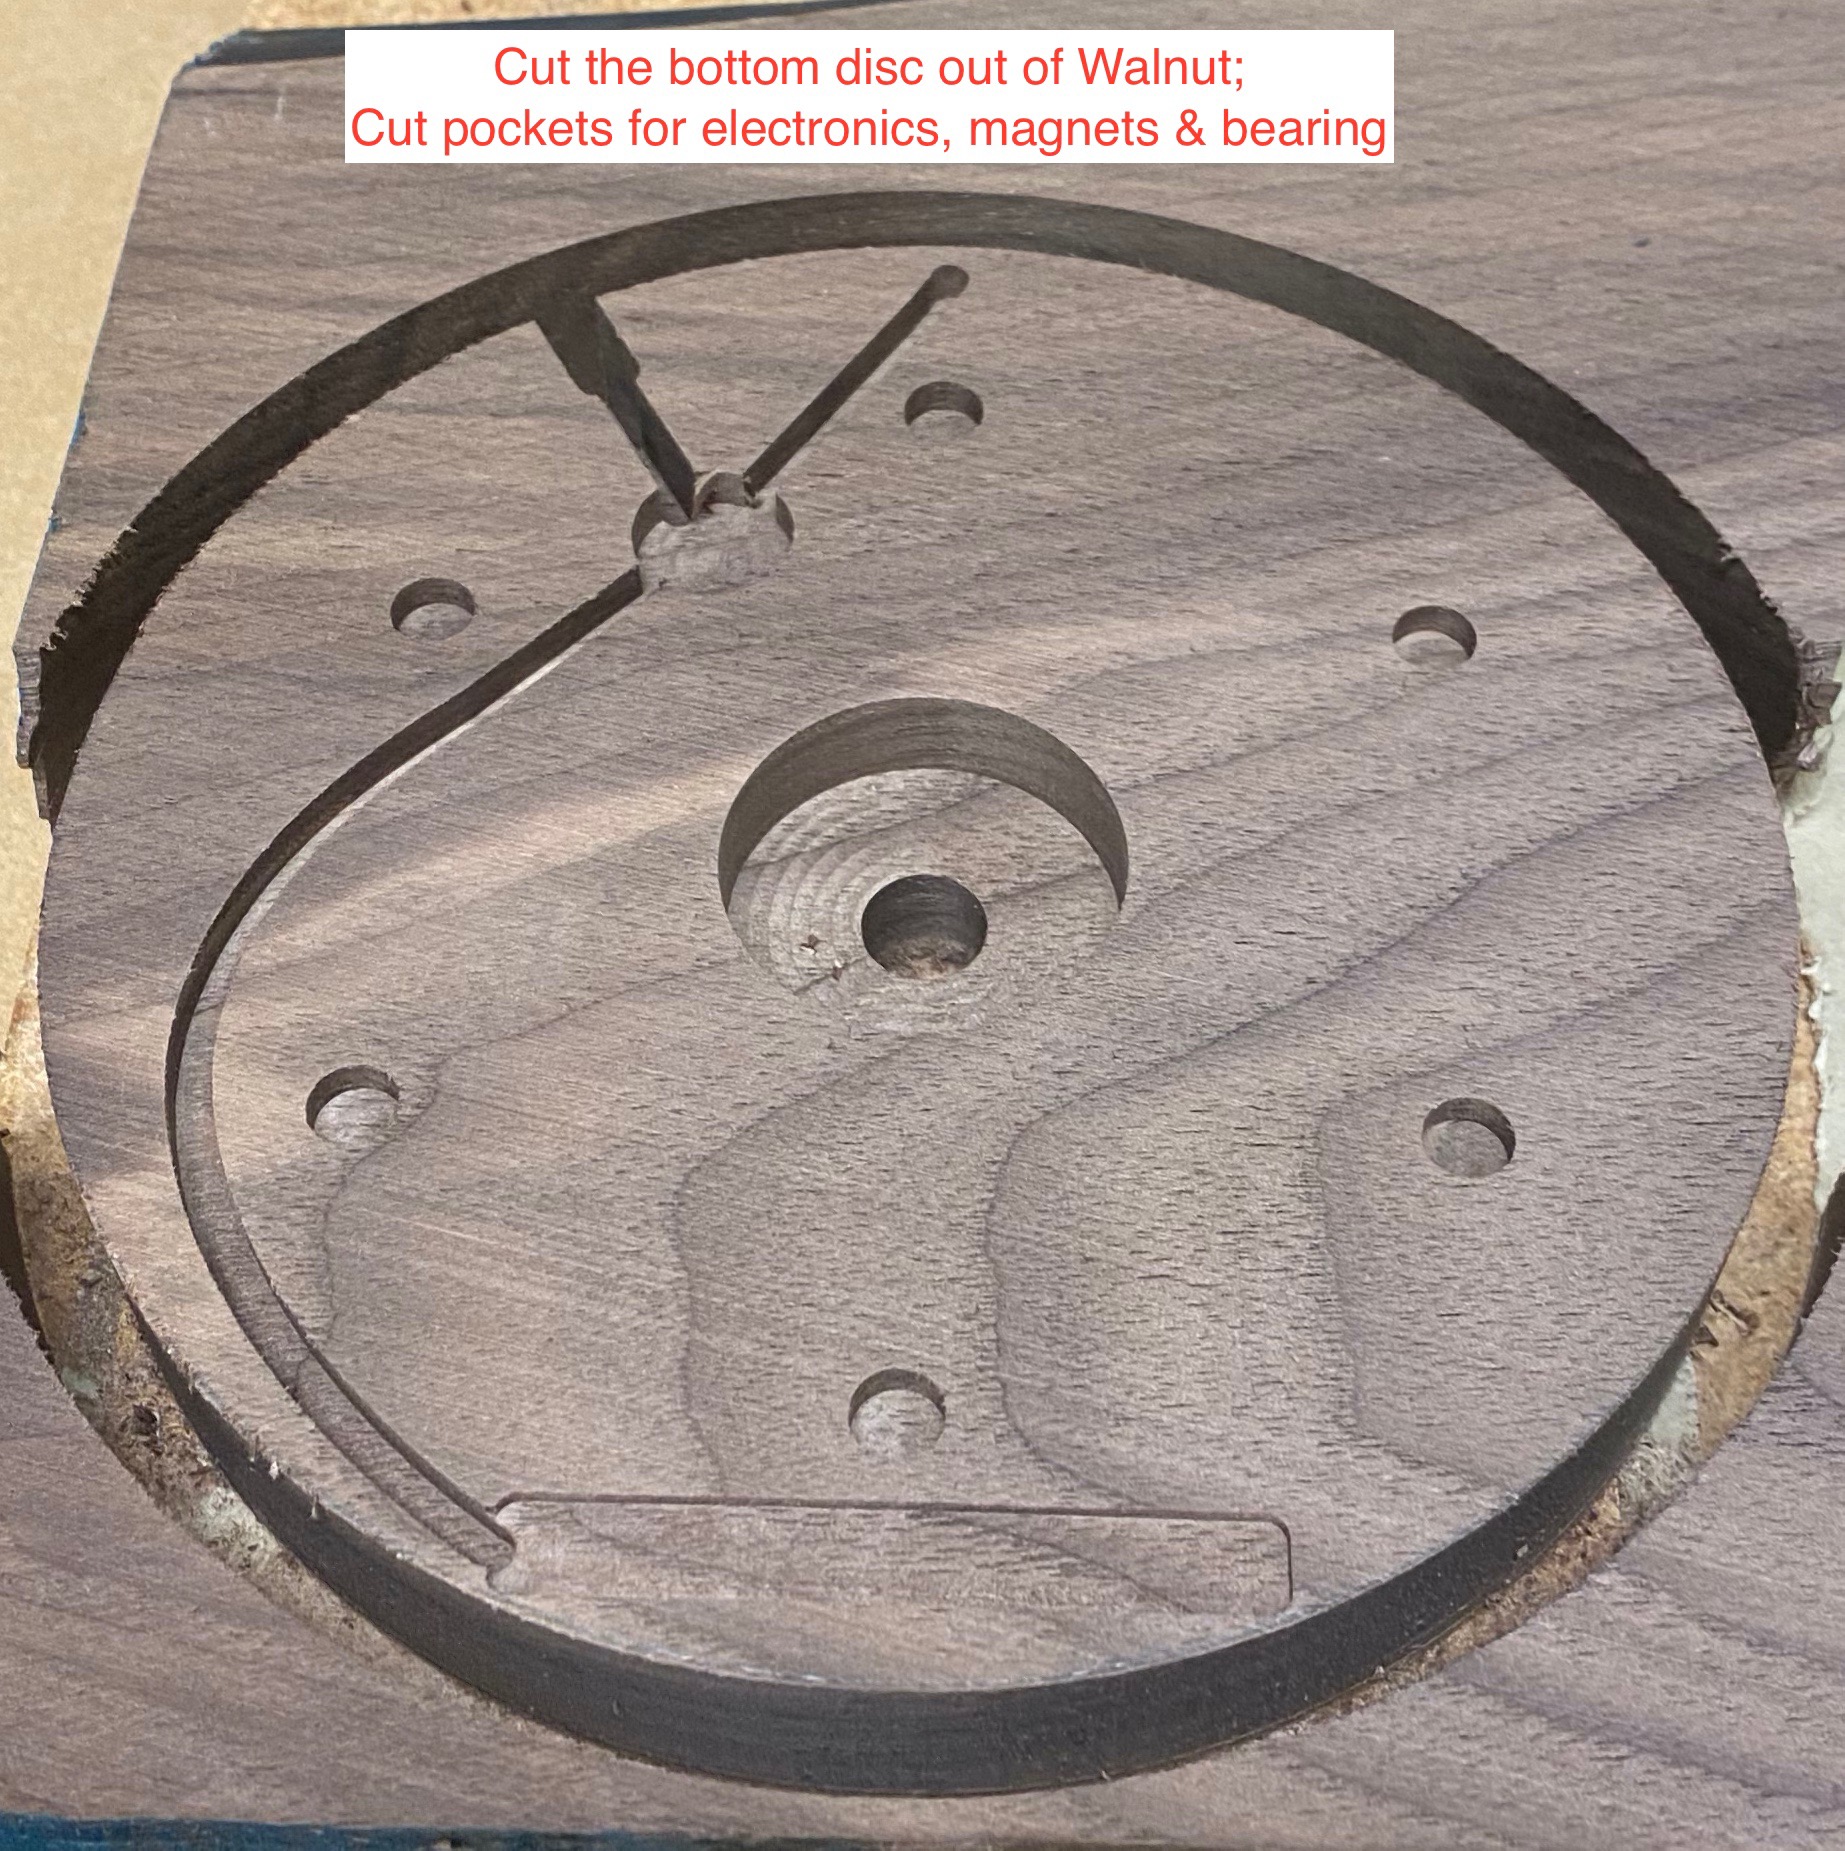
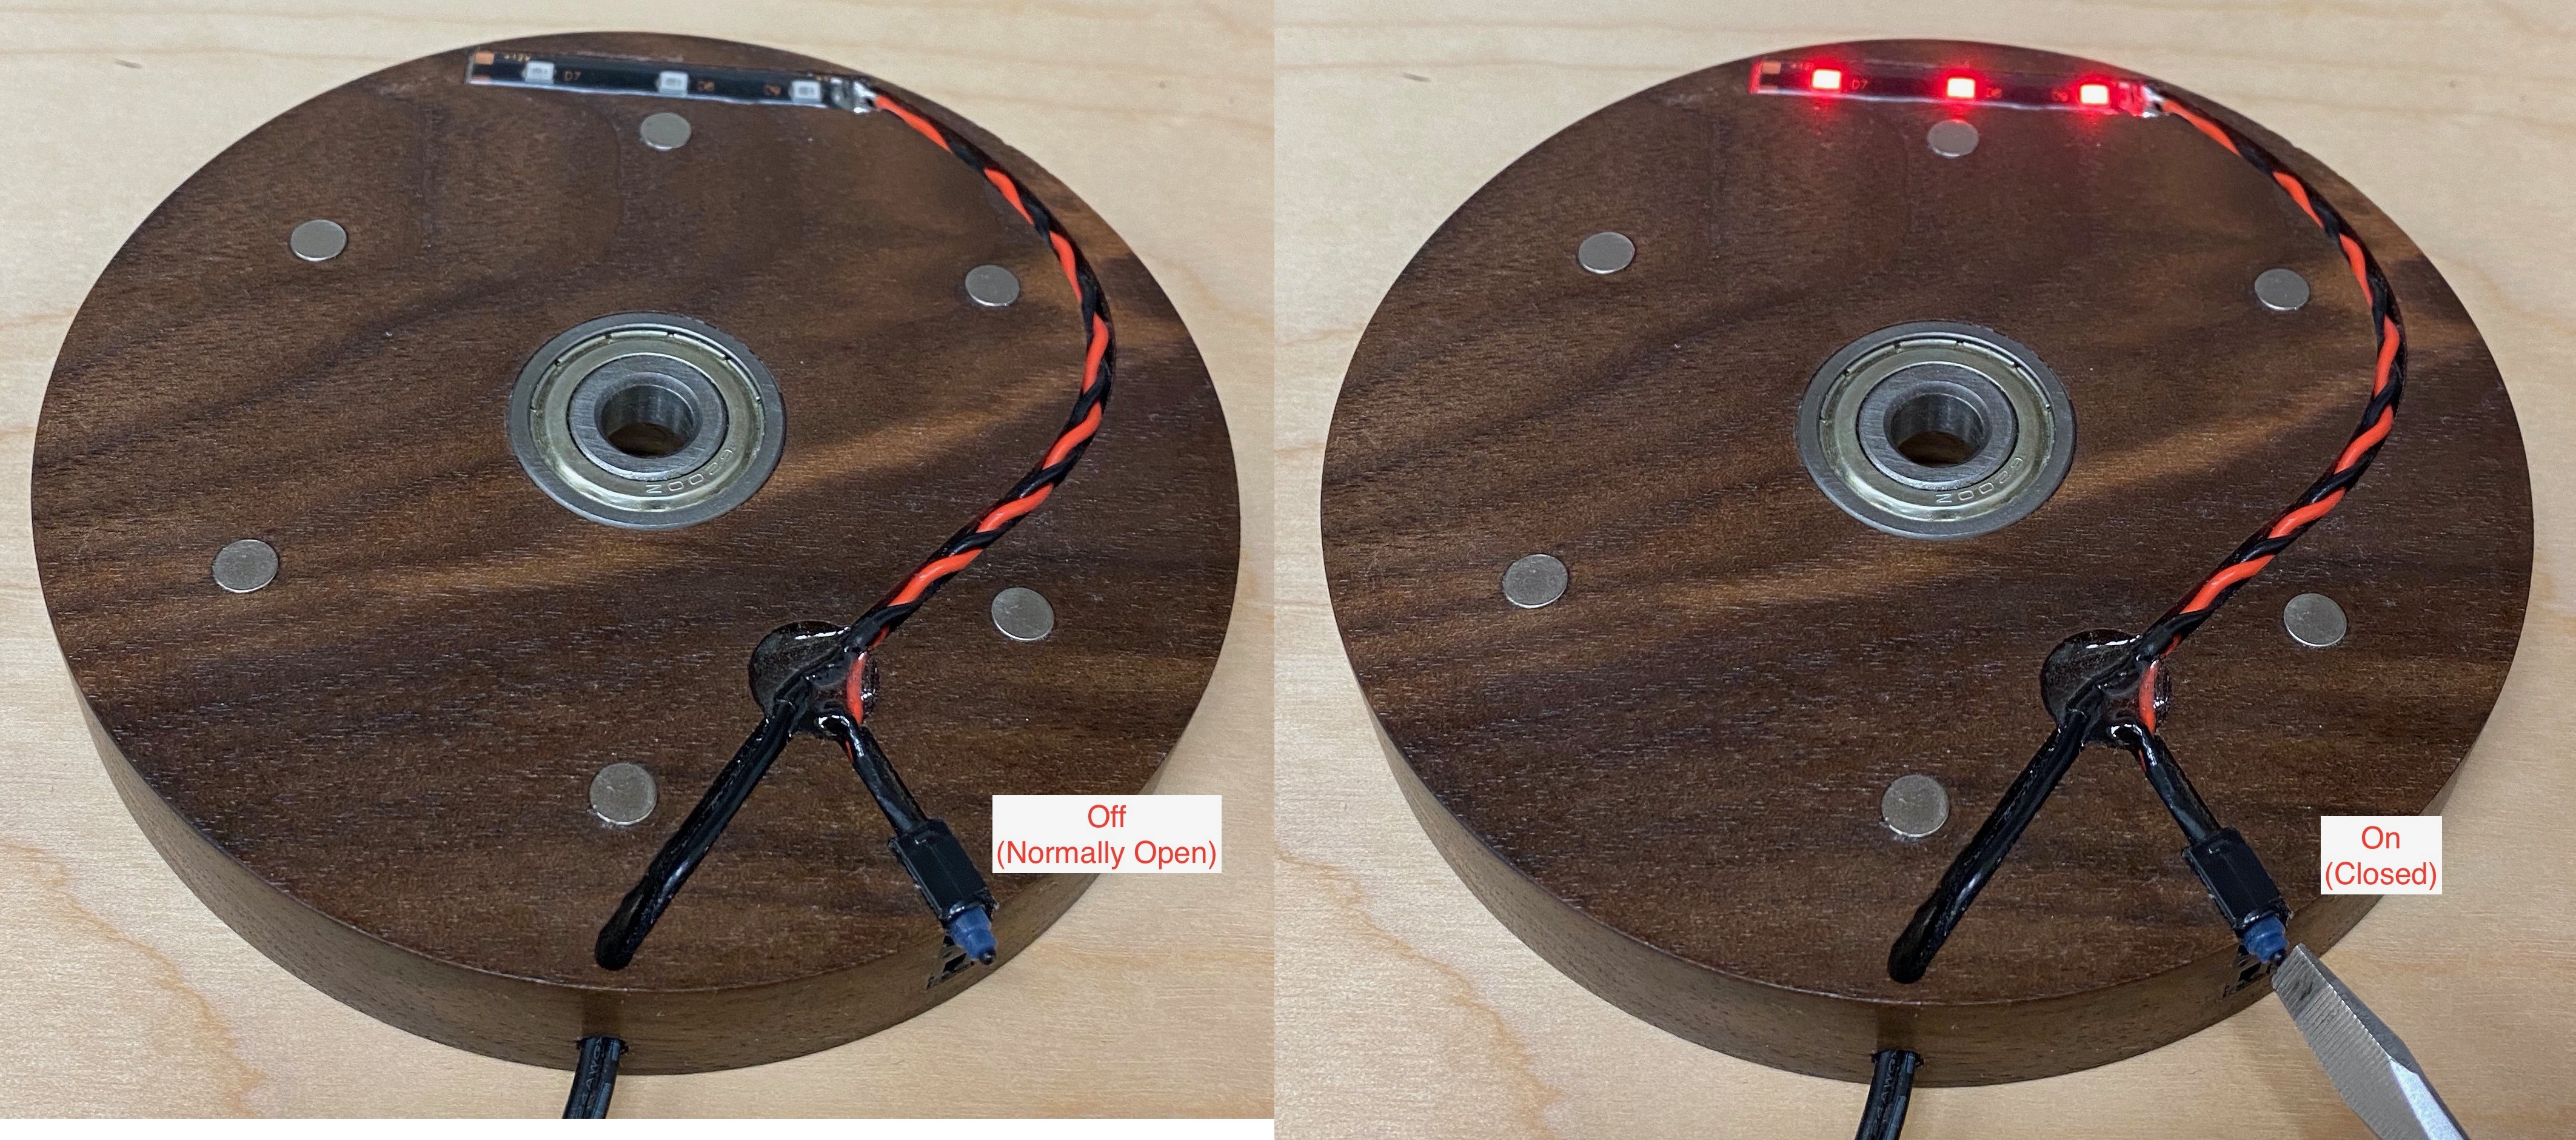
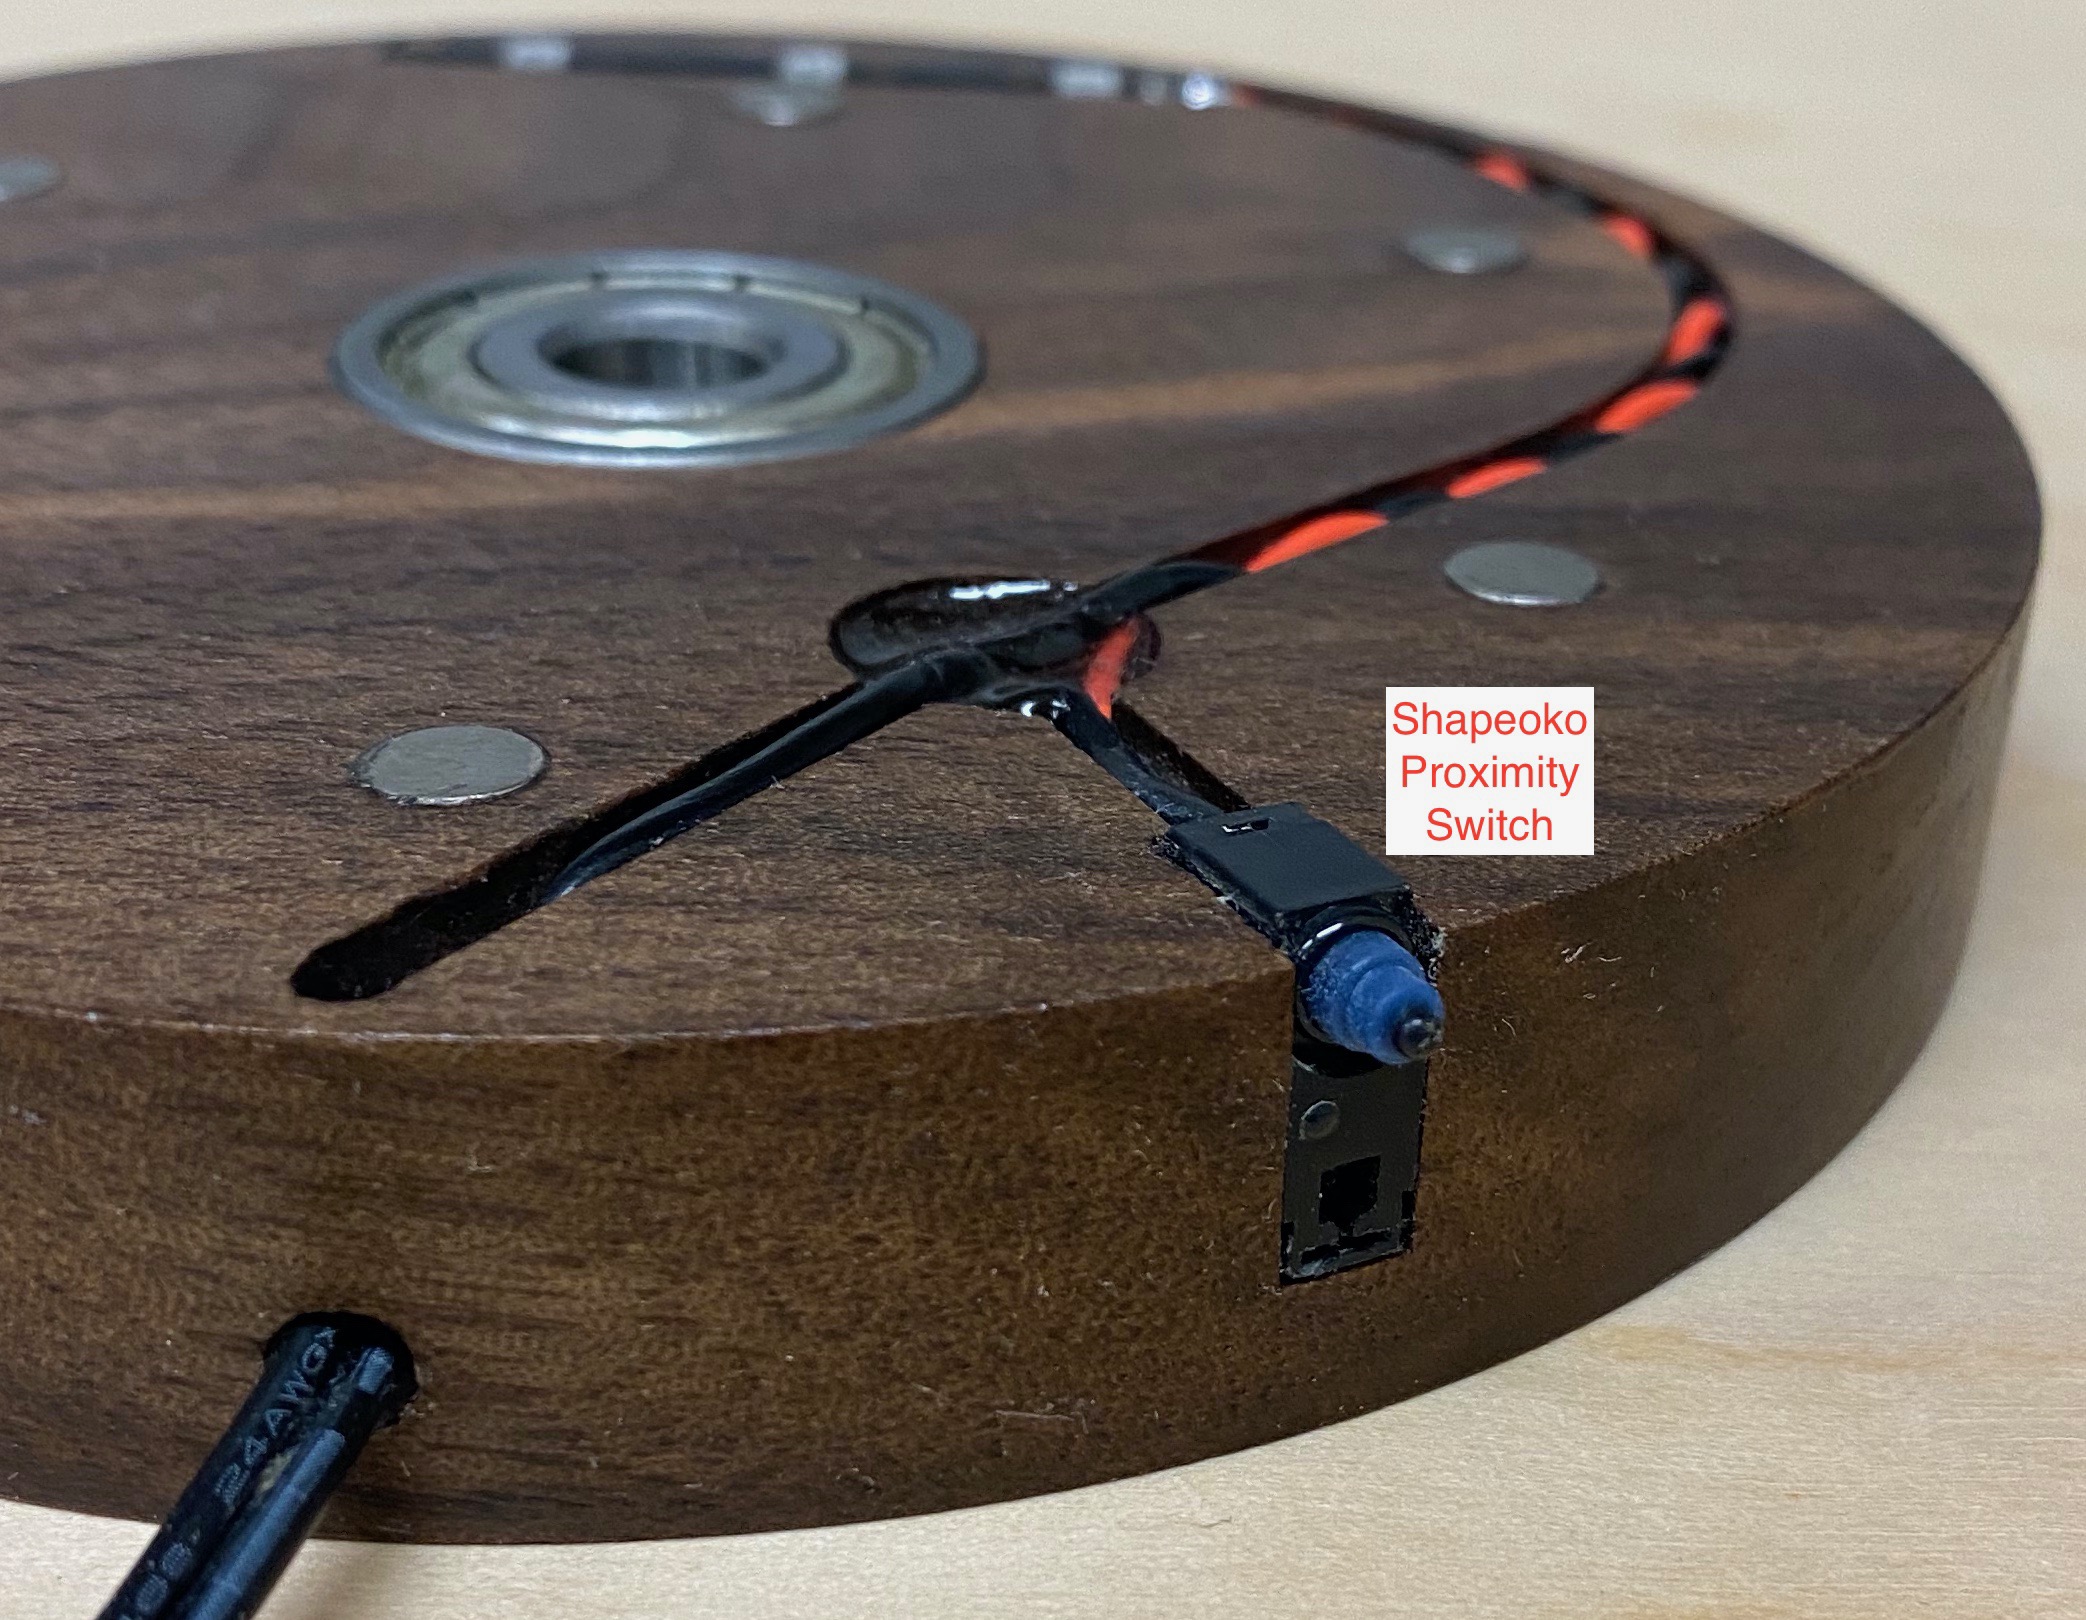
The 2”x3” Lexan “scenes” drop into slots in the top. Underneath, on top of the bottom disc, is a single 2” LED light strip that illuminates the “front” scene. It turns on/off by simply rotating the top (“On” when rotated to a scene; “Off” when rotated between scenes.). Rare earth magnets provide tactile “stops” all the way around so the top stops exactly on a scene (“On”) or between a scene (“Off”). On/off is controlled by a repurposed Shapeoko mechanical proximity switch that contacts a scalloped lip under the top piece.
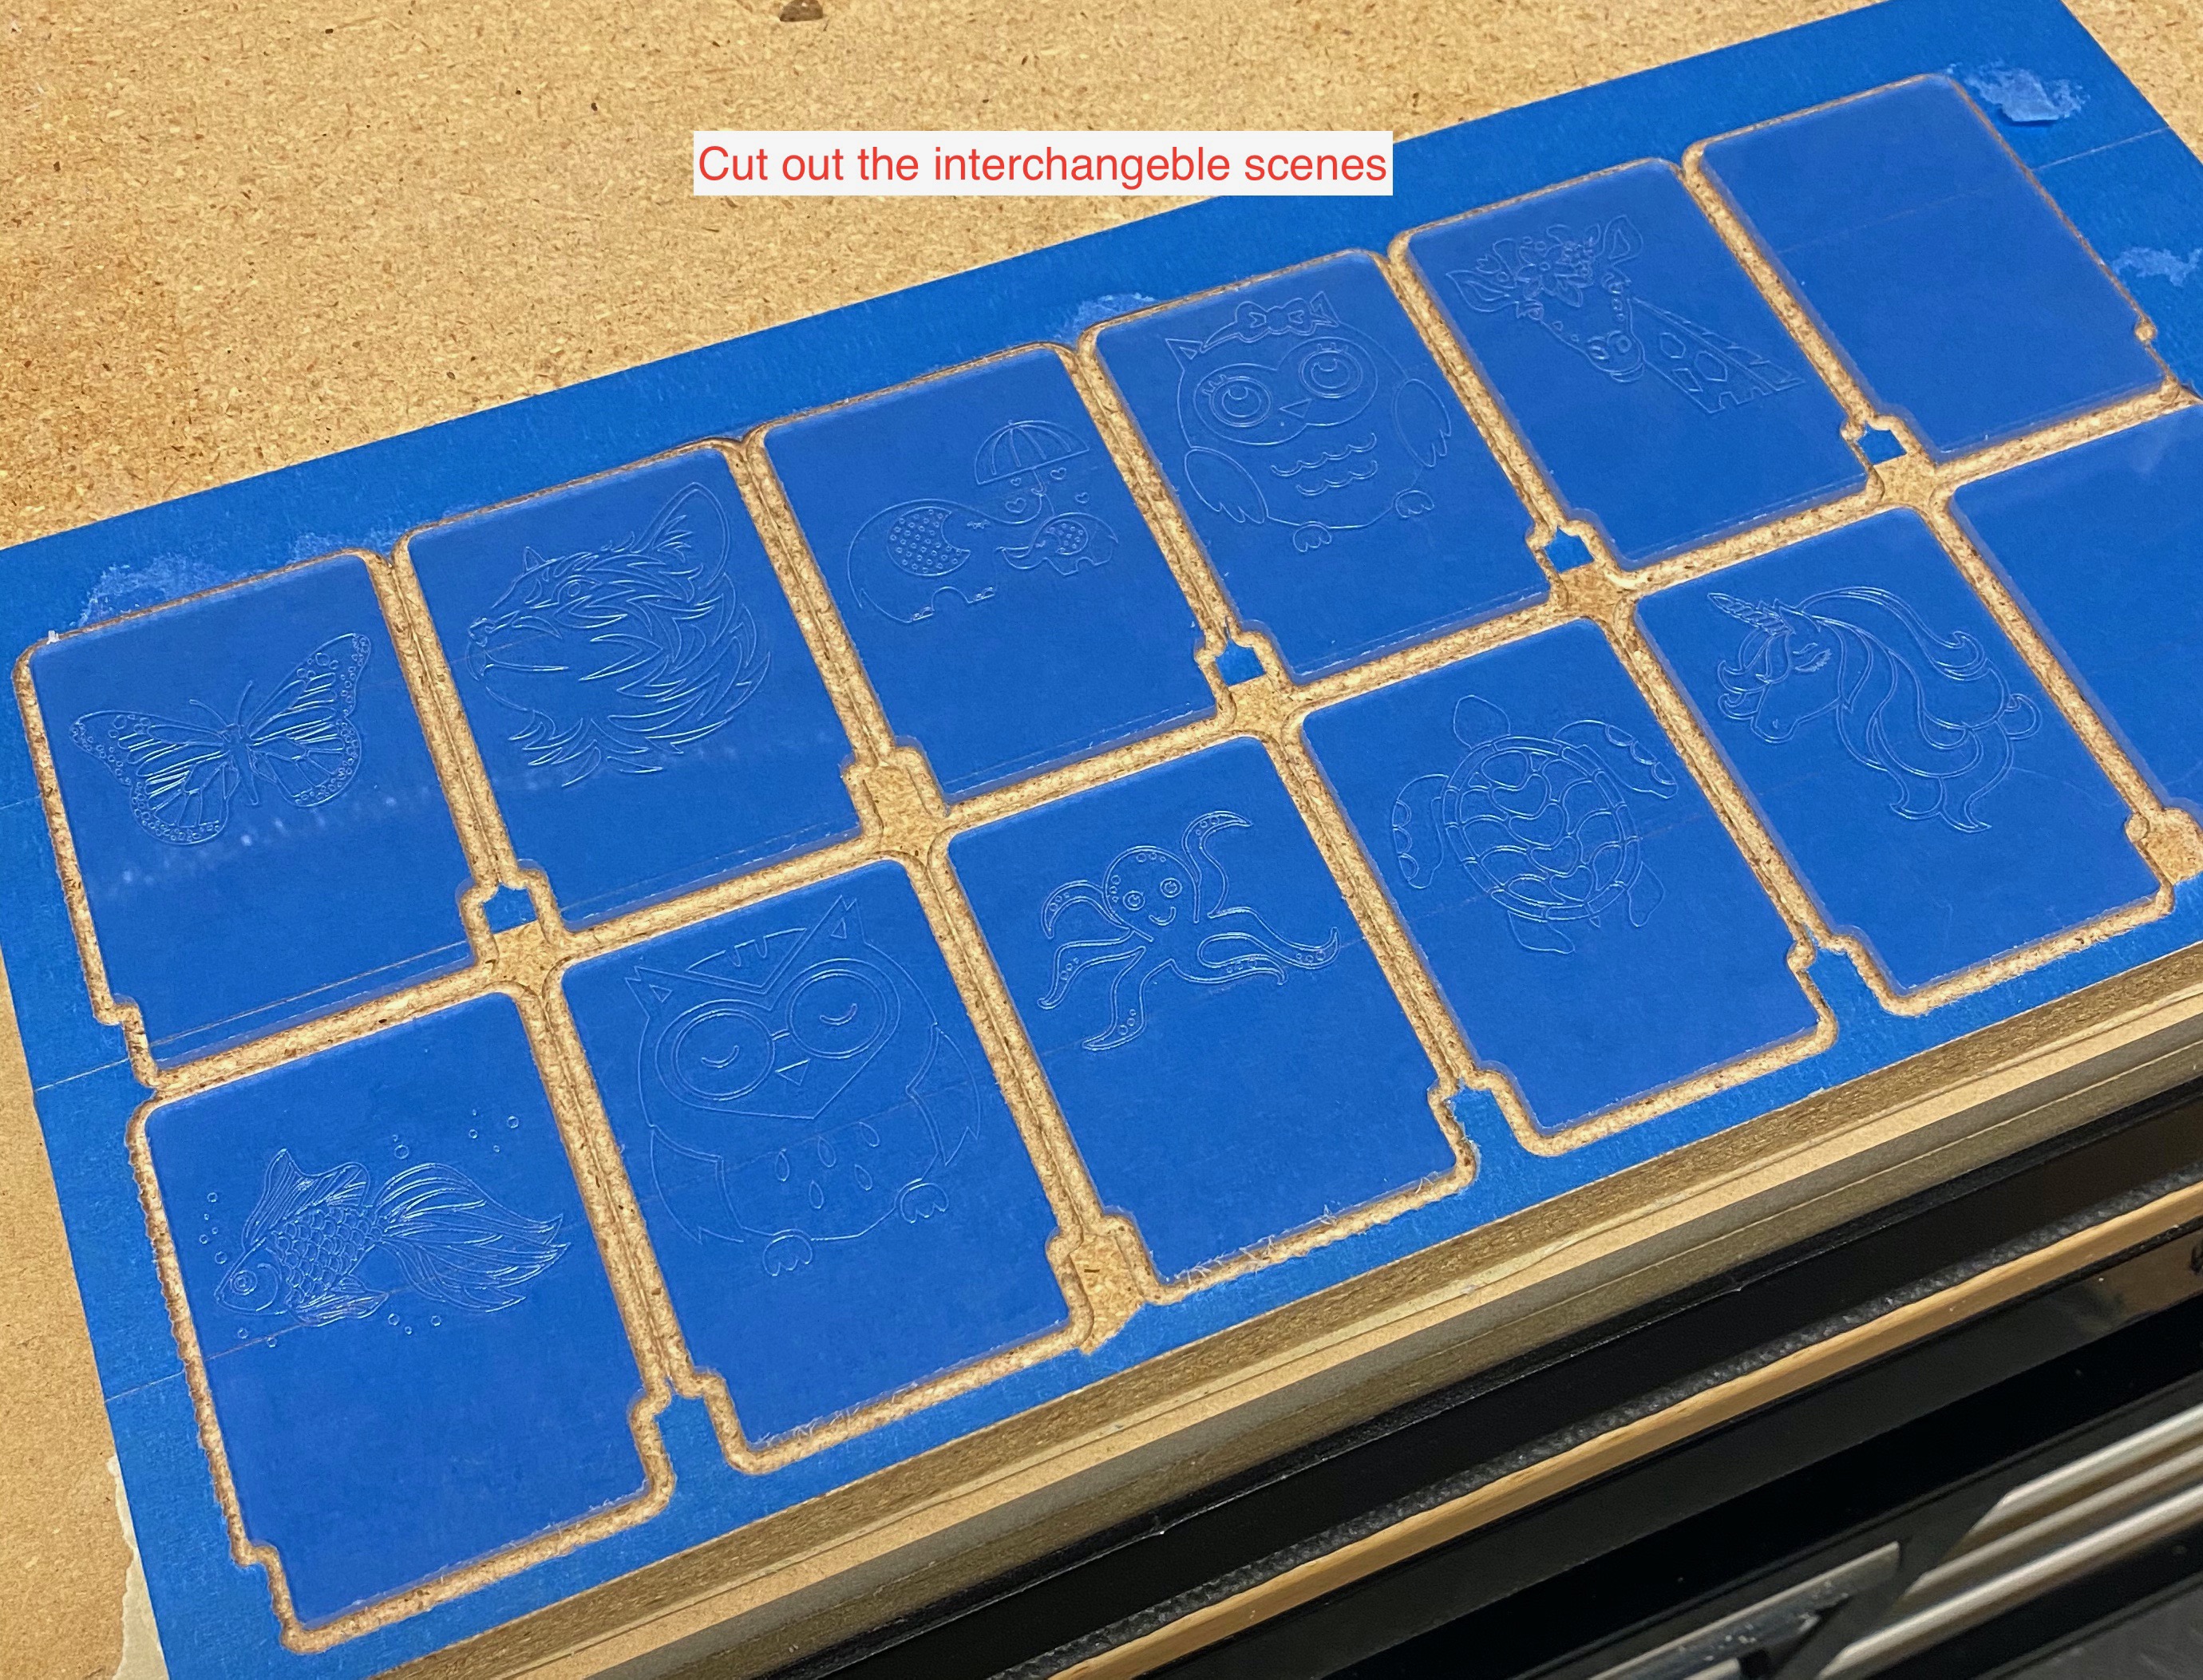
I wanted to do Disney characters but didn’t want to run afoul of copyrights, so I found some fun “free for personal use” SVG files instead. This is more of a girl’s version (I’m biased since I have twin daughters), but I can envision dinosaurs, happy monsters or superheros for boys.
I made 10 Lexan scenes (because I couldn’t decide!), though the Nightlight only holds 6 at a time (dealer’s choice!)
INGREDIENTS (all stuff I had laying around):
3/4” Walnut
3/4” Maple
Lexan (.09” thick)
LED light strip (2” long; 3 LEDs)
Shapeoko Mechanical Proximity Switch (left over from an upgrade. I’m a pack rat and this project reinforces why!)
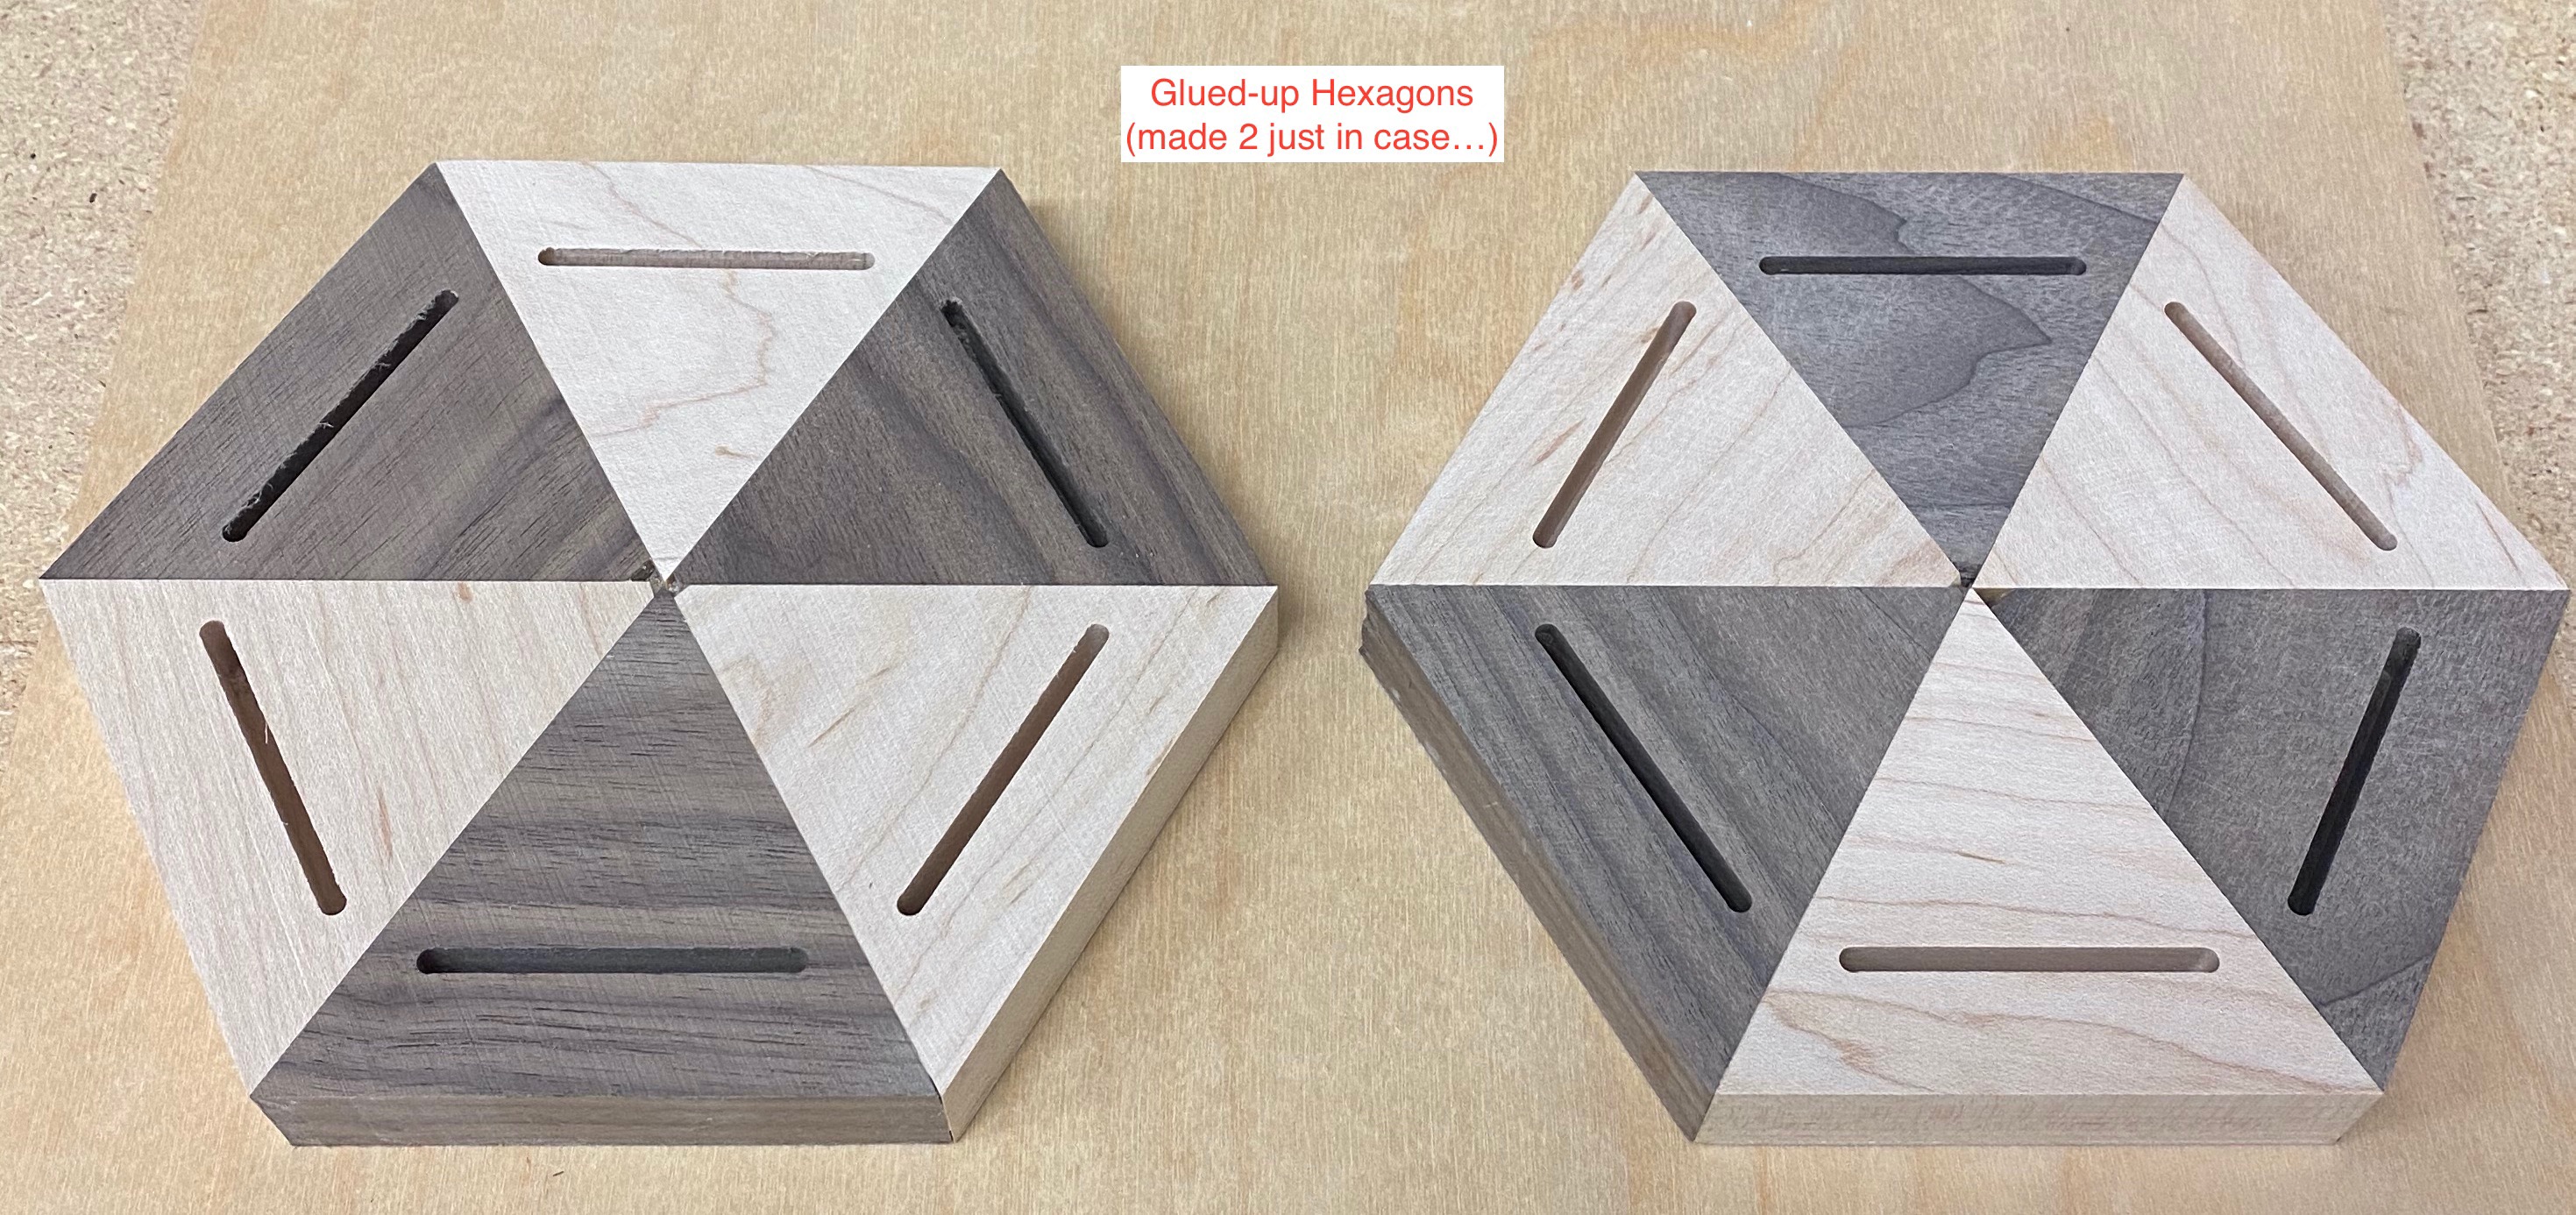
I made two tops just in case. Good thing, because the first one was misaligned by 30 degrees (basically it turned “on” when it should’ve turned “off” and vice versa. Solution: Rotate the misaligned scalloped lip 30 degrees and make the part again!
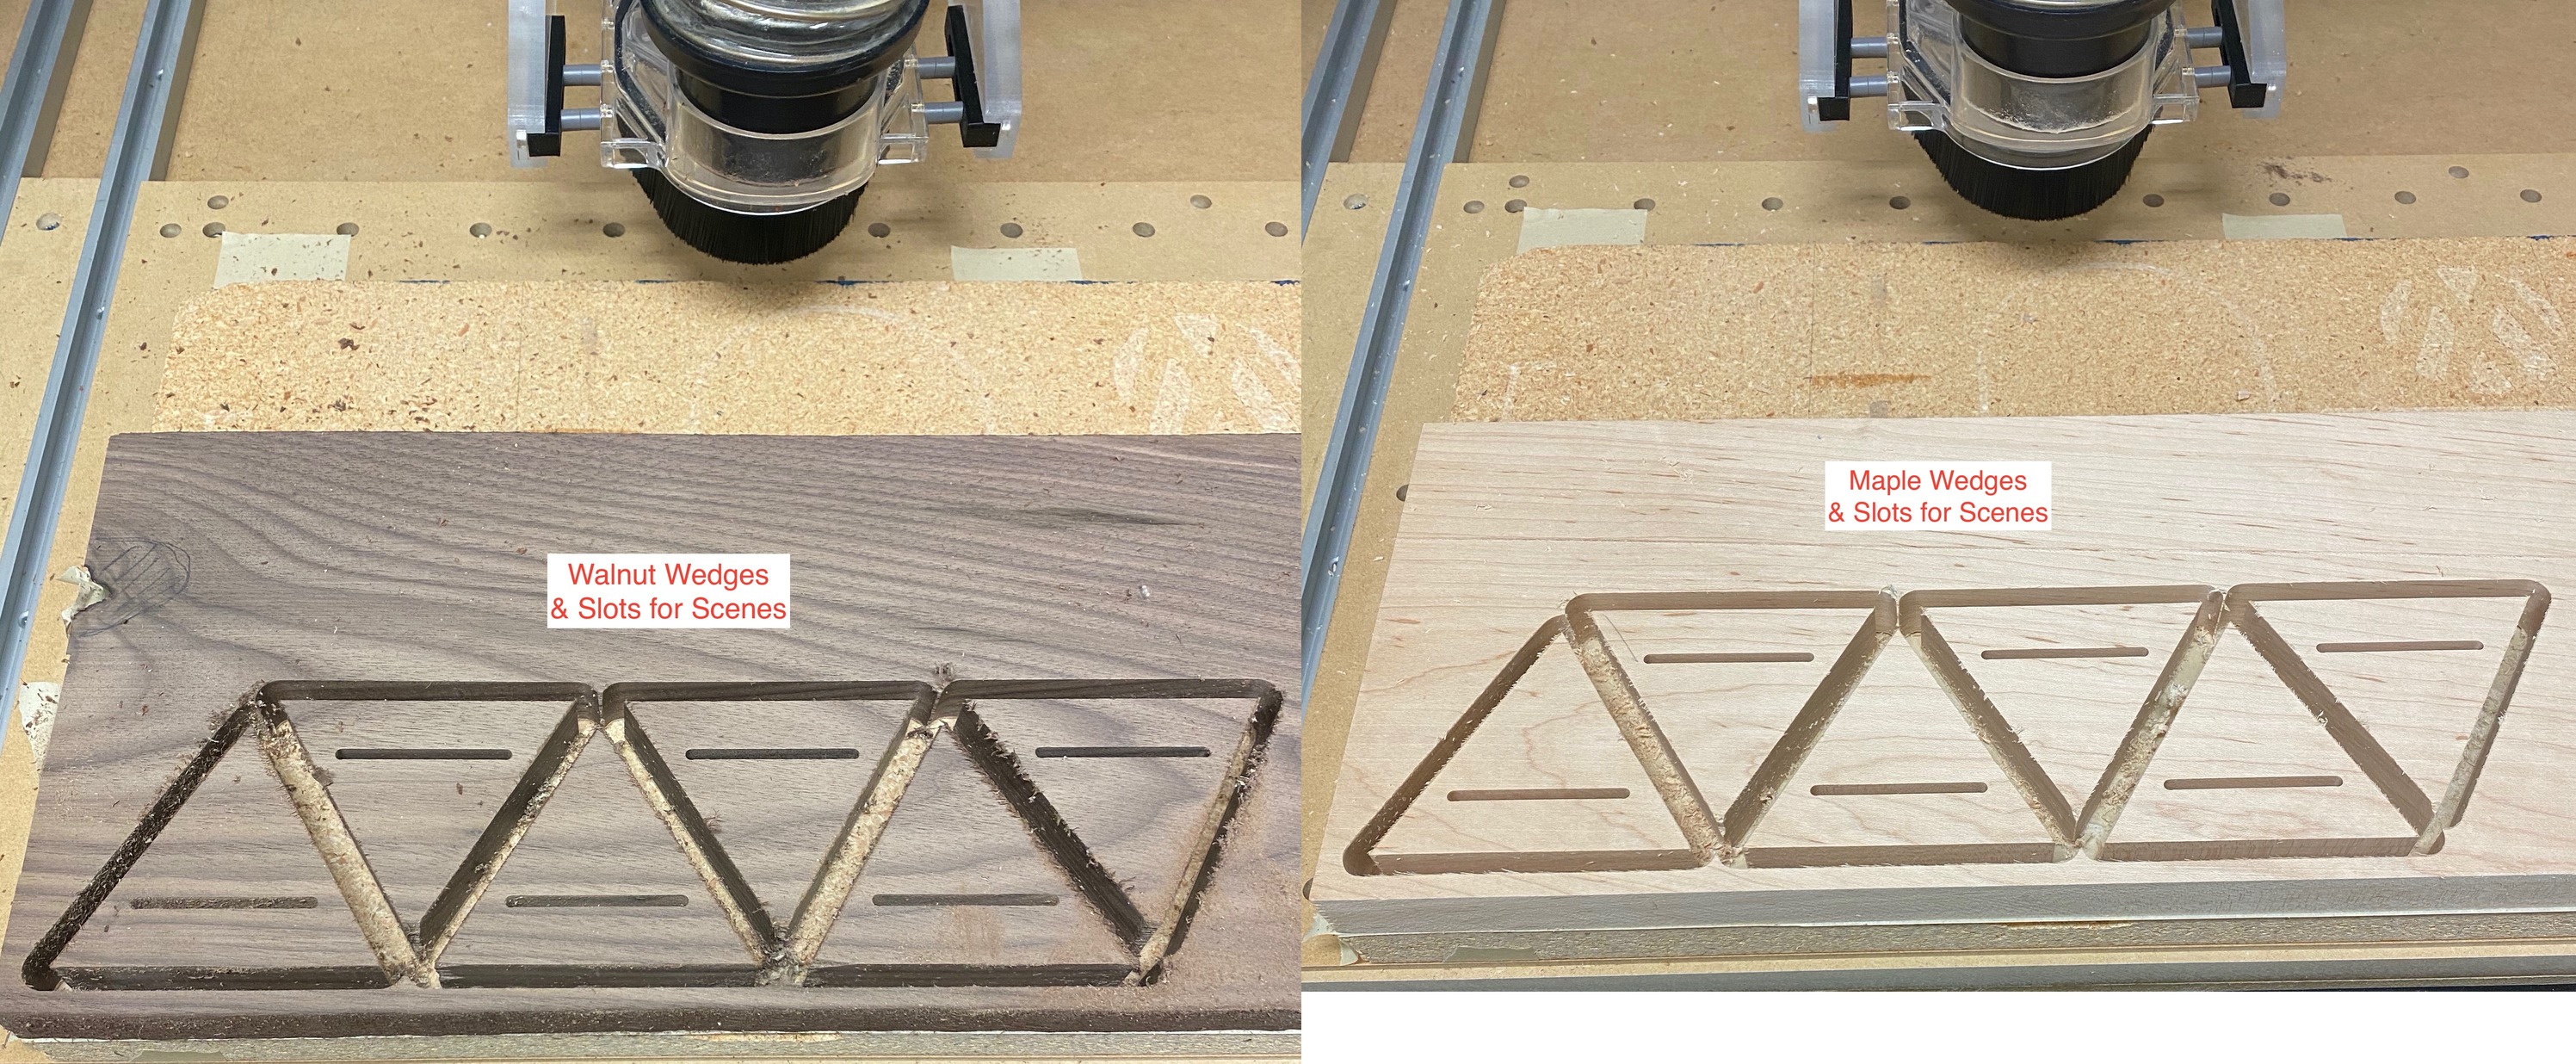
Each one of the 10 SVG “scenes” is a separate c2d file. I diamond-dragged each image sequentially in a 5 by 2 grid. Then I cut them all out in one operation.
For diamond drag edge-lit images, “less is better”. I tried filling them in with cross-hatching, but they look a lot better if you just drag the contour and skip the cross-hatching.
This was a fun project involving wood, plastic, electrical elements, mechanical elements, photography and some head-scratching design work. And 100% “free” with stuff I had laying around. Oh, and made on my Shapeoko XL that I’ve had for about 11 months. Thanks for inspiring me to participate.!
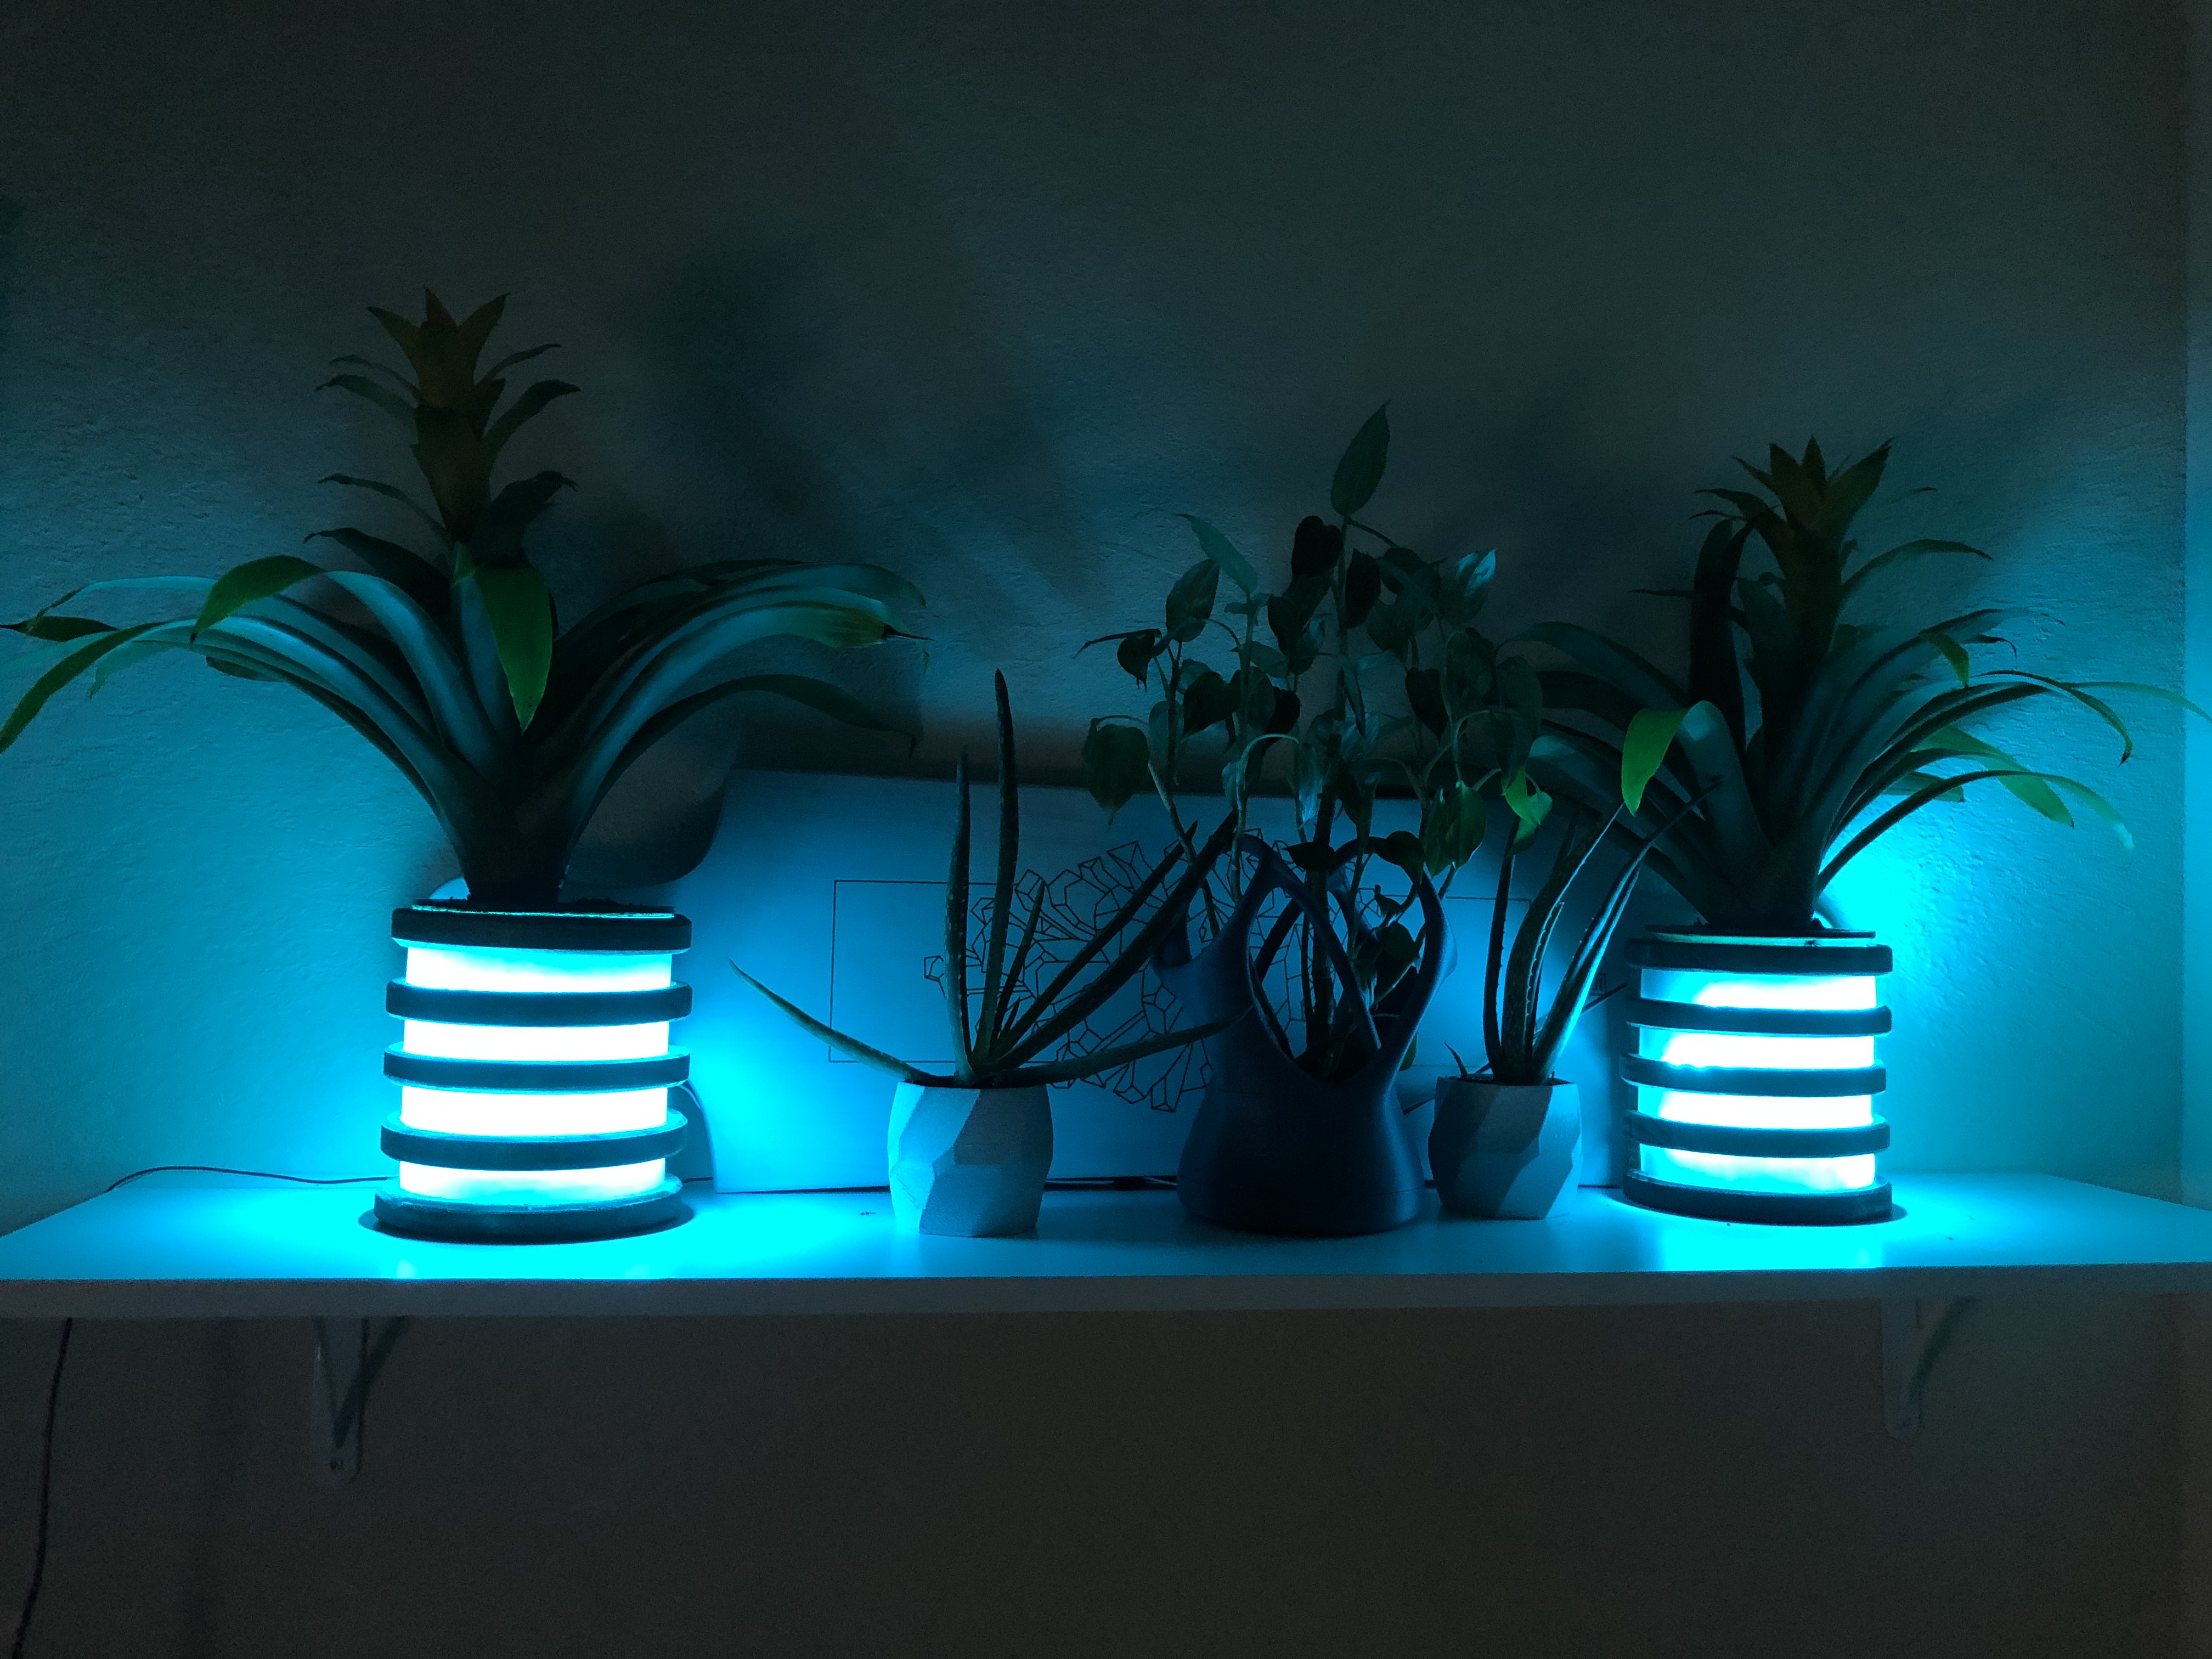
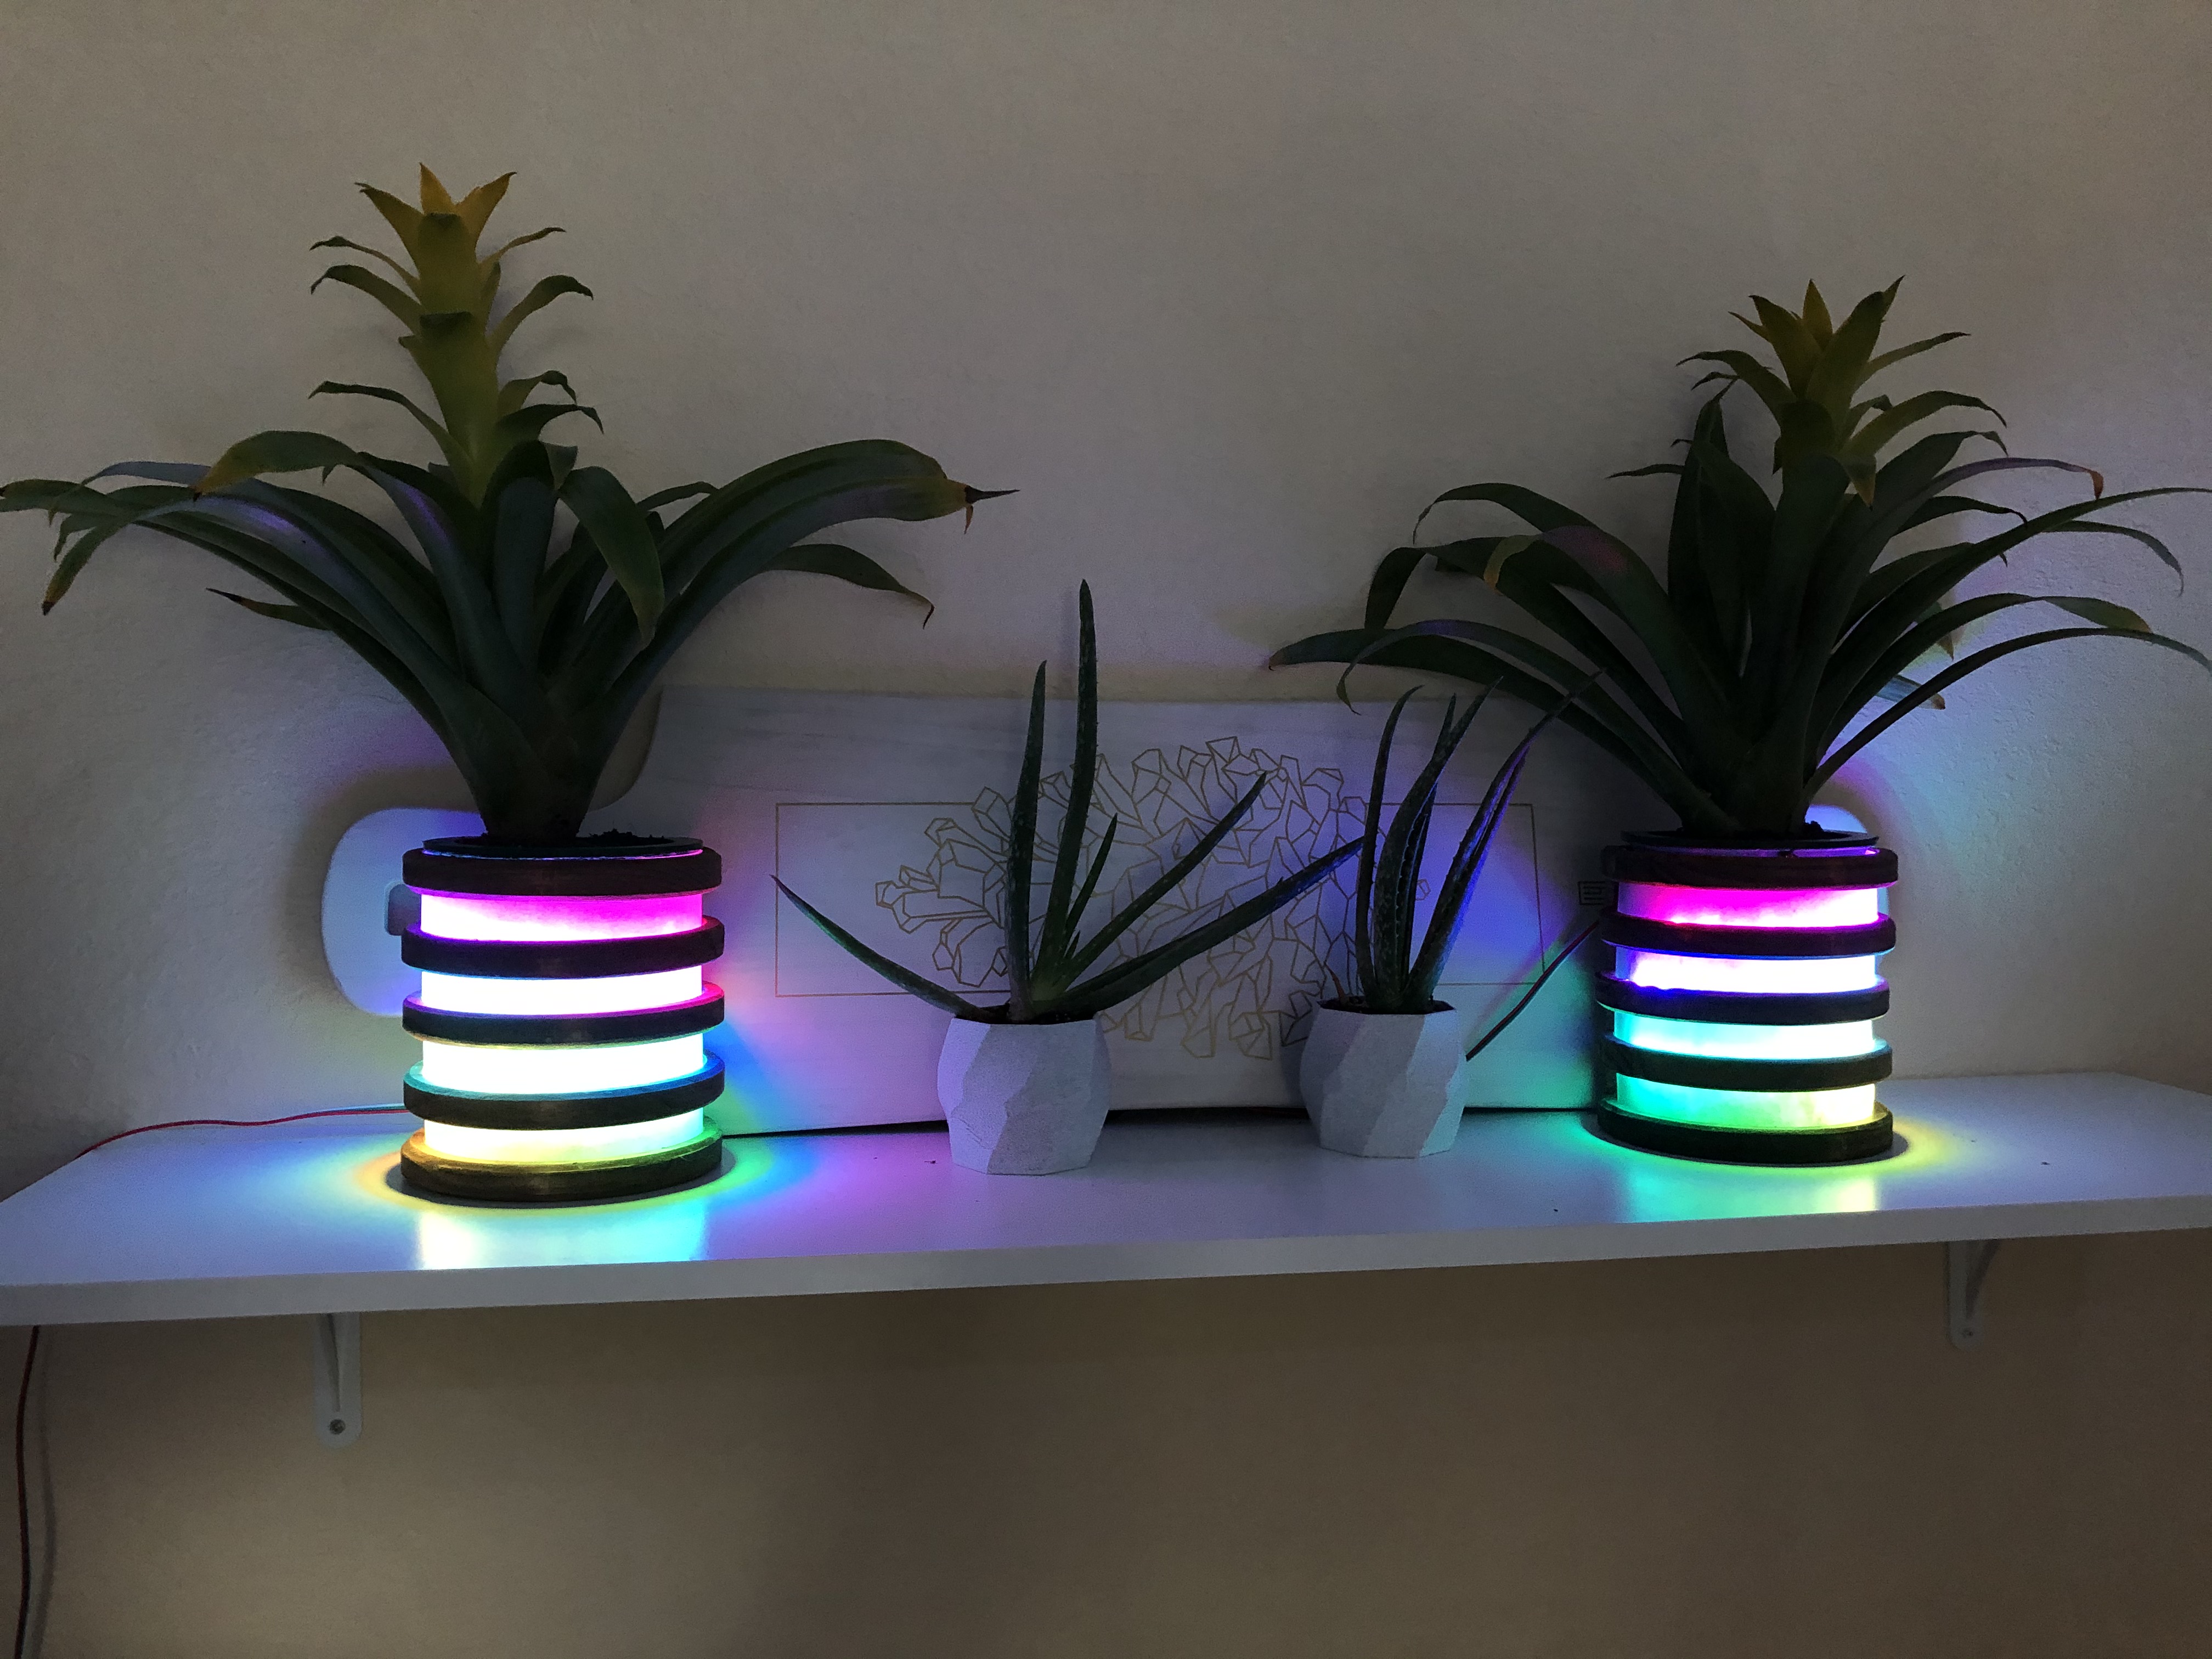
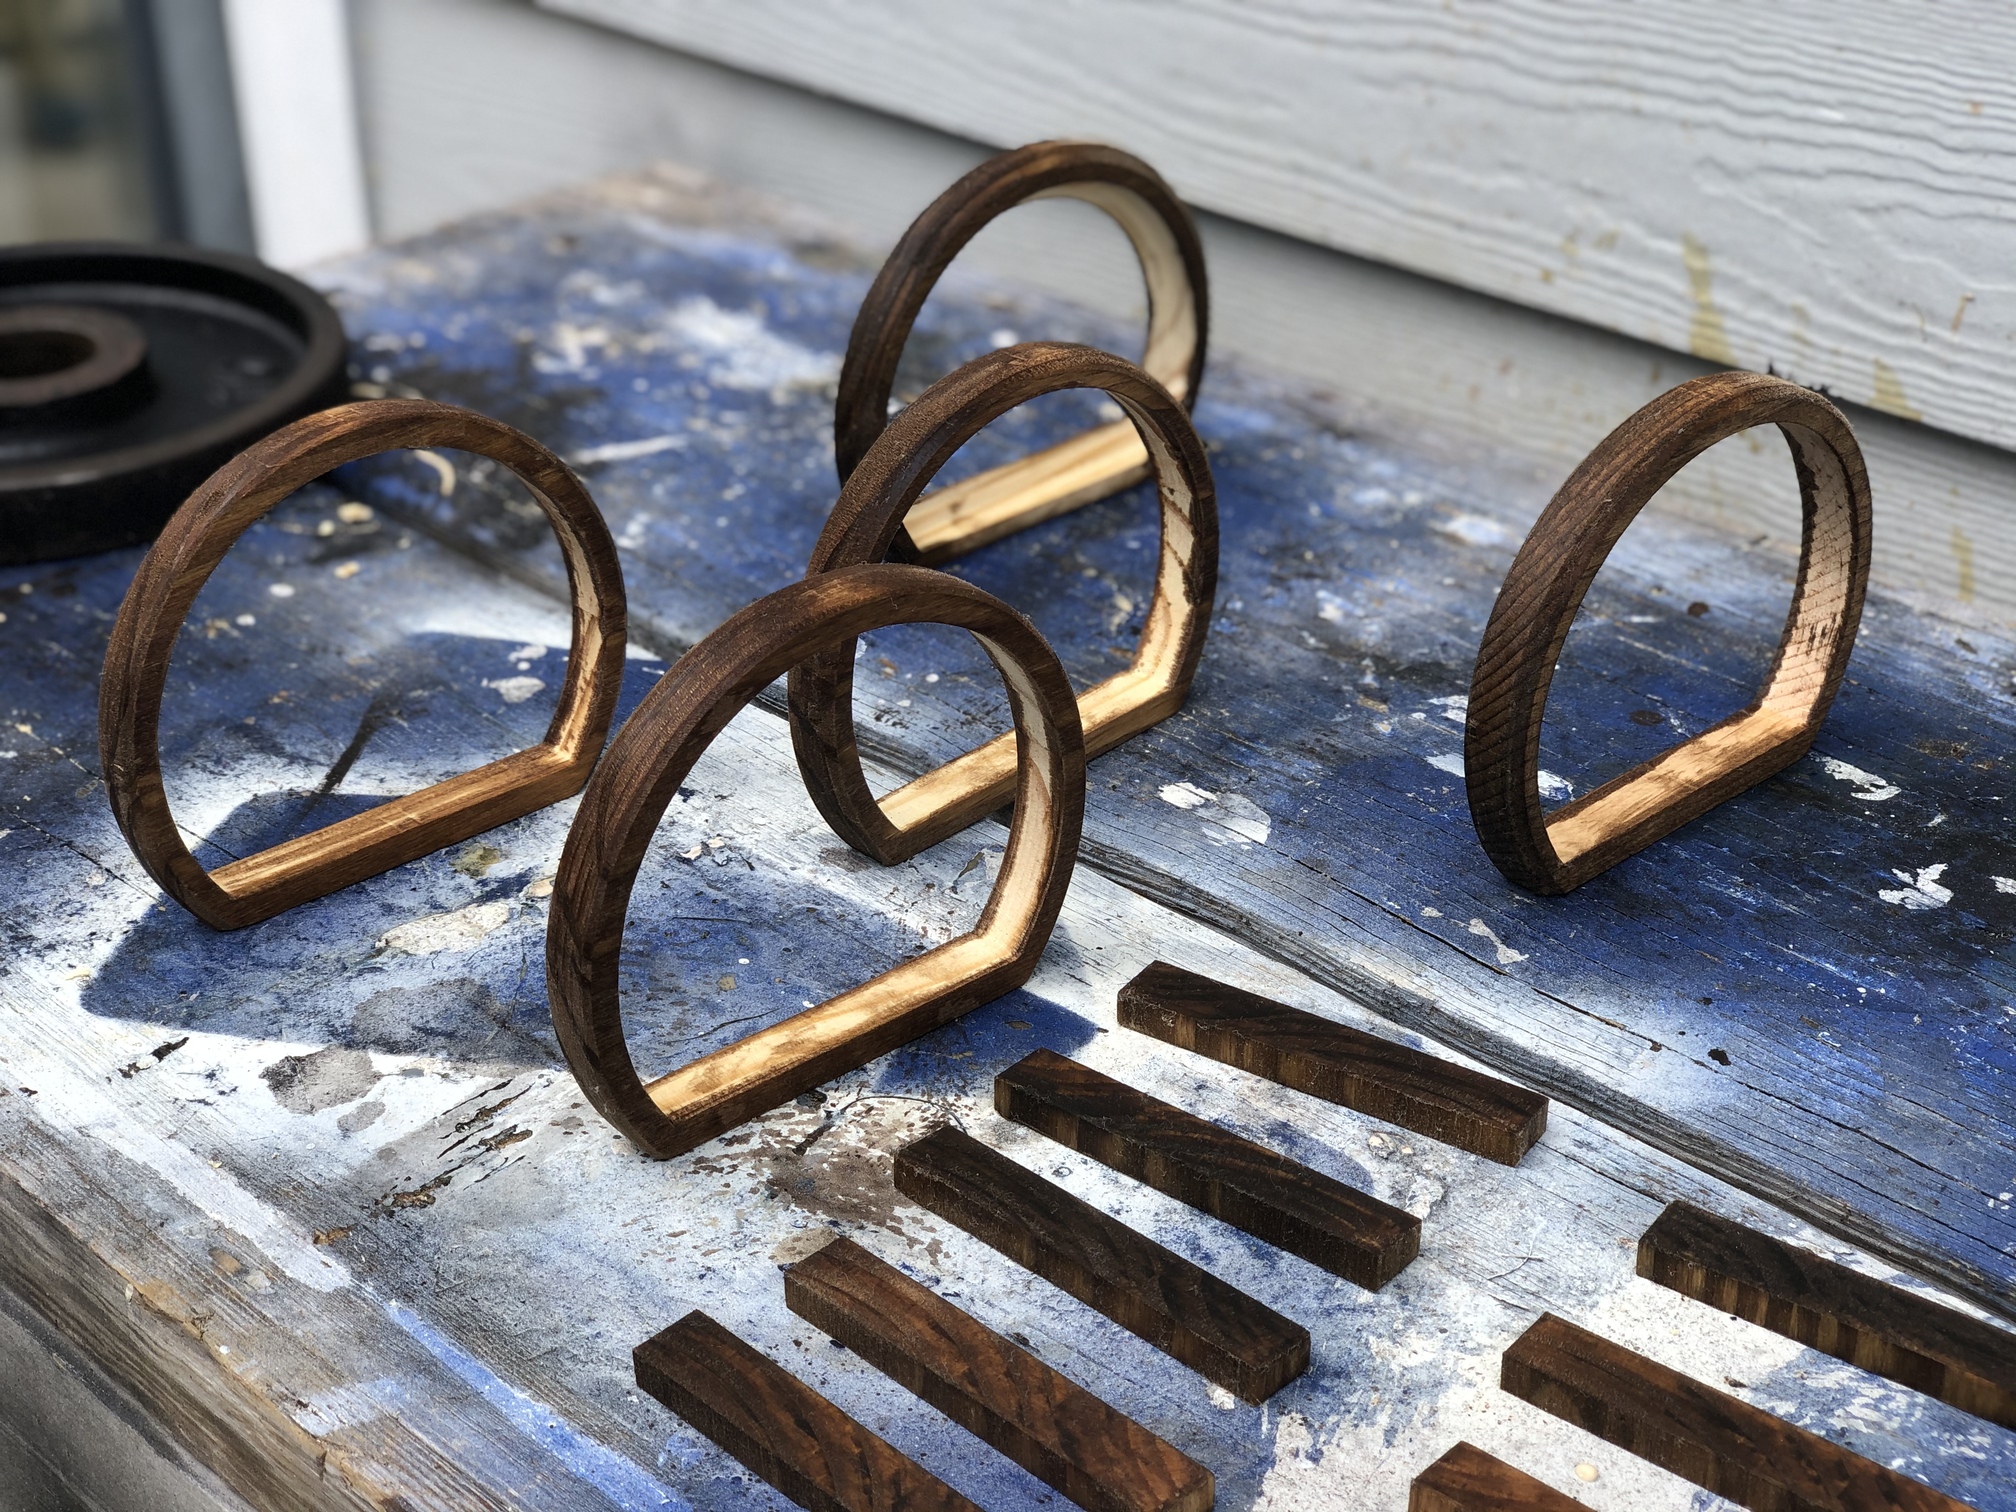
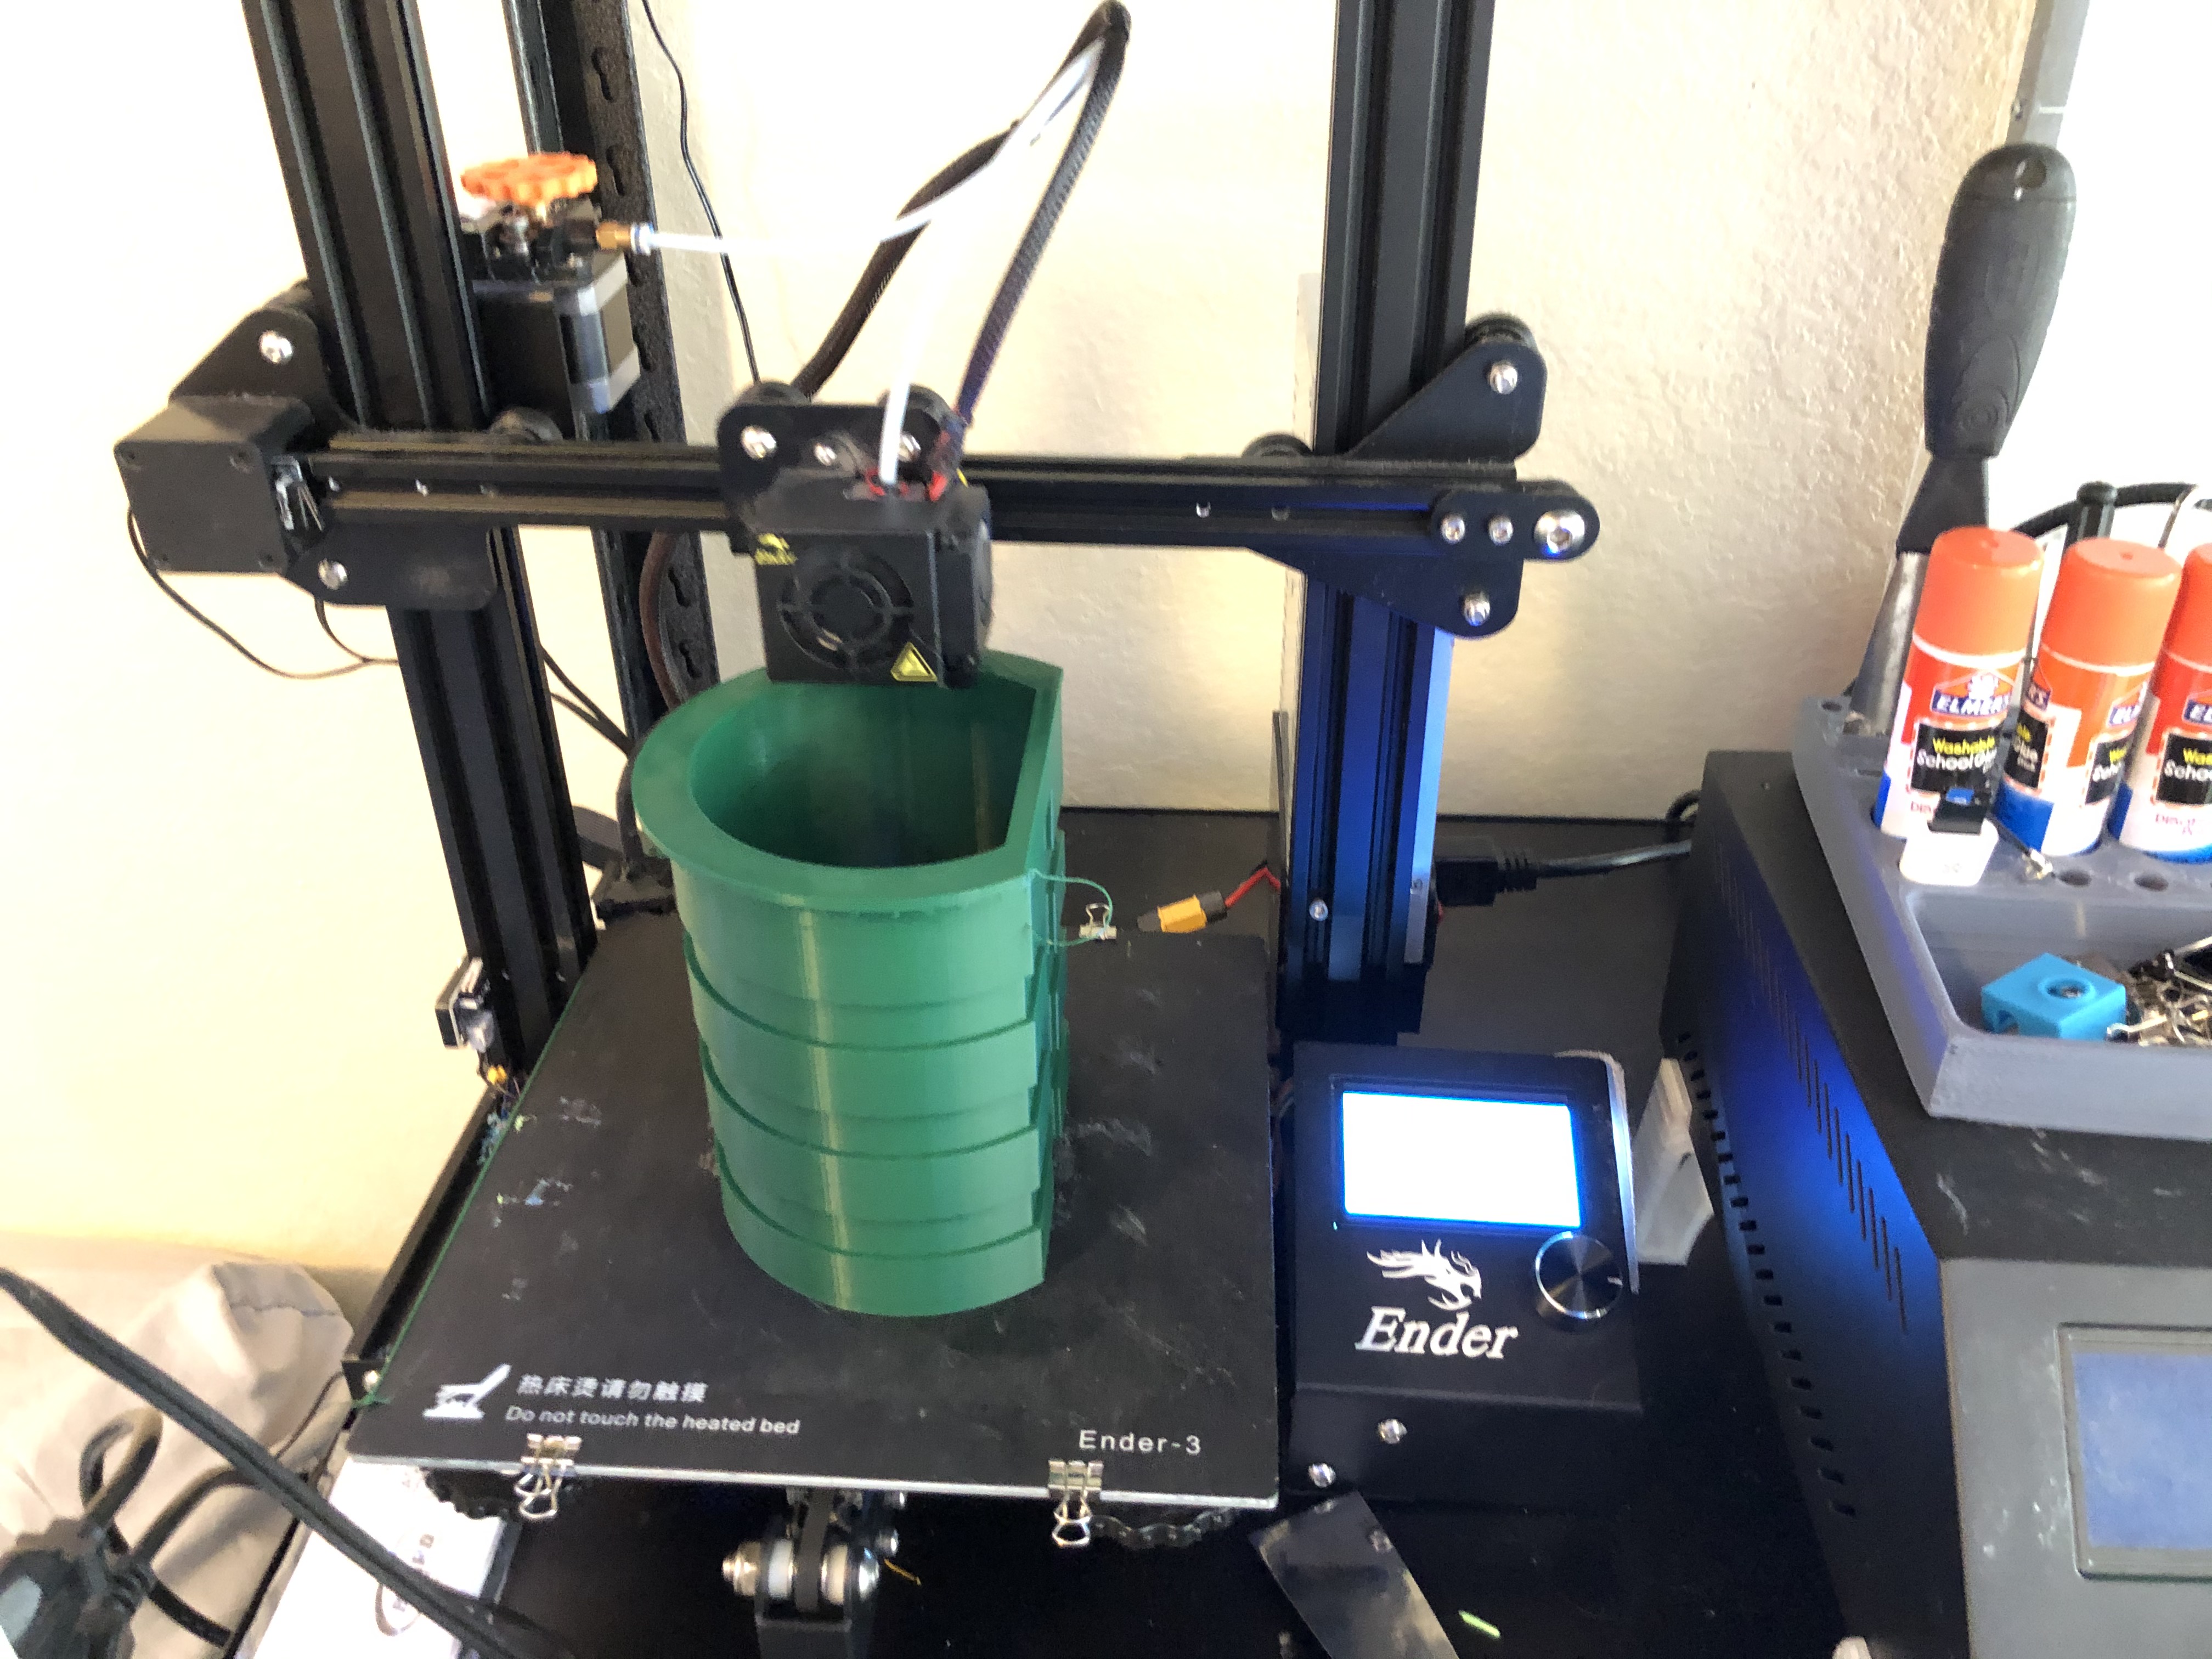
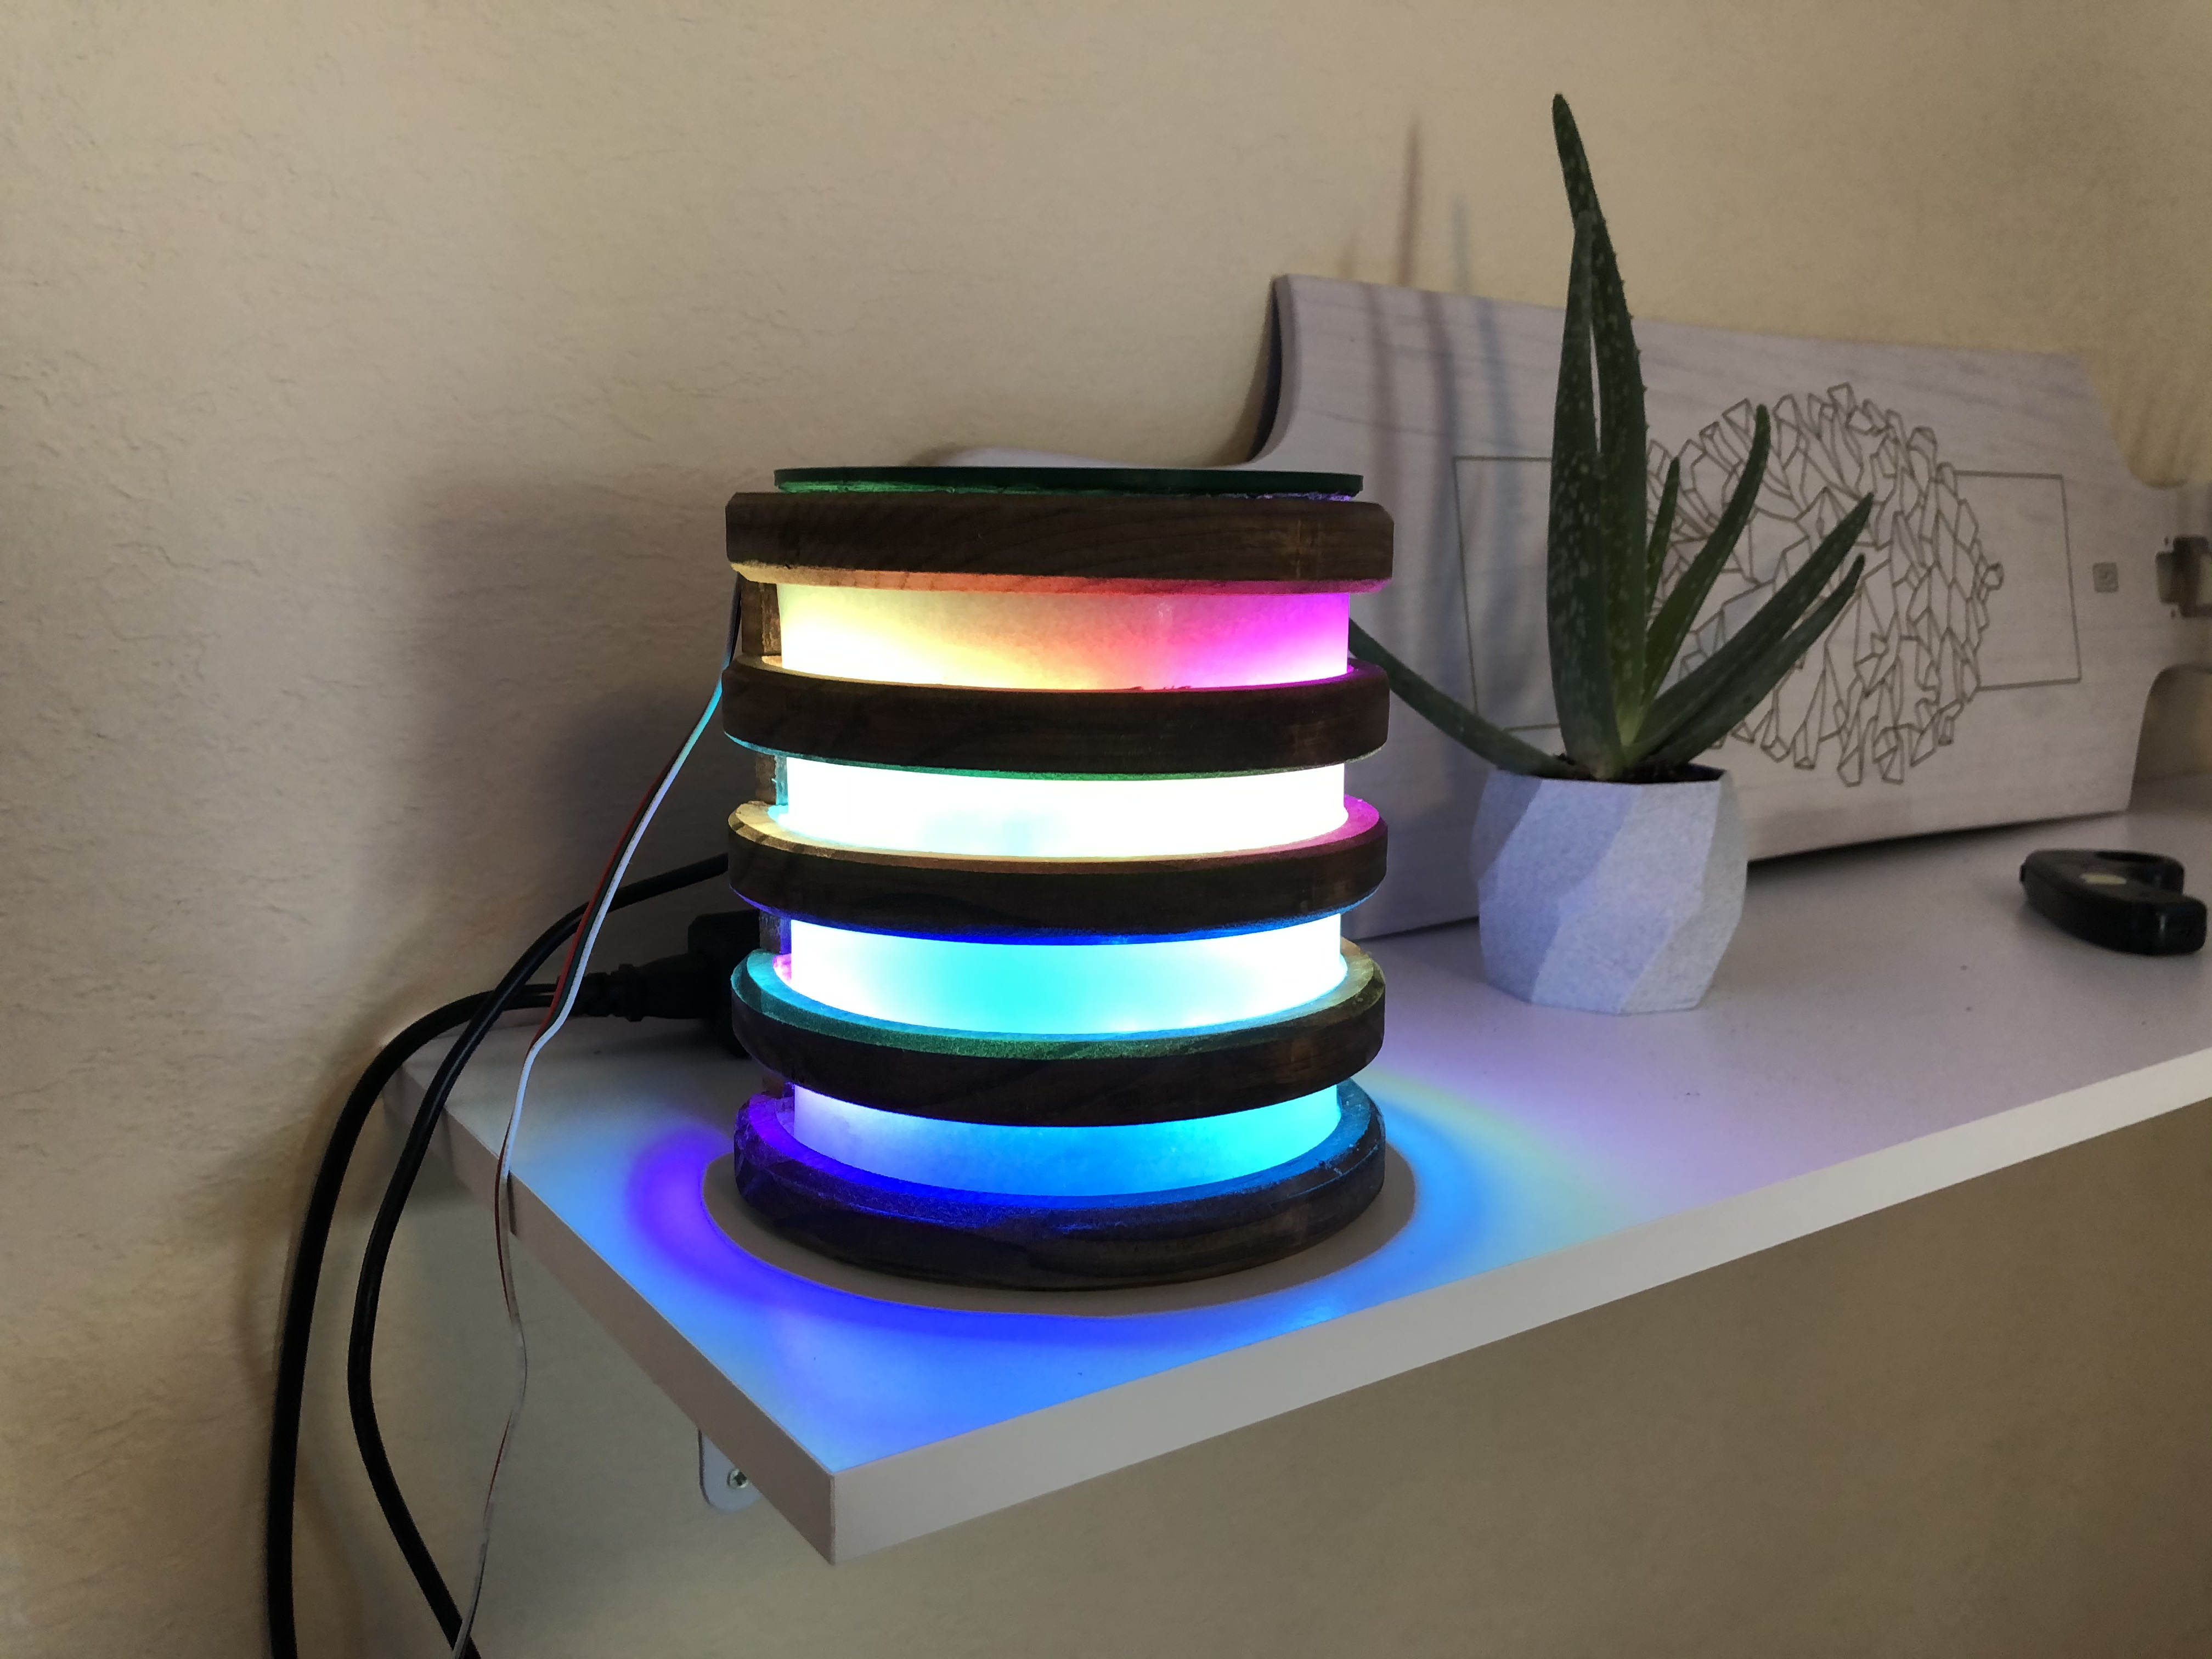
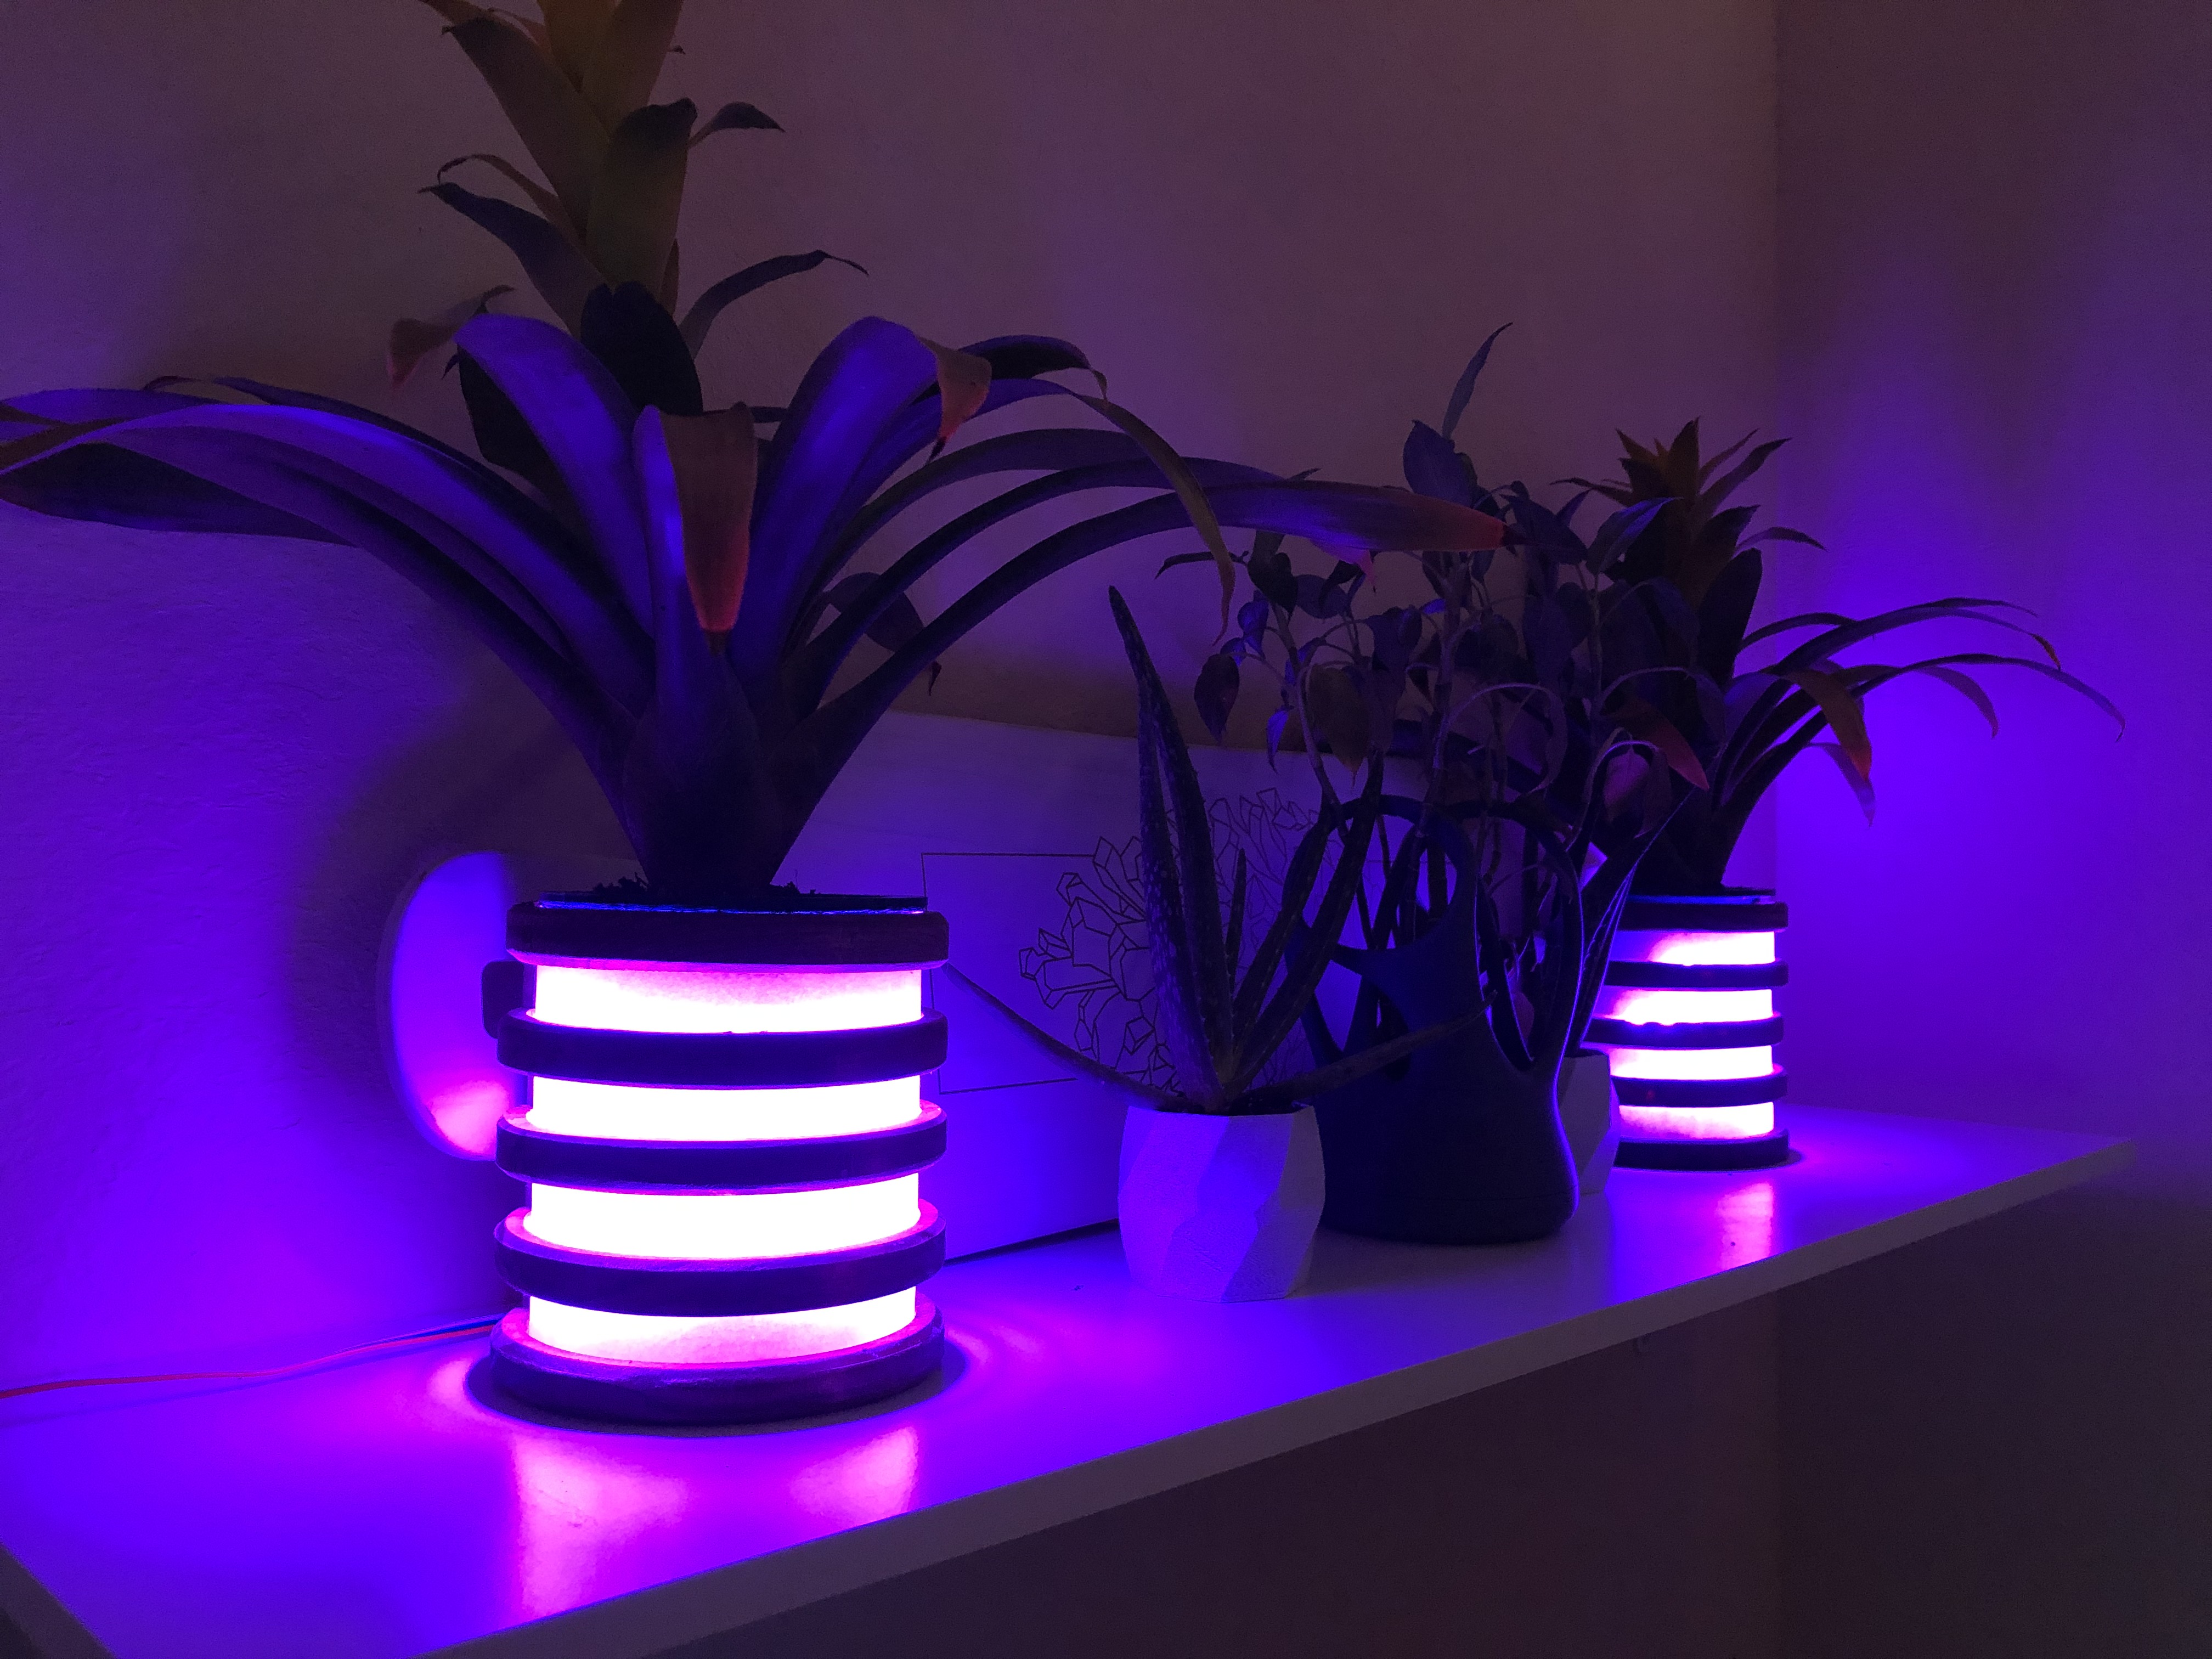
These LED planters were something I wanted to make years ago but just never got around to, this months theme was the perfect excuse to try and finally make them. Theyre made up of 5 stained pine rings, a bent and sanded sheet of acrylic, a 3d printed pot and some sweet individually adressable LEDs. They also house real plants and can be mounted to the wall!
They were an absolute pain in the butt to pull off and I honestly didnt think I was gonna meet the deadline for the contest, but I was able to rush a few things and get them finalized today.
These things seriously kick butt and the LEDs look even better in person.
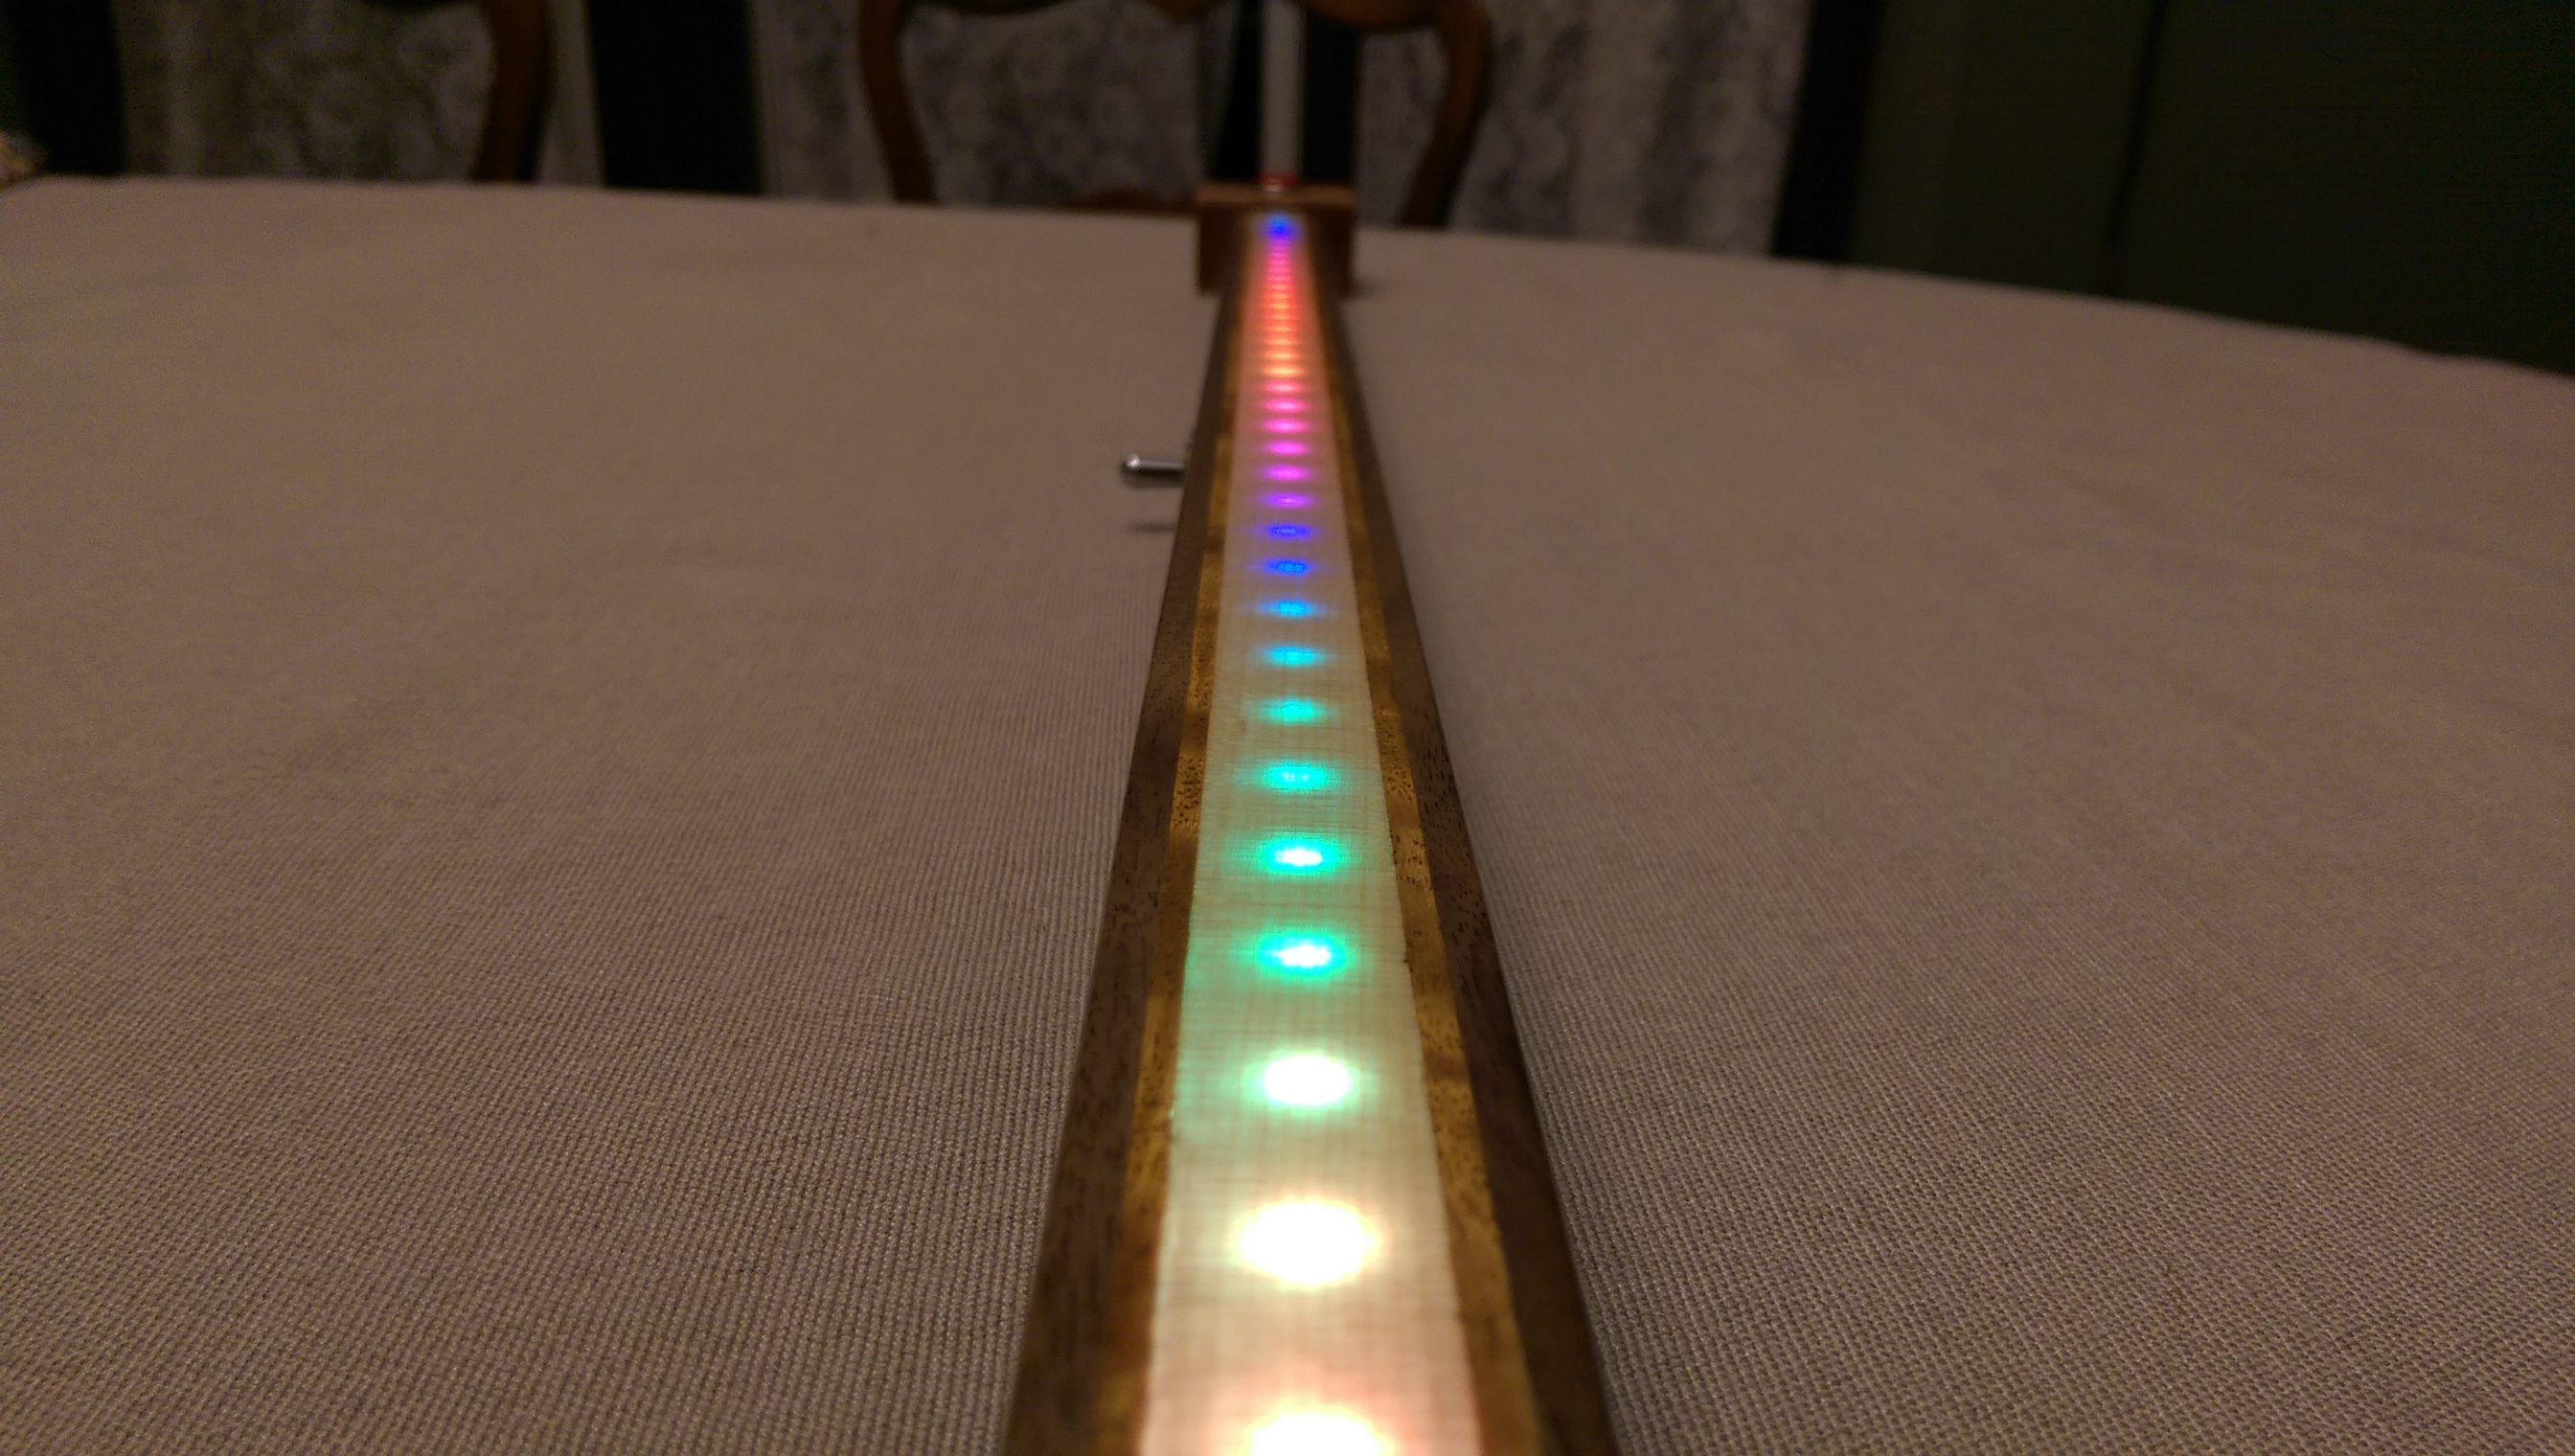
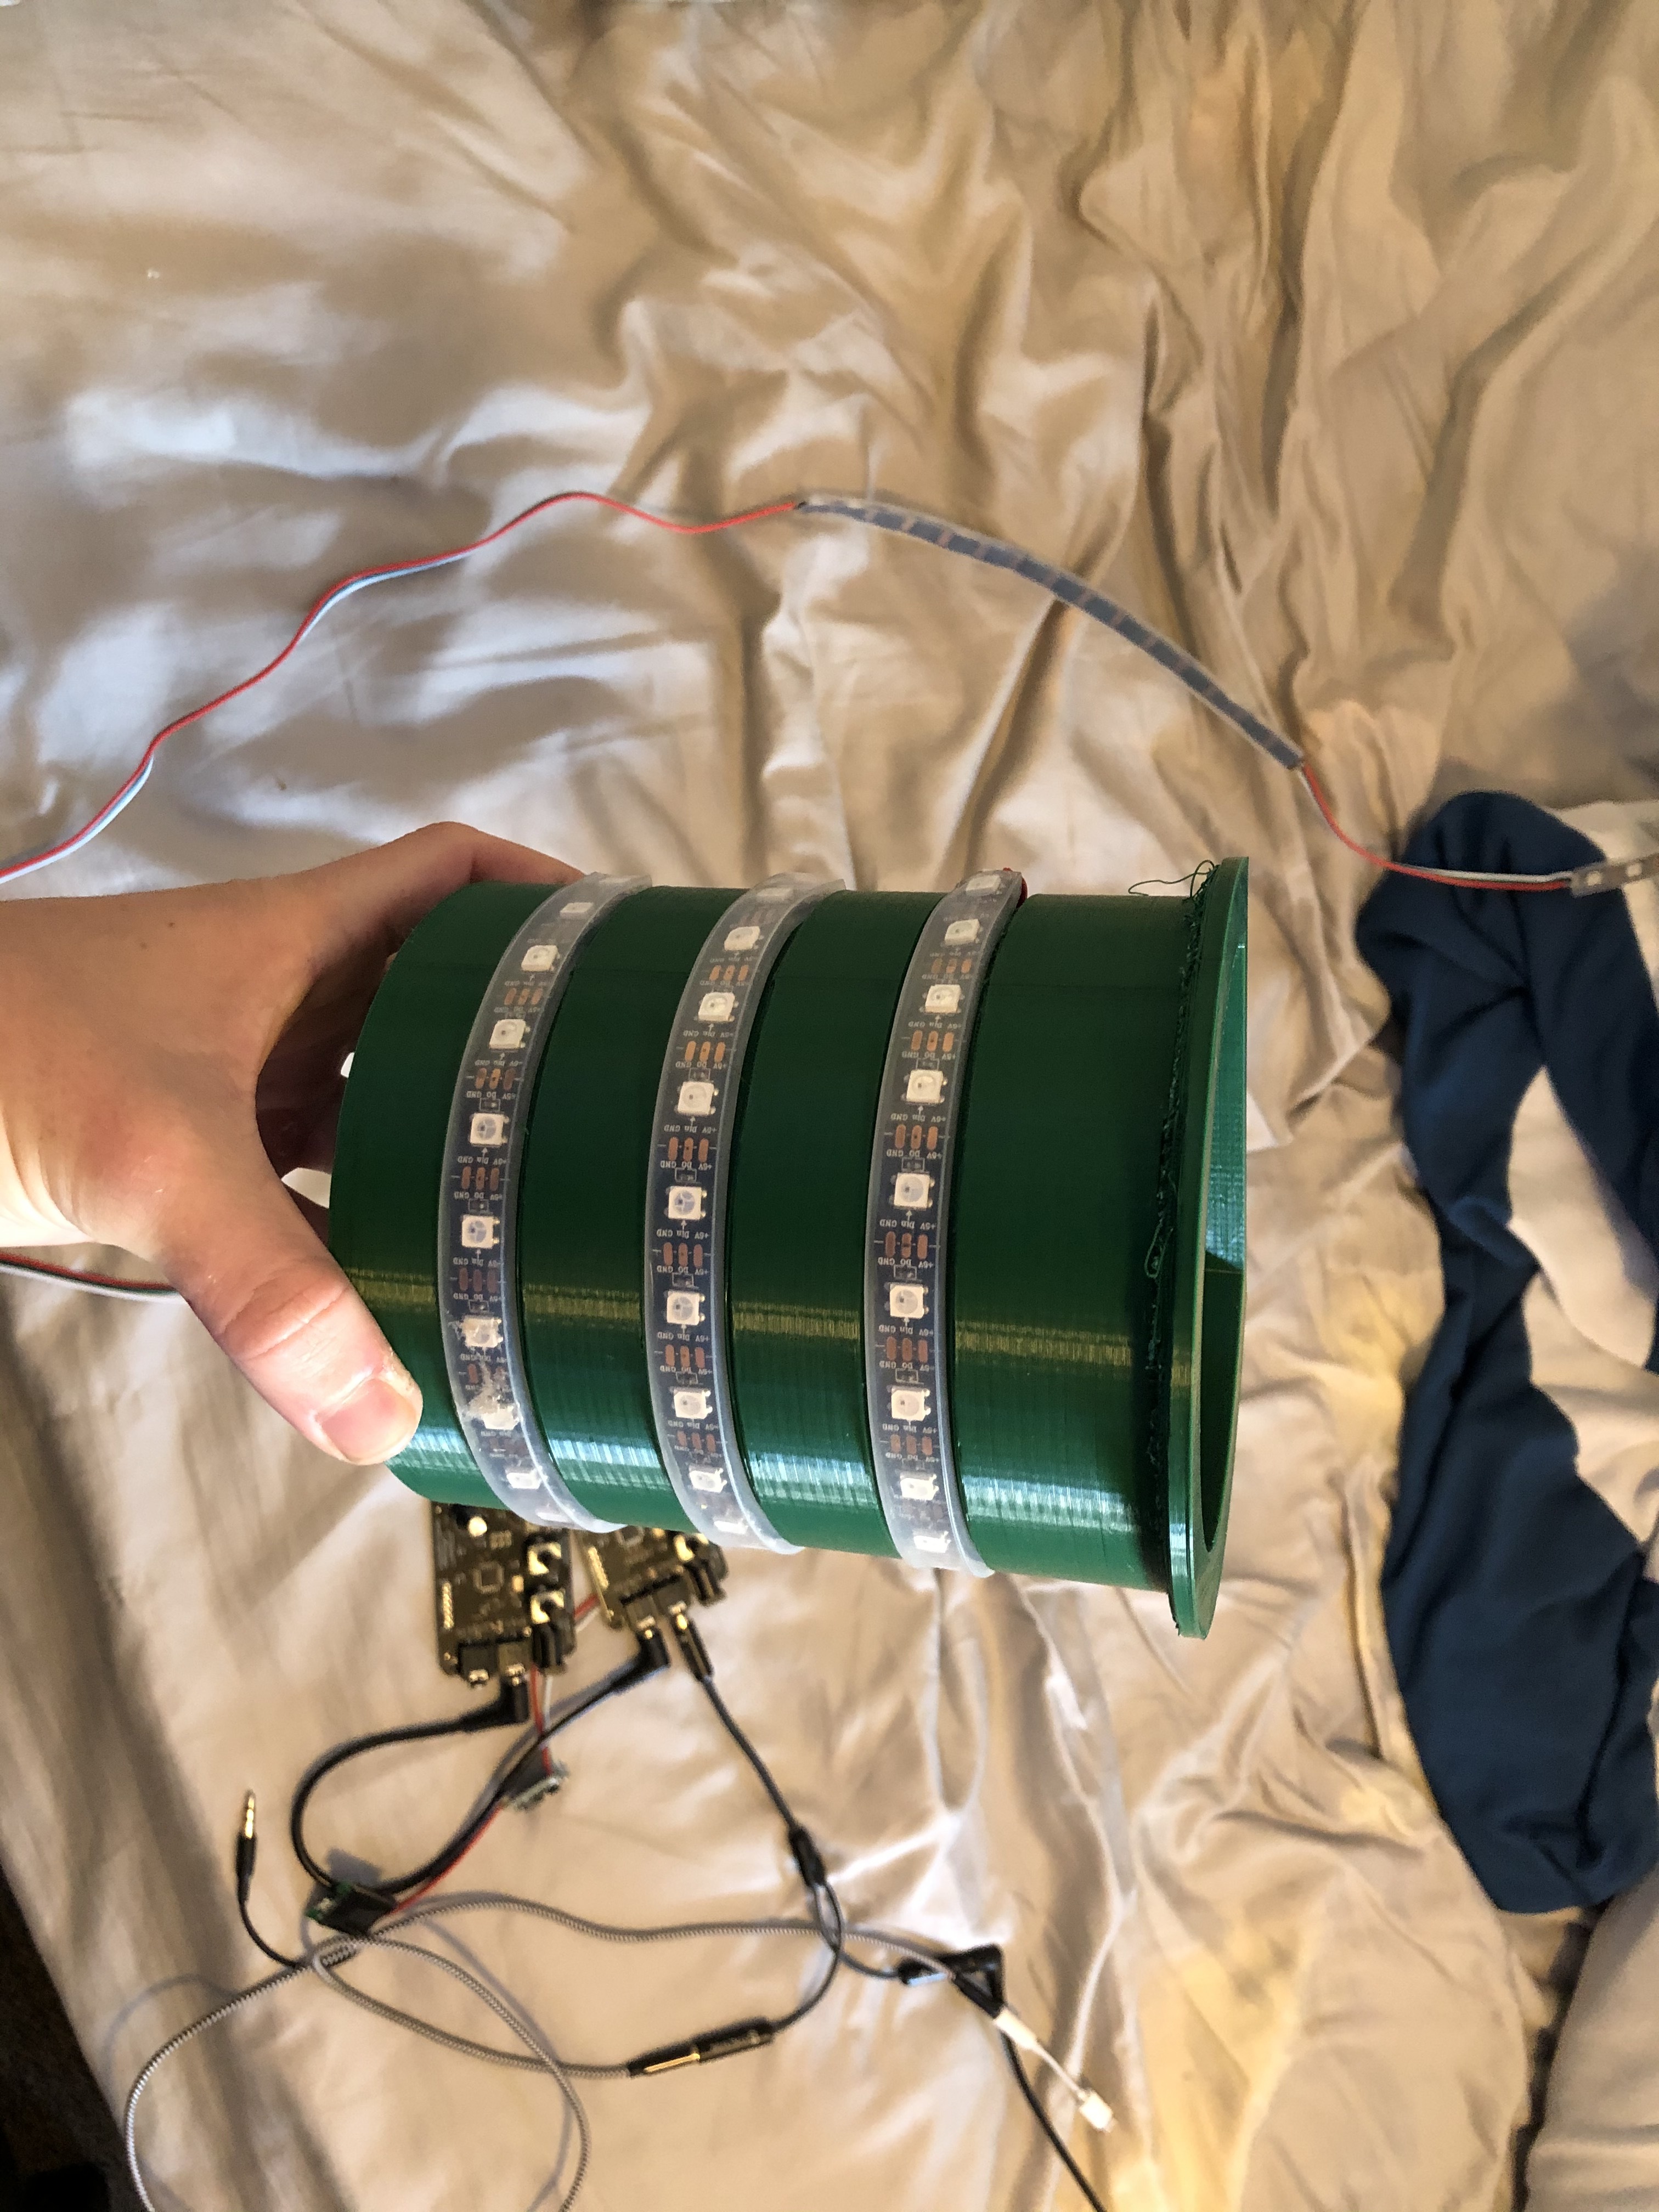
The LEDs are ws2812b individually addressable 5v LEDs, which means each pixel operates independantly of all the others. This allows for some sweet multicolor effects which you can see in the below video:
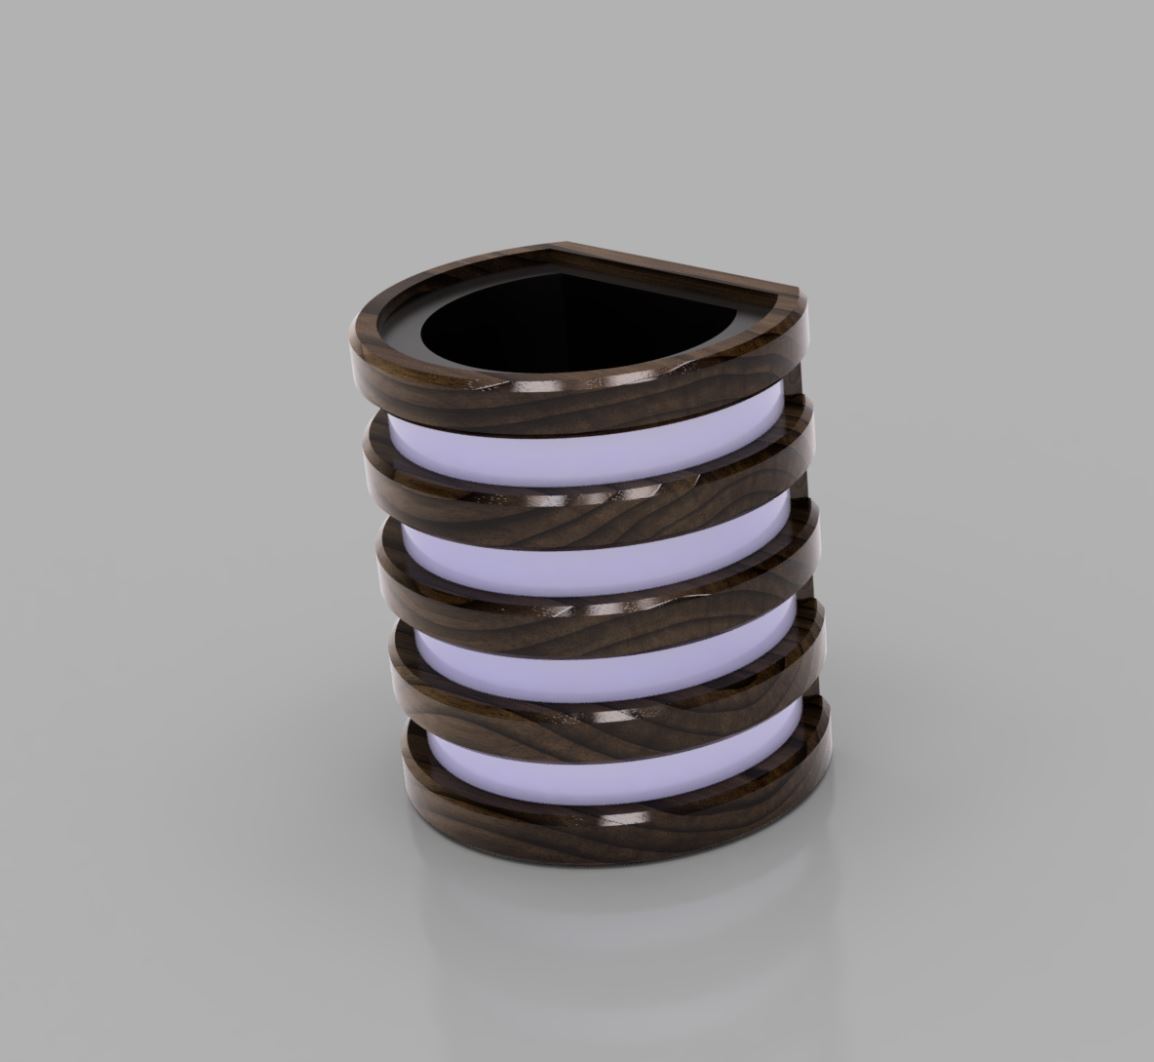
I designed them from scratch in fusion 360 and also did all the CAM in fusion 360. Just like last months contest I was able to use the new manufacturing model feature and the arrange tool to easily arange all the components to be cut with the shapeoko.
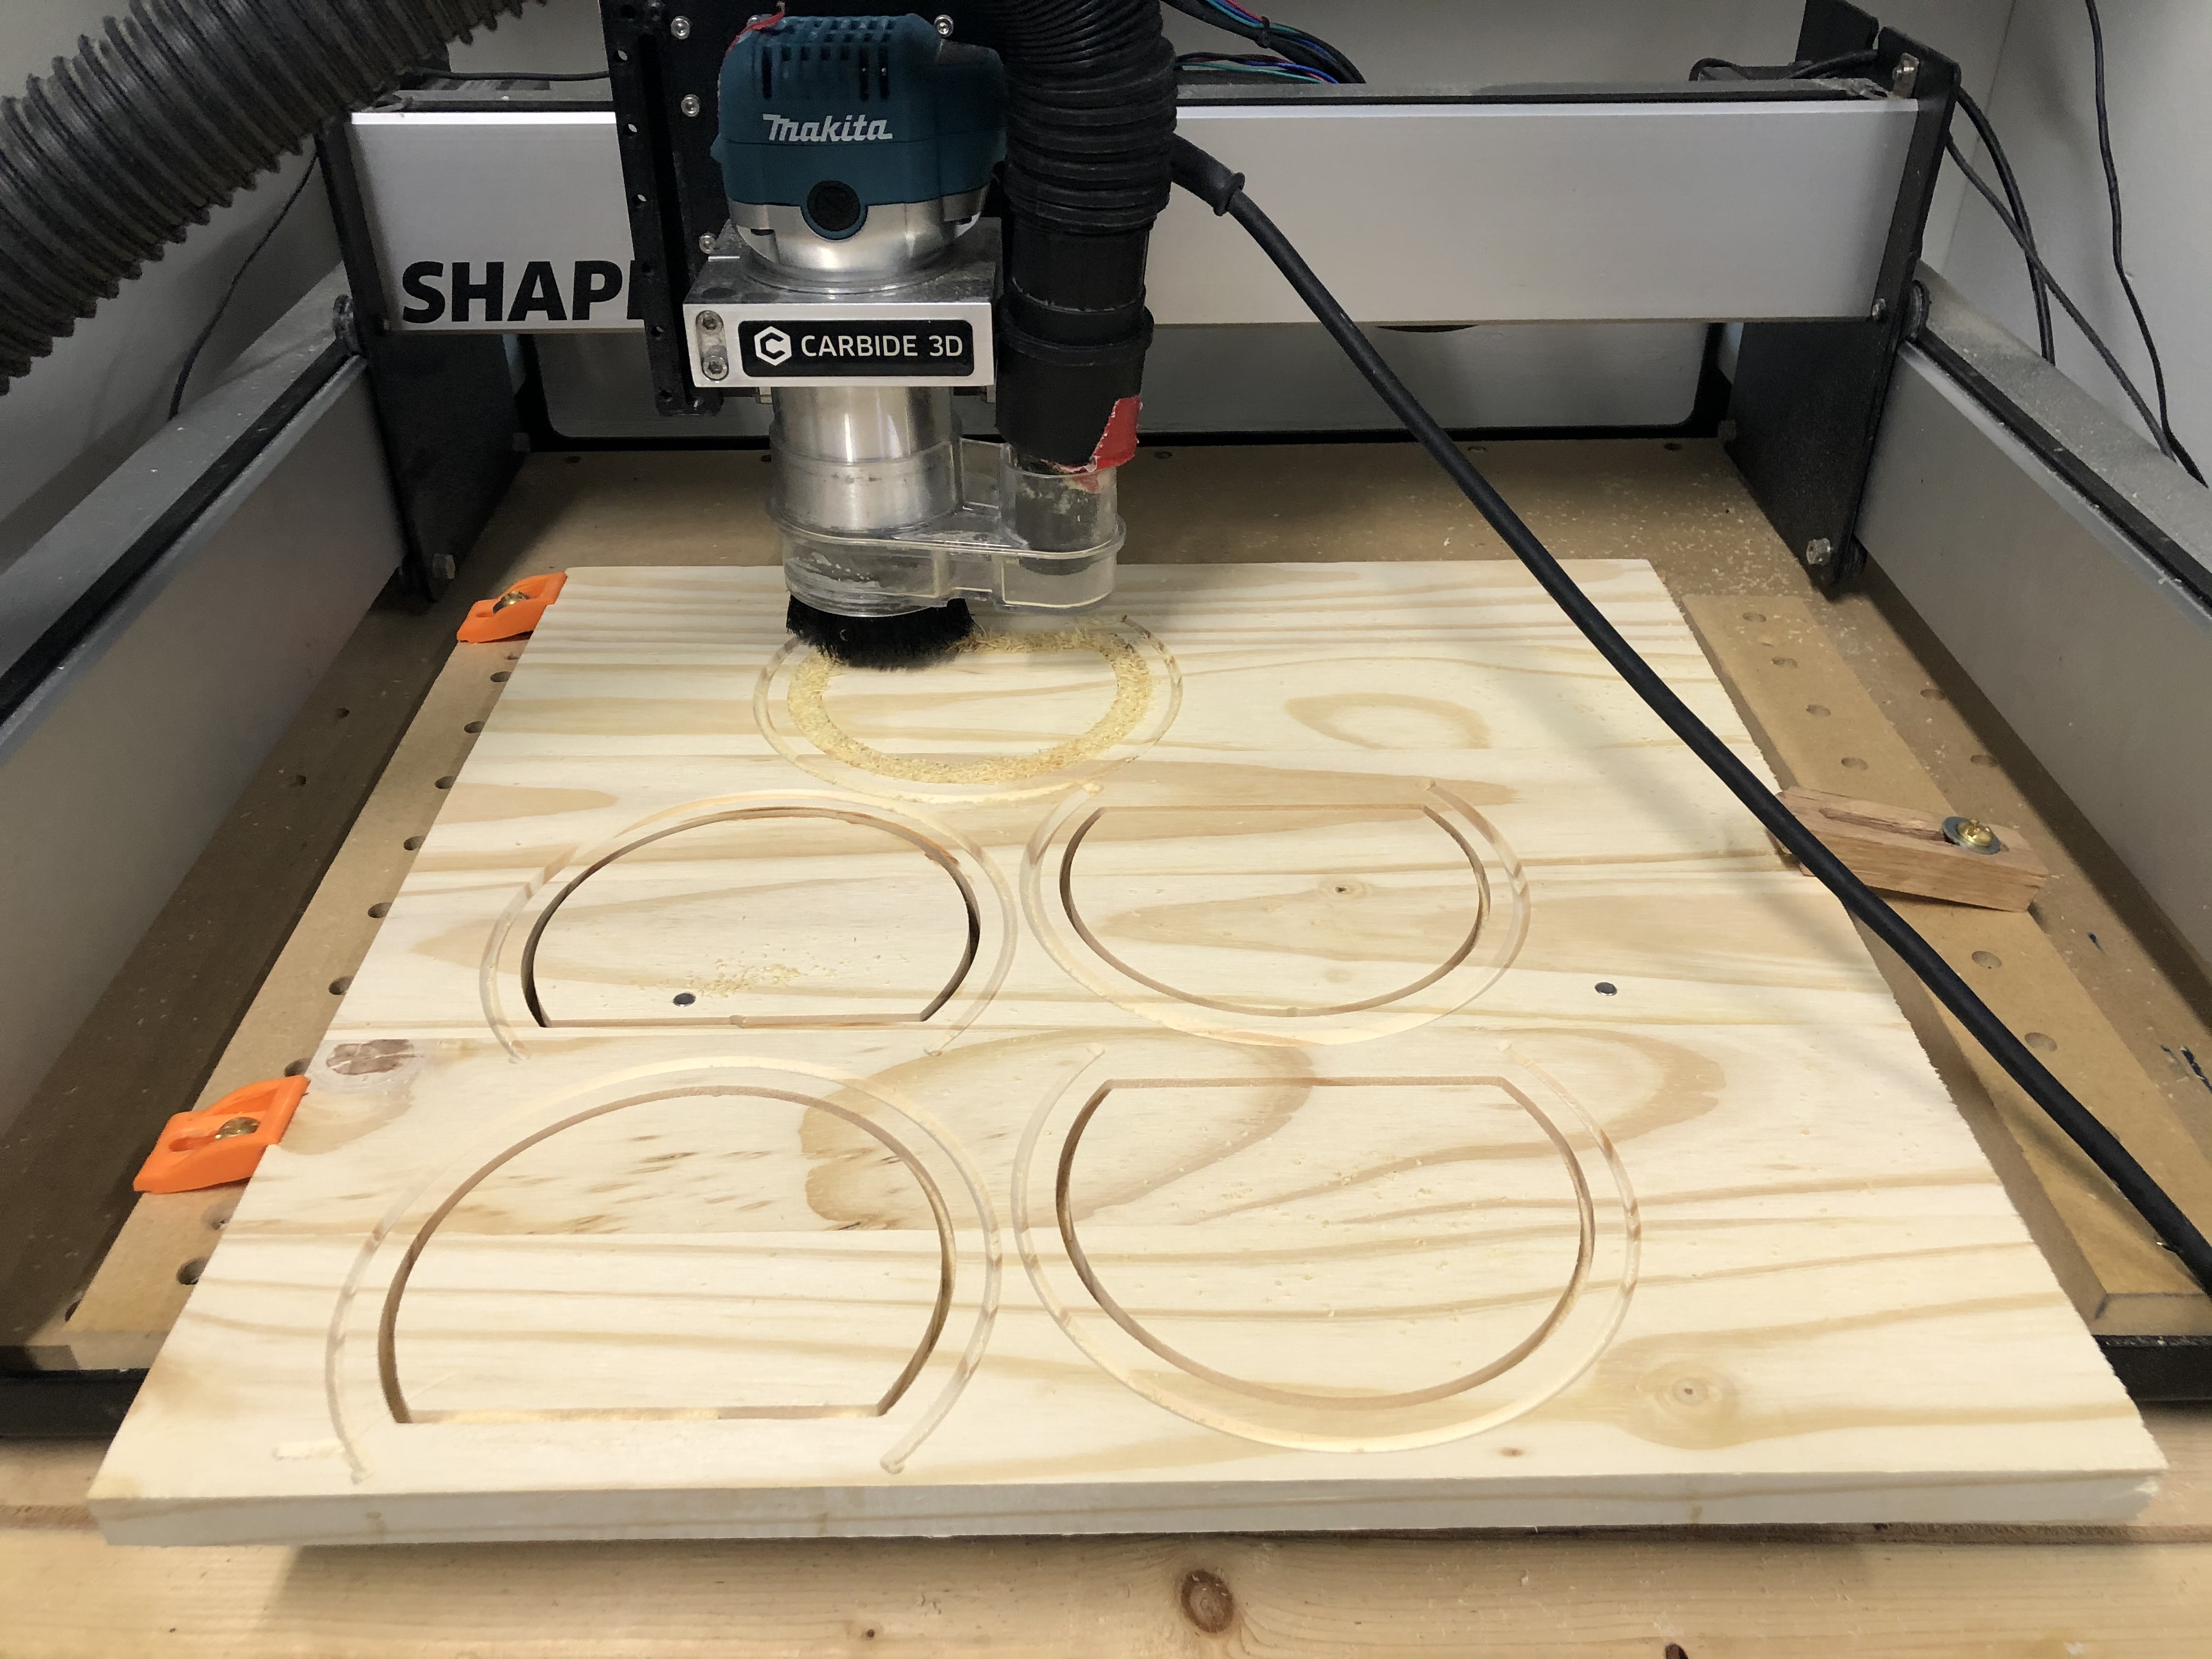
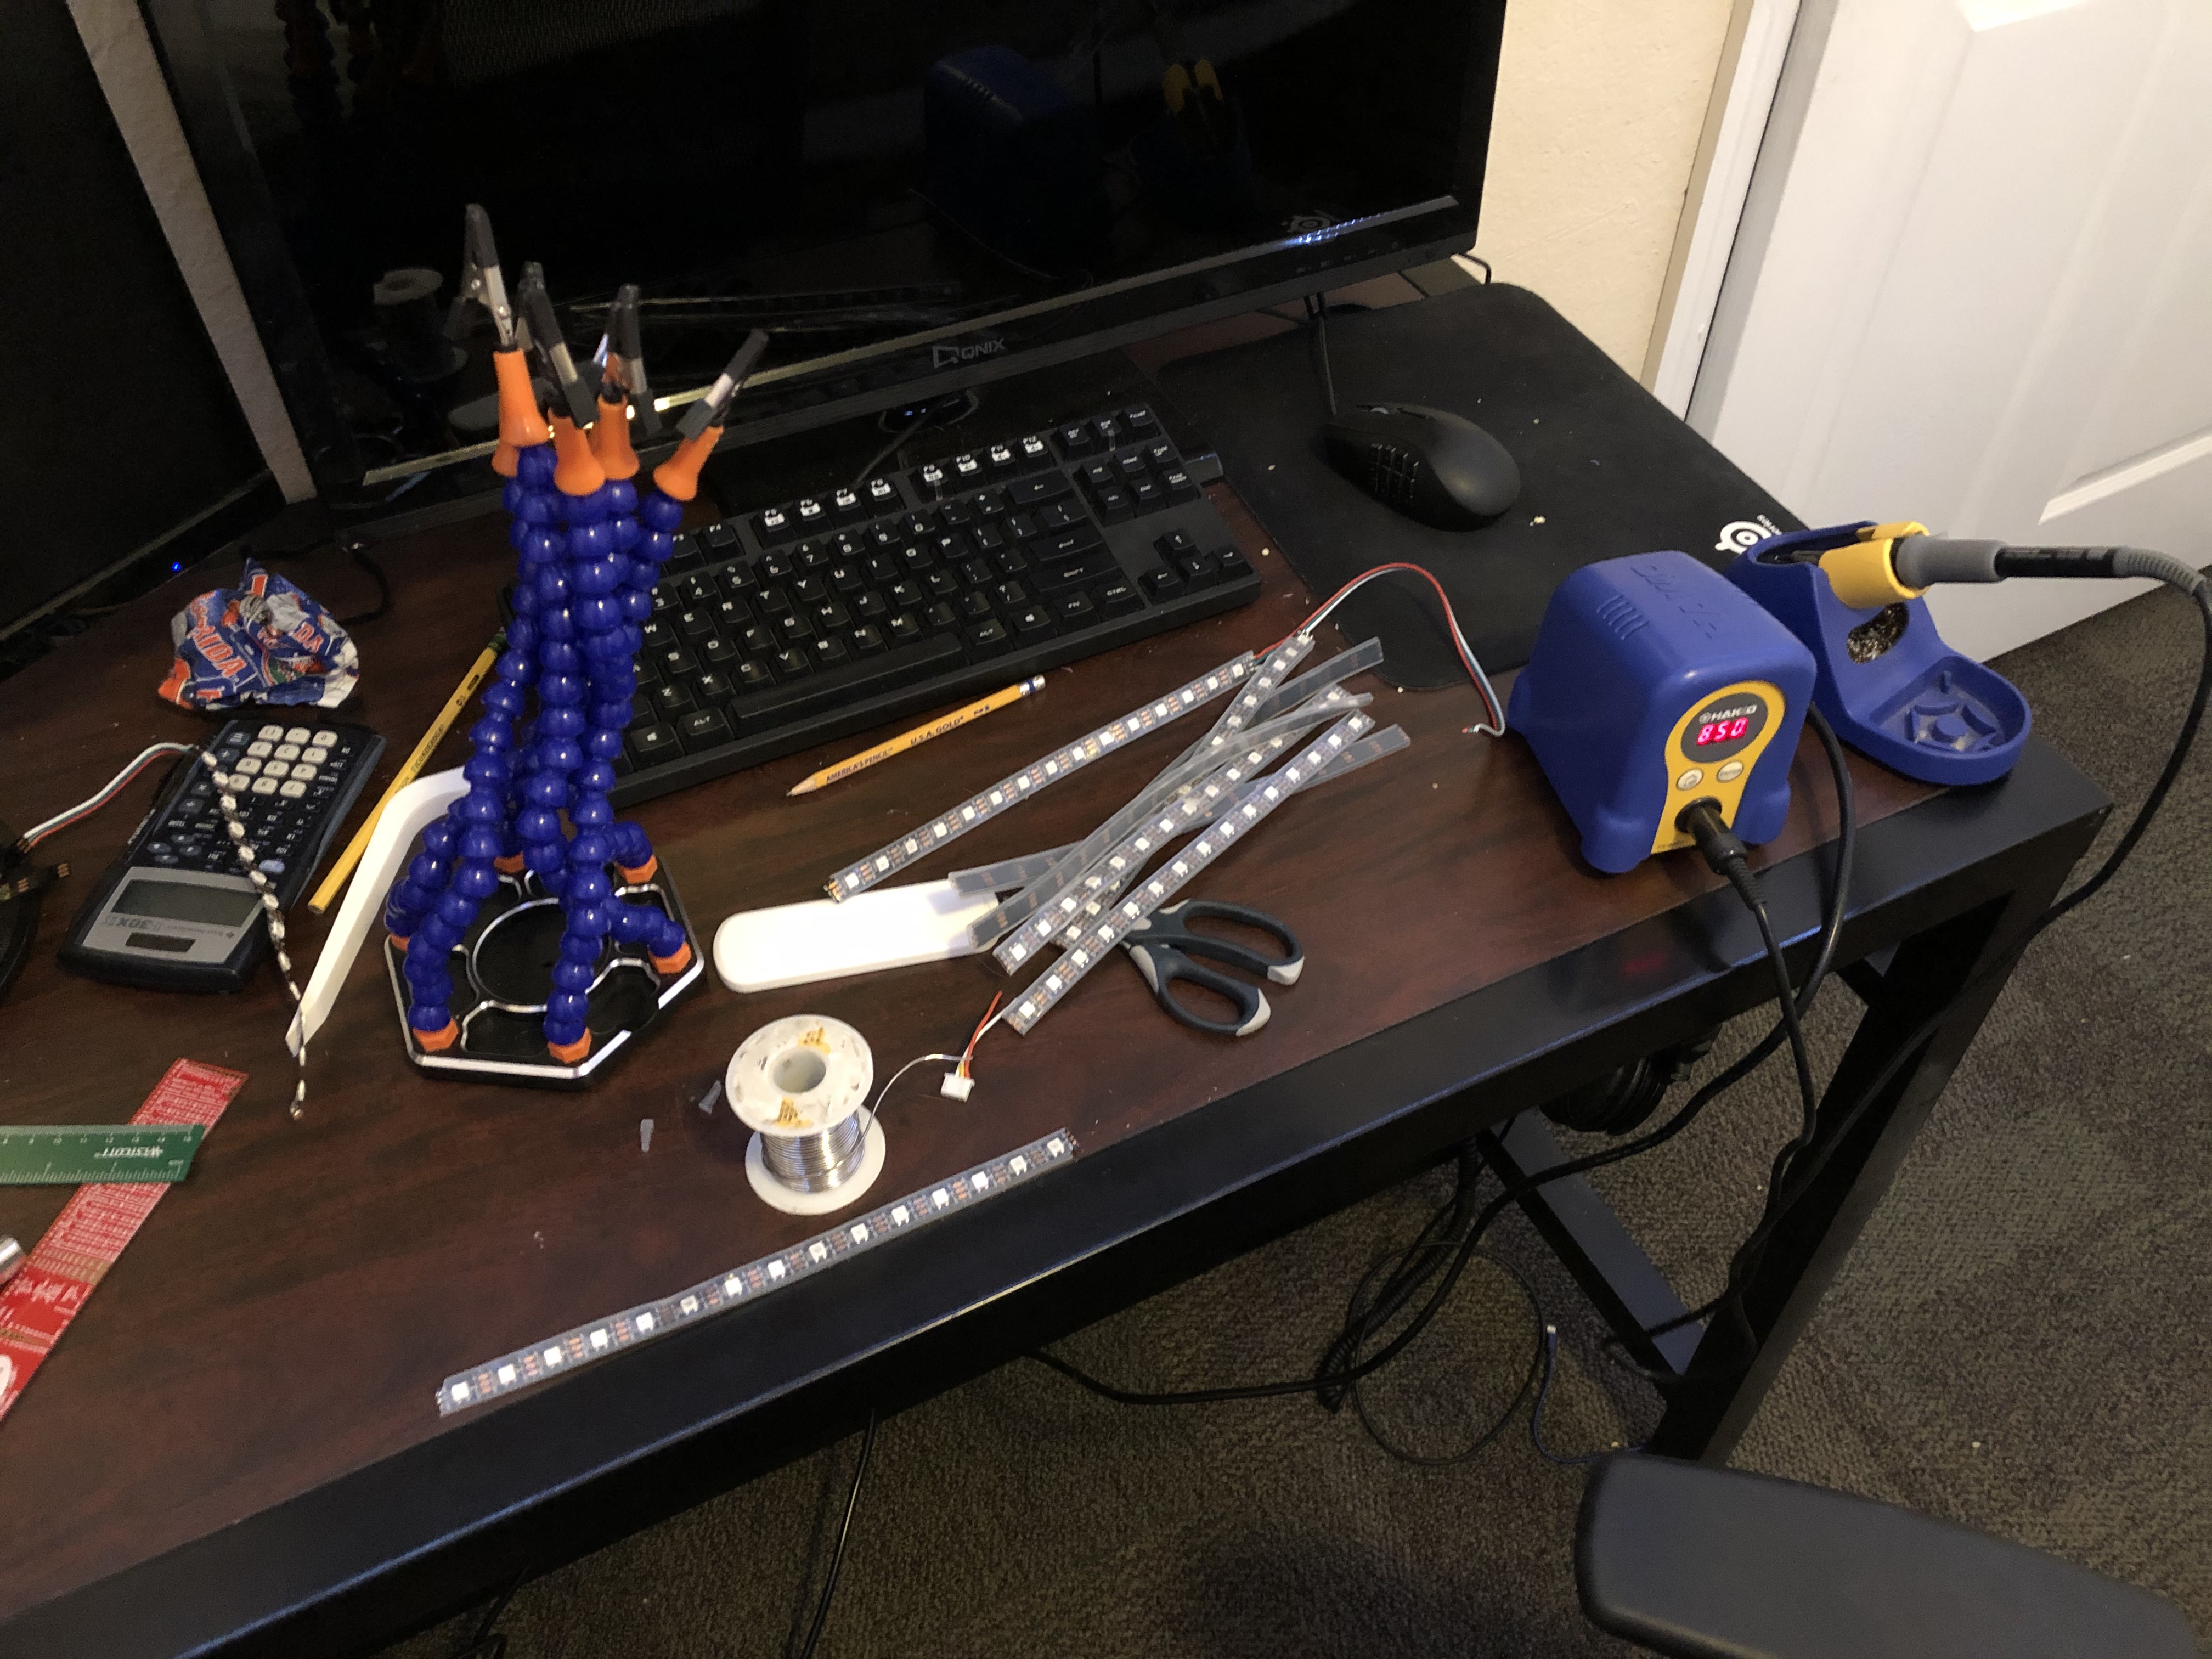
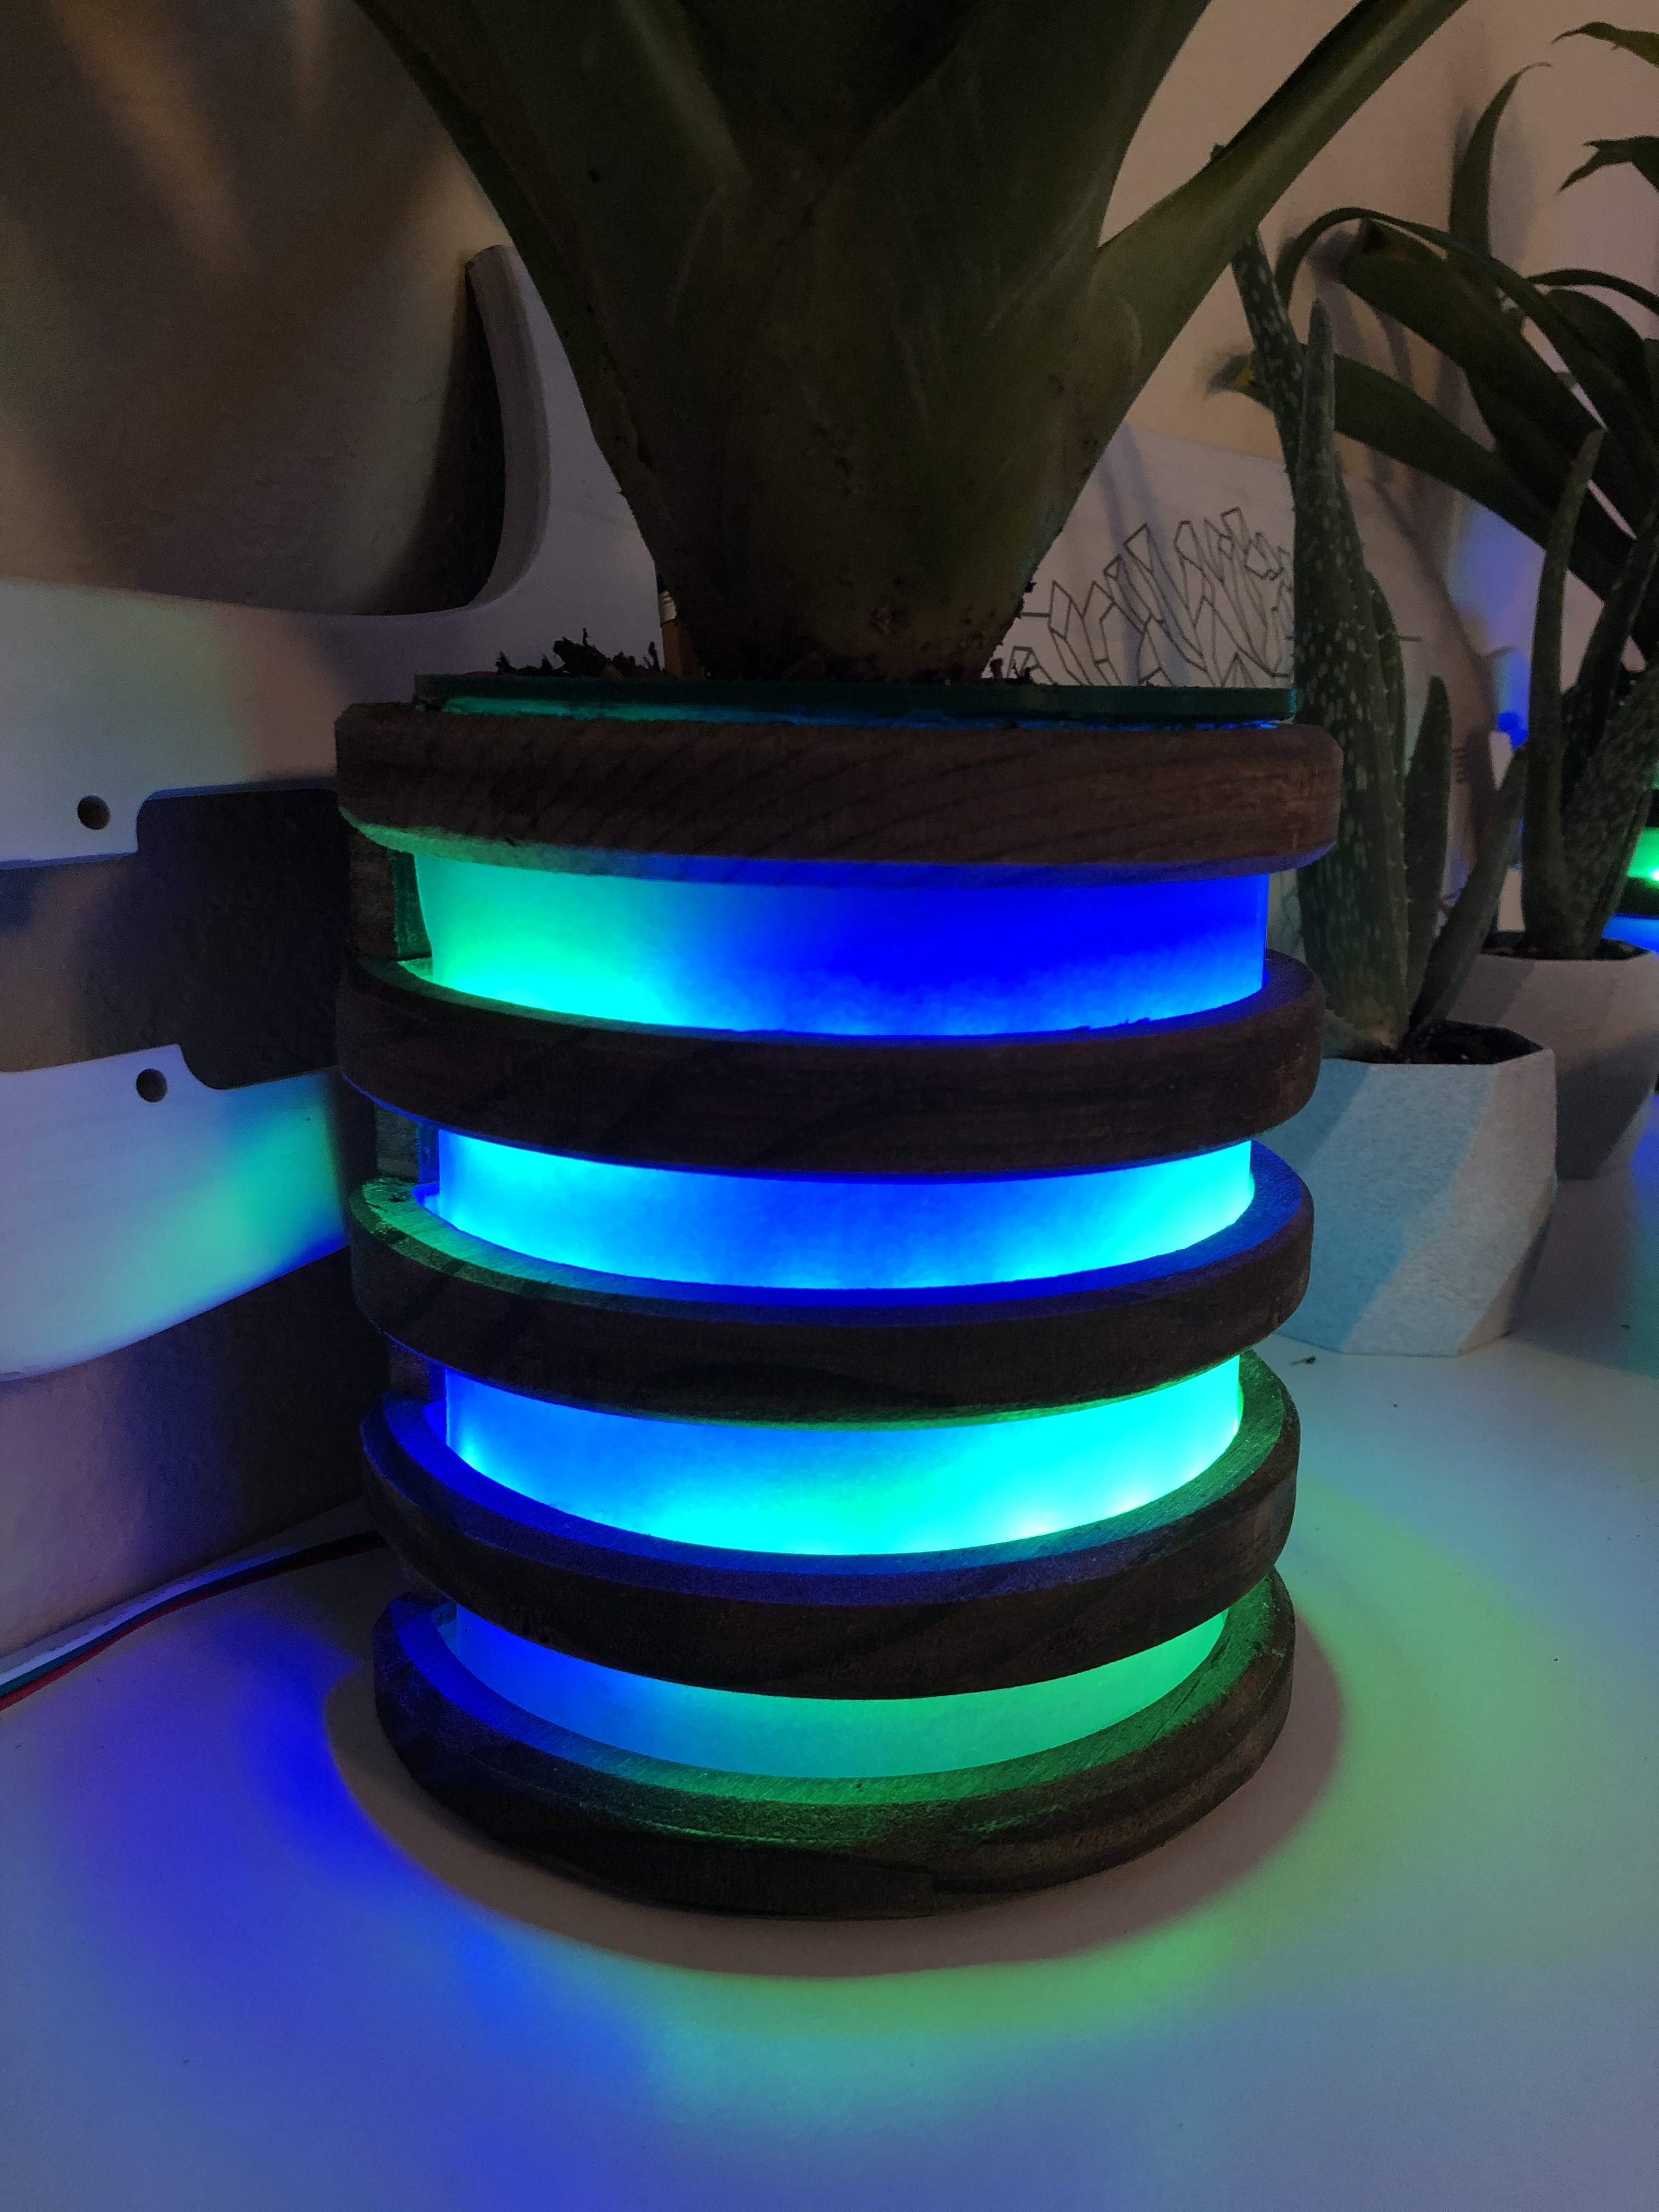
I started the build by cutting the pine rings and spacers that would eventually be glued together to makeup the wooden frame. I used dowel pins and multiple side machining to add a nice chamfer to both sides of the ring. Using multiple sided machining added a lot of time to the process but I’m fairly happy with the results, the chamfers add a lot of depth and detail to the rings.
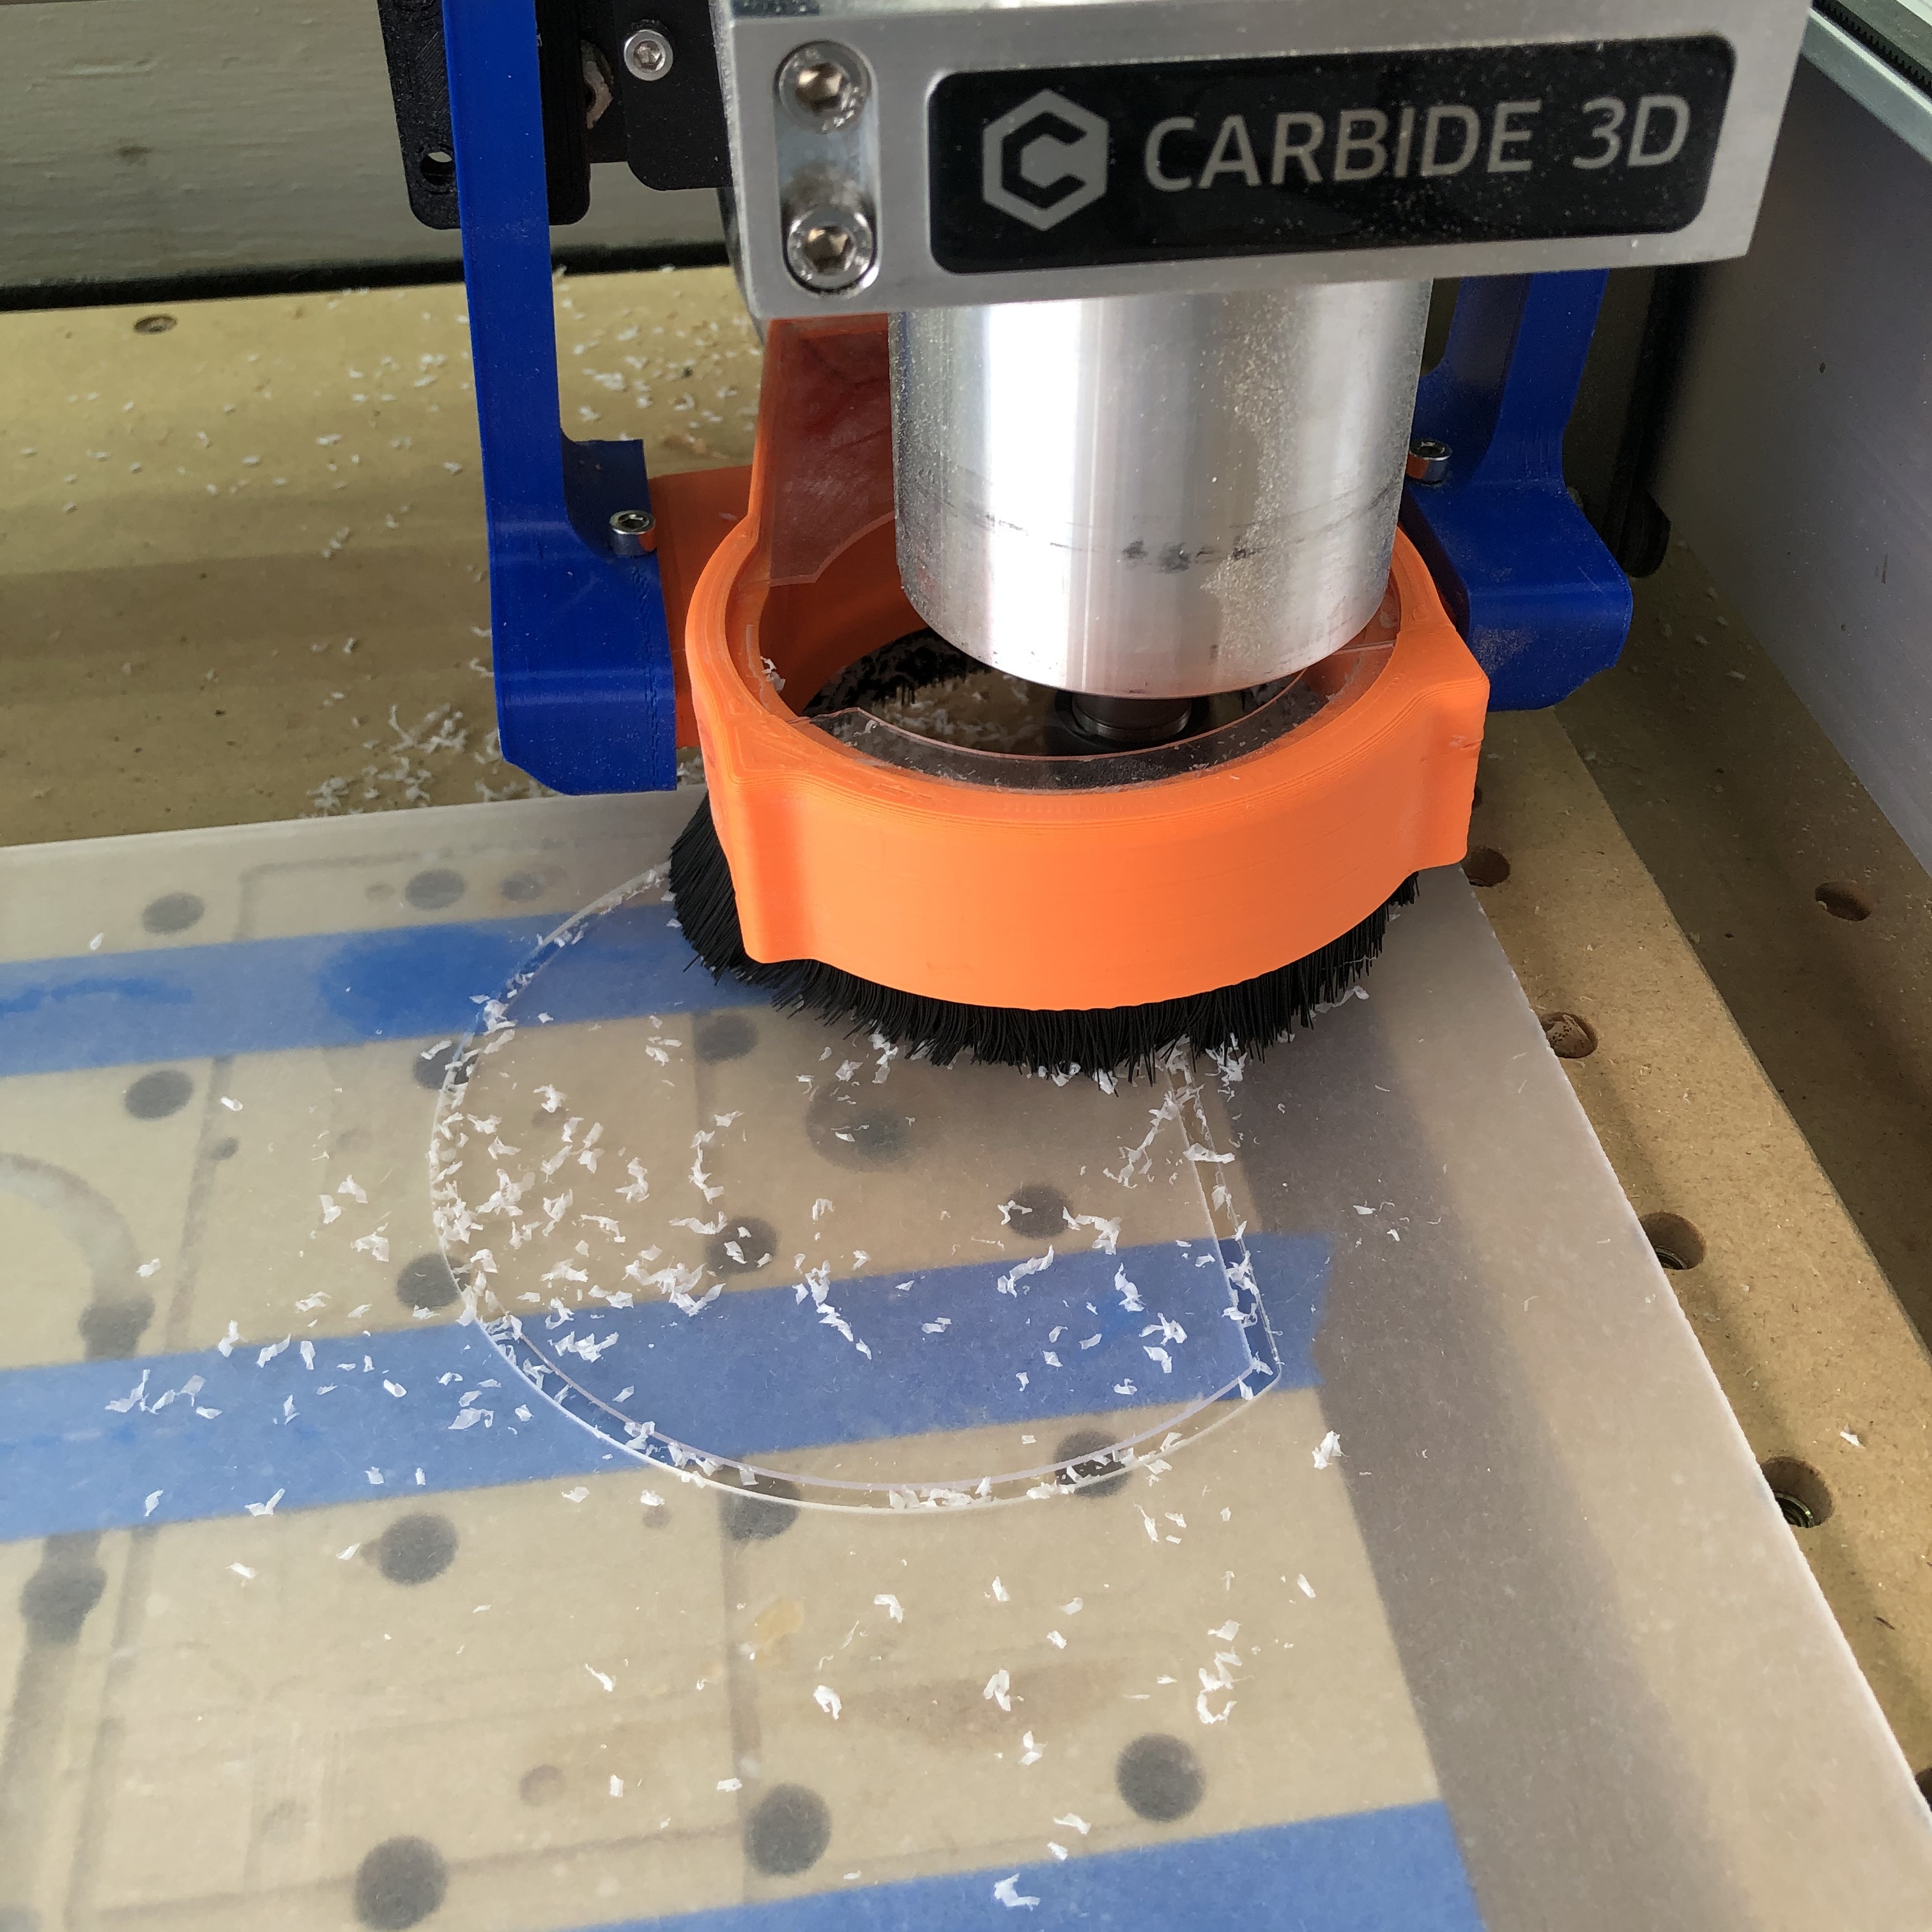
Now its time to move on to the acrylic.I started by sanding the .093" sheet to give it a frosty matte finish. This will difuse the lights from the LEDs and make it so you cant distinguish individual pixels.
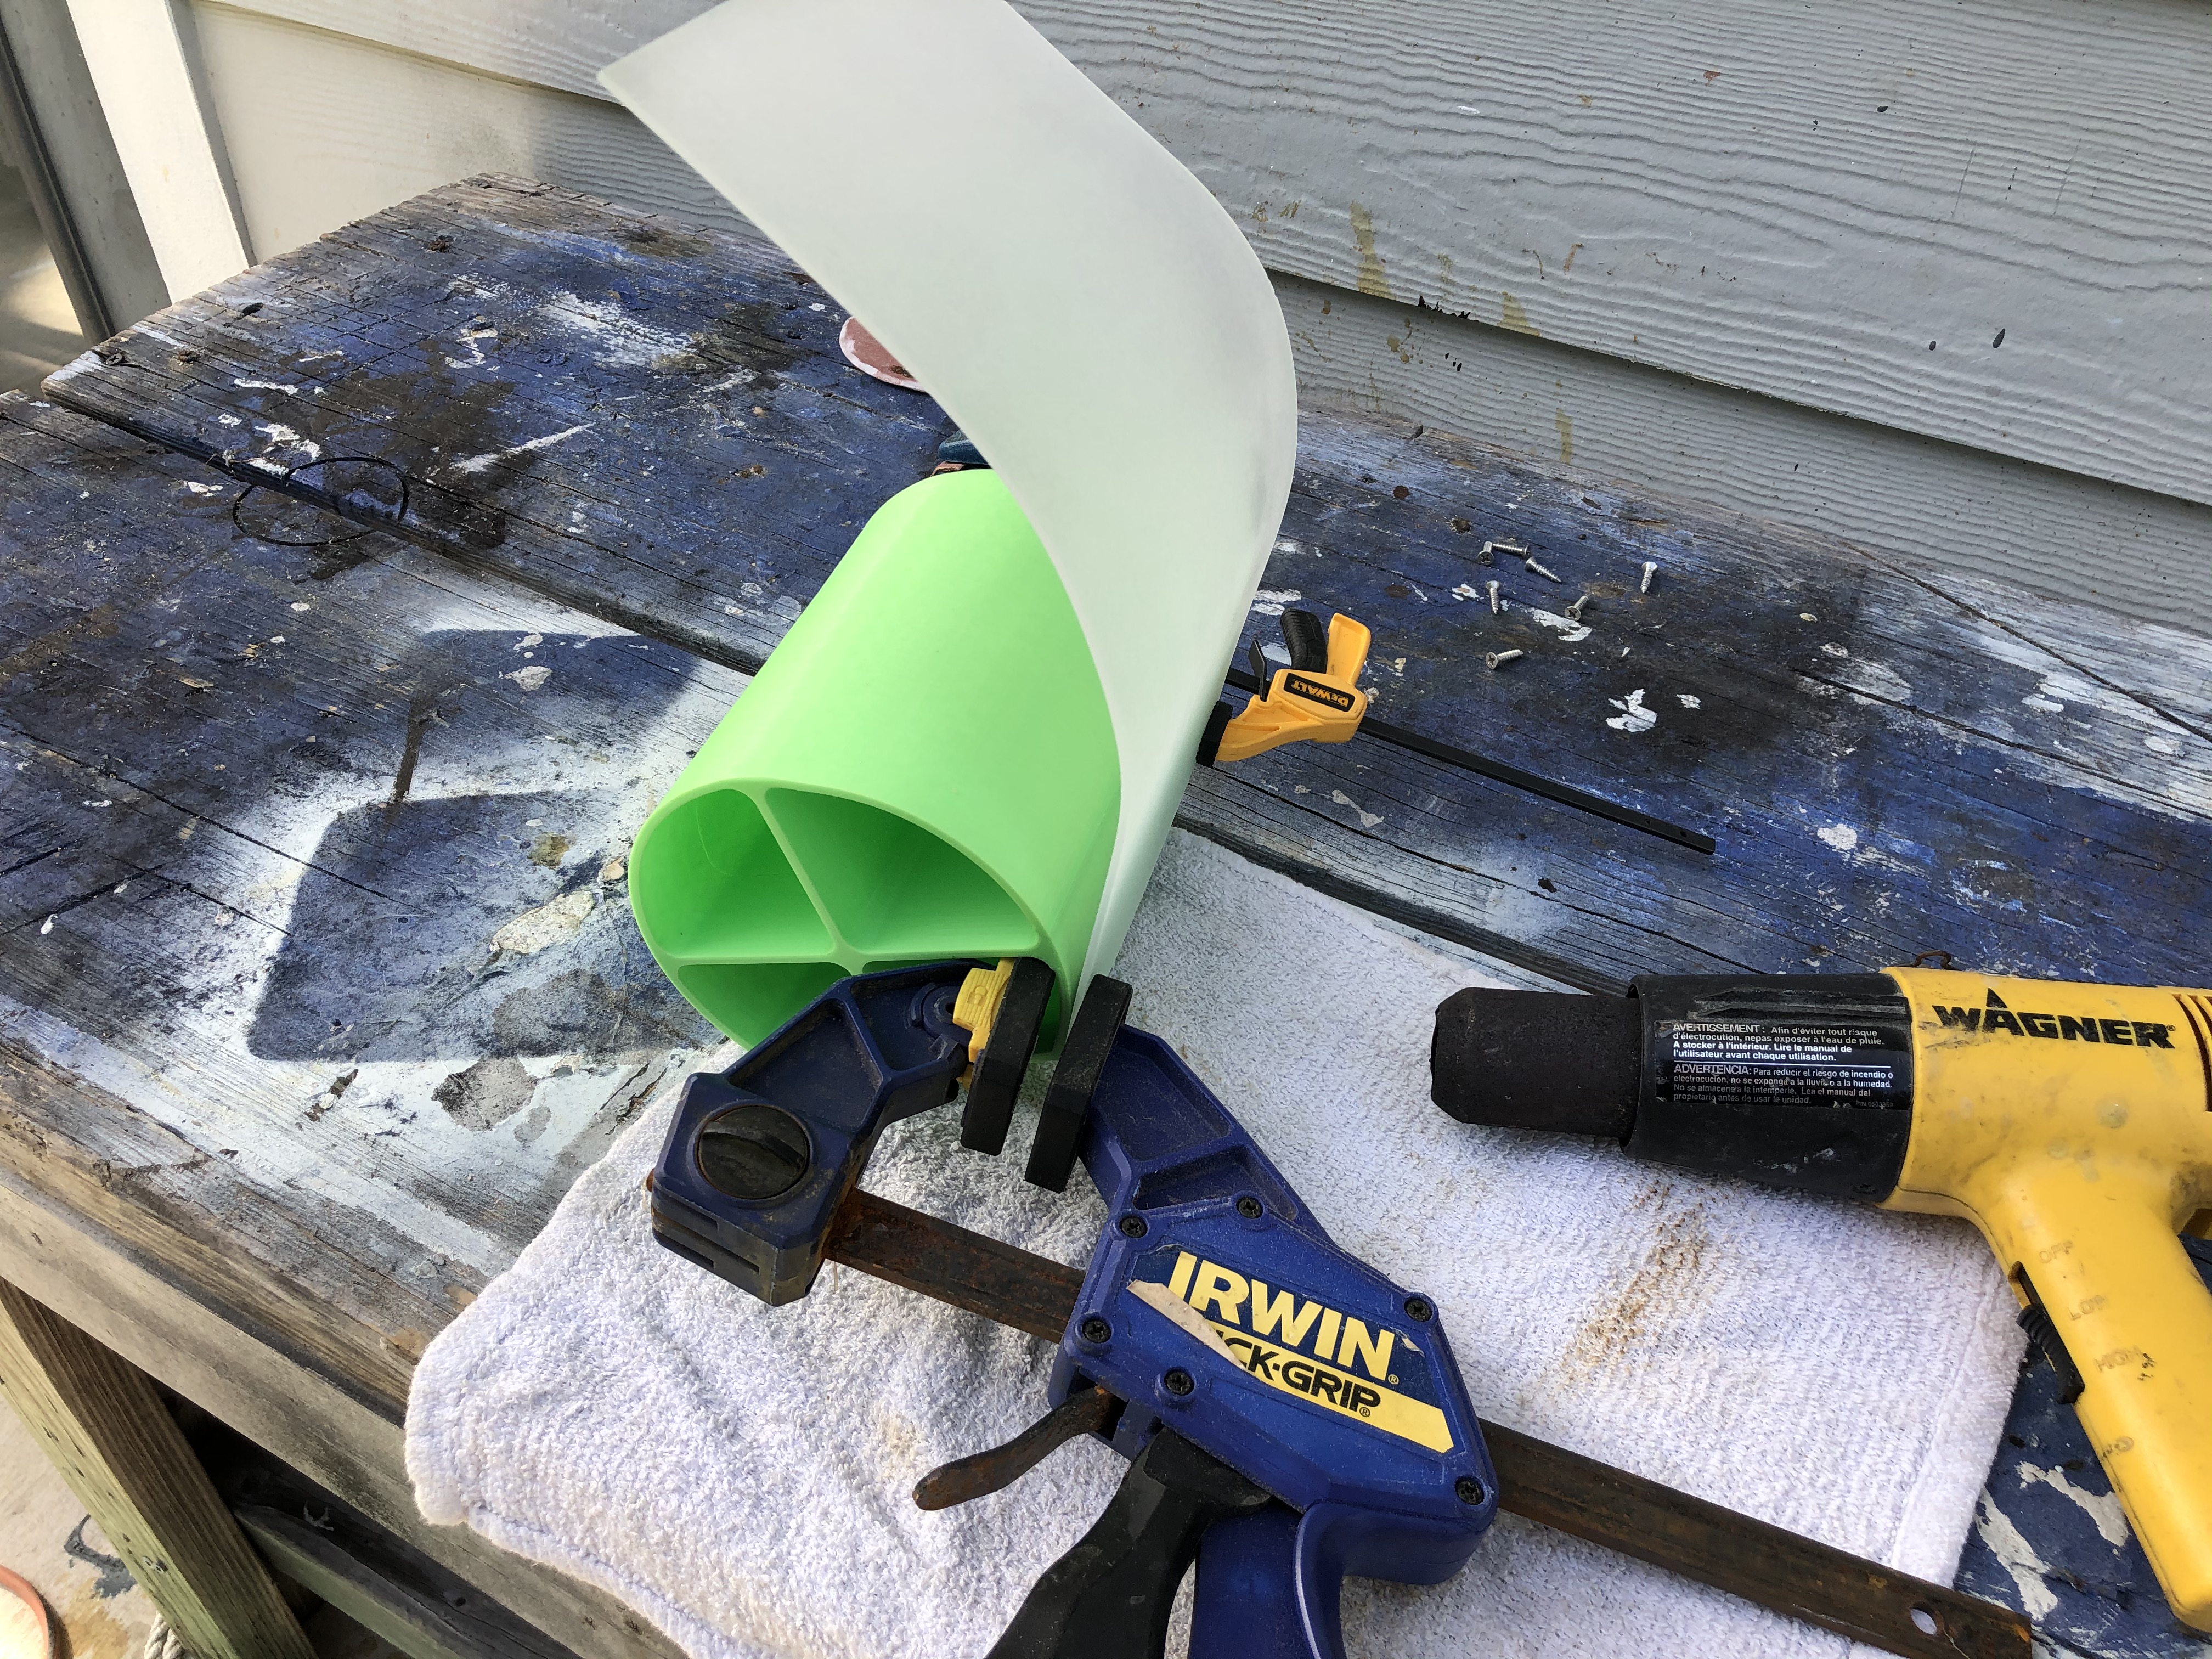
Then I heated and bended the cut acrylic using a custom fixture I 3d printed out of PLA. The PLA almost couldnt stand the heat and started to warp but it was able to get the job done for the two sheets.
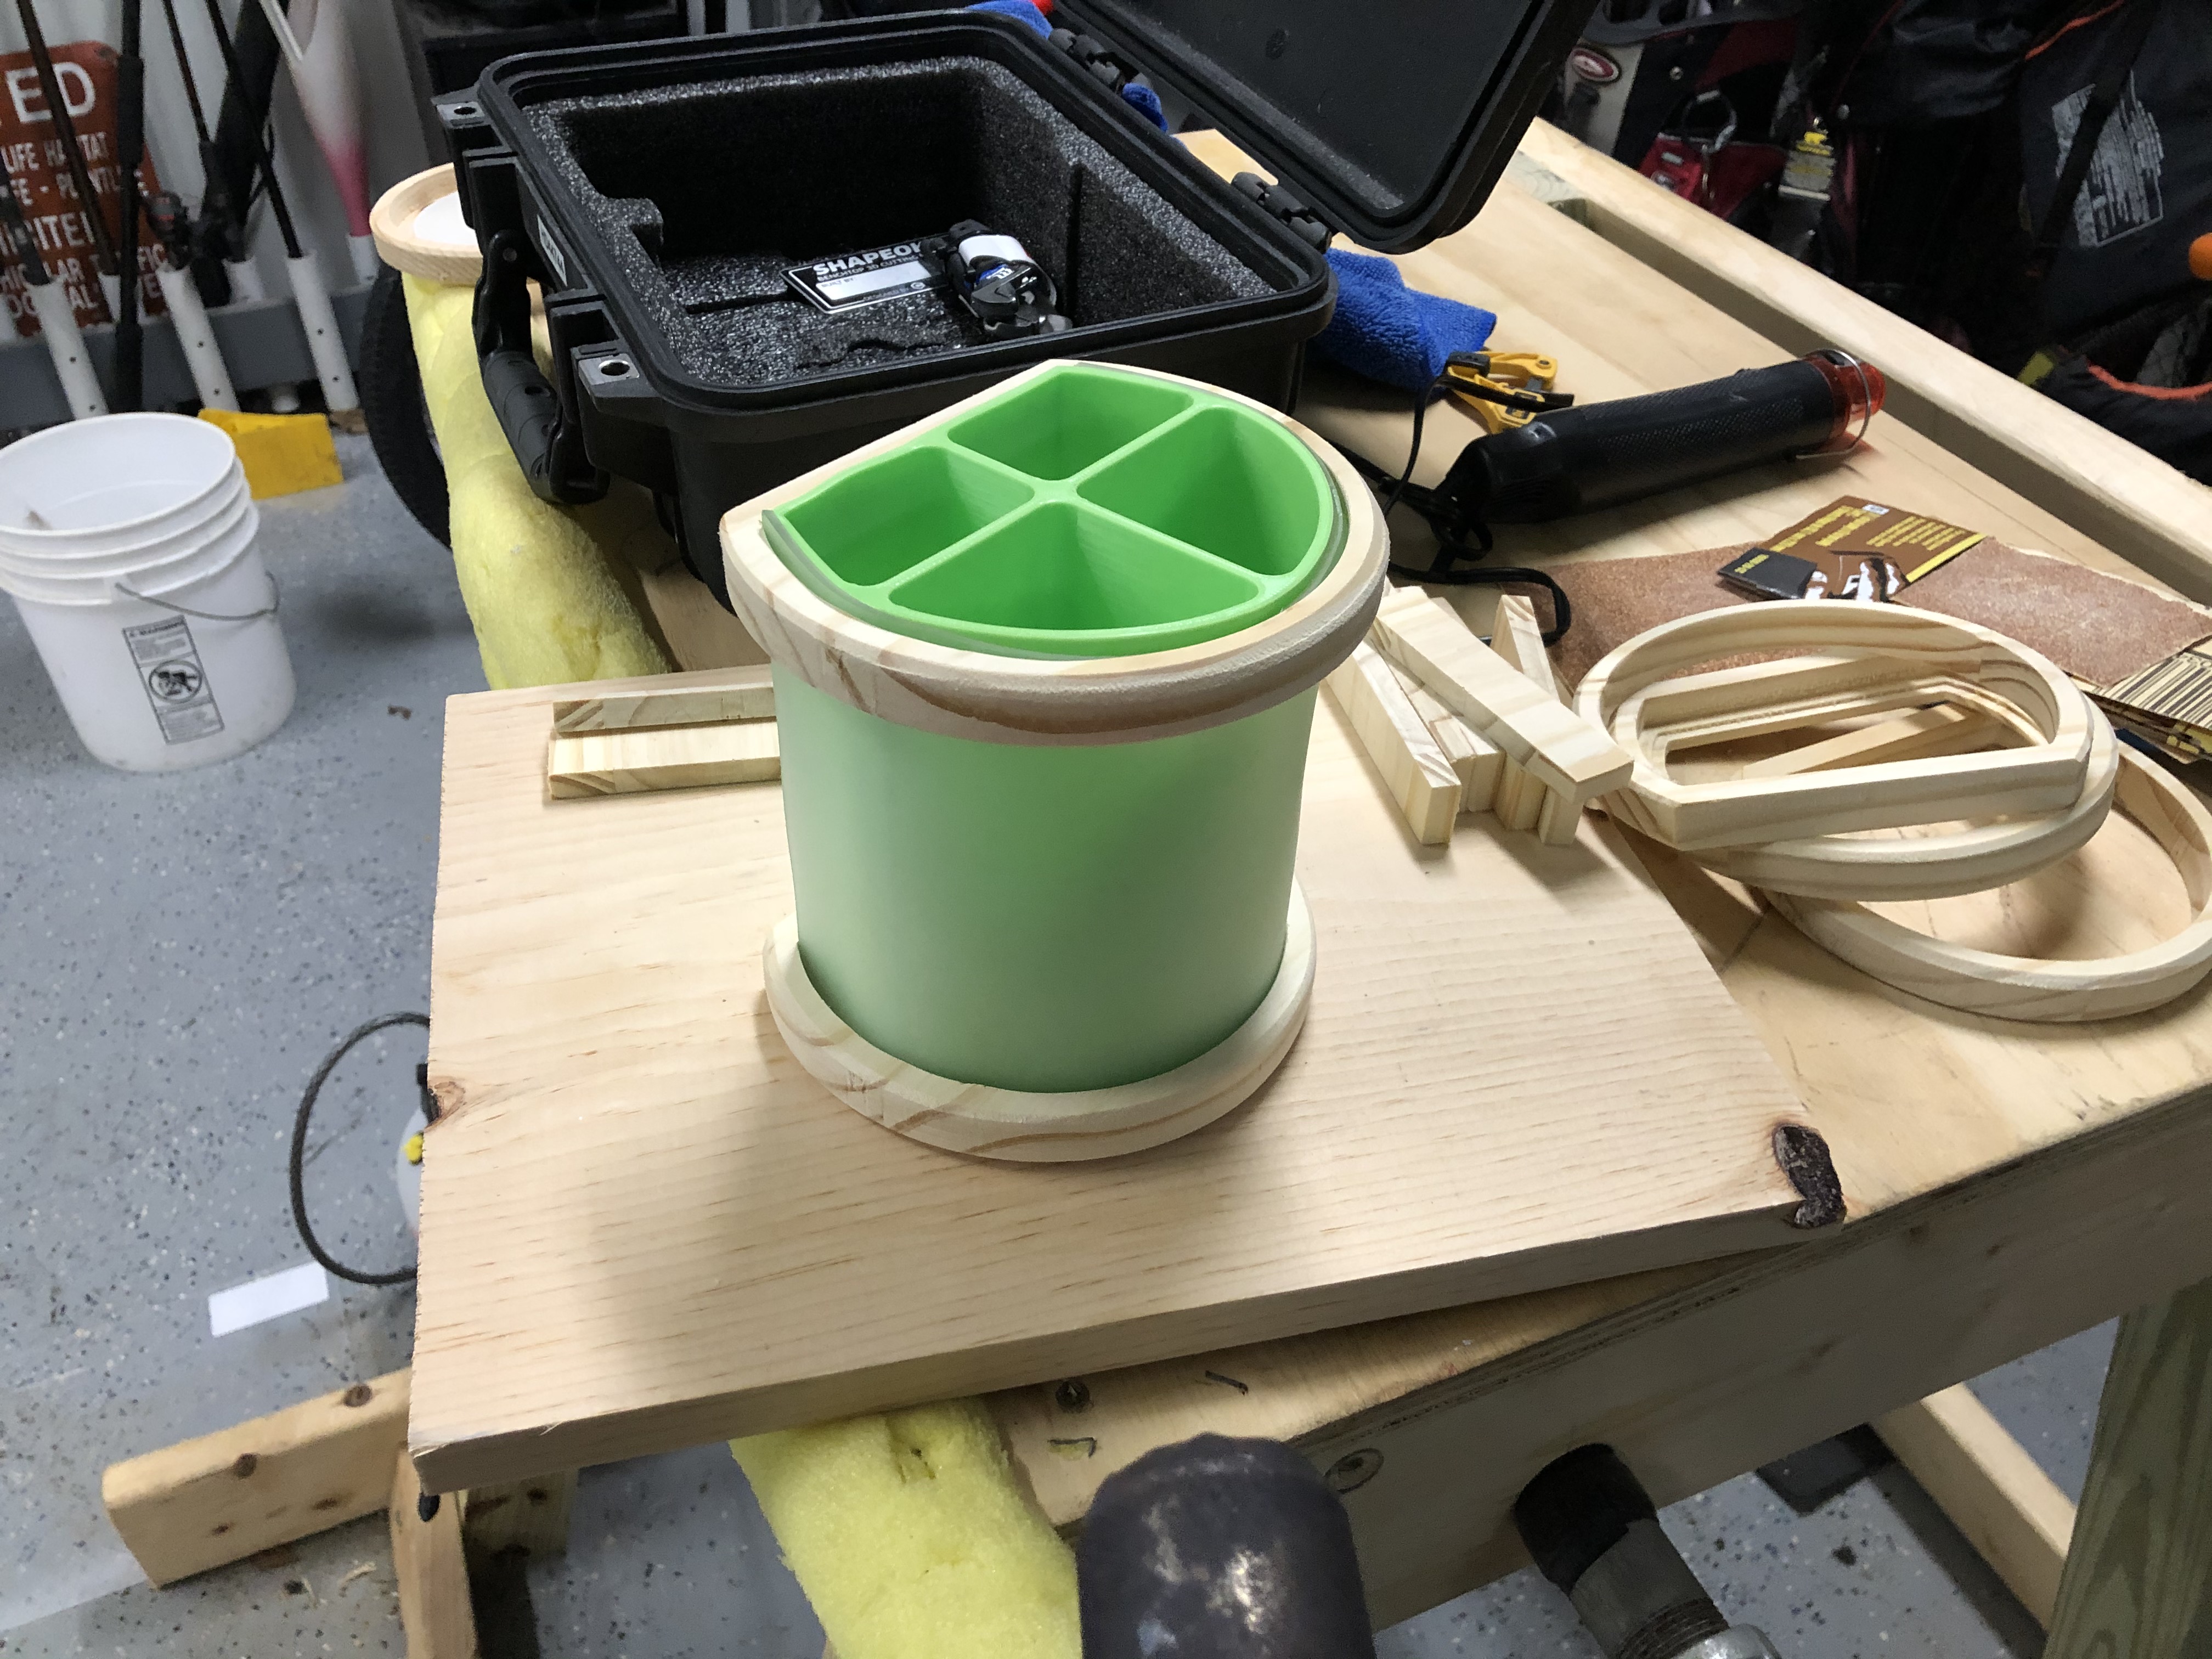
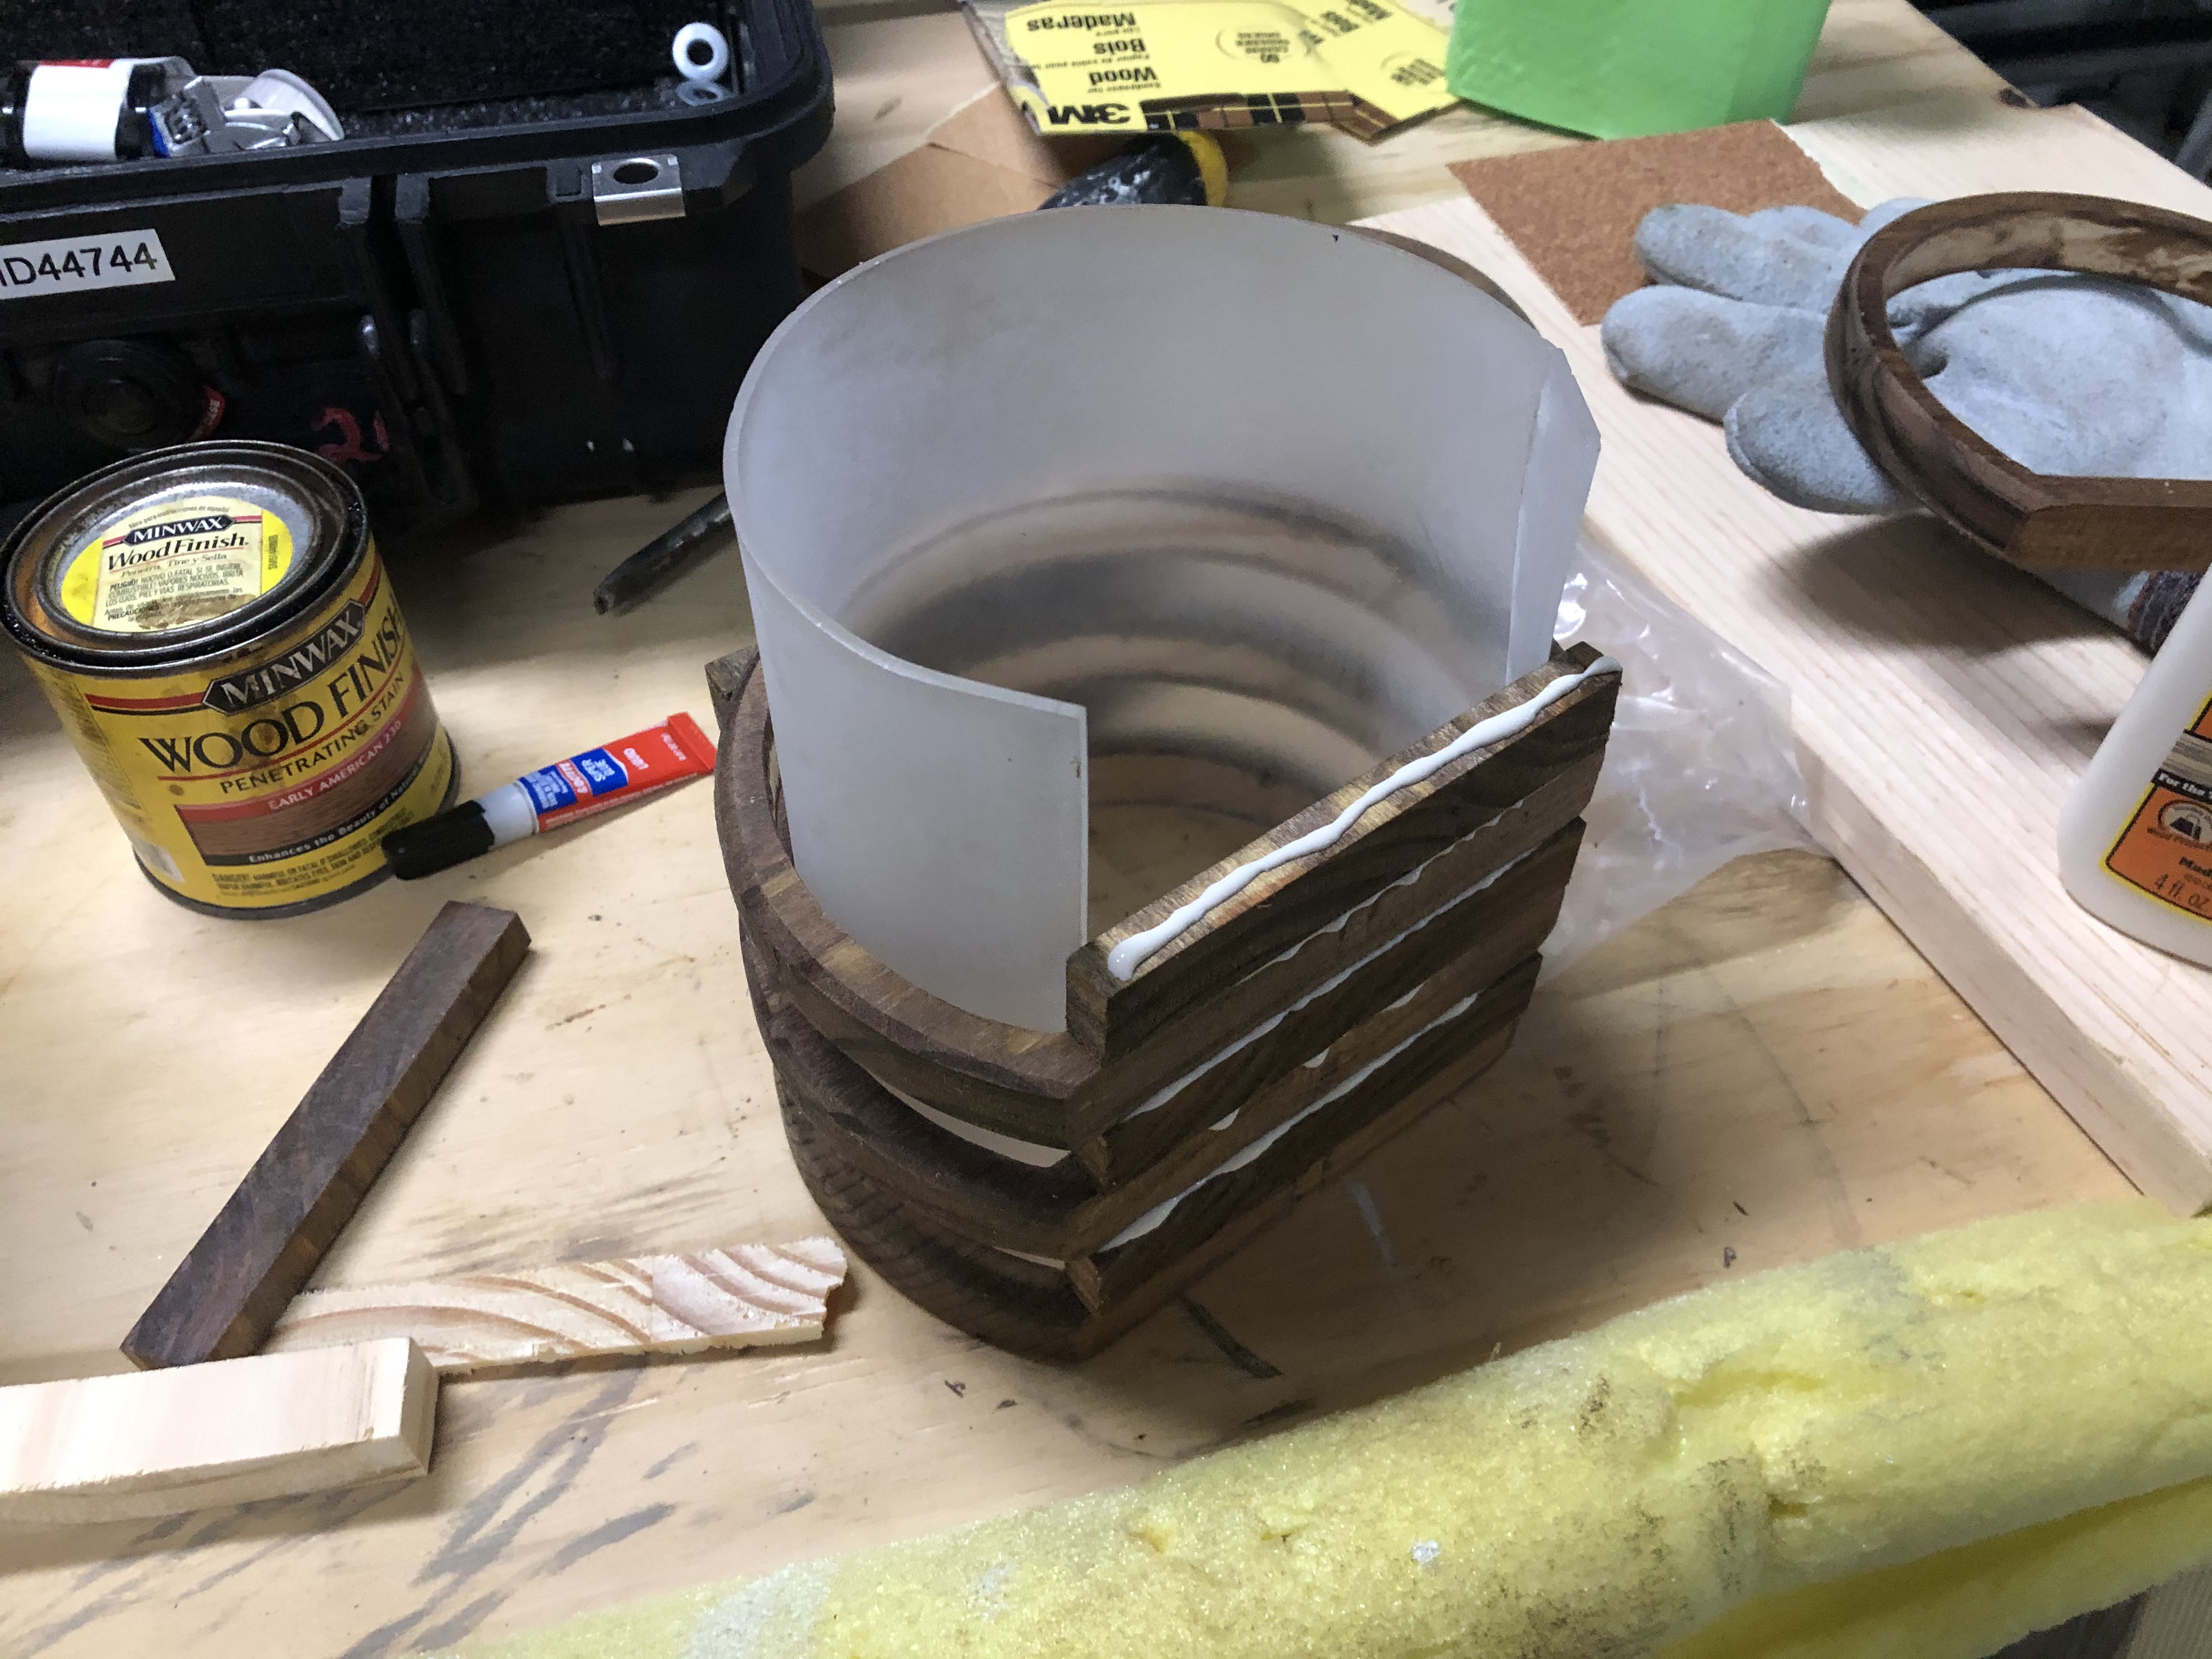
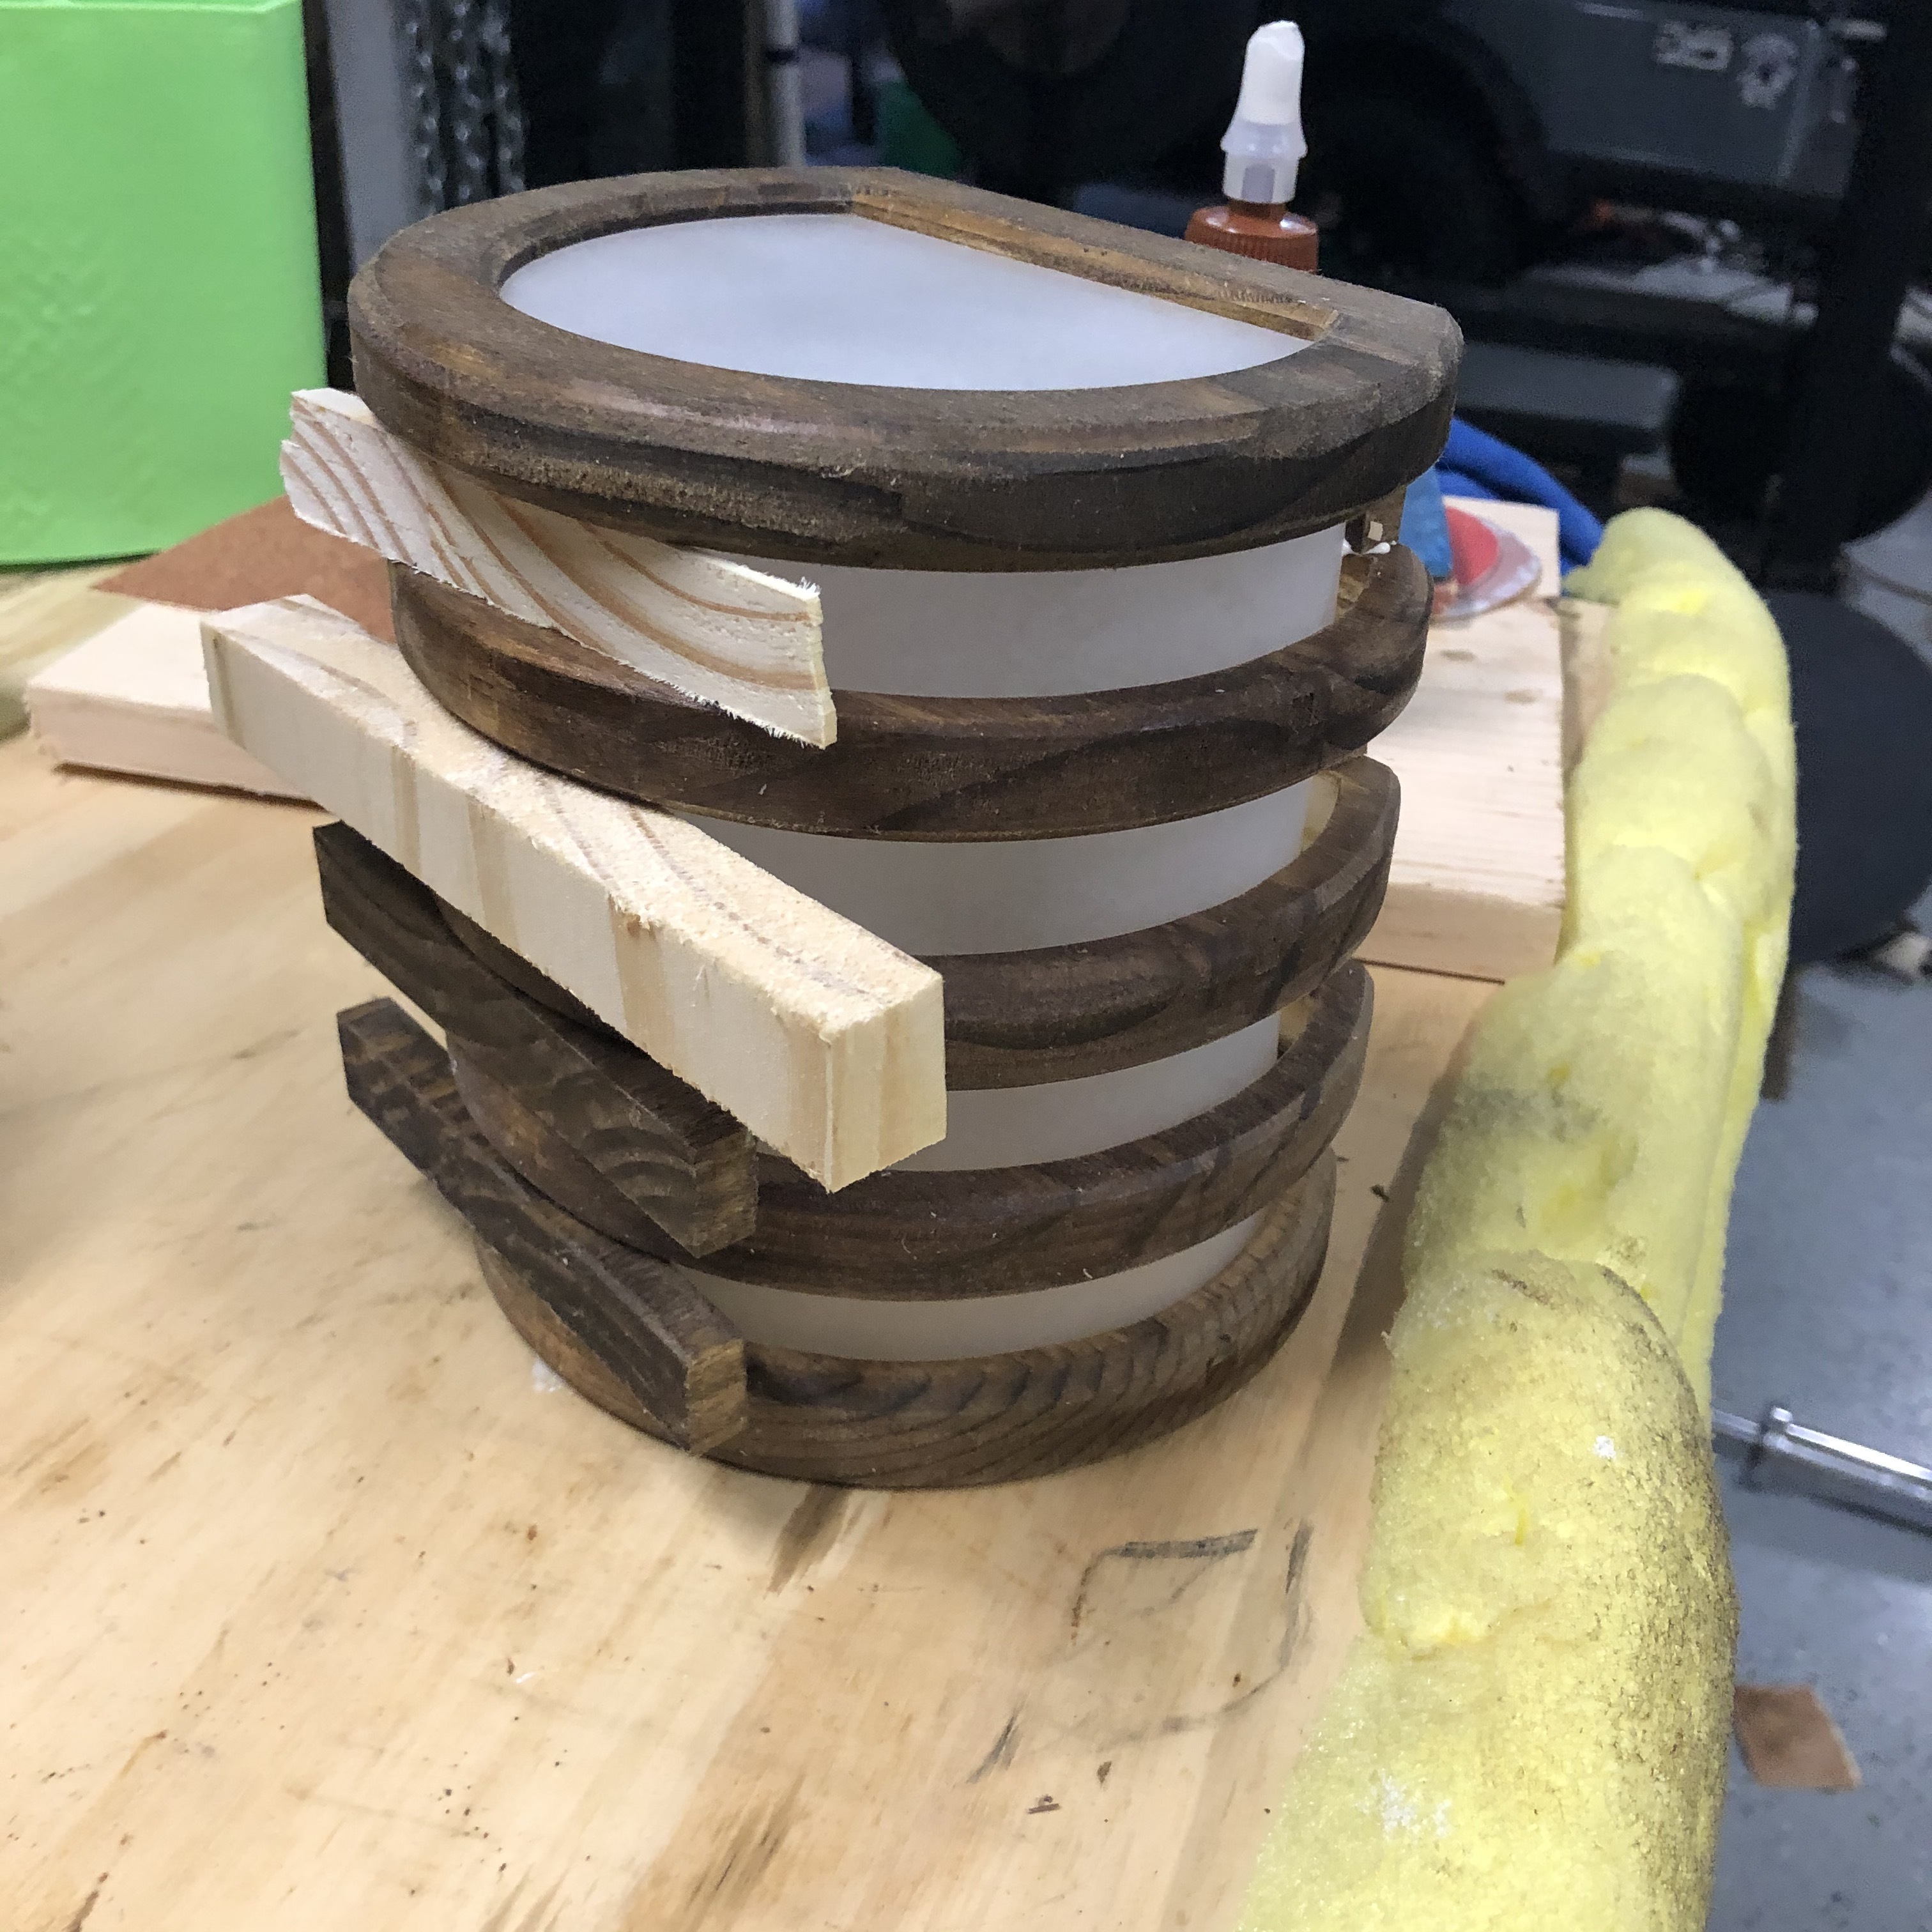
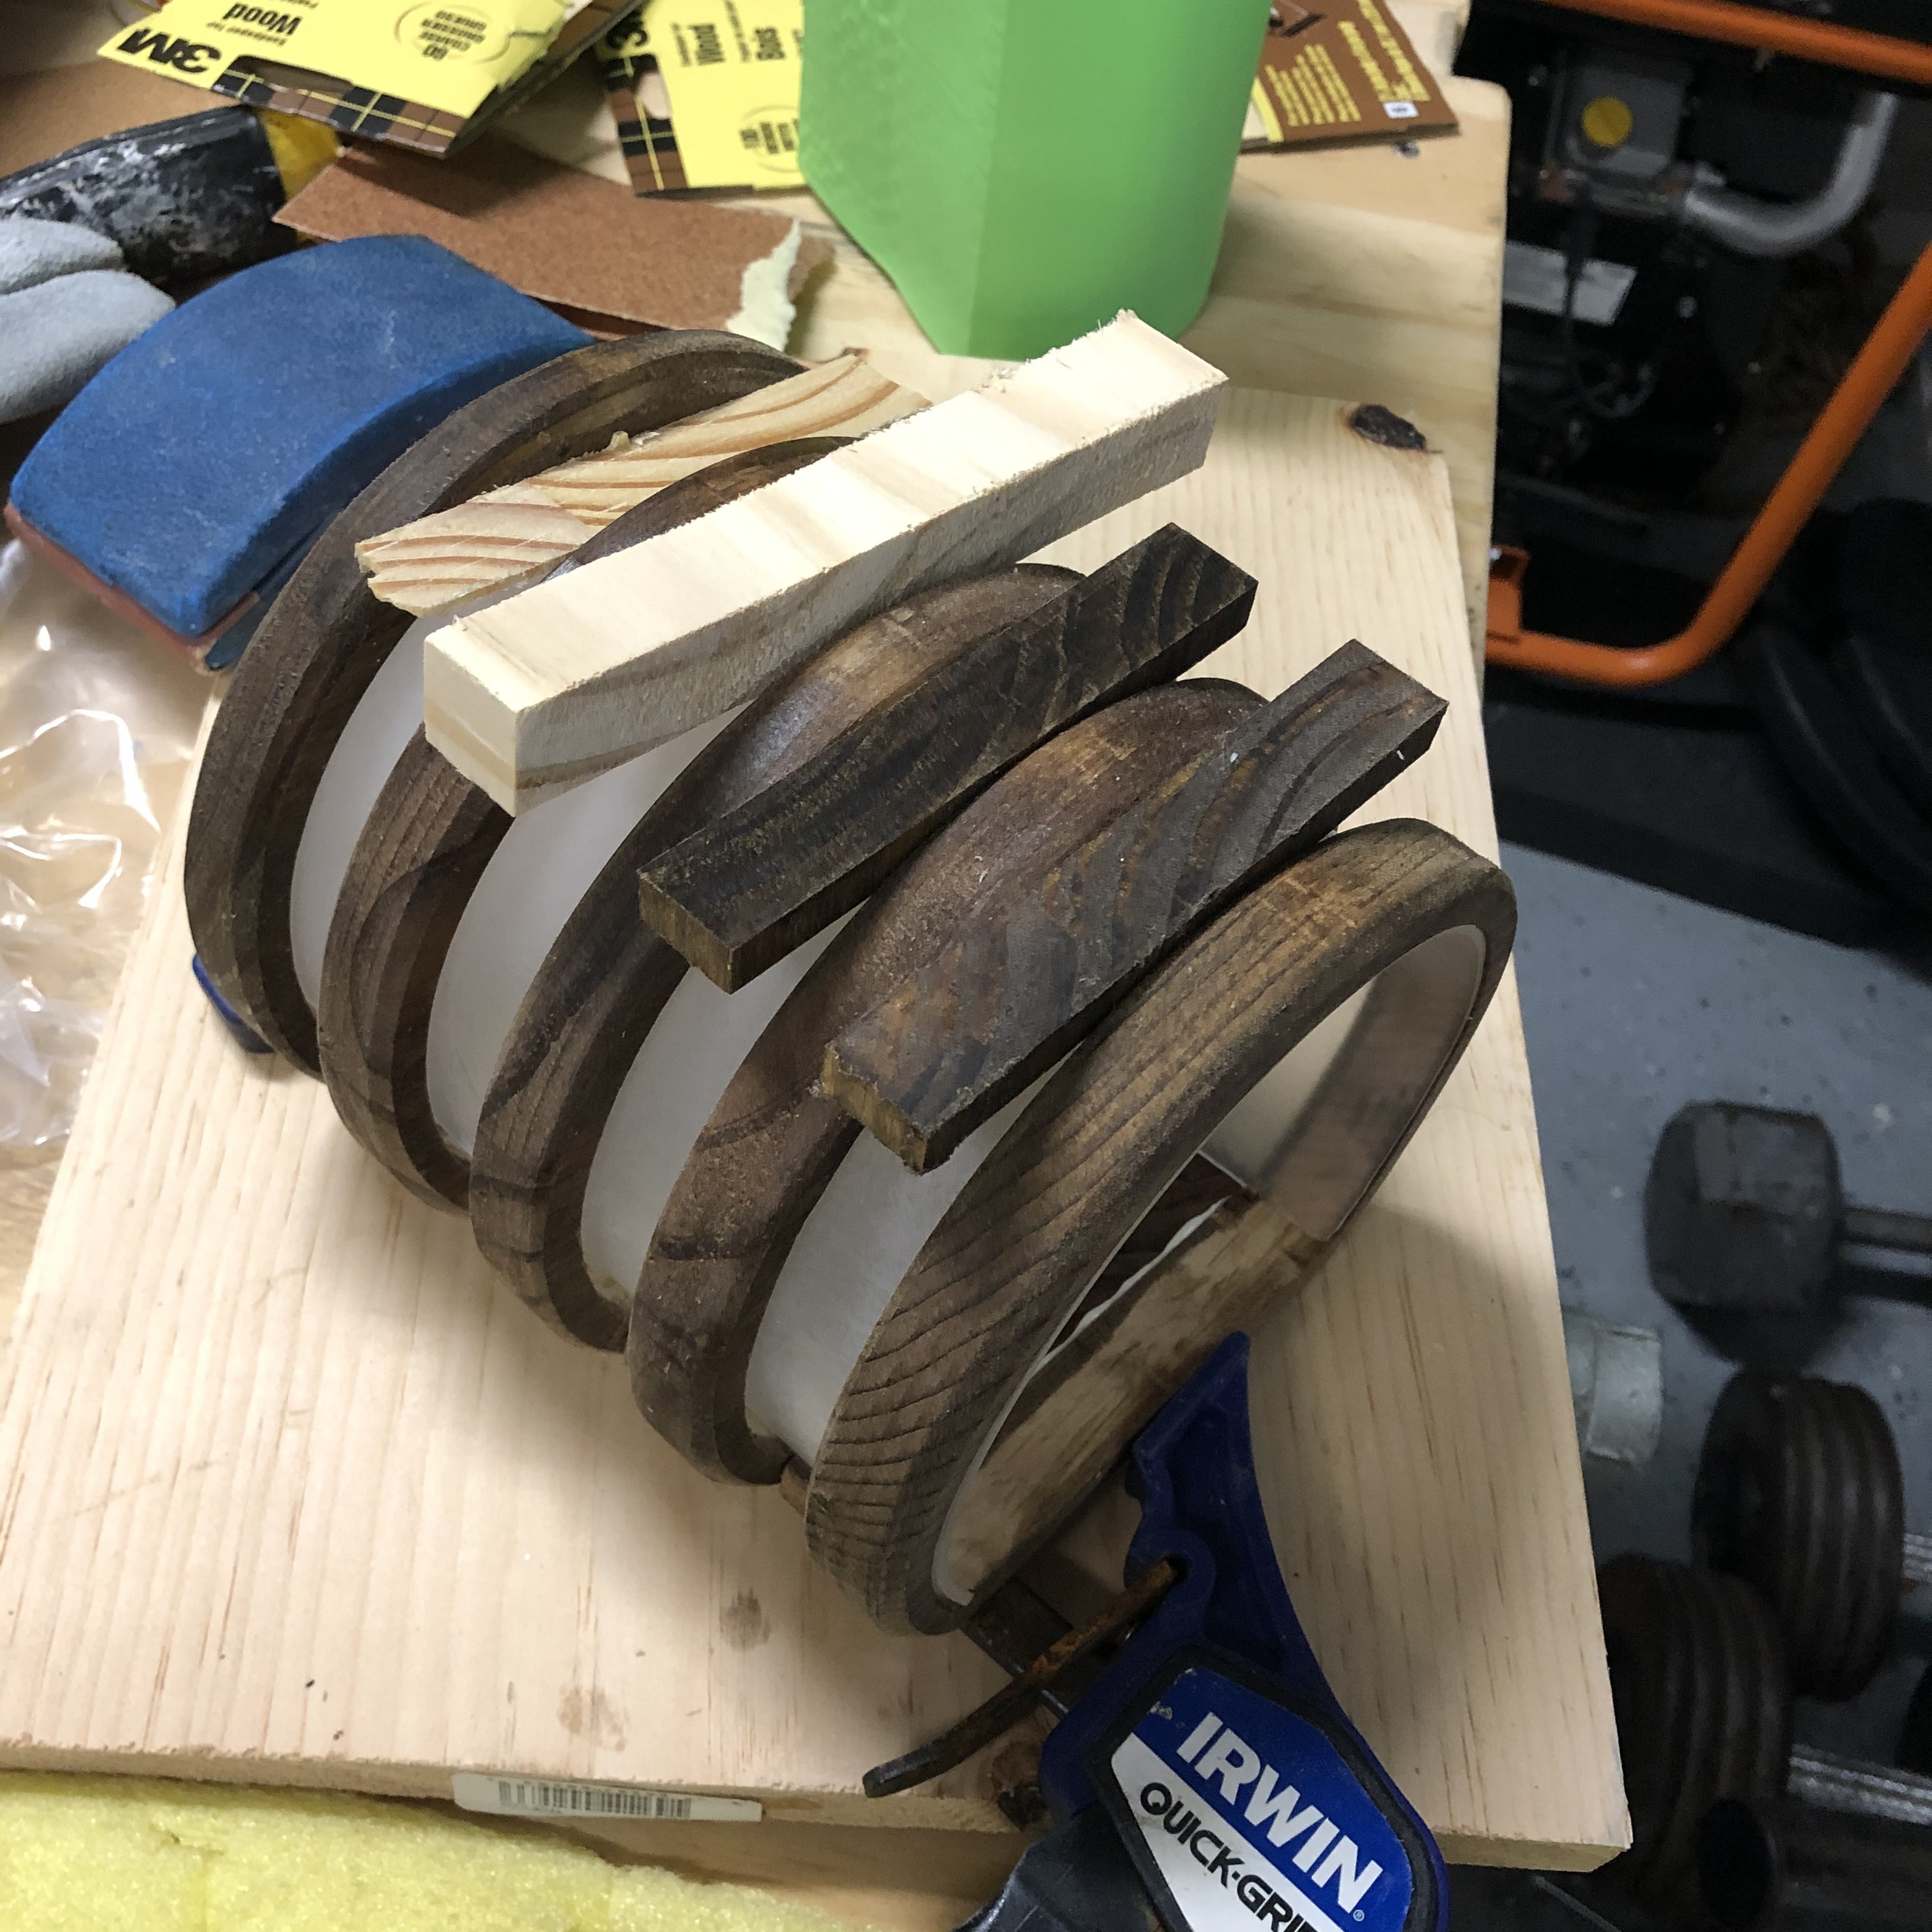
Now its time to glue it all together. I used wood glue for the wood and super glue to hold the acrylic to the bottom. The rounded acrylic fit fine with just a press fit. I also used some scraped wood blocks as spaces to make sure the rings stayed parallel.
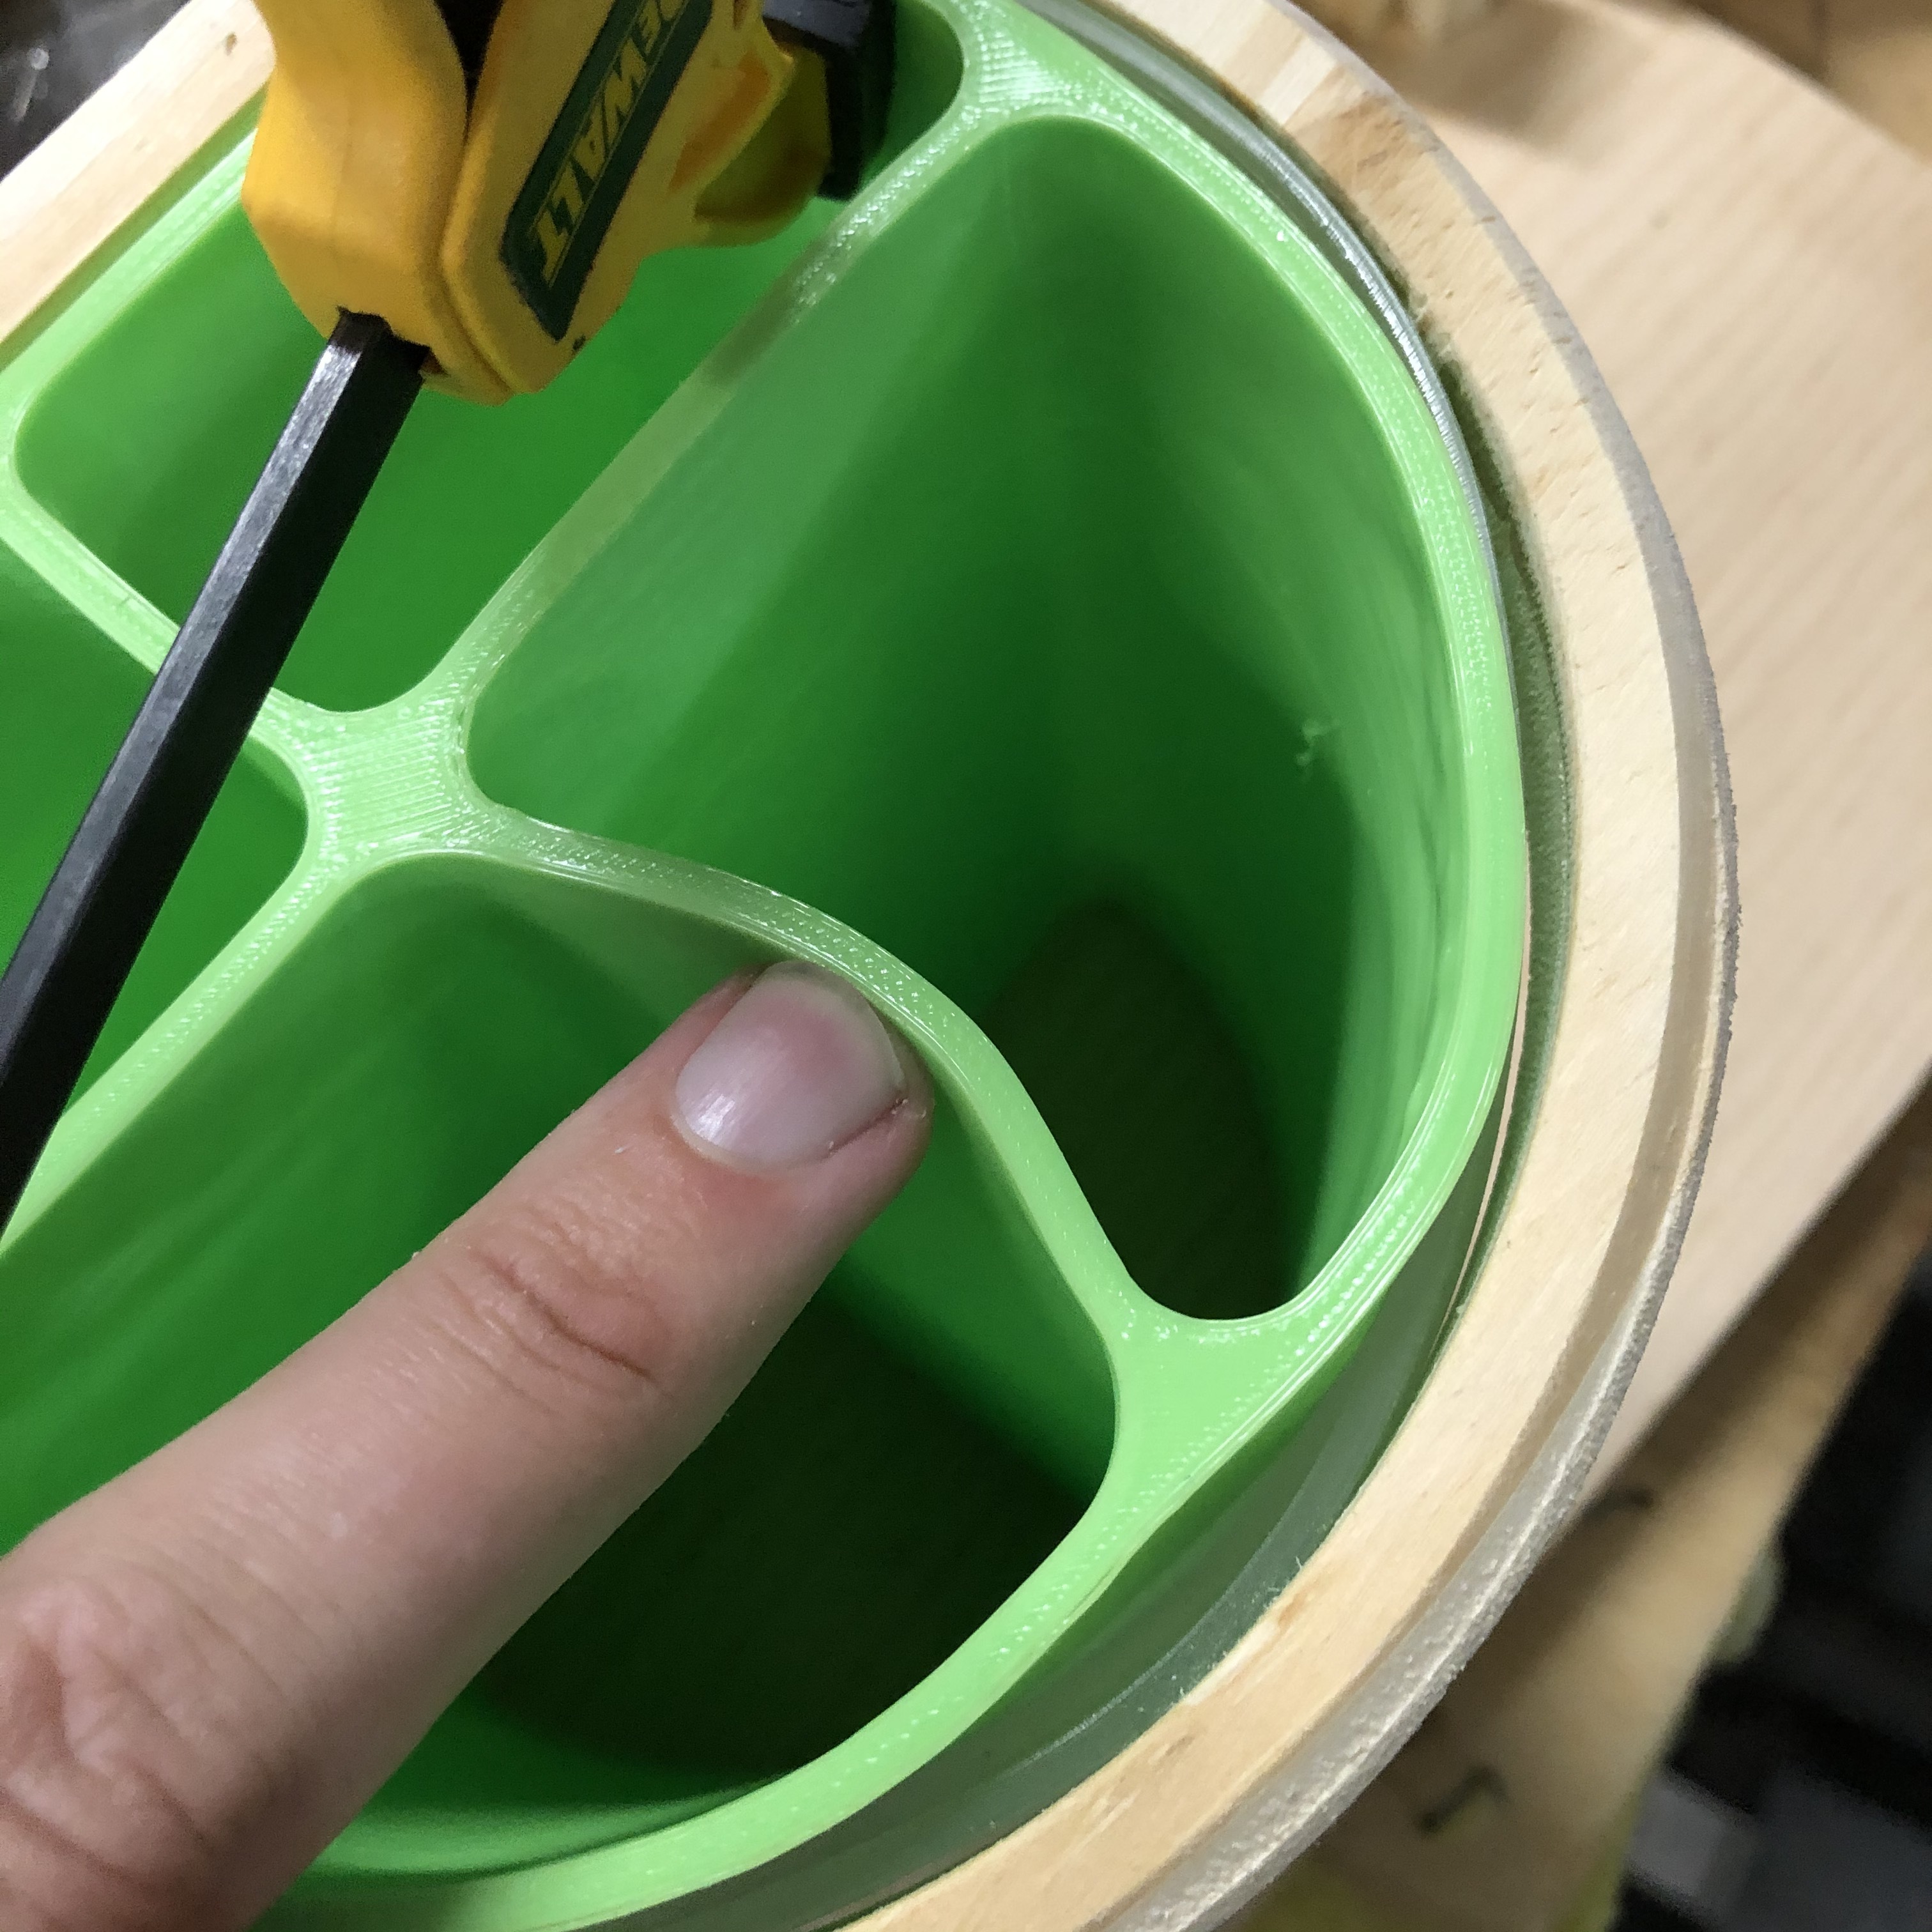
The final part was 3D printing the pot to actually hold the plant. I designed this part to have grooves to make it easy to hold the LEDs and have them line up with the wooden rings. The LEDs arent actually visable in the final design, theyre all hidden behind the wooden rings in order to hide the individual pixels and create a more seamless design. If you want to replicate this without a 3d printer you could just use a large PVC pipe.

 )
)


 Do they do the local lockdown thing in Germany ?