Community challenge #21: Magnets (closed)

Hi everyone,

Let’s kick-off challenge #21!

The theme will be: Make something that involves magnets.

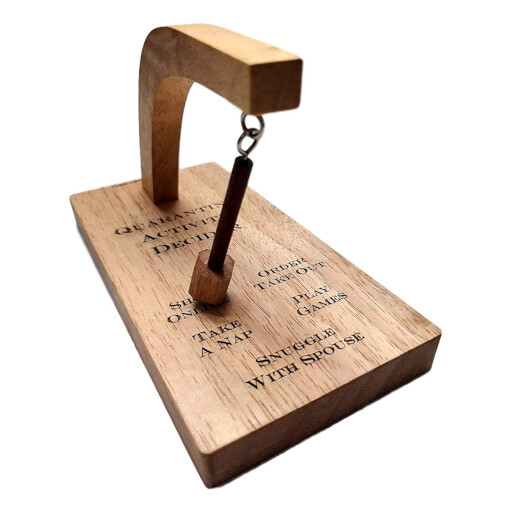
I for one have been wanting to make one of these “decision making” gizmos that have a magnet in the base and another one in the pendulum:

Another cool example is how @wmoy used a hidden magnet in this Pokeball and its base:

Rules for this 21st challenge:

  • submit your entry in this thread (you can post multiple entries if you want)
  • you must use your Shapeoko or Nomad, and the project must include magnets.
  • post pictures (or a video) of the project that illustrate where magnets are and what their purpose is.
  • (still) no handicap system this time.

Timeline:

  • Deadline is set to June 6th 2021, midnight PST

  • there will then be 7 days for voting.

    • voting will be open to legit community members only, and the jury reserves the right to remove votes from “outsiders”, and will also break any tie.
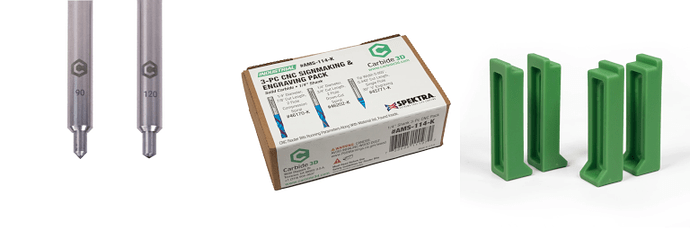
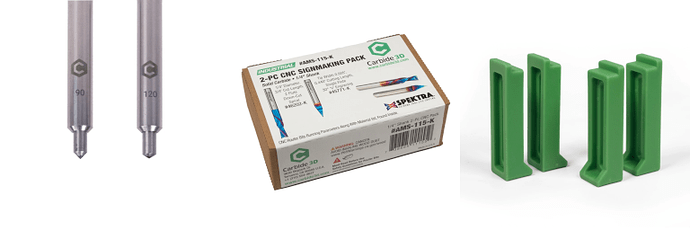
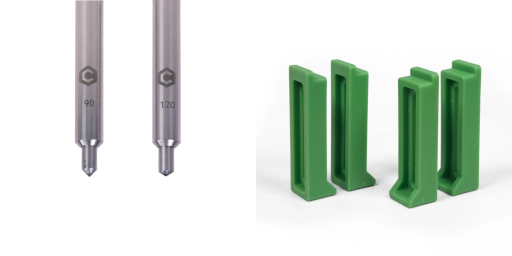
  • First place: MC Etcher combo pack + Amana kit 114-K + Essential clamps

  • Second place: MC Etcher combo pack + Amana kit 115-K + Essential clamps

  • Jury’s prize:MC Etcher combo pack + Essential clamps

prize3

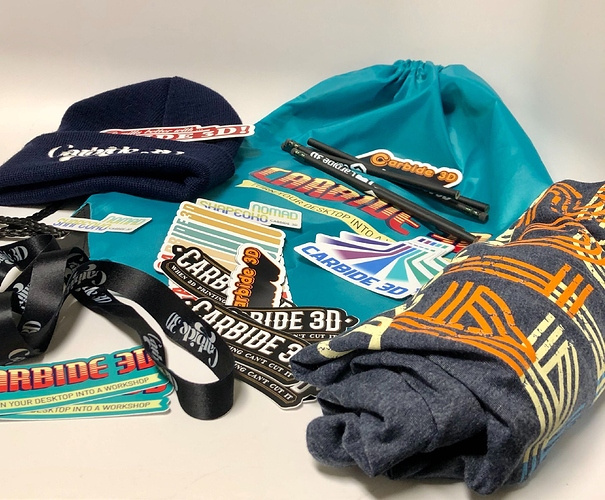
and the obligatory swag:

image

Ready, steady, go!

7 Likes

The decision maker can be rigged to always say yes to any question. Should I buy a new machine, Yes. Should I buy some expensive wood, Yes. etc etc etc. For your significant other you can always say the decision machine said yes so I took the advise its not my fault, well it might fly.

2 Likes

I only got my Shapeoko in March, so I was excited to see this contest since it is the first time I have something that I have done that fits. My entry is fairly simple in its use of magnets, but the design took me a long time since it was also my first real project on the Shapeoko. I designed a cribbage board like a lot that are out there. It felt like every time I moved to the next step, I found out the Carbide Create would not quite do what I needed so I ended up combining Carbide Create and Inkscape.
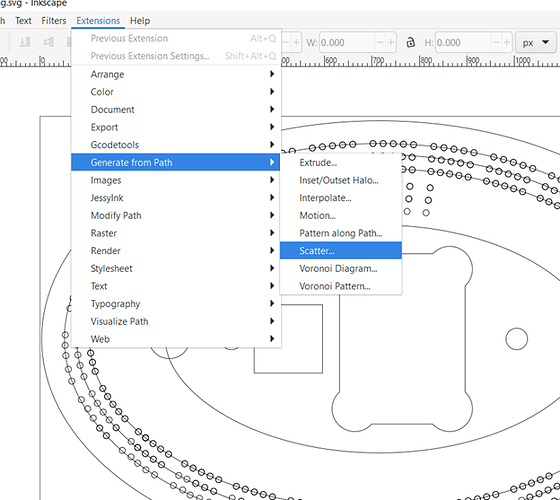
The first step was designing the ovals needed for the actual outside shape of the board. This Was not easily possible in Carbide Create, or at least is seemed like it was not. I went to Inkscape and created the outer oval and then imported the SVG into Carbide Create. This I discovered was too soon. I wanted to have the peg holes follow the oval and did not want to create them and manually place them. Back to Inkscape. I copied and scaled the oval to smaller tracks for the peg holes to follow and then created a circle that would fit the pegs and used the scatter tool to force it to replicate along the path This took a lot of trial and error to get the spacing right.

Once I got the holes in a spaced the way I wanted them I went through and removed every 6th circle to provide some spacing for groups of 5 and then removed some extras near the end and left a single hole for the winner.
After this I was finally able to move back to Carbide create and import the SVG file. I was able to remove the path ovals that were used for the peg holes and create an offset one from the outer oval to use as a reference for the topper that would come later. Within the topper oval I fit a cutout to store the pegs and cards and magnets.
Once the base cribbage board was done, I was able to make a copy of the Carbide Create file and use it as a topper file. I removed everything except the inner oval, the card pocket, and the magnet holes. This is the file I use for the underside of the topper. I then copied this file and removed everything except the outer oval. This is now my template for the top of the topper. I modify copies of this file for anyone who wants a custom board.
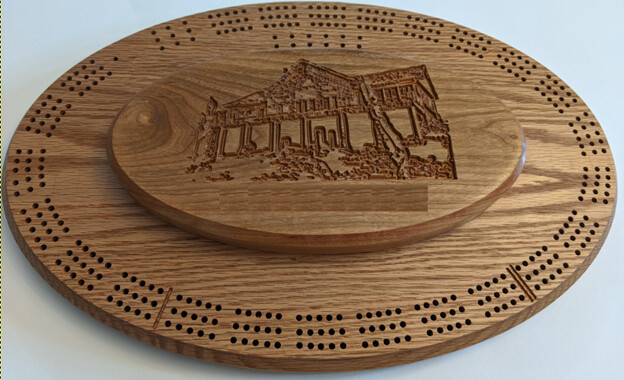
My favorite topper is probably the one that made use of GIMP and the new trace image feature in Carbide Create. I was able to take a picture of someone’s cottage and then use Gimp to sharpen the main features of the cabin and then import it into Carbide Create.

image

I used Red Oak for the base and Cherry for the topper. Sorry about the weird part under the cabin. I wanted to remove the family name that was carved in underneath.
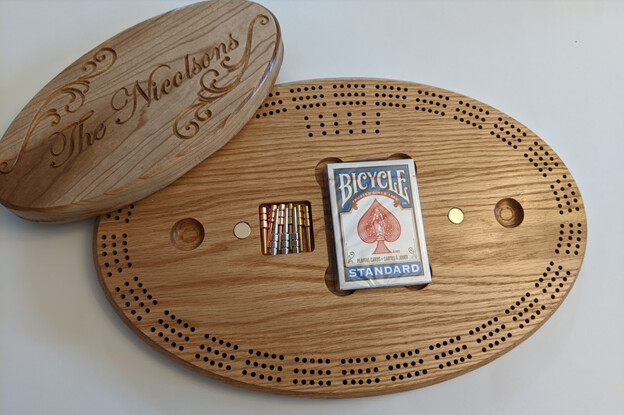
Here is an example of one I carved for my family with the magnets visible to show how they are used.

image
I have since removed those indents in my files since the magnets are not strong enough that I needed slots for my finger to pry the topper off. It looks a lot cleaner as you can see from the image above with the cottage.

15 Likes

Thank you for kickstarting this challenge Ryan, nice cribbage board and pretty impressive project for someone who has had his machine for two months or so!

Unrelated side note to everyone: I was a bit too hasty to write the rules and forgot to include the usual one which is to include the design file for the project. So I won’t backpedal and add it now, it won’t be a rule this time, but everyone is still quite welcome to share their design file if they like (in the spirit of sharing an example, the details of the toolpath settings, etc…which is quite useful to other folks who would like to try something similar)

1 Like

Thanks Julien. This took a lot of searching this forum and tutorials and online videos learning Inkscape.

I am more than happy to share the project files. I have learned so much from this community that I am more than happy to share back. Here are the 3 files I use to create this. All the paths are using custom bits so I expect people will need to redo the paths but it would give them a great start. Also the underside of the topper includes my logo which they would need to remove. That took some more Inkscape learning since I needed the words to curve.

Oval Cribbage board Base Final.c2d (1.1 MB)

Oval Cribbage Board Top Underside.c2d (469.6 KB)

Oval Cribbage Board Top.c2d (868.6 KB)

5 Likes

I hope everyone’s magnet-related project is coming along nicely but y’all keeping it a secret until the last minute :slight_smile:

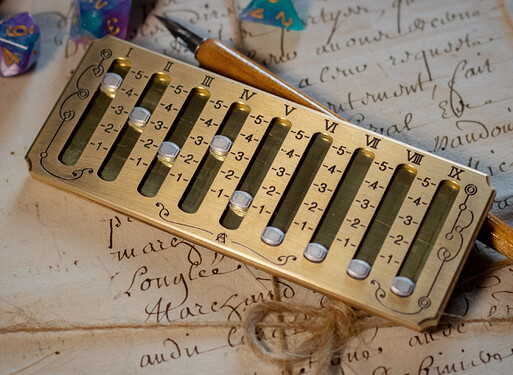
This isn’t a competition entry since I’ve already made it, but more of a show and tell or for inspiration.

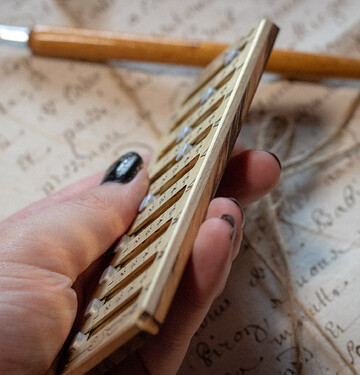
This device is made out of brass, aluminium and wood. It’s used for counting available spell slots in D&D. It has 18 small magnets to provide clicking locators for each of the sliding thingies. For each slider, one magnet is embedded in the back of the aluminium button, and one is free-floating behind the central brass sheet, which has ridges on the rear surface.

It’s made using a ShapeokoXL and a Nomad.

EDIT: Updated with narrative because of taskmaster Julien :slight_smile:

This item is the latest iteration of several designs based on using magnets as position indicators. Each design used hidden ridged surfaces and a second set of magnet to give a clicky positivity to moving the sliders.

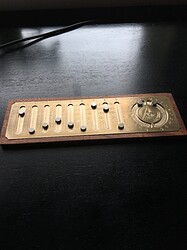
Originally we had the front set of magnets sitting on the surface freely, as in this design:

but in play testing it was awful since a metal ruler would stick to it and pull all the outer magnets off the front.

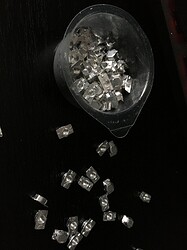
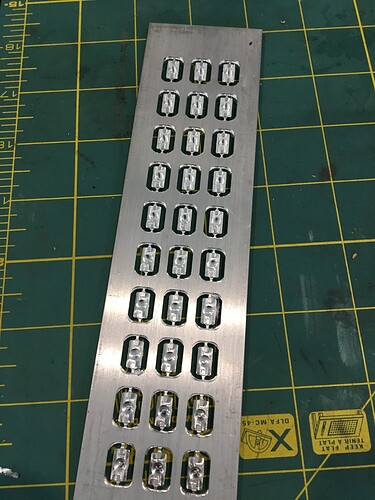
To counter this, we decided to to embed (technically hammer) the magnets inside the back of aluminium buttons. This involved making these on the Nomad:


on mass, like this:

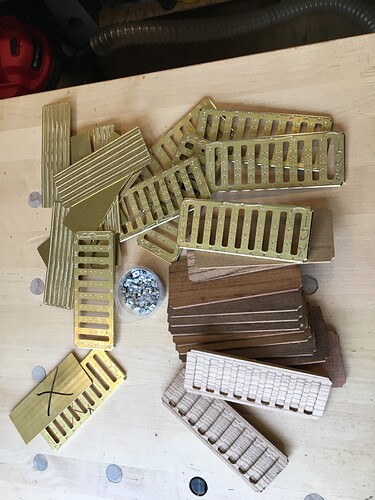
These are the parts that are involved in the device. This shows the ridge-backed inner sheet that creates the click. The inner sheet is thin and there is a small cavity in the wood, so it actually resonates and makes a satisfying sound. I claim this as deliberate, but facts might call it serendipity:

The wooden parts and the main pockets are done on a ShapeokoXL. The engravings and buttons are done with a naked Nomad. The design is done with designing :slight_smile:

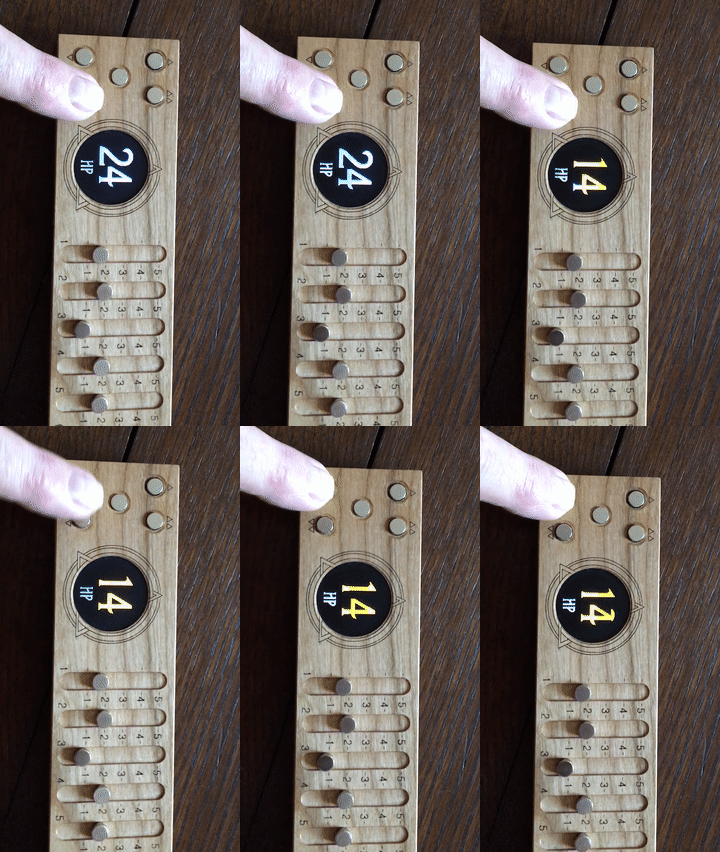
We also explored far more complex versions of this device… some with an embedded ESP32
powered by a rechargeable battery and some custom firmware (you can’t take the software engineer out of the maker sometimes):

spellcounteresp32

but we’ve currently gone with simplicity as per the top design.

19 Likes

Beautiful!
Nice themed-background for the photo too.
I’ll note that I have not made it a rule that a project made before the challenge cannot be entered, so I’m happy to validate this as an entry, all of the more if you happen to have additional “work in progress” pics you could post, and would like to elaborate on the thought process behind the design, tips, mishaps, etc…

5 Likes

That’s very kind of you Julien, but it wasn’t my intention… and… and now you want extra content?! Bah. Pesky French man :smiley:

I’ve plenty of WIP photos so I’ll see if I can scrape a meaningful narrative together… just for you of course.

EDIT: Updated this post to say that the previous post has been updated

3 Likes

Excellent, thanks for the narrative and pics. Love the nerdy ESP32 detail too!
And now you’re officially in the competition, whether you like it or not :upside_down_face:

3 Likes

Noooo!
I was hoping I had a default win coming my way. Default, Default, Default…

Just kidding. That DND spell tracker is amazing @Gerry .

3 Likes

My entry isn’t nearly as glamorous I’m afraid… Here it is:

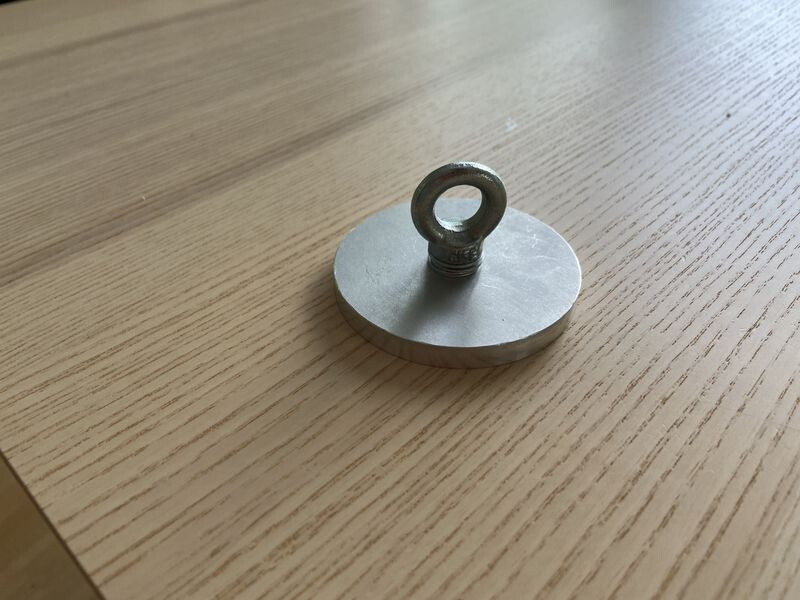
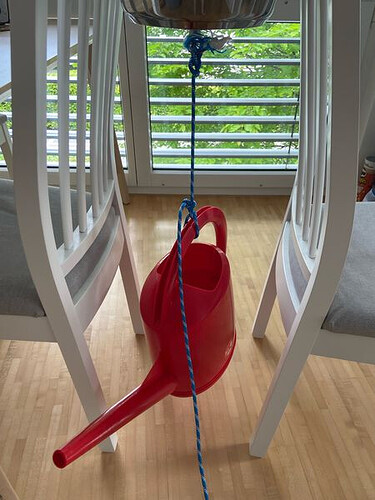
It’s a magnetic hoist:

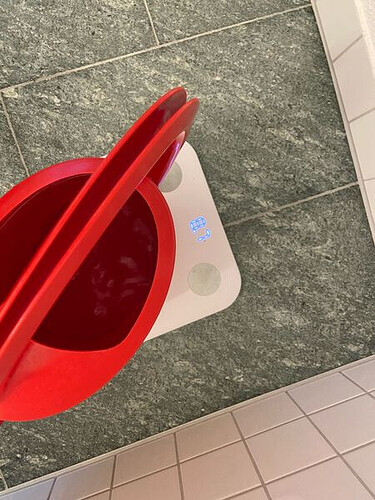
I got it to hold 8.7kg of water:

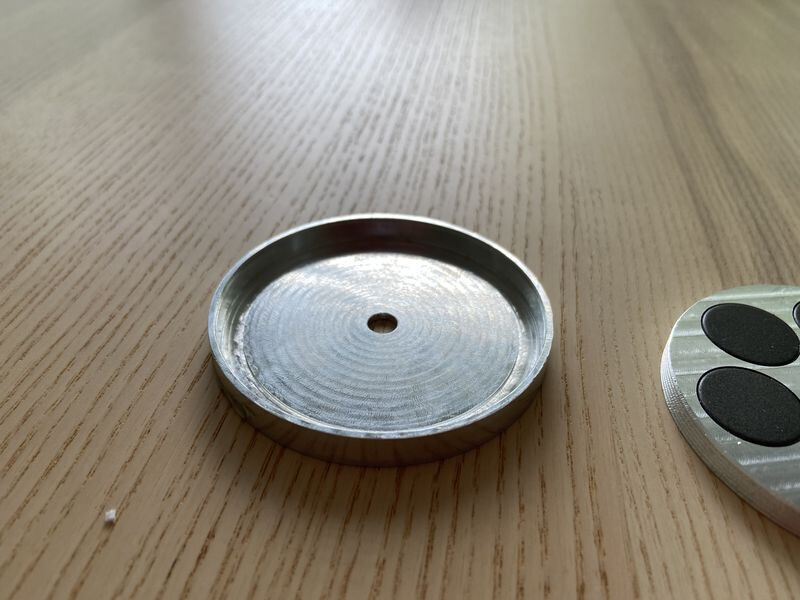
It’s made of two machined parts, one that holds the magnets, and one “cap”:


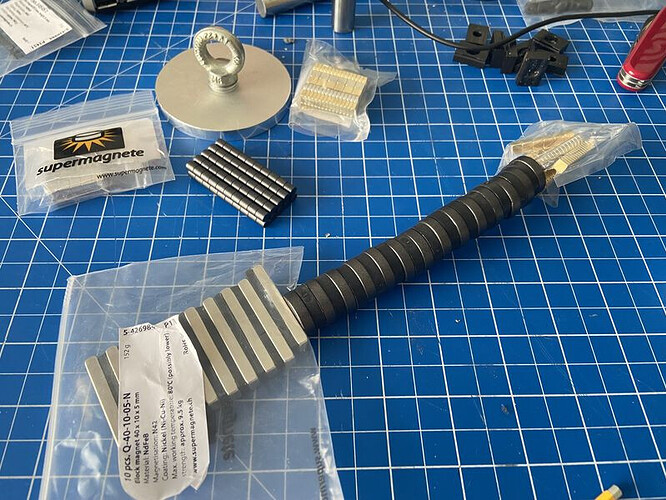
I started this with all kinds of grand ideas. A while ago on YouTube, I saw this video about a 3D-printed magnetic switch and since then had it in the back of my mind to try to mill one. When I saw the contest come up, I thought now was as good as time as any, so I bought a whole pile of magnets:

I milled some variable-depth pockets:

On my shiny new mod-vise

And found that 0.5mm was too shallow (the bottom of the pocket visibly distorted on the bottom) but 1mm was just right.

So I wanted to make a starter project to make sure I could get the magnets to fit, and that the magnetic field was strong enough with the bit of separation induced by the Aluminium. I made the hoist pictured above.

Originally, I planned to have the cap screw on to the magnet holder using threads milled on the inside/outside edges of the cap/holder but when I’d milled the cap, I discovered that it fit quite nicely on the holder… Before the threads were milled… I’d milled out a pocket with the thread outer diameter instead of the thread inner diameter, so there was no material left to mill into threads…

But the rest of the hoist worked, so I started looking into how magnetic switches worked again. Turns out, the fundamental method of operation is turning this:
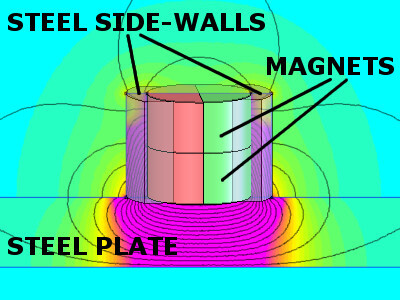
image

Into this:

image

Simple enough, right, just rotate the magnets? I could embed them in a disc like the one I made for the hoist (which was why I made it) and rotate the disks 180 degrees relative to each other.

The problem was that the magnets I bought were all axially aligned, which means the top is north and the bottom is south, rather than being split down the middle top to bottom like in the pictures above.

This meant that I couldn’t just rotate my disc magnets around their axes, I had to flip them like pancakes instead.

Given that I wanted this to be a small disc, that didn’t really work. And given that I couldn’t buy radially-magnetized magnets in time, it wasn’t possible to fix.

I did briefly entertain some ideas of mounting the bar magnets you see in my earlier picture to some little gears that would spin them around their axis but I don’t have the tools to make sufficiently small gears, or the surfaces to run them on.

I also thought for a bit about using some of the smaller magnets as replacements for springs. For example these buckles have little springs to keep the golden toggle thingos held in:
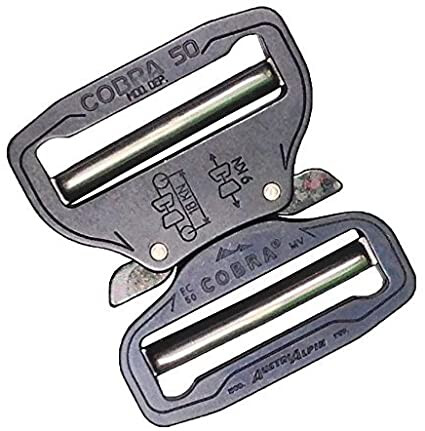
image

And I thought about milling in slots for magnets that would push against each other instead.

Along similar lines, I thought of making a spring-loaded latch that worked with magnets instead of springs.

But in the end, I ran out of time, so couldn’t make any of my other ideas work. Plus, the magnets are a cooler solution than springs but they’re less practical.

I also considered doing this:


But it didn’t have any need for the Nomad.

I have my hoist and I learned a bunch, so I’m happy.
13 Likes

Great write up ! (which counts a lot as far as voting is concerned, just saying)

4 Likes

Hey everyone. I just joined the forum but have been lurking for a while. I’m really looking forward to getting to know people round here and contributing to the community where I can. For some quick back story, I use a Nomad 3 in my apartment in London. If the photos below look a bit odd, it’s because I’ve stripped the machine down to it’s frame and put it in an unbelievably heavy enclosure to minimise the noise.

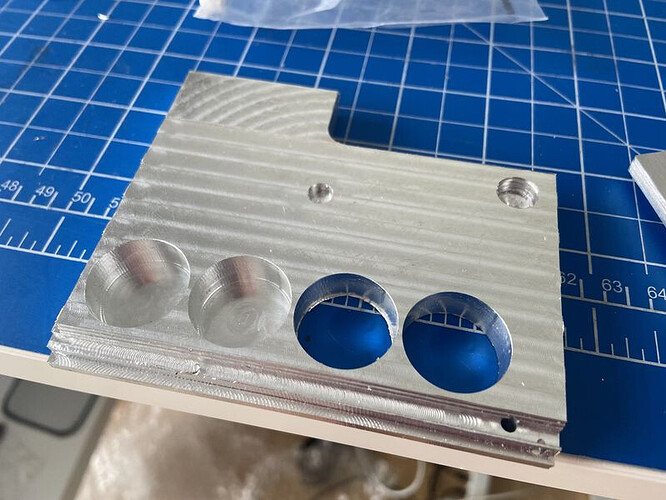
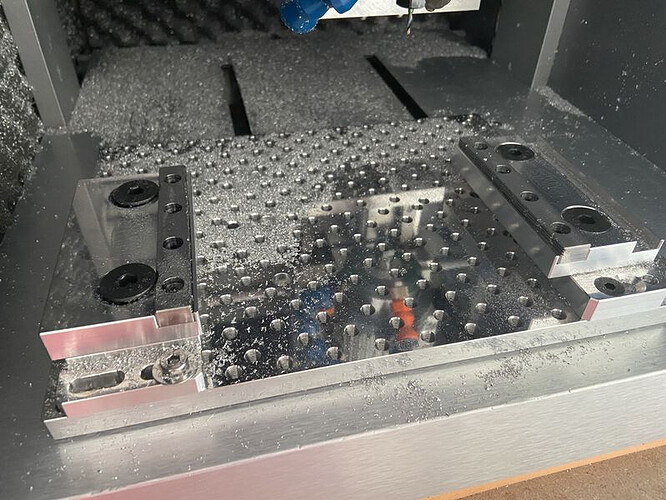
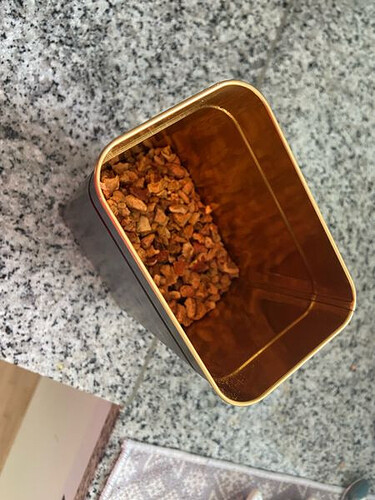
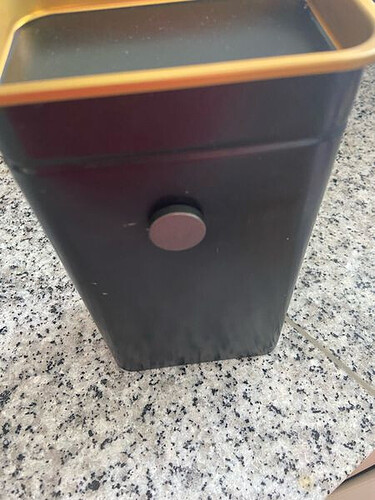
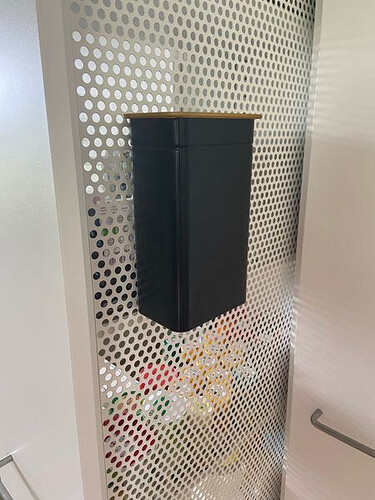
Anyway, this contest caught my eye because I had already worked on a project involving magnets. I won’t go into the details now (maybe it would make a good gallery post), but the idea was to replace the stock doser on a coffee grinder with a chute - so I could grind a single dose at a time. It begged to be a sheet metal project but I decided to do some heavy aluminium milling instead. The milling went well, but trying to precisely measure and reverse engineer the coffee grinder was tricky and the final product didn’t fit perfectly. I used tiny magnets to connect the two main parts of the chute together. Here’s a sneak peak but I’ll save the rest for another time.
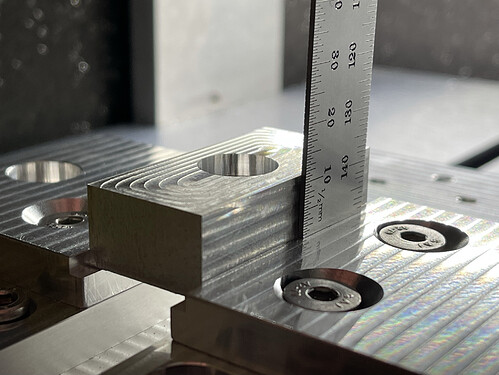
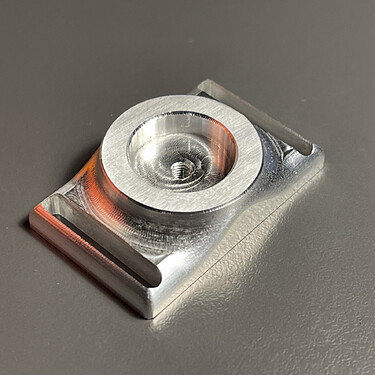
For this contest I decided to make a magnetic cable management… puck. It’s inspired by something the instagrammer hour.glass_ingenuity makes, but his are unbelievably cool and way better than I could hope to achieve.

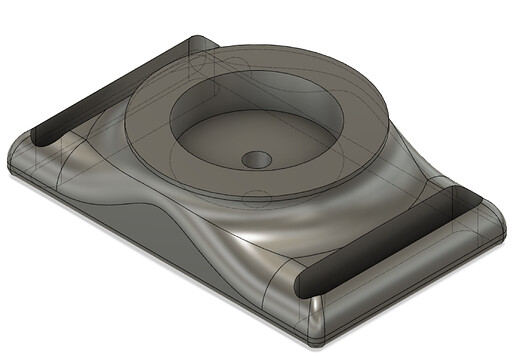
My design started off as some simple shapes, but soon became quite complex as I added fillets everywhere.

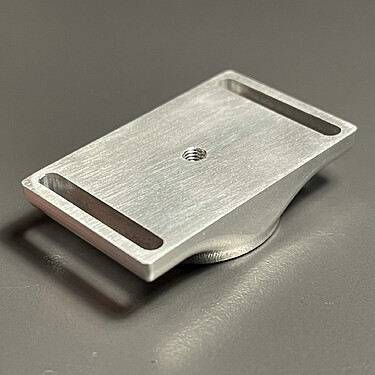
The model above doesn’t include the magnet itself, the threaded hole in the middle (as that will be done by hand), and the velcro straps to hold the cables. It’s about 40mm long, those slots for the straps are 3mm wide, and the diameter of the hole in the middle is 2.5mm. This was going to call for some small tools!

First I mounted some squarish stock left over from a previous project in my DIY low profile vise:

Then I removed the bulk of the excess stock from the top with an adaptive tool path, using a 4mm single flute:

I’m seeing a difference in the surface finish depending on whether the tool is moving front to back or back to front, even though I’m doing climb milling in both cases. Something to look into.

Next I milled out the big hole in the middle with the same tool and checked the remaining height to ensure the main adaptive tool path wouldn’t cut into the vise:

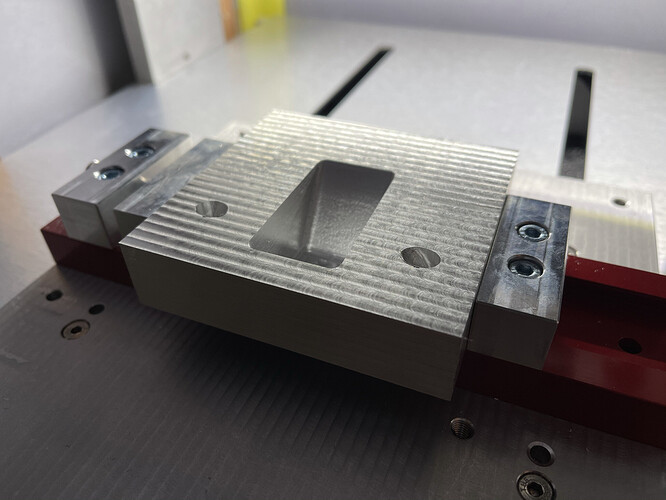
The main adaptive tool path went well again using the 4mm single flute, with 0.1mm stock to leave for finishing. Here’s the result, shown alongside the 1mm single flute that will be used to cut out the small slots and hole.

Here it is before finishing:

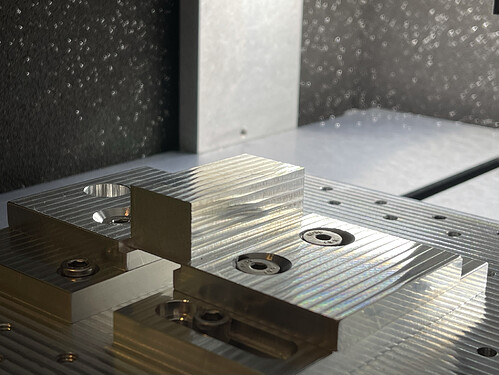
Here it is after finishing with a 3mm 2 flute ball nose end mill. Ready to flip over to handle the other side:

I quickly realised machining the other side was going to be tricky. There wasn’t a good way to hold the part without making soft jaws, nor zero the machine in way that would reliably hit the filleted edges. I ended up using the Carbide 3D low profile vise with some parallels and this gave a surprising solid hold.

I ended up compromising on the design and went for a flat surface instead of the originally planned filleted edges.

And here’s the part after tapping the M3 hole and finishing just the flat surfaces by hand. I left the 3D surfaces natural:

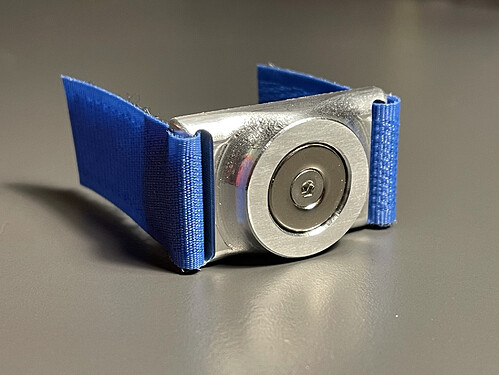
And here’s the final part with the magnet and velcro attached. I gave up stitching the velcro loops because the tight fold made it difficult, and ended up using CA glue, which worked nicely. I used a countersunk ring shaped neodymium magnet, and a countersunk M3 screw.

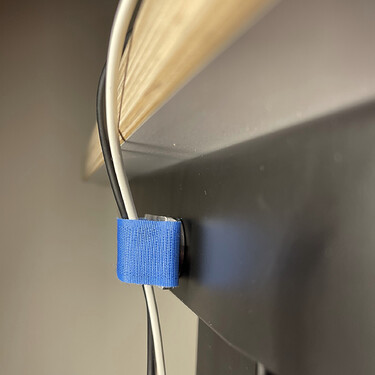
And here it is in “action”:

Apologies if I’ve gone overboard with the photos! Here’s the Fusion 360 model too:

Cable Holder.f3d.zip (1.2 MB)

Thanks for looking!

15 Likes

I love it when people’s first post is an entry to a community challenge, and a great one at that!
Very nice and smooth, a testament to the Nomad capabilities.
Would you mind also sharing a pic or three of your enclosure (here or in a separate thread)? We have folks asking about running a Shapeoko or Nomad in an apartment from time to time.

MAG MOUNT DUST SHOE


QUICK INSTALLATION VIDEO:
[https://youtu.be/RKHcMgmKcg8]

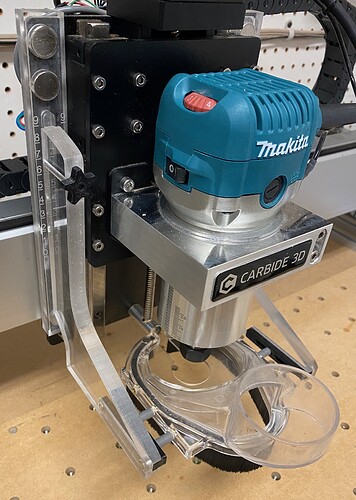
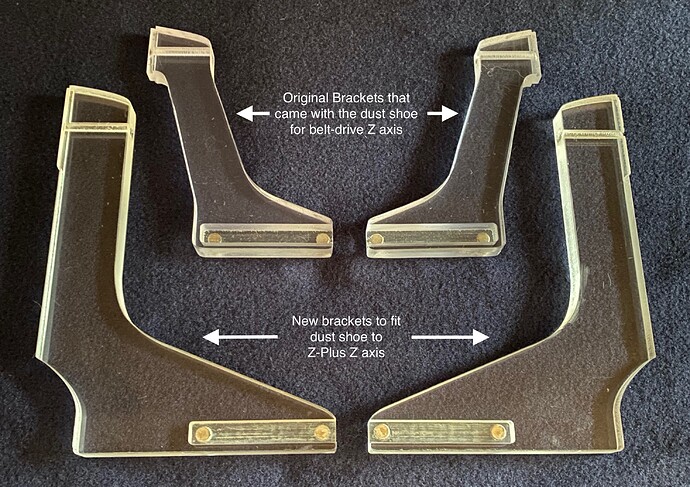
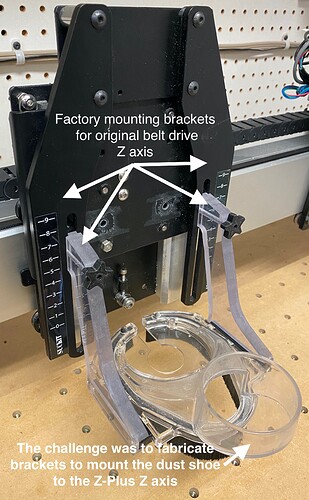
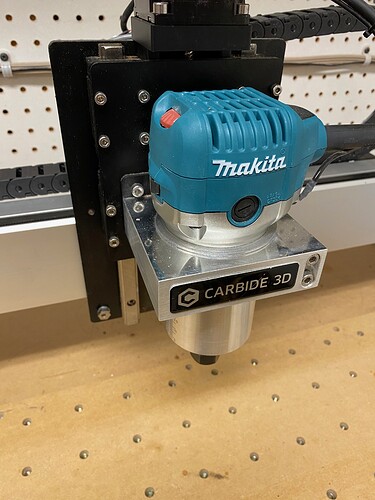
My 3rd party dust shoe was designed for the original belt-driven Z axis, and I needed a solution to mount it to my upgraded Z-Plus. The back plate of a Z-Plus is steel, so magnets were the perfect solution.

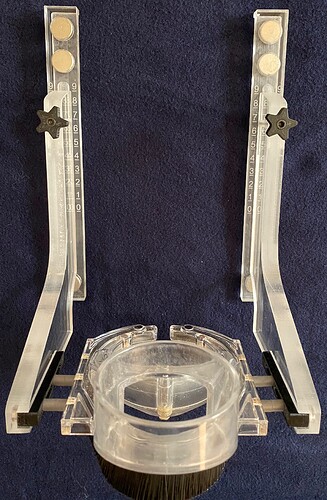
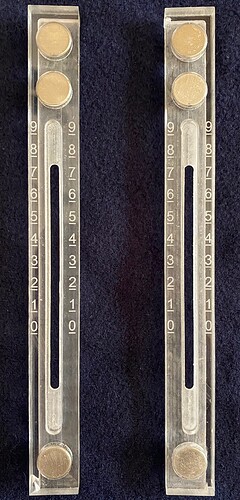
The mounting rails each have three N45 Neodymium magnets (5/8” by 1/4”, rated at 15 pounds of pull force each). These things grab VERY tight (see the video link). Magnets were glued in with 5-minute epoxy. I used a diamond drag bit to mark alignment lines in 1 CM increments like the original.

Everything fit into a 12” x 12” piece of ½” acrylic, sourced from Amazon. I made prototypes in MDF to get the dimensions dialed in before cutting the final parts in acrylic.

CONSTRUCTION NOTES:

Acrylic (for me) was challenging (and terrifying at times). Why?

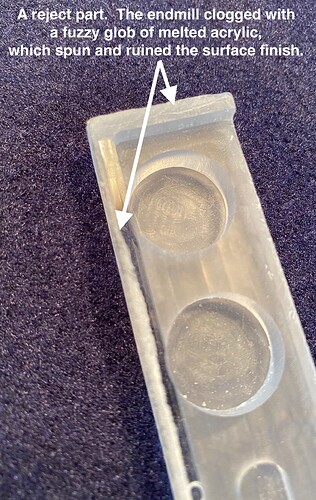
  1. I used a single-flute endmill, but it still tended to accumulate globs of melted acrylic, which would then spin and scratch up the surface of the project. I had to pause many times to scrape the melted globs off the endmill. I’m sure thinner acrylic would be more forgiving (More skill on my part would help too…)

  2. Acrylic seems to be elastic, causing it to rebound after cutting, making the diameter of the holes smaller than intended. The magnets were exactly .625”. They fit in a .625” hole in MDF, but not in Acrylic. I had to create a series of over-sized test holes (.626, .627, .628, .629, etc.) until I found the size that resulted in a slip-fit (the final size was .634”).

  3. I murdered an innocent .125” endmill when I made a mistake on depth-per-pass. It plunged full-depth into ½” acrylic and took off at 60 ipm. It travelled about 1 inch before it screamed like a banshee and snapped.

Fun project in an unforgiving material.

MORE PHOTOS:

Original and New Brackets:

Magnet-Mount Rails:

A Rejected Part:

What the Original Looked Like:

Z-Plus without Dust Bracket:

Z-Plus with New Dust Bracket:

C2D FILES:
Mag Mount Dust Shoe Brackets.c2d (440.0 KB)
Diamond Drag Reference Marks.c2d (712.2 KB)

11 Likes

Wow, nice job!

The Nomad’s rigidity… Isn’t fantastic and IIRC it’s not consistent, so the machine can deflect more in one direction than another, even on the same axis. I see it on top faces especially, the ridges are really noticeable if you leave “both ways” facing turned on and cut aggressively.

For side walls, I recommend decreasing the depth of cut. For facing, stick to one direction and maybe add a shallower finishing pass.

I had a similar problem for my part and used the threaded hole in the center. I put a bolt through it and another piece of stock, with a bunch of washers for elevation, then put the other piece of stock in the vise. Not amazing for hogging material but perfectly adequate for some light milling.

If you leave some extra material around the edges, you can mill those faces and use them as a reference.

And what kind of toolpath did you use for the fillets? I haven’t done much 3D stuff like that and there are so many options it’s a bit daunting…

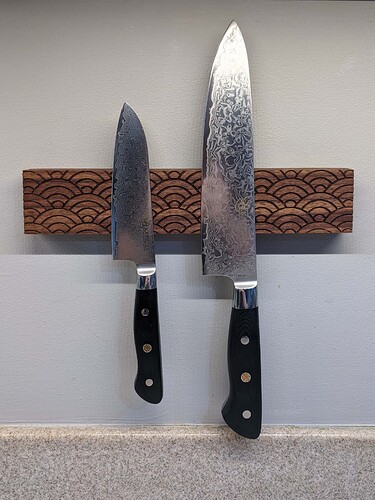
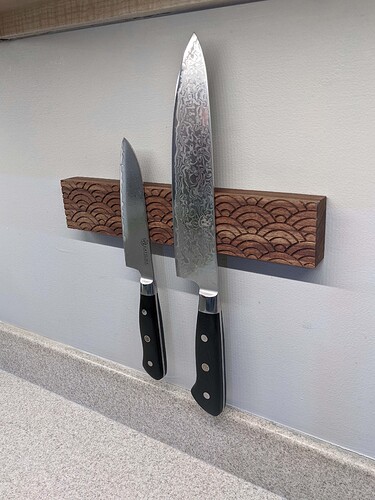
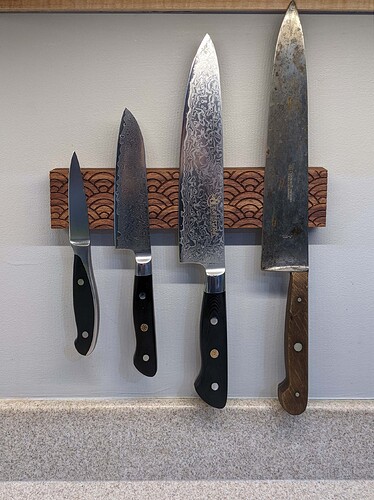
We made a magnetic knife block - our first real Shapeoko project!

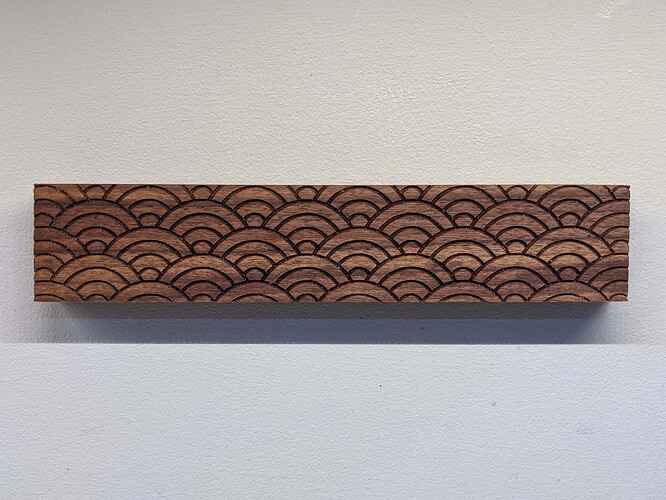
Used some walnut scrap from our local lumber yard (I love their off cuts section!) that happened to be a good size - including thick enough to keep our tall knives over the counter backsplash/lip. Engraved a seigaiha pattern on the front with a v-bit. Our original plan had been to do this in maple and cut a pocket to fill with resin, but when I saw the challenge this morning we decided to use what we had on hand and could finish today, and finally get our extra knives off the counter.

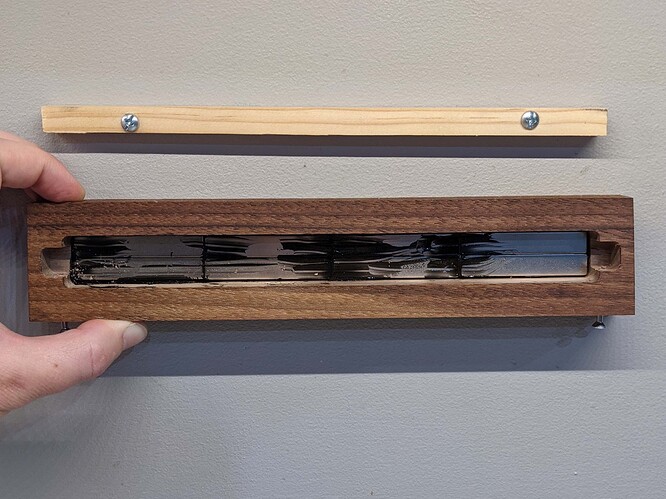
Cut a couple pockets into the back - one for magnets, another for the mounting strip. Stuck in 16 of these magnets with some leftover silicone.

Finished it off with some tung oil.

I had meant to make it longer, but I forgot that carbide create for some reason scales down my projects when I bring them in from illustrator (am I doing something wrong? Is there a fix other than remembering to rescale?). I’d conveniently left a good bit of excess engraving on the top and bottom to make sure the edges got covered so the wood was covered top to bottom, but it didn’t end up quite as long left to right as I had planned. I did rescale the back part to fit the magnets right - which was really the important part.

My design files aren’t especially interesting, but these are the .c2d files.

back_center_zero.c2d (20.2 KB)
front_2in_6pt_vee.c2d (355.5 KB)

17 Likes

As @jepho notes, CC expects 96 ppi — in Adobe Illustrator this should occur when you export (not save) an SVG — it also helps to uncheck the “Responsive” checkbox if present in your version of AI.

3 Likes

Awesome, thanks @jepho and @WillAdams for pointing this out! I also did not expect scaling to be an issue with vector file formats. Will try exporting and checking dpi next time.

1 Like