Community Challenge 28 Entry- Matching Topo Table Tops

This piece was commissioned about a month back and is still in progress. Pretty long, lot of lessons learned. Alot of machine time. Etc. So instead of clogging that thread, I will start a thread and link it in to the contest when this thing is done.

Customer reached out via Etsy, asking if I could engrave the Grand Canyon into a tabletop. We went back and forth a bit and eventually I decided, though I am not a wood worker, that we’d give it a shot.

Customer and I eventually found the slab he wanted to do this in, and I guess somewhere in the process of finding that slab he decided I might know what I am doing (which as this thread progresses, will become readily apparent I do not!), and changed up the project to include two matching tops.

Ultimately, this would be a map of the Grand Canyon with a location marker and plaque for a large mule deer he harvested several years back, and a map of the location he proposed to his wife (Lett Lake, CA)

I set up a google drive folder for the files. They were large, and I ended with about 40 different iterations of them as I went. I think these ended up being the files mostly used in the process. Although I did have a number of one off files that I ended up using and did not save.

[Topo Tabletop Files - Google Drive]

After splitting the slab and deciding which would be which, I decided to machine the Grand Canyon area first, as I had already done many of them in smaller wall hung pieces. As it turns out, this would be the same, only, different. I got a few pictures of it during the machining process and after the initial run. Which, as it turns out, would not be the last.


9 Likes

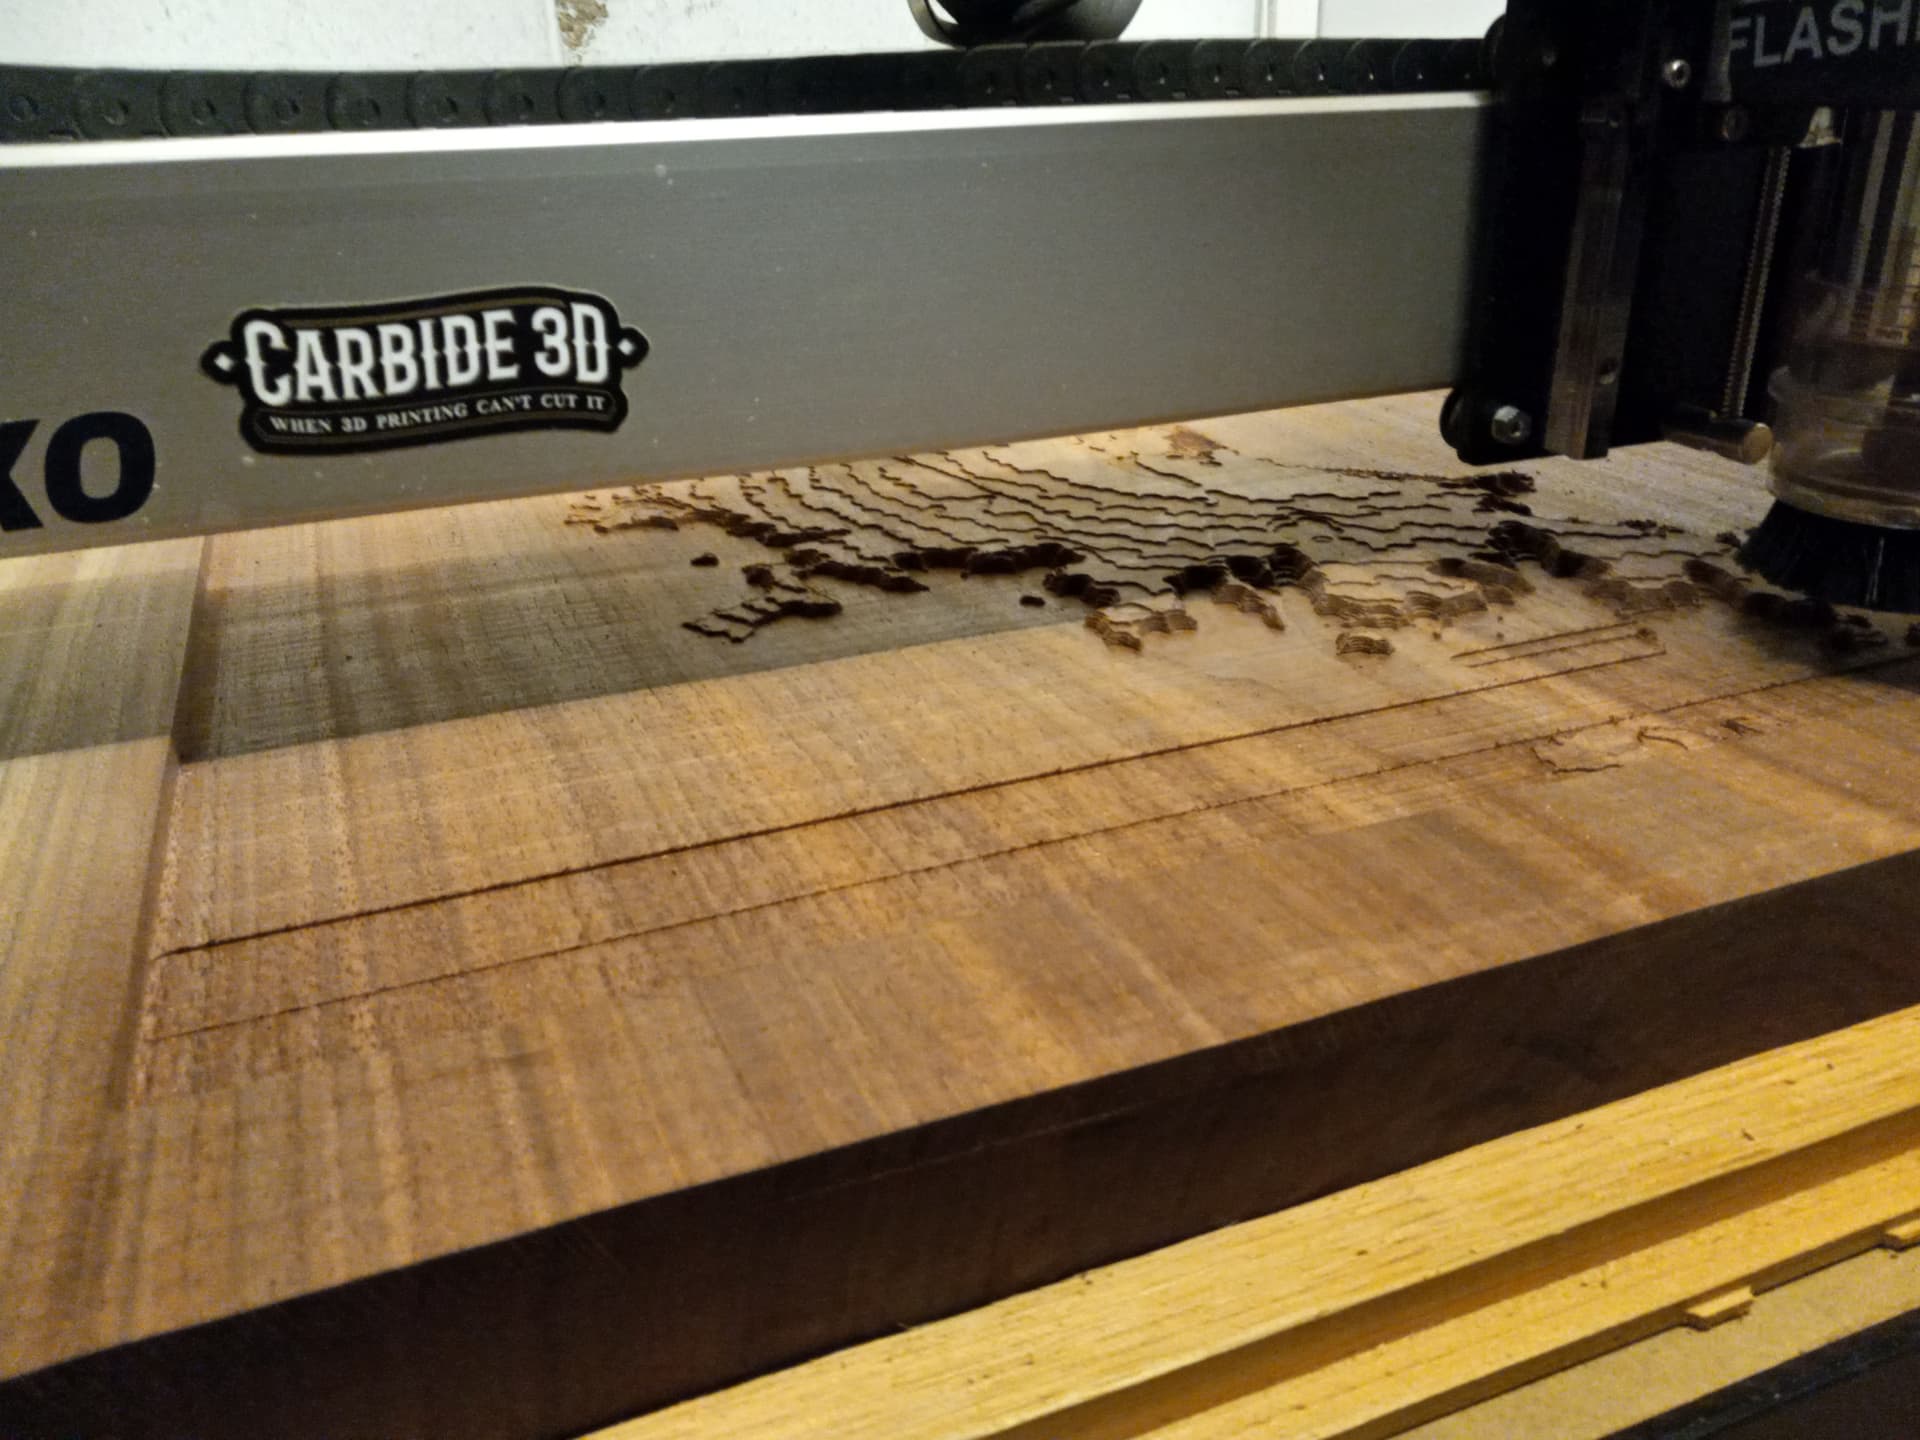
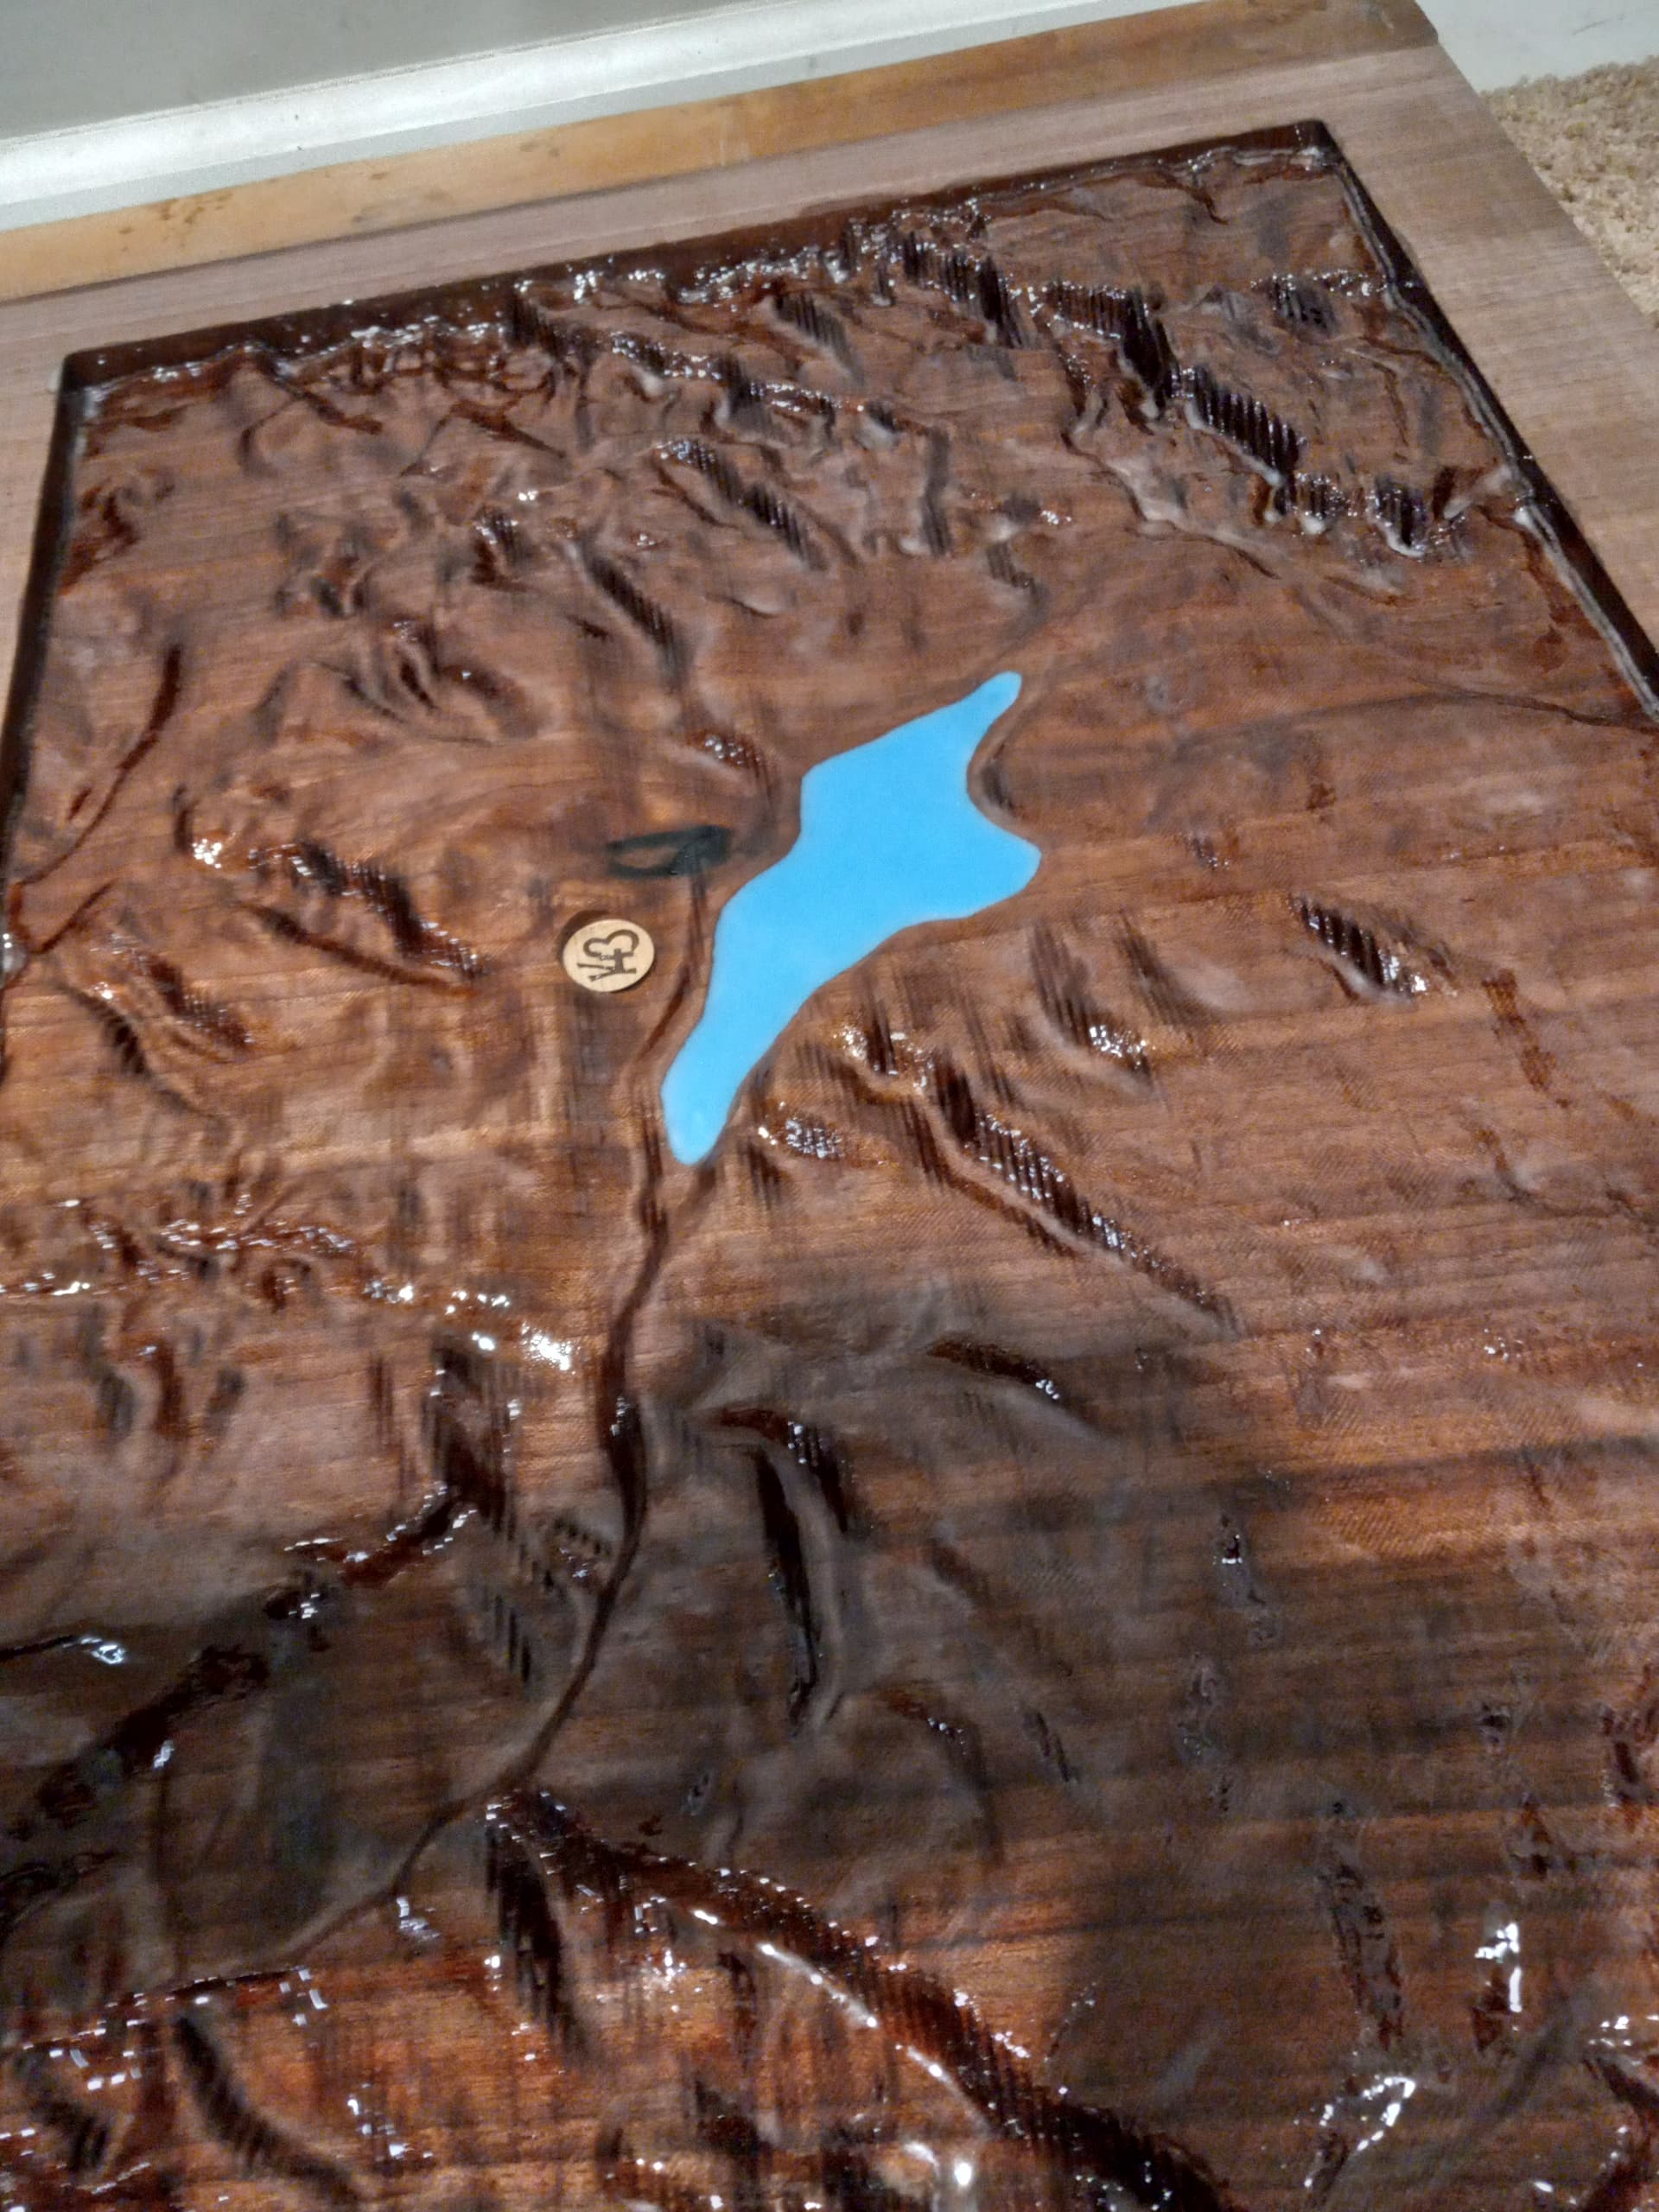
After getting this far (20 plus hours in 3d Roughing and 2 alternating finish passes), getting the plaque design figured out and having a Fiverr Graphic design person try to put this deer in a medallion, I thought I was ready for deep pour epoxy. Then it occurred to me to check across the top with a level to see how far down the highest portion of the terrain would be… Yeah. Not a happy thing as the top of the highest terrain feature was about 1/32 below the tabletop finish. I knew it would be exposed during a final surfacing pass. At this point, I had already lost my zero, removed the slab from the machine, and proclaimed victory.

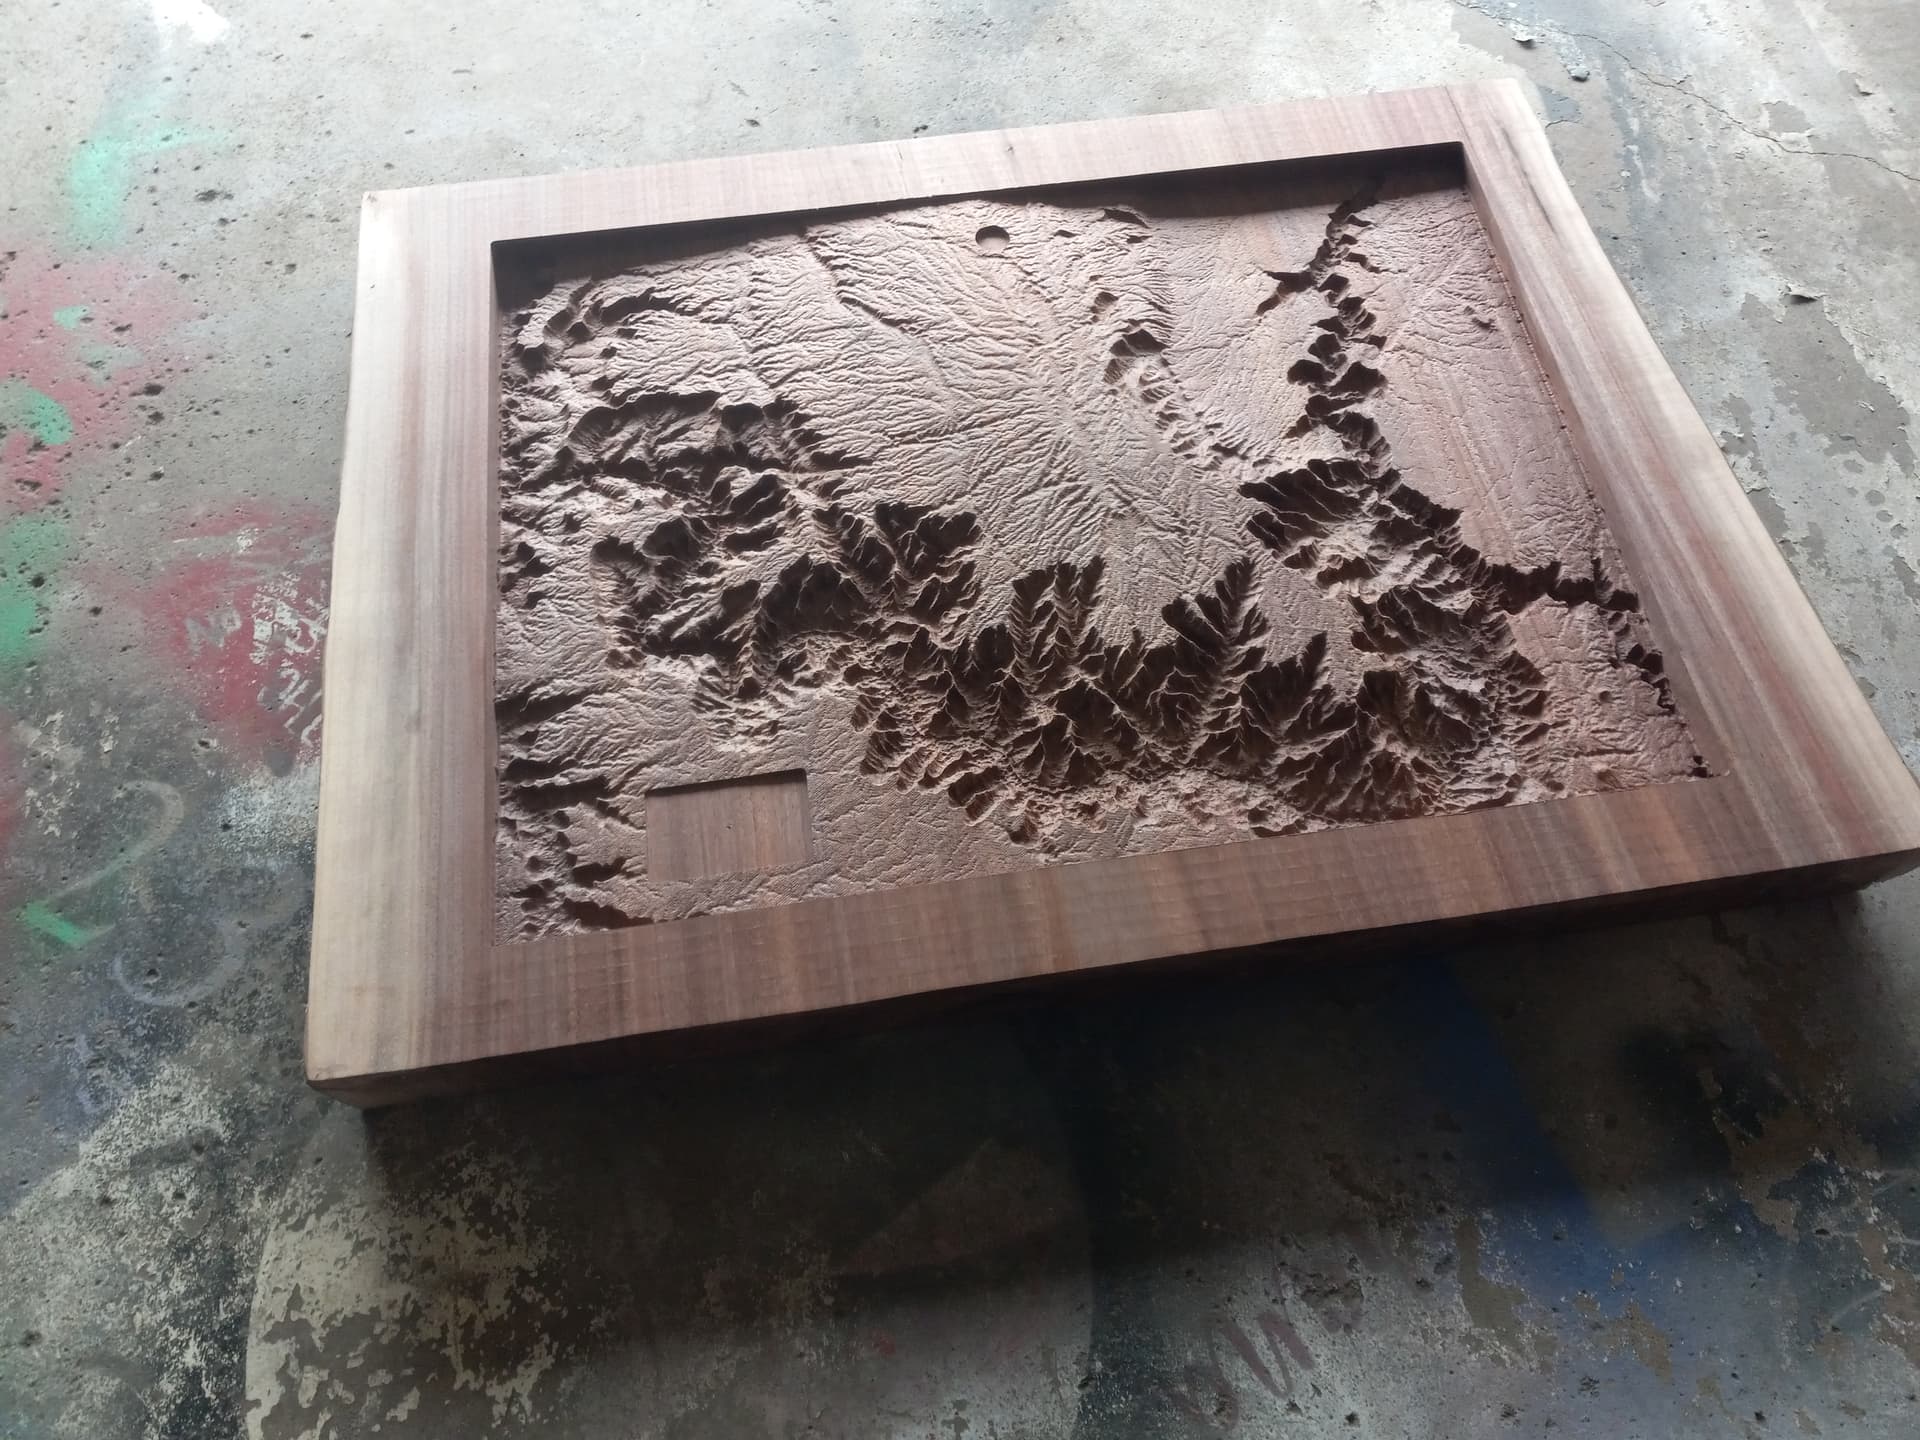
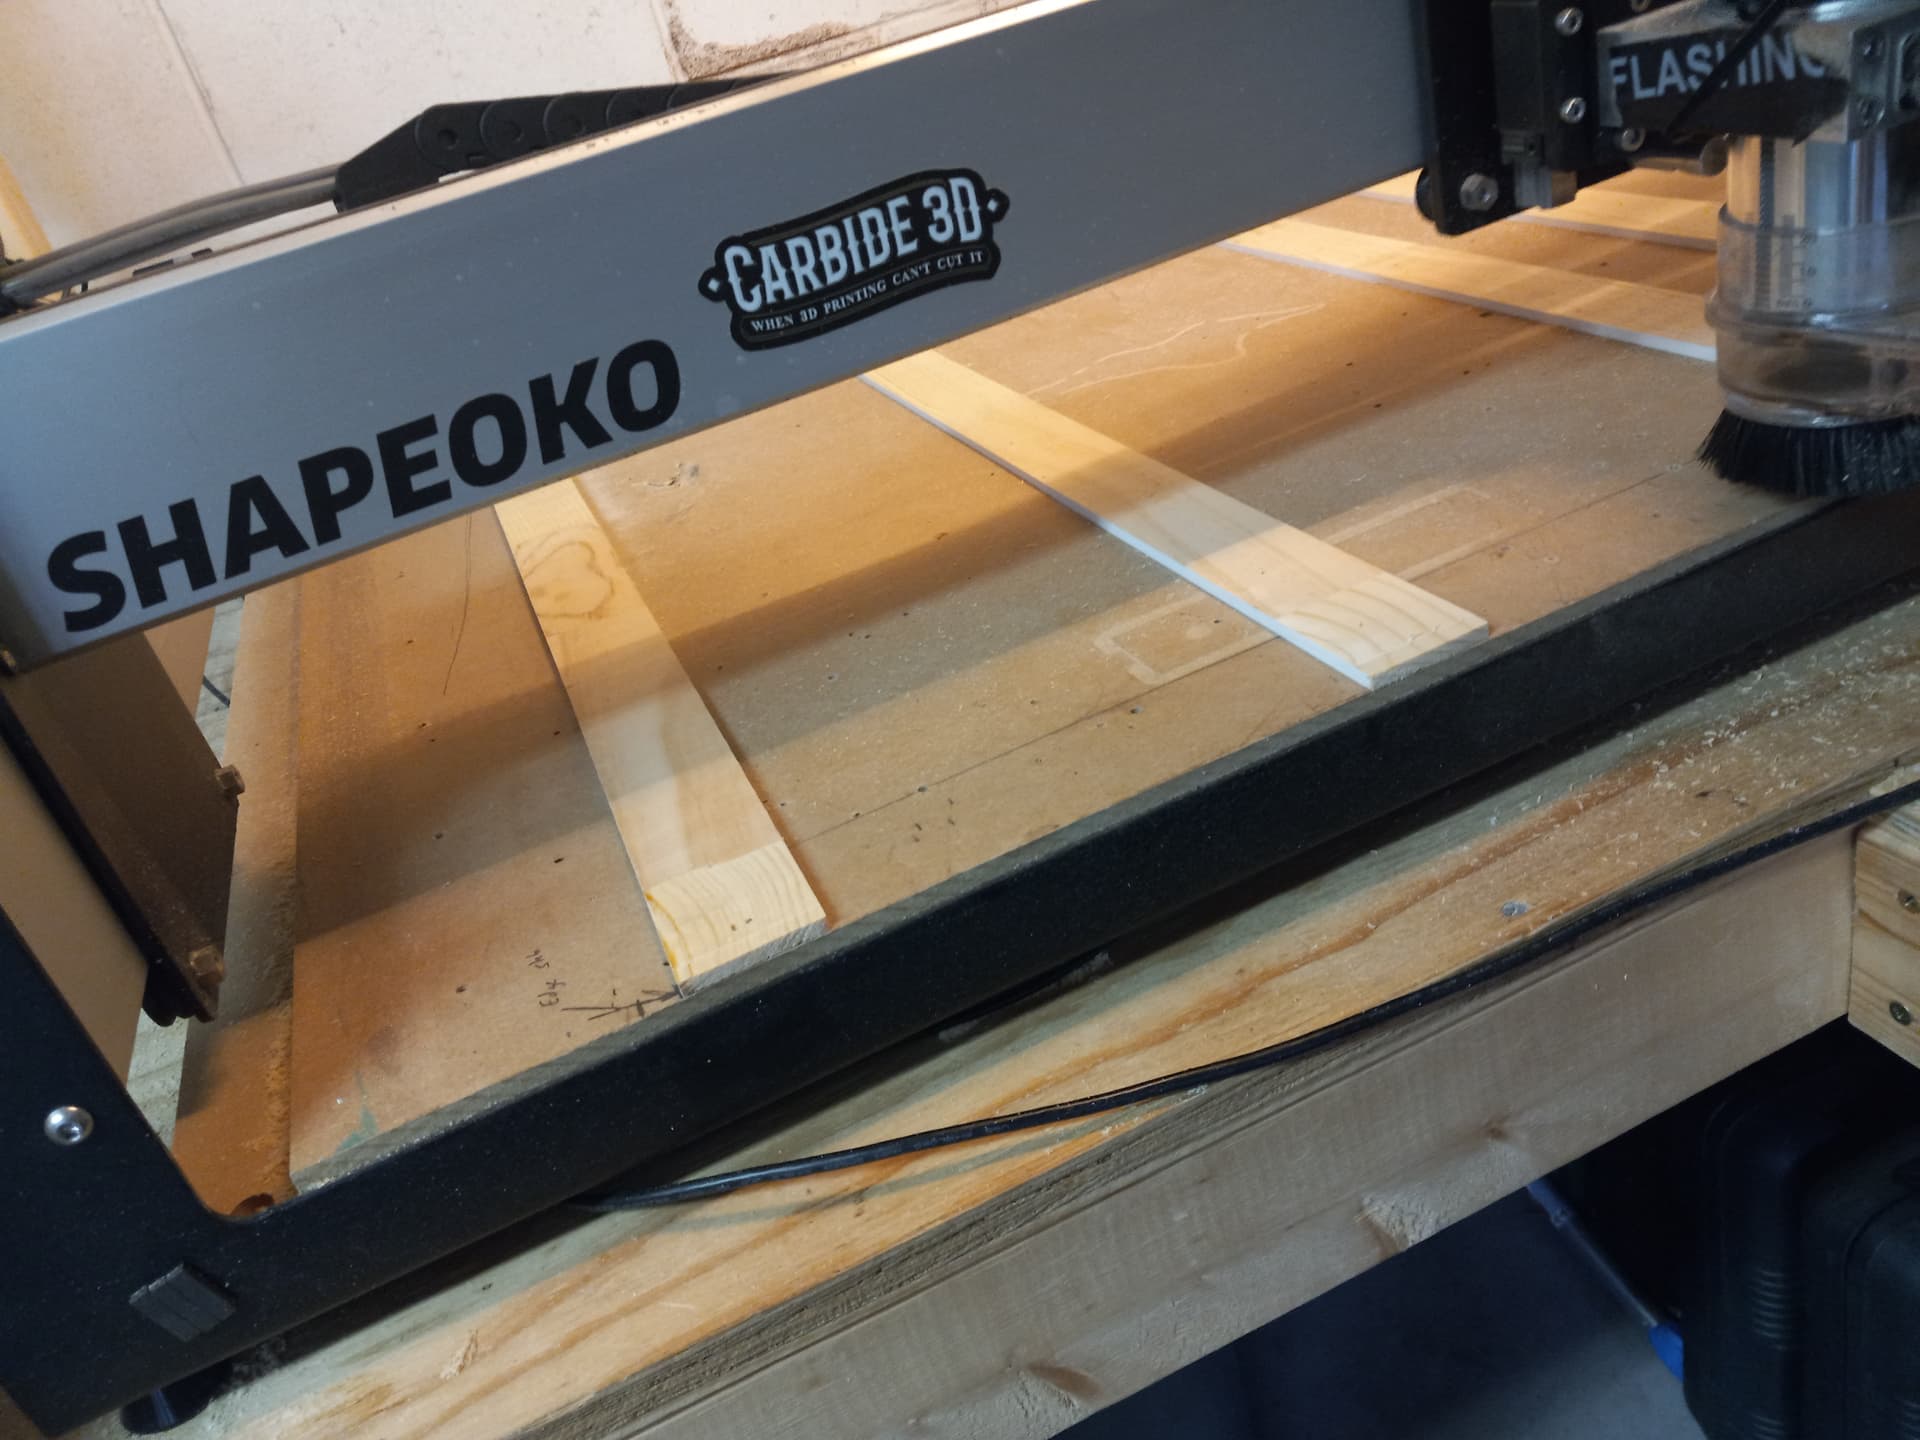
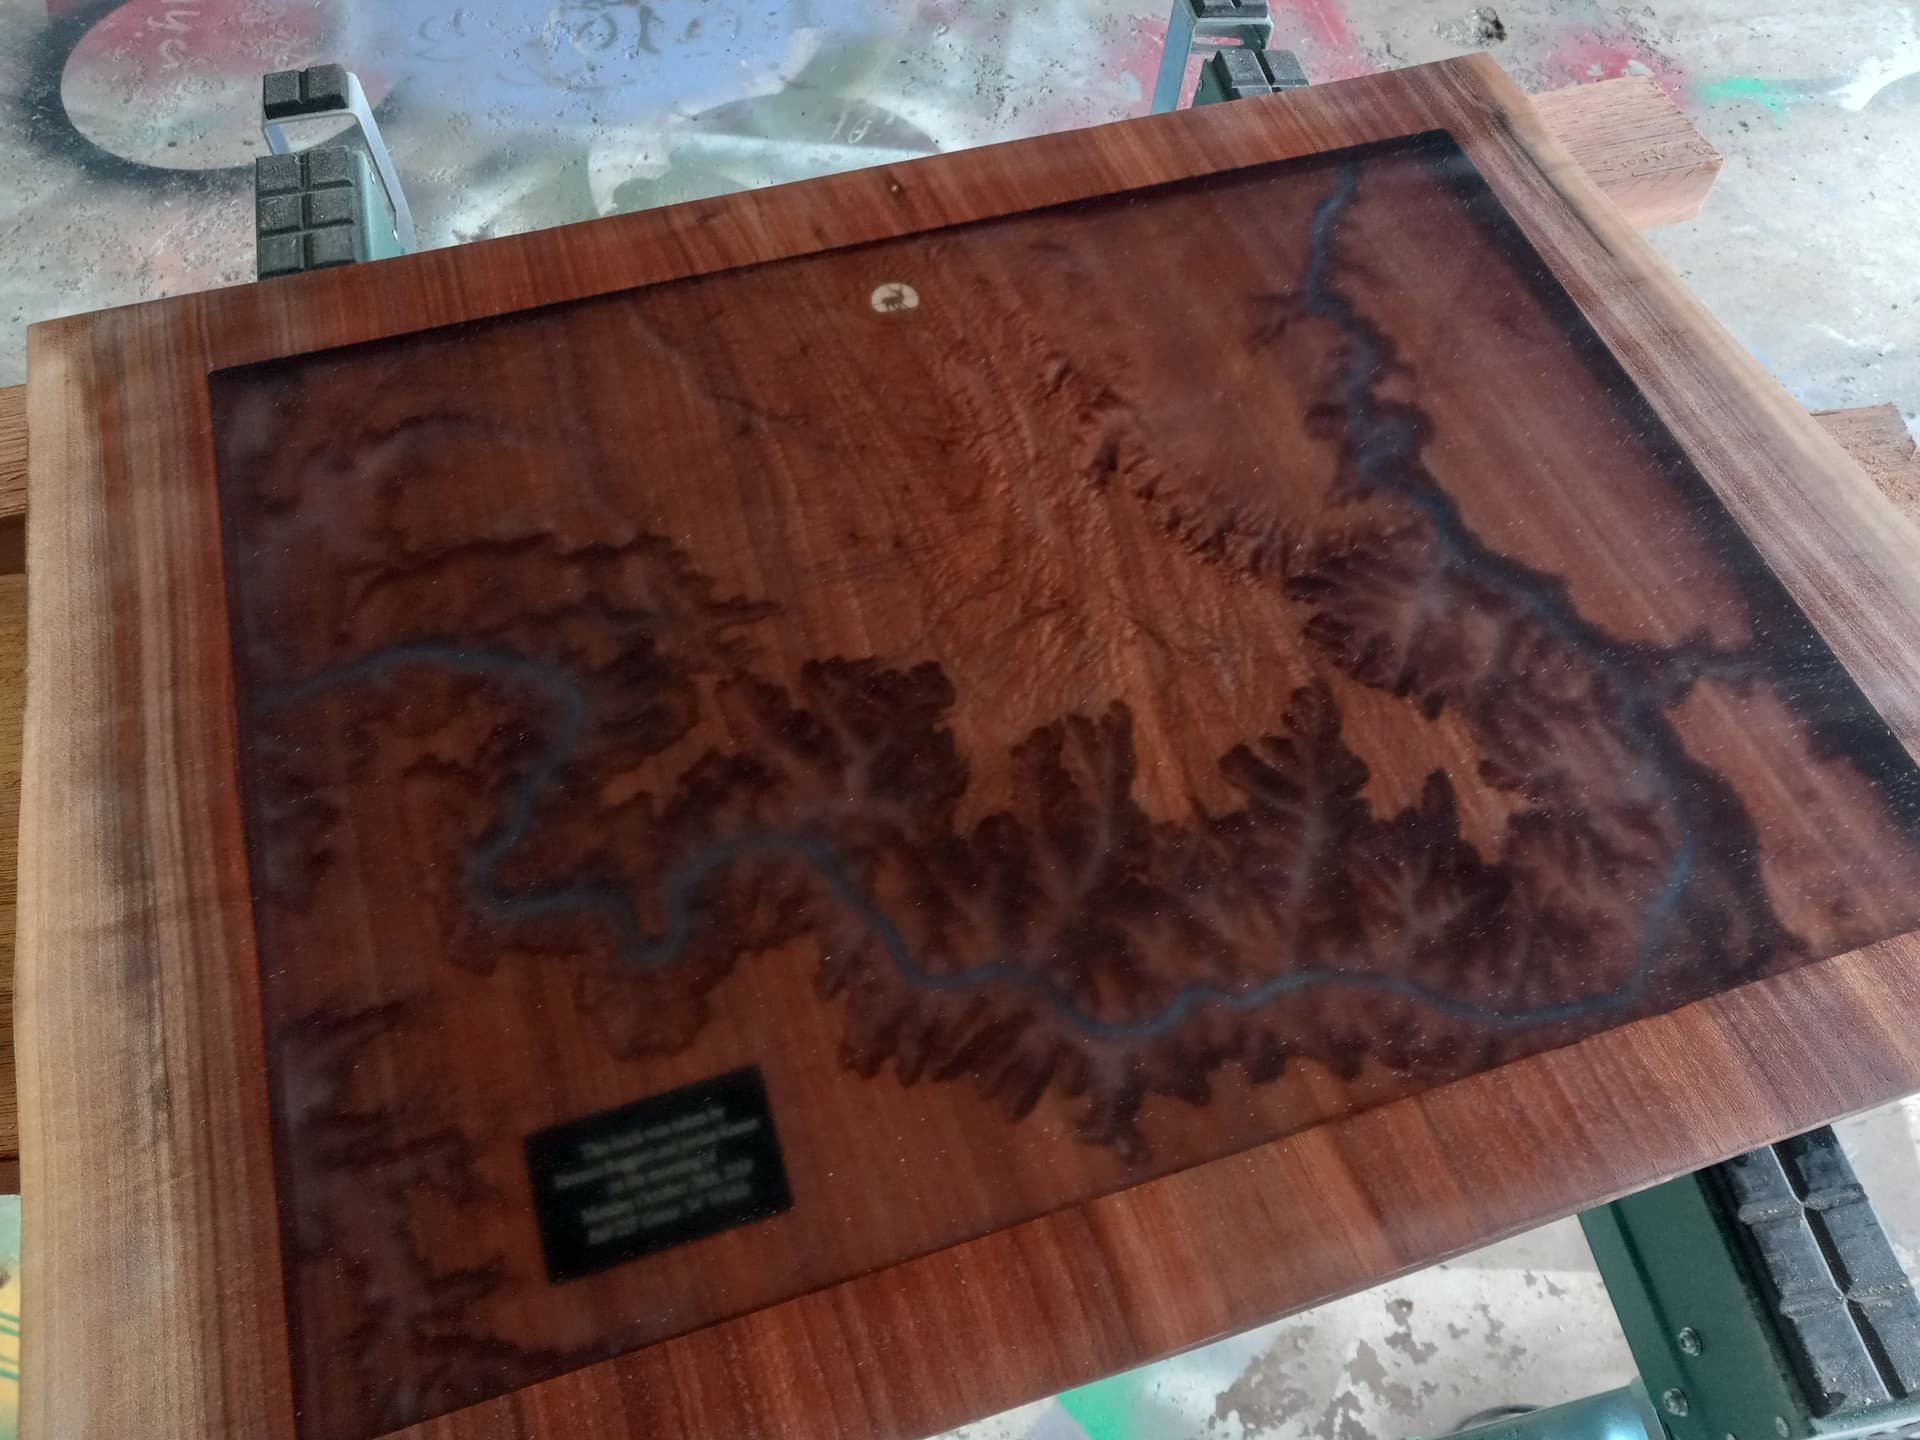
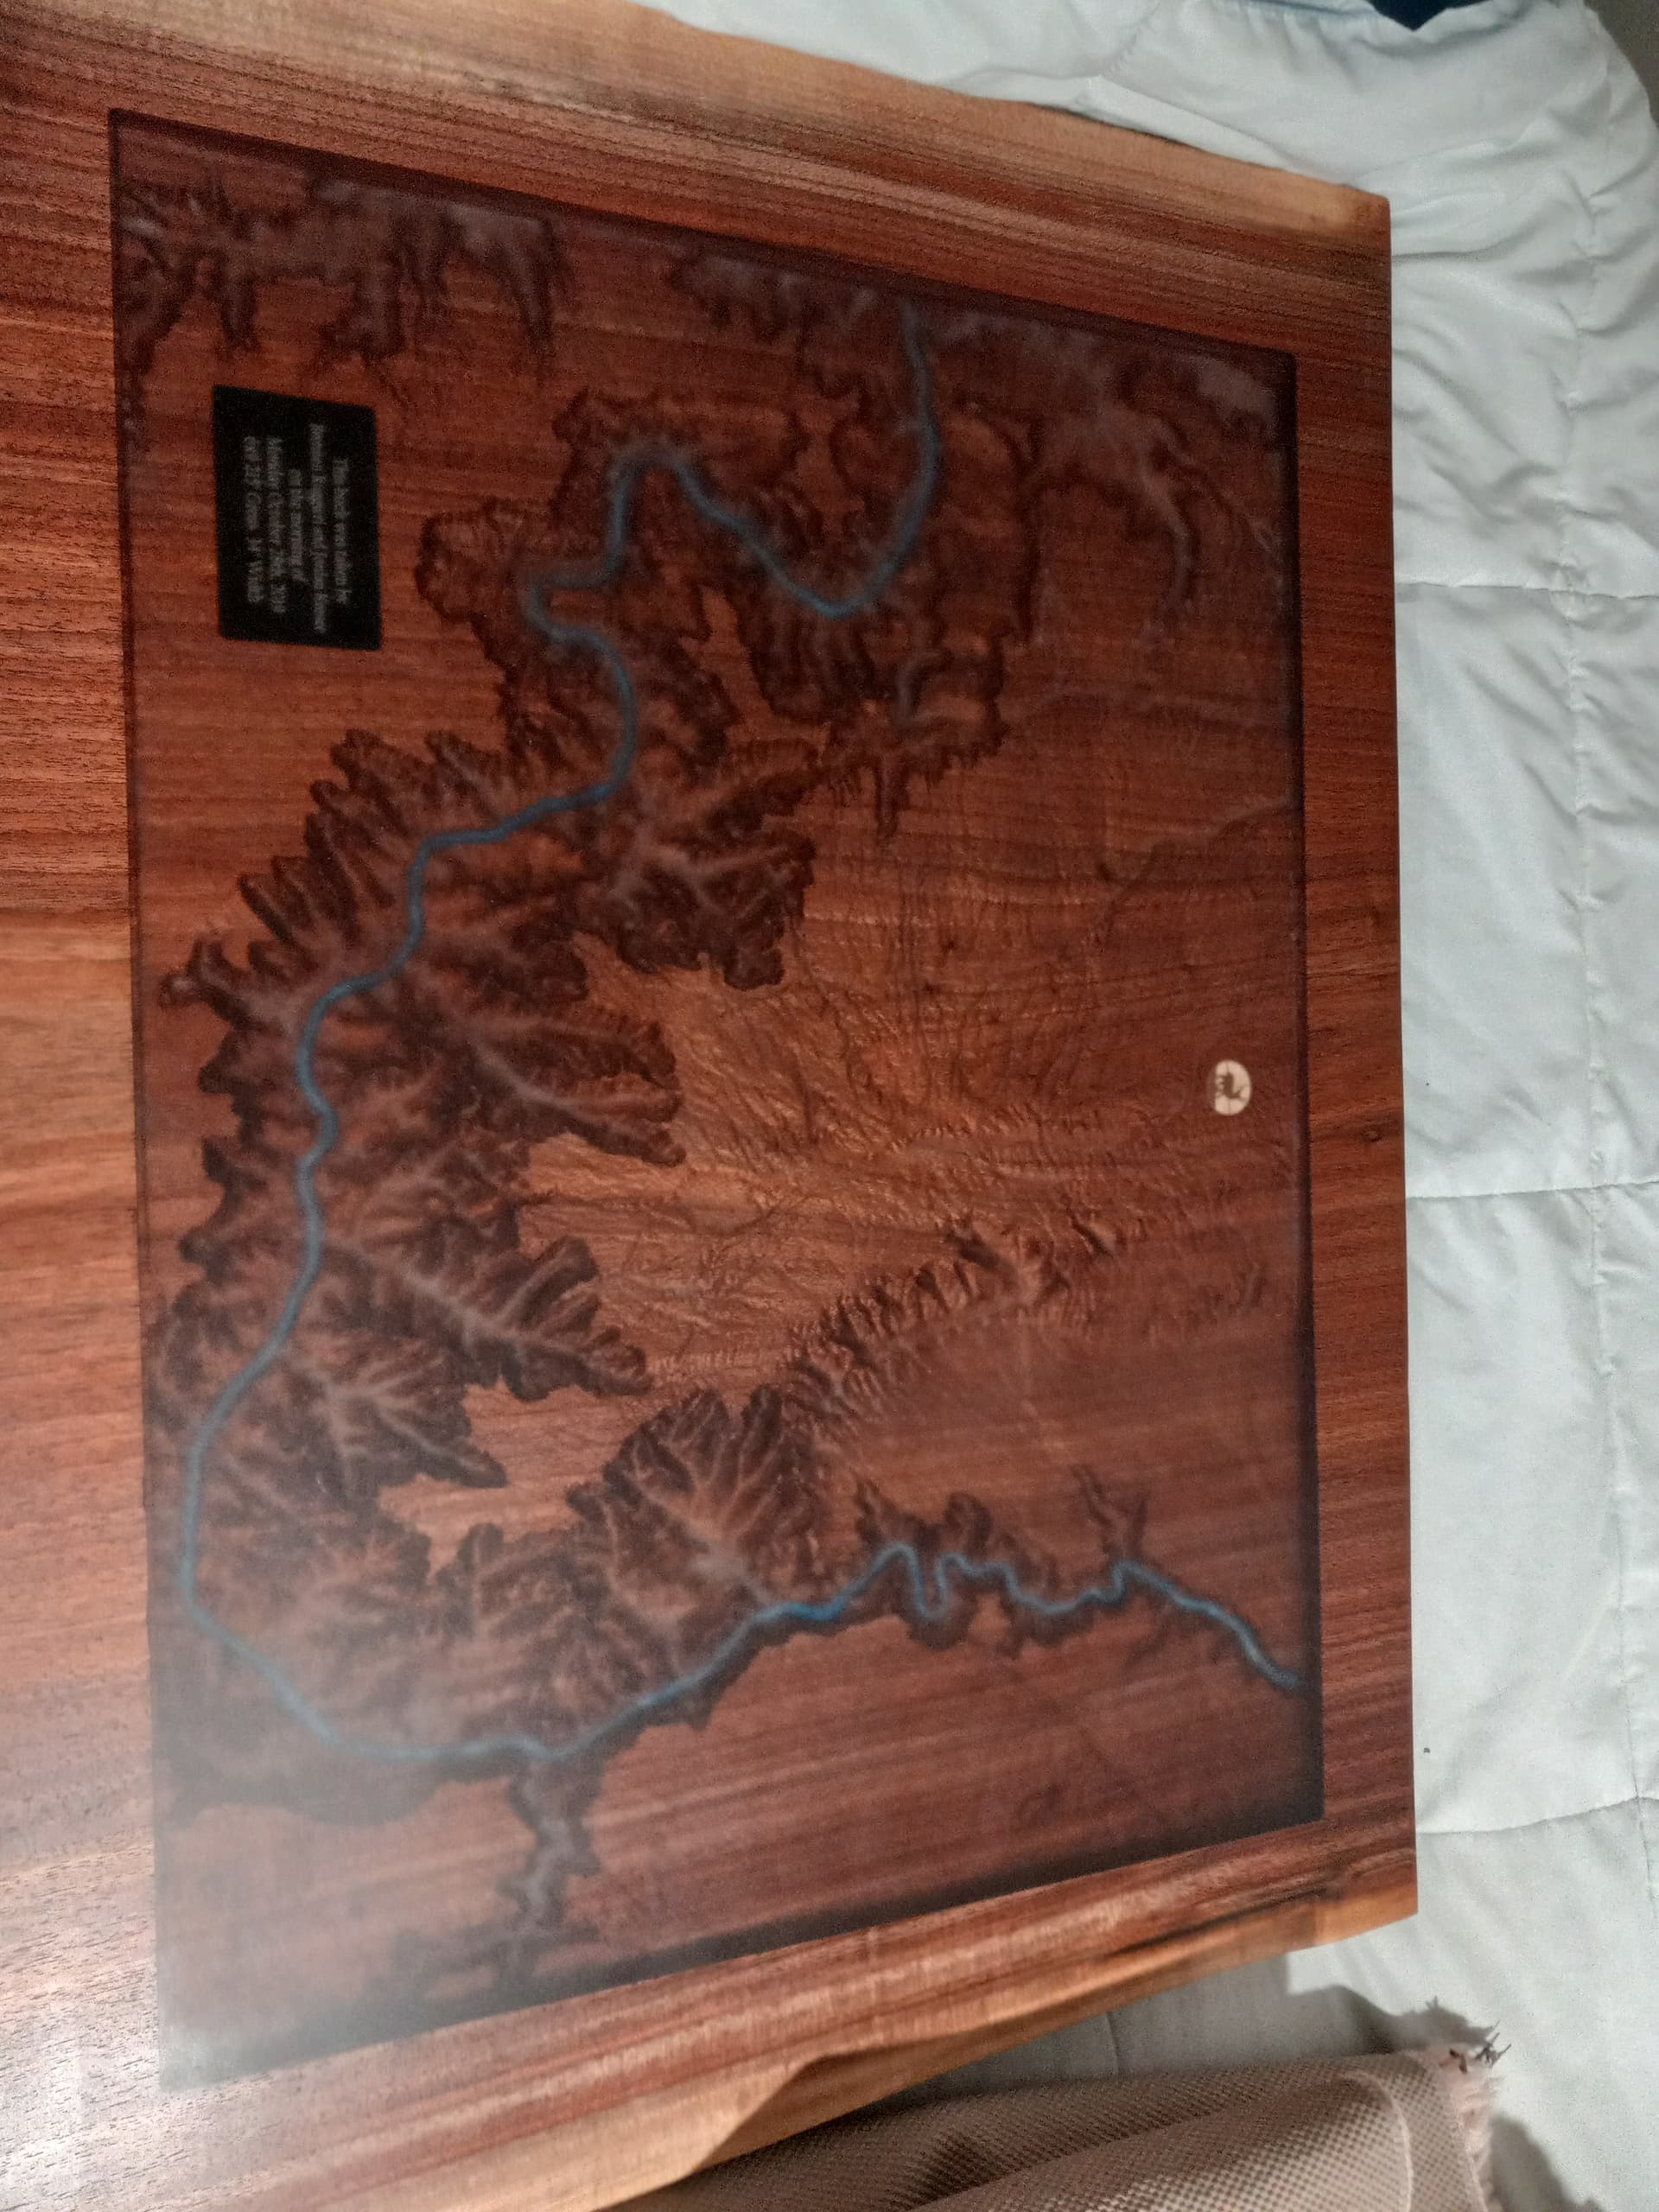
Realizing I had to get it machined down further, I got it back up on the Shapeoko and did my best to align it perfectly on both X and Y axis by putting a 1.5mm bit in, getting it close to the edge and jogging. Of course I immediately tapped into the piece and broke that bit like a genius. Once I got it where I thought I was aligned, zeroed properly, I lowered the Z height an additional .1 and ran the finishing pass again. Zero was off probably a 1/16th each way, which showed in some of the terrain features. So, once that was completed, I lowered it again another .1 or so, and ran it again (Then immediately started a thread here figuring out how to not do this again for the sister top). Eventually I got it worked down to a suitable depth for the epoxy to cover the top after a final surface. I used a laser to engrave the Deer on a piece of hard maple and engraved the plaque in one of those laser engravable aluminum business cards and got them installed and glued in.

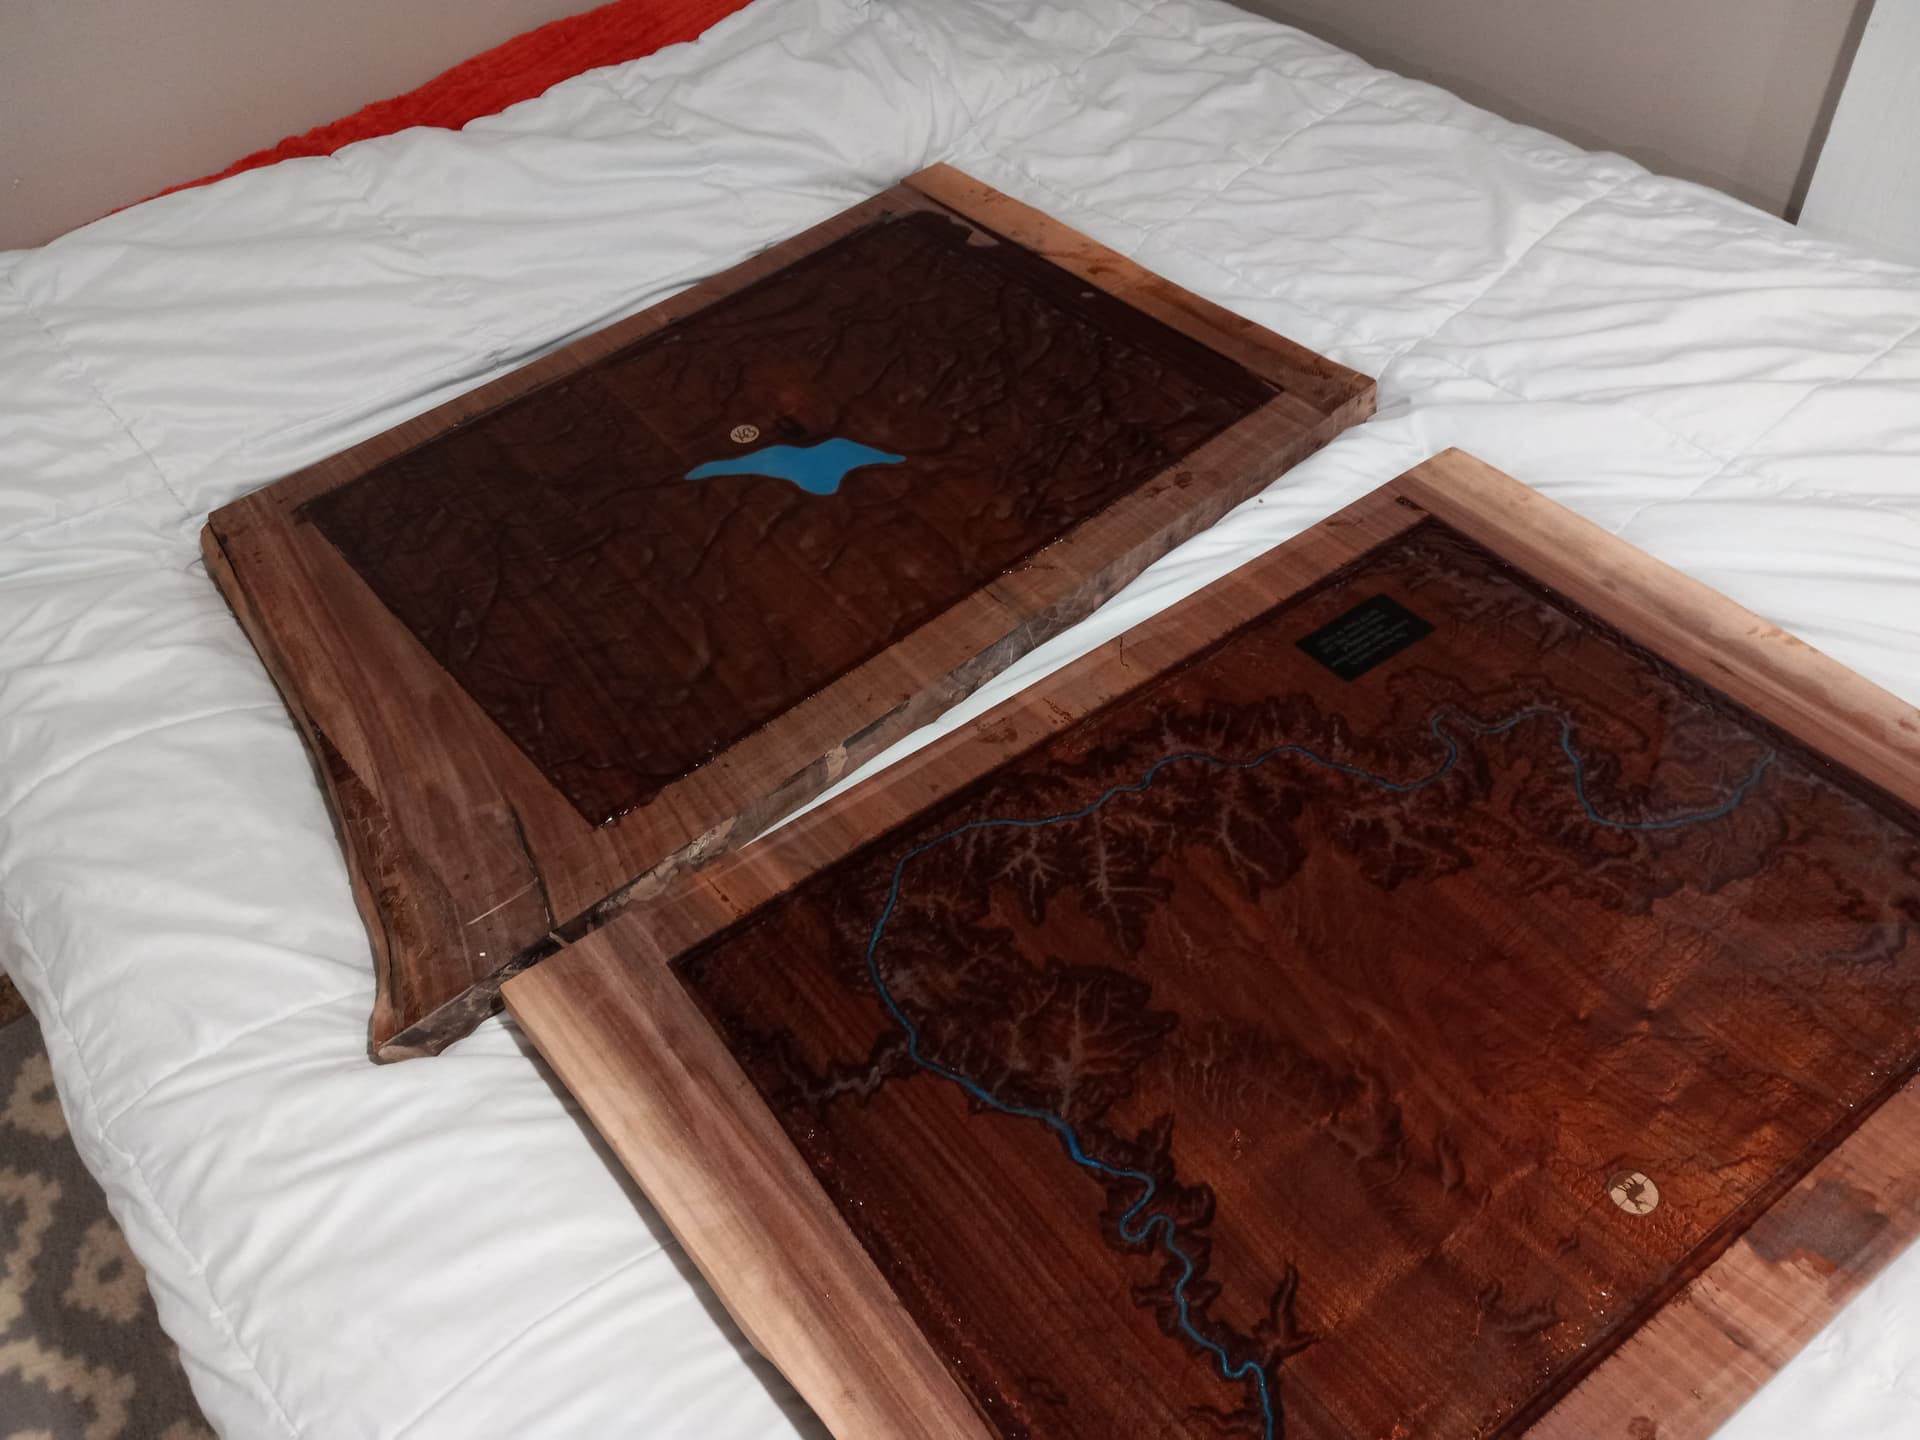
The bottom of the Canyon where the river is, doesn’t engrave as a depression, but as a series of weird spikes. Had to take a big router with a 1/8 bit to hand route the Colorado river along the bottom for epoxy. Took some pictures and sent to the customer, to which he inquired, think we can light the water features? Whatever, at this point I am down to try whatever, and after making sure I bore no responsibility if it didn’t actually work. Spoiler, one worked, the other, ummmm, kinda worked.

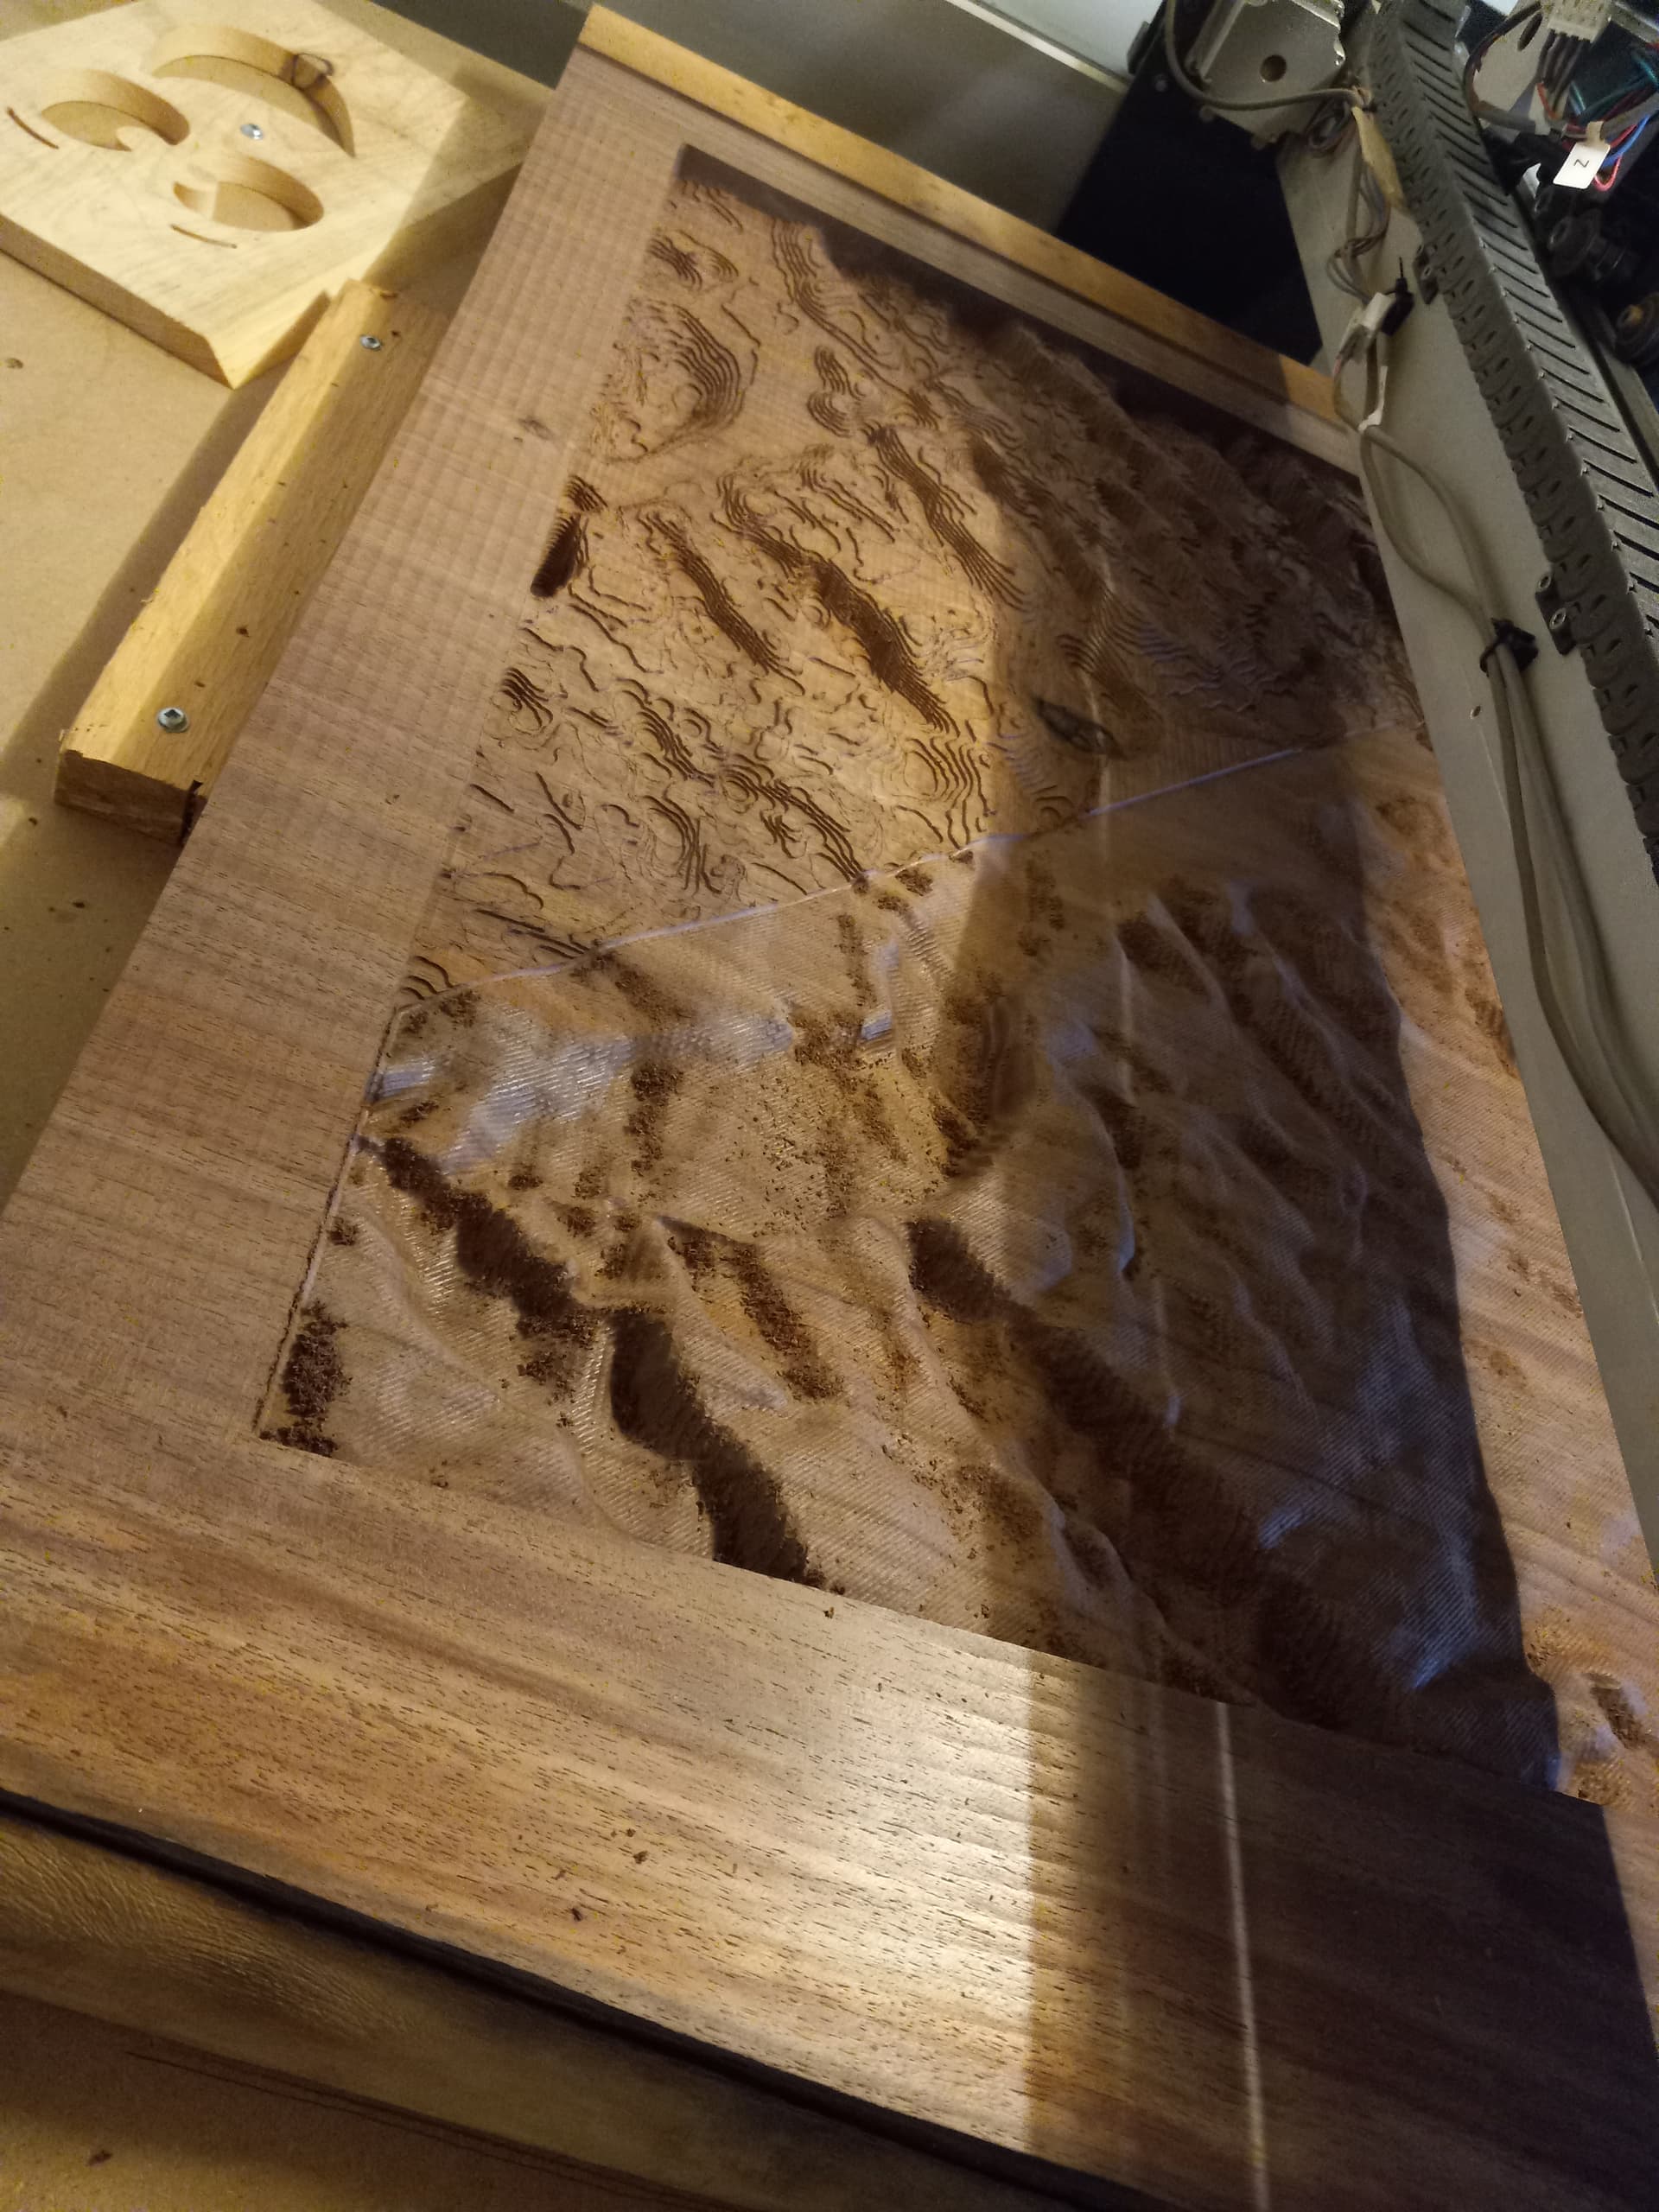
I will not include the link to the side glow fiber optic setups I purchased, as they just were not a great product. At least for this application. I routed deeper for the river. Drilled a hole through to the bottom of the slab where the fiber would connect to the light source and measure the light source with calipers and eventually designed a recess for the source and wiring, along with a cover. Did a test cut in some cedar laying around…

One thing that worked brilliantly was using the penetration for the fiber as the zero point in Carbide Create, and orienting the design in the direction where the 1.5 inch recess wouldn’t penetrate the topography surface. It was close, but by my math and using a level to rough guess, I should have had about .15 clearance. Somehow this went off without a hitch.

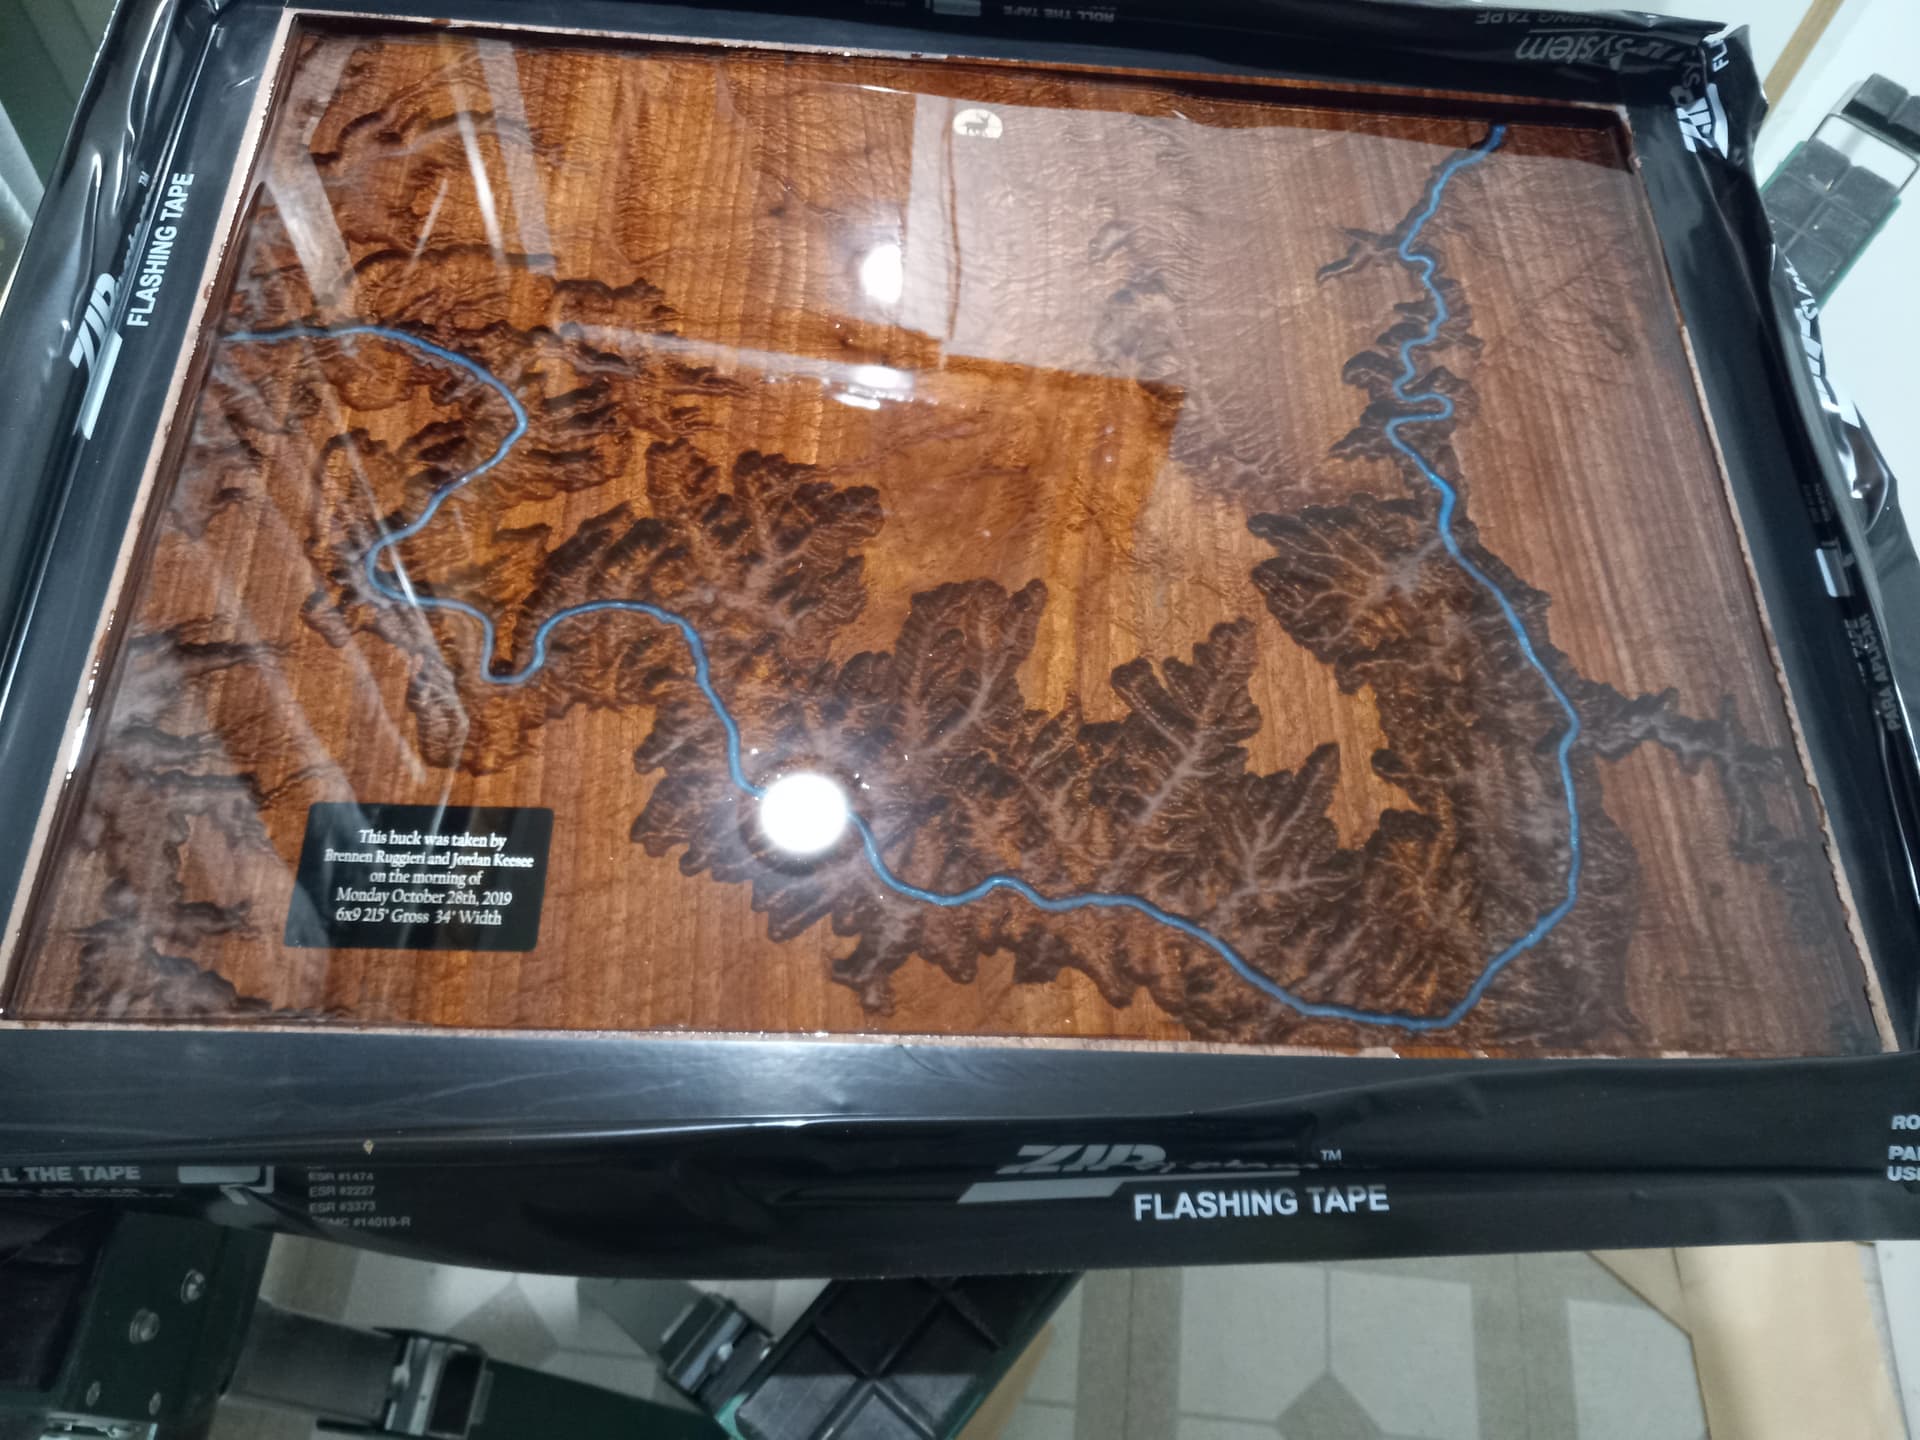
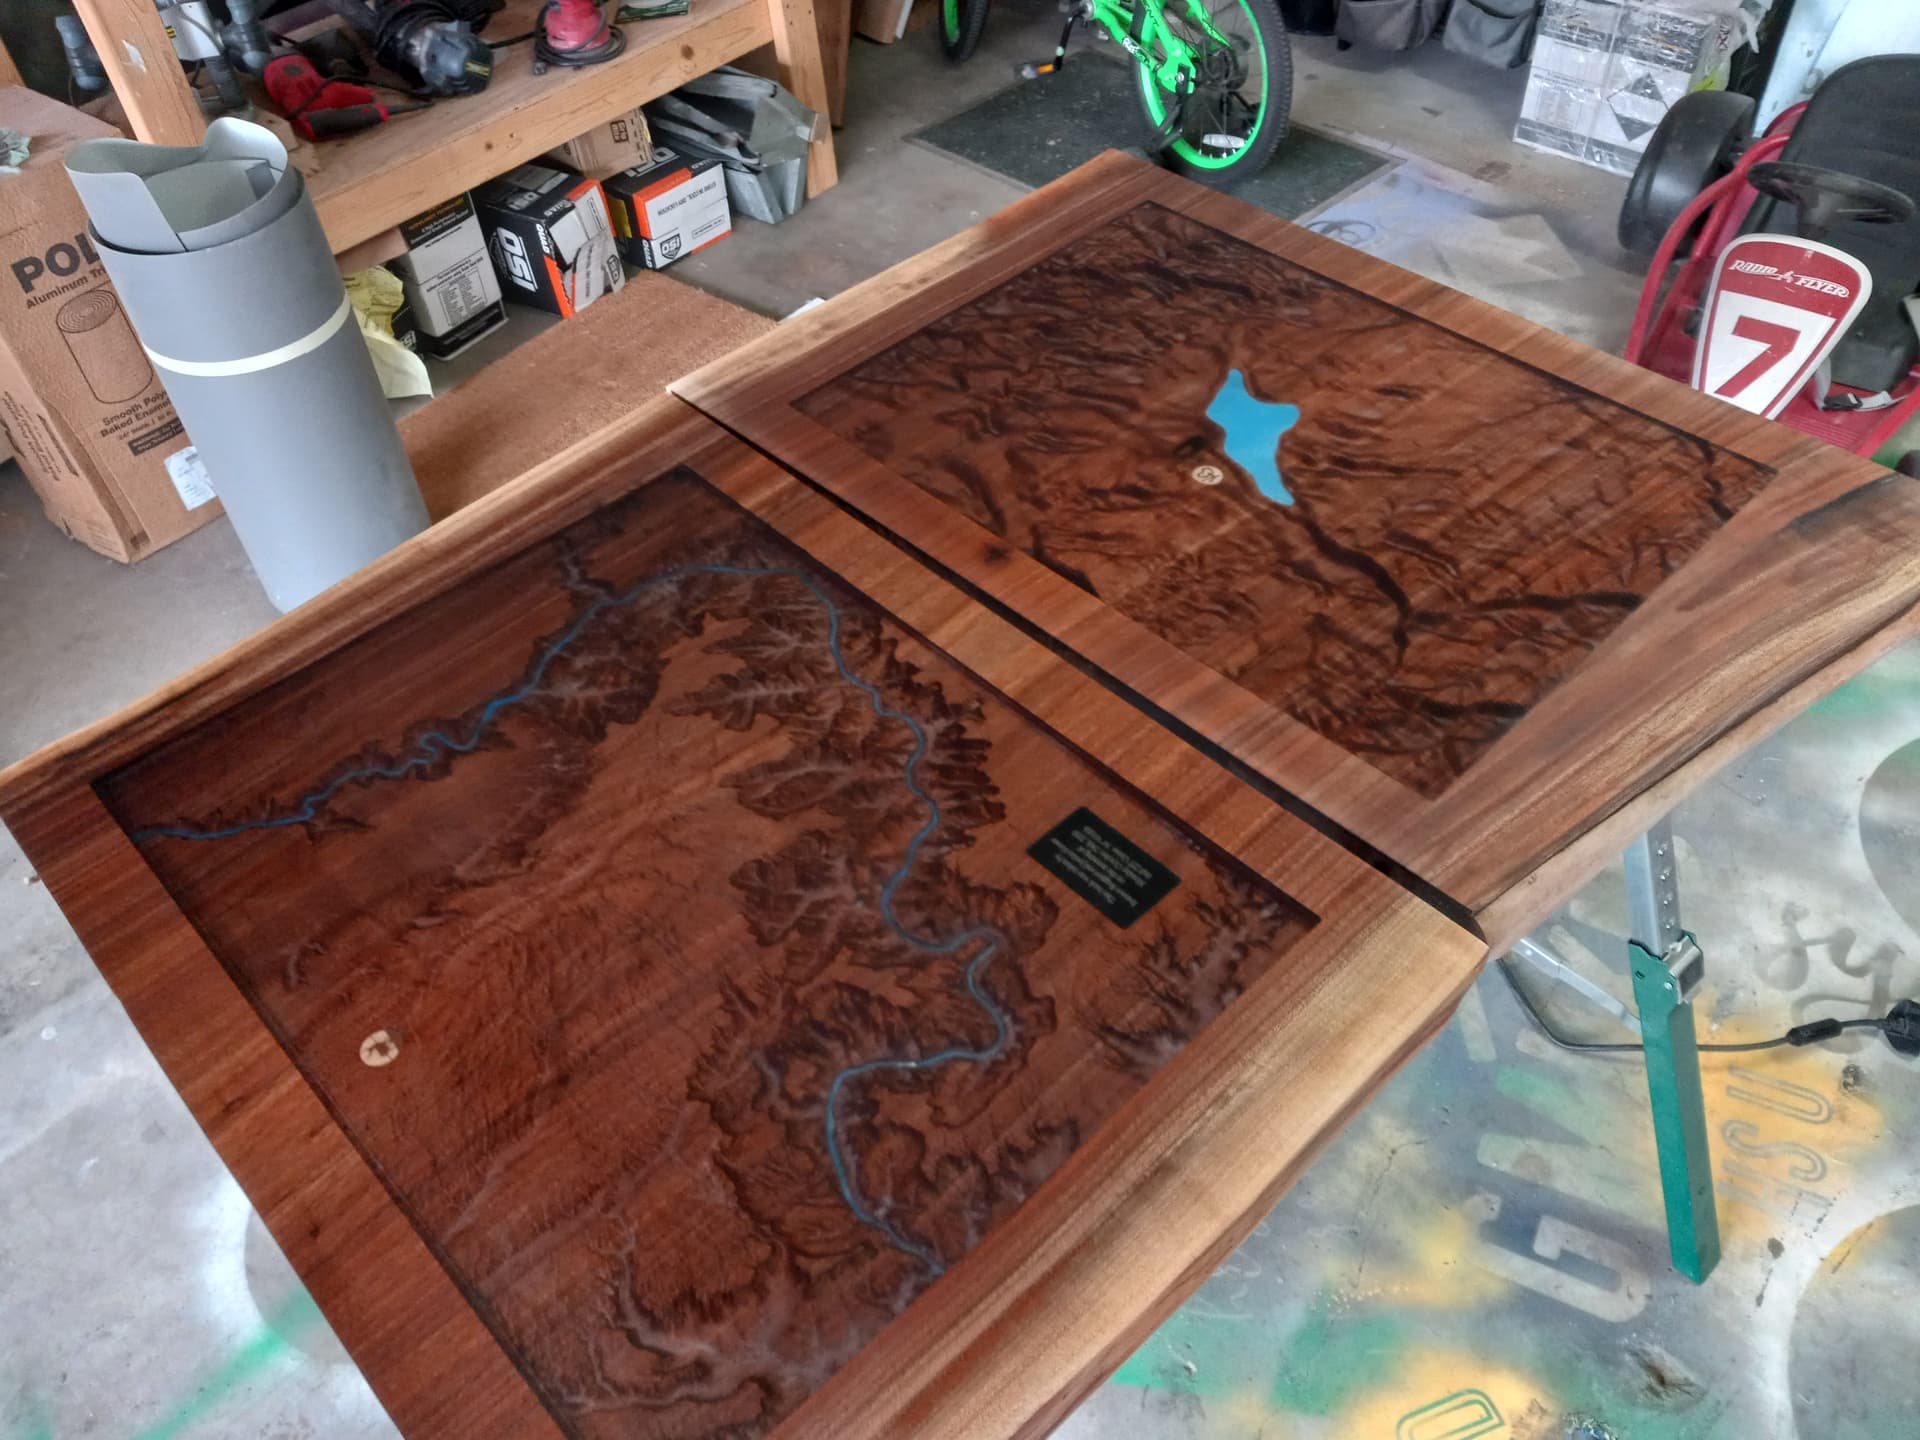
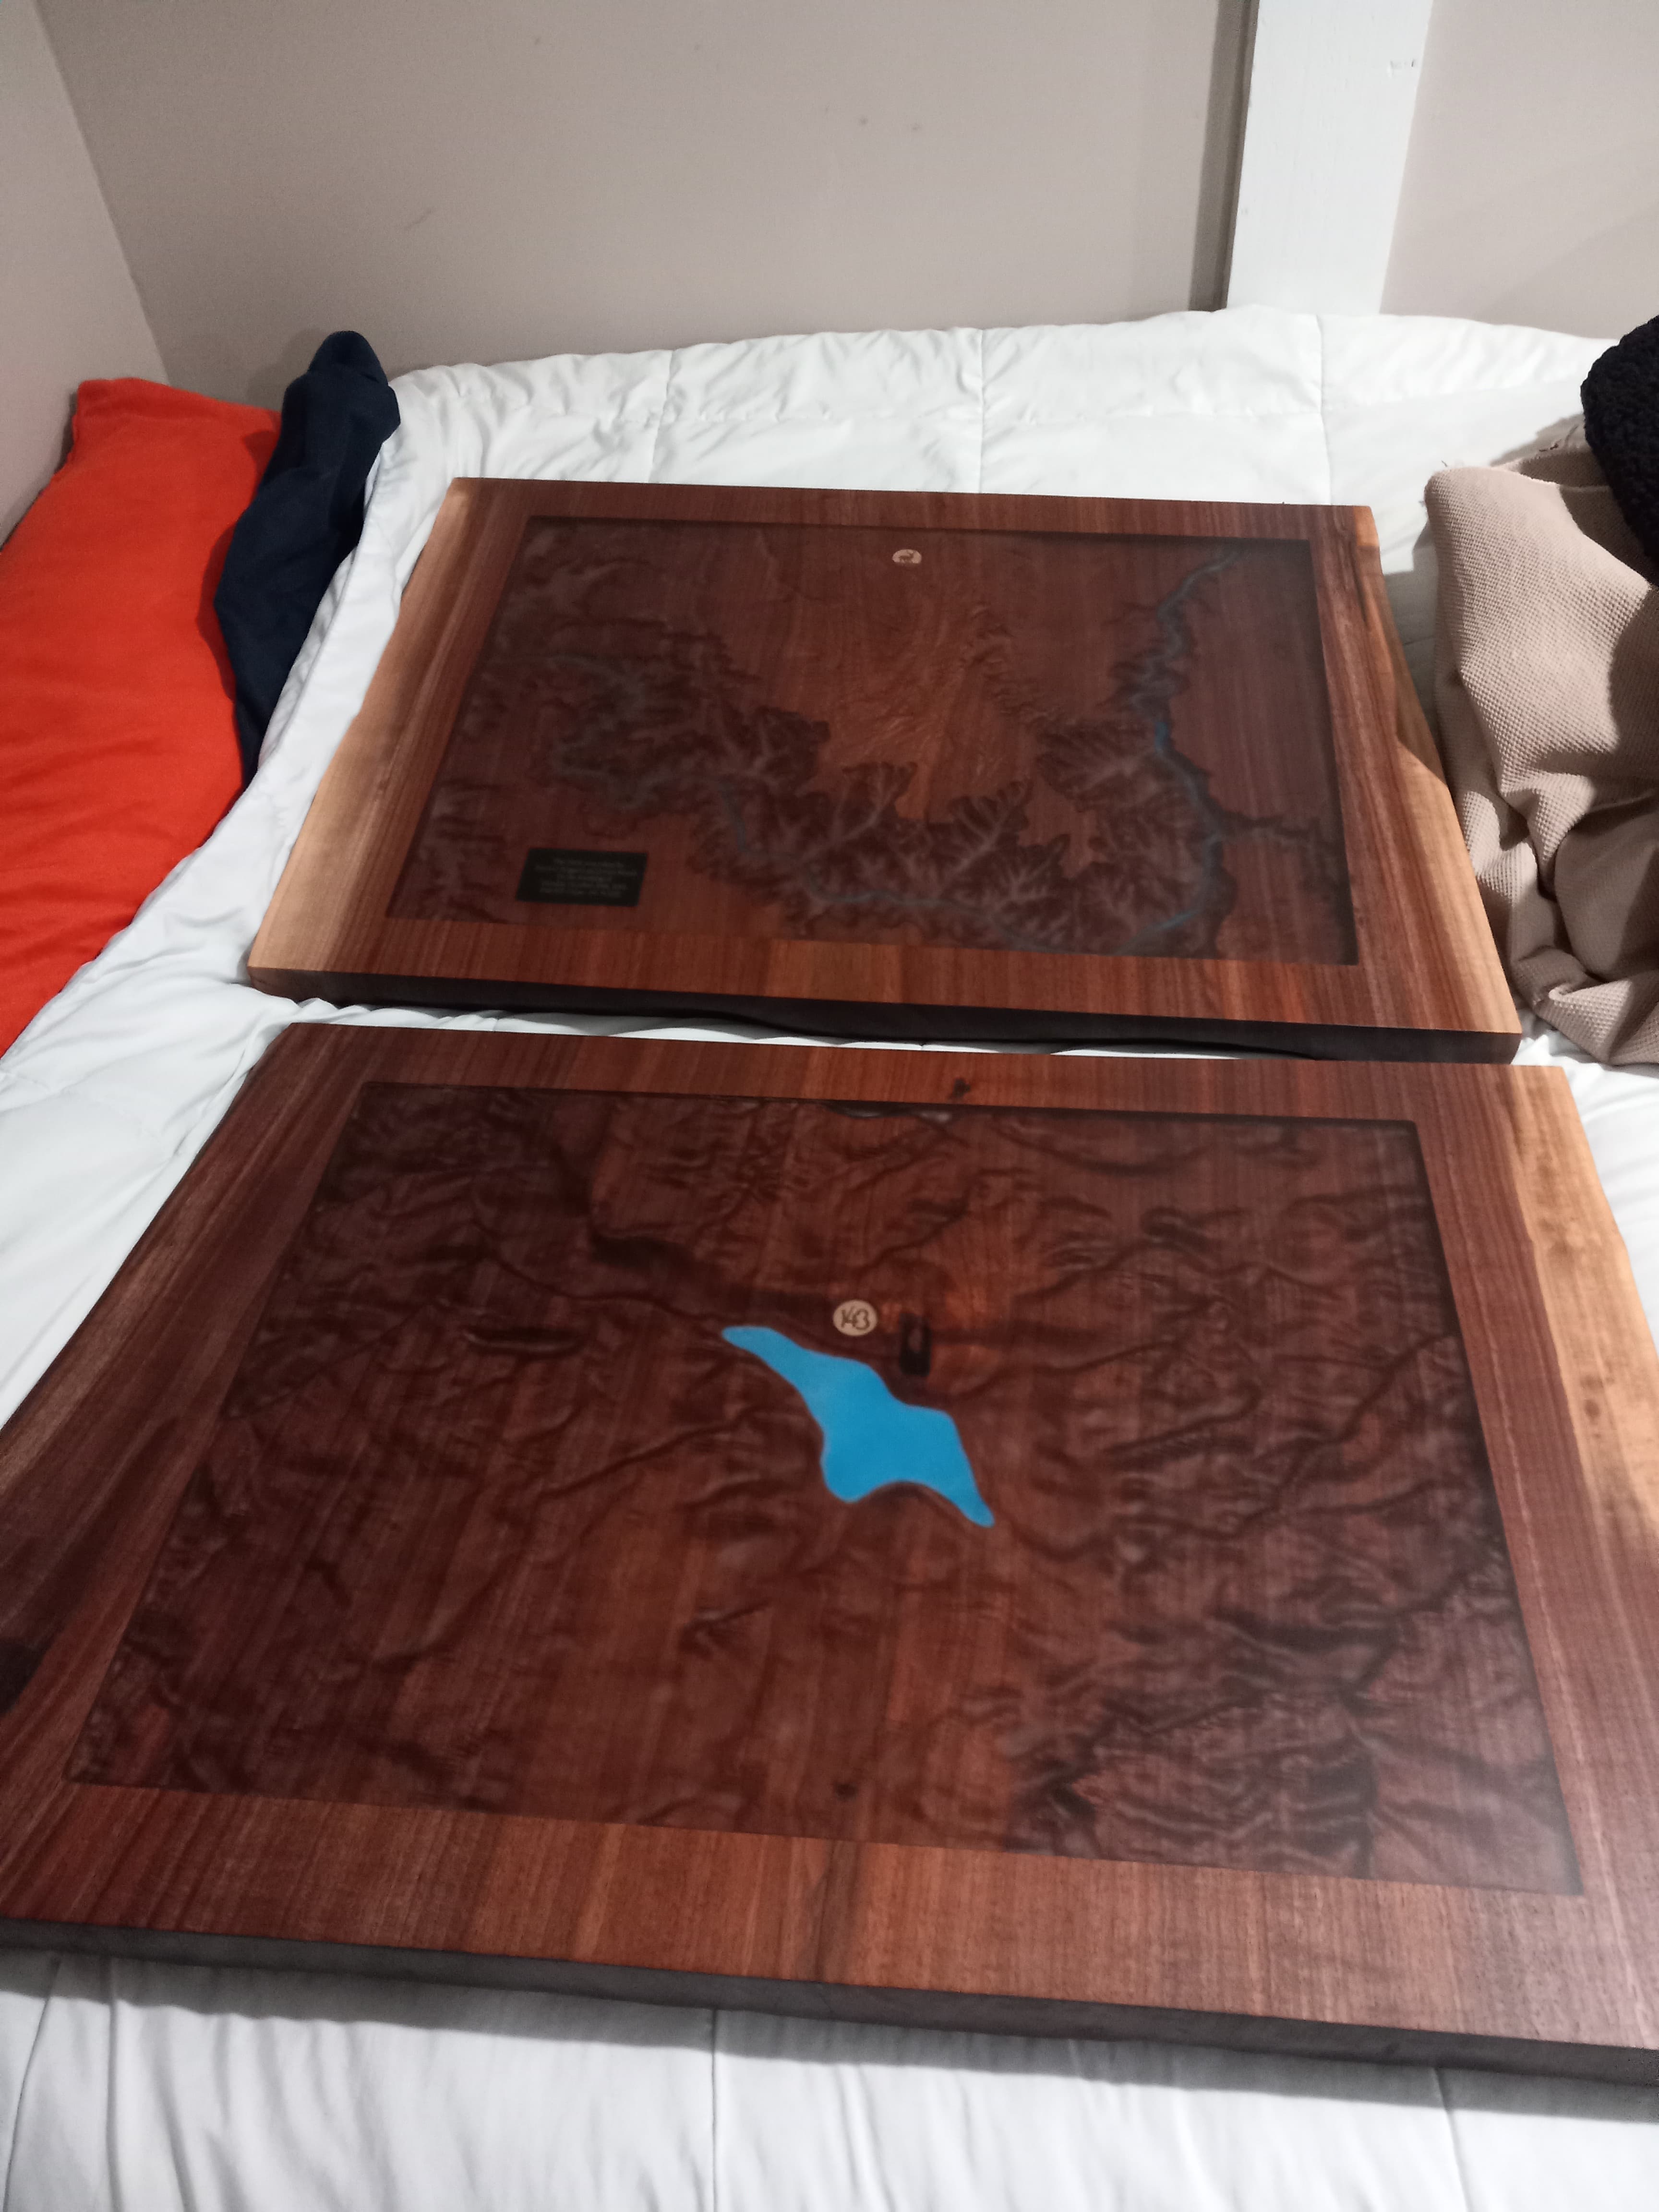
Got the fiber pressed into the canyon, and blue epoxy in with a syringe. It worked and had a cool effect, for about half the river. But the bends in the river are just too much for side glow fiber. I am sure there were other ways and means of lighting, but not on this timeline. We agreed to move on with it. The lake went much better.

After cure time, got a seal coat of epoxy on the canyon and eventually got her poured in deep pour, which is where we are on that one as of today. Going to be curing for several days before I get to surfacing her down.

7 Likes

During cure times I worked on machining the Lake topo in the other slab. Kind of the same process, except this time I was better armed with some lessons learned. Got a great tip from Tod1d which came from Will some point earlier about visualizing depth of topo features during carving. Link to that thread below. I think that is extremely helpful! So thanks guys!

[3D model help please

This topo I had to use a different site for the topo… Really awesome site I found somewhere on here. Here it is again for those who haven’t seen it!

https://touchterrain.geol.iastate.edu/

One of the other struggles I learned from was in long machining times associated. The Canyon was nearly 25 hours (almost 40 total) of nearly continuous machine time. Lots of pausing and doing other things around the shop. Not great on my steppers. Had another thread on here where I learned about the toolpath tiling feature, and also realized I was out of date on my version of Carbide Create.

Deep topo map question - CNC Machines / Shapeoko - Carbide 3D Community Site

Even though I didn’t use tiling, I did figure out I can use geometry and do roughing (and probably could have done finishing) in smaller blocks where I could actually shut the machine down. That was extremely helpful, and the way the machine and software seamlessly blended the roughing across those blocks was impressive. Again, Thank you Will for that assistance.

One thing I am totally unhappy with and learned from was that in order to bring this small little mountain lake to a size where it showed up, I had to zoom way in. And the difference in scale between 50 plus miles of topo in the canyon and what is probably less than 2 miles for the lake, it was just a different look. Customer loves it, so works for me. Scale is an issue. If making matching pieces, I highly recommend you keep the scale of the topography as close to the same as possible.

Lighting the lake was different than the canyon of course. I ended up using a trick I got somewhere here a long time ago. Put a piece of trace paper on the flat spot created by the lake on the actual slab while it was on the machine, retaining the original zero. Once traced, I put two marks on the paper exactly 1 inch apart. Scanned it, brought it over to carbide create, and scaled using the 1 inch marks to size the lake outline. Rotated and placed it in the original cut file, based on that X/Y zero, and then set a new Z to the height of that flat spot. Ran air once to make sure it was going to cut right where I wanted, and then recessed the lake for epoxy. Inside of that, I offset and cut a deeper recess for a piece of plexiglass which I sanded to help diffuse light, and then a deeper still pocket to hold the fiber. Cut the plexiglass using the same outline, offset inside by .008 so it would fit. Got the lights in, plexiglass in and covered in epoxy. Didn’t get much for pictures during that process. Also embedded a small laser engraved puck in maple marking the exact location he proposed to her. Had to flip it over, and also get a recess machined for the light source, etc. It oriented 90 degrees the other direction from the canyon, to avoid deep topography features. Easy enough to accomplish in CC. Again, zero was the penetration.

After a seal coat of epoxy, I got this one poured in deep pour yesterday, and that is where we currently sit.

2 Likes

This image of overlapping geometry to contain smaller portions of topography to keep machine times reasonable, is the absolute best simple thing I missed in all previous projects I have completed.

I know it is silly and probably common sense… but man, that really helped. Another one that has helped, or will help coming up, is the toolpaths for the final surfacing job. Previously I had always used a simple pocketing operation to surface. However on this, I wanted to avoid the direction change on top of the epoxy as happens in a typical pocketing operation in CC. Learned from Fenrus that the engraving toolpaths allow for the simple creation of a machining strategy that keeps the direction change of the surfacing bit off of the workpiece. Simple and great solution for something like this where the pieces are larger (these are roughly 36" X 23" X 2.5".

Epoxy surfacing toolpath - Carbide 3D Community Site

More to follow. Really on hold until I get the epoxy cured. I am sure I missed about half of this actual process, and tons more problems that I will surely bring up later on in the thread. This was a Fire, Ready, Aim project from the start. Sometimes that’s the best way to learn I guess. Any questions, let me know. Hopefully I can help someone else as much as all the other aforementioned posters here have helped me.

7 Likes

Got the tape pulled (zip tape is wonderful for epoxy) while it was still elastic enough to do so, but before it got totally cured. Turned out fine, now just gicing it a bit to fully cure. I made the mistake of surfacing down a patch in the lake slab maybe a day early, and without getting every bit of that rubberized tape off. Immediately gummed up my surfacing bit. I tried cleaning it off, but hasn’t been the same since. So another few days to go.

Finish will be Rubio Monocoat Pure. I certainly hope it works well. Looks easy enough to apply and seems to be a better solution than a sprayed poly finish. Ive got a lot of surfacing, sanding and prep to do first.

3 Likes

I love this! Really inspiring work!

1 Like

Thank you. Its been a really fun project. It is definitely not without its flaws. But is coming together. The way these machines can catch so much detail is still amazing to me.

If there are flaws, you hid them well. I think your client will be pleased with the result.

When I originally setup my machine, I ran a second flat waste board on the original and made it bigger than the cut area to the rear of the machine. Then ran another waste board on top of that in strips and rails. Because the original thickness of this slab needed every mm of Z height, i had to remove the second layer which I had been surfacing and using. Now the layer underneath which unfortunately exceeds the cutting area to the rear of the machine will not work. I need passthrough because the slabs exceed the max Y travel distance… Surfacing will not work. It would leave an edge at the back. My solution was to just put some runners and surface them down.

Got to test the engrave toolpath while doing it, i essentially used the exact toolpath ill use to surface these in a few days to bring the slats flat. When i bought and setup the machine, I had zero clue what i was doing, and essentially bought it to be a circle cutter for my wife’s Etsy shop. Passthrough just wasn’t on my mind. When this is done, I am going to rework my entire enclosure and setup. This should suffice for now.

2 Likes

Got the Grand Canyon surfaced today. Using the engrave toolpath, 4 passes, took about 45 minutes. I worked it down .008 at a time, moving extremely fast across the epoxy using a 1" Whiteside. With the very minimal clearance above the topography features, and no do overs if I go too deep, i took my time and worked my way down slowly. This is it,sanded 80, 120 and water popped.

Did run in to what I think may be a bug in my CC build. I had played with toolpath tiling in my known good surfacing toolpath. Turned off the tiling and reworked everything back to how i had it. But when i ran the file, the machine started to the far north east side of the project, rather than the southeast. No big issue, as soon as it took off i knew something was up and stopped it. Went back and verified everything, resaved it, and ran it again. Did the same thing. So created a new file quick, exactly the same, and it ran as expected. Seems turning on tiling and turning it off has some effect to future ops. I didnt dig too much. Could have been me being me too. Will look later on.

3 Likes

So taking a look at the attached file, it looks as if it is indeed some weird glitch in the matrix. When this file is run on my machine, it takes off to the extreme northeast of the cut, and begins there, and proceeds north. I duplicated it exactly in another file, and it goes straight to the east and works its way north from there. Something about selecting, playing with, and then de-selecting tiling must have been what it was. I had considered using tiling on the surface because it does exceed my cutting area, decided to just do it manually since it is only an inch or 3.

I just noticed uploading it, that it is on 6kb, where as the file that worked correctly is 44Kb in size. The corrupt file was also originally 44Kb. Strange. Certainly not an issue, but an important reminder to always pay attention to your machine, especially when starting a job.

Edit to add, I could not replicate this in a new file. Who knows?

Surface Final.c2d (6.3 KB)

Getting near the end of the thread here… today i got the other slab surfaced down. I did end up removing quite a bit of material, quite a bit more than i had thought. This slab came from the center of the tree and contained the core in the upper half. I believe removing as much material as i did, the slab started to cup around the core. I believe its stabilized now, and with epoxy poured solid and hard, movement from here should be minimized.

That is something to keep in mind when doimg topos, you will have some wood movement after carving due to internal stress in the wood being relieved. I have experienced it with nearly every one of these ive done.

Also got sanded down on the other slab, fixed a few pits wuth CA glue and a first coat of Rubio on. Its a little dull, but i was told to expect that with the first coat. Ill get a second coat a good buff in and i think itll shine up really nice. Color is amazing.

Something i’d really like to note, now that I am done with the shapeoko portion of this build…

I bought this machine less than 3 months before the Shapeoko 4 was announced/released. And we all know how quickly things progressed after that. I have a dinosaur now. Reading the forums, seeing everyones new shiny machines, its easy to be like, i should have waited, just a little. But rest assured, if you have a dinosaur like I, these machines are still quite capable. I put around 80 hours in on the machine with this build, and all the testing, flattening, roughing, finishing, etc. It never skipped a beat. I had one minor issue with a file going haywire. I also started roughing before realizing i didn’t turn bitsetter on. Of course i stopped, re-initialized and didnt zero again before hitting run. It went to plunge to the center of the earth but fortunately i was watching and caught it.

This machine is still exactly as i put it together out of the box. I’ve barely had to do a thing beyond basic cleaning and maintenance. So thank you guys. Even when i do get another new shiny toy, i’ll hang on to this thing and keep it going.

Machine did its job… all thats left is to figure out the finish!

You can see the lines, but you cannot feel them at all. They sanded right out. Its so satisfying when you get down to the last pass and see the final finish. This was at .015 depth of cut, running 160 IPM with a 1" whiteside, 1/4" stepover.

Next up, final photos. Couple days out now.

3 Likes

This is the pair right before final finish. Needed to do a little buffing on the epoxy to clear it up a bit. Turns out, finishing clear epoxy back to cryatal clear… is time consuming.

3 Likes

It’s raining and lighting in my basemet and shop is horrible. But they look really good in person. Fun project. Theyll get another coat of finish later on. Alot of successes and failures. Some key takeaways:

  • the Shapeoko 3 XXL isn’t the newest model, but quite capable. I have done some long cuts, plenty of topos before… but the machine ran greater than 80 hours on these. No issues.

  • the forums here are a great resource when your stuck, I absolutely got some great advice here that kept these things moving. So thank you all.

  • Carbide Create has come a long way. Clearly alot of capability that i just have not needed or thought to use to date. I have some learning and catching up to do.

  • sideglow fiber optic lighting isn’t great. In a perfectly straight line, the light is consistent. Any bends and curve changes the consistency of the light

  • I should have been more prepared for warpage once all the bulk material was removed. I knew it, somehow thought the thicker walnut would alleviate that. It did not, fortunately it wasn’t too bad.

  • true woodworkers are… well, a different breed. So, for those of you on this forum who are, i tip my hat to you. Working with slabs and surfacing, epoxy, patches, finish out of something other than a rattle can… whatever it is… there is more of an art to it than i even thought. I have a very very long way to go.


5 Likes

This topic was automatically closed 30 days after the last reply. New replies are no longer allowed.