This came up on Facebook: Redirecting...
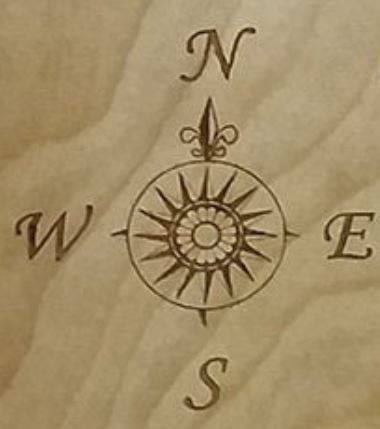
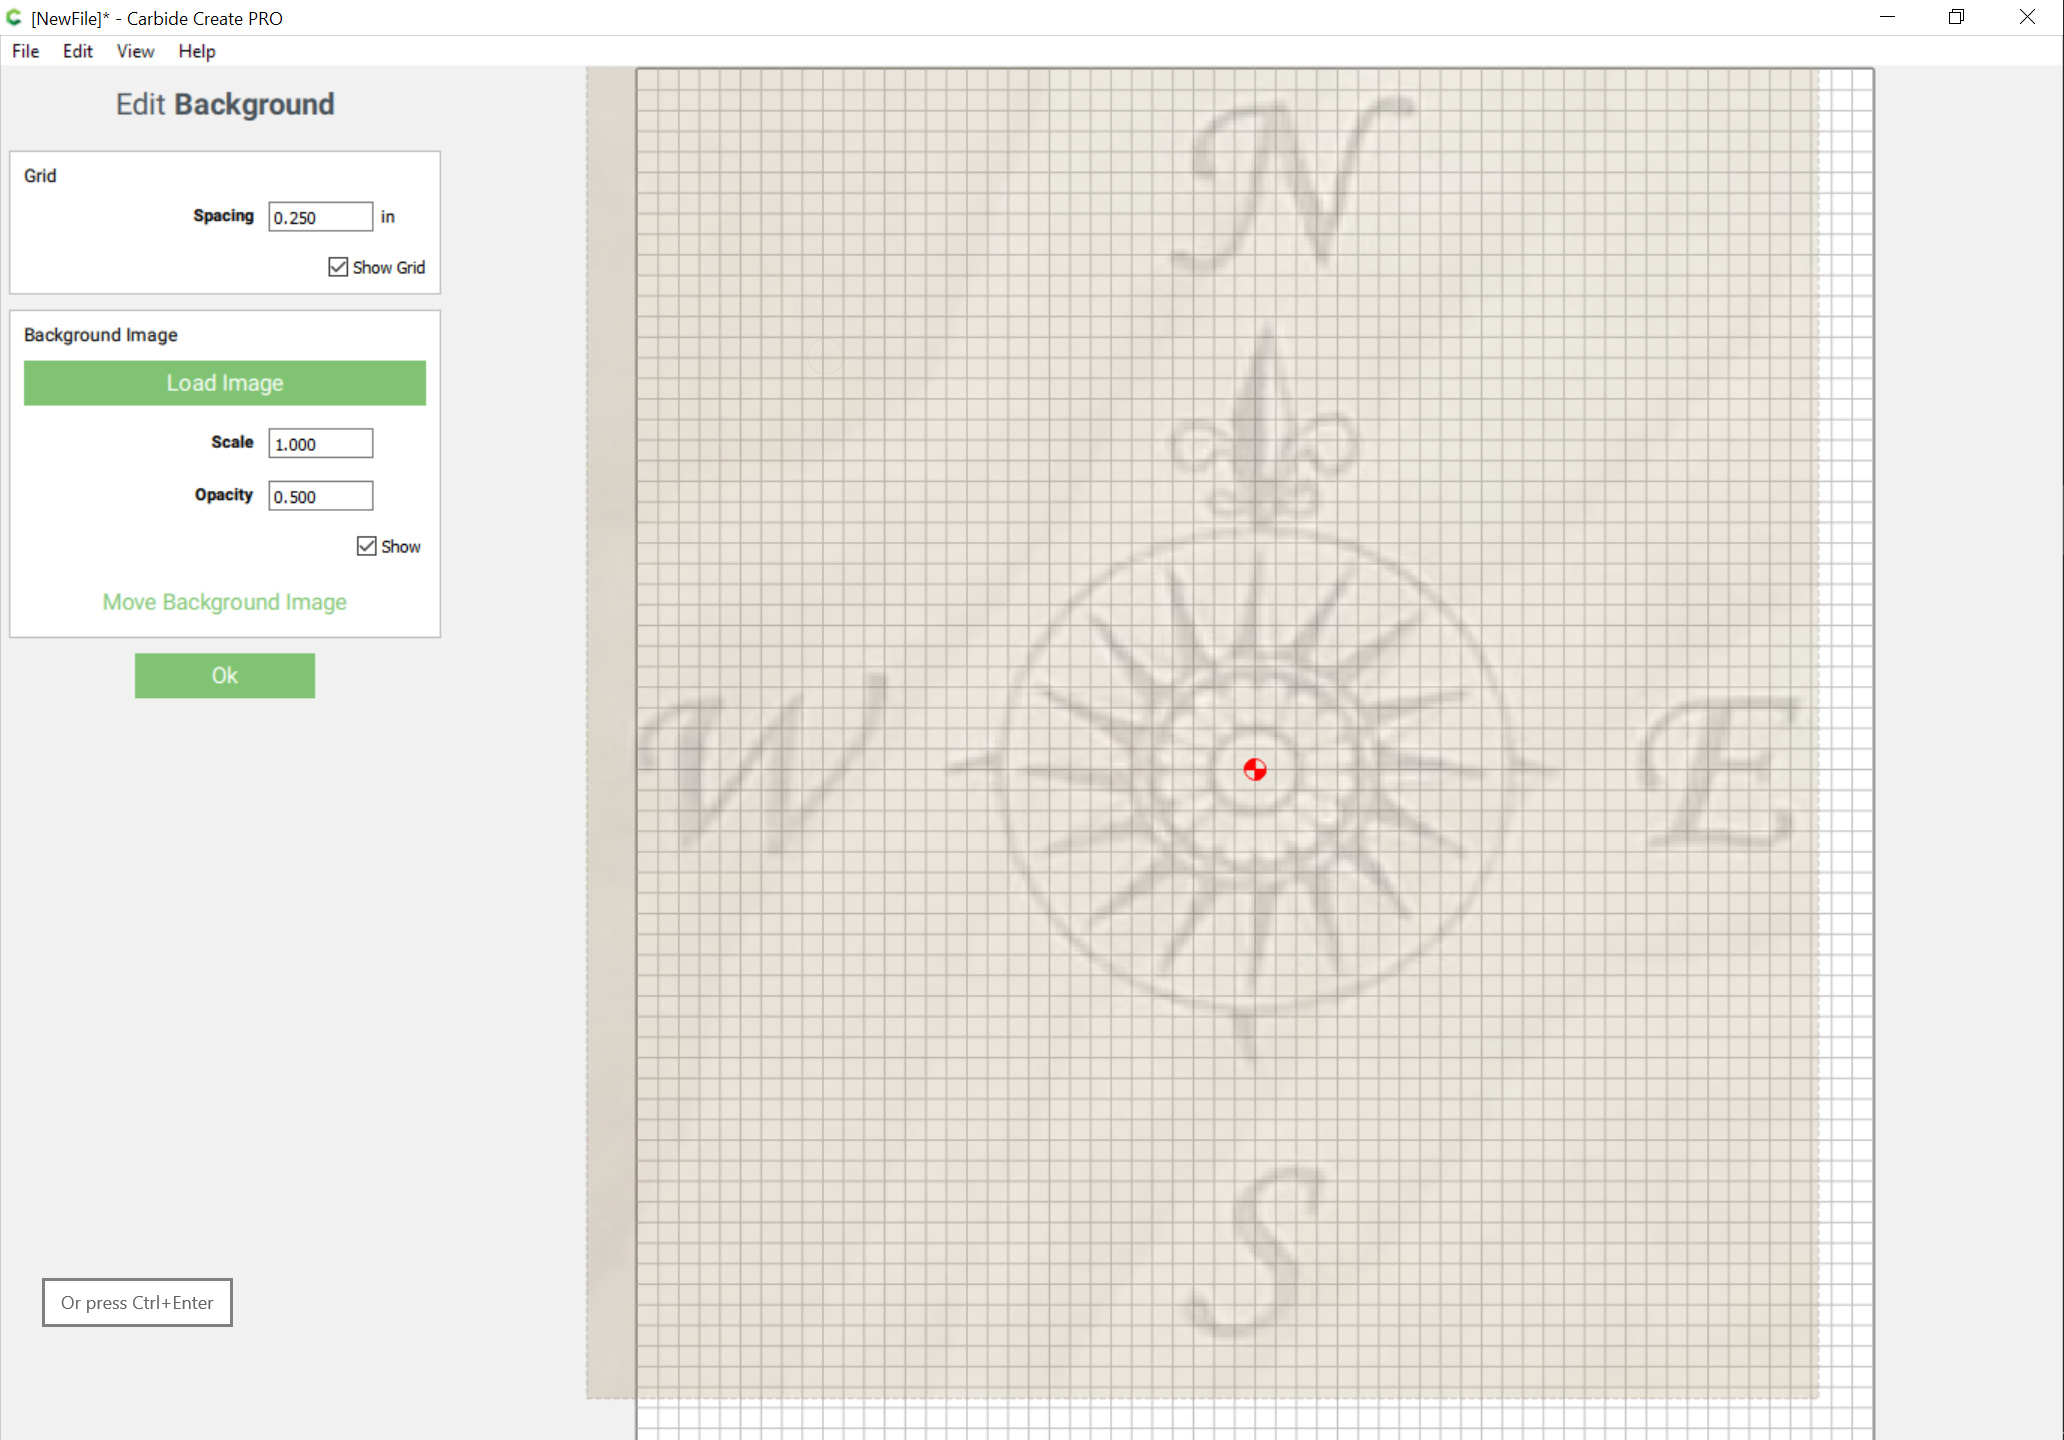
Since it’s symmetrical, it’s pretty straight-forward to draw — start by placing the image on the background
This came up on Facebook: Redirecting...
Since it’s symmetrical, it’s pretty straight-forward to draw — start by placing the image on the background
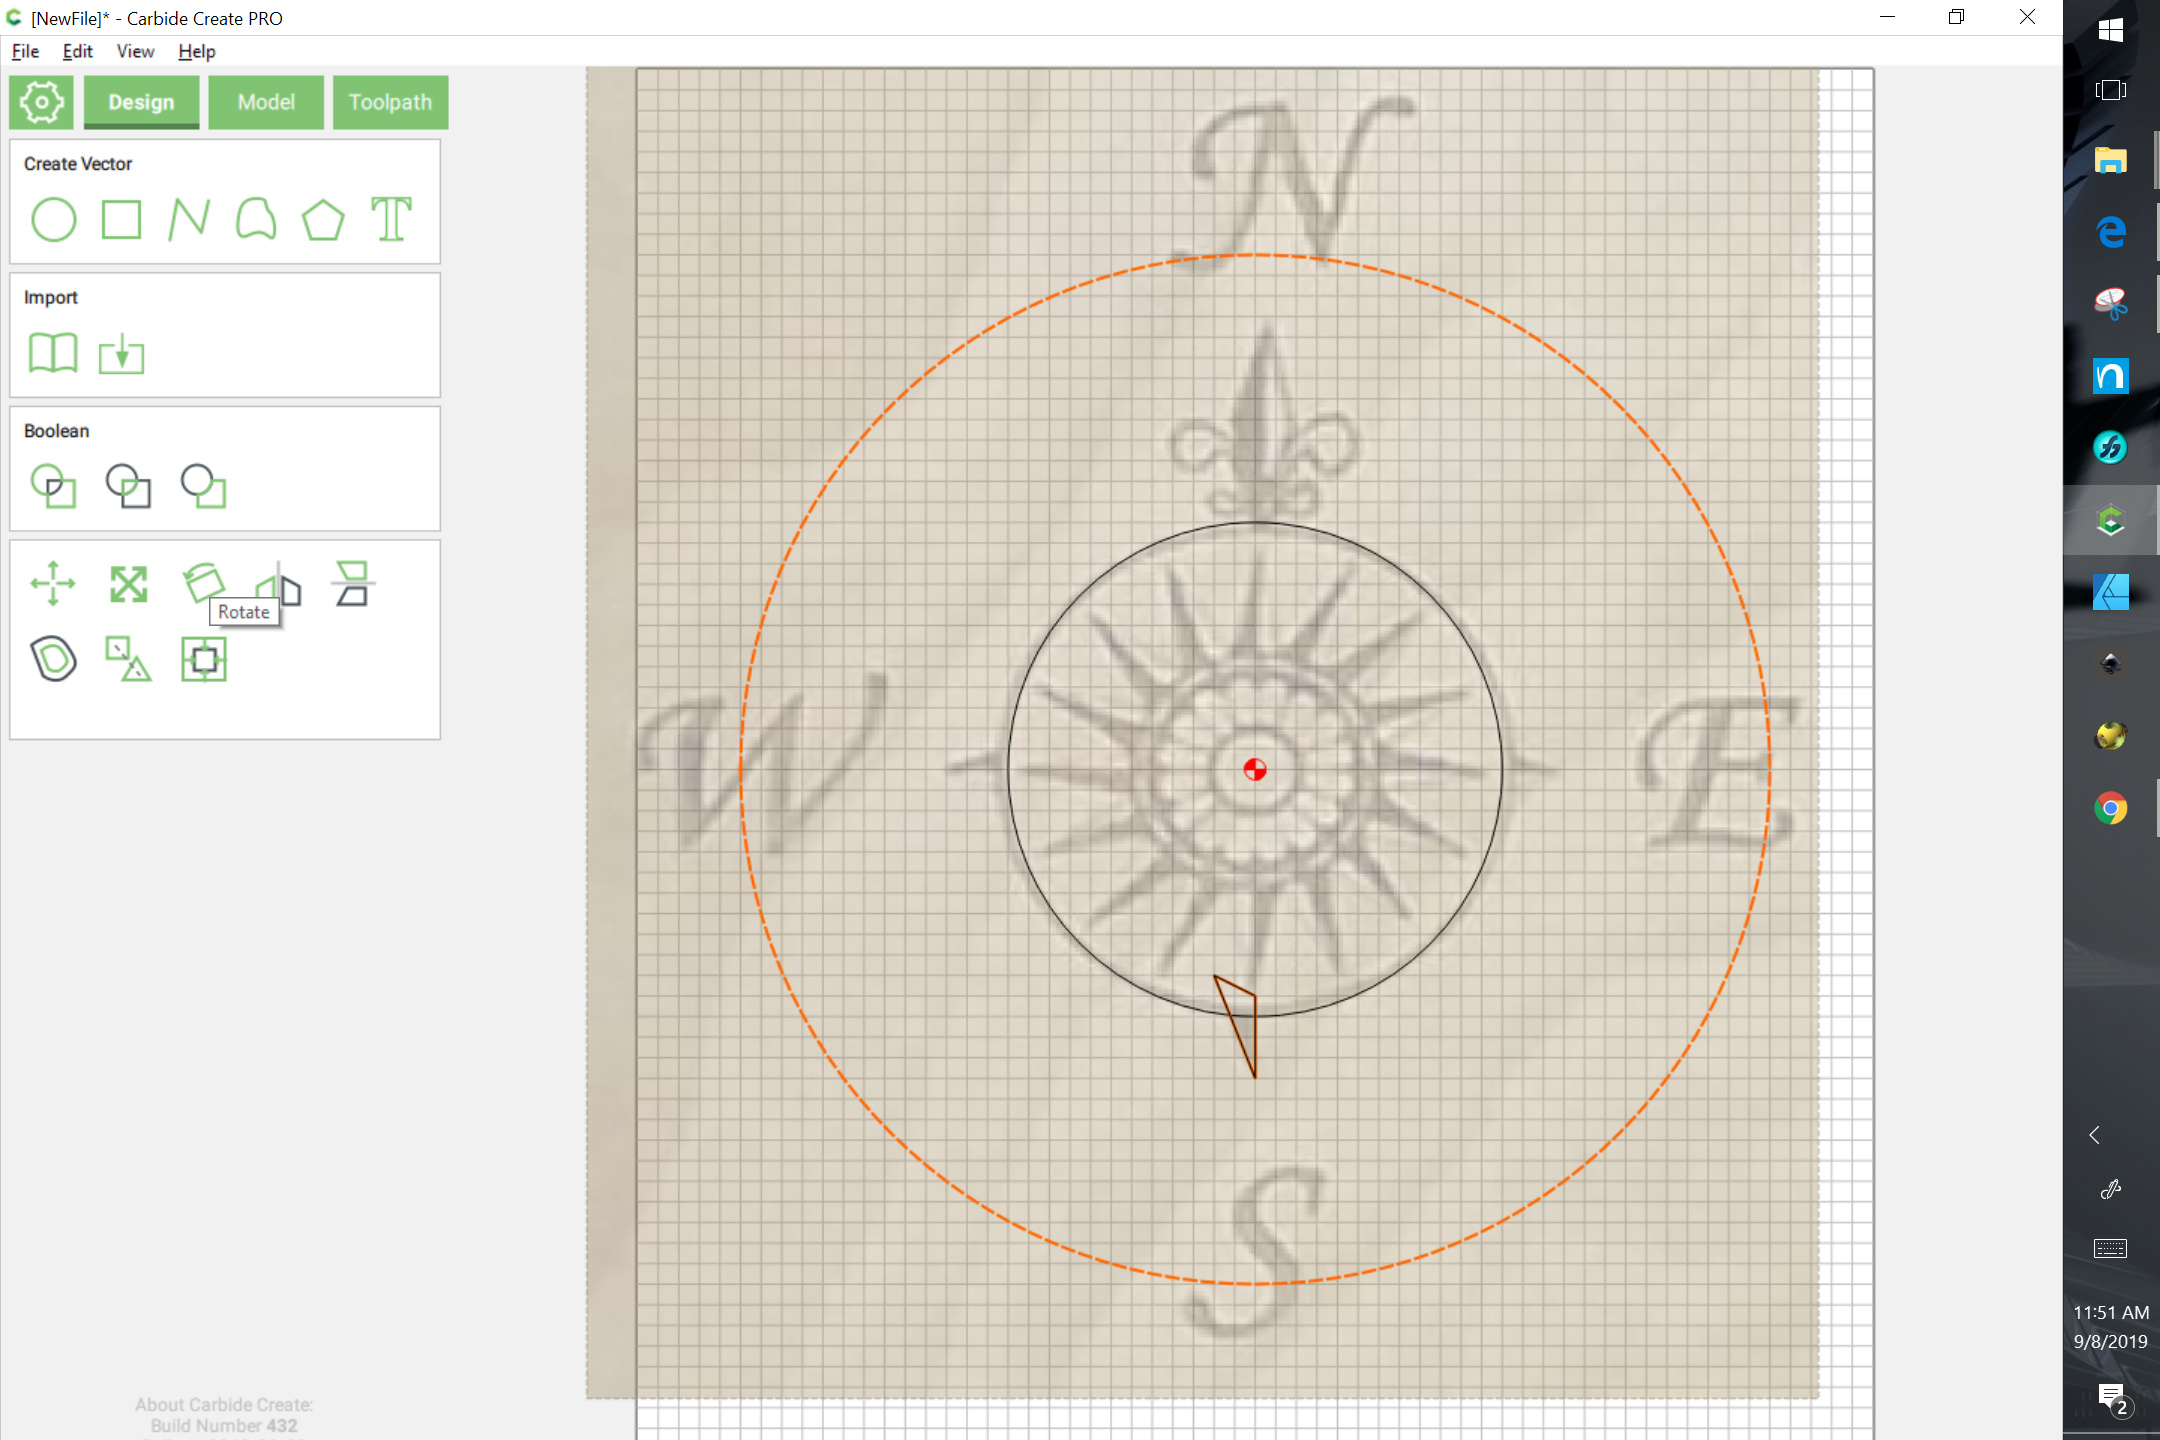
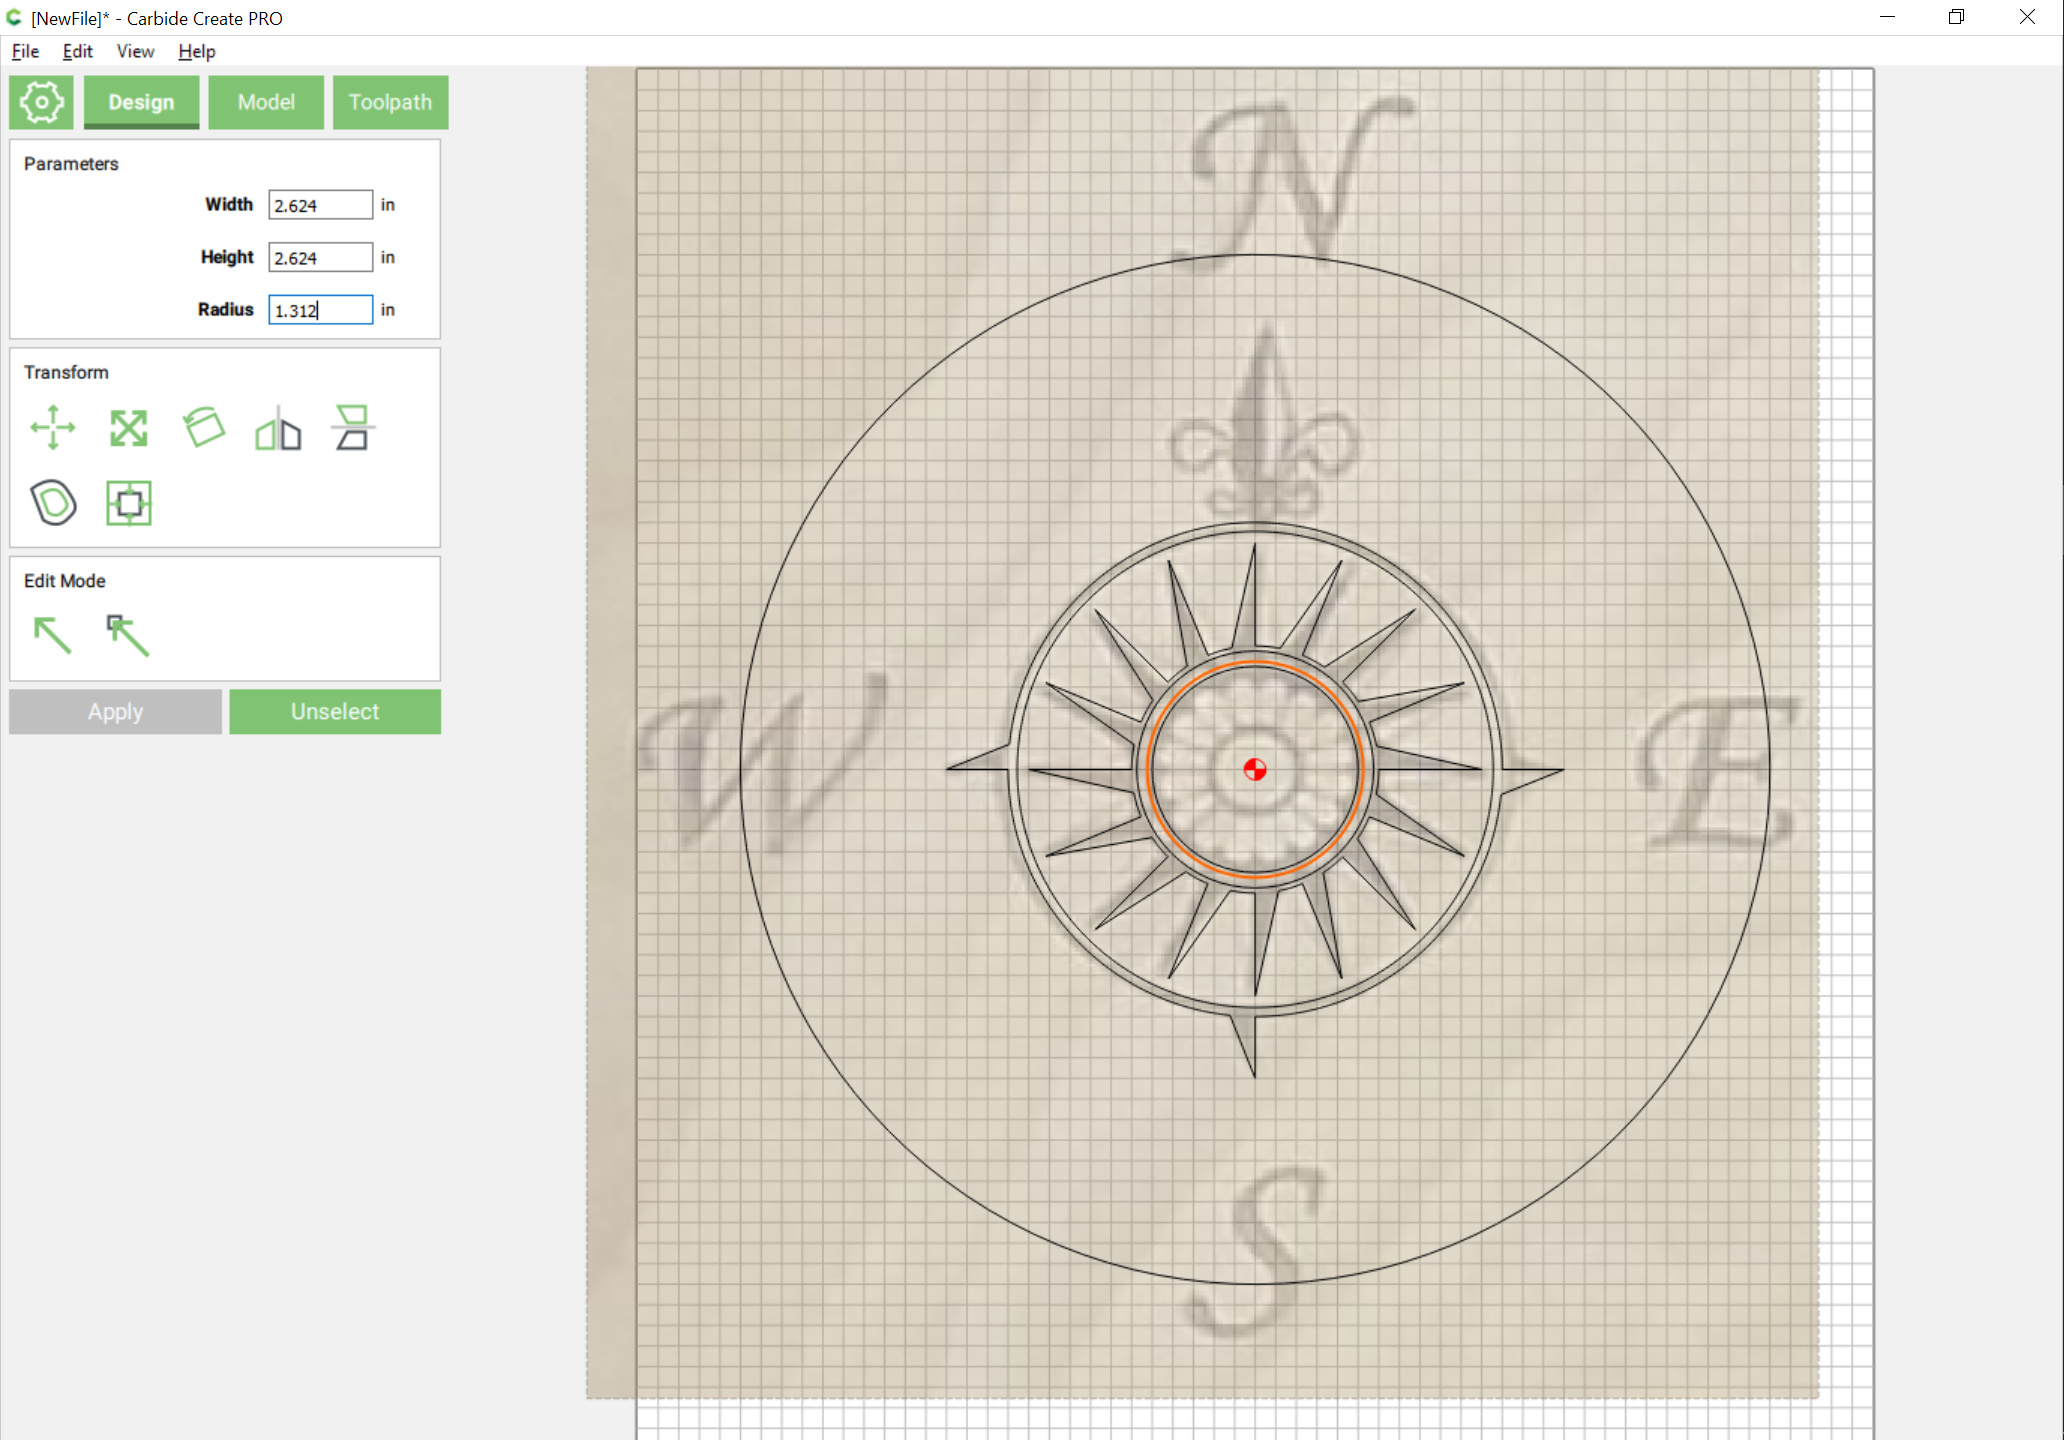
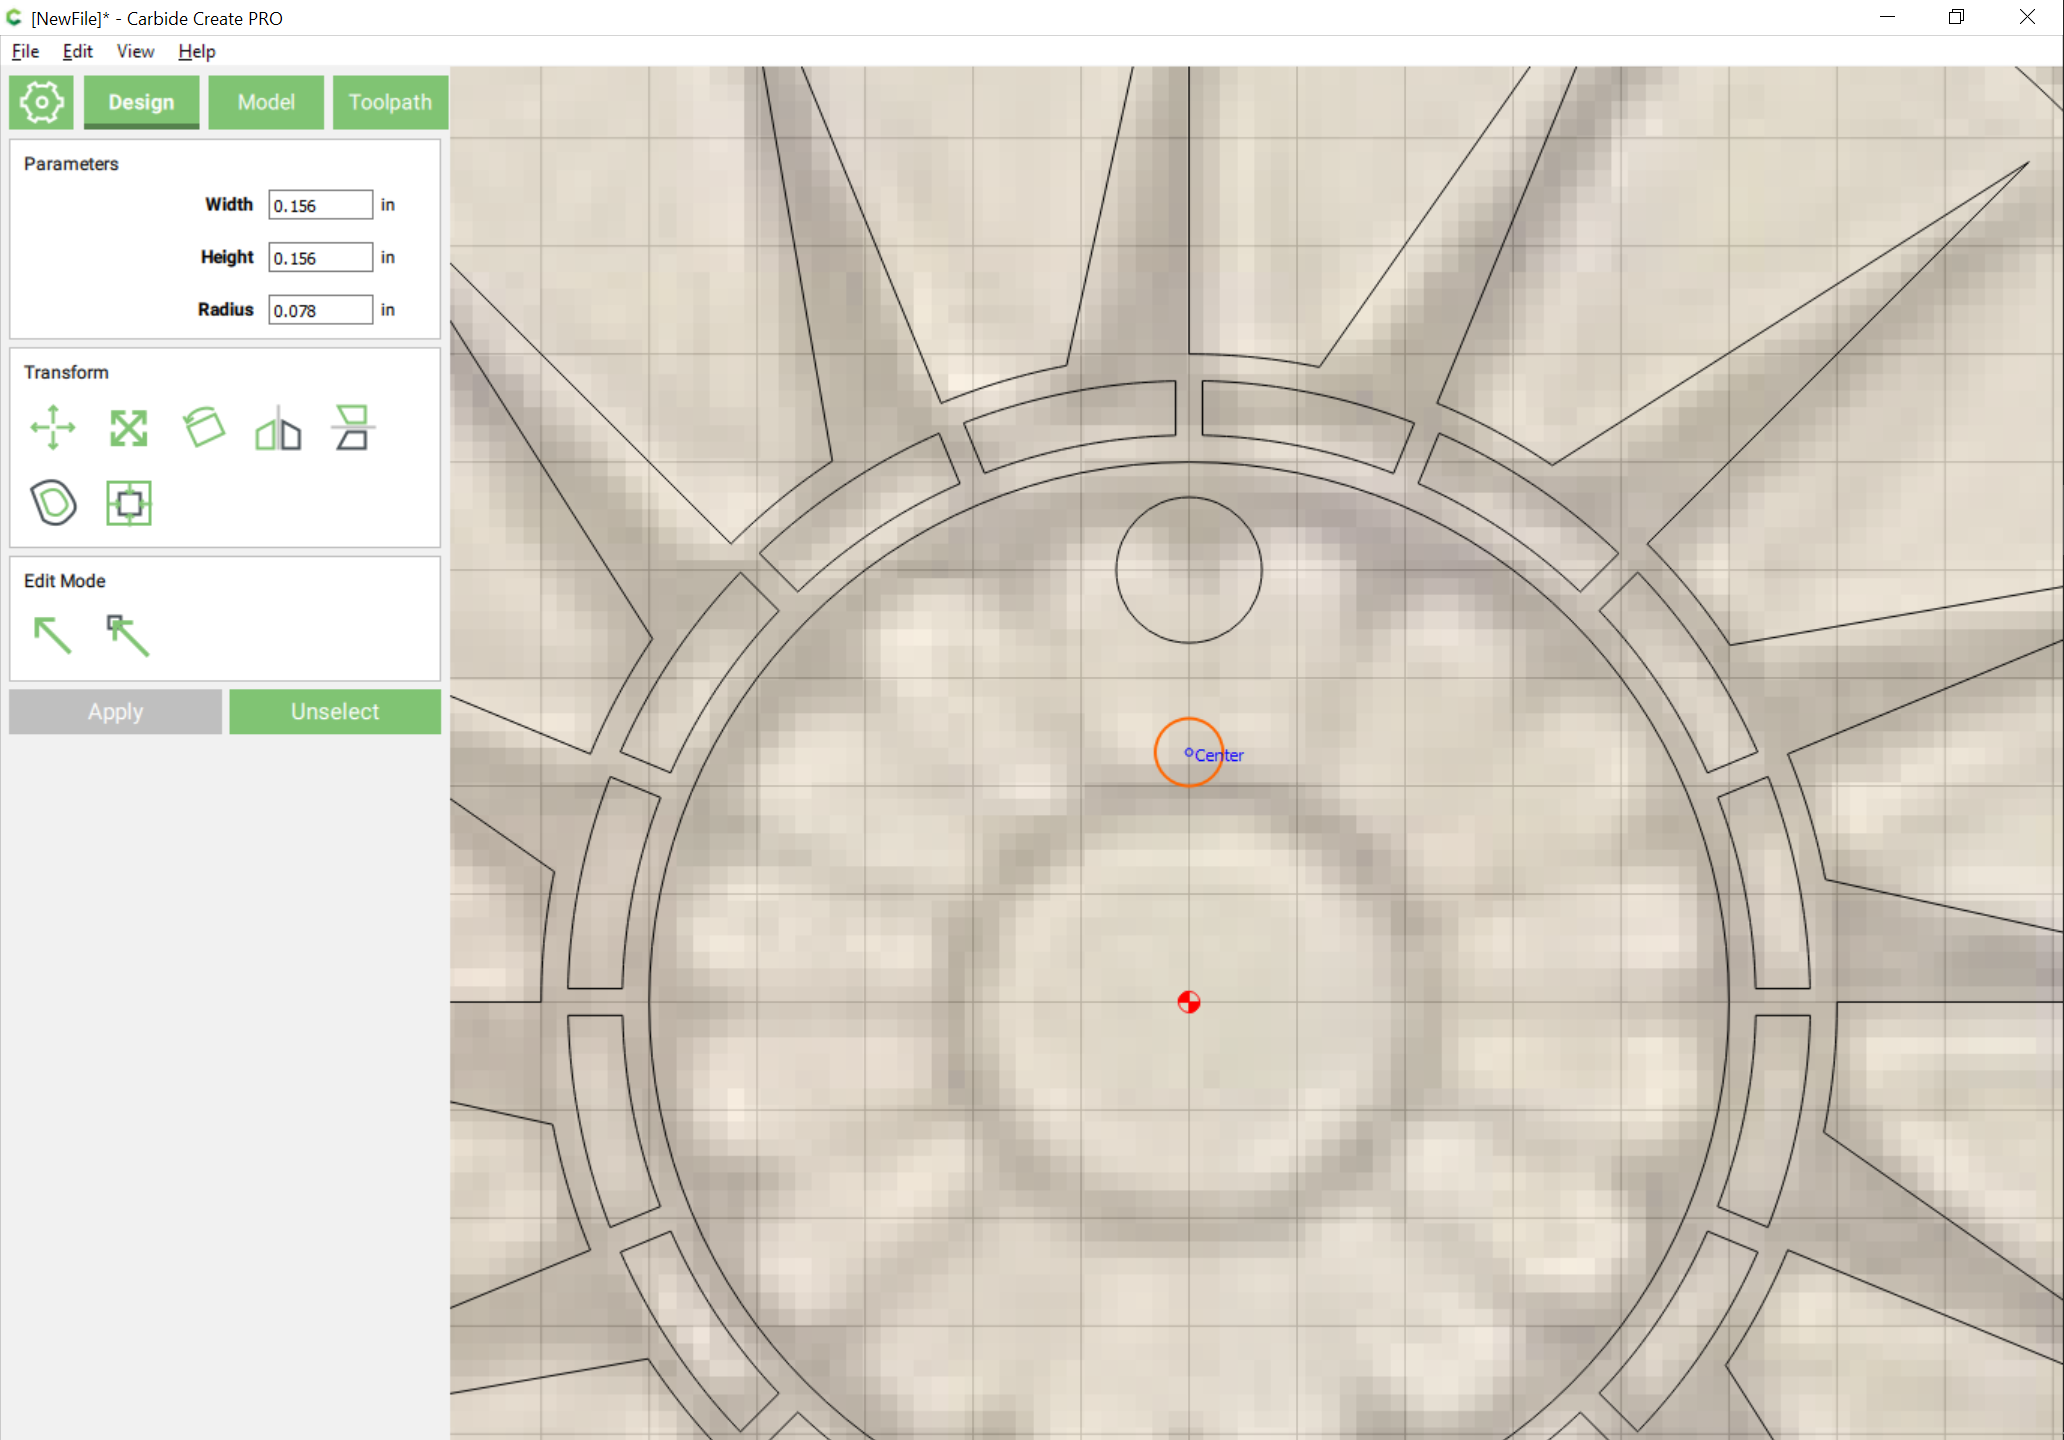
Note that since this is symmetrical and we will be rotating it will be easiest to place the image so that its center corresponds to the center of the stock and set the origin to the center as well:
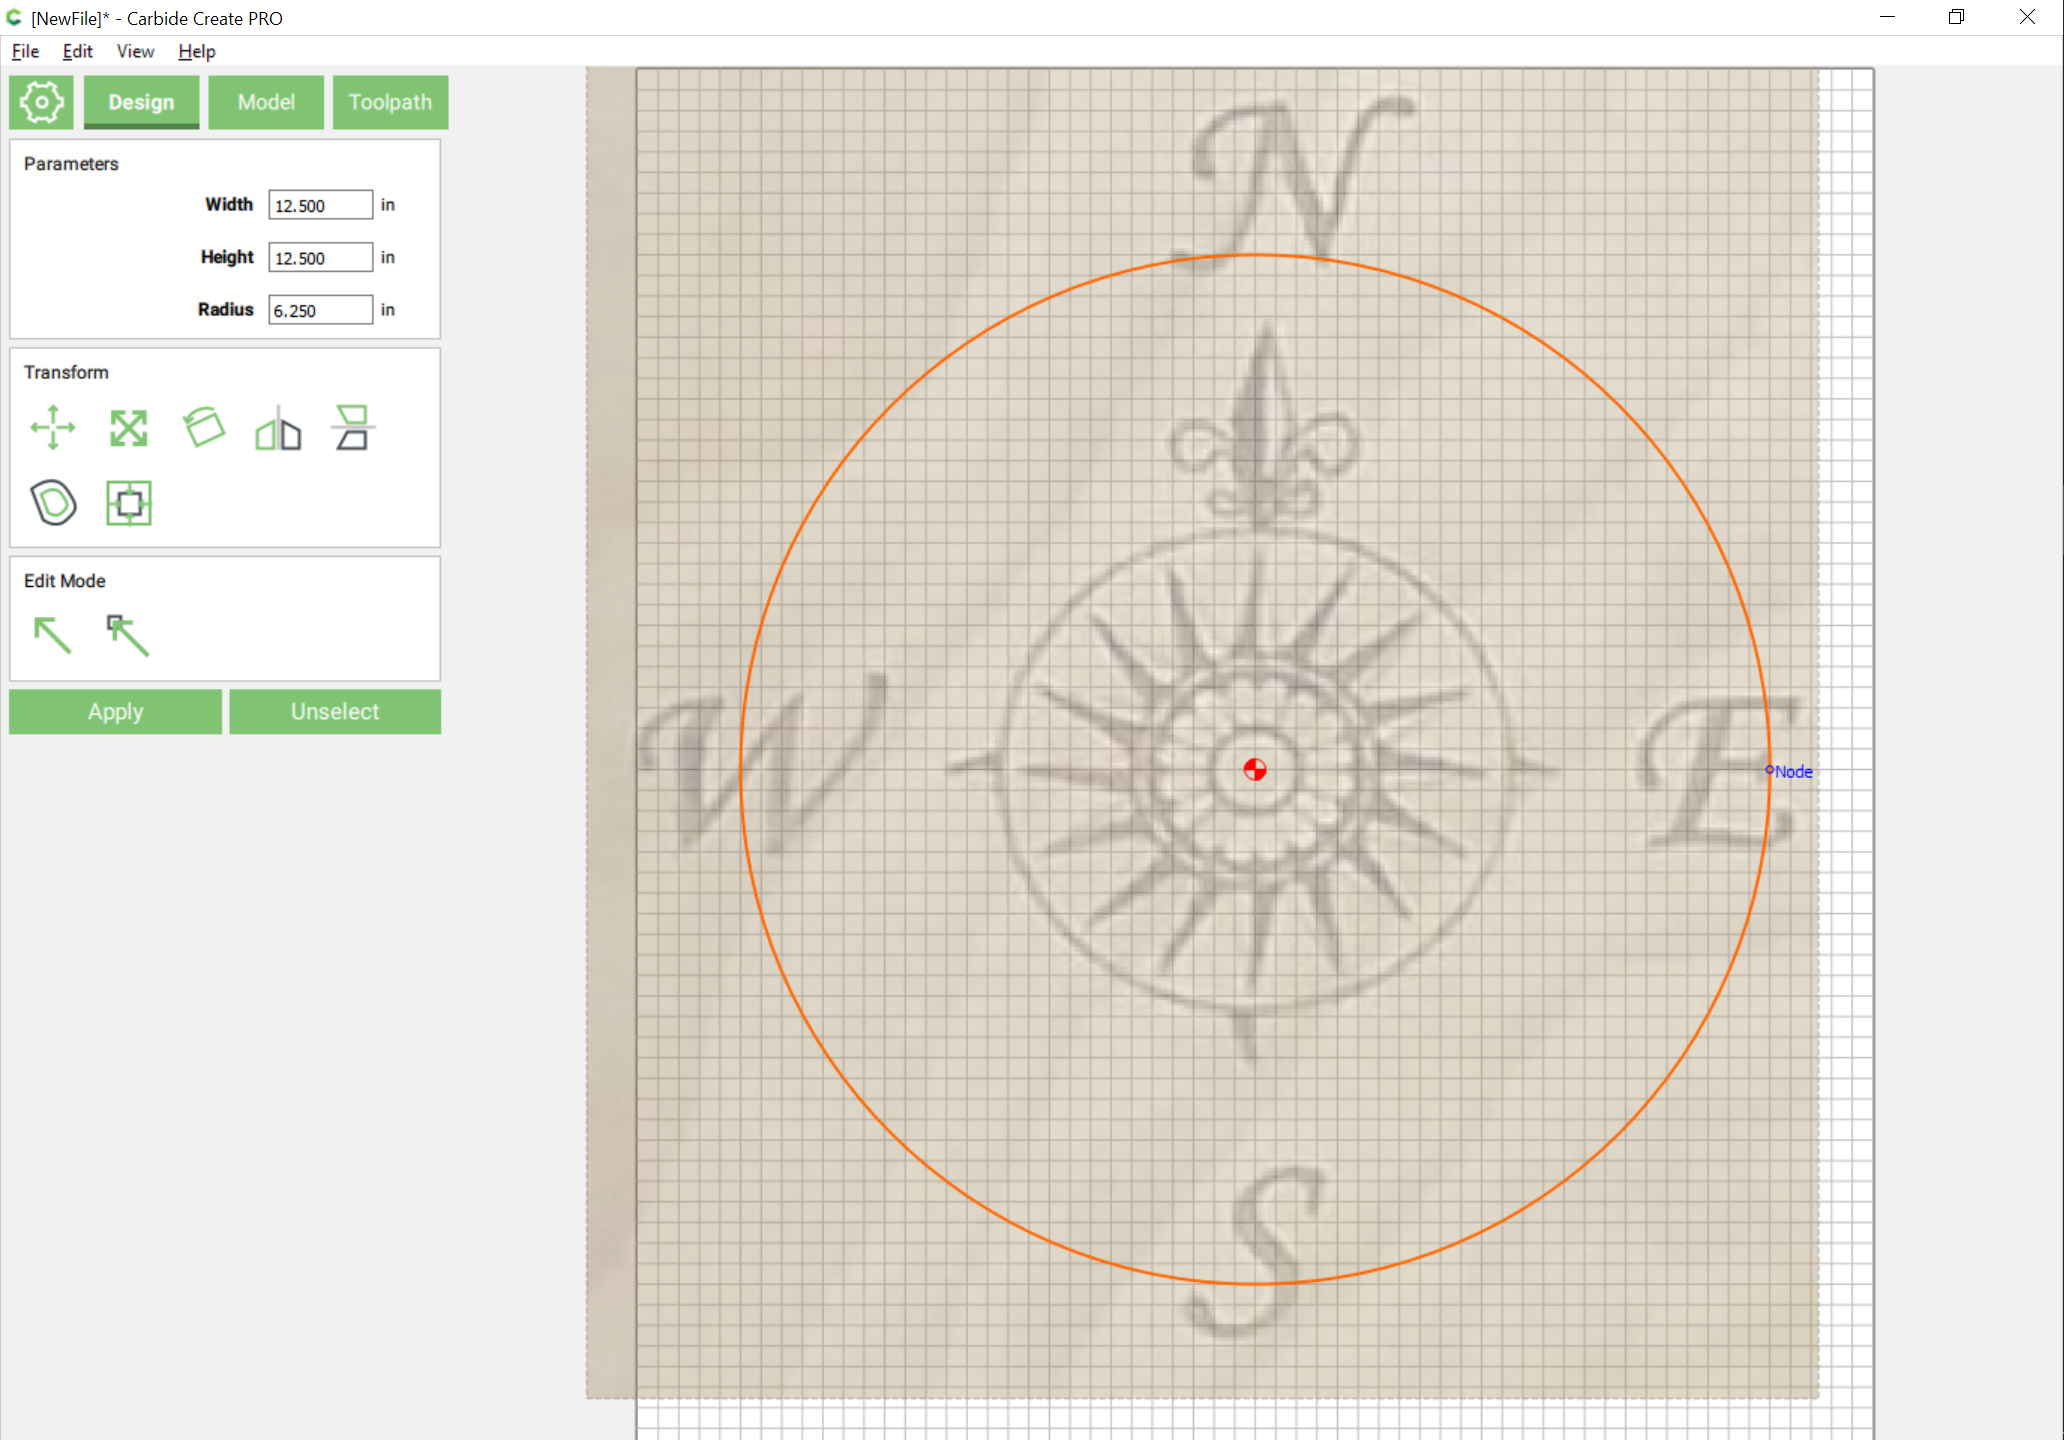
Having a fine grid and enabling snap to grid will help in keeping things symmetrical. Start by drawing a circle large enough to encompass anything which you will be drawing for the sake of rotating things at need:
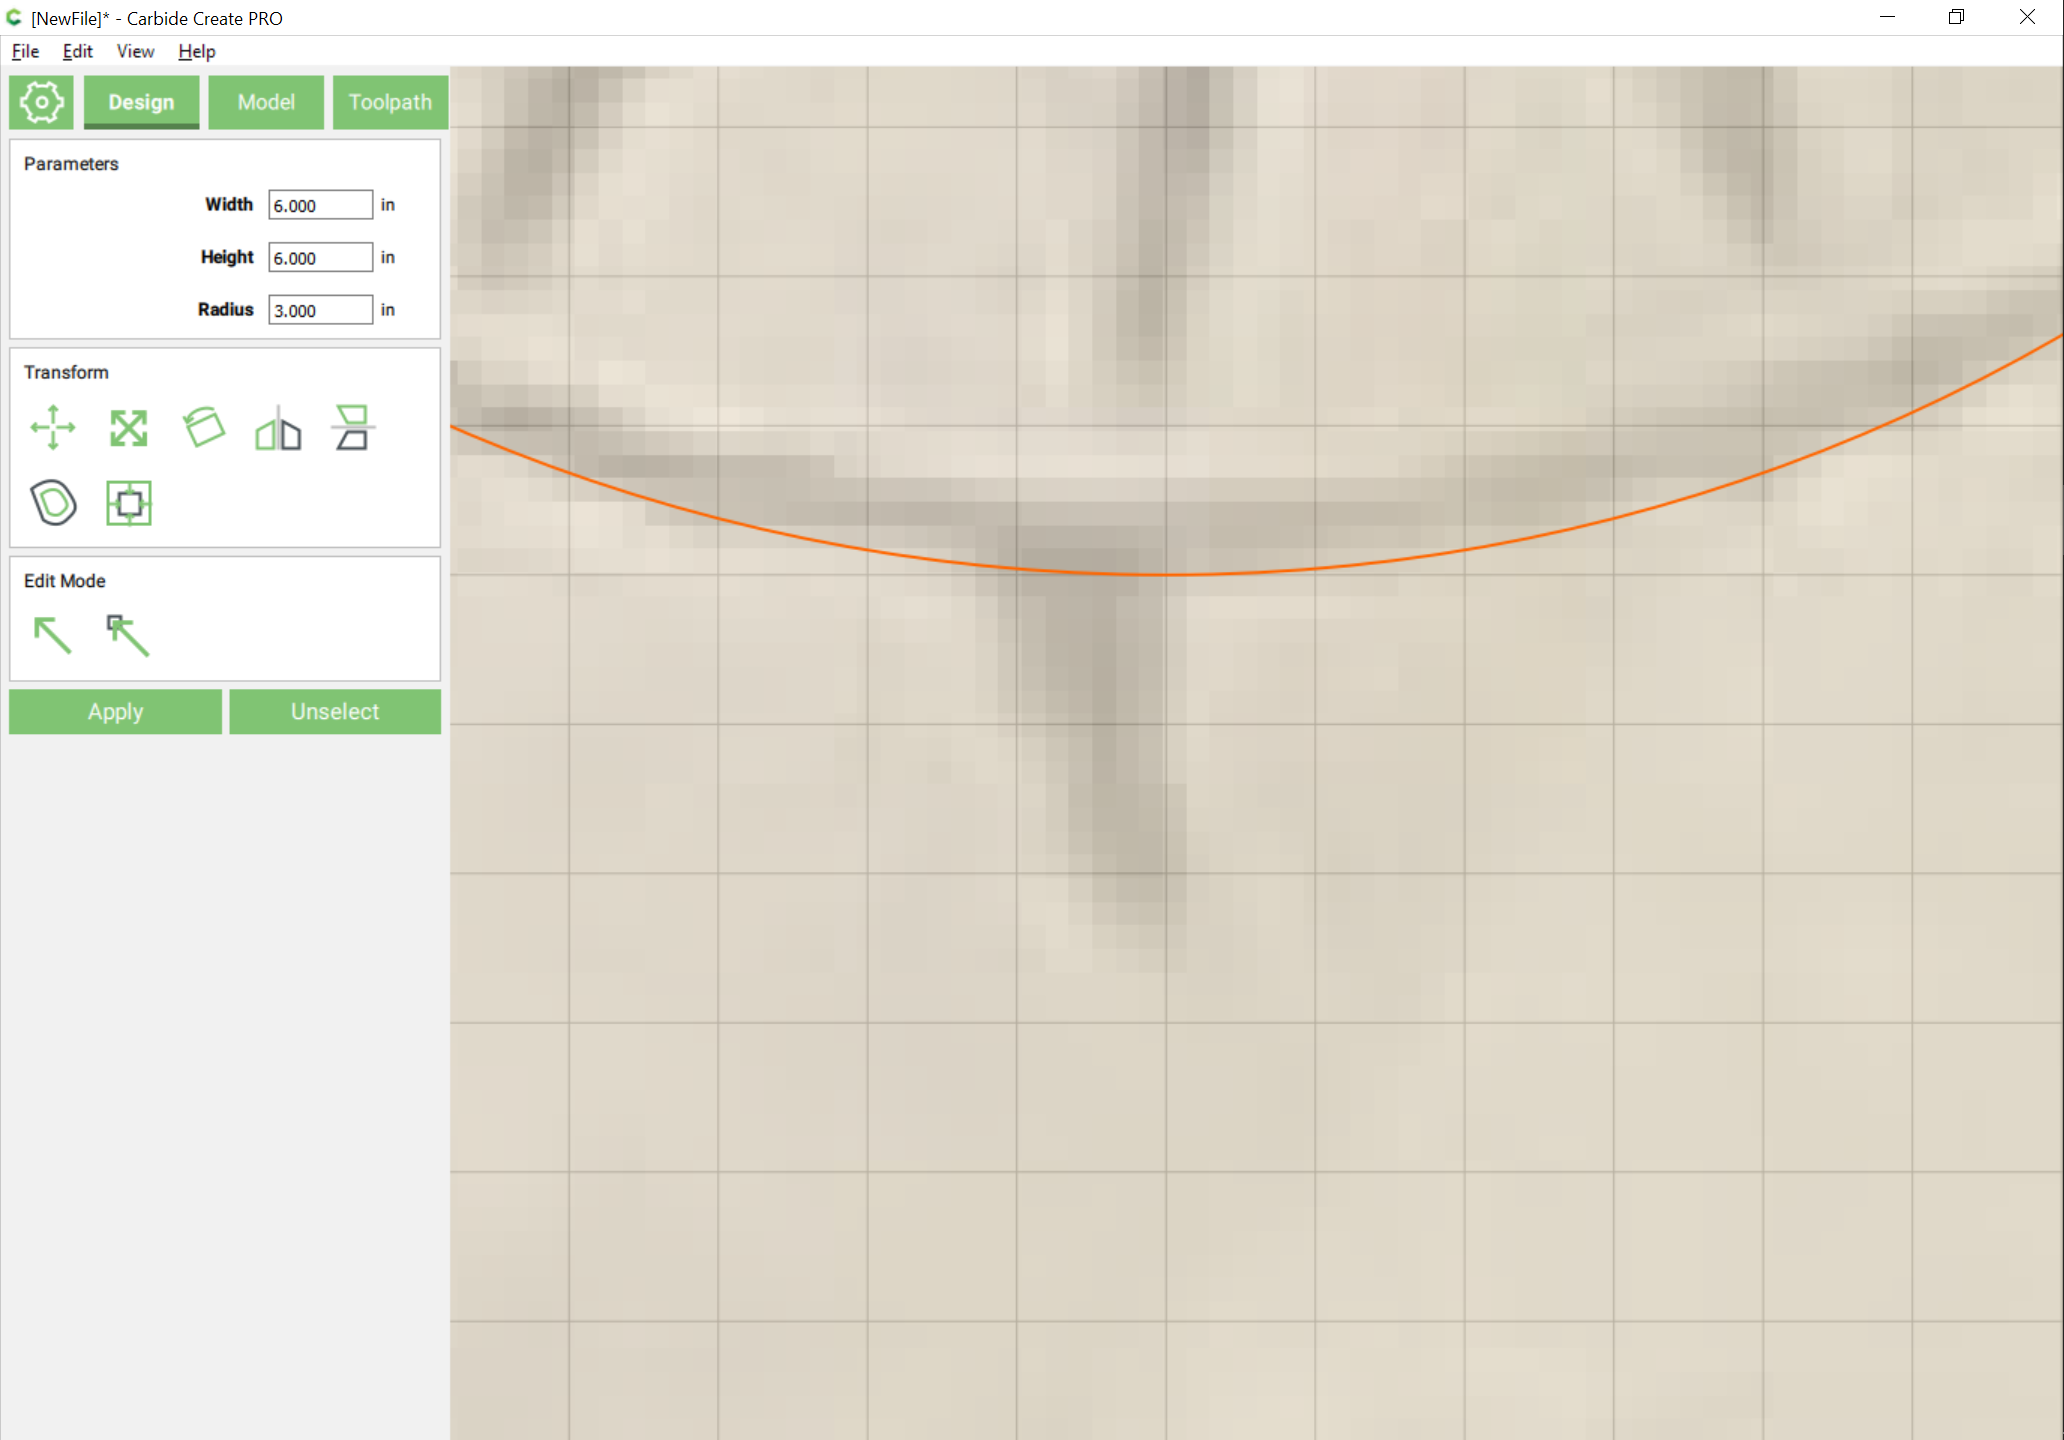
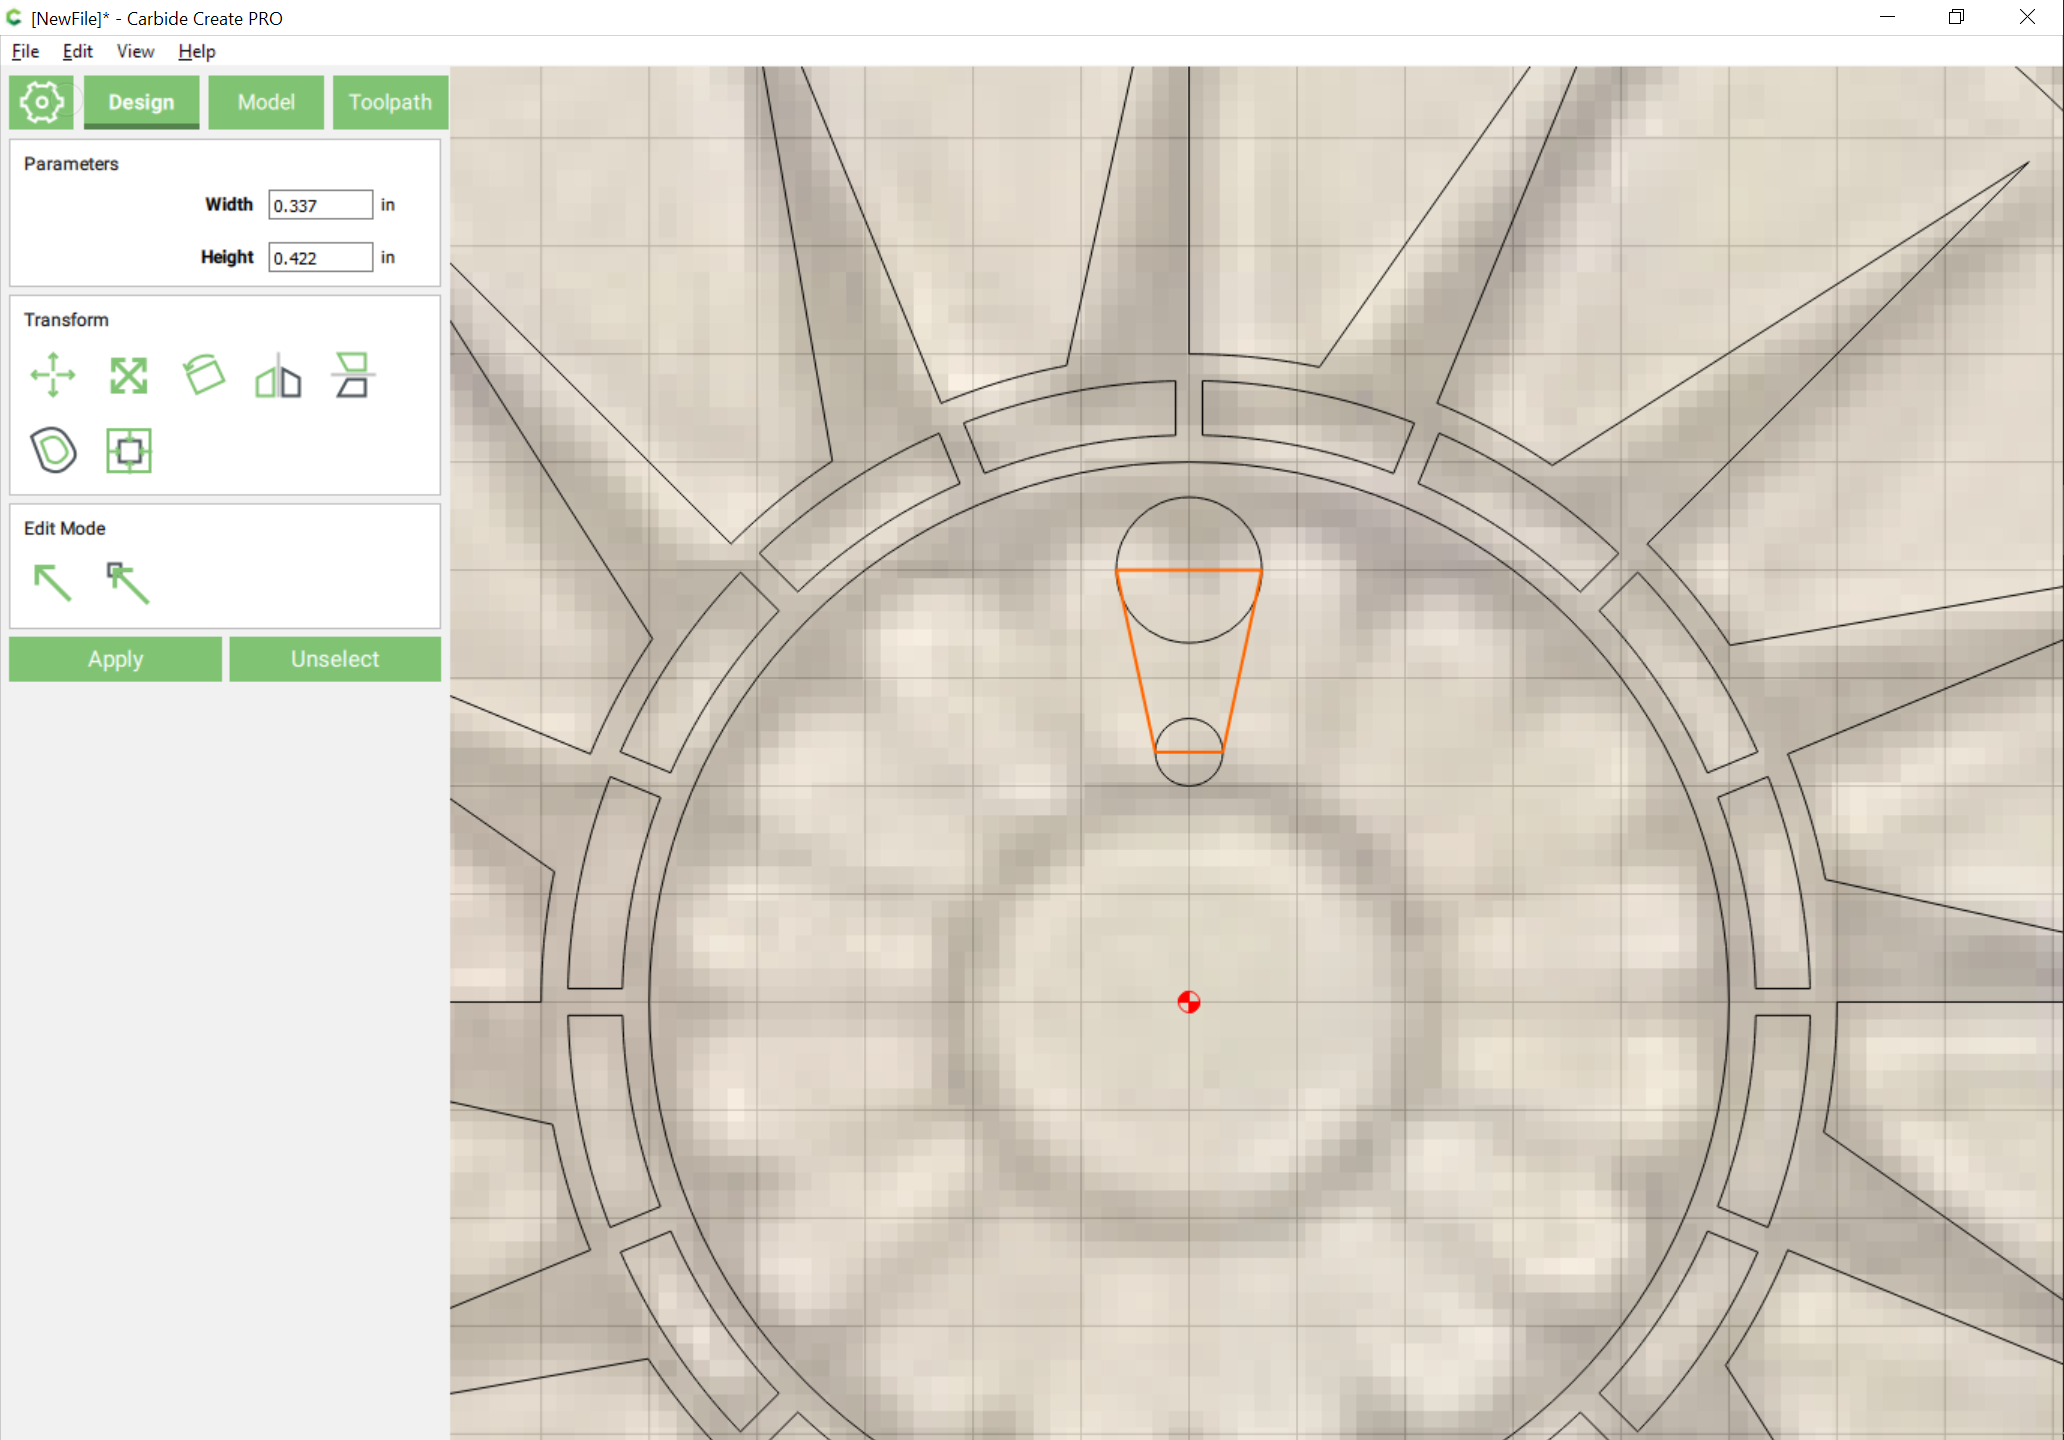
Then draw a circle which aligns with the outer circle and zoom in on a small detail which relates to it:
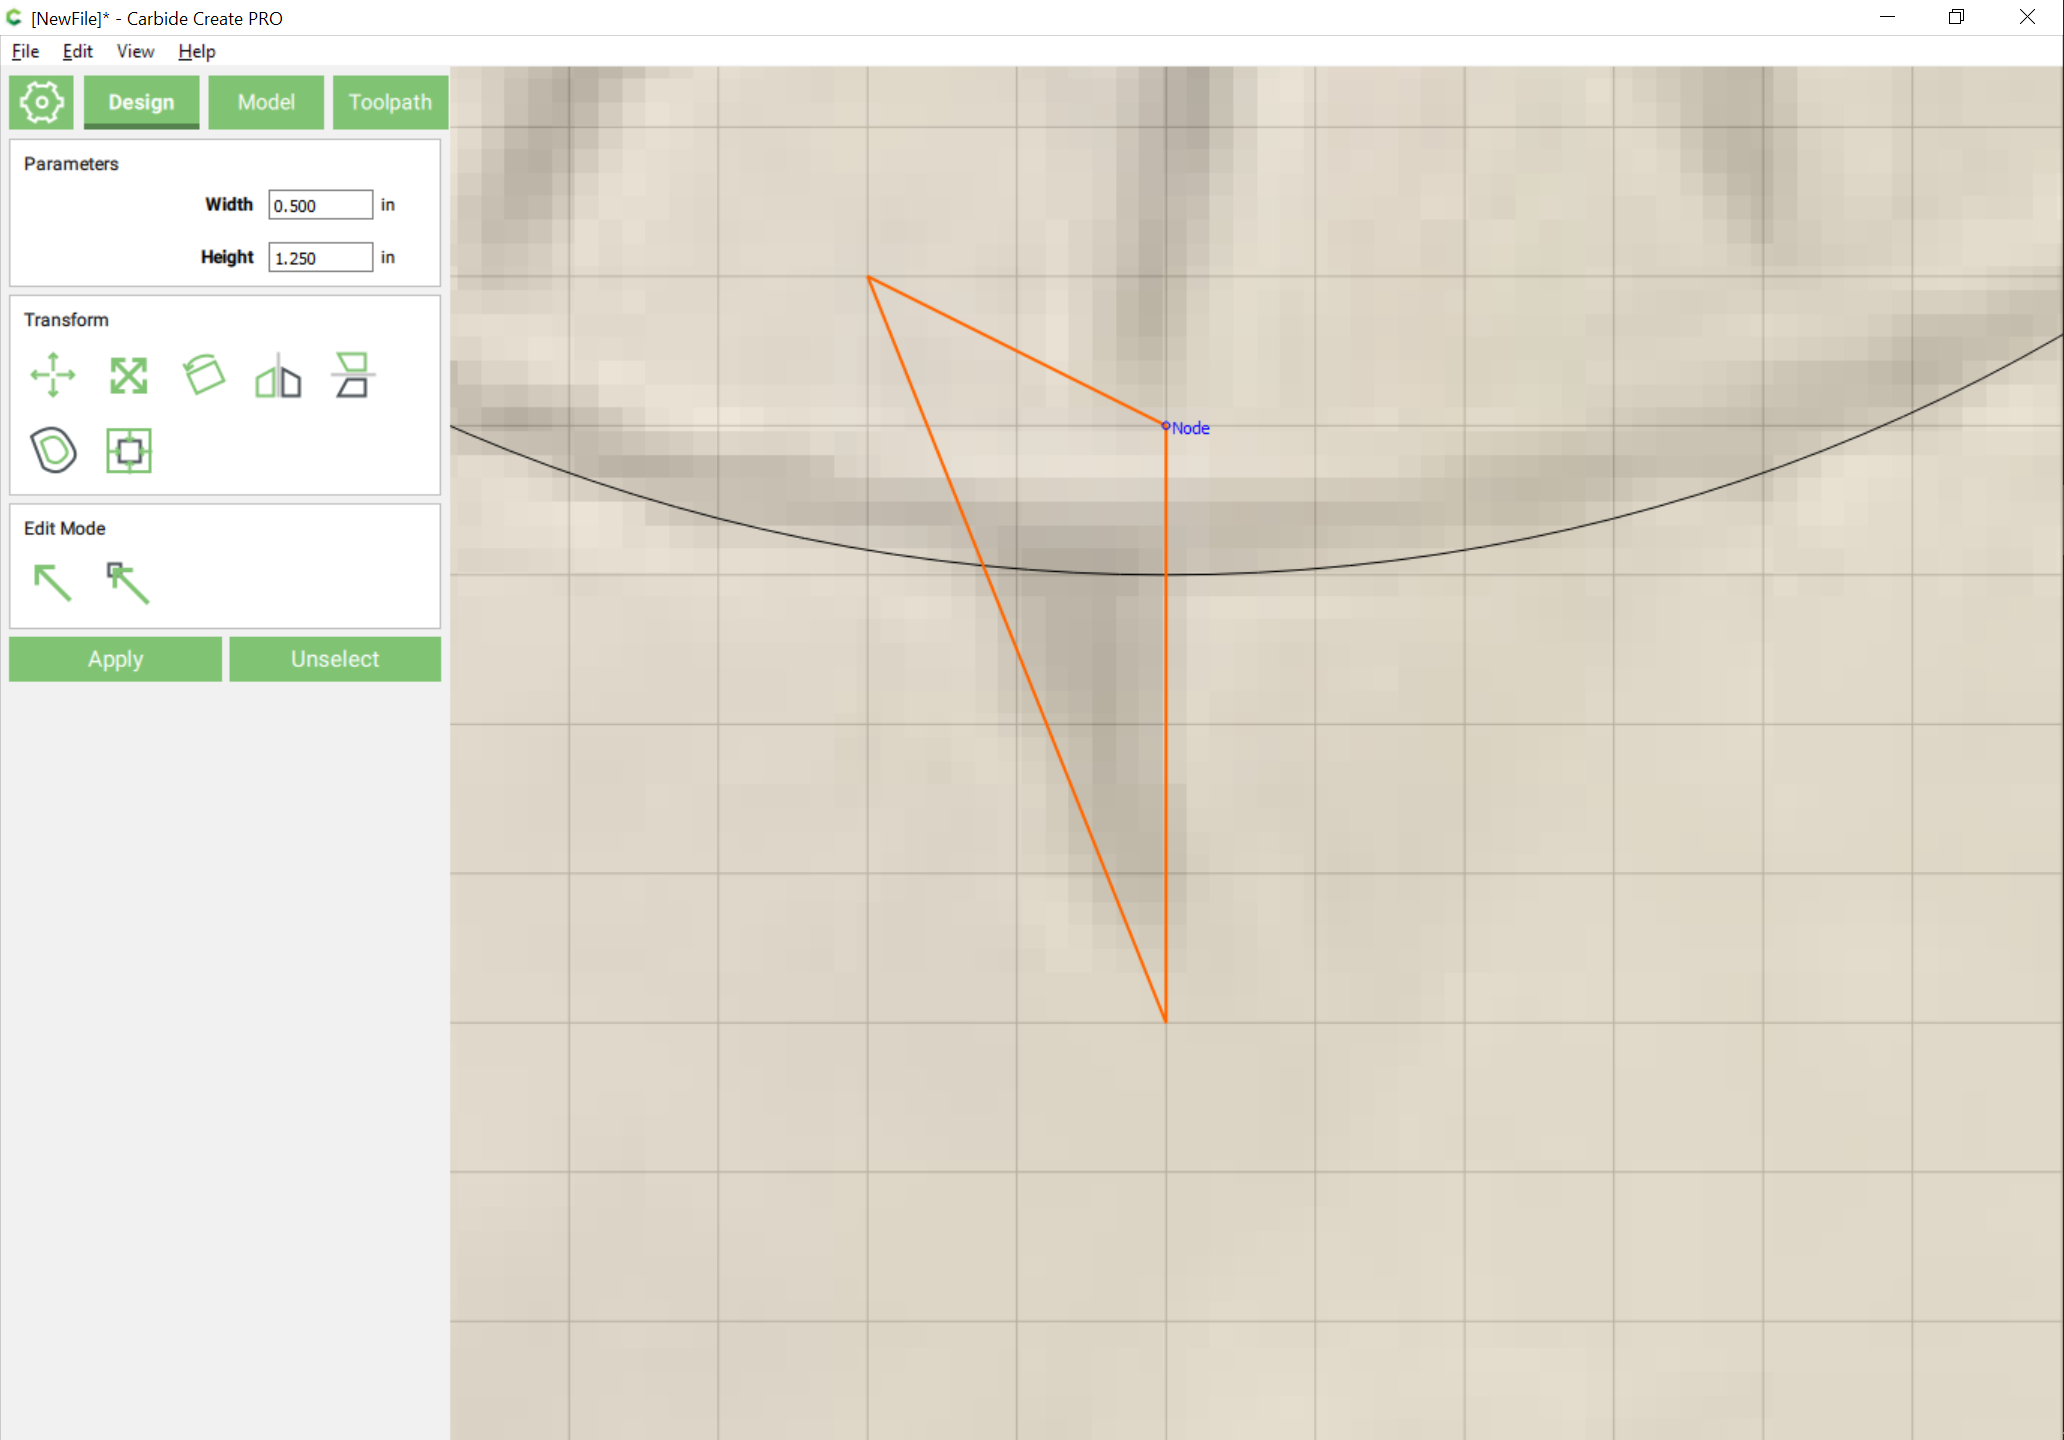
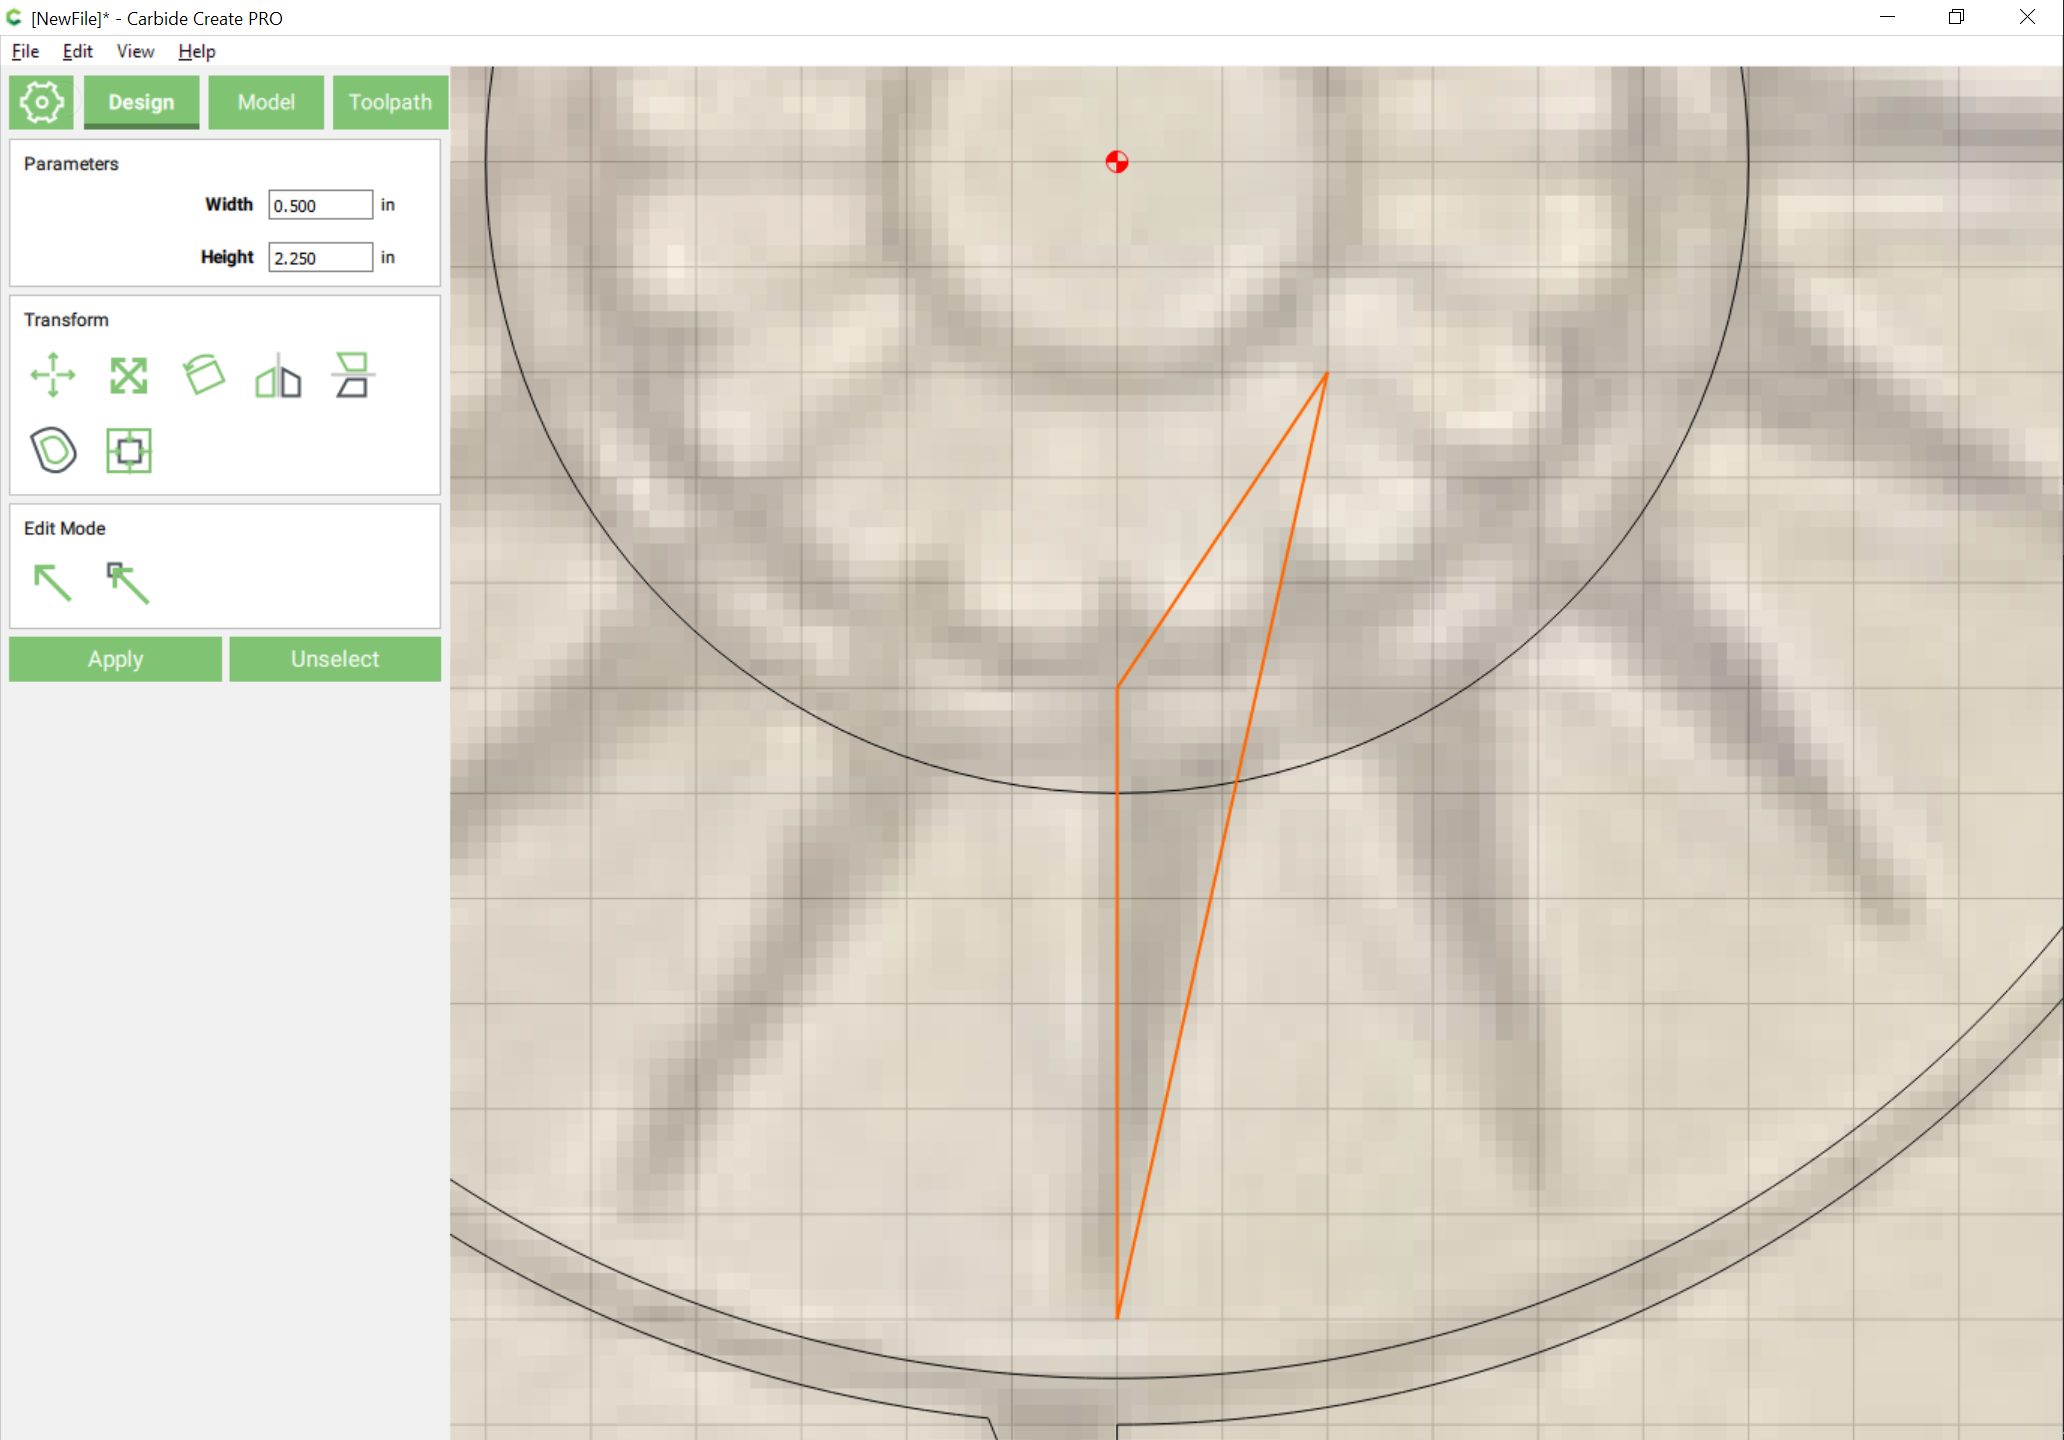
The arrow/indicator for south seems to be a curved pointer — something like a portion of a lens or vesical piscis — this could be drawn using the curve tool, and while it could be made by overlapping, I believe that it’s actually a half-arrow / right triangle which is easily drawn with the polyline tool:
Note that each point extends beyond the circle and is aligned to a grid point — that makes closing paths and aligning things easier.
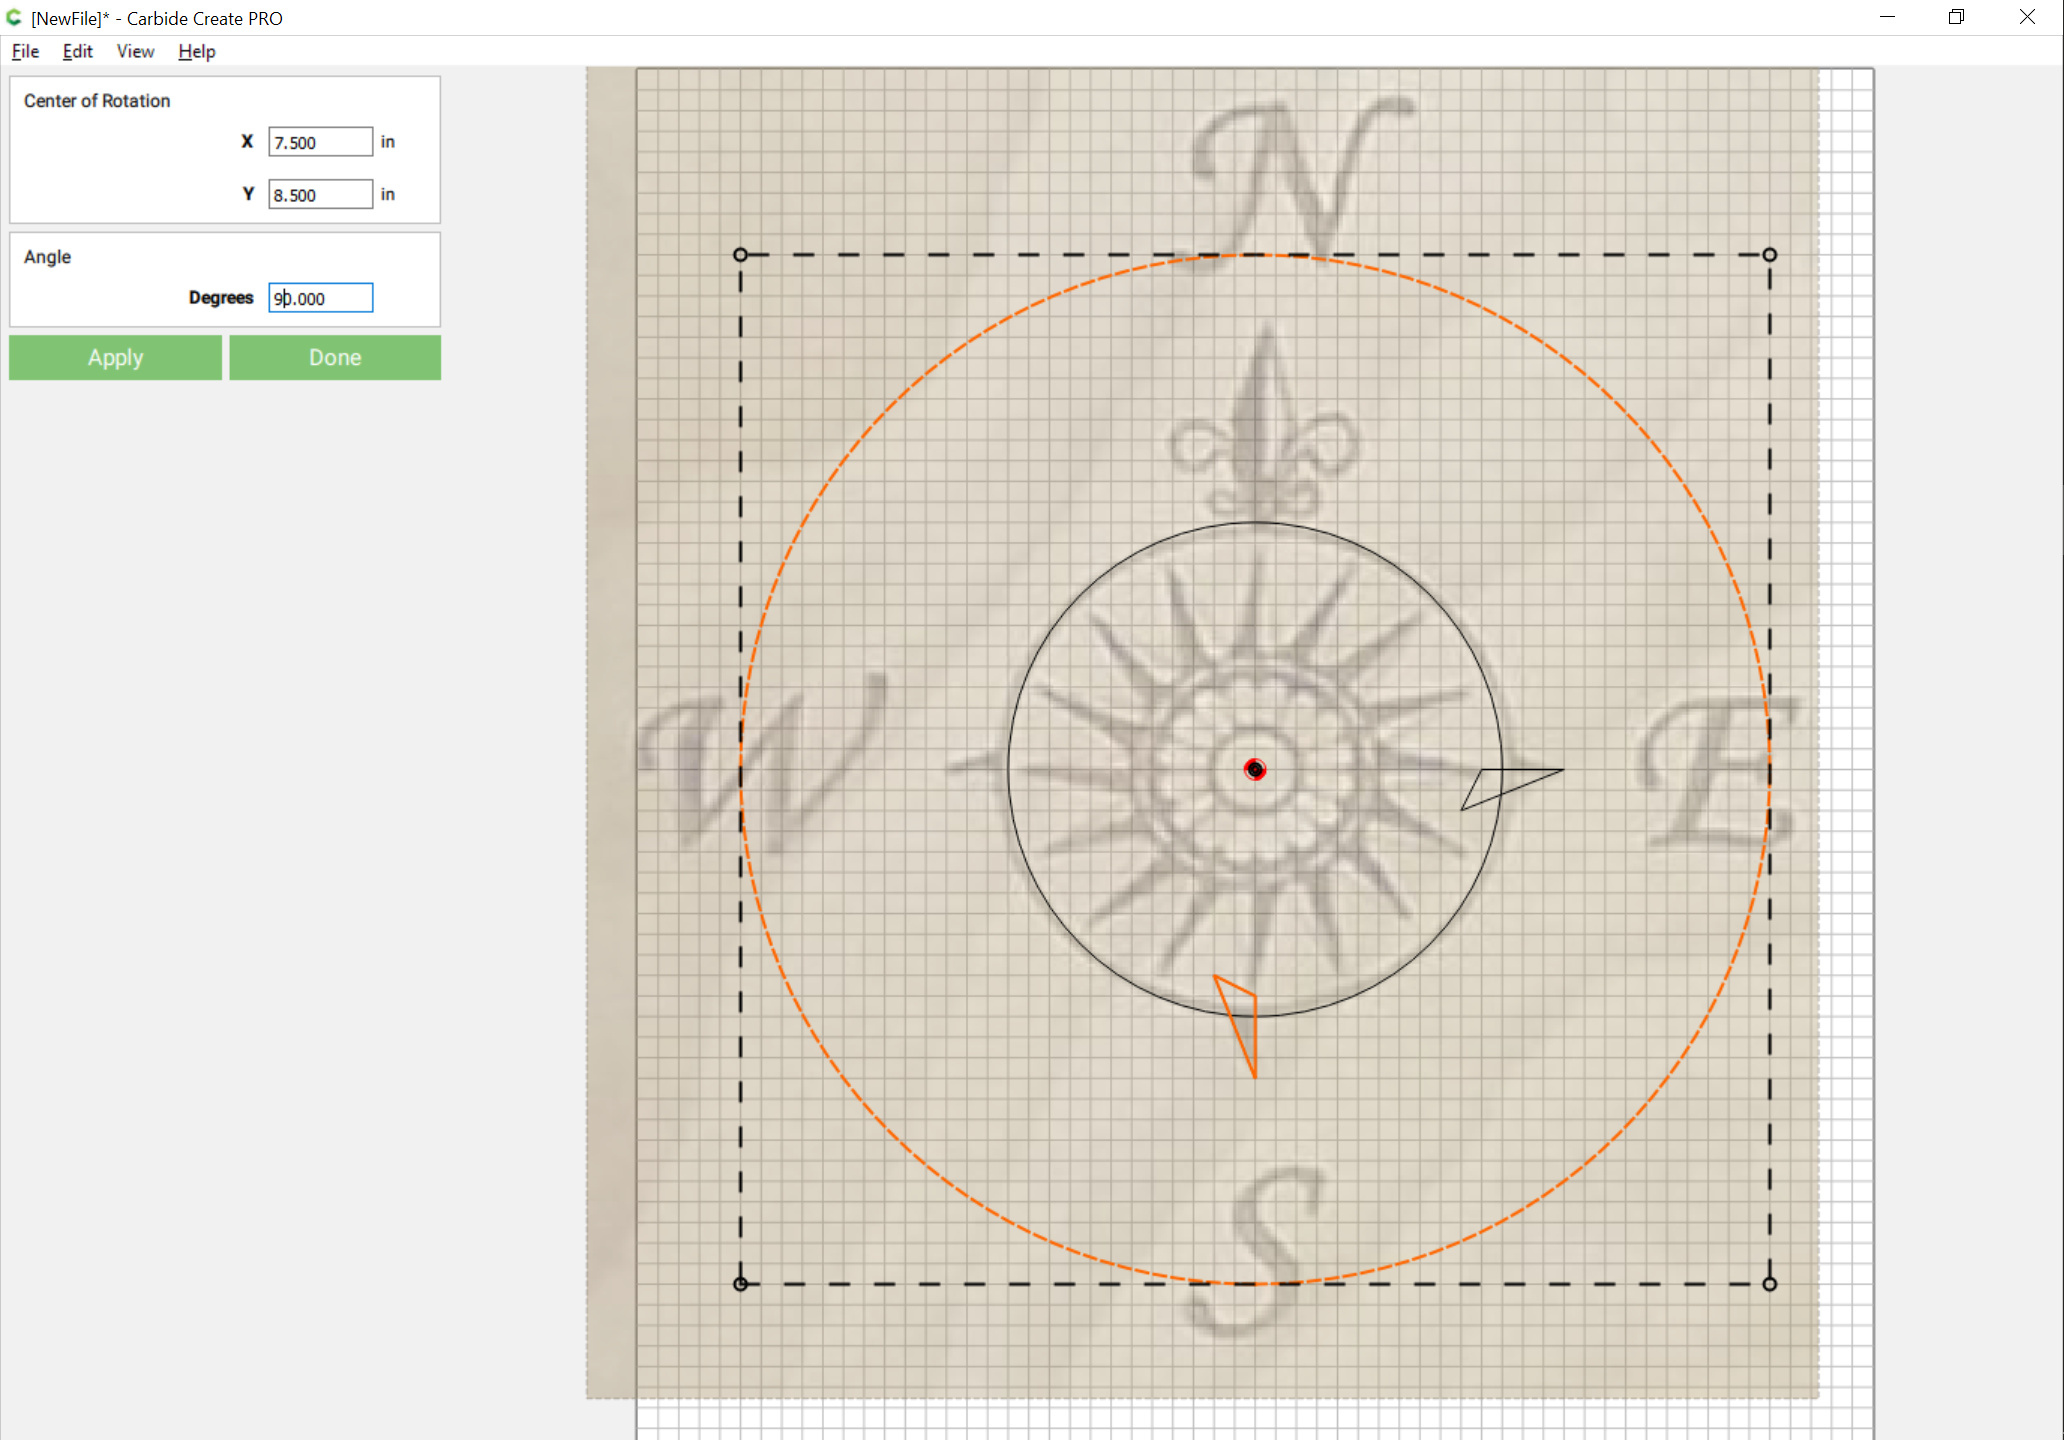
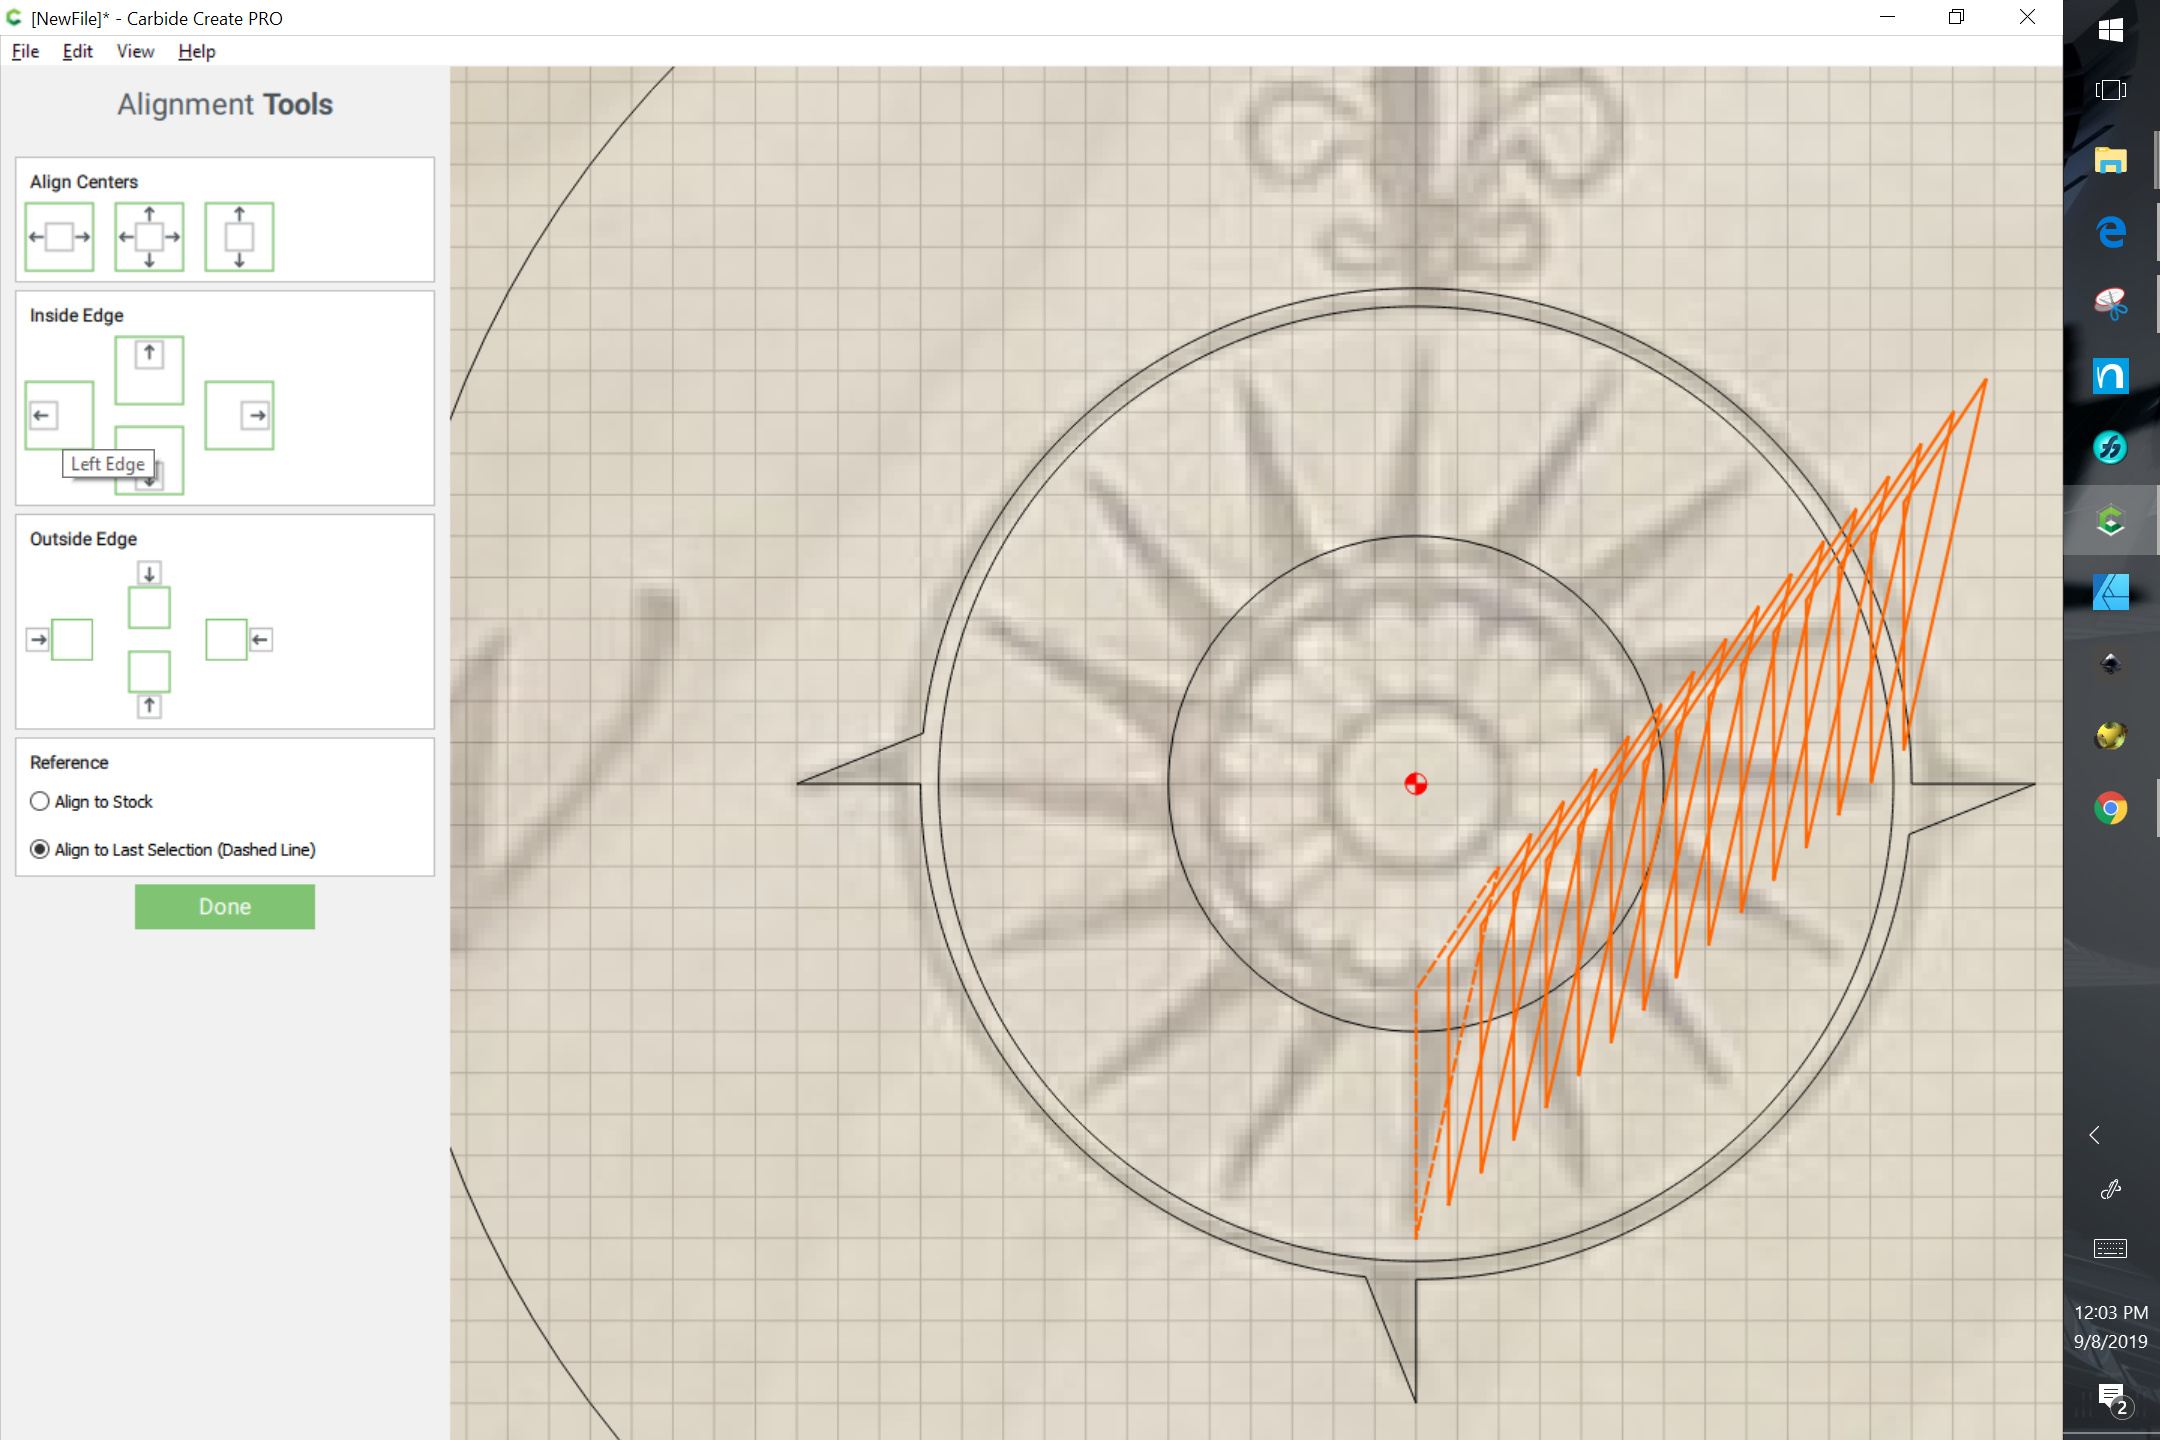
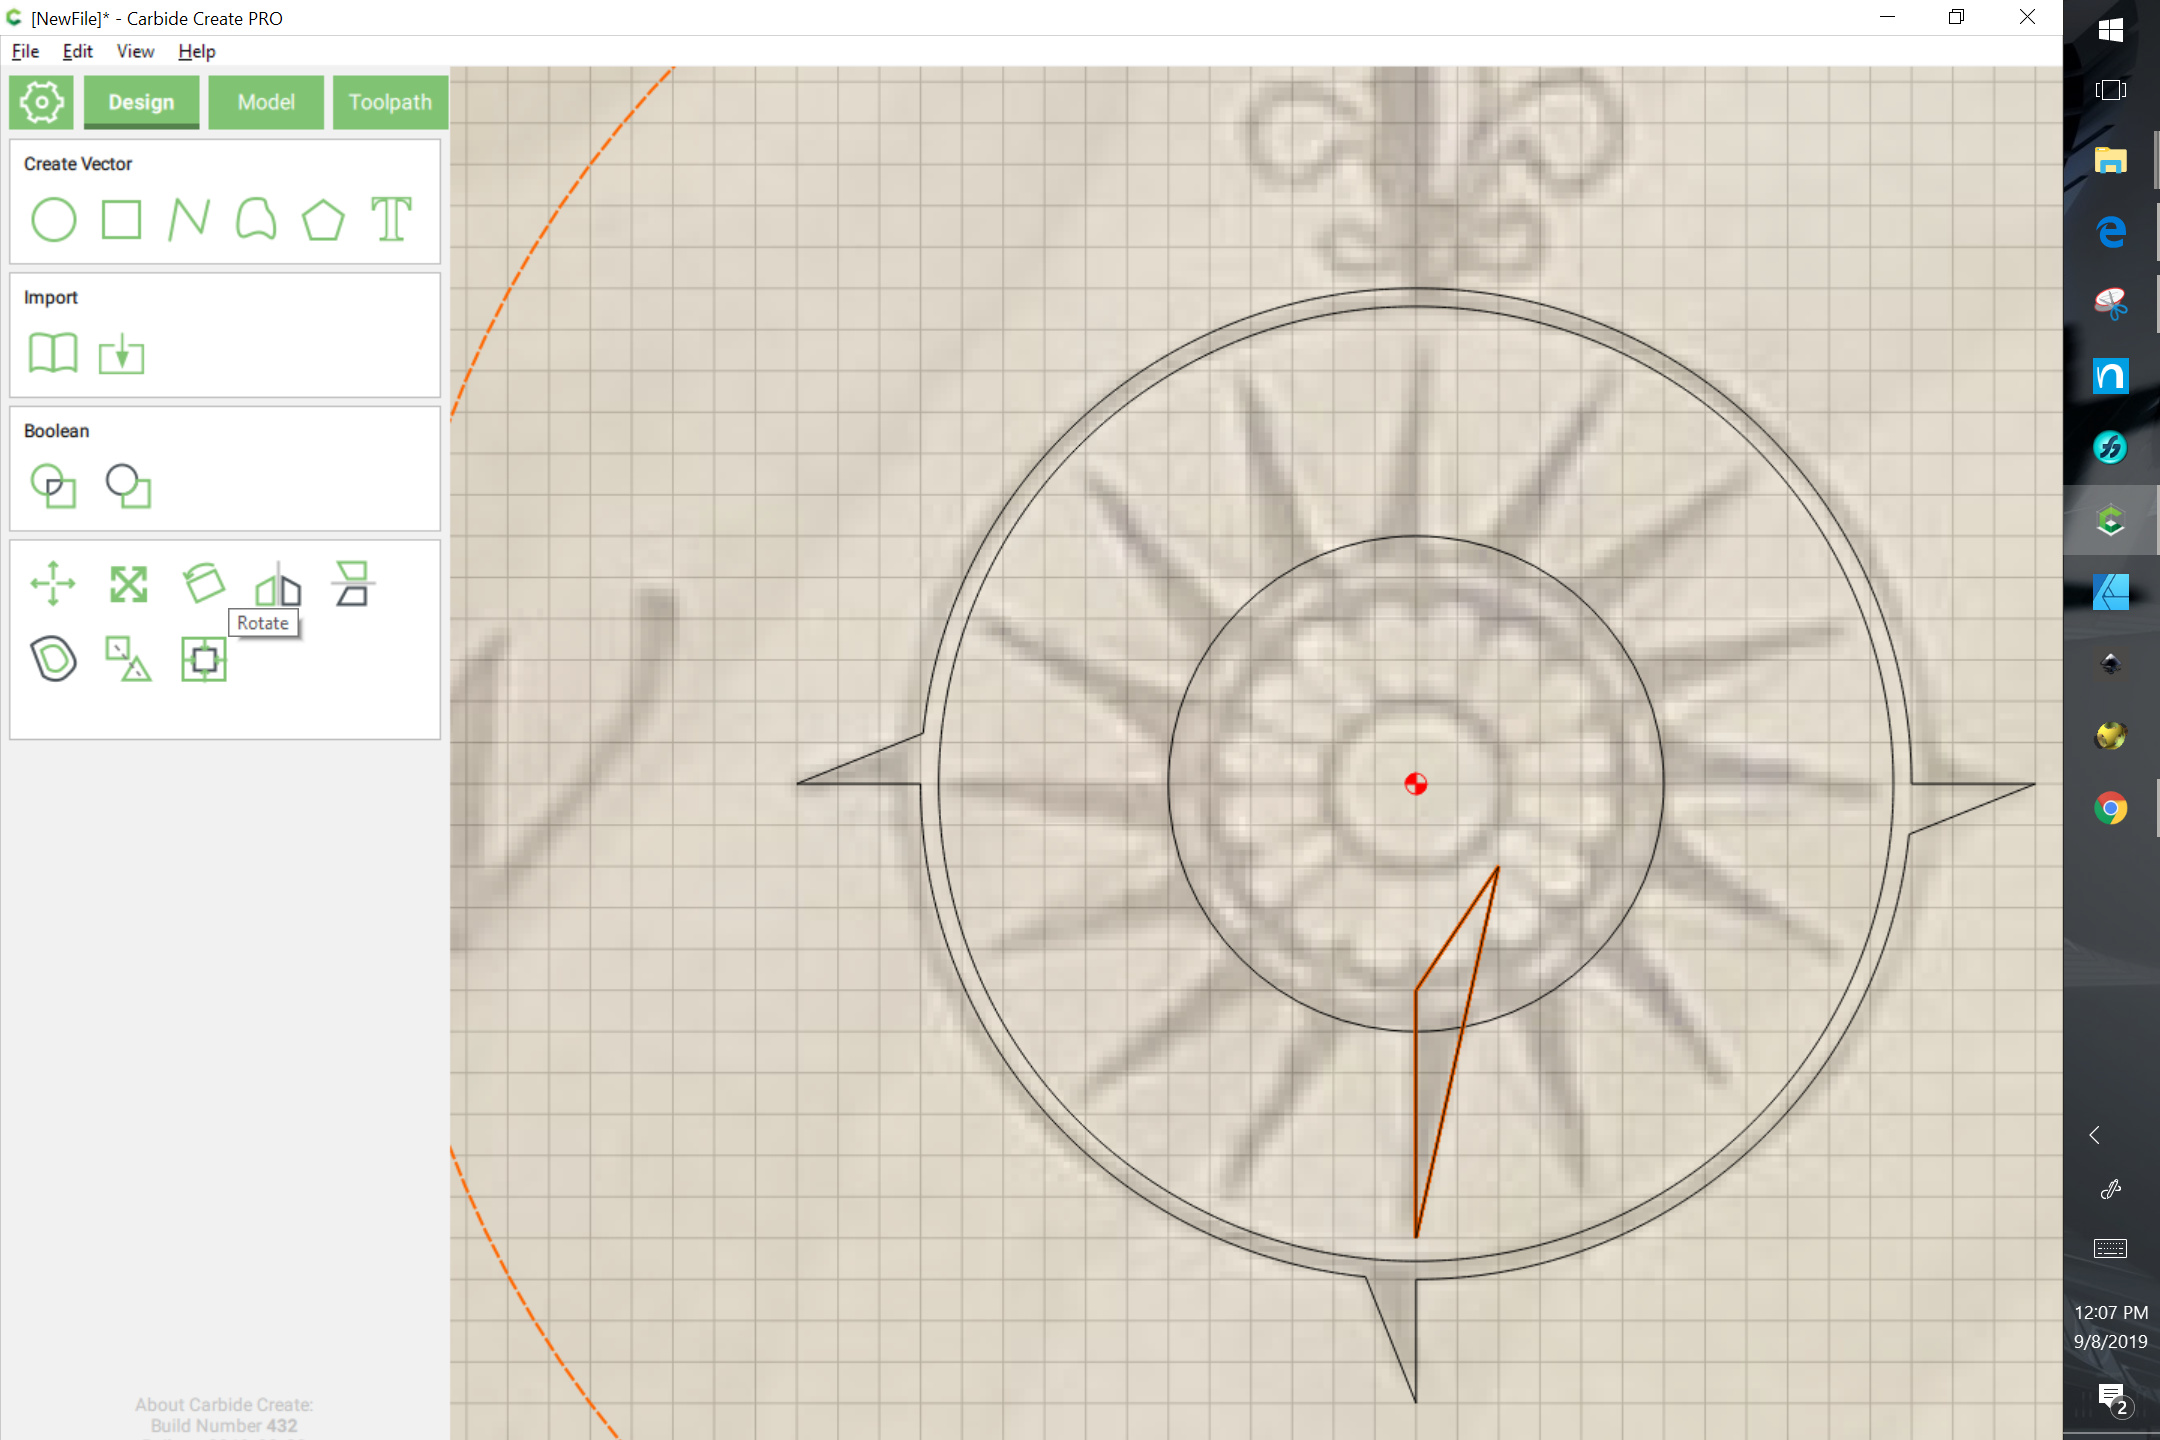
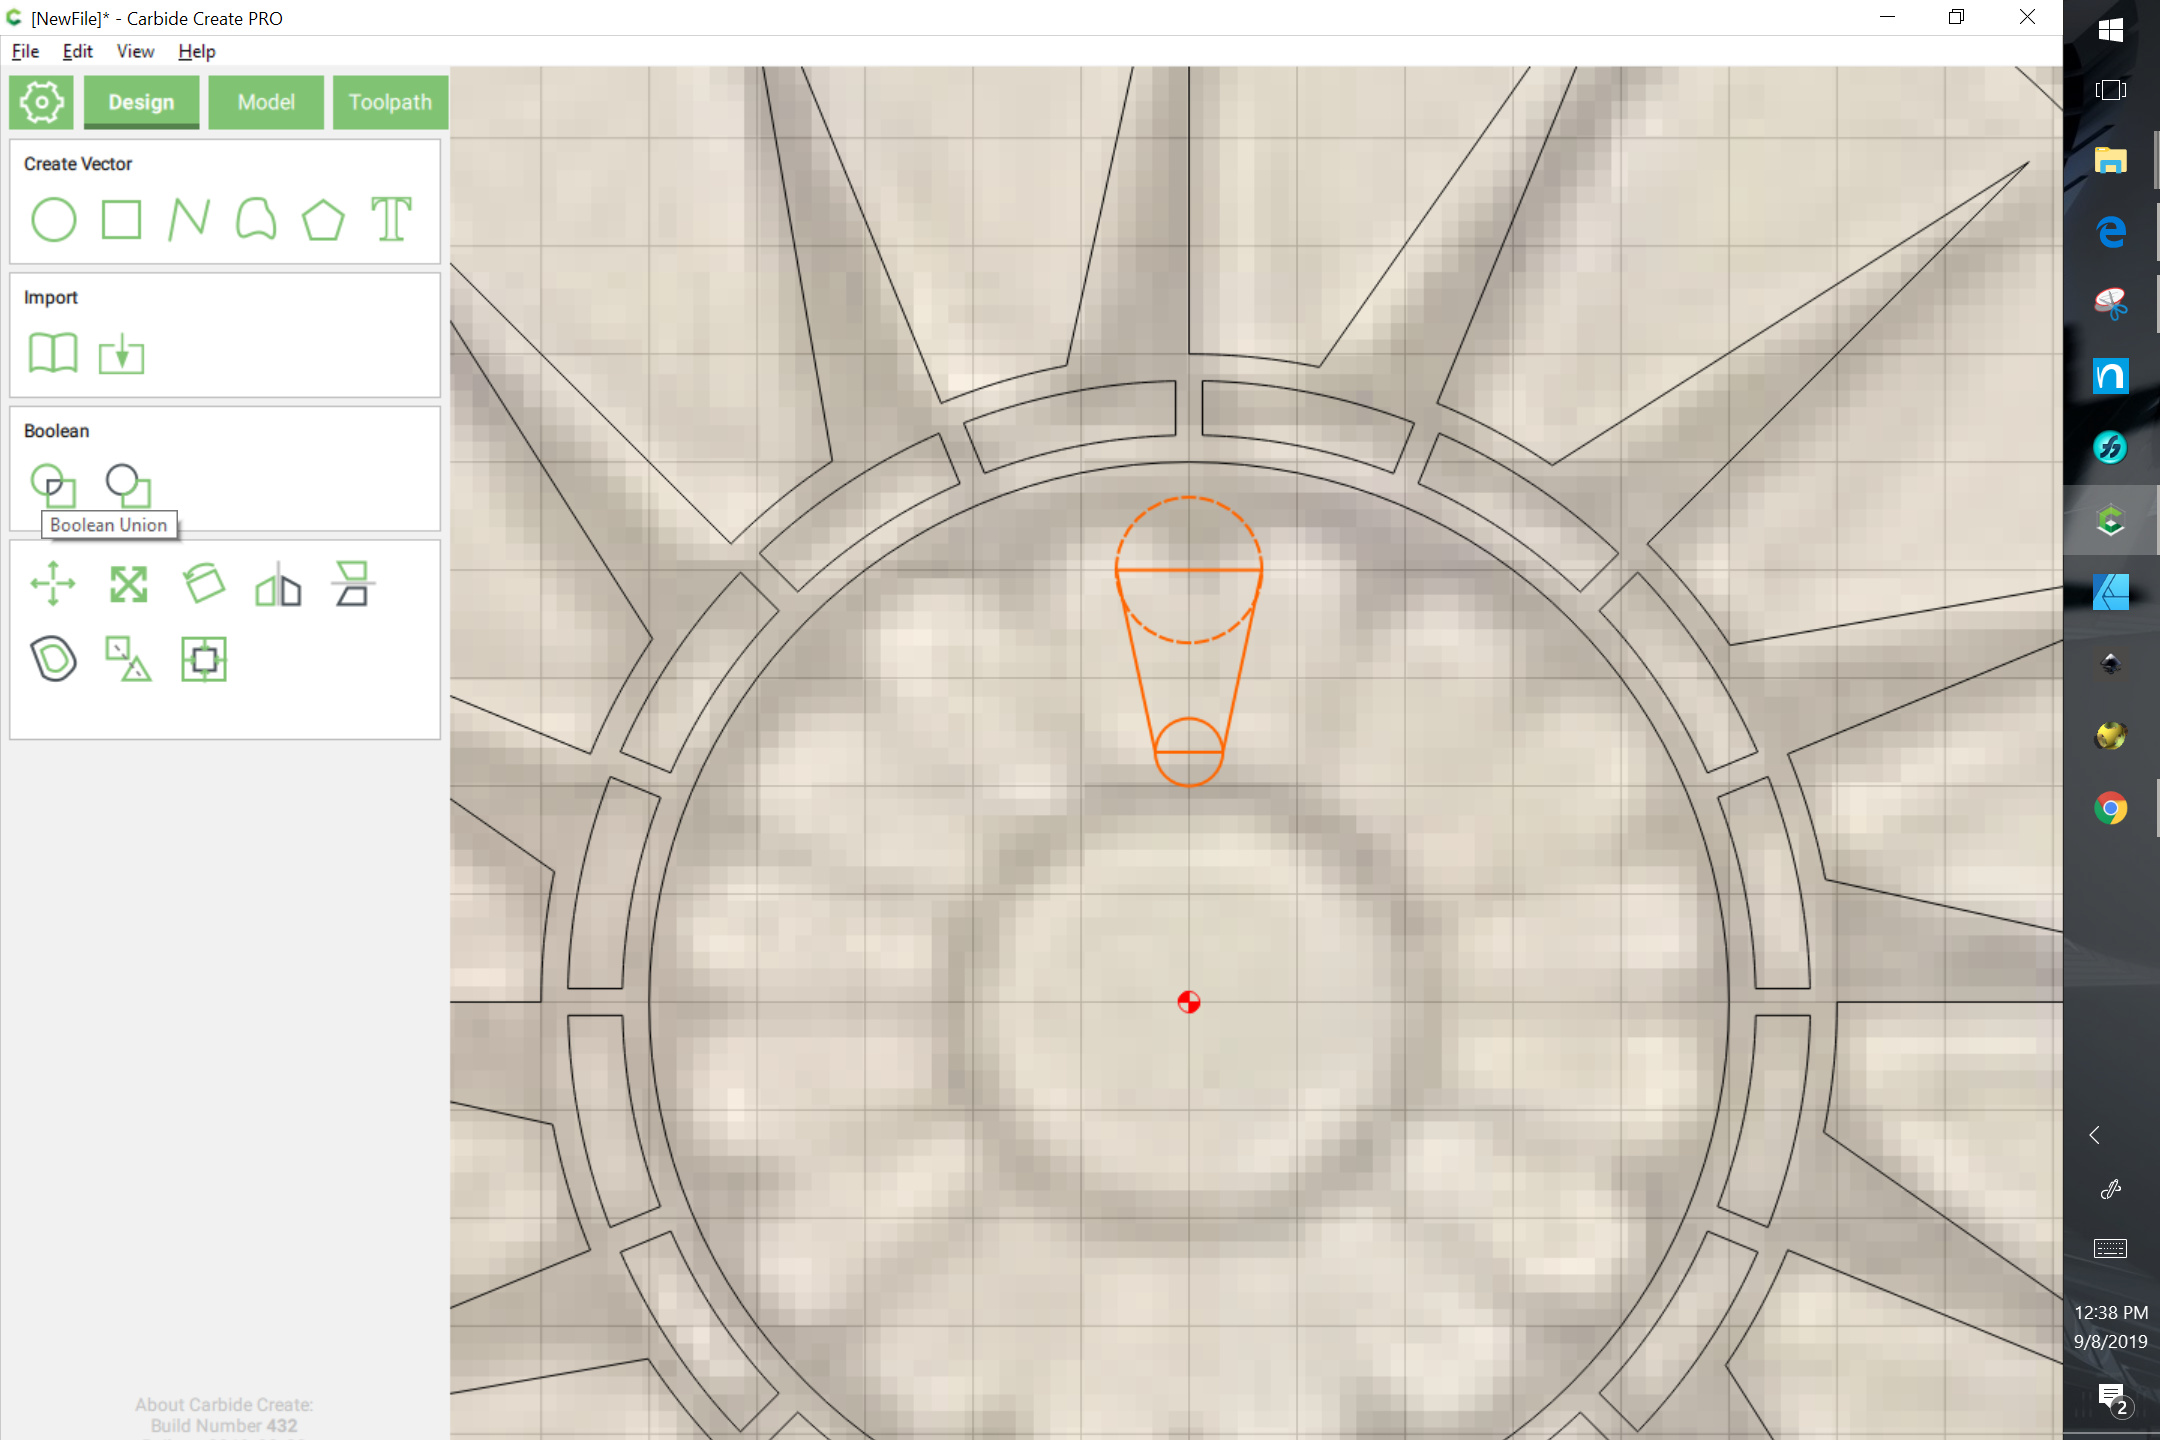
Select the just drawn triangle and duplicate it twice using command/control c (Edit | Copy)
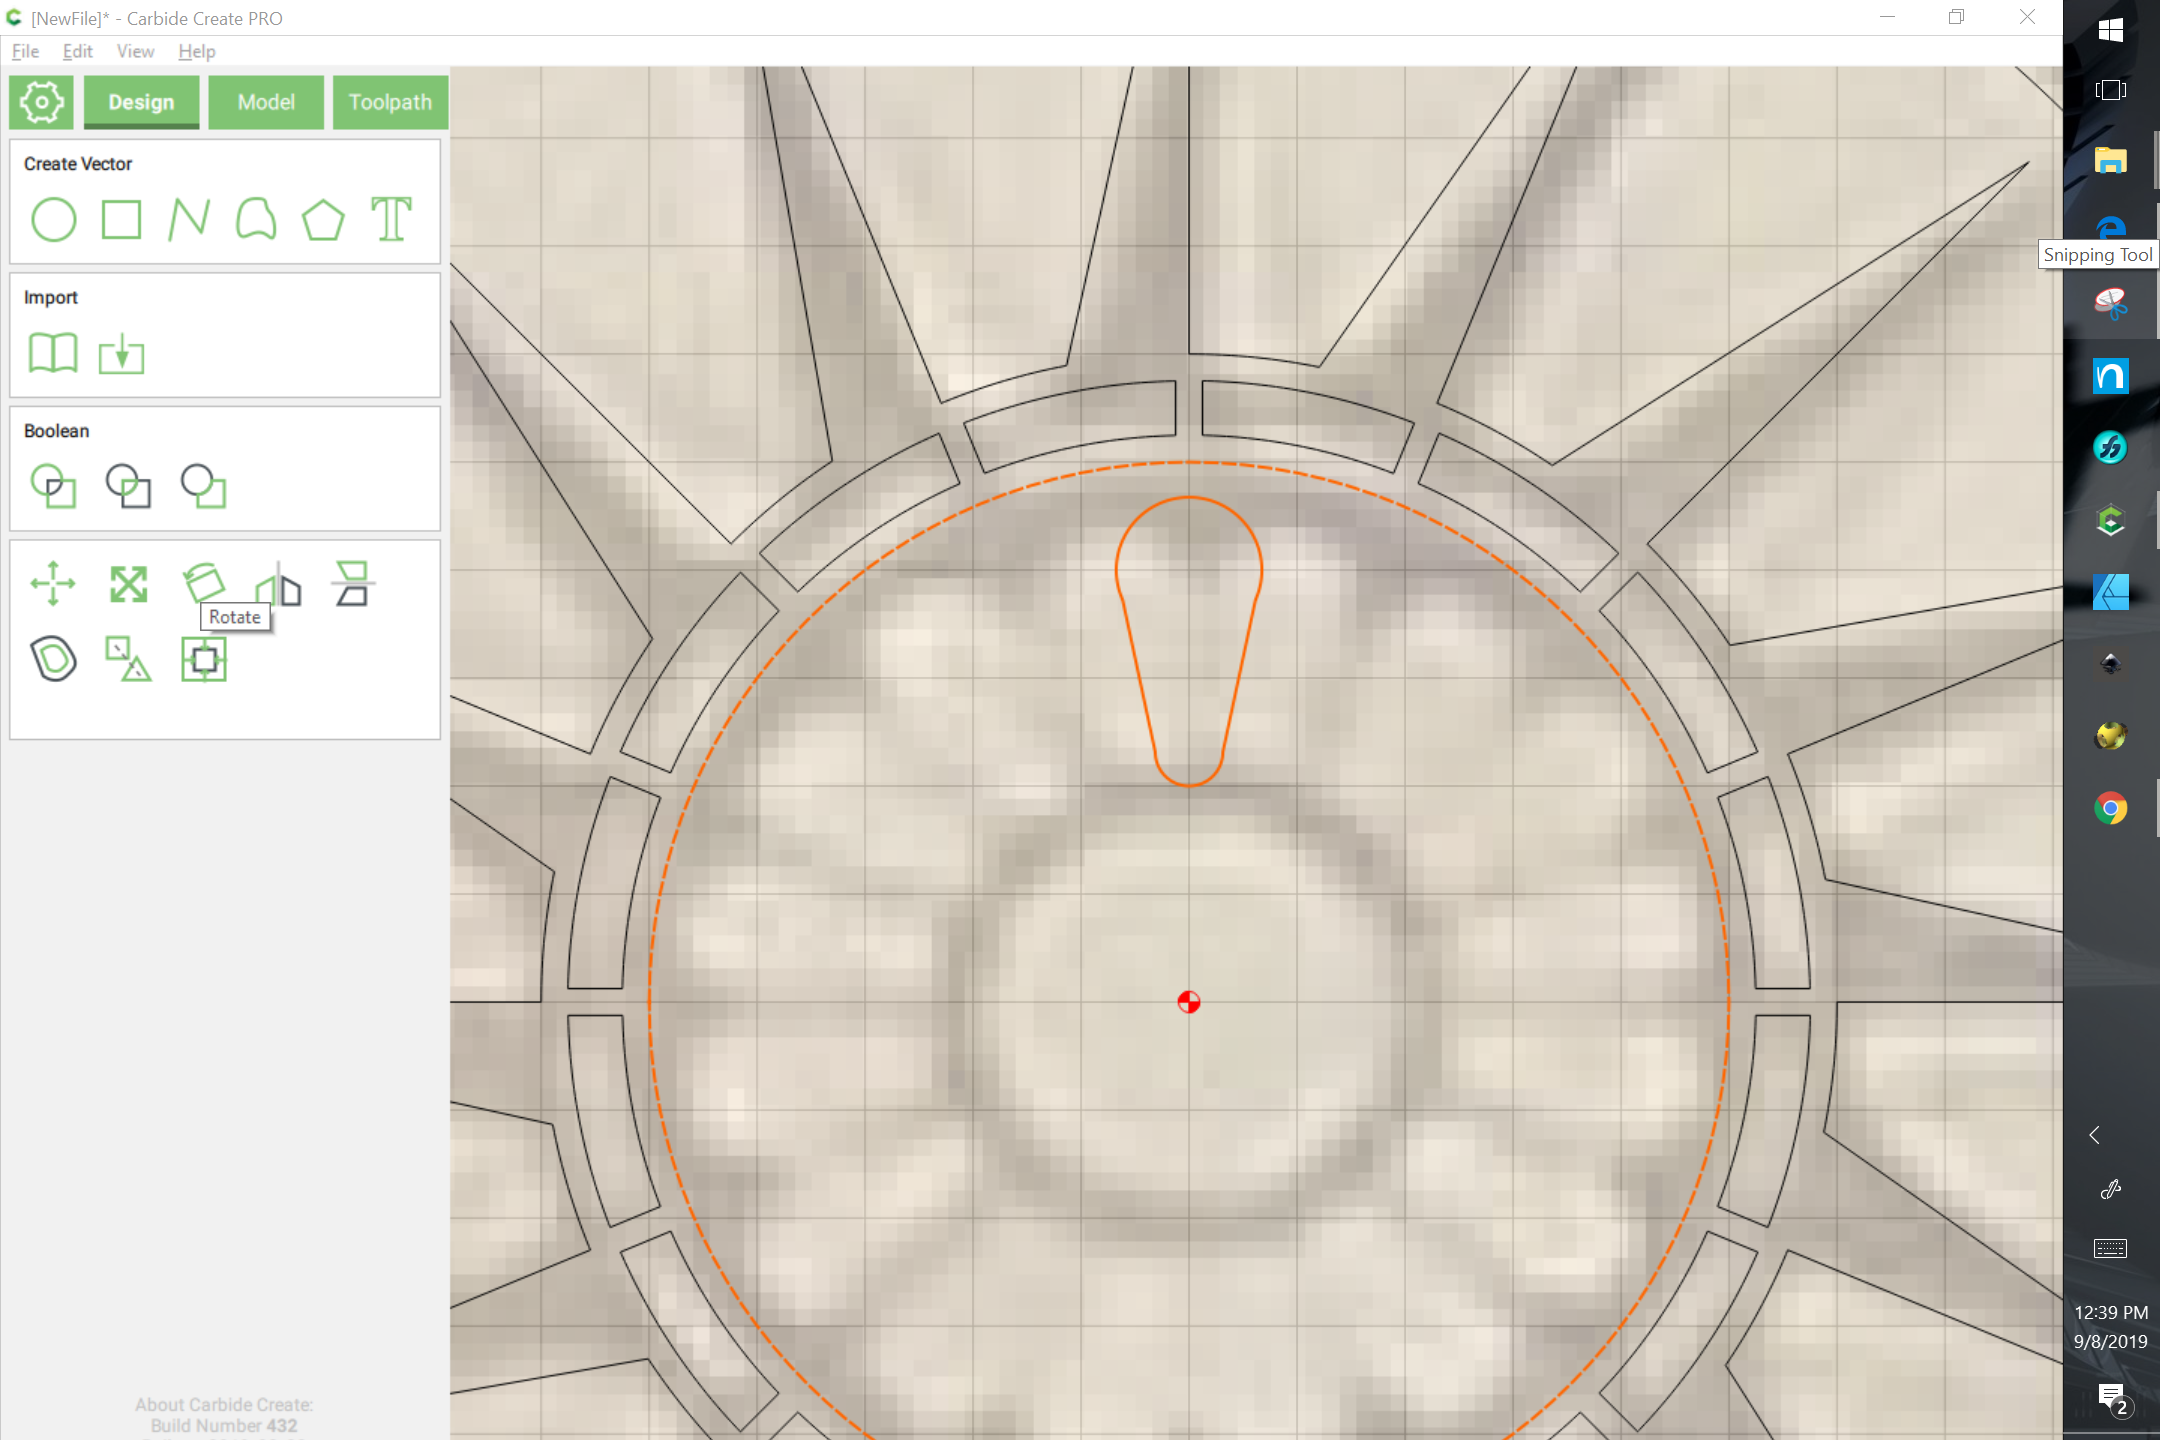
Drag the duplicated triangles onto the original and then with one selected, shift-click on the large circle to select it:
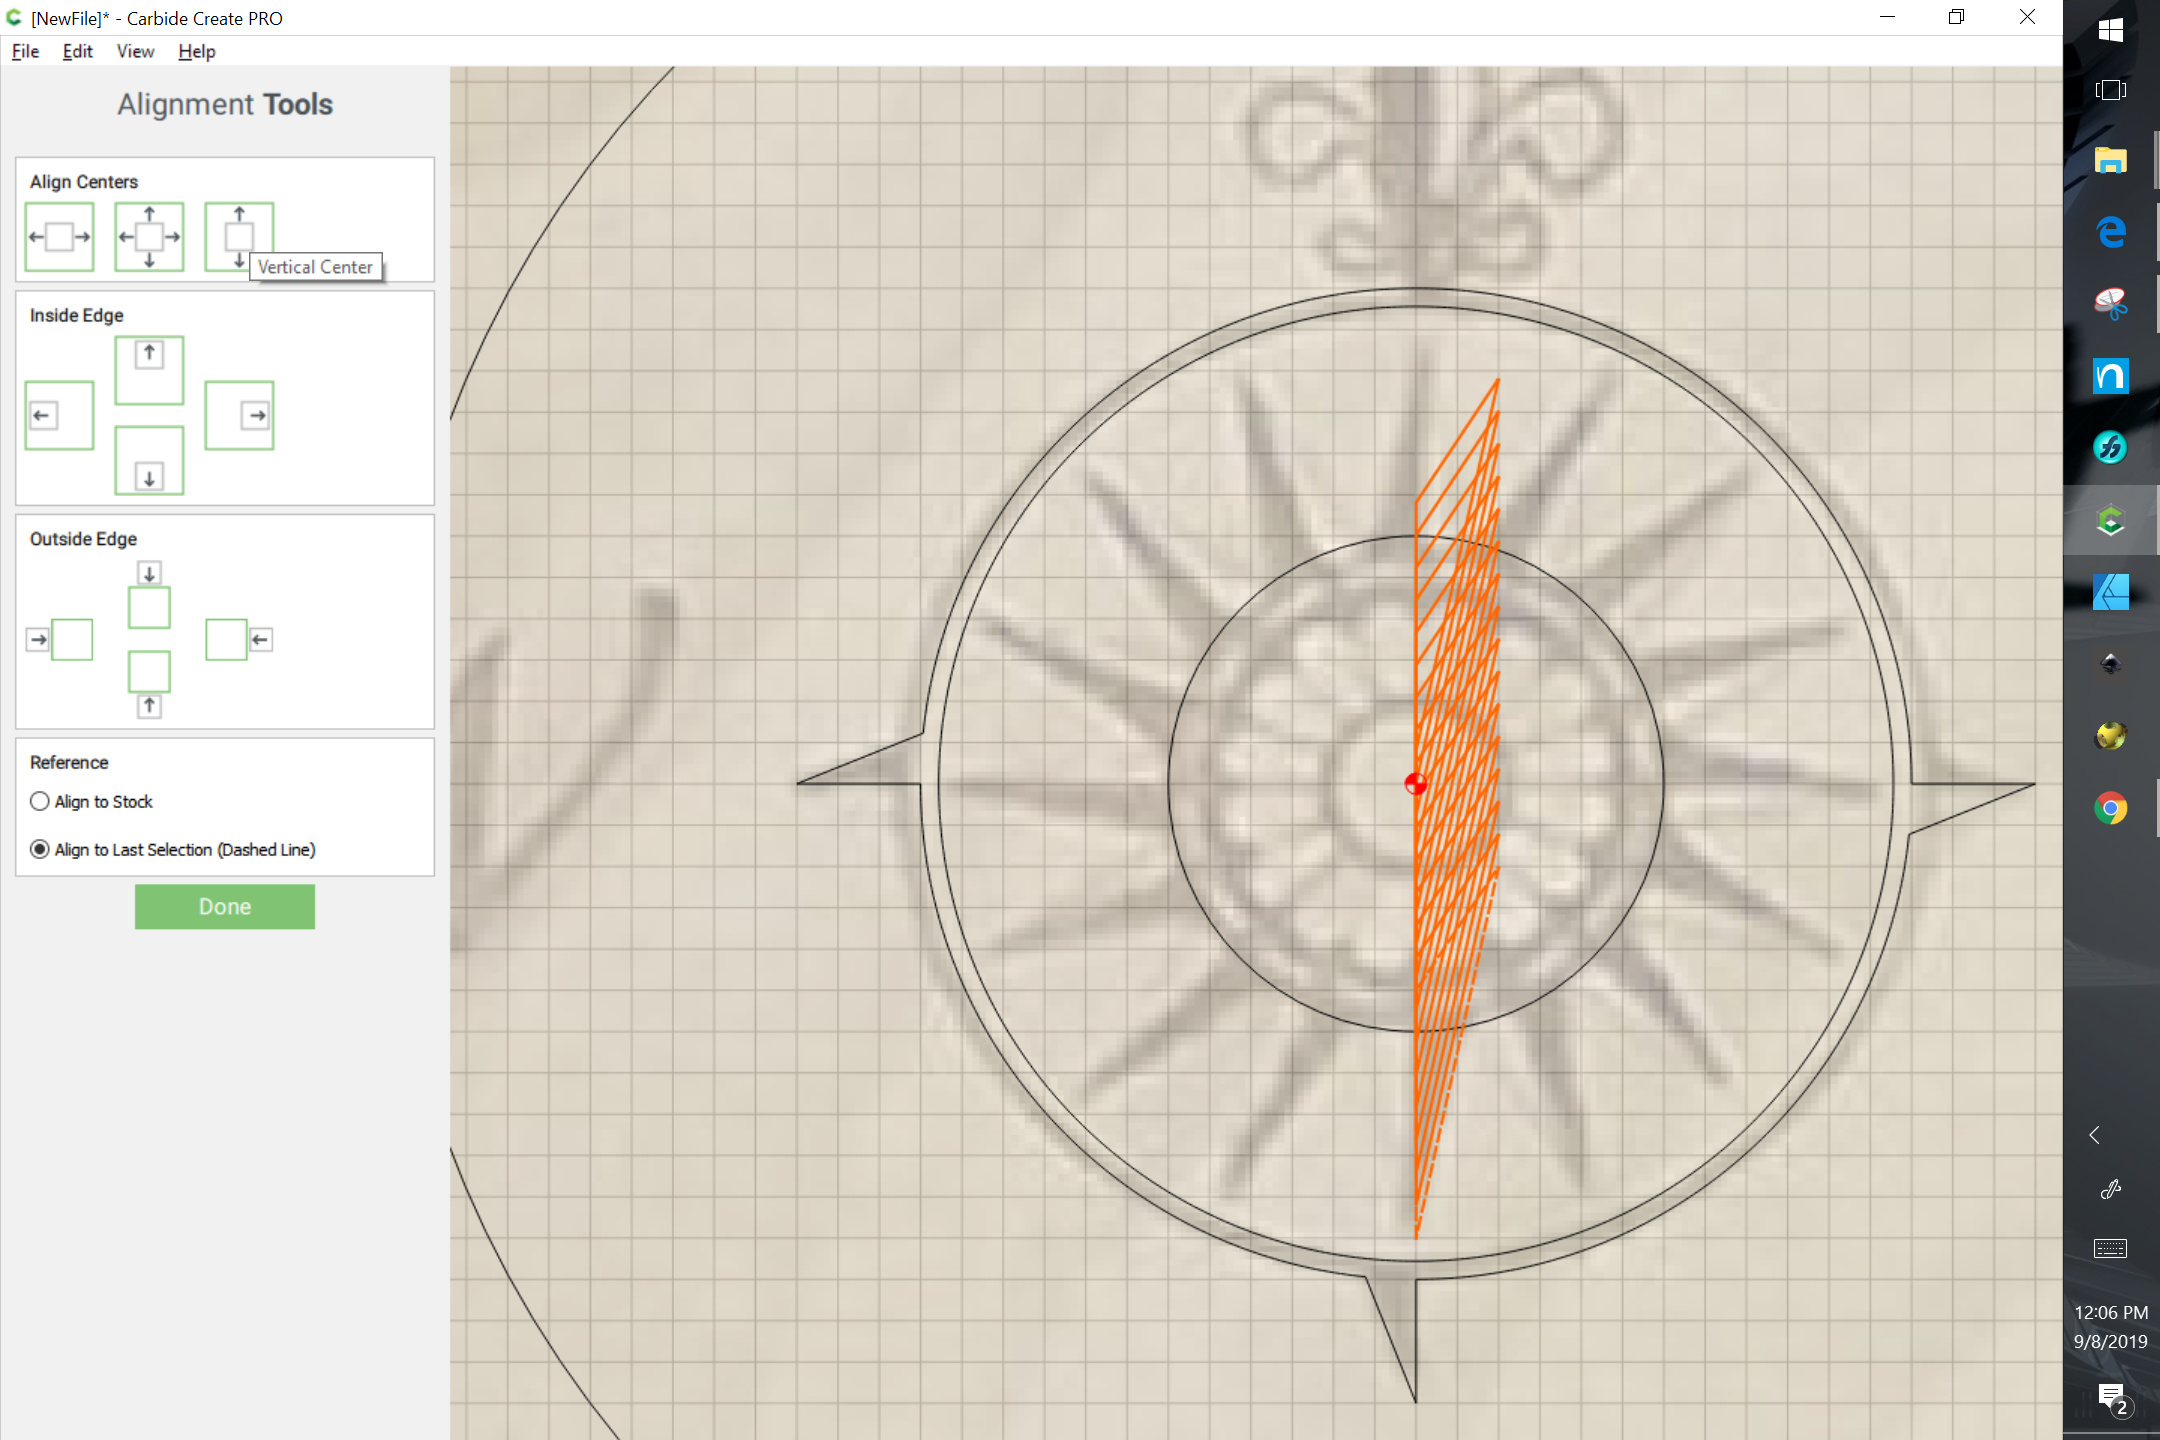
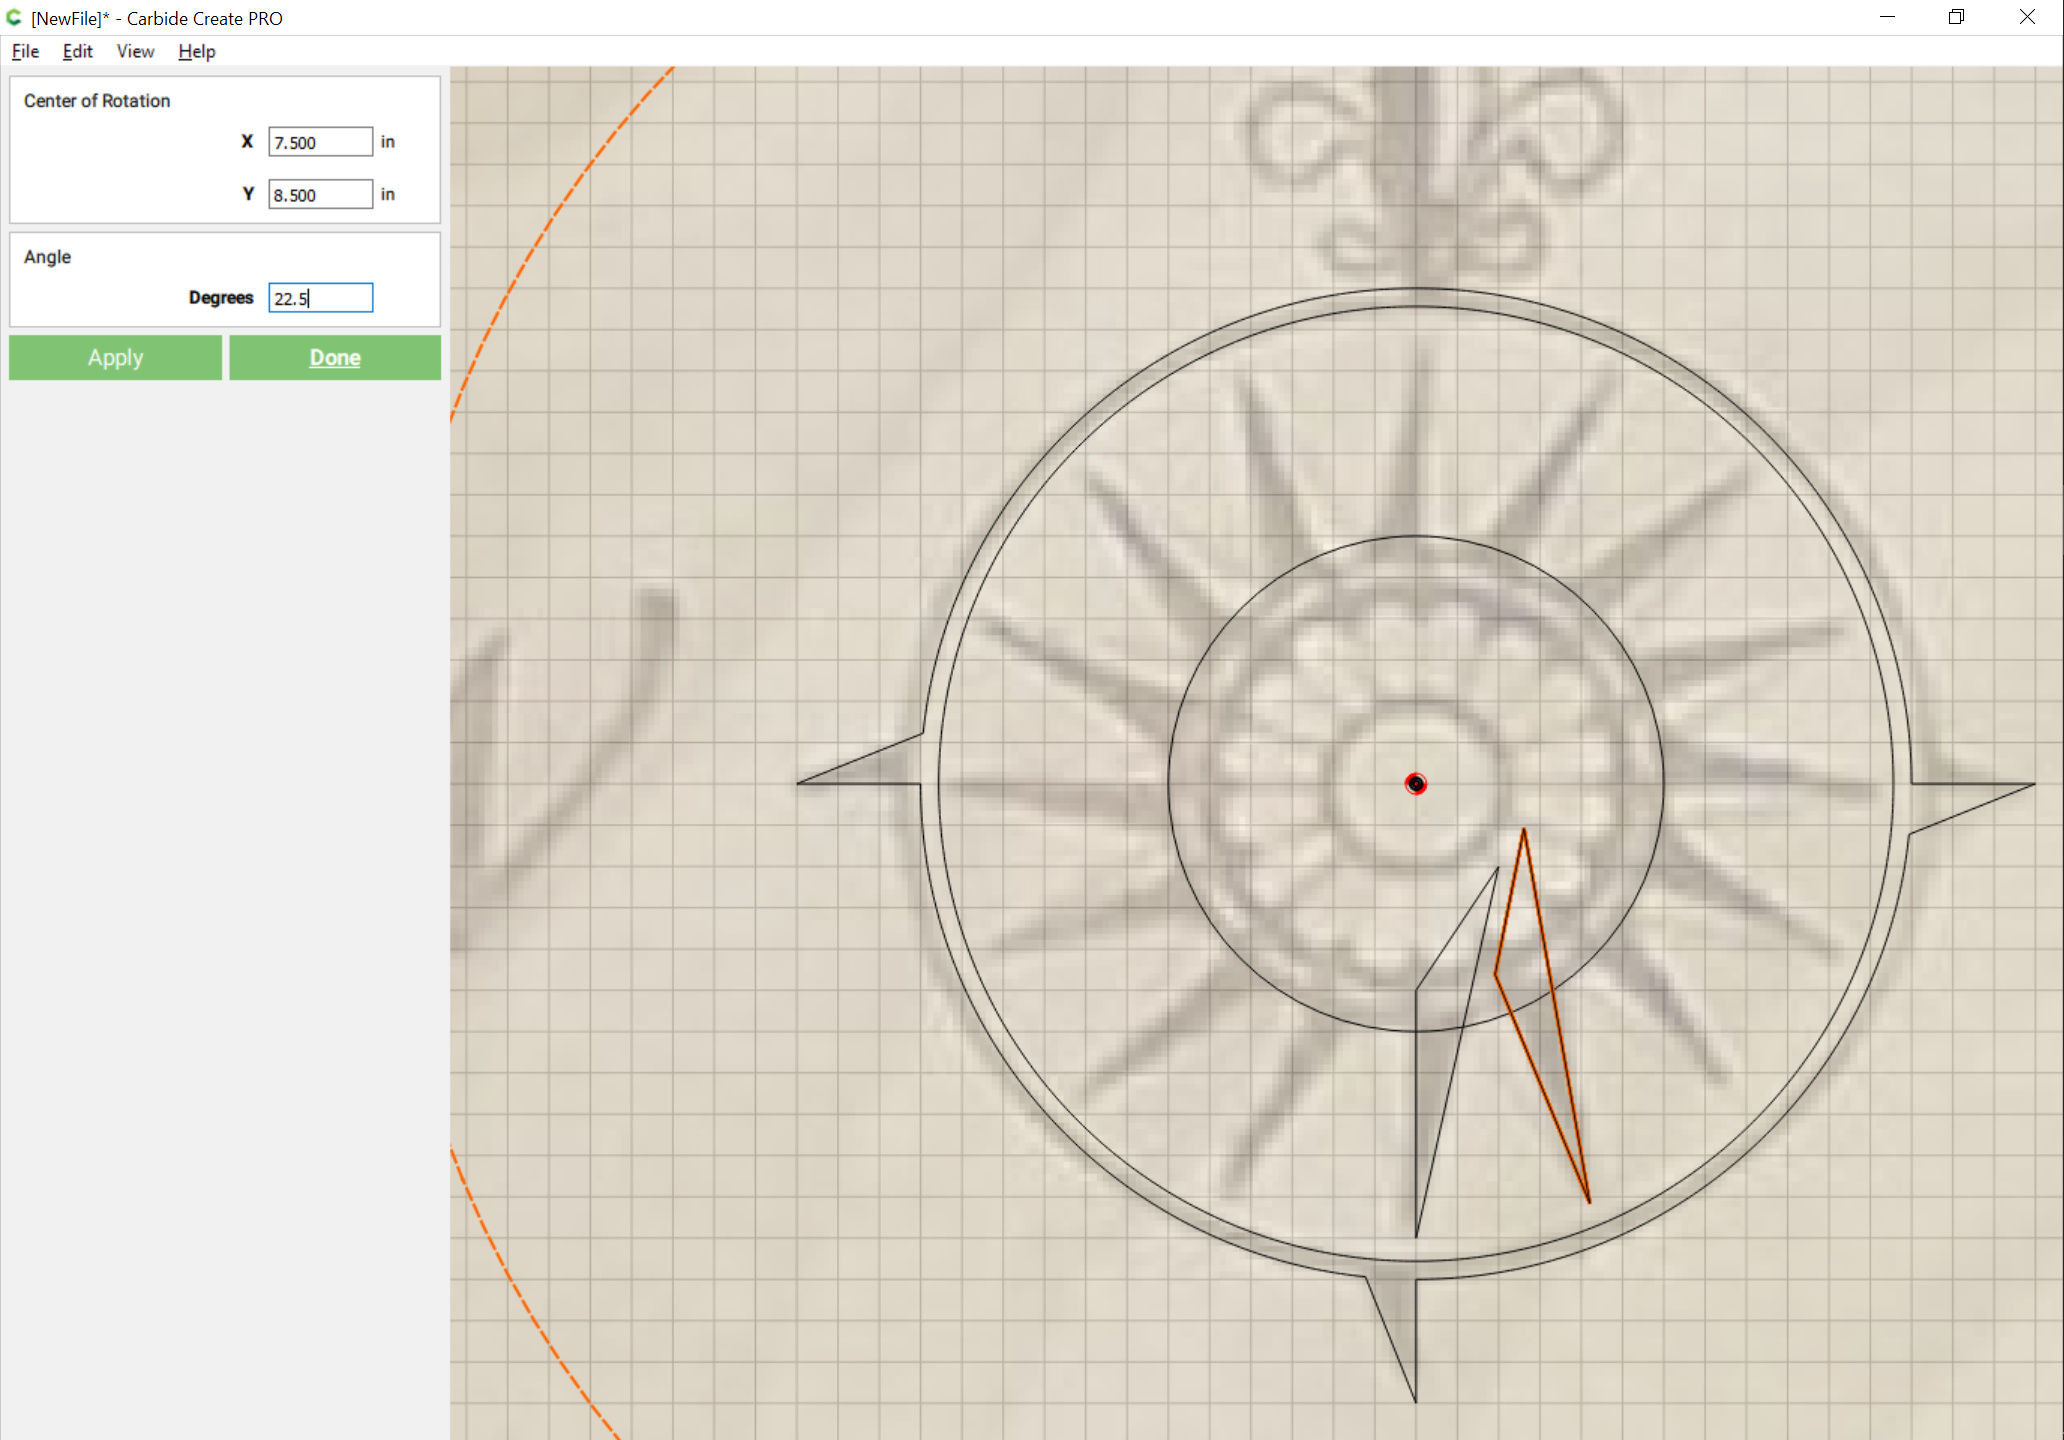
and then use the Rotate tool to rotate it 90 degrees:
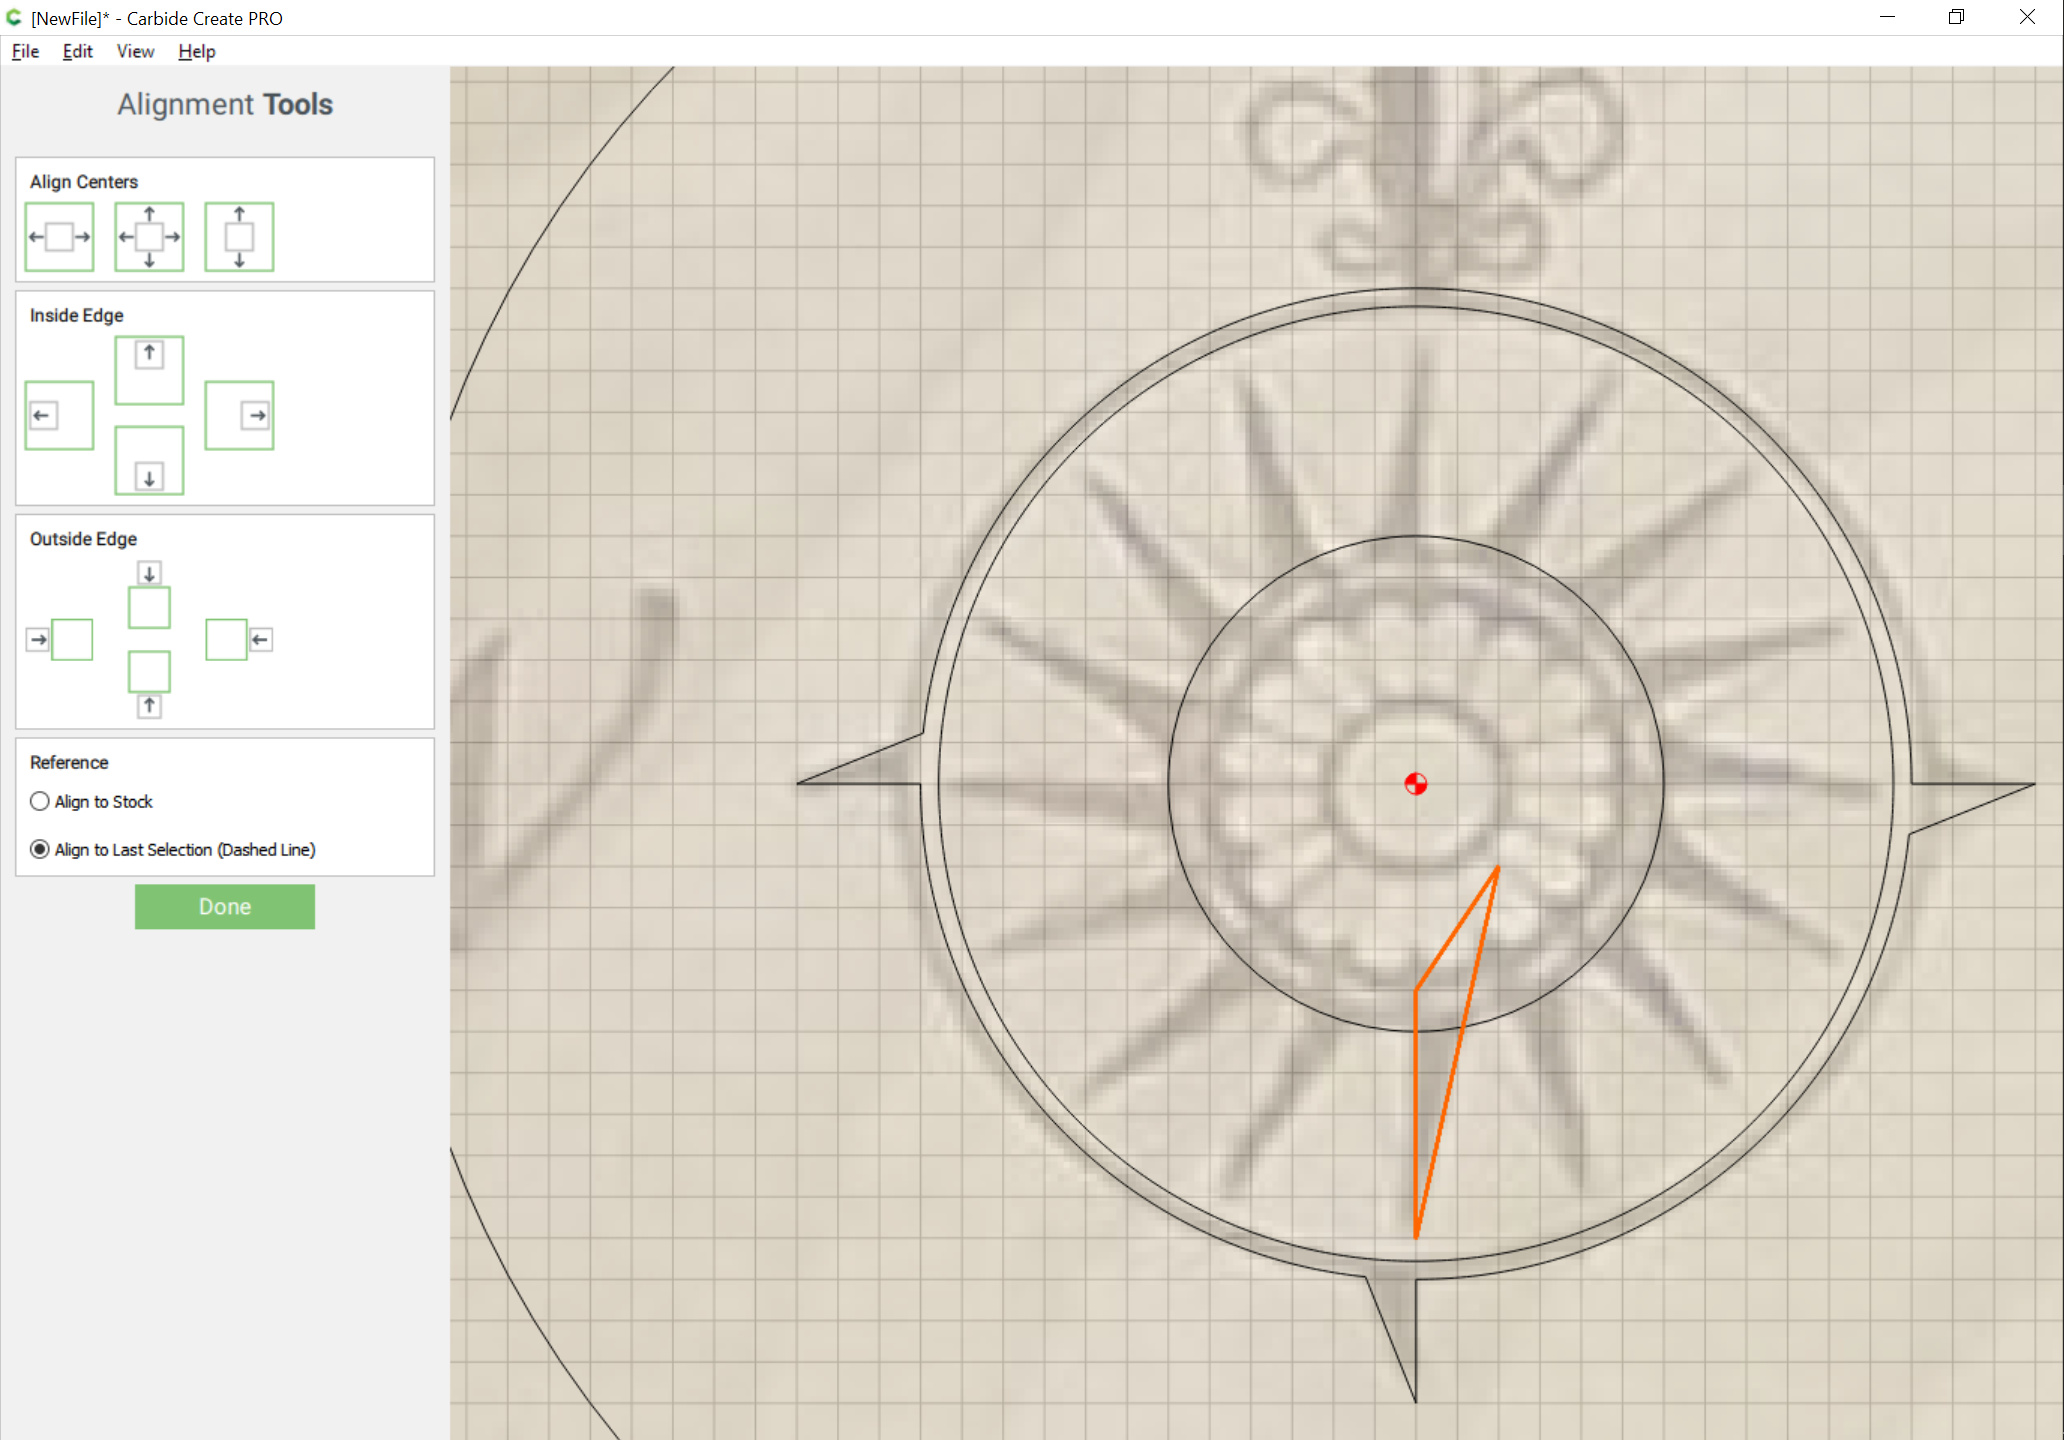
Then repeat with the angle set to -90:
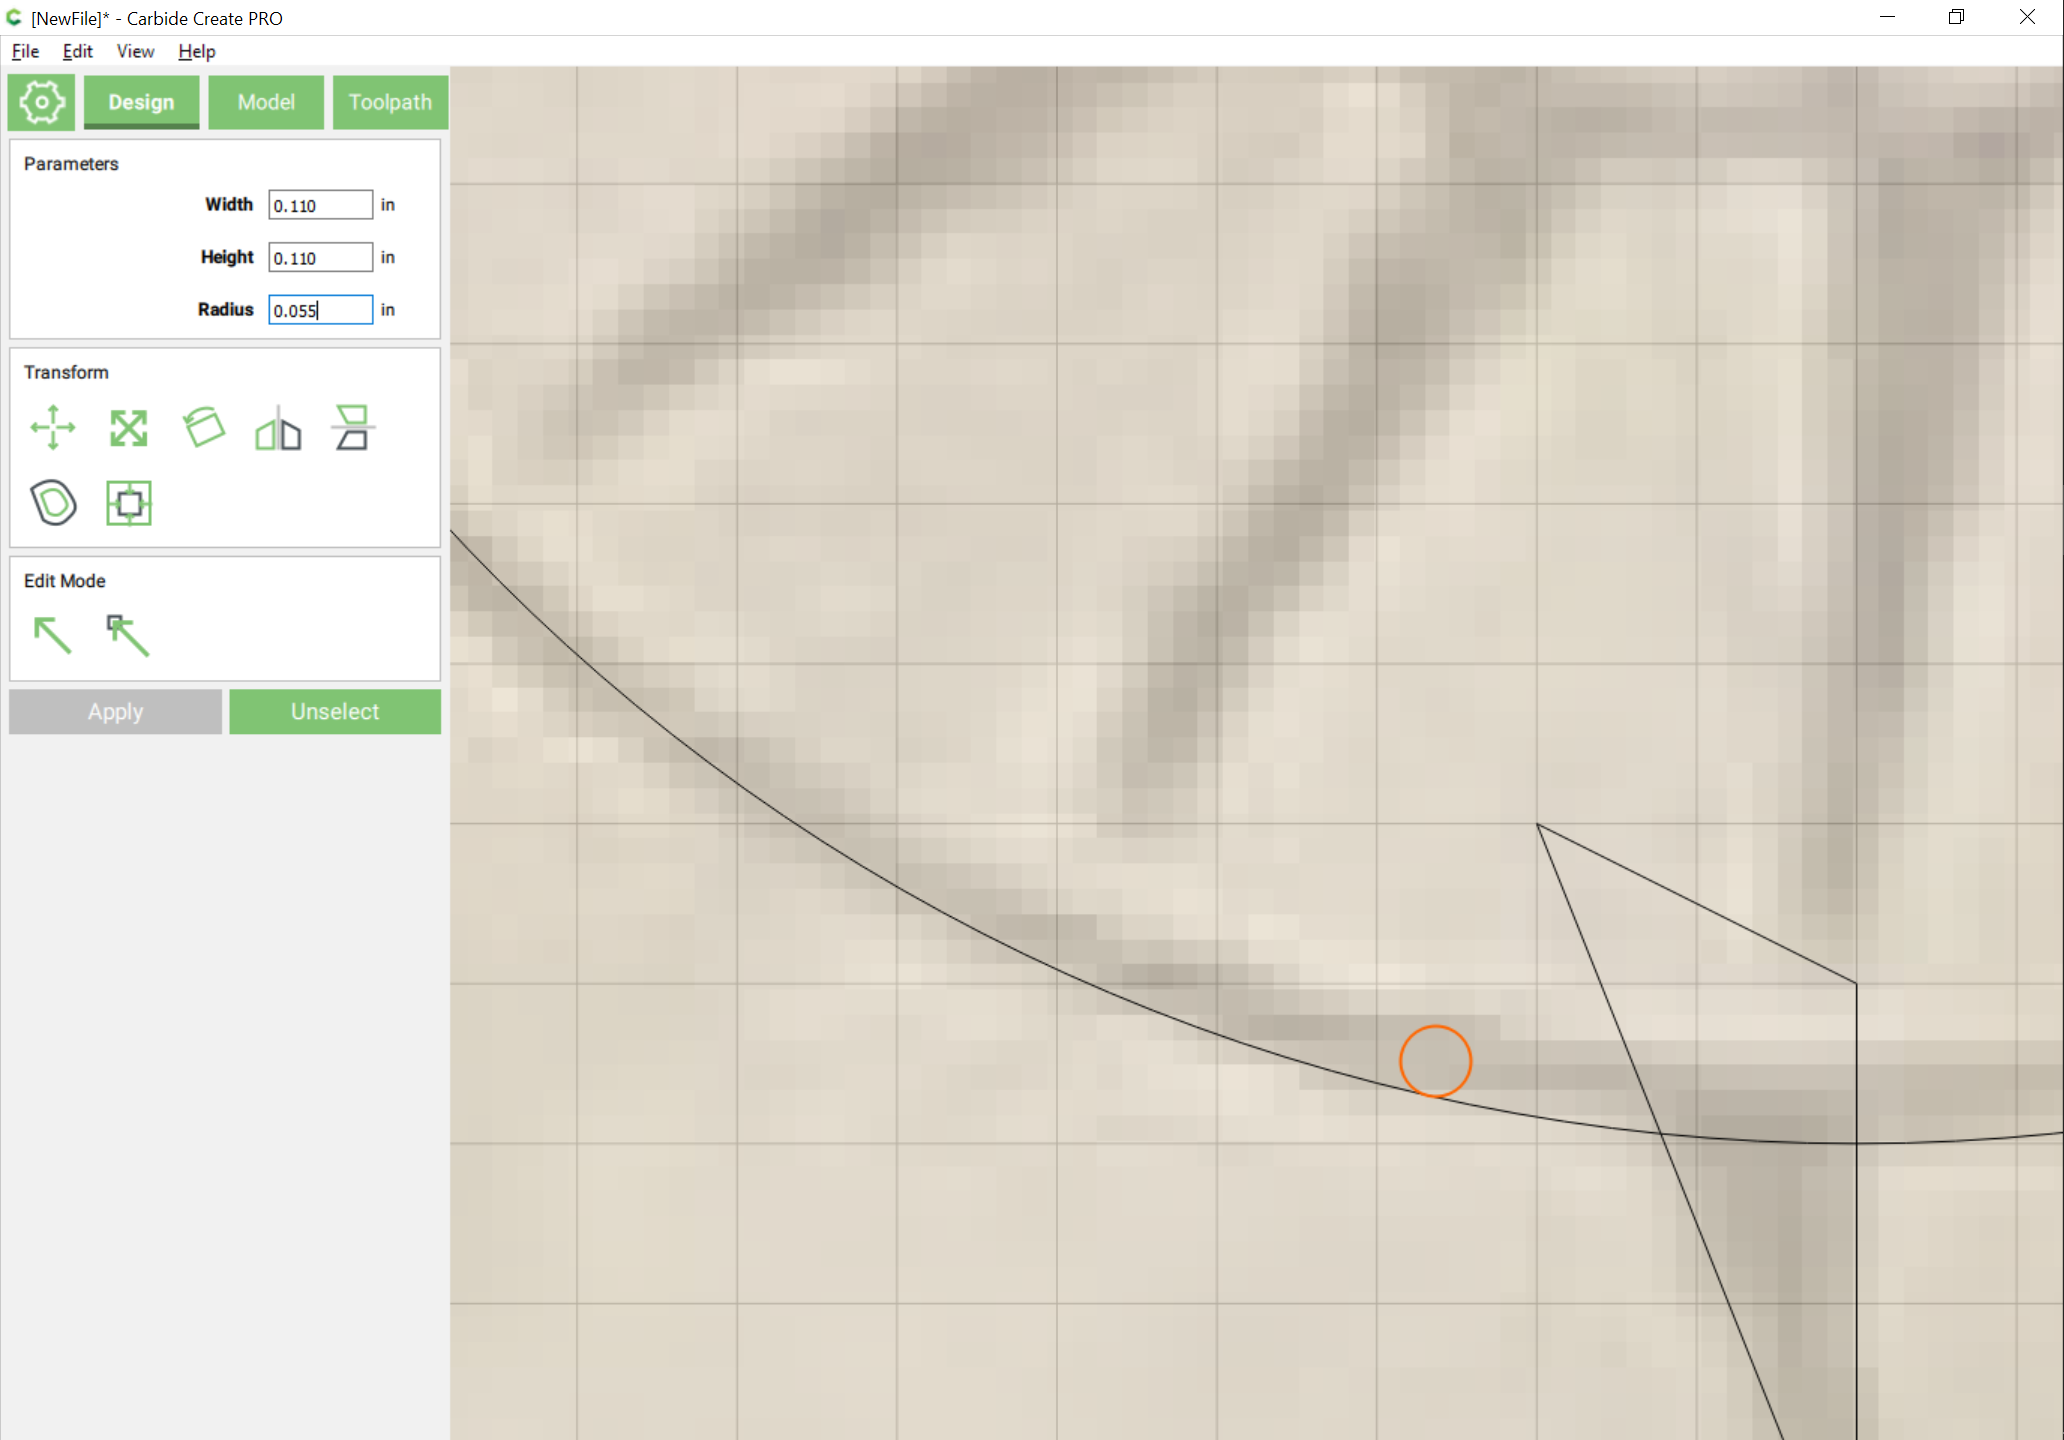
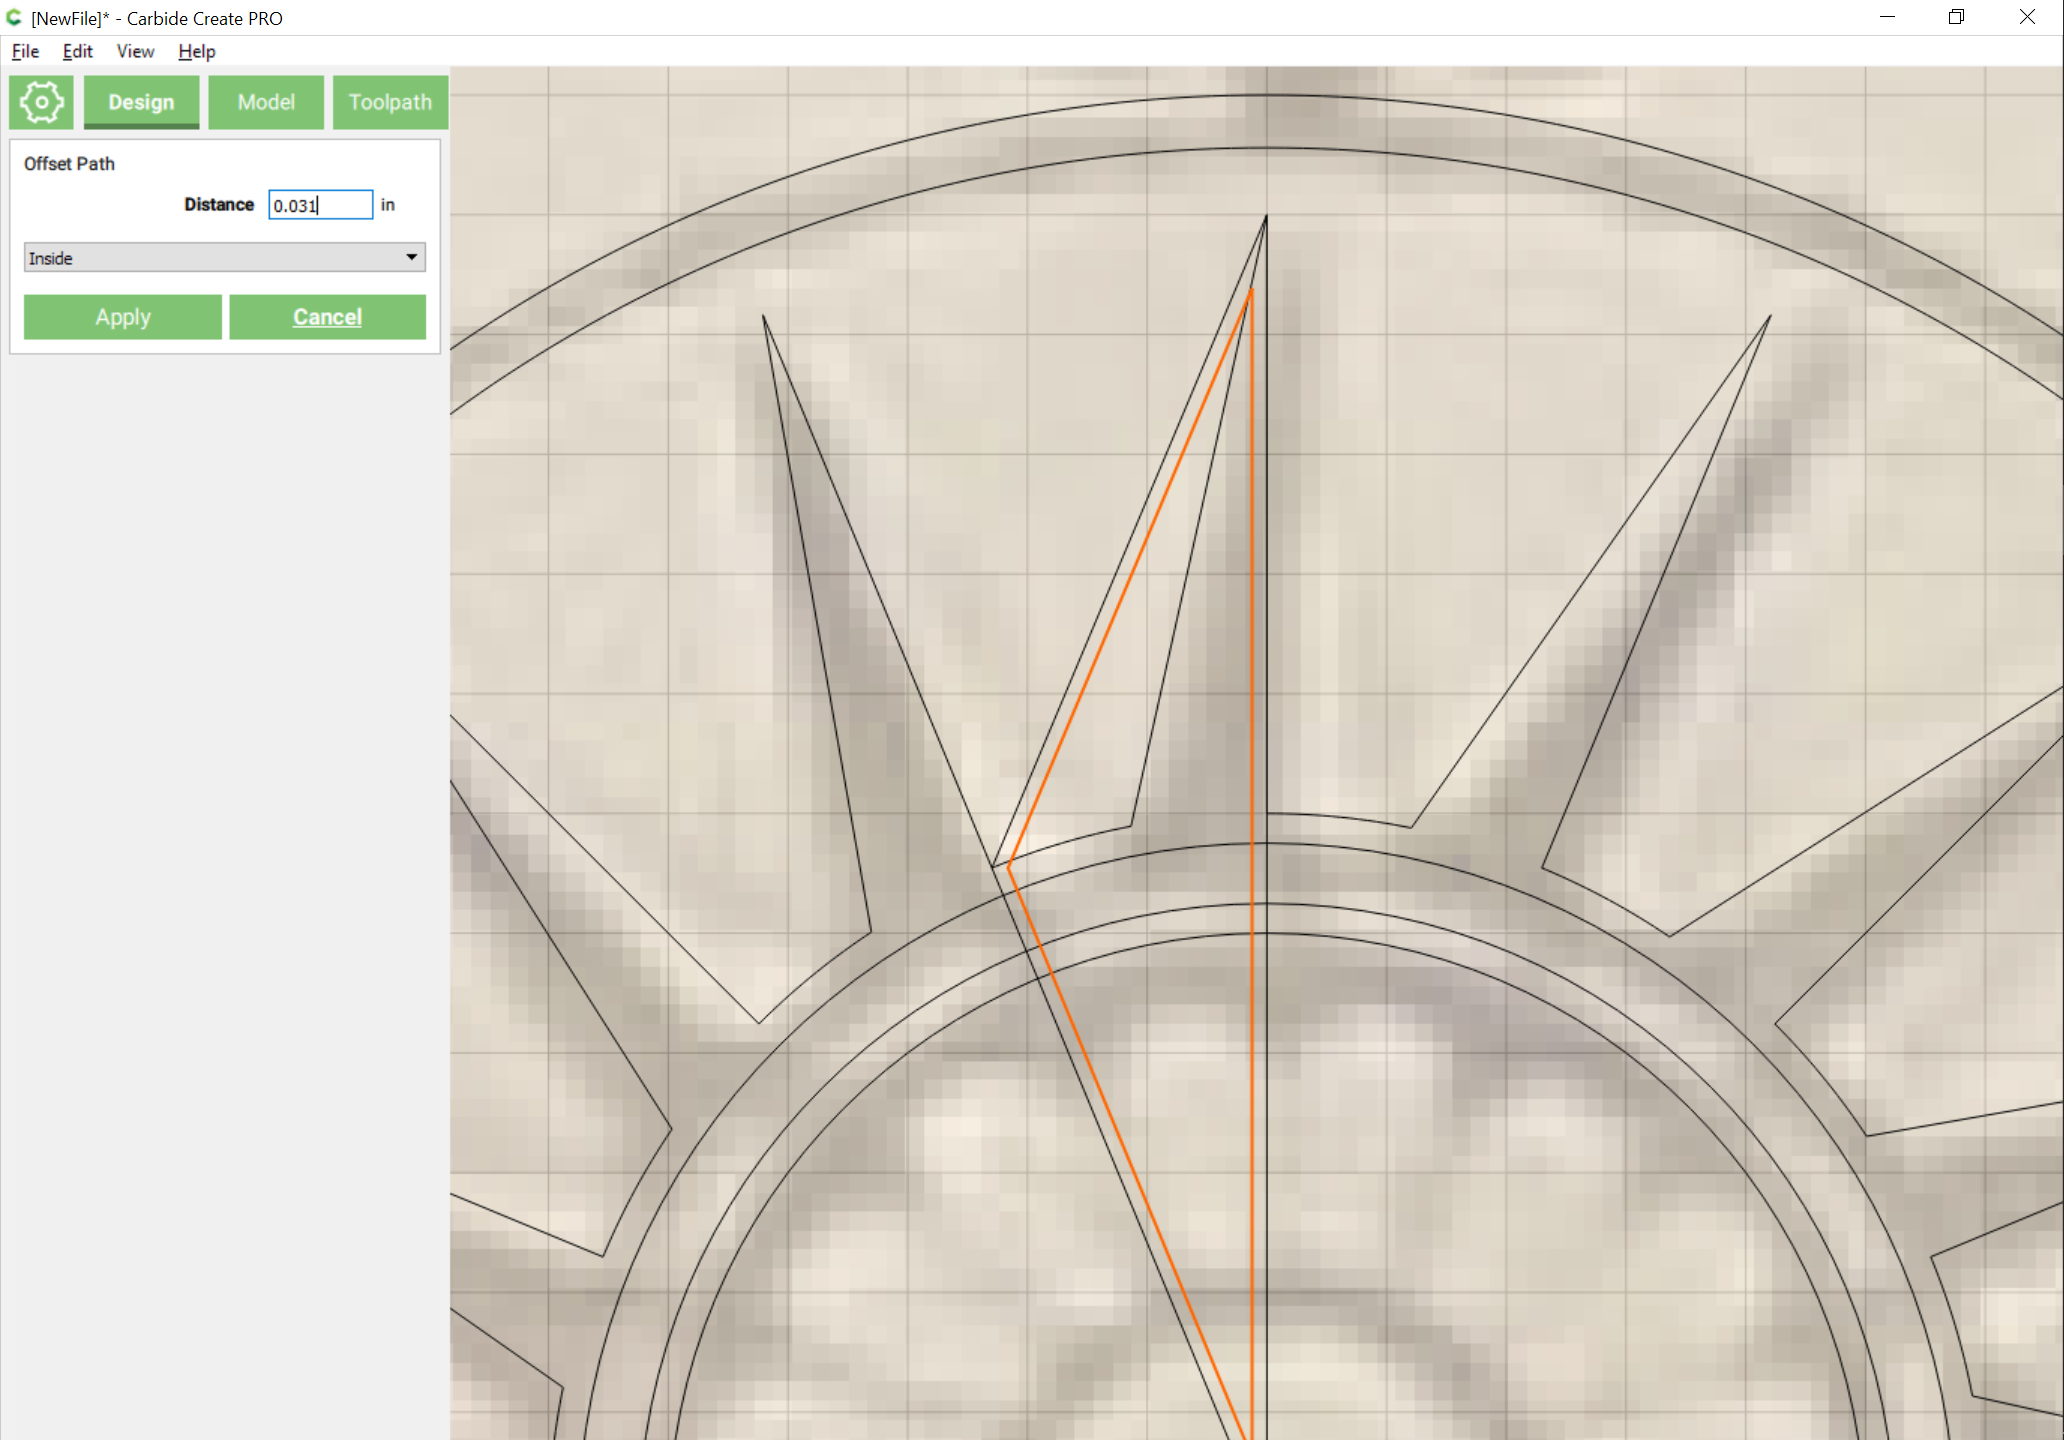
Zoom in on the circle the triangles are placed against, turn off snap to grid, and then draw a circle to measure how thick the circle’s line should be:
and Offset the circle to the inside by that distance:
(Note that you should use the diameter, not radius of the circle)
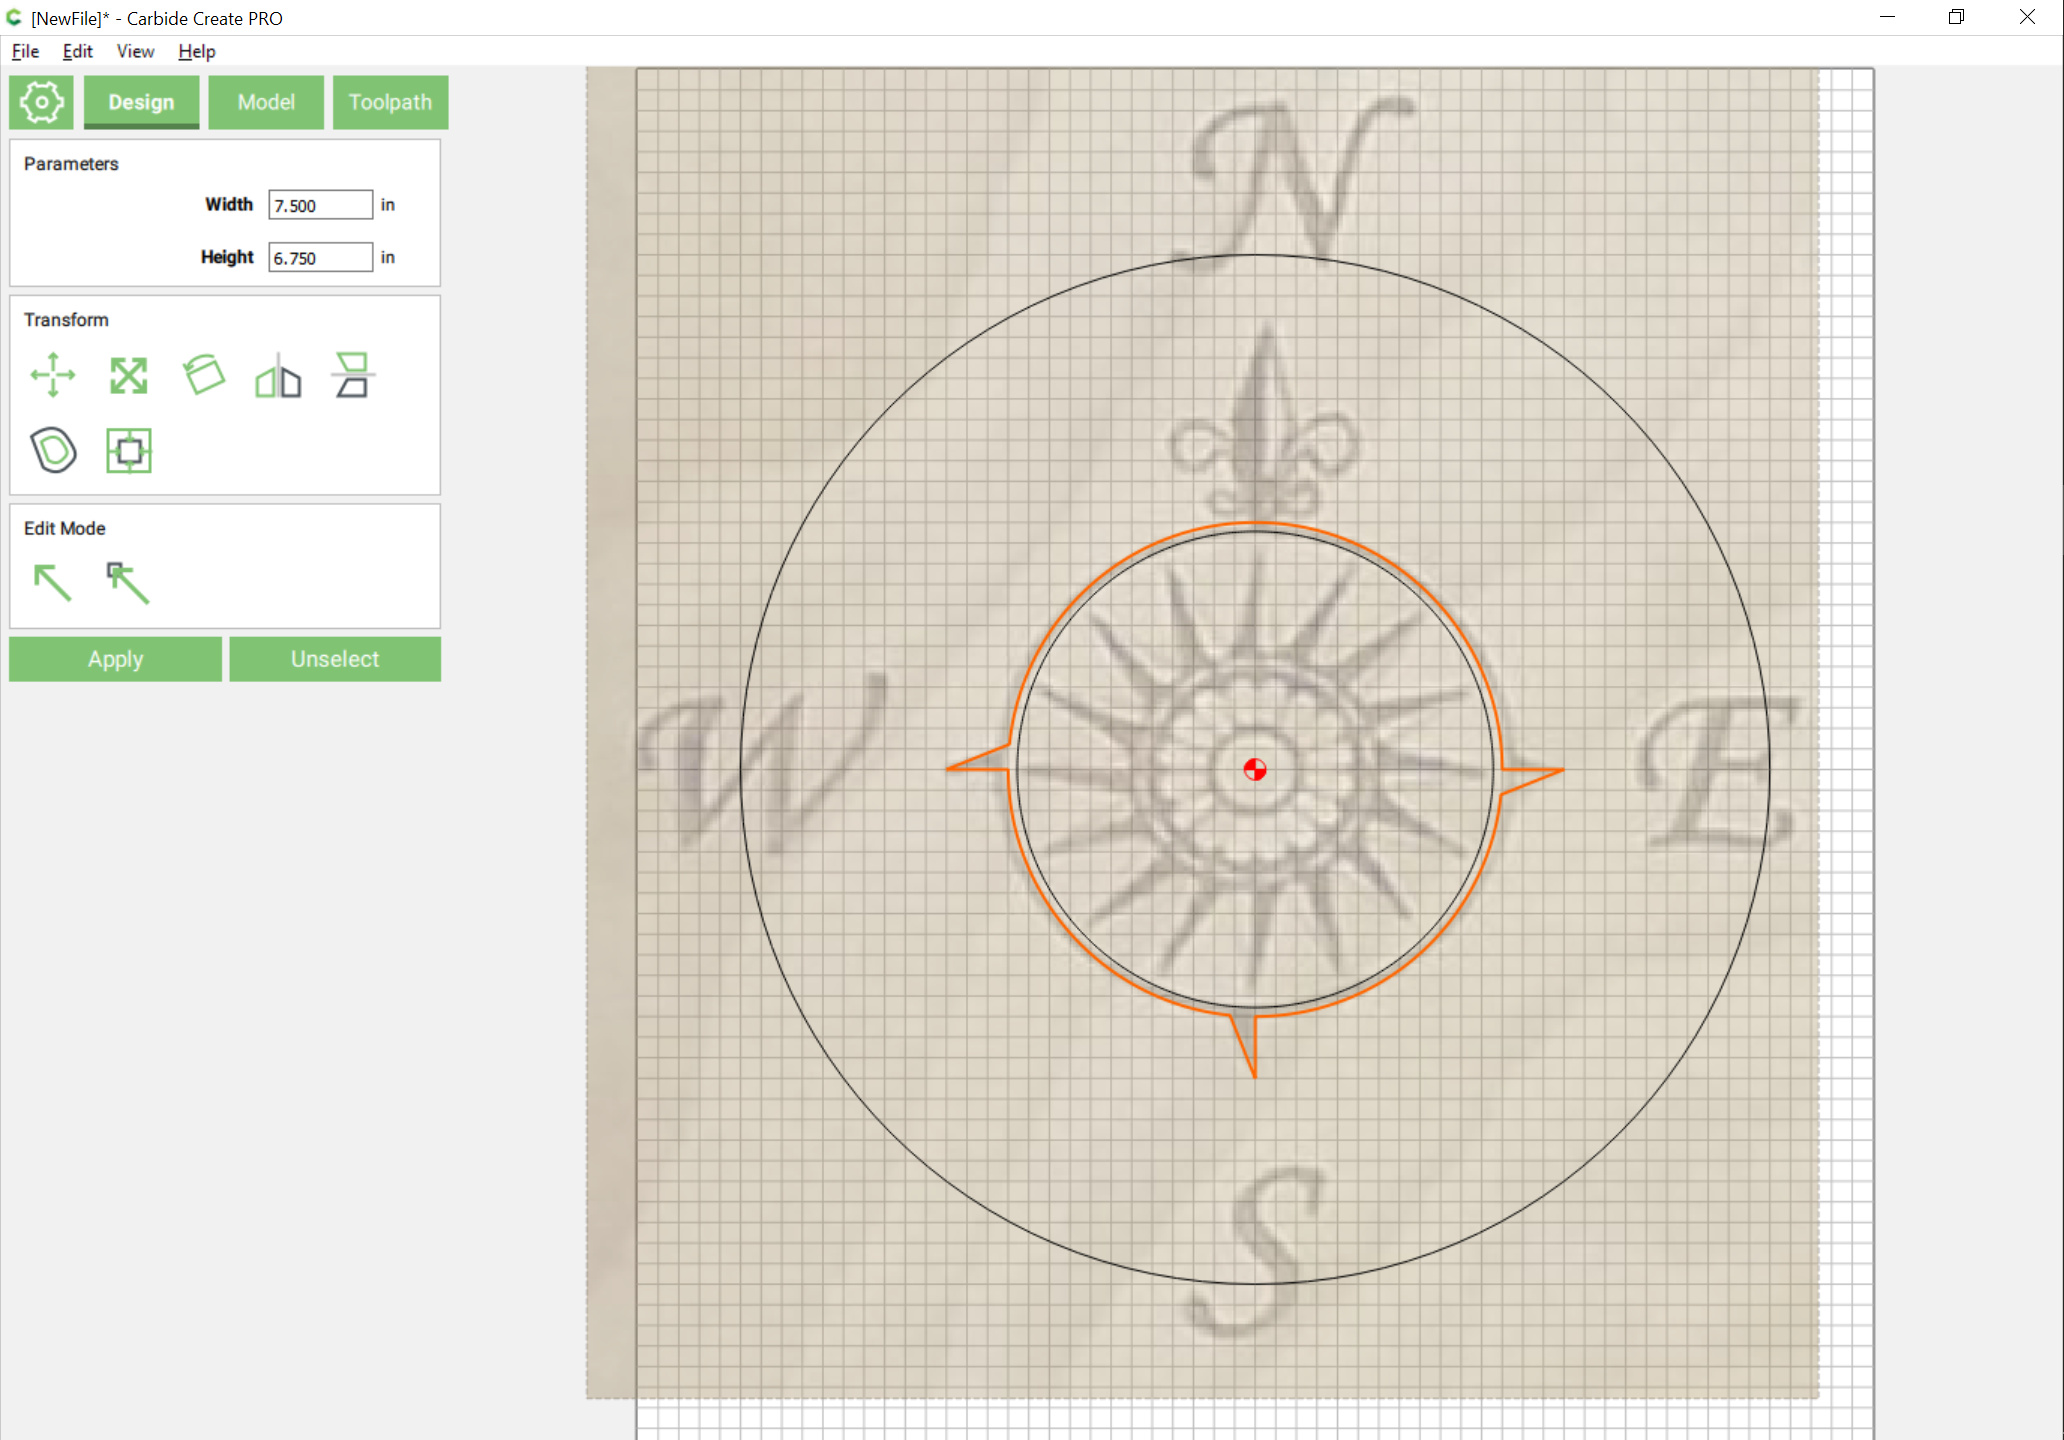
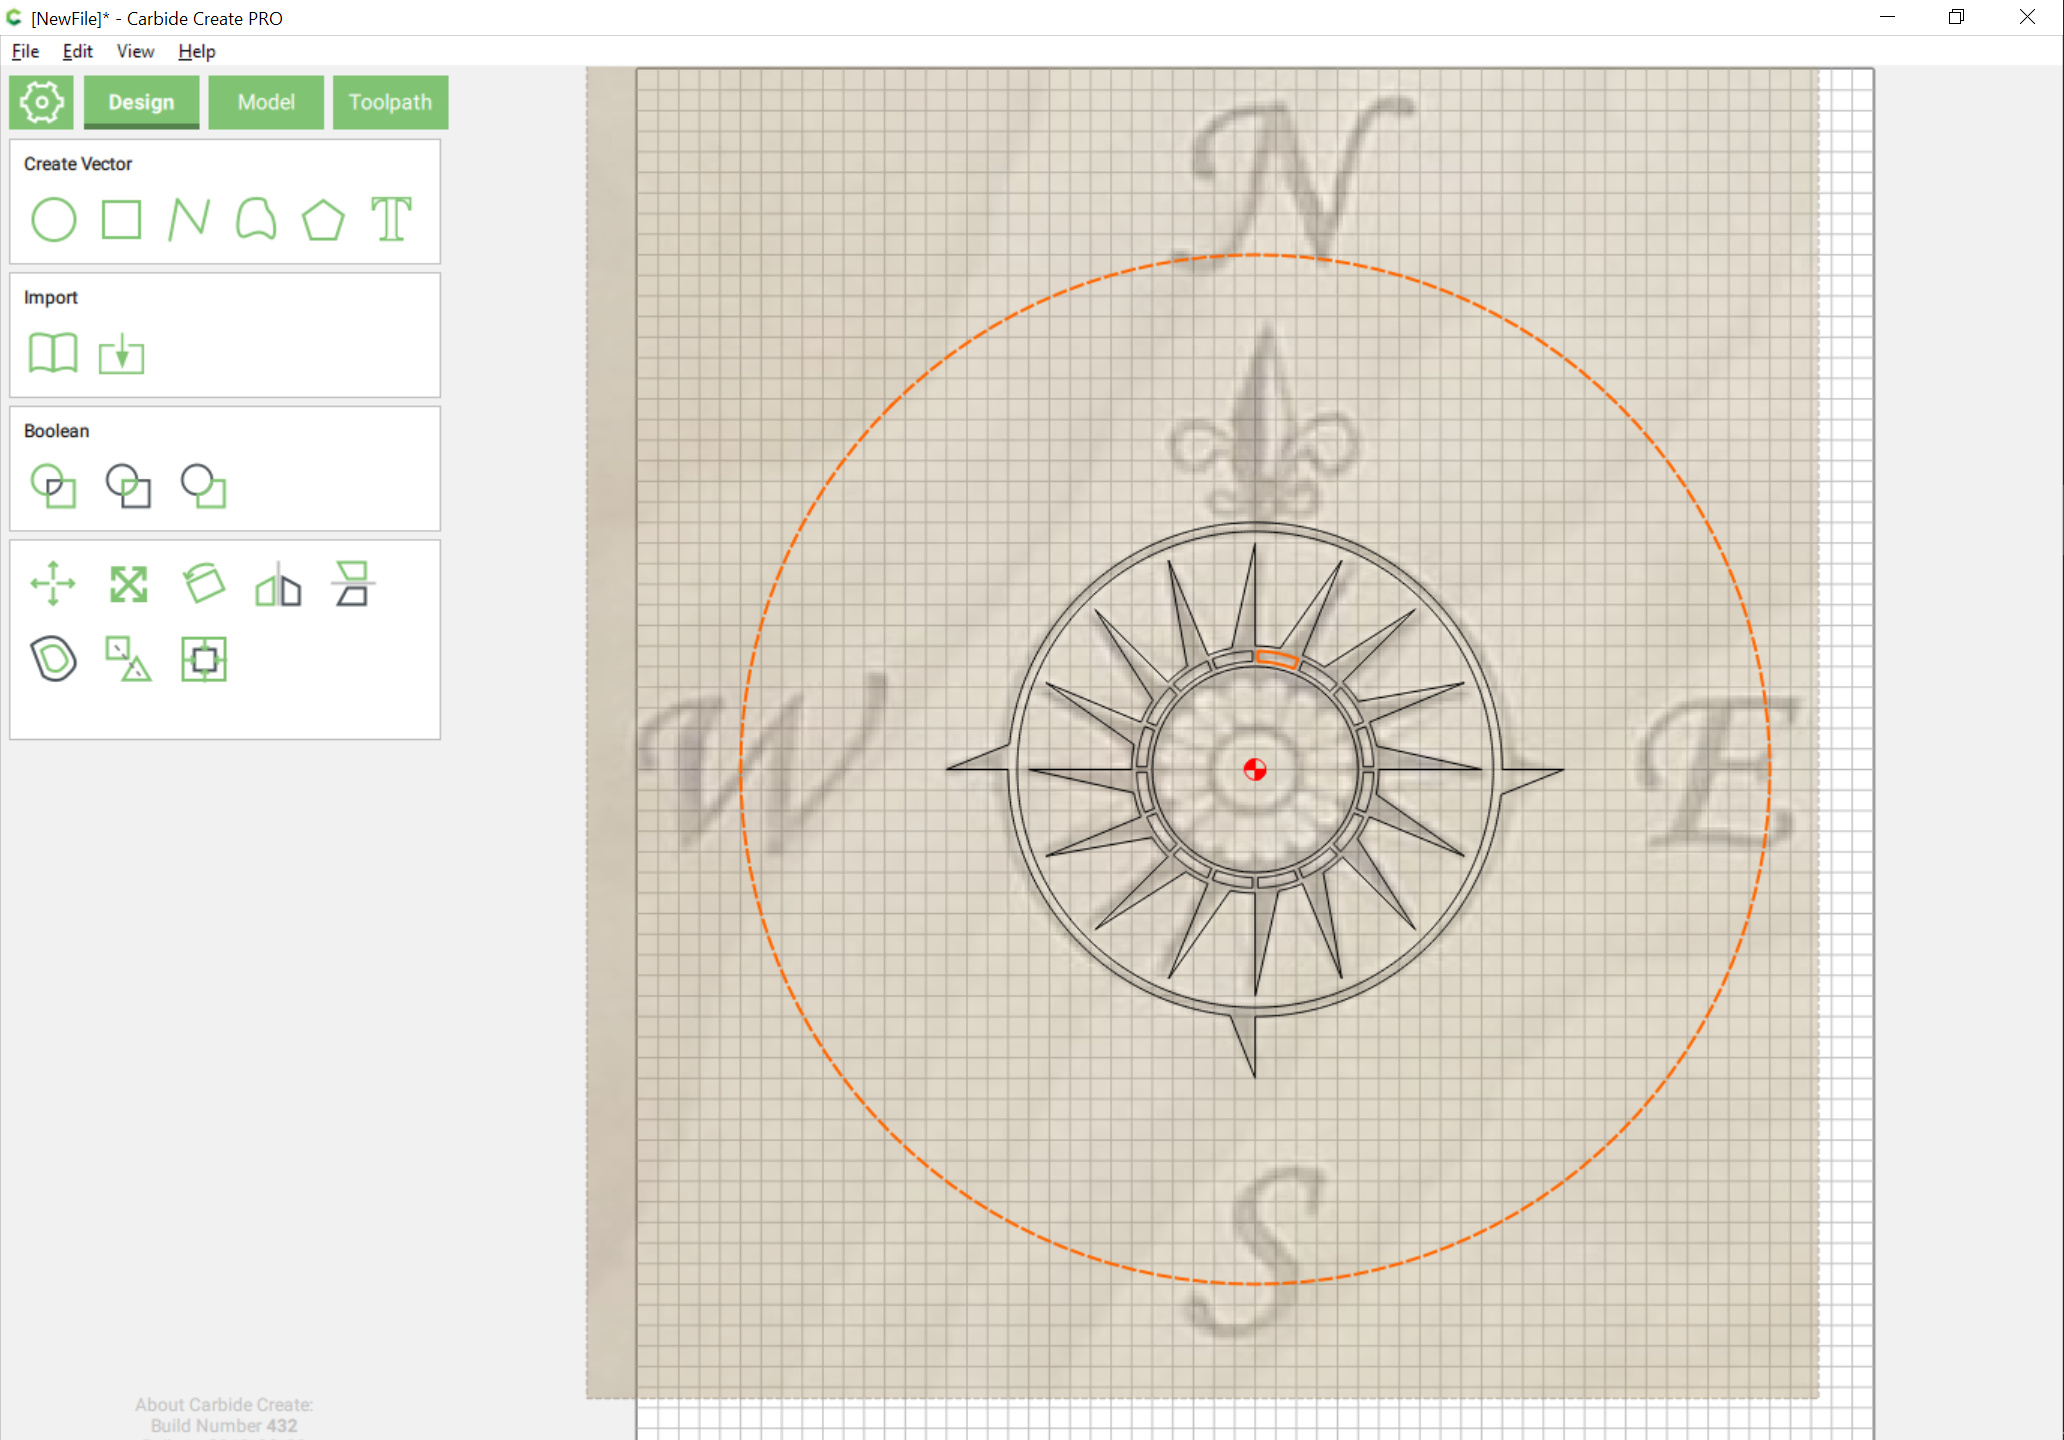
Delete the circle, turn Snap to Grid back on, and Reset the view and select the circle and 3 triangles:
and do a Boolean Union:
Zoom in on the inner portion of the rose and repeat this:
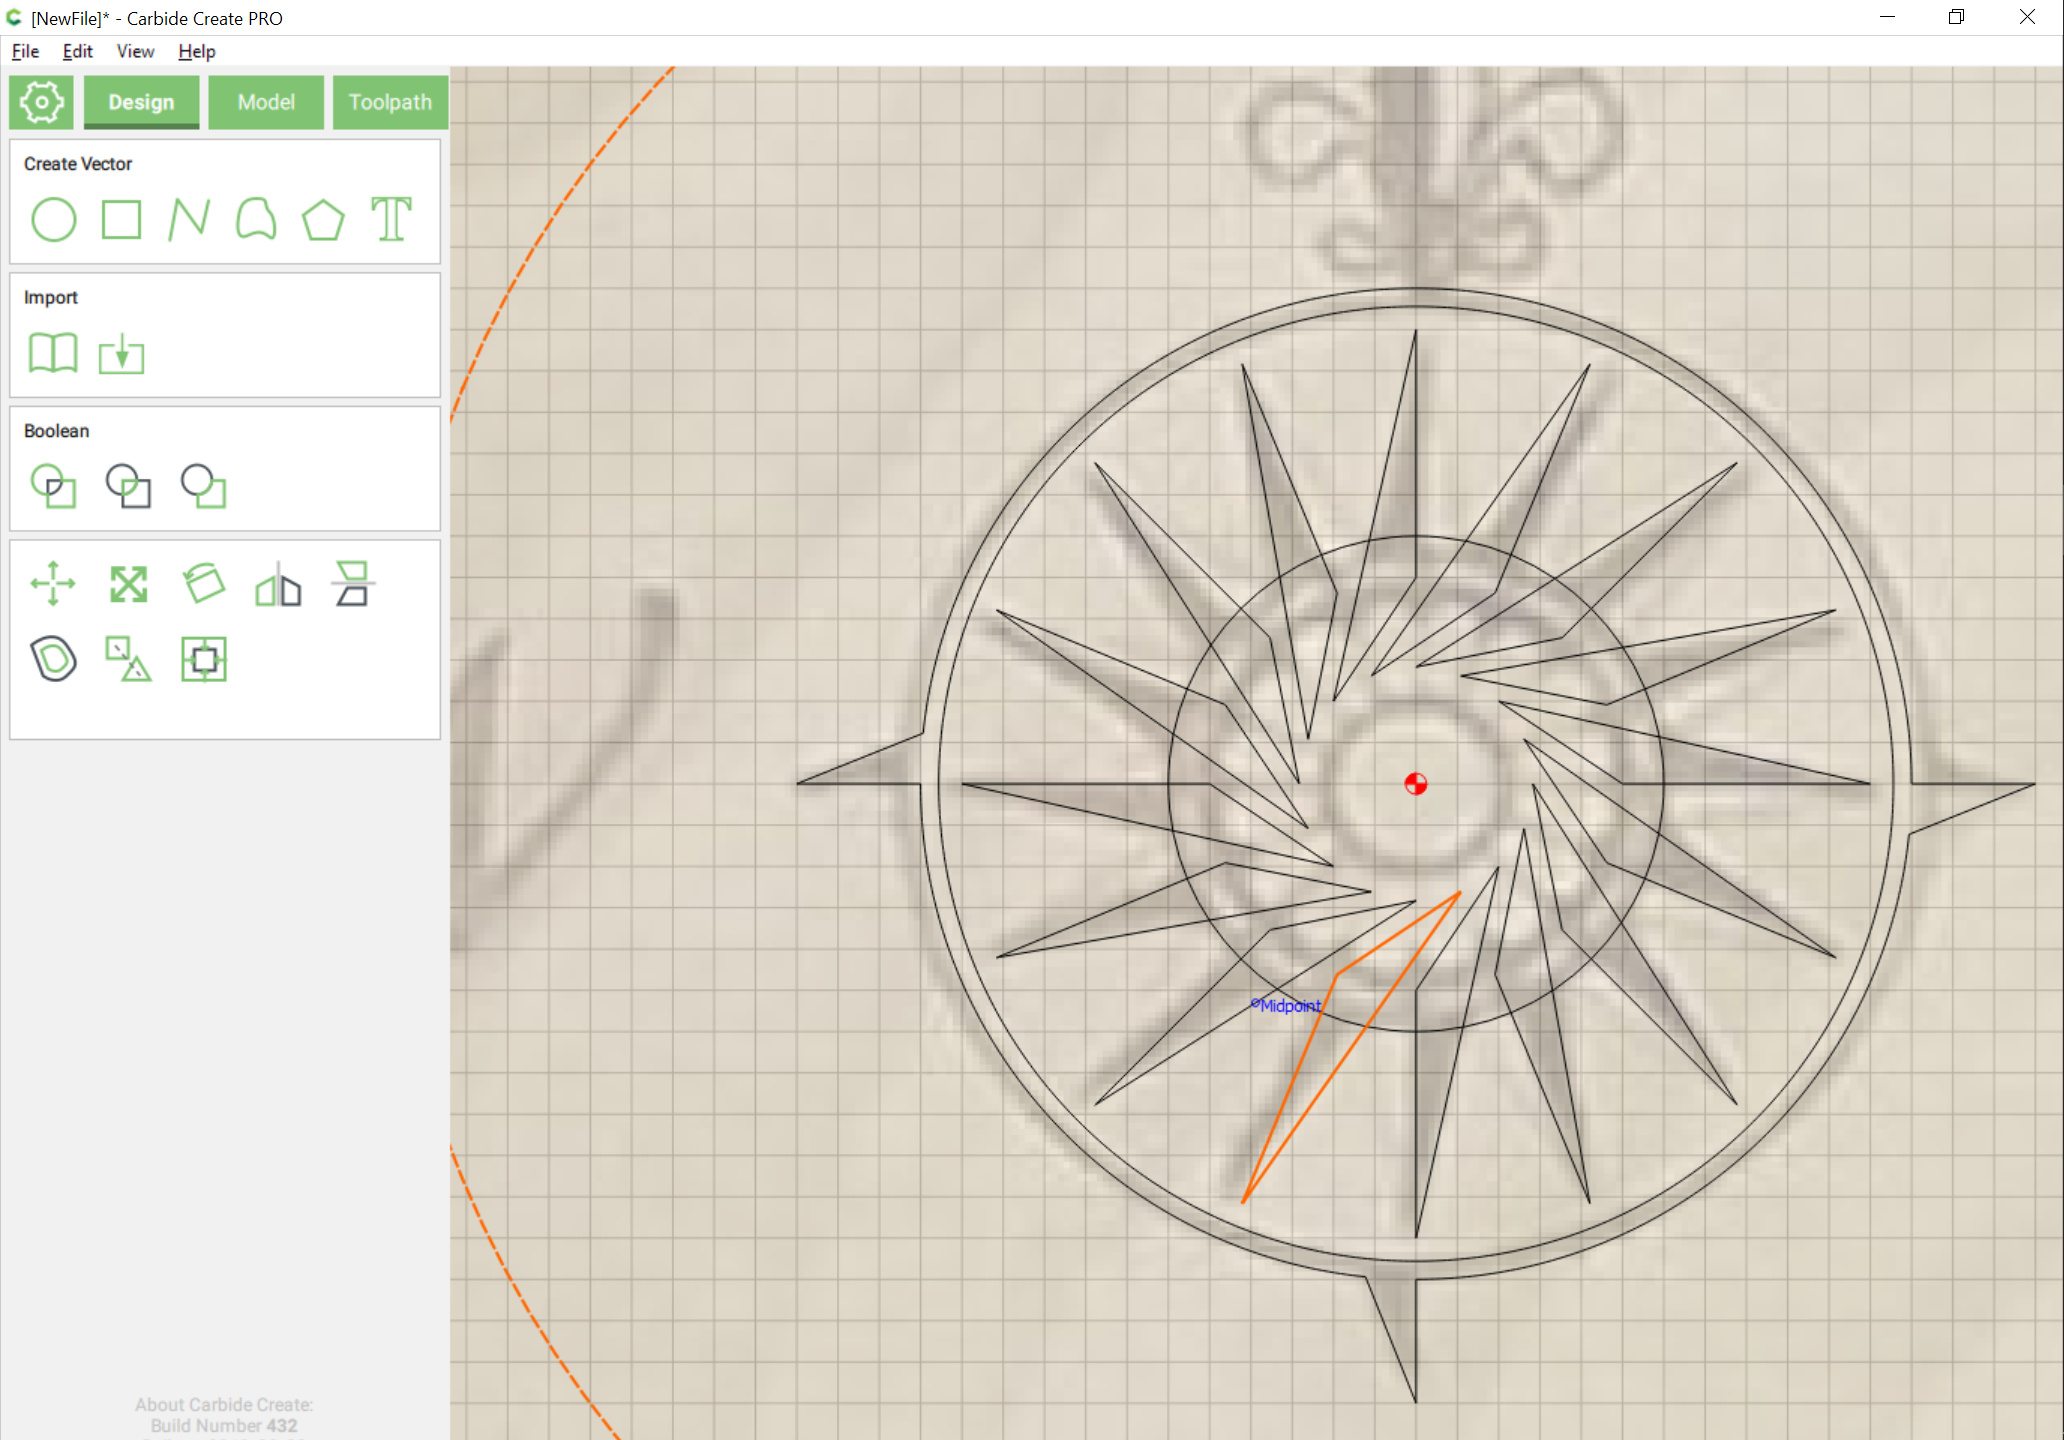
Note that you’ll need 16 triangles and the rotation will be 360 / 16 == 22.5 degrees — rather than dragging 16 objects it will be quicker and more efficient to align them:
Make sure that the bottom left triangle is the key object (dashed highlight) and align against the Left edge:
and Vertical center:
resulting in:
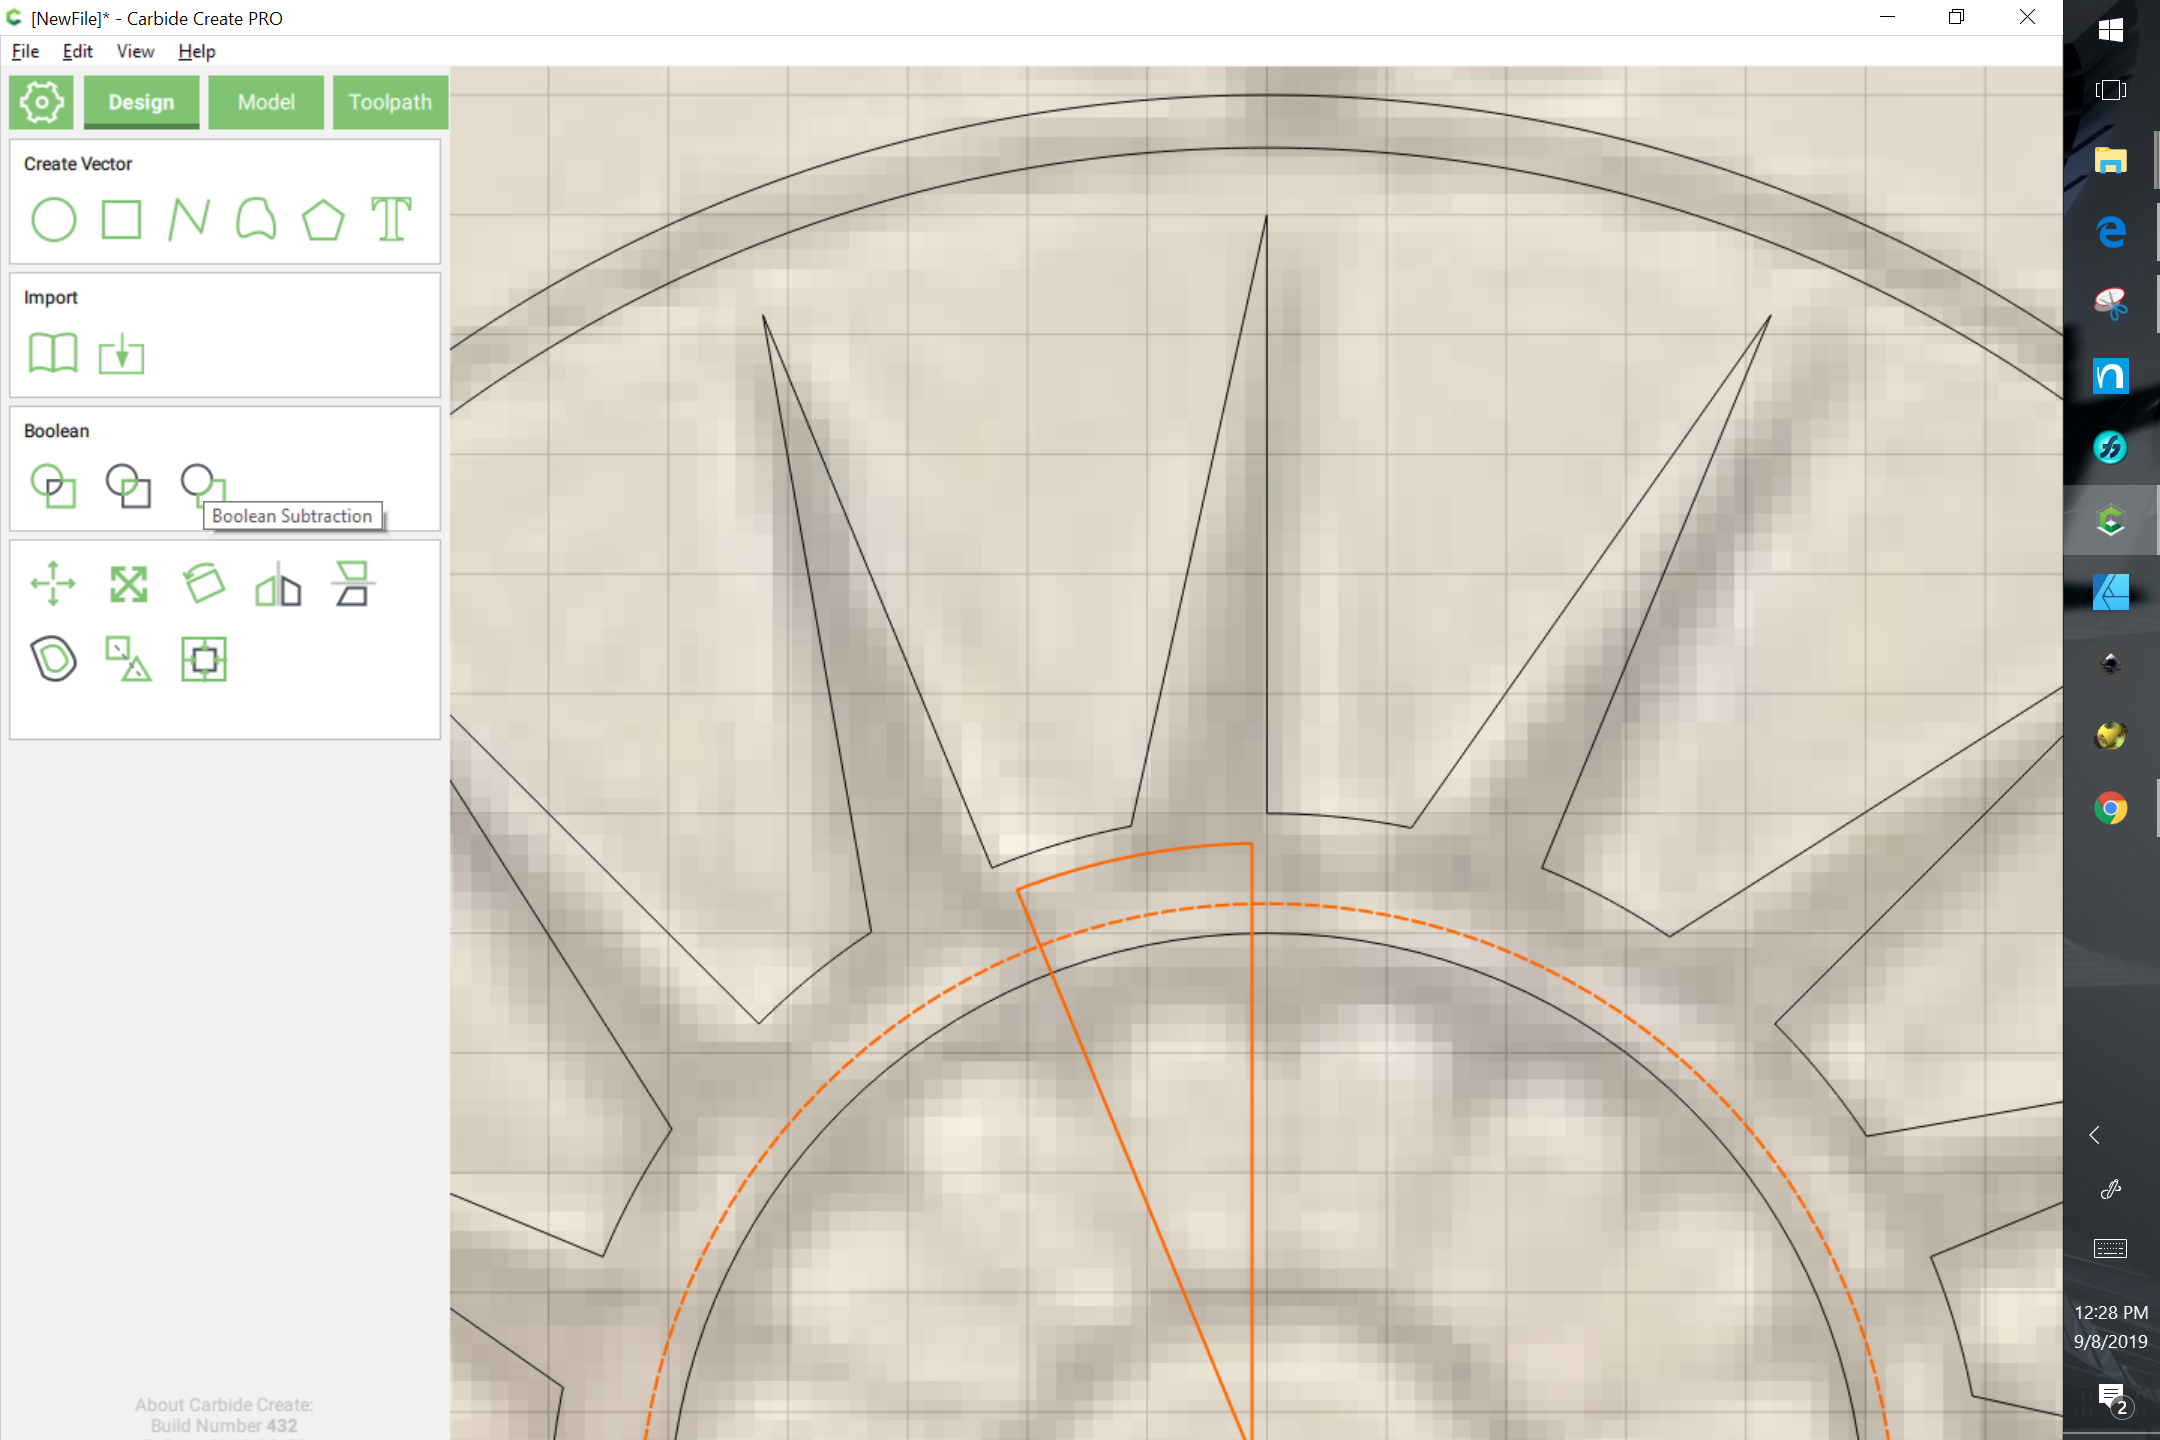
Shift-click on the stack to remove one triangle, then shift-click on the outer circle to add it to the selection:
and rotate by 22.5 degrees:
Shift click on the stack of triangles to remove one and repeat the rotation 14 times:
Select everything and Boolean union as before:
Draw a circle to use for the banding at the center:
and draw additional ones of suitable dimensions to use to define the inner and outer portions of the banding:
At this point we need to draw up a small arc section which again, may be repeated 16 times (with adequate foresight this could have been folded into the previous rotation set — I am by no means a latter day Prometheus, though I do identify with aspects of that character) — the easiest way to do this is to draw a triangle which has a point at the center and defines the arc in question:
So that the band edges will point to the desired angles, inset the triangle by half the desired thickness:
Delete the original triangle, select the triangle and the circle which defines the outer edge of the band and do a Boolean intersection:
resulting in:
shift select the circle which defines the inner edge of the banding and do Boolean Subtraction:
Resulting in:
Again, we duplicate it 15 times, align it, then select the surrounding circle and rotate by 22.5 degrees 15 times:
Again, there are 16 petals to the rose, so that they could have been done at the same time as the other elements, mea culpa.
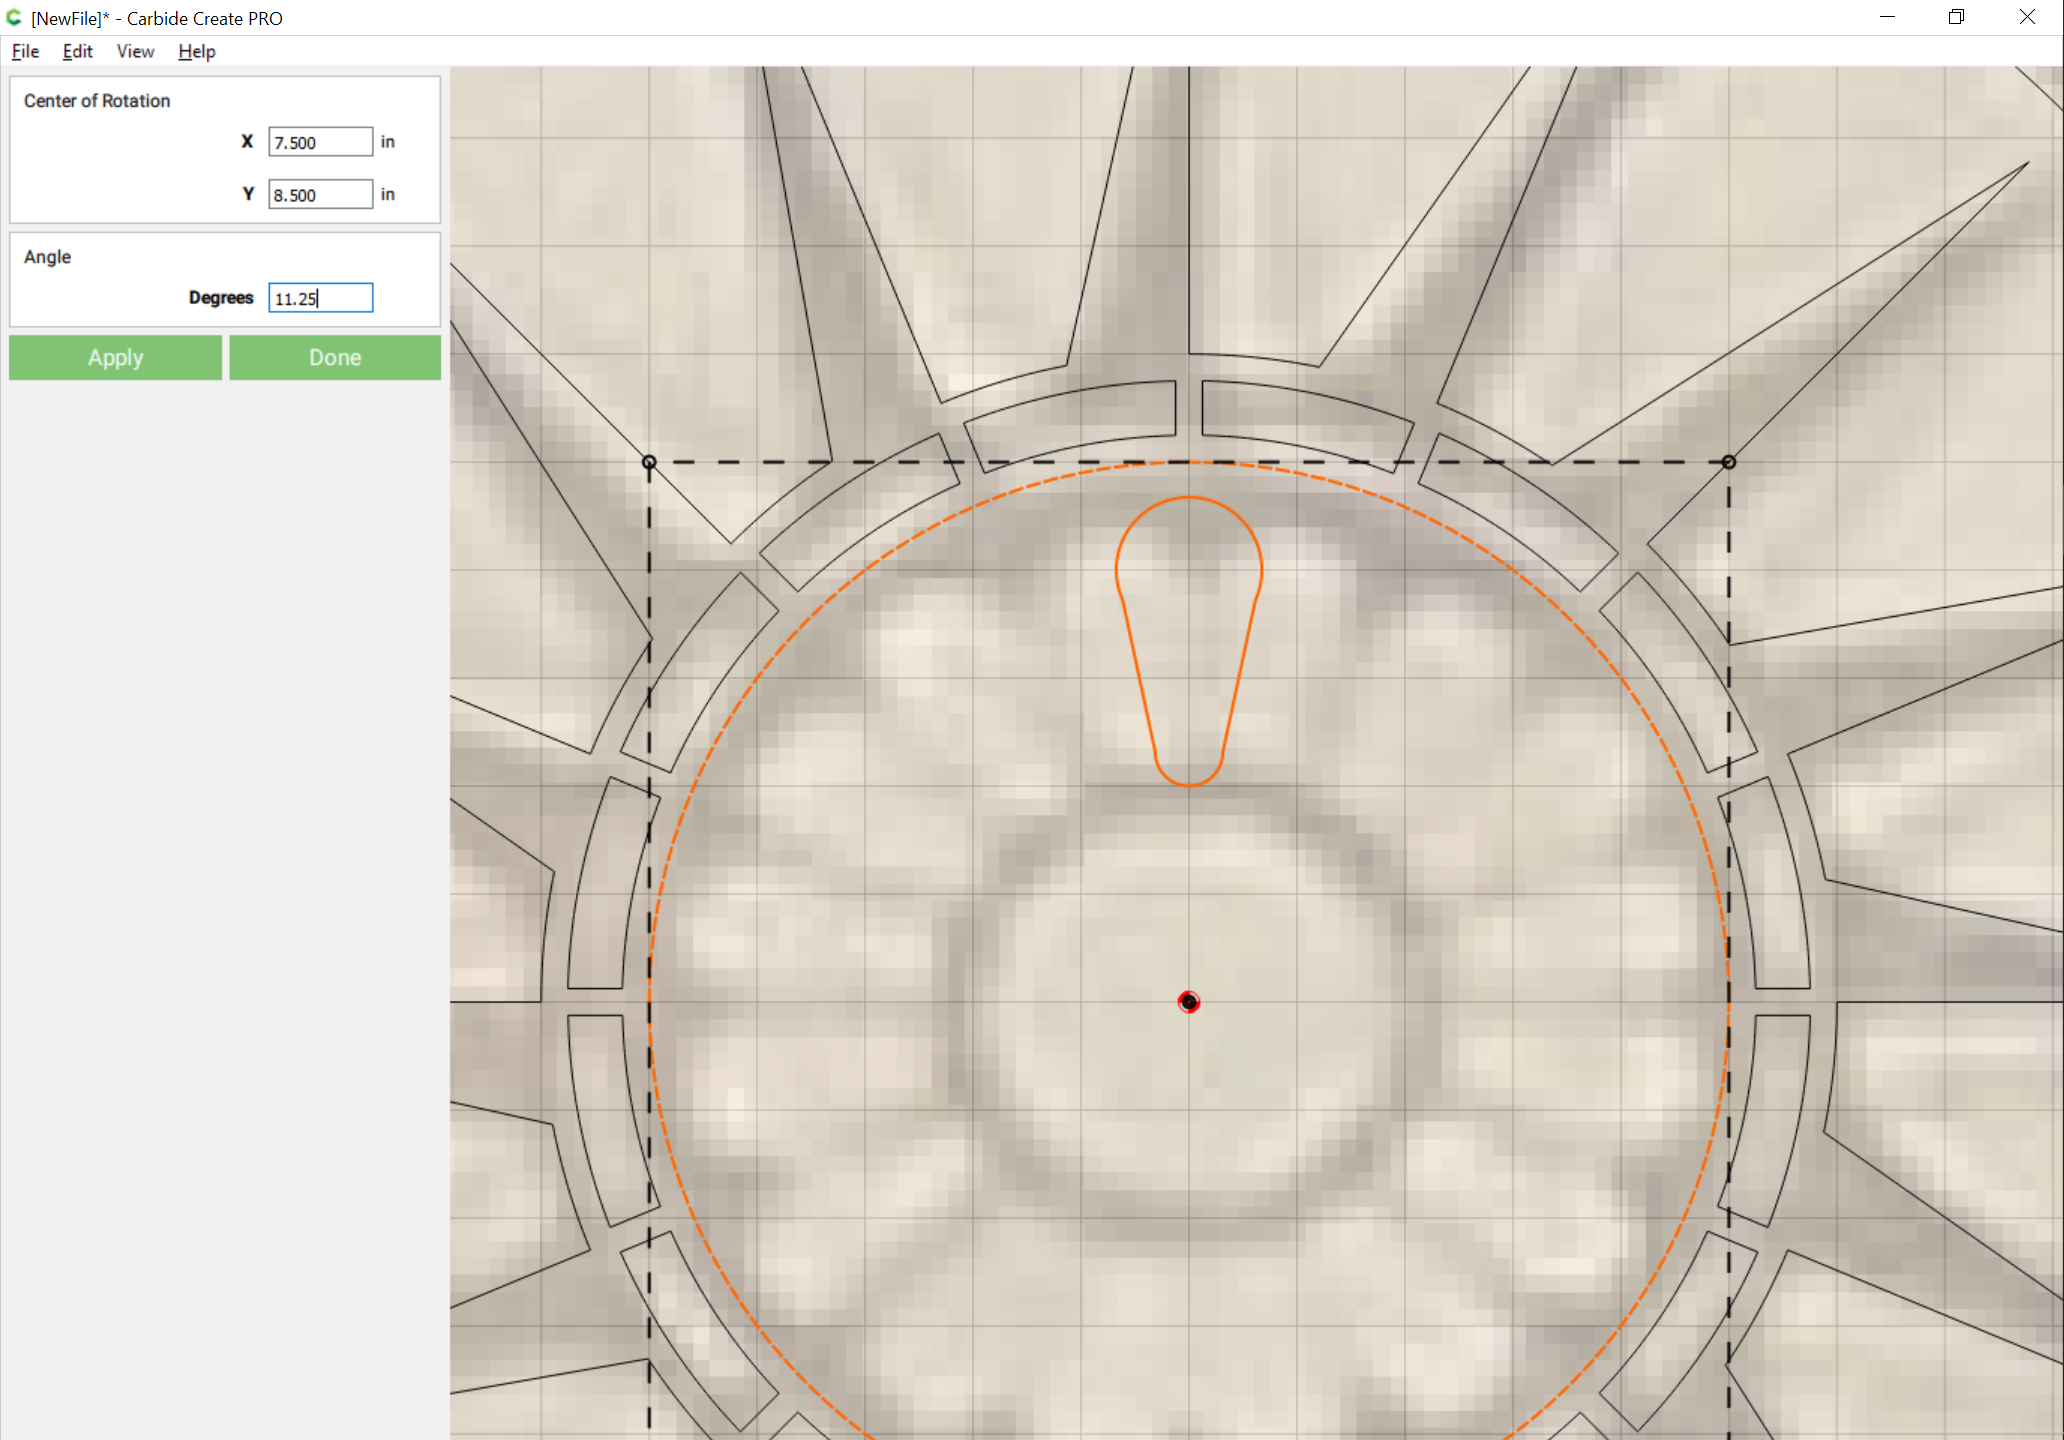
The rose petals are slightly offset, so that one should work with them from the center of the outside edge — that’s rather awkward to draw, so instead we will draw them slightly offset, rotate them by 11.25 degrees, then do the duplication and rotation.
Draw a pair of circles which define the top and bottom — ensure that they are aligned along the central axis:
Then draw in a polyline which aligns with the left/right-most nodes of the circles:
Select the circles and the polyline and Boolean Union:
Resulting in:
Select a surrounding circle and the just made geometry and rotate by 11.25 degrees:
Then duplicate the flower 15 times, align to the original, and repeat the rotation 15 times:
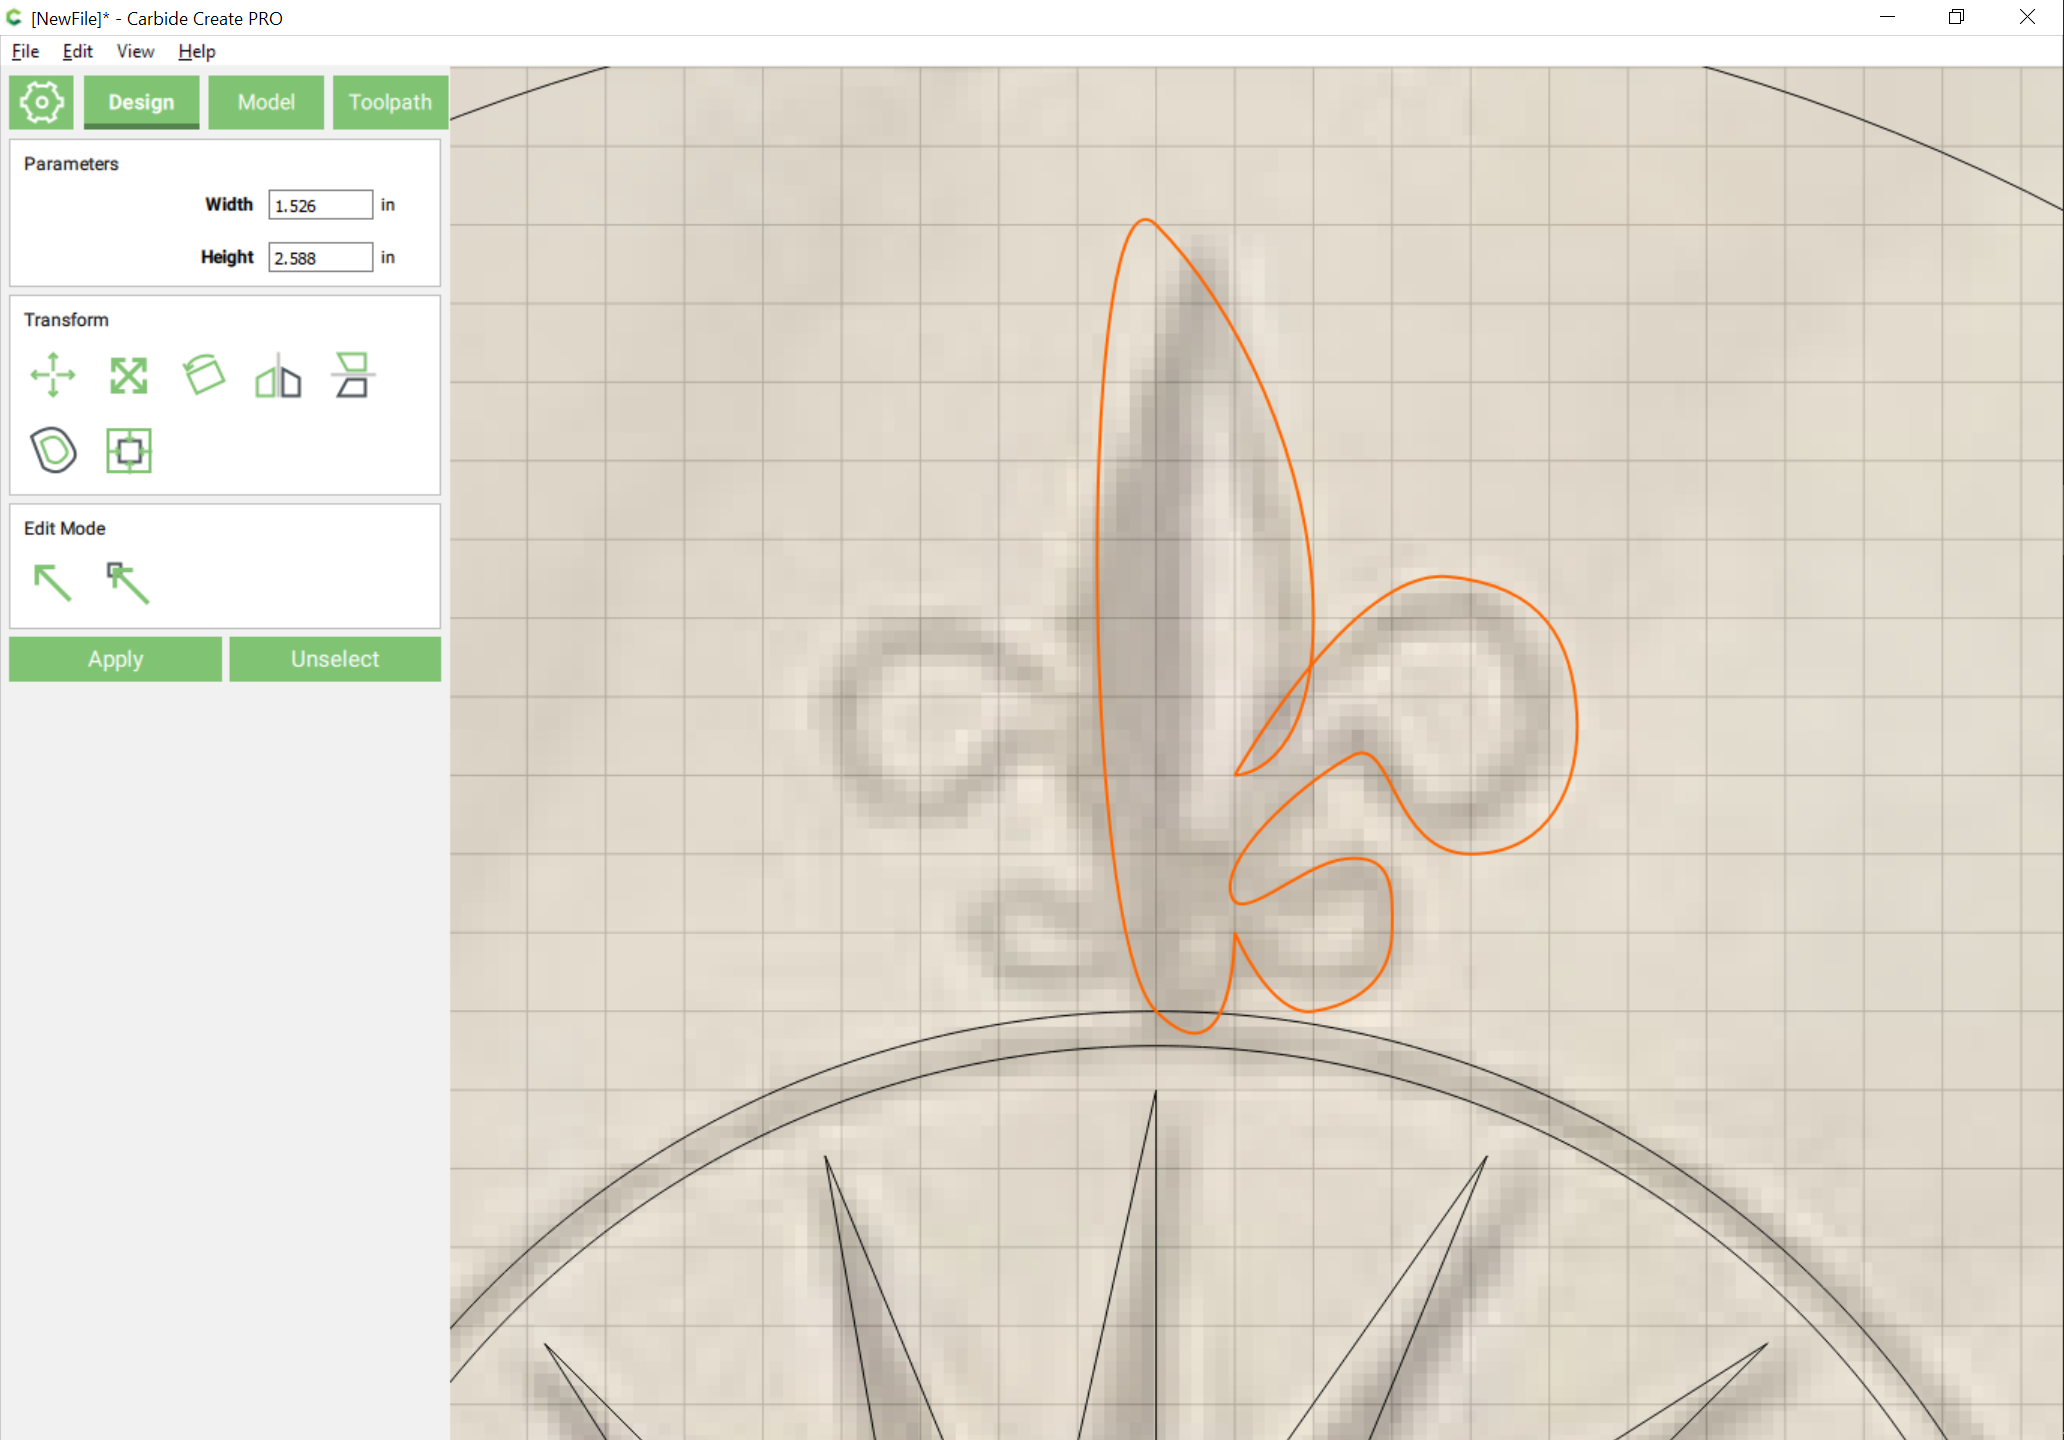
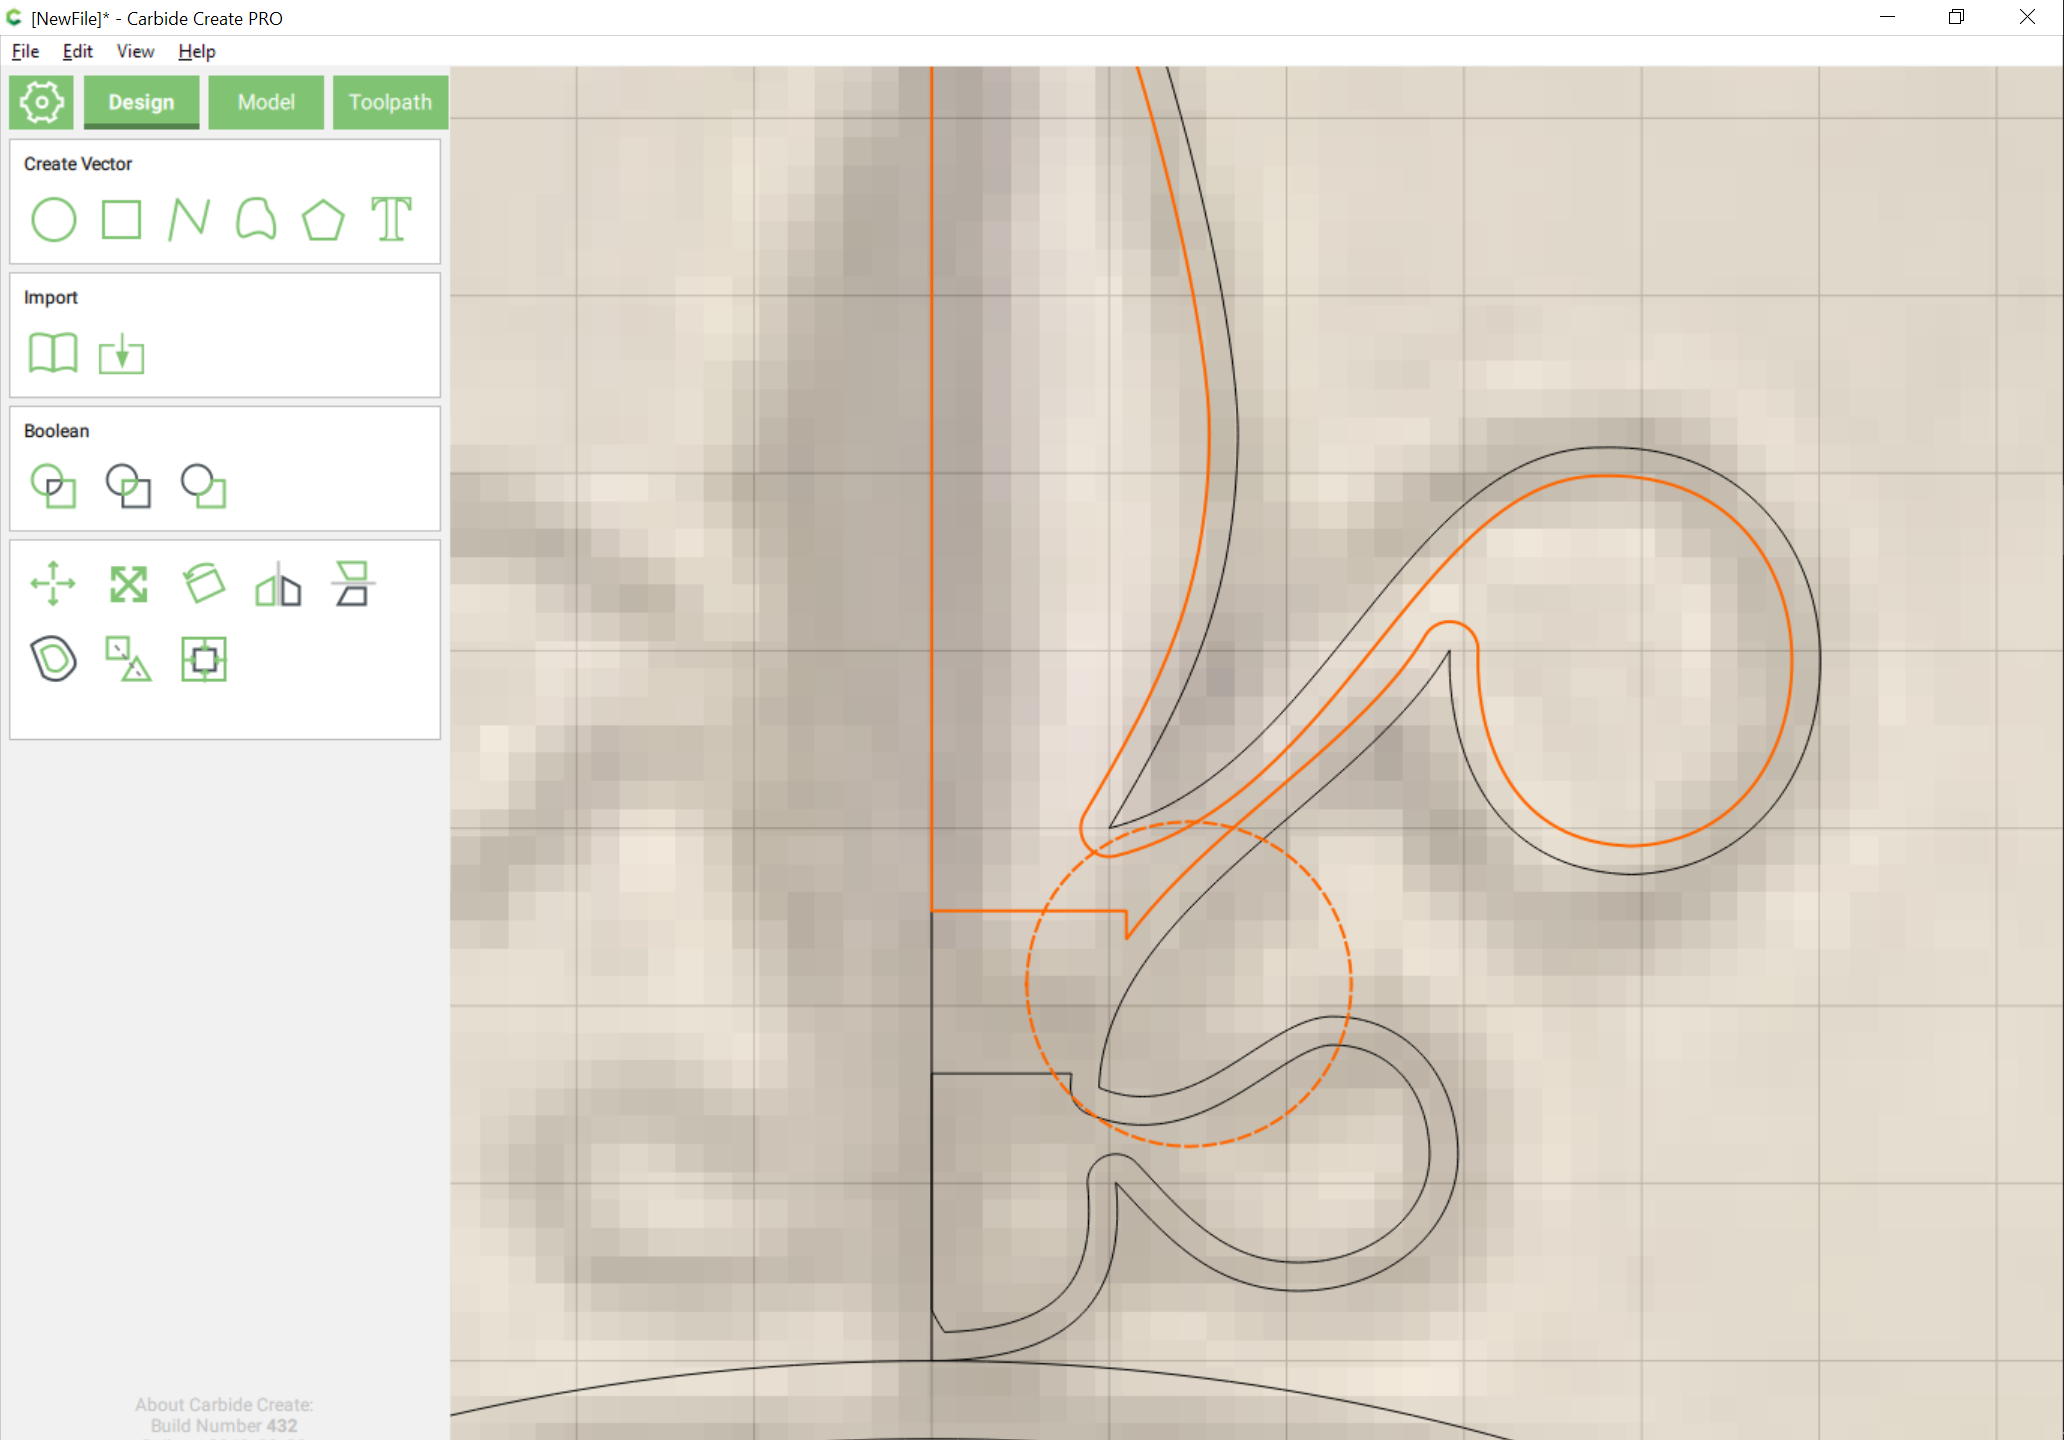
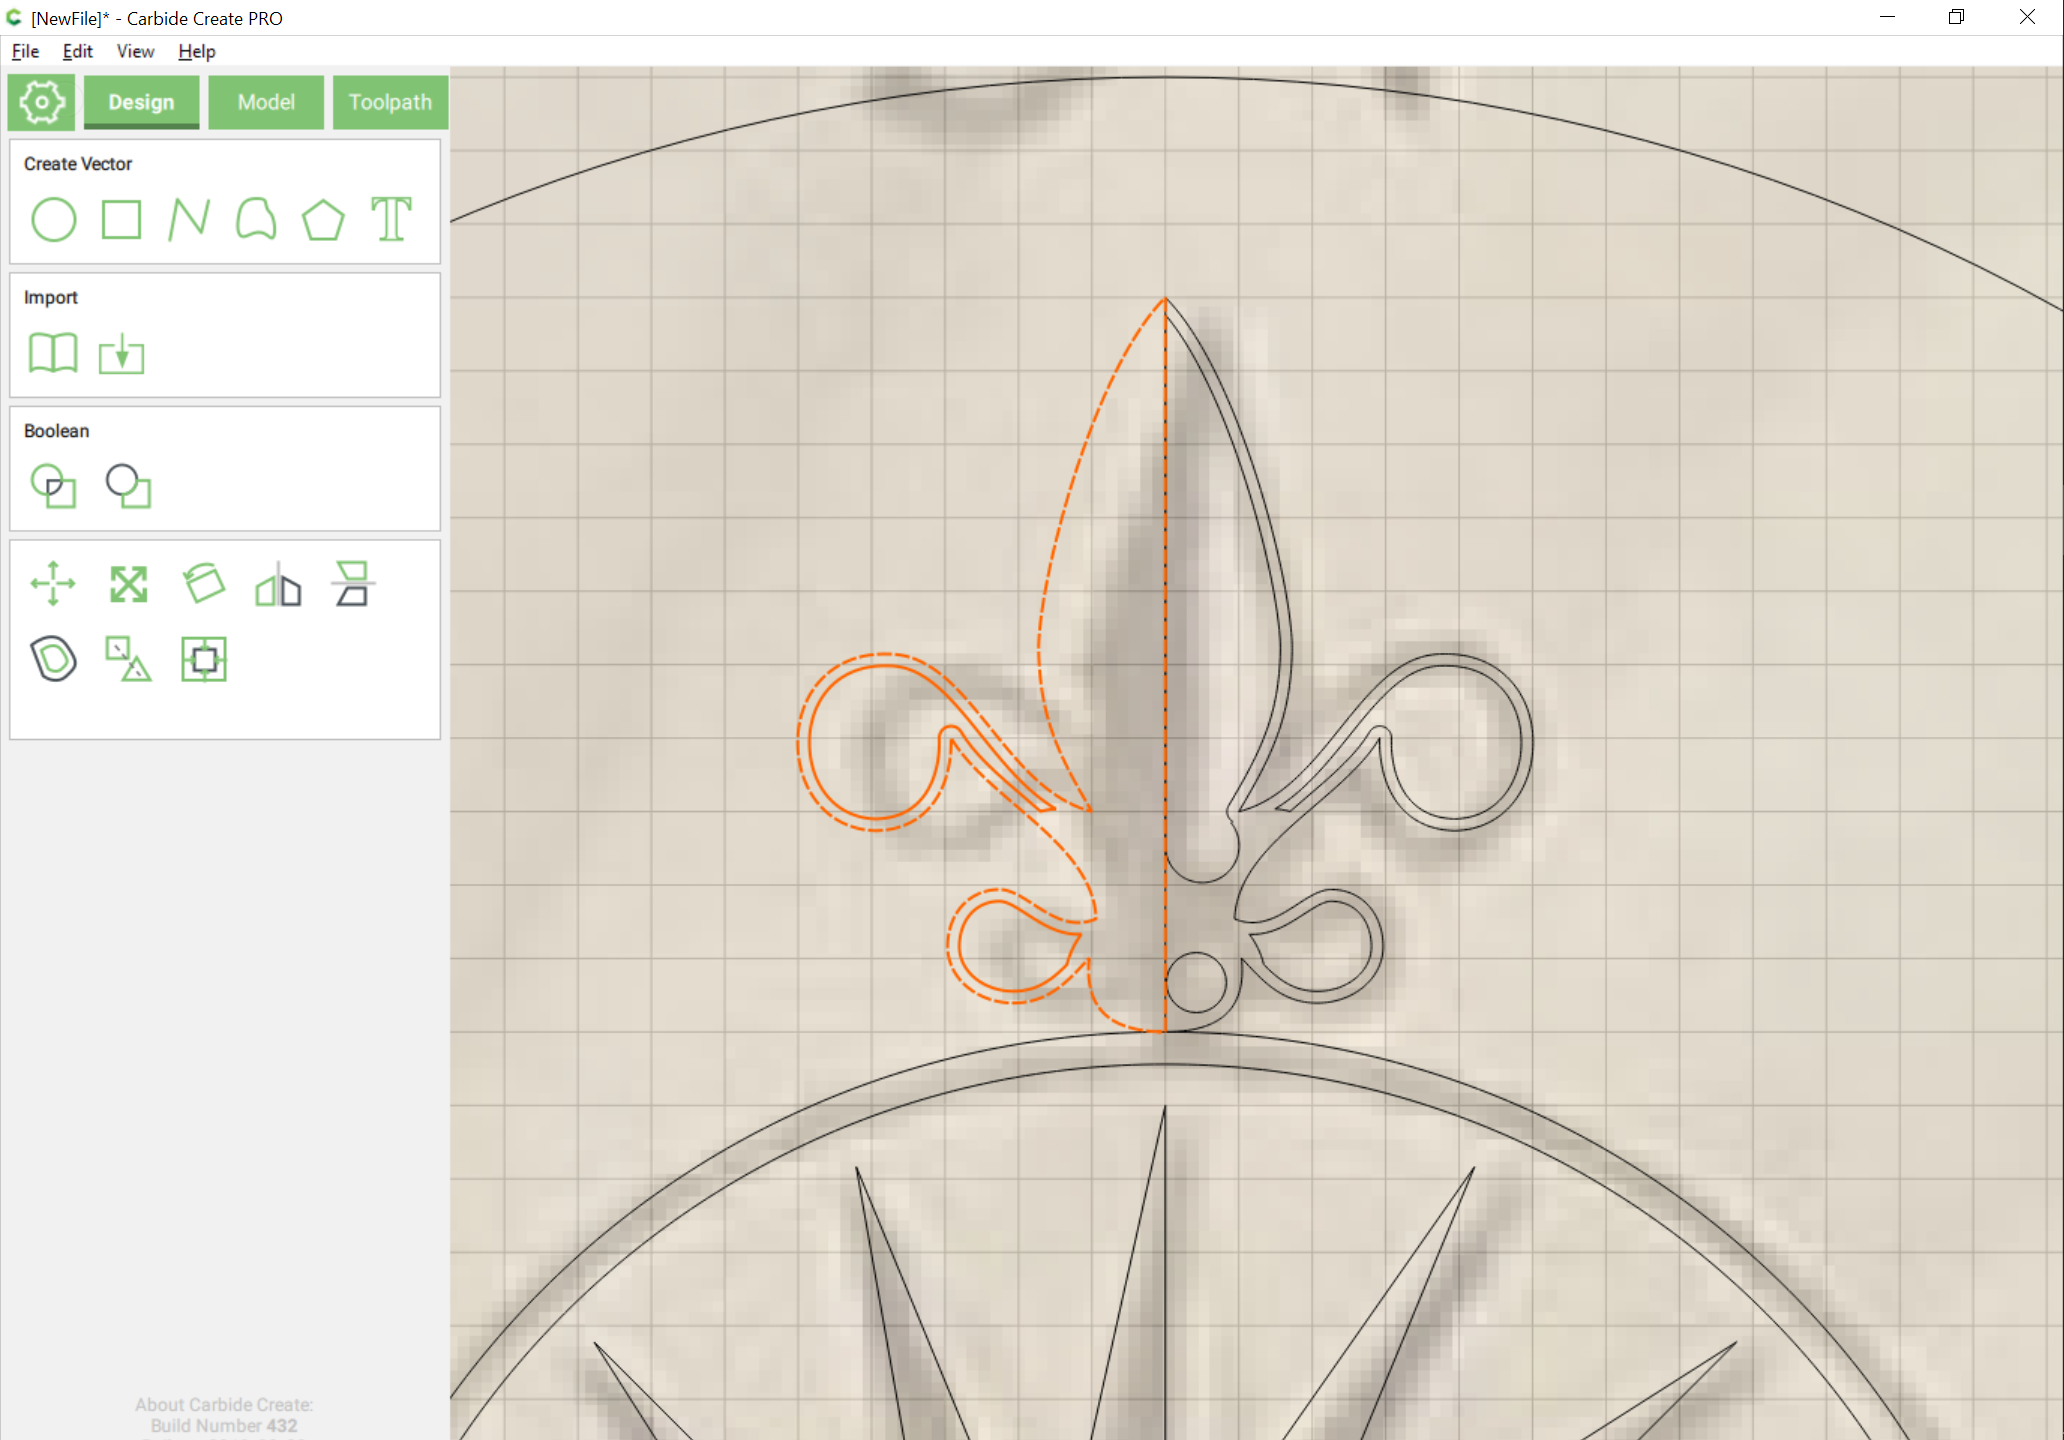
Zoom in on the Fleur-de-lis like ornament at the top and with Snap to grid turned on, use the Curve tool to draw a rough approximation of one side of the design:
Turn off snap to grid, go into Node edit mode and adjust the placement of the Nodes and adjust the curves so as to match the desired outer edge. Note that you can use the Alt/Option key to make sharp points:
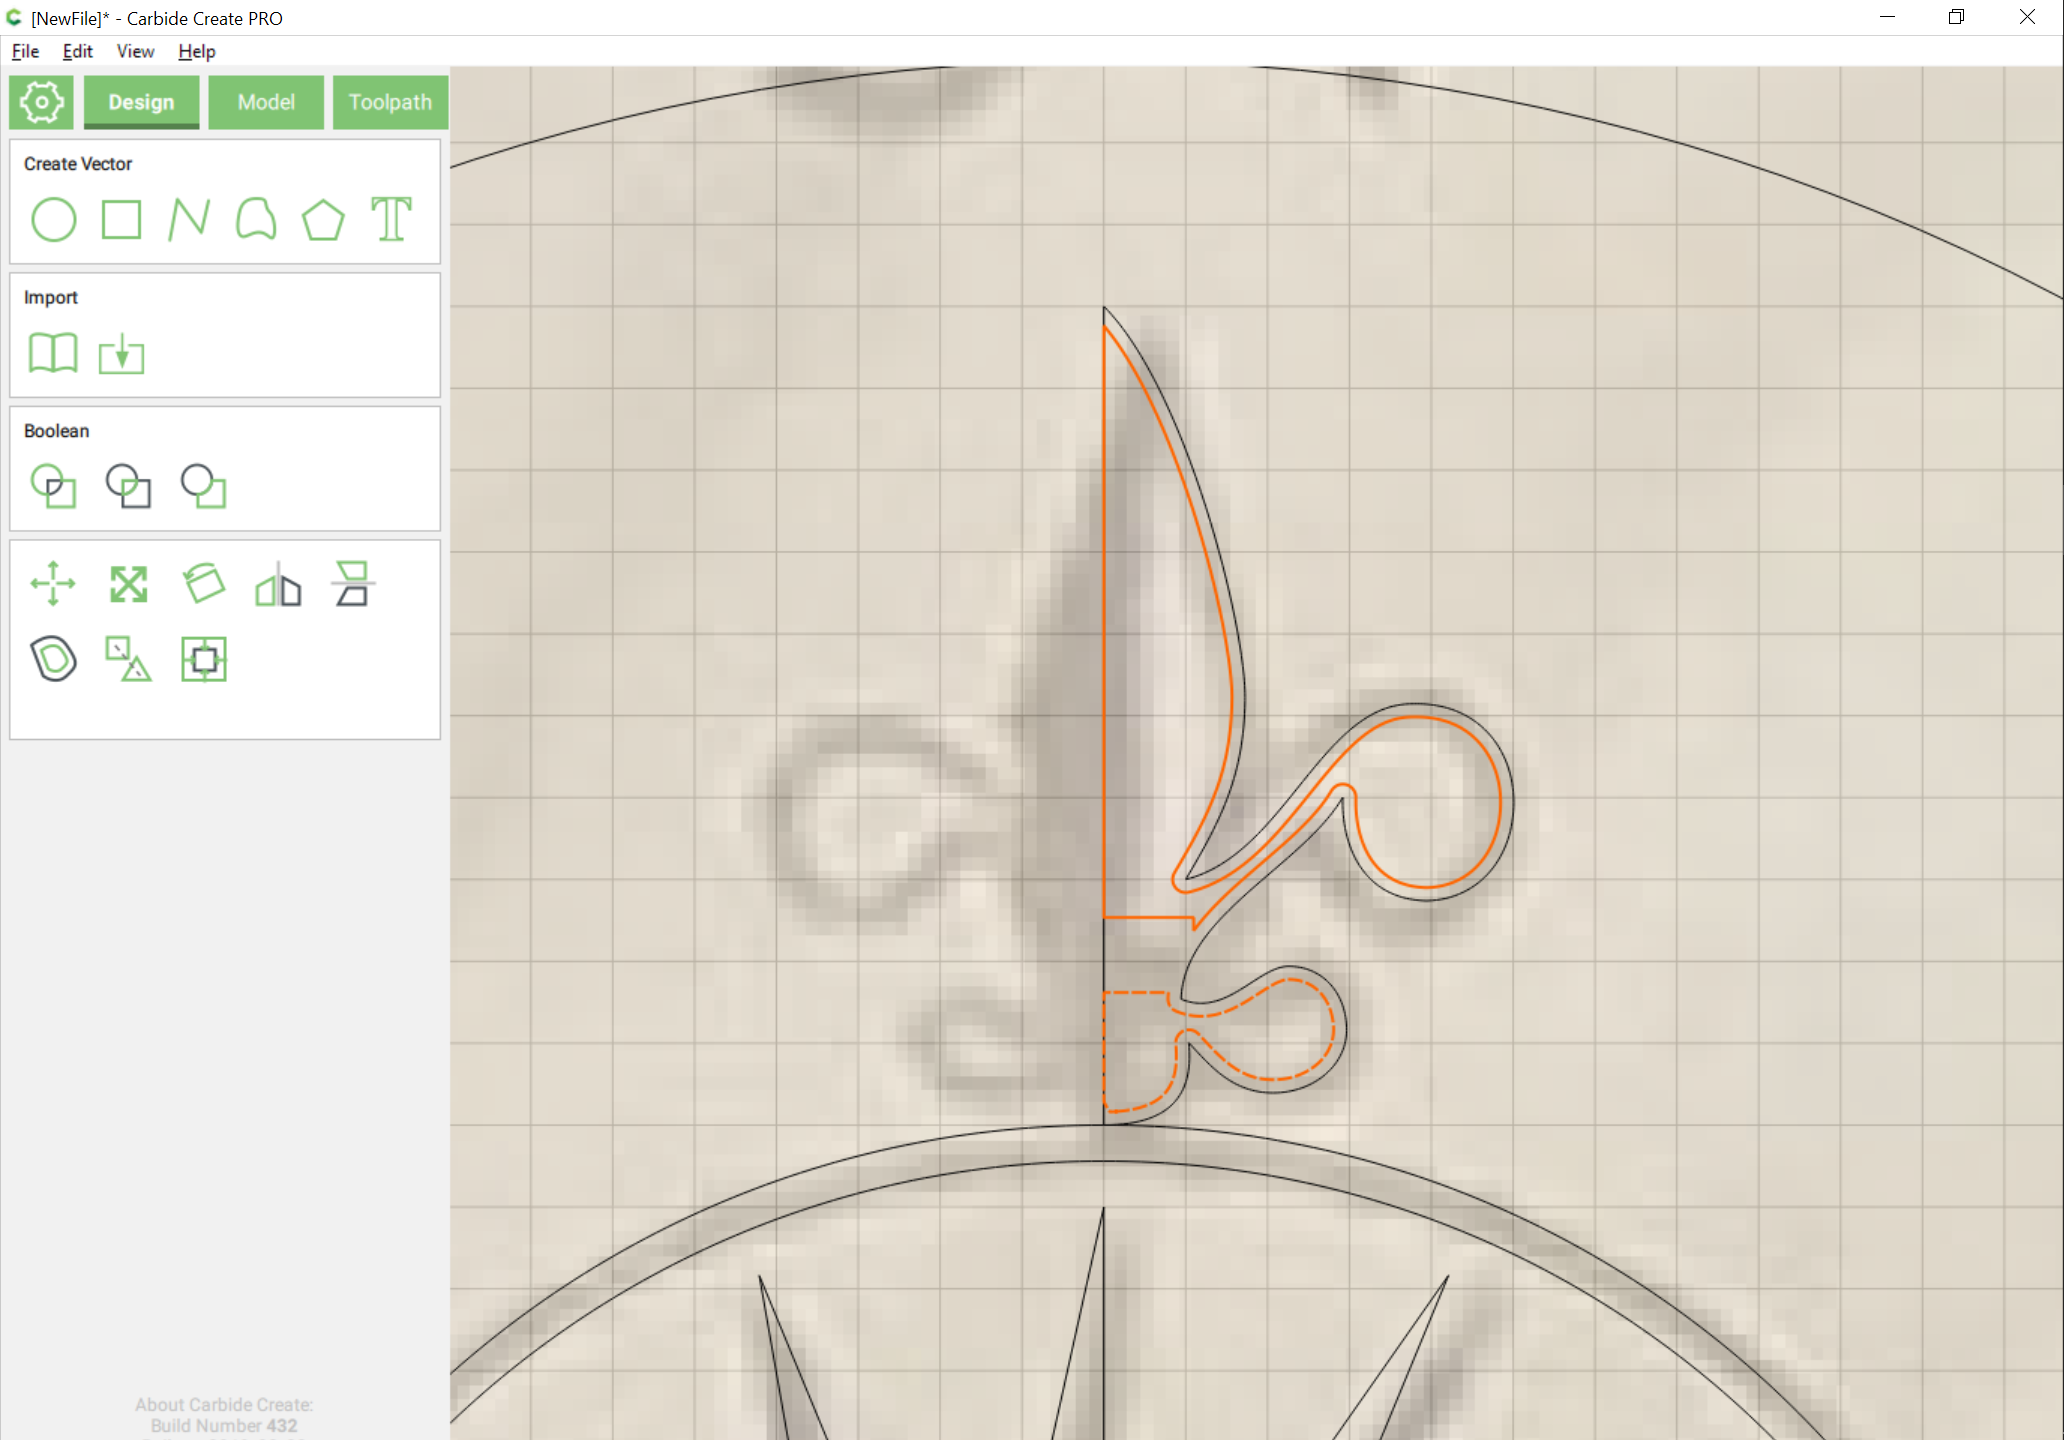
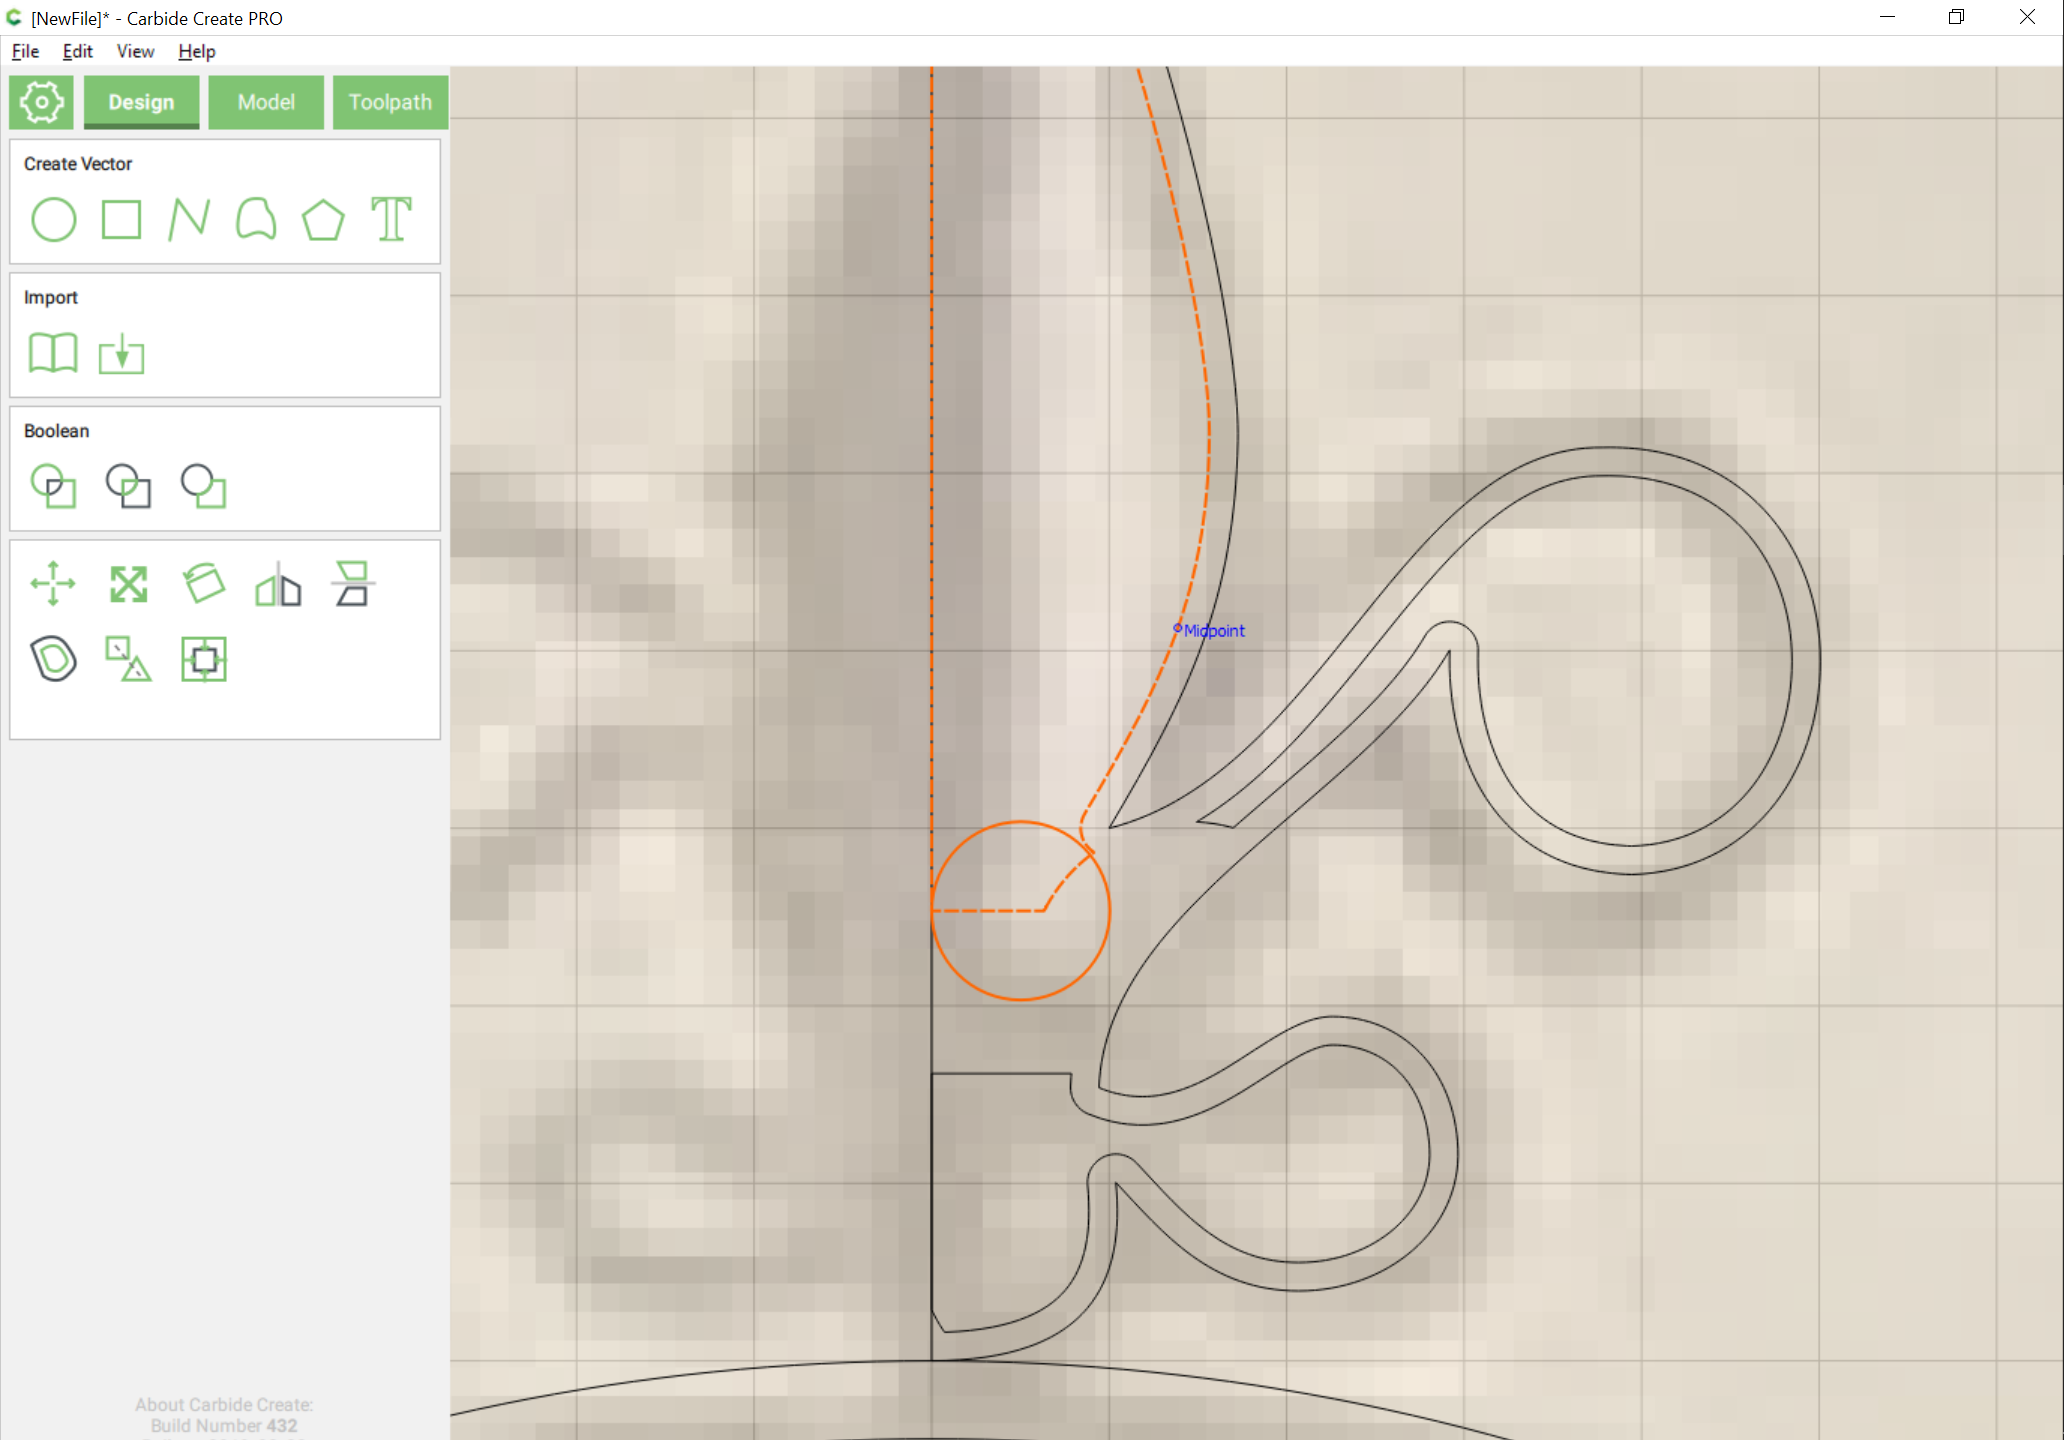
Inset by a suitable distance and then draw a rectangle to slice each part into half:
Draw in geometry to add as necessary to the inset piece and adjust as necessary.
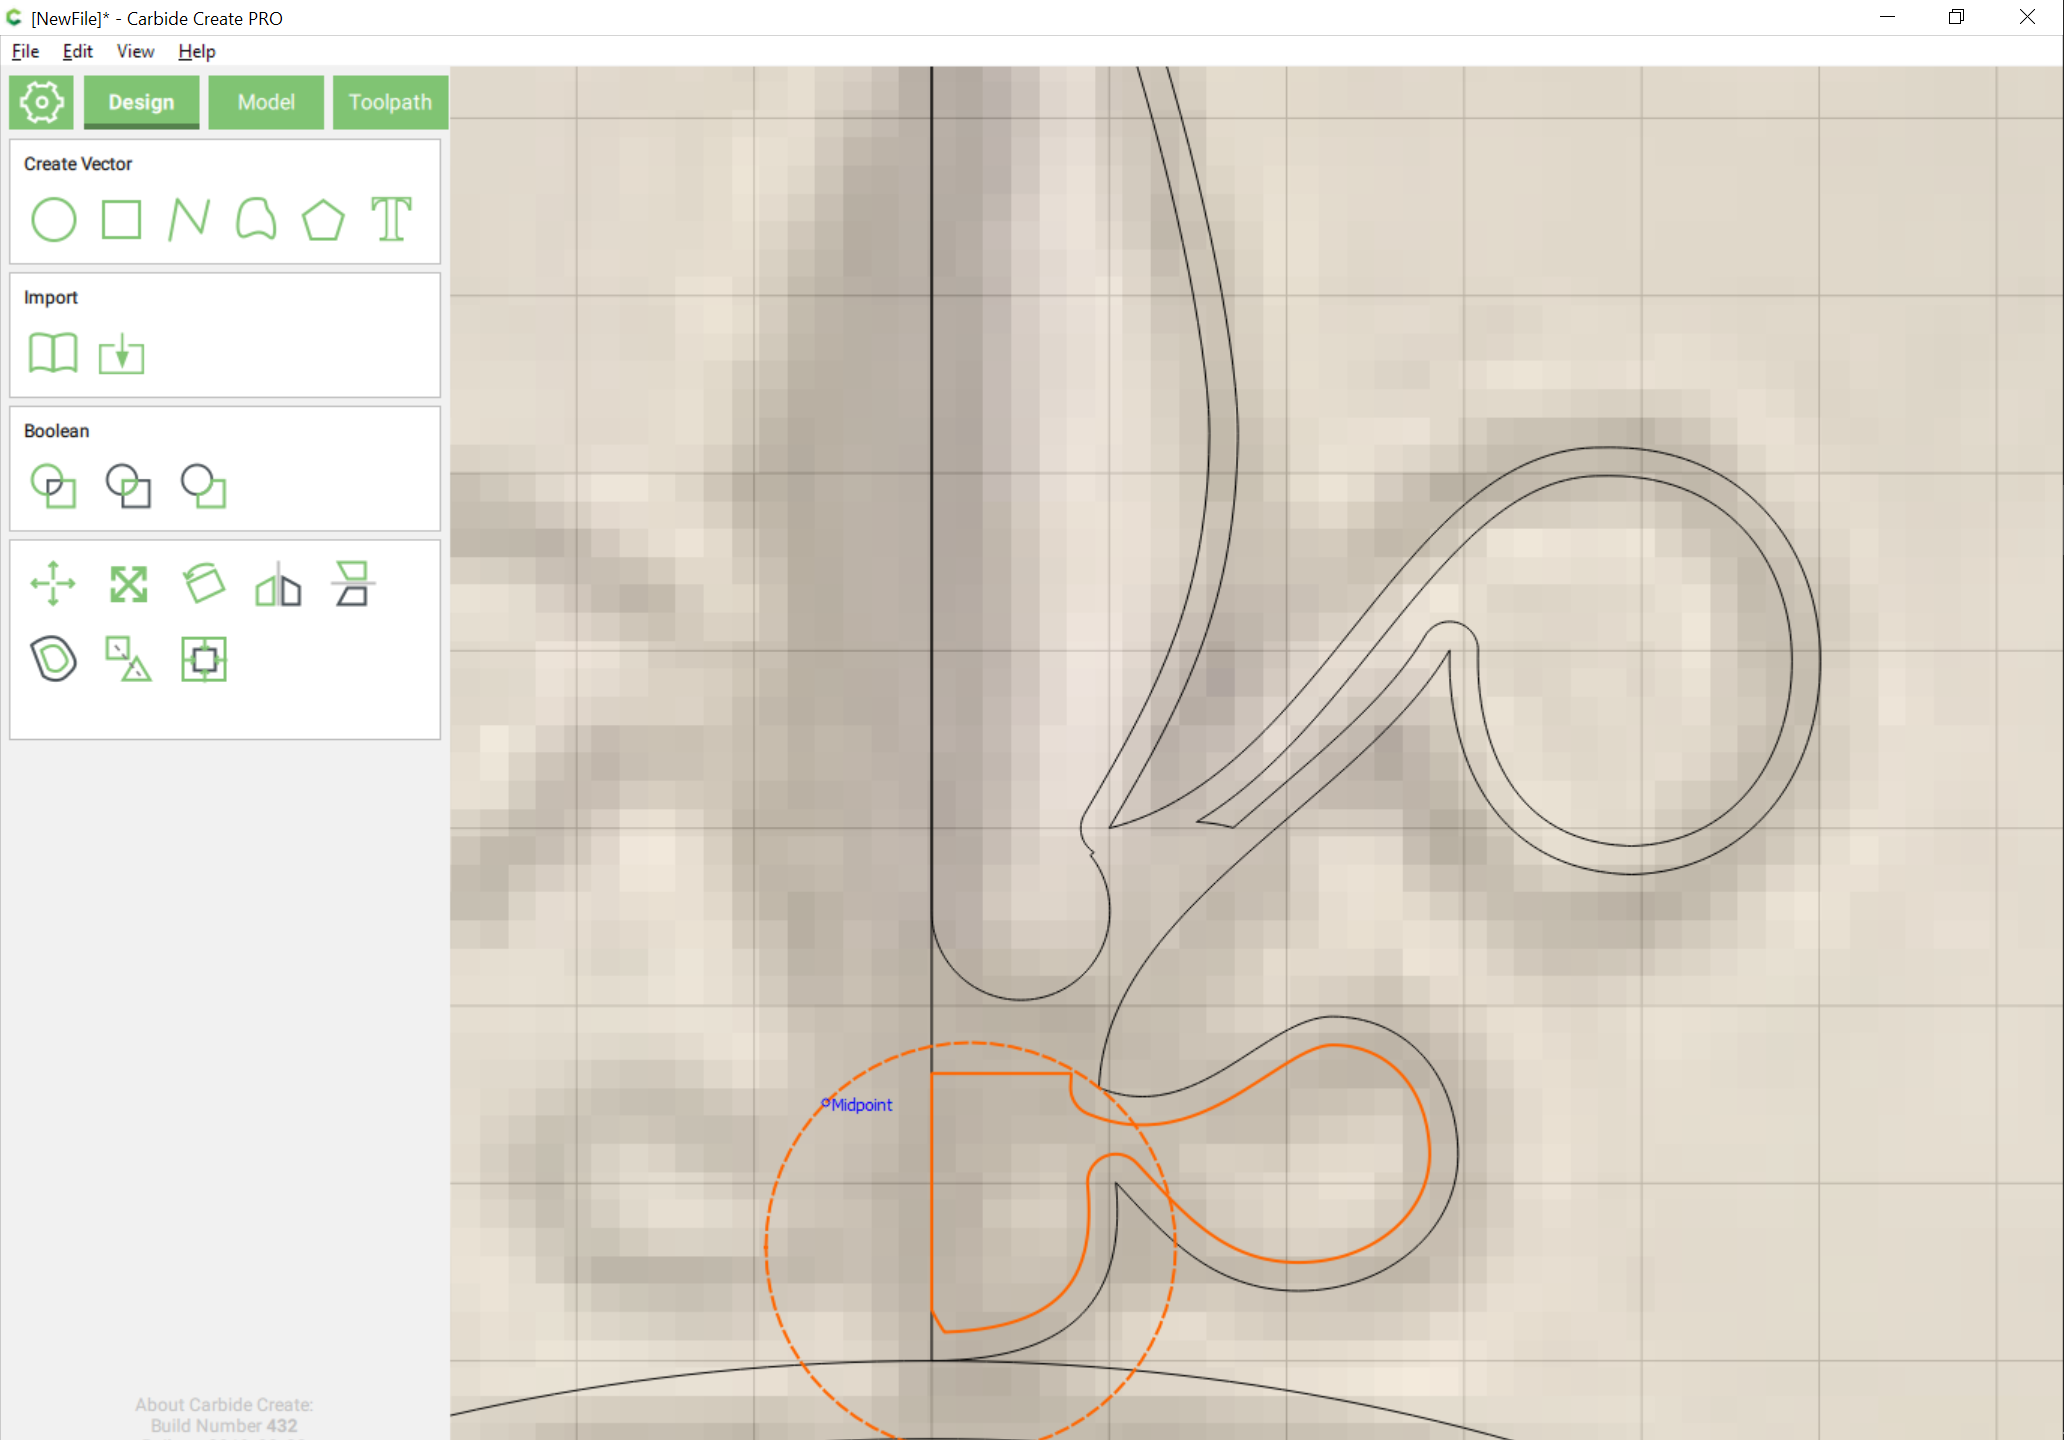
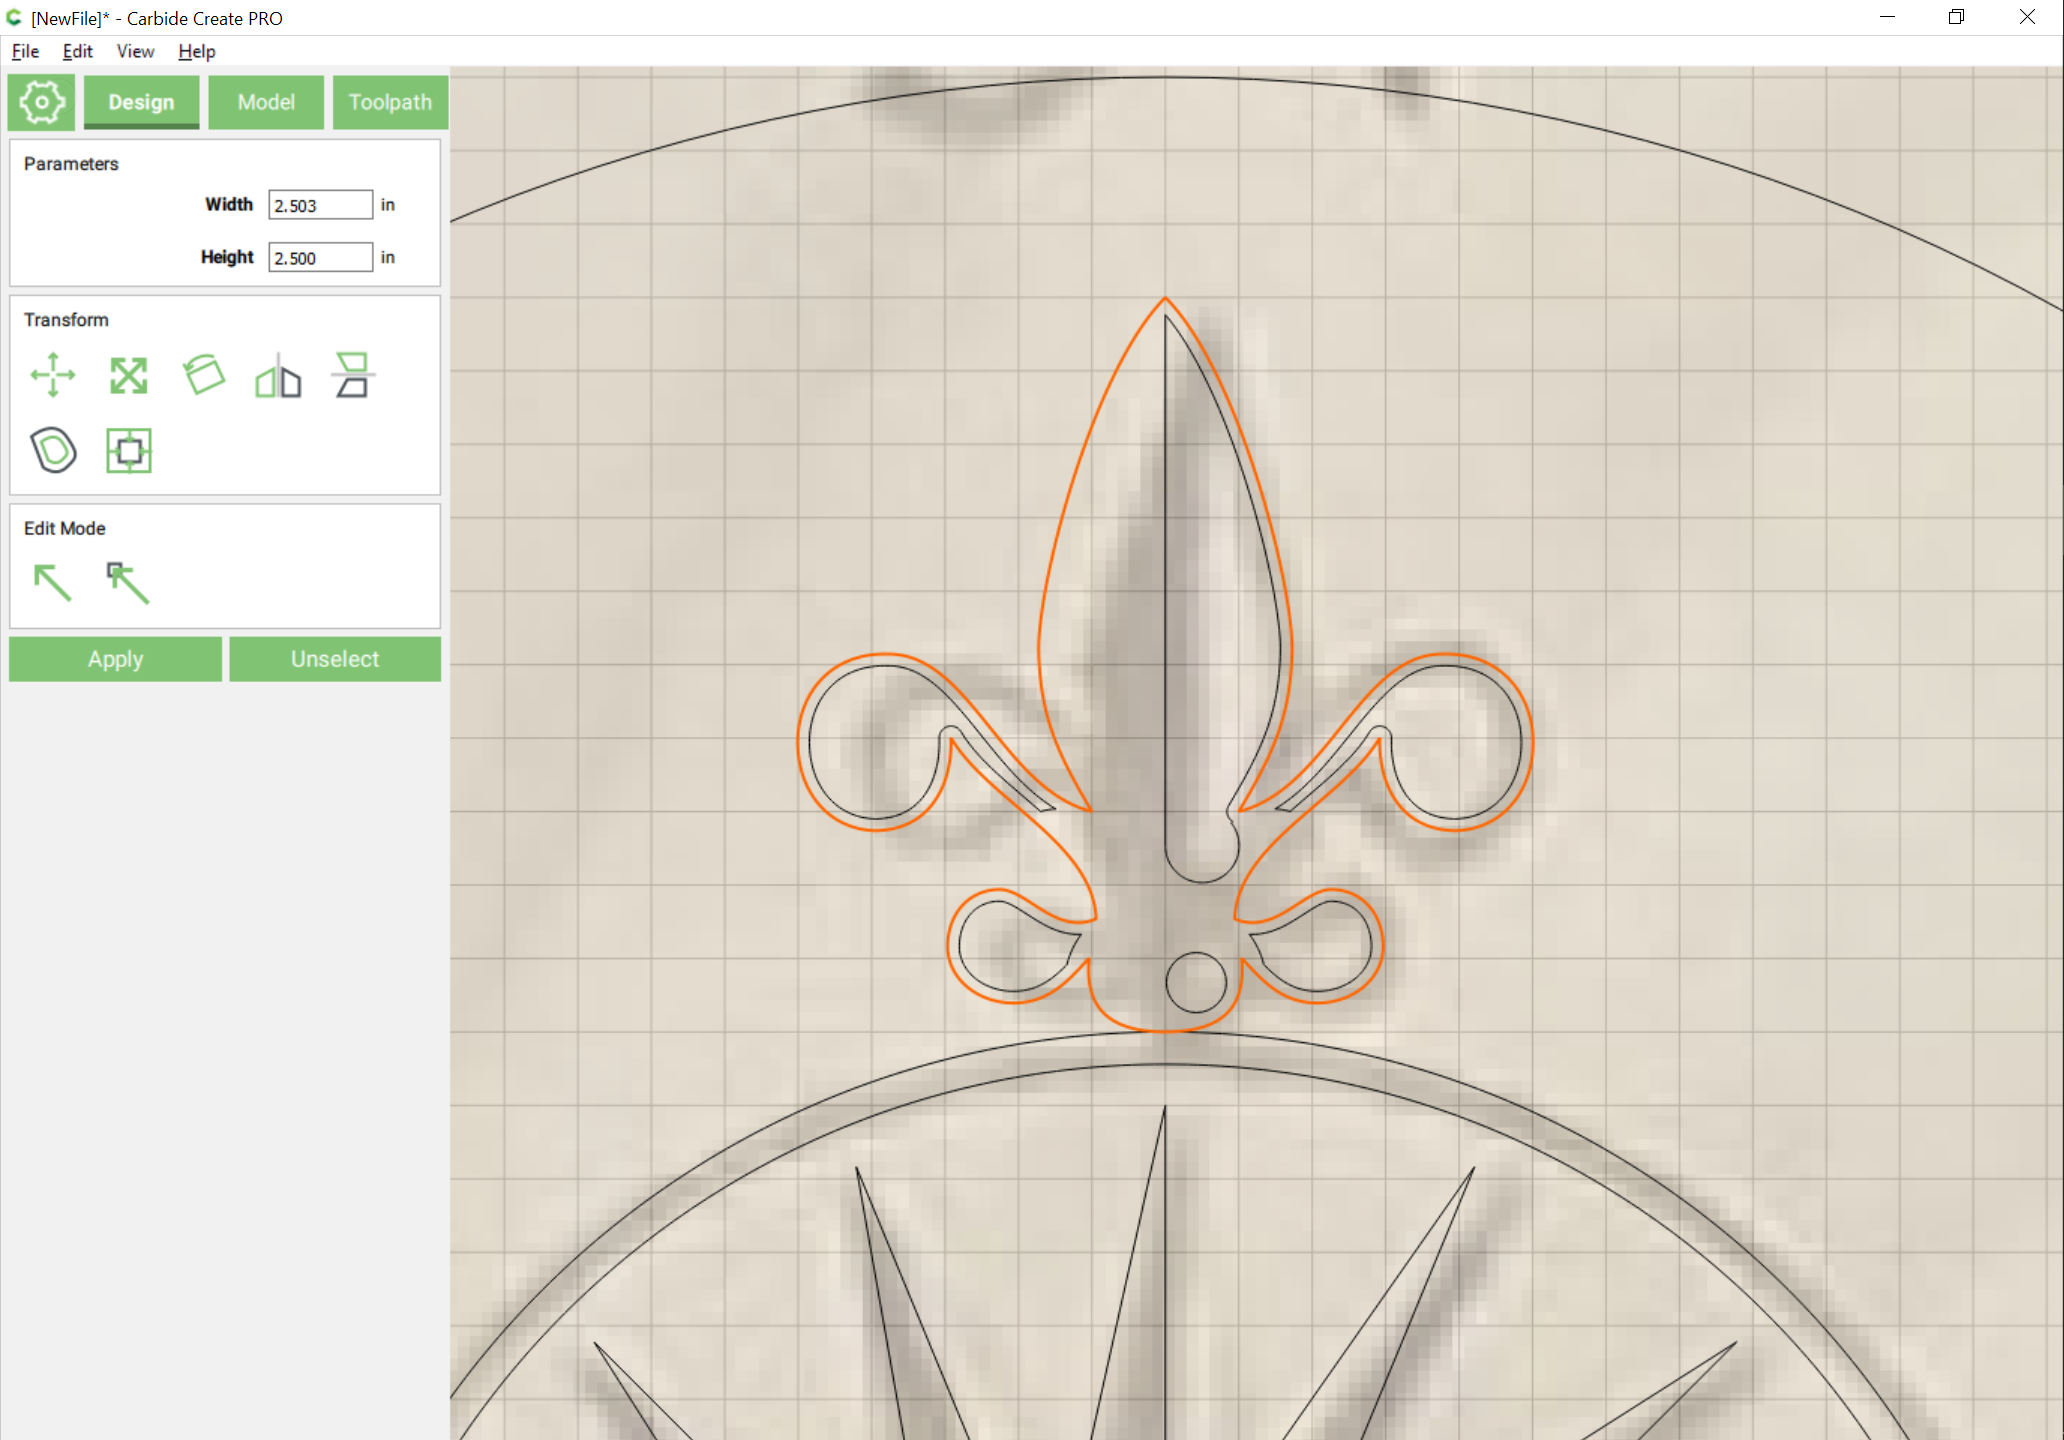
Then select the parts which need to be duplicated:
Duplicate and flip them horizontally and drag into alignment:
Select the two halves and Boolean union:
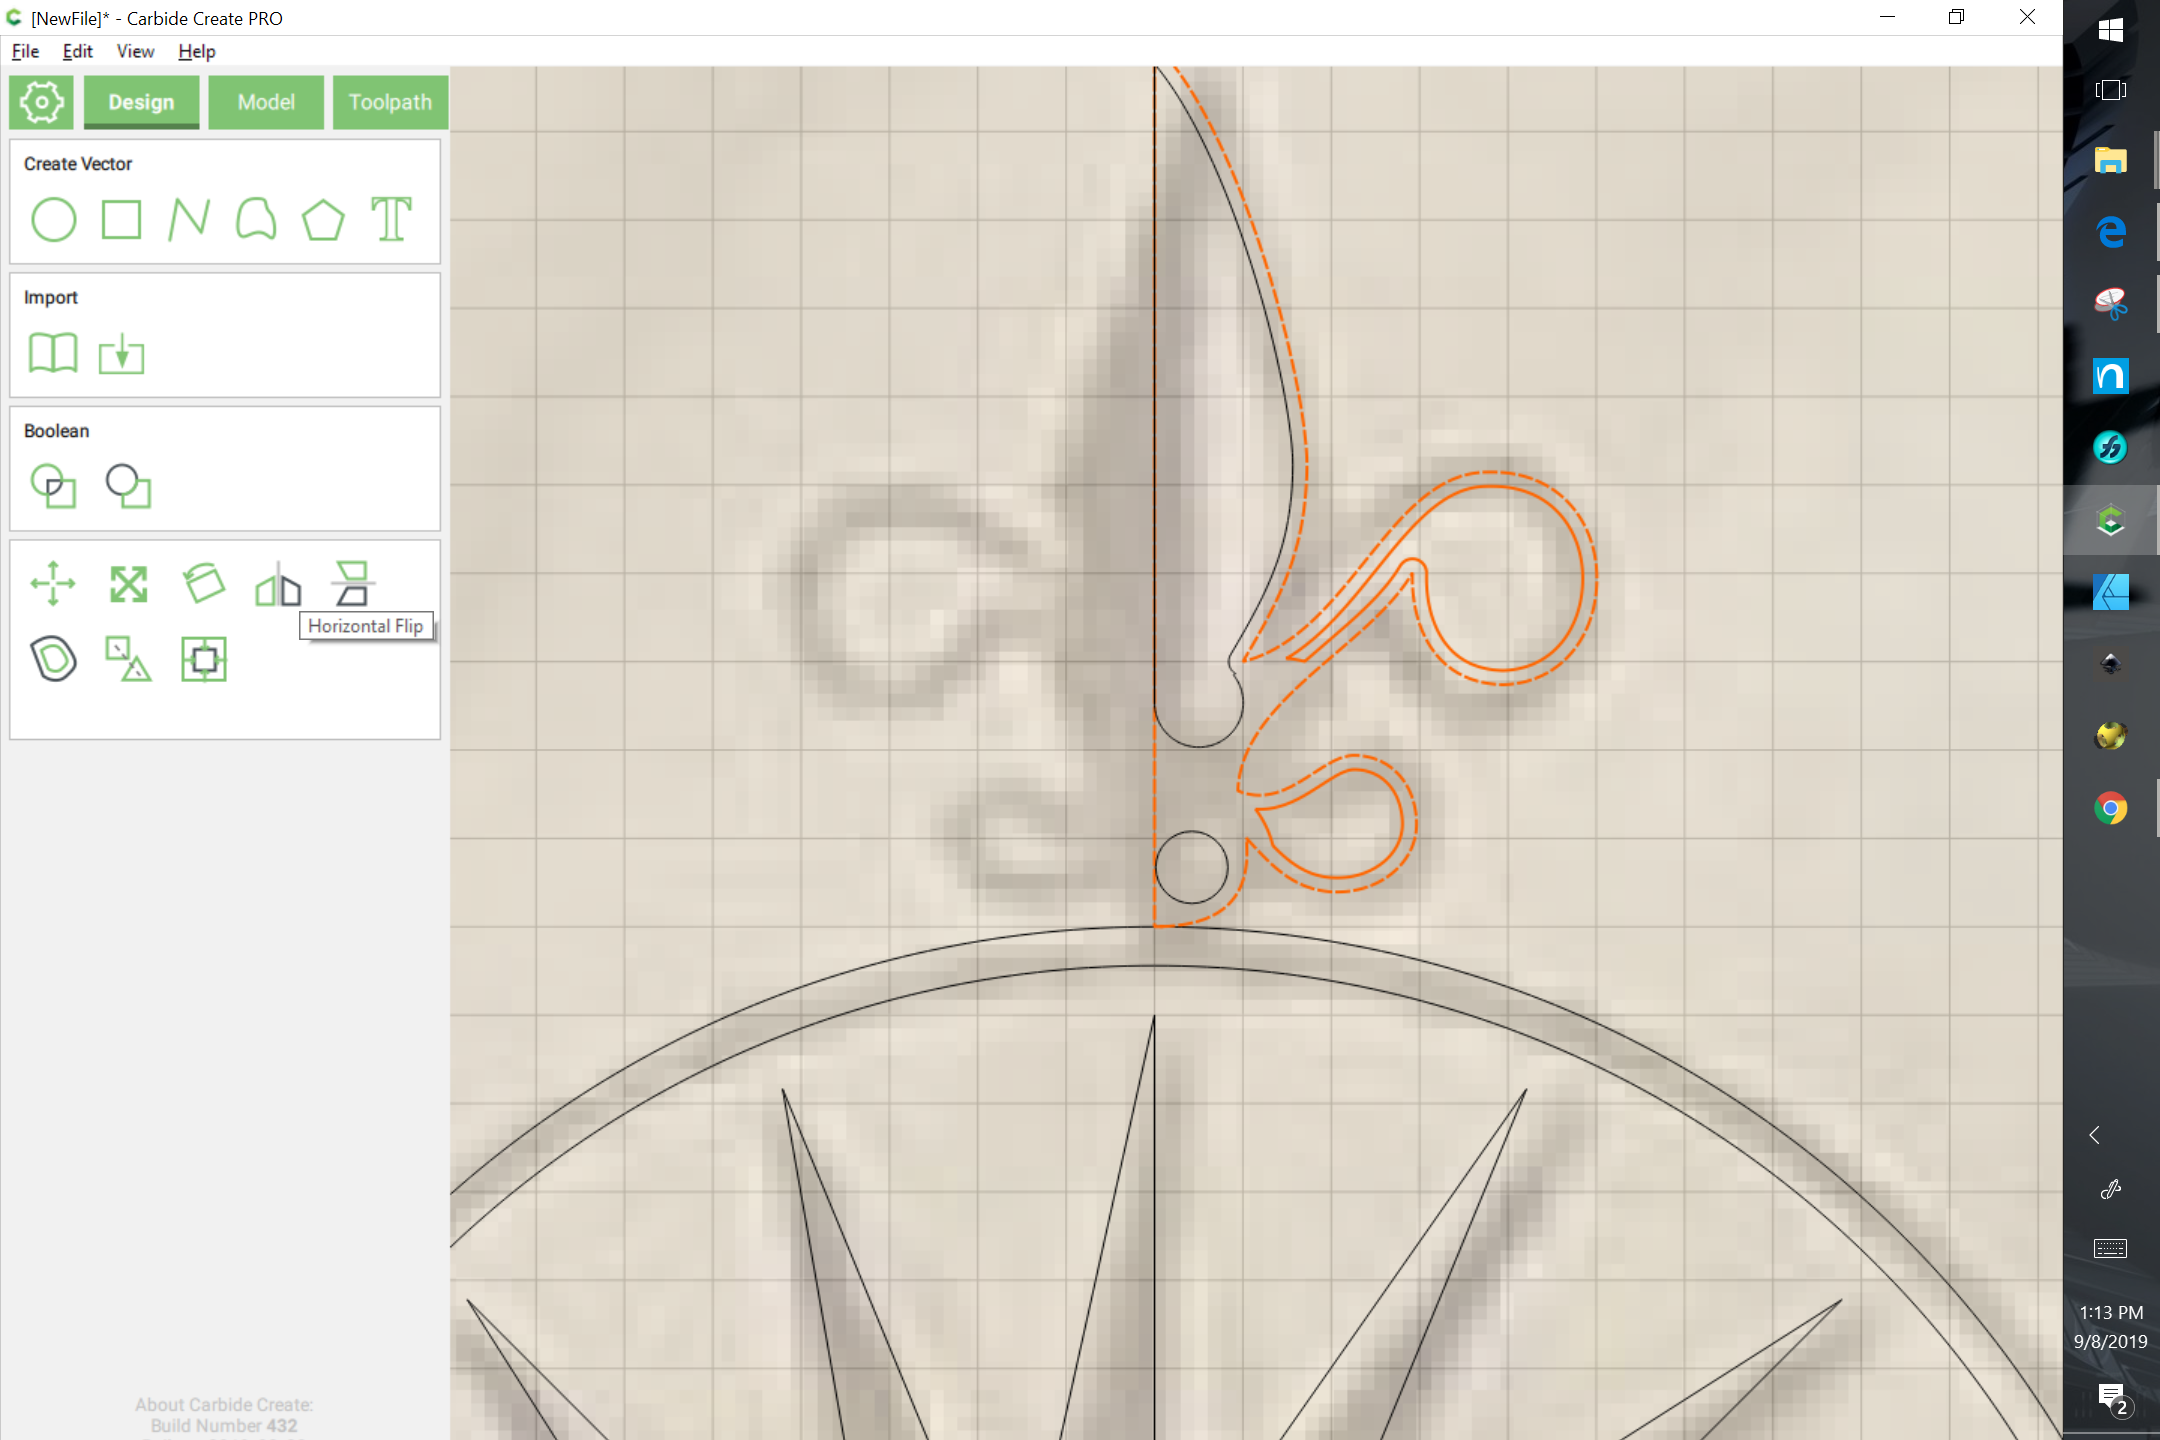
Adjust as necessary (in this case, scaled horizontally a bit):
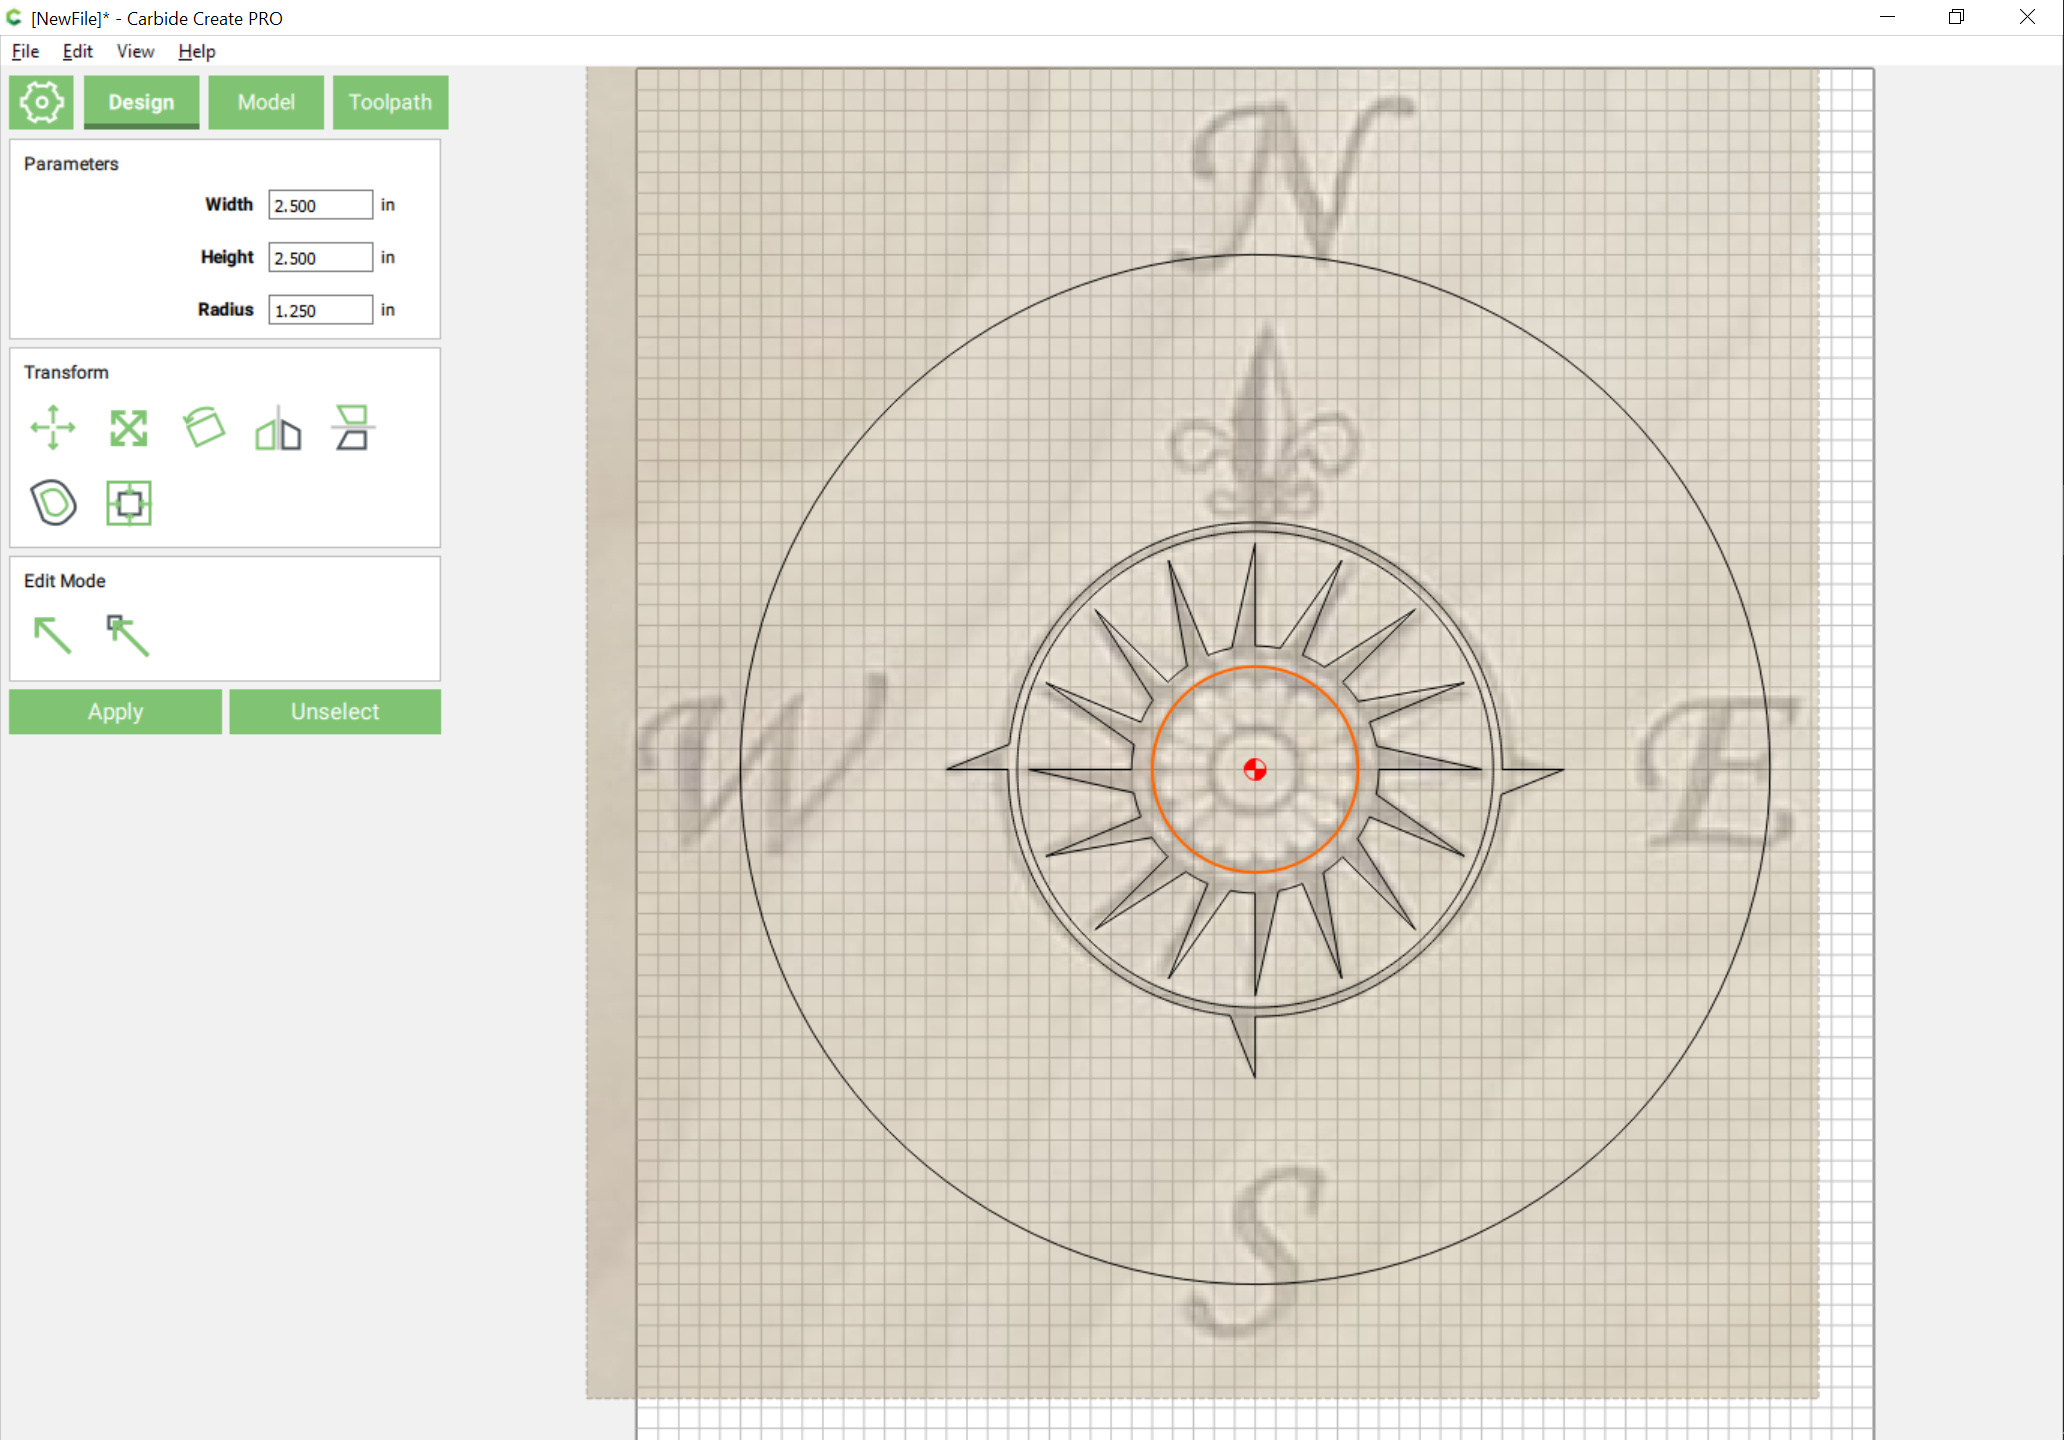
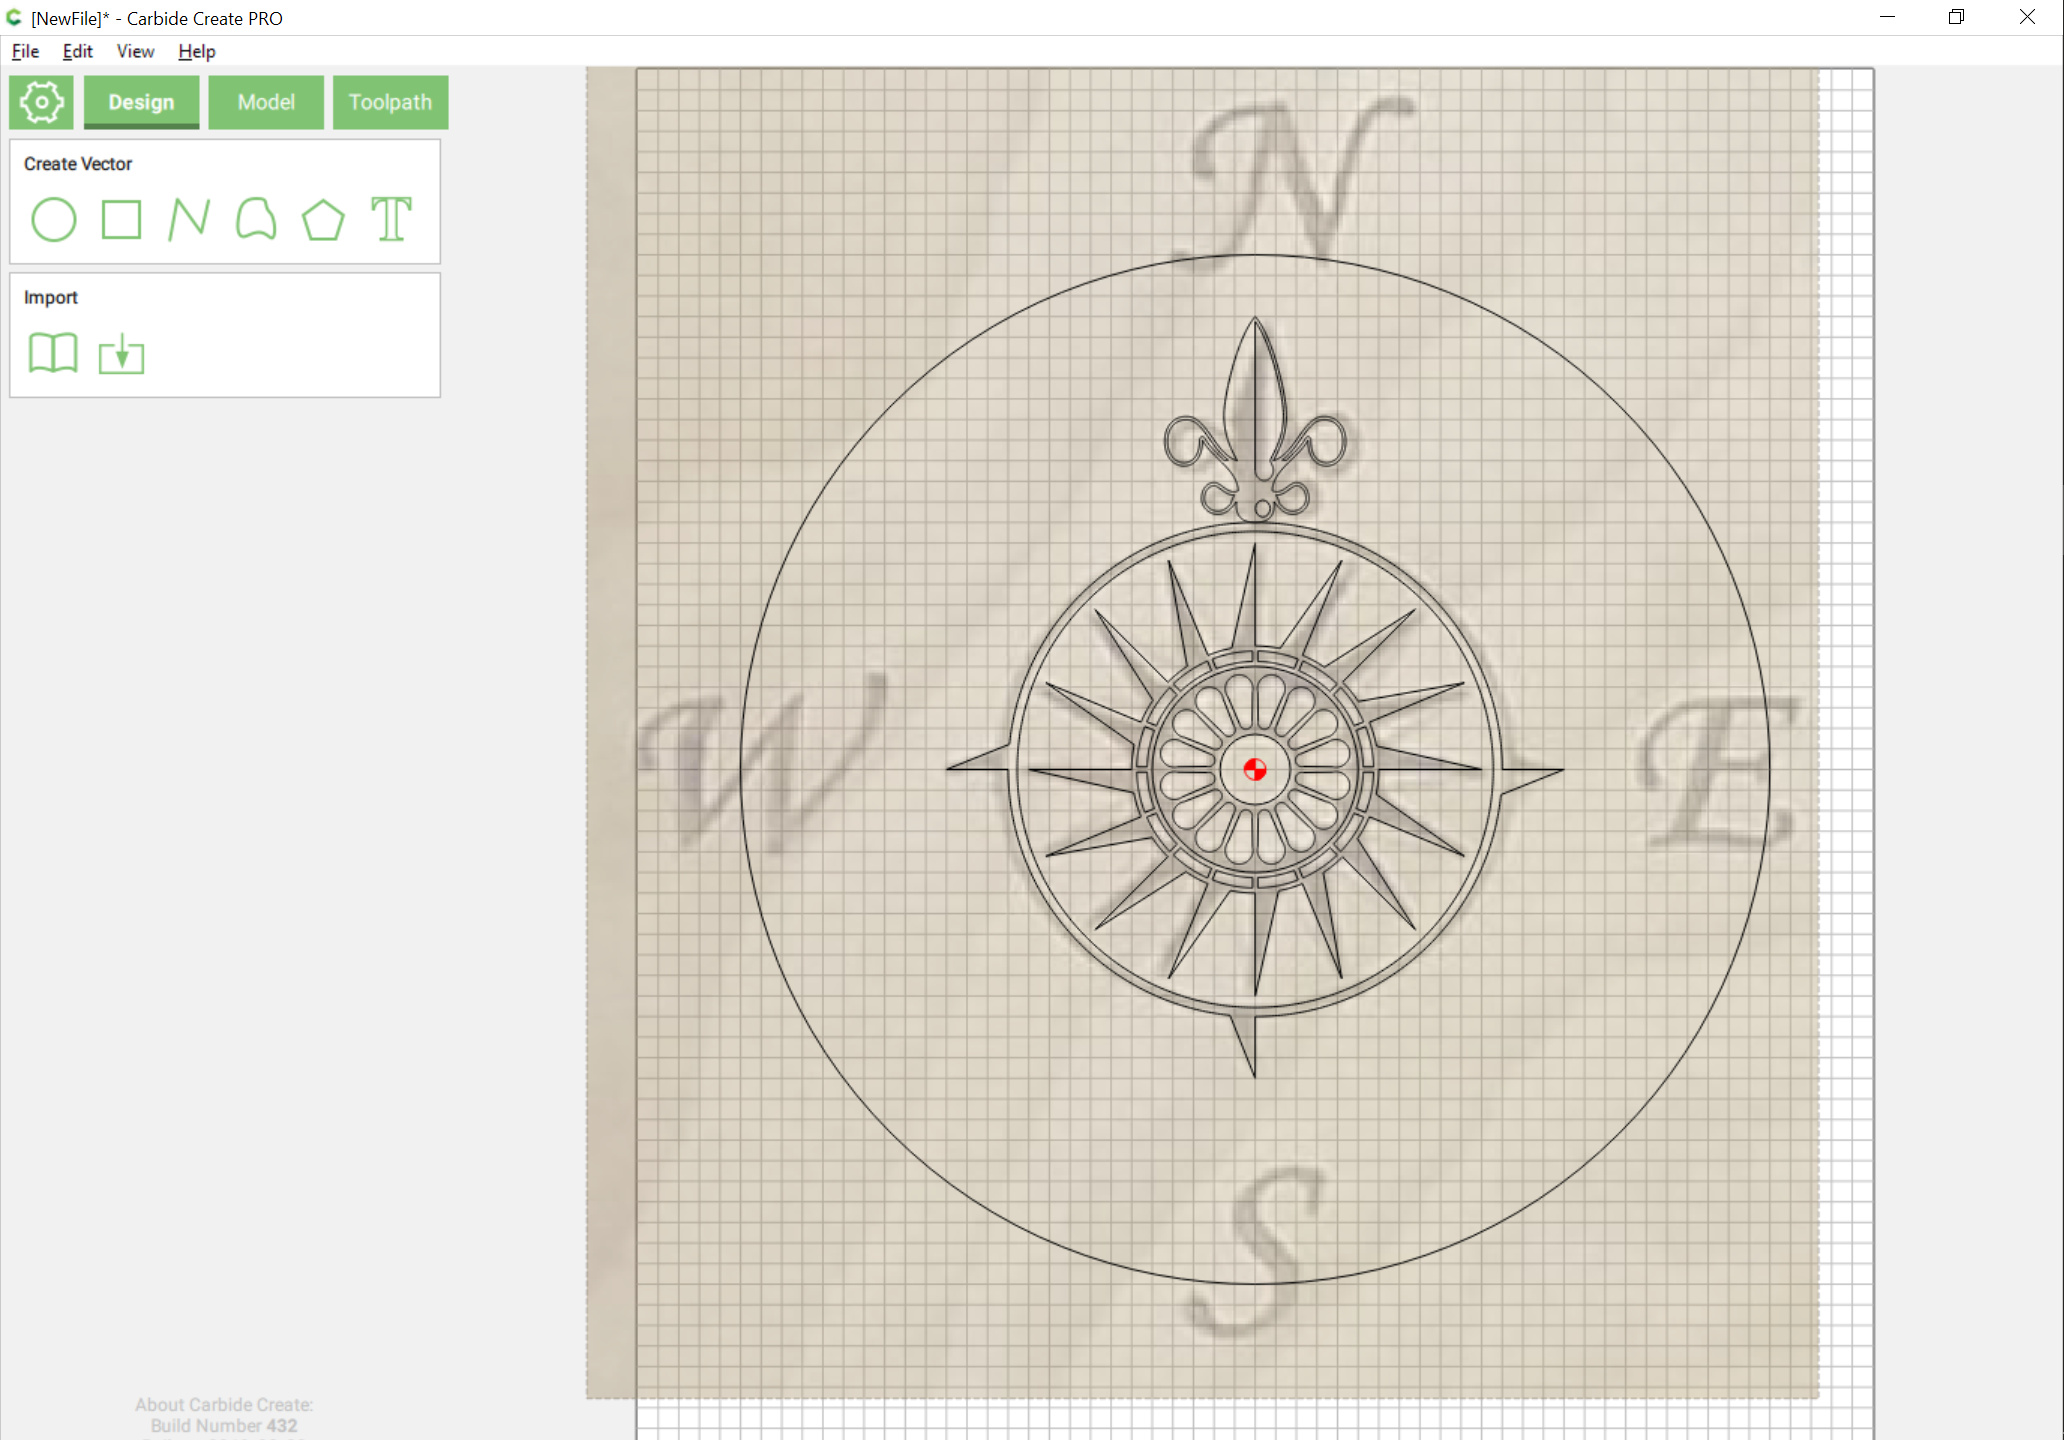
Delete the outer circle and use an appropriate font to set the text:
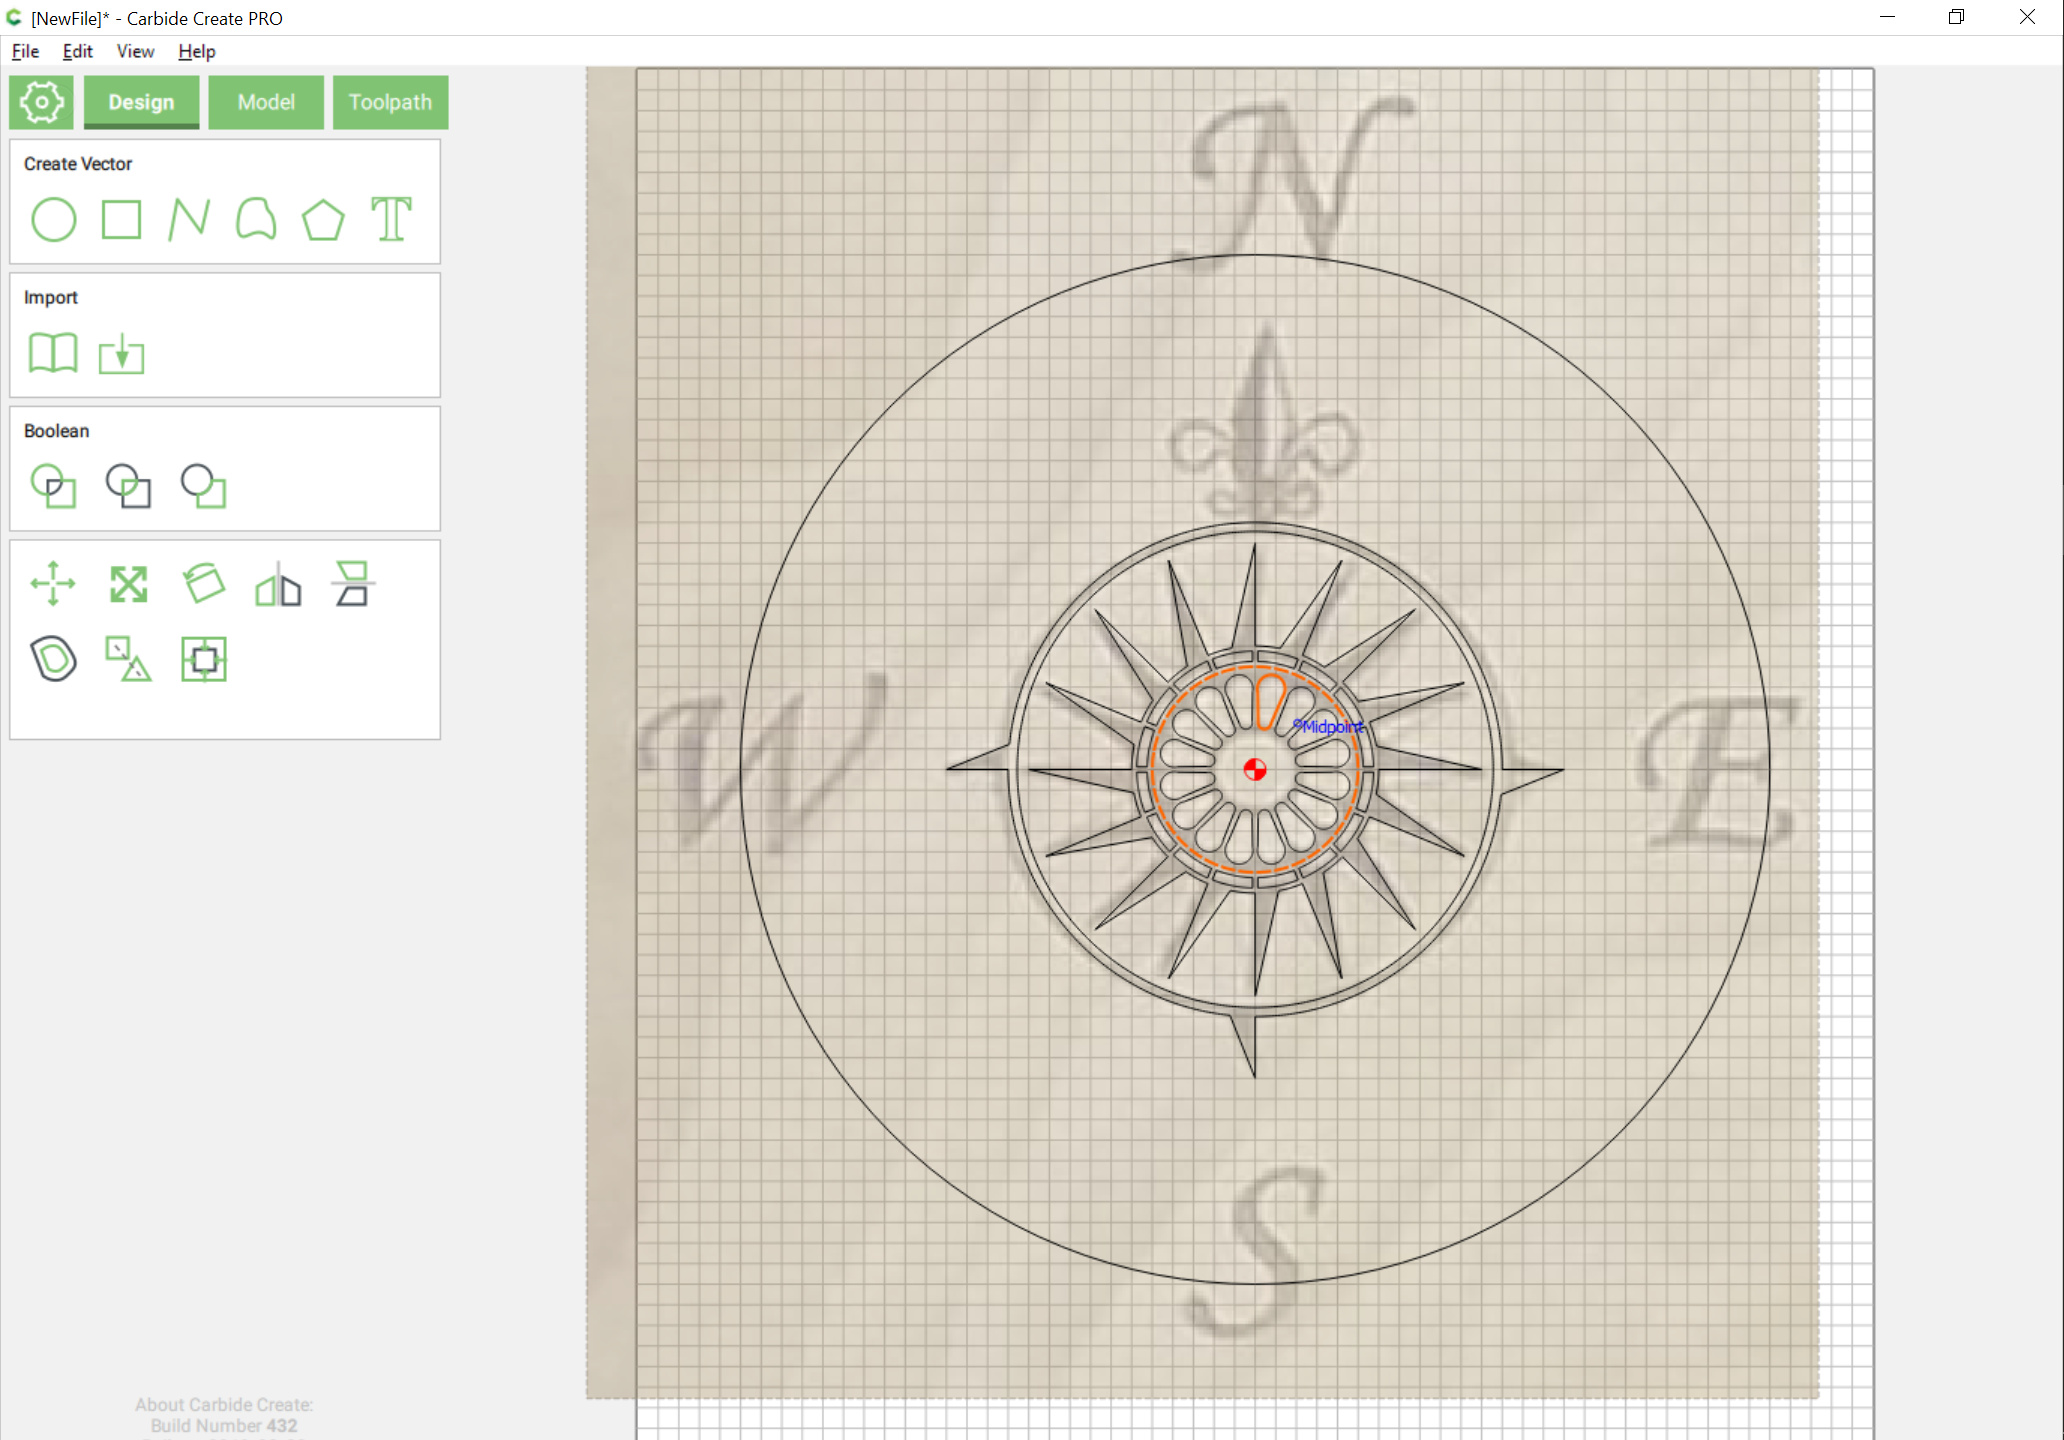
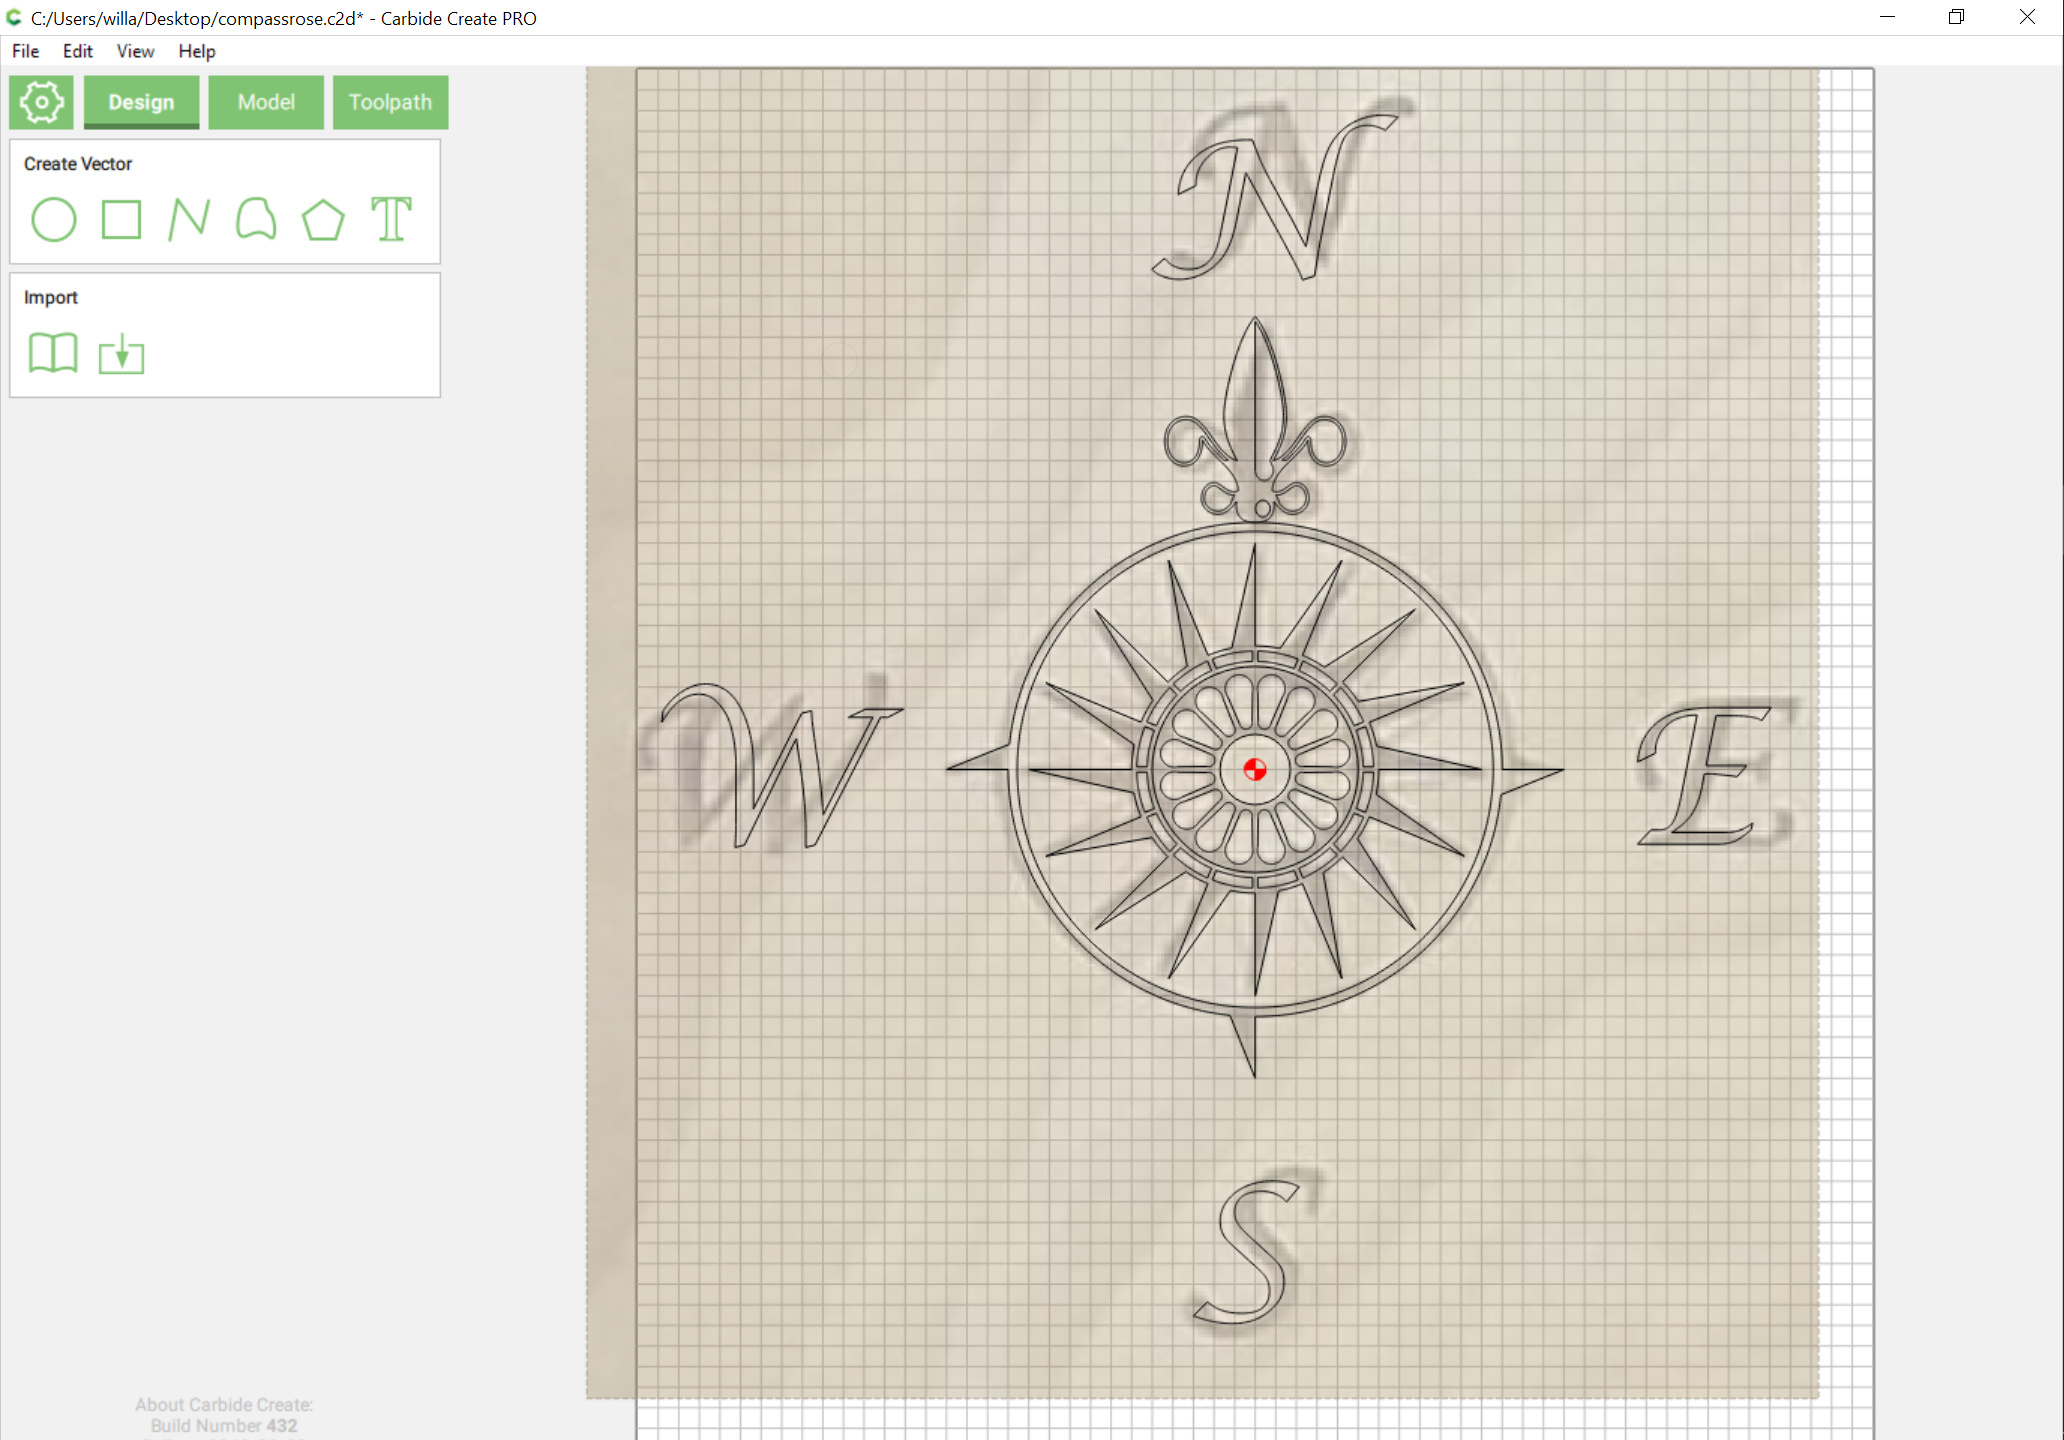
Attached: EDIT: further updated version: compassrose.c2d (856.0 KB)
I’ll probably revisit and redraw the ornament at the top latter — didn’t do a good job recognizing the shapes and drawing them.
Redrawn ornament:

EDIT: (which has been applied to the .c2d file above)
This is great work, Will. The dedication to go through all of the steps here is very nice. What you do for this forum cannot be appreciated enough.
My only complaint would be against the software itself for not having an array drawing feature. I cannot really consider it as a serious 2D or 2.5D drawing/modeling app without something as basic as linear and circular arrays that I was using in digital drawing software 30 years ago. CC is nice for doing small fixes to some SVGs that I import in prior to creating toolpaths, but I cannot ever imagine I would go through the painstaking steps you did above when a simple circular array would have created most of that image with one button click in numerous other programs.
Yeah, I miss Power Duplicate (and many other features) from Freehand.
My first job out of college was pretty much drawing in Illustrator and Freehand for 40+ hrs. / week back before either application had many of the features which they have now, so I guess I’m used to it.
And of course, it’s far easier using a computer than drawing with India ink using a technical or ruling pen, rules, compasses, French curves, &c. as I was first taught to do. Guess I’m dating myself.
Awesome tutorial Will. Will give this a try.
Great tutorial, you have great skills sometime it feels like drawing in CC is like trying to cut a 2X4 with a multitool. You eventually succeed but it is quite the effort.
I’m curious about this design where the little triangle are offset. Is this due to a bad drawing or is there a reason to have this offset? I would think that in the perfect world, this would be straight as it is supposed to indicate the sub-divisions of the compass and should not have a deflection.
I was working from the provided low-resolution original — looking at it a bit more, I suspect that there are supposed to be half-open/half-closed symmetrical triangles pointing at each section — I’ll re-do the drawing to reflect that at some point in time.
No worries, I was curious as to the reason, they were deflected. You drew what you saw.
Agreed. Thank you for sharing the process.
Seconded… especially for CNC work. I use both linear and circular arrays in most designs I create in Vectric Aspire. @robgrz and the team have done awesome work with CC/pro in the last months and it was a requested feature so hopefully it’s in the pipeline!
I would just find a clean graphic and then convert it to a svg file. A lot easier than hand drawing