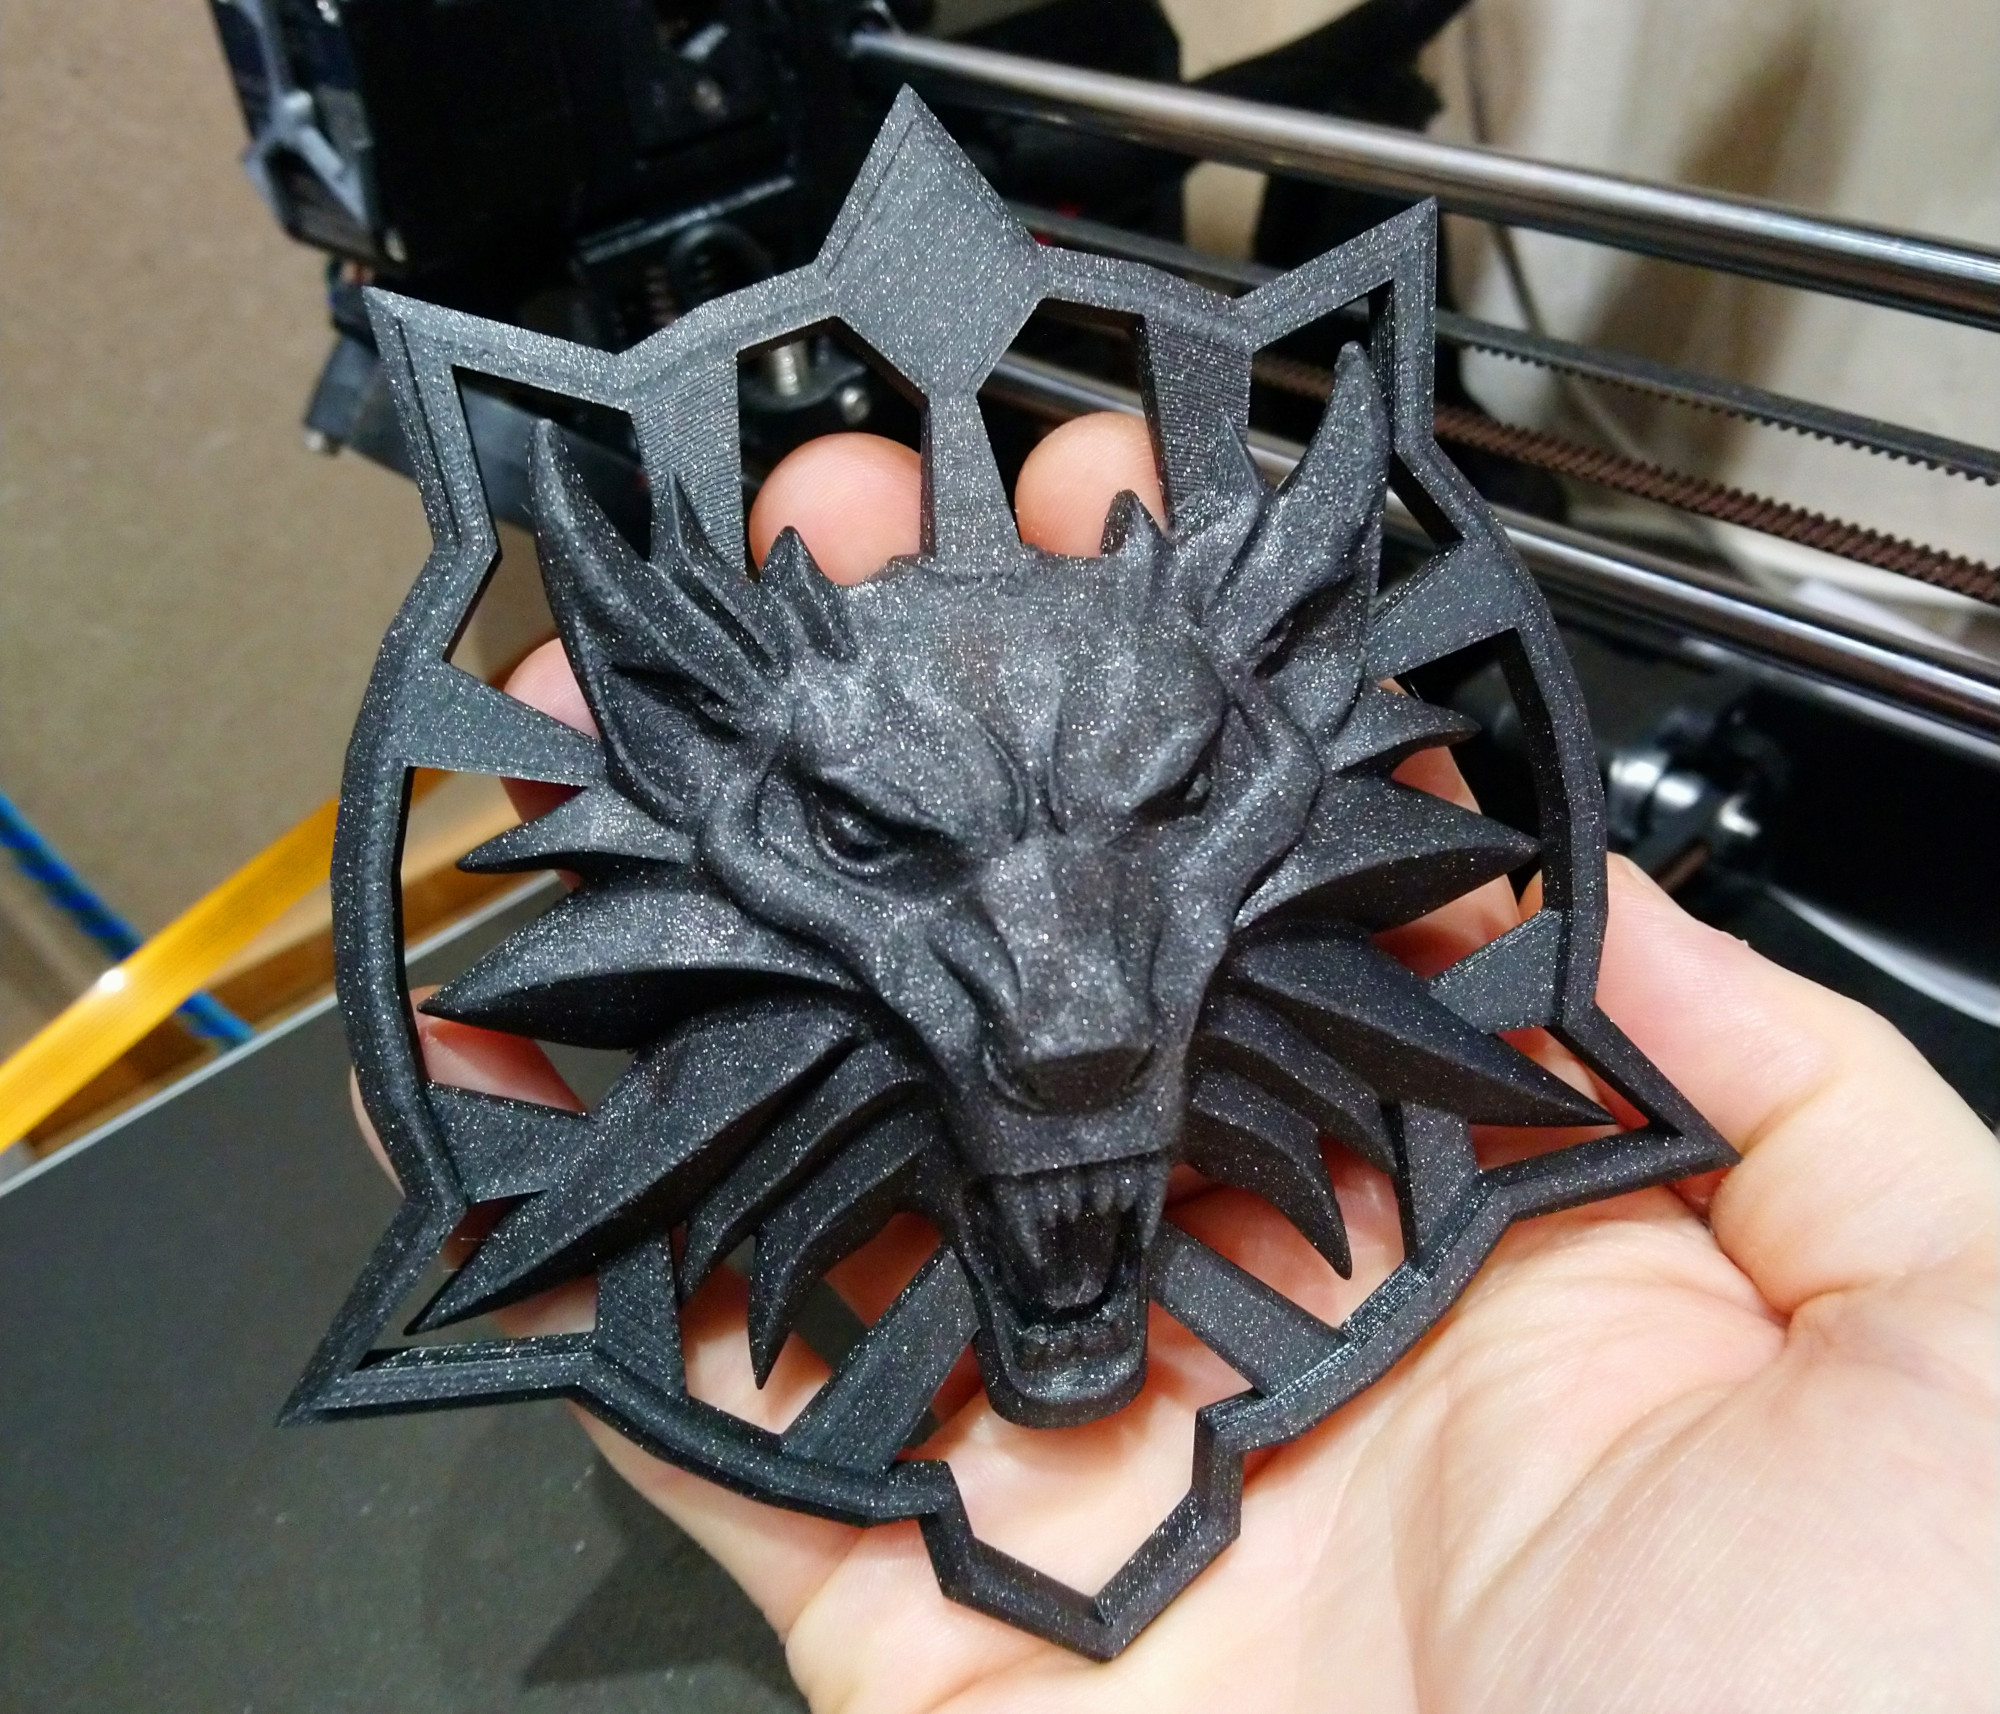
man I’m glad I bought a Prusa, I can’t get enough of getting this kind of result on first try with zero tuning and no clean-up.
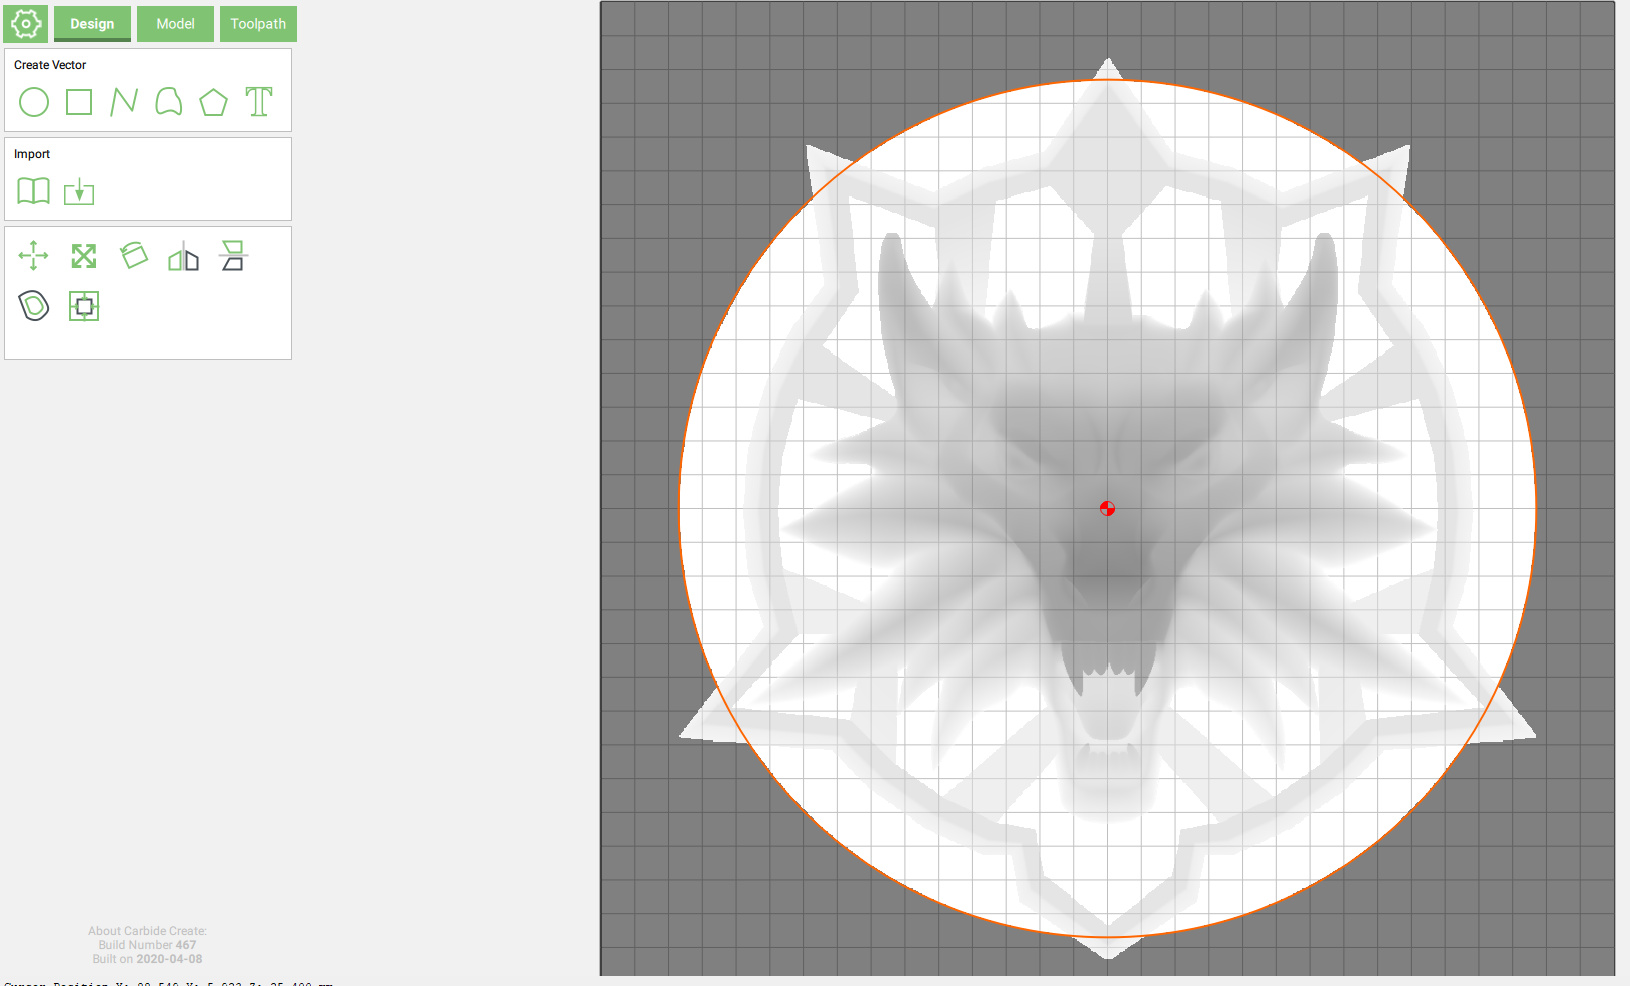
I should try and mill this with my Shapeoko, as a challenge. The 3D model happens to have almost no overhang areas, so it’s not impossible. I uploaded the STL in @fenrus STL2PNG converter (by the way: Arjan, why not join forces with @robgrz and integrate that STL-to-heightmap feature in CC Pro? Pretty please ? ), and it sure looks pretty and machinable:
with the exception of the upper teeth (overhanging the tongue), which would be the main challenge then. Maybe I’ll mill them (or print them) separately from a white material.
It’s about 1" thickness from the bottom to the top of the nose. I may need to buy 1/16th endmills with longer LOC than those I have, to pull this off. Ultimately I’d like to see if I can mill this in aluminium.
So, if you had to do this, how would you do it ?
Side note: if anyone wants to beat me to it, use CC Pro to carve this and win community challenge #7 in the process, you are very welcome to do so! Here’s the thingiverse link:
I could fire up Fusion360 but I kind of liked the idea to do this all in CC Pro, however CC does not model tapered bits. Do you think I can get away with declaring it as a ballnose of the same radius ? I may get in trouble in near-vertical areas like those eyebrows, but other areas should work ?
I input them as ball mills and try to stay aware of the deep spots. I haven’t checked lately, but does CC give you the option of leaving stock behind on a finish pass? If so, maybe one finish pass with the tapered bit with some stock left behind followed up by “true” finish pass with a longer “skinny” endmill?
First let me say that the Shapeoko world has been needing an affordable STL-to-heightmap feature (Rob?). Secondly, IF the cut isn’t too deep you CAN get away with fooling CC that this is a ball endmil, but for those deeper cuts…a proper tool description that includes the taper would be best (oh look, again Rob?). Lastly, since it’s just a decorative piece, I’m sure a little wall scuffing with the sides of the taper cutter would be acceptable.
@Microwave_Monkey:
CC Pro only has a stock to leave option for 3D roughing, but that’s a good idea, I can easily fake stock to leave on the first finishing pass (i.e. set zero “stock-to-leave” higher than it should be)
@RichCournoyer:
I agree, and it can’t get more affordable than the free tool @fenrus implemented, hence my nudge to Rob to get in touch with him and integrate that in CC Pro
I’ll have a go at using this tapered endmill as a small ballnose and see how it looks. And who knows, it might be one of those moments when Rob jumps in and says “we implemented it 2 minutes ago, go and download the latest beta version of CC”
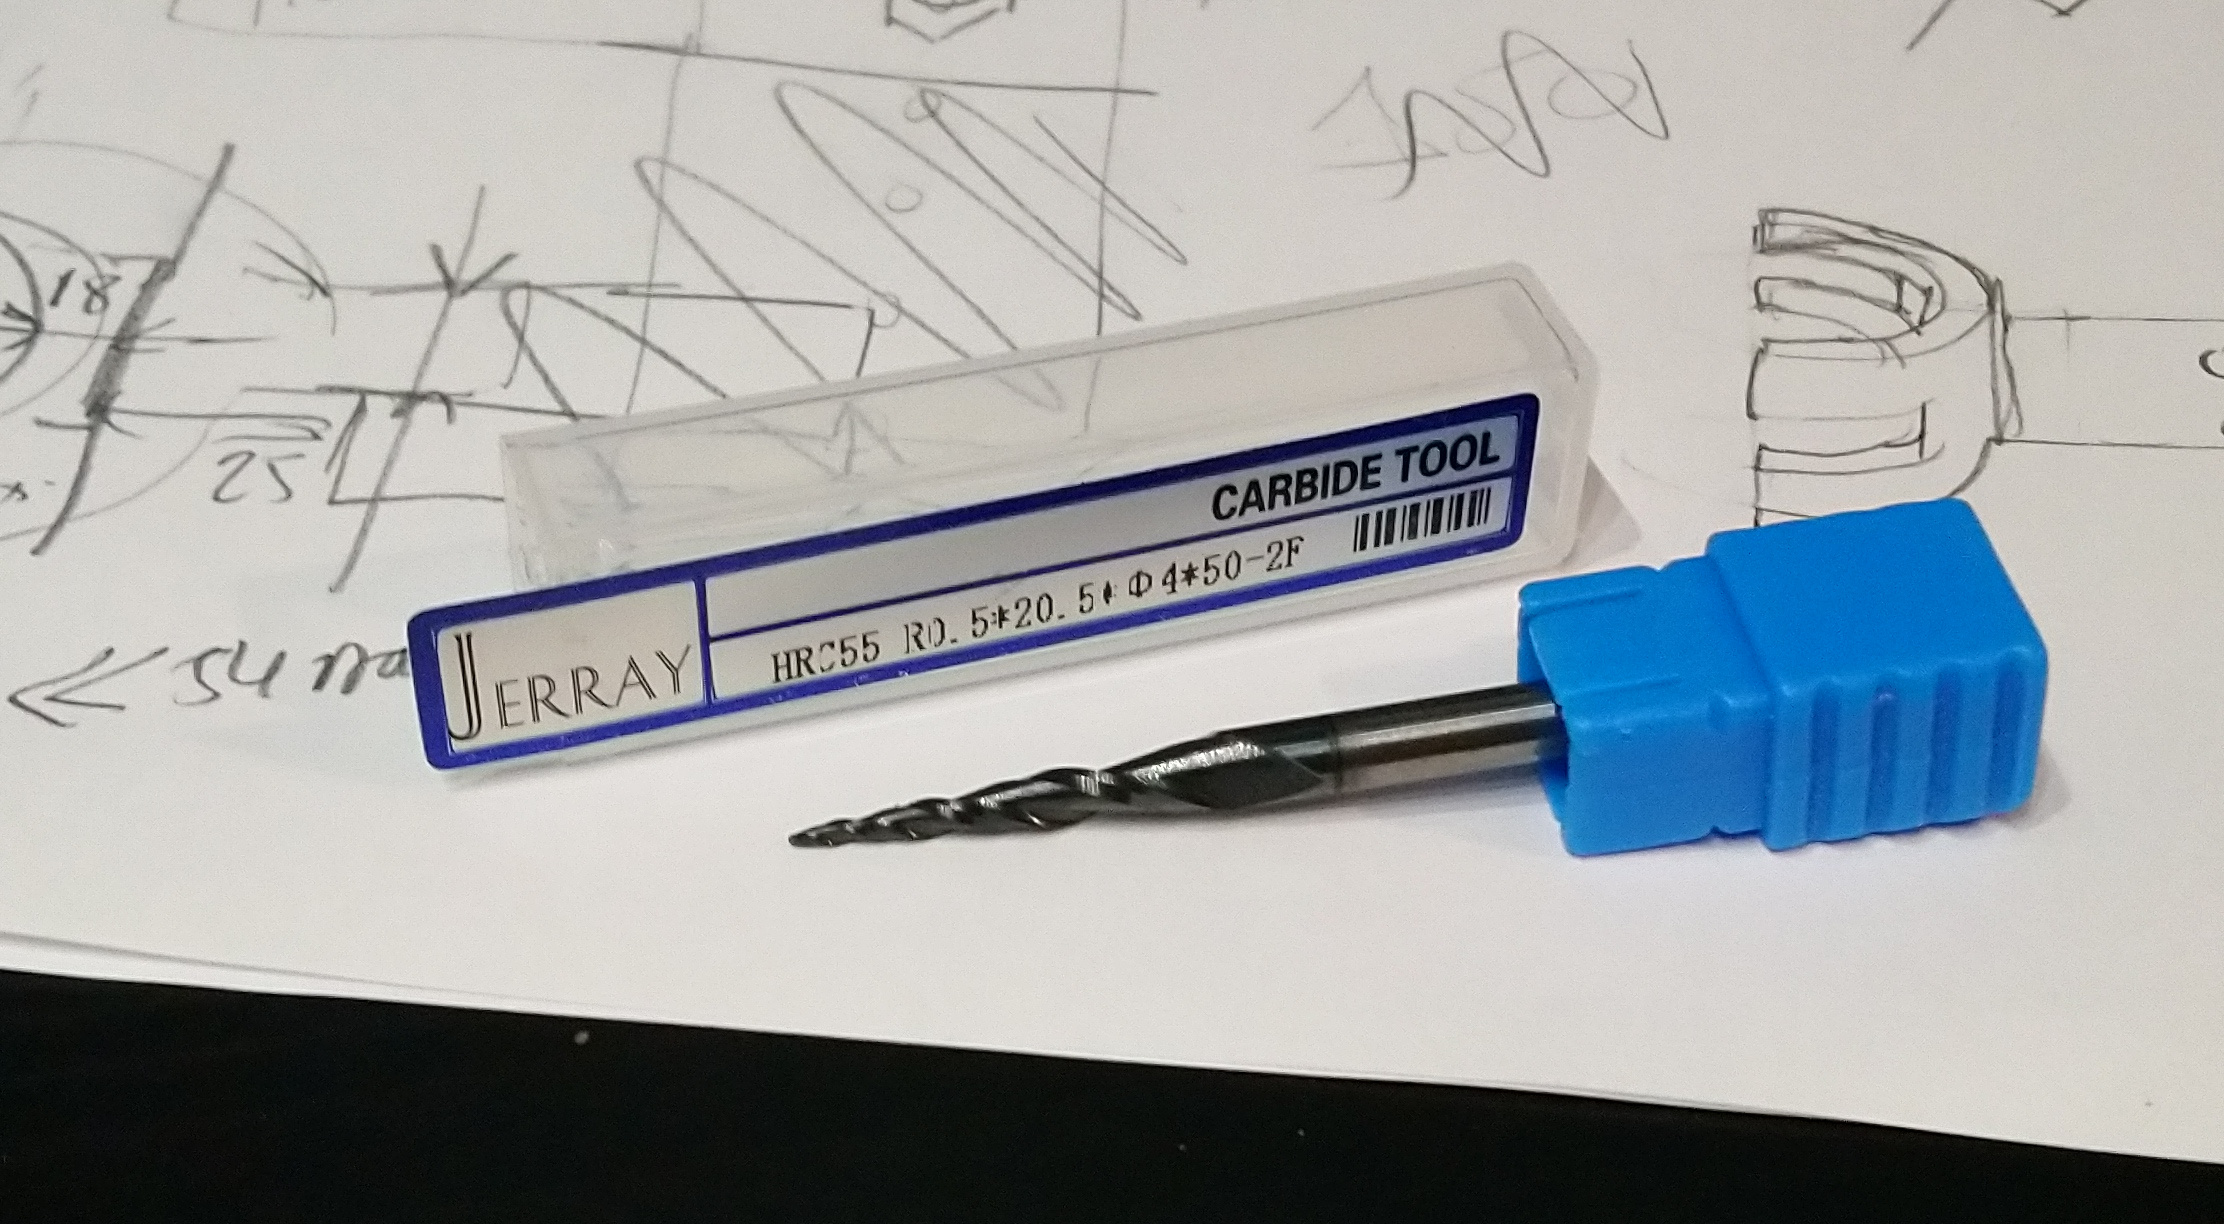
I know longer endmills can very quickly start to go “sideways” (pun intended ) but by adjusting my feedrates I have had a lot of luck with these and find myself using them as one of my go-to endmills: CTS 1/16x3/8 4fl
They are tough little dudes that take abuse very well.
They also have a 5/8" length I am curious to test out:CTS 1/16x5/8 4fl
Edit: I should make it clear I cut mostly softer woods.
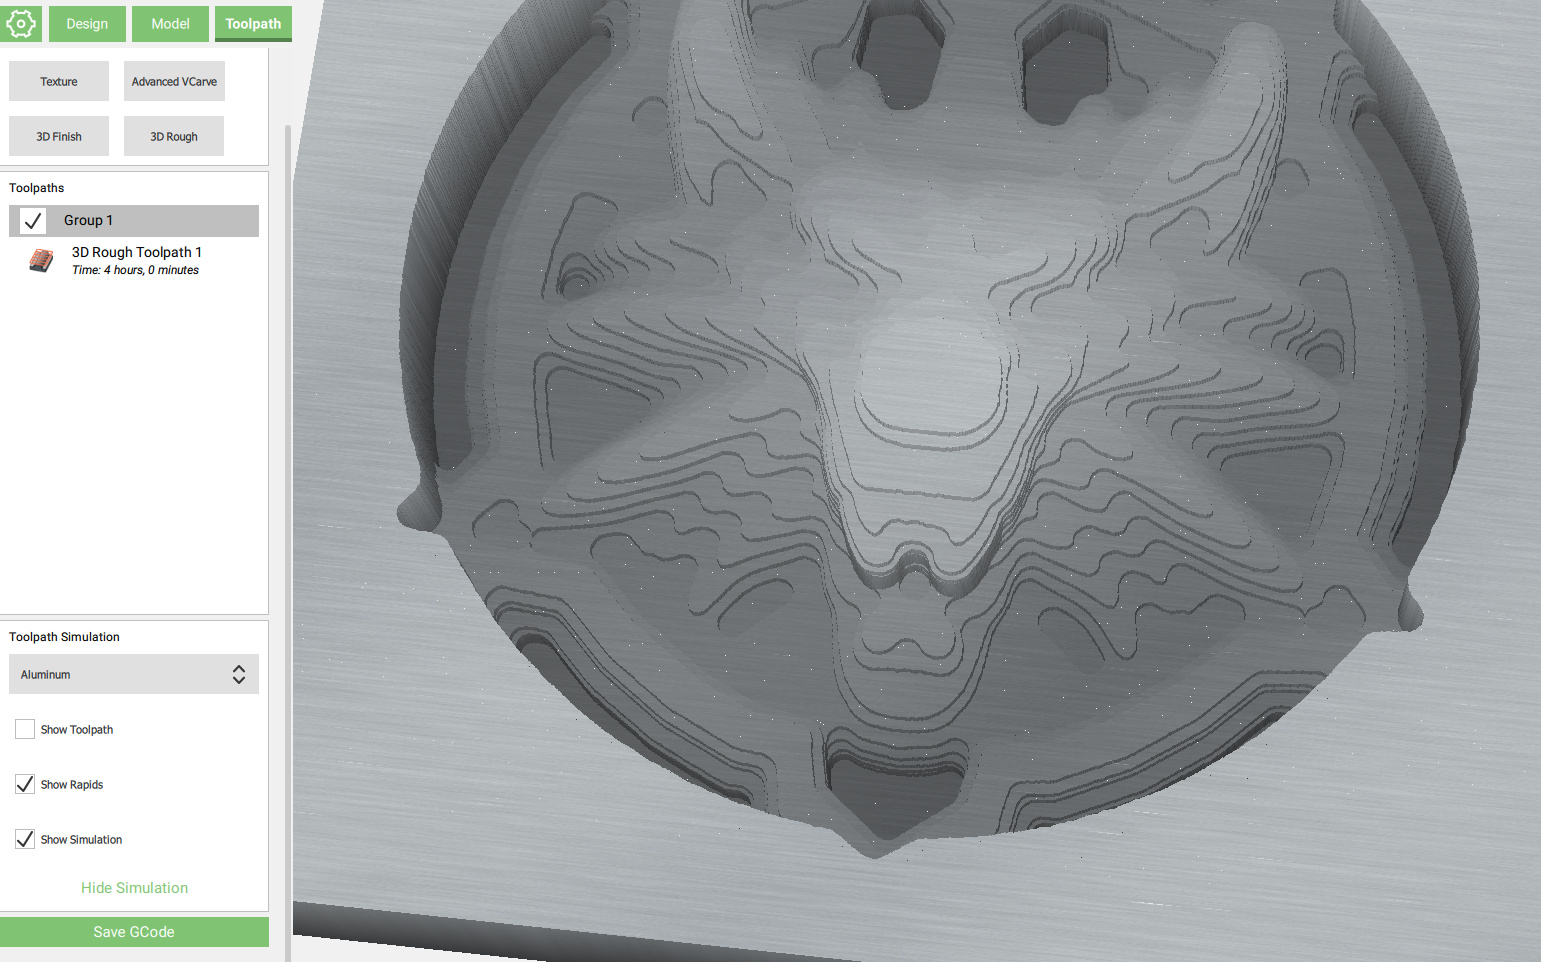
(ridiculously small stepover used just as a way to preview the details of the resulting cut)
@fenrus: agreed on the looong roughing ahead if I use a small stepdown. Is that g-code you posted from your own G-code generation tool (last time I checked it “only” managed SVGs) ? The header does not look like either Fusion or CCPro. Just when I needed a large block of Renshape to max out feedrate, I used my last/only one.
@Microwave_Monkey thanks for the recommendation, I’m afraid I would have a hard time finding that brand here, but I might be able to find the next best thing.
I saw that thread, but somehow missed that one post where you mentioned using your own CAM. It’s not up on github yet right ? (and tell me if I should stop mentioning you and your awesome tools, maybe you’re preparing a commercial version of your own). Still impressed.
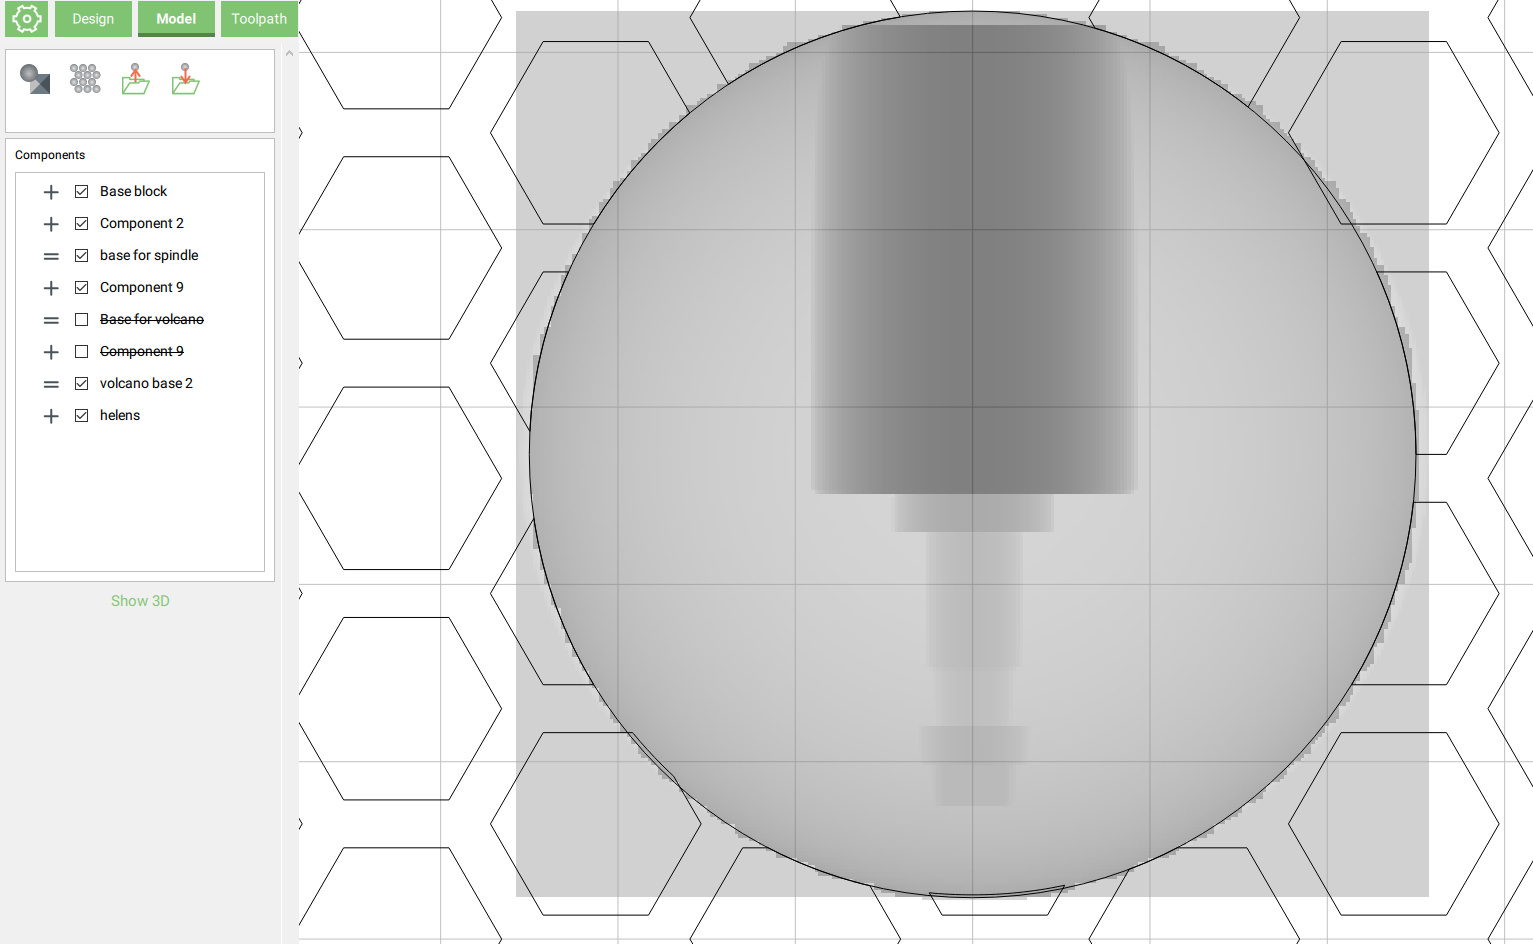
Allright, first road bump, I had never tried using a non-rectangular area for heightmaps in CC Pro, I draw a circle and I thought it would clamp the heightmap to within that selected shape…but no it doesn’t.
Am I right that heightmaps are currently only supported on a region that is the same shape/dimensions as the imported image (after scaling), i.e. the black & red outline ?
I have different ways to workaround this, but wanted to double-check if I am missing something. I do want to contain the heightmap-generated 3D surface within that circular region.
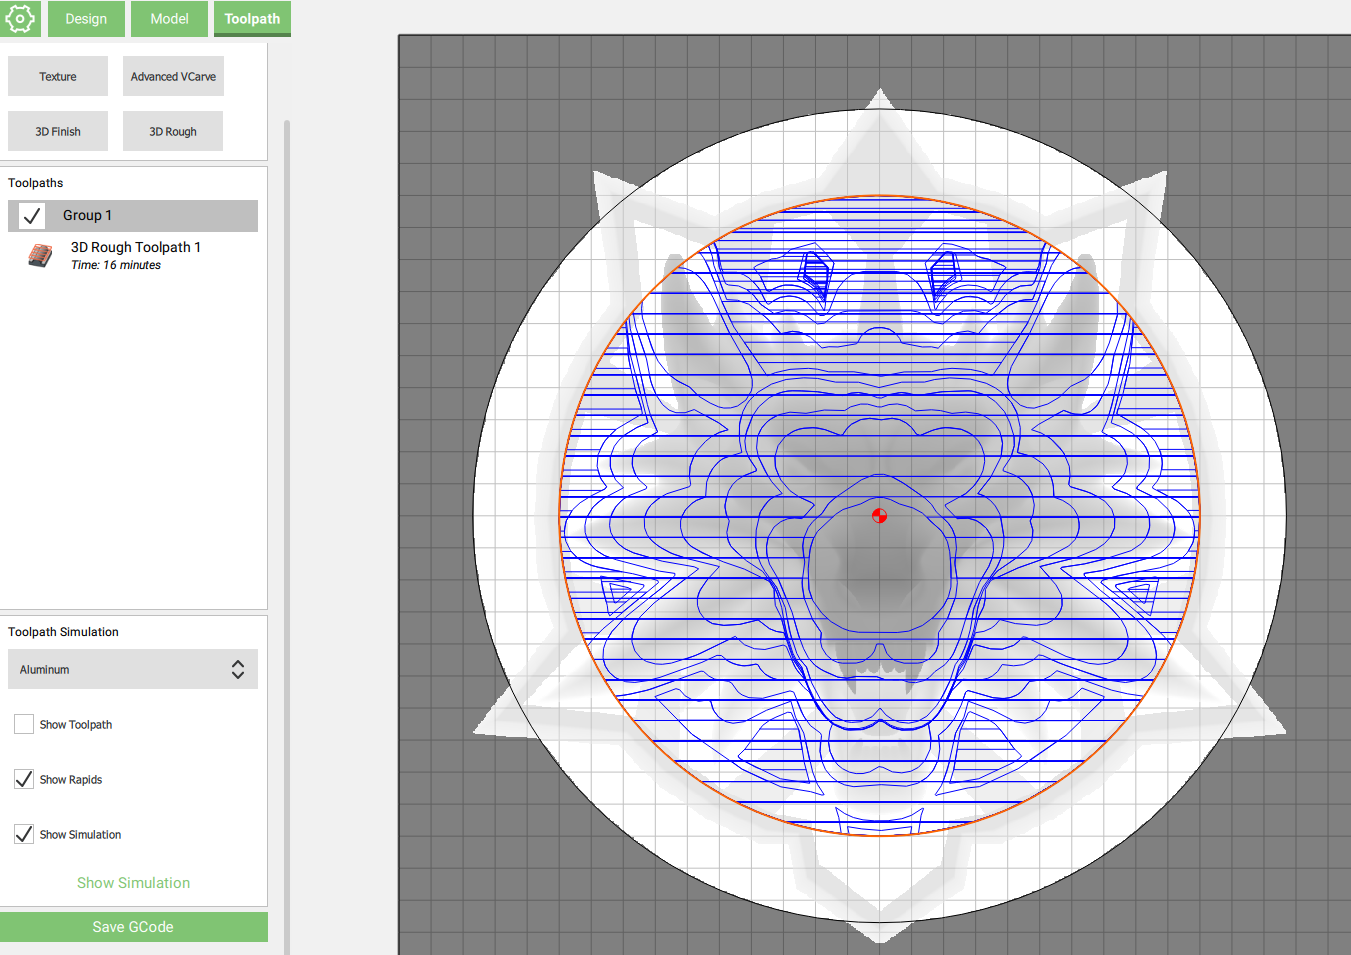
I had this on the backburner and now I’m back to it, and…it turns that CC Pro seems to not care much about me selecting the circle for the roughing toolpath,
I wonder if this is a variation of the same bug/behavior reported in other threads (about CC Pro using the selected shape as the limit for the tip of the endmill, i.e. not containing the endmill within the shape as it does for regular pockets)
So I took a look at your contest entry to see how you managed that, and your spindle heightmap shows up with jagged edges all around the circle shape:
so what it will do is an outer contour with center of the bit at the circle (that I complained about) but that contour is at the height of the thing at the edges of the endmill… for you most of that is at surface (since it’s dark in your screenshots) except for the spikes.where it’ll go down
in my picture it was “mid level gray” so not at the surface
 ), and it sure looks pretty and machinable:
 ) but by adjusting my feedrates I have had a lot of luck with these and find myself using them as one of my go-to endmills: