I first tried using a circle which radius is smaller by half the tool diameter compared to the original circle, to compensate for that “center of the bit at the circle”, but…it will still try and cut into those pointy corners a bit. Only when I use a circle that is one tool diameter smaller in radius, does it behave as I want.
It really looks to me as if the toolpath is using an “outer contour of the selected shape with the selected tool” as the boundary, but I have messed up with my file so much that I’ll have to redo a simple project from scratch to confirm.
I don’t understand your plan the… you want the fuse to work in the little triangle outside the circle?https://community.carbide3d.com/uploads/default/original/3X/5/6/56f92c70358605b7286ed82d8aebdd7df2d22994.jpegdon’t
What I would have liked is that CC Pro contain the toolpath generation within the boundary I selected (circle below in orange), so I would have expected it NOT to try and go in those pointy corners:
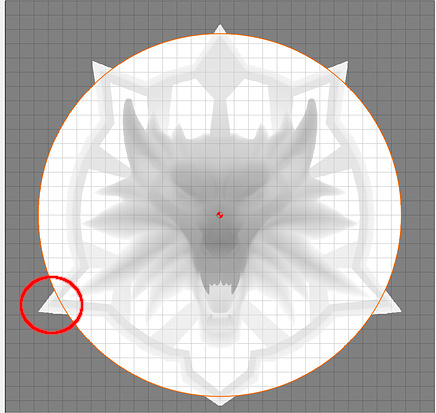
but it does:
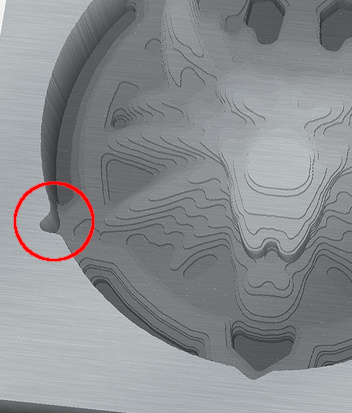
Anyway, I compensated for that behavior by reducing the outer circle diameter and it turned out ok, but it’s far from intuitive.
I wish we had a formal bug report & tracking system (à la github), because posting about a bug (or at least a questionable implementation) and hoping for someone to catch the ball on the developer side is not very predictable.
1 Like
Yes, I understand, and I was also thinking about it for other projects, how to manage this.
I have a solution, I think you would have to rework your drawing on another software, cut the tips and reload in the same way in CC.
What format do you have it in?
Yeah I’m sure I could clamp/mask the PNG heightmap manually in GIMP or something, to only keep the circular area, but that’s extra work, and I think CC should do it for us by enforcing the boundary of the selected shape.
1 Like
yes it will be great… we could load a png file, and execute only a specific part, without overflow 
1 Like
at least I’m no longer alone saying that this is a bug
4 Likes
I proceeded to put that CC Pro sweetness to good use.
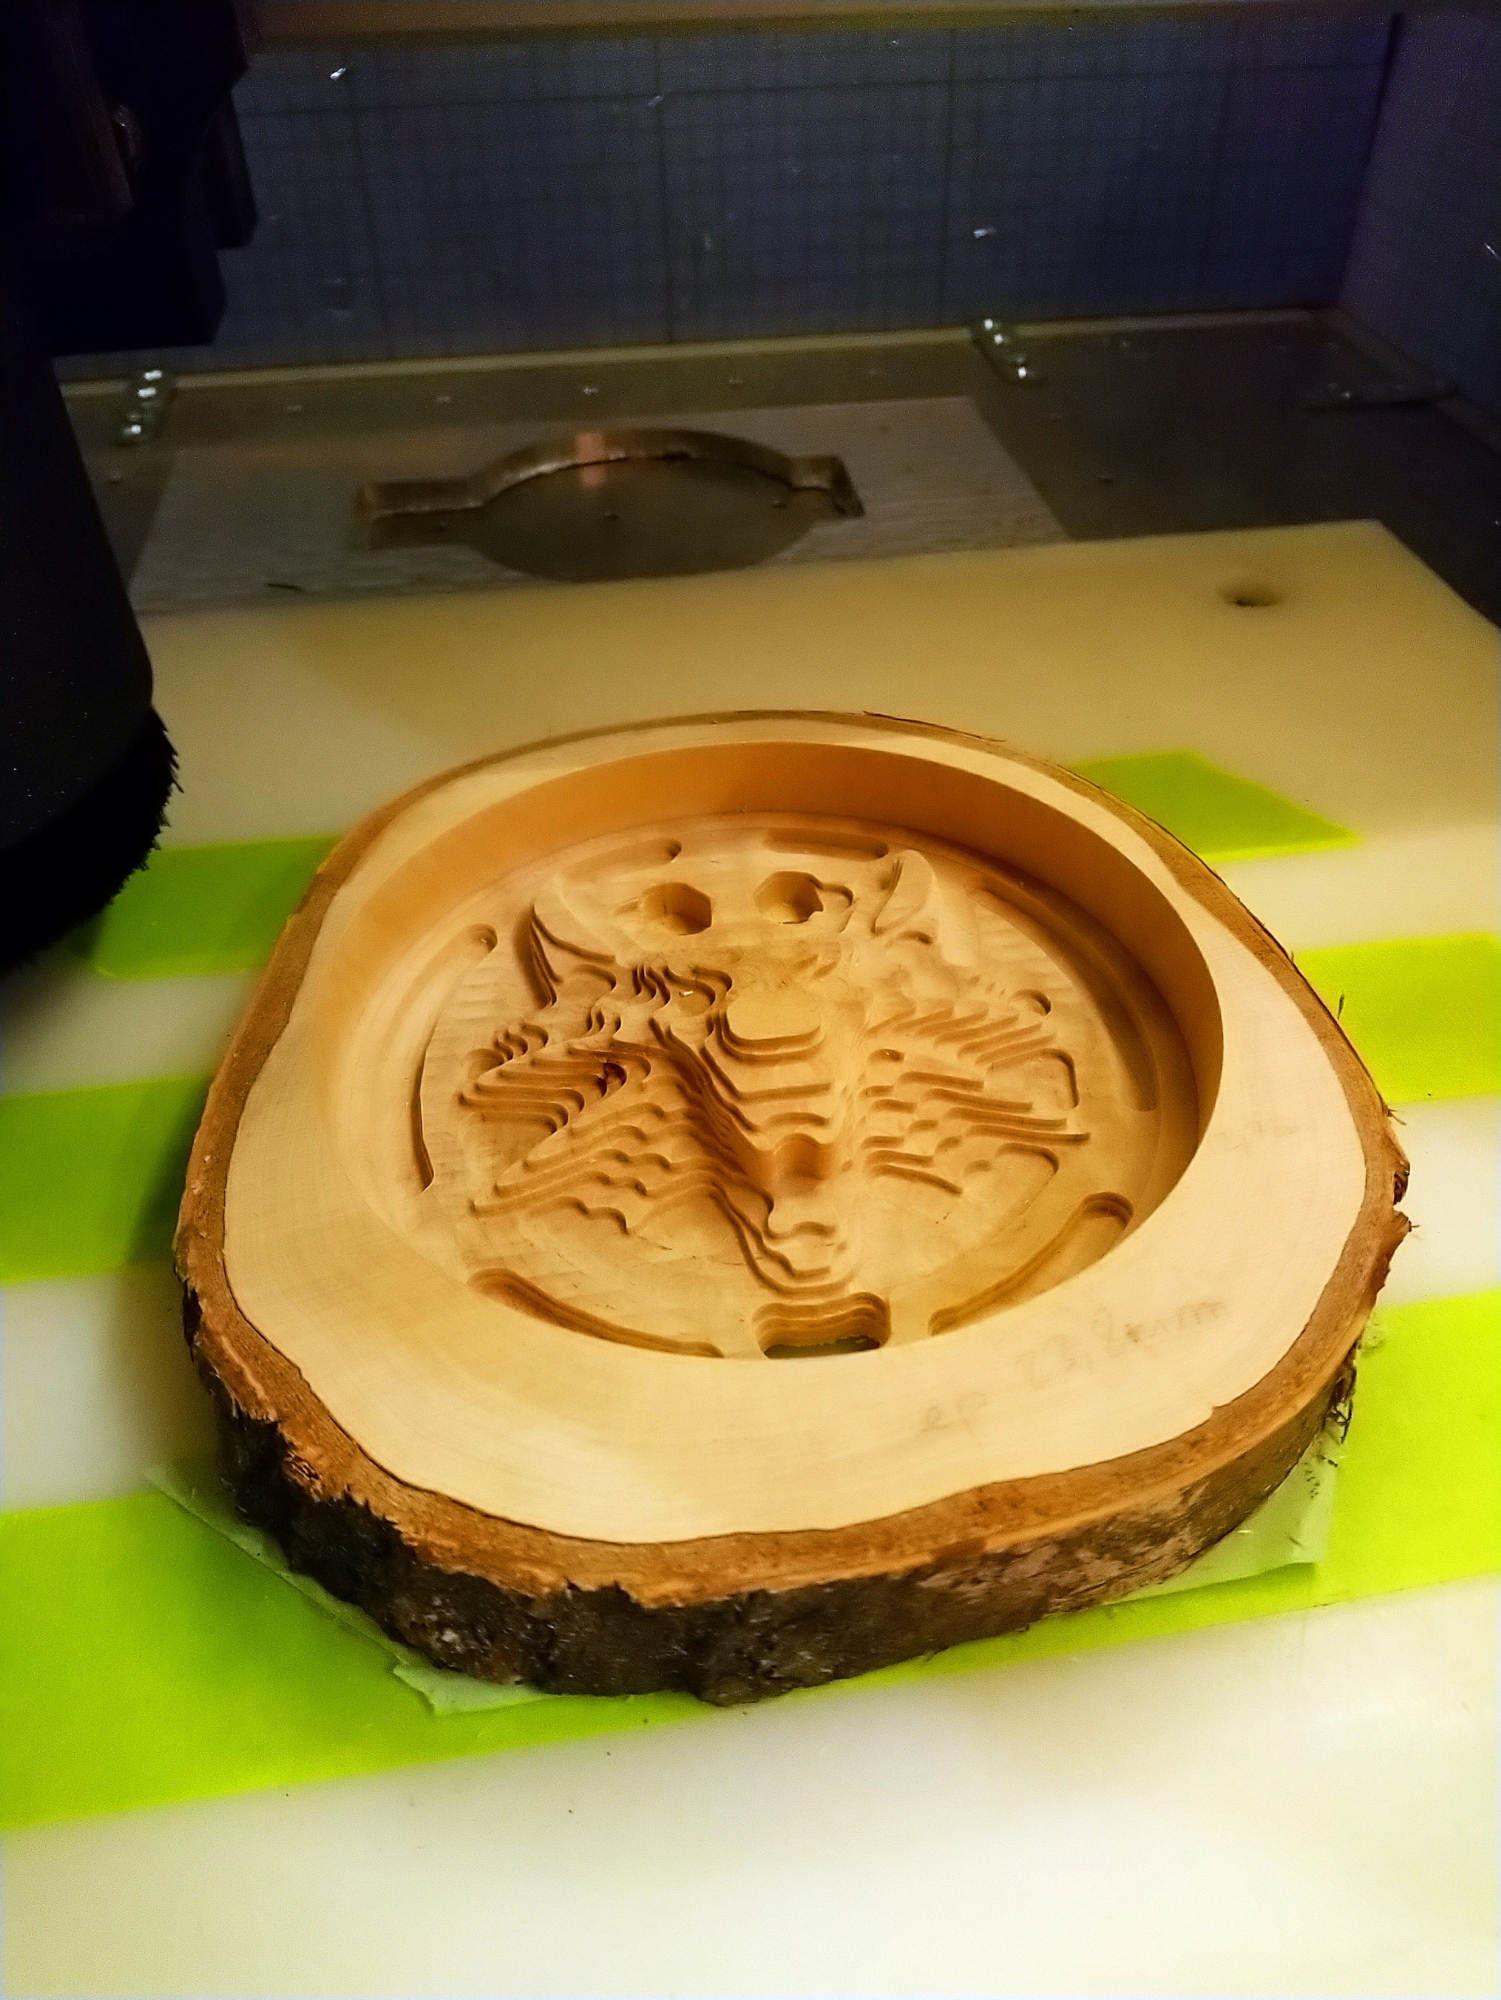
The other day that thread reminded me that I had a tree cookie (birch) waiting to be milled, and I thought this could be a good material to start from, so I used tape & glue (semi-mistake, more on this below):

By the way, did I mention I still like my latest dust shoe design? I have not felt the need to “improve” it for a few months, so maybe just maybe my dust collection quest is over.

Anyway, believe it or not I don’t think I had ever milled birch before (while very common, for some reason it’s not easy to get birch lumber in small sizes here), and I was pleasantly surprised that it mills perfectly, roughing with a 6mm endmill was uneventful (24.000RPM, 100ipm, 2mm stepover, 1.5mm depth of cut/ stock to leave), it took about 35min:
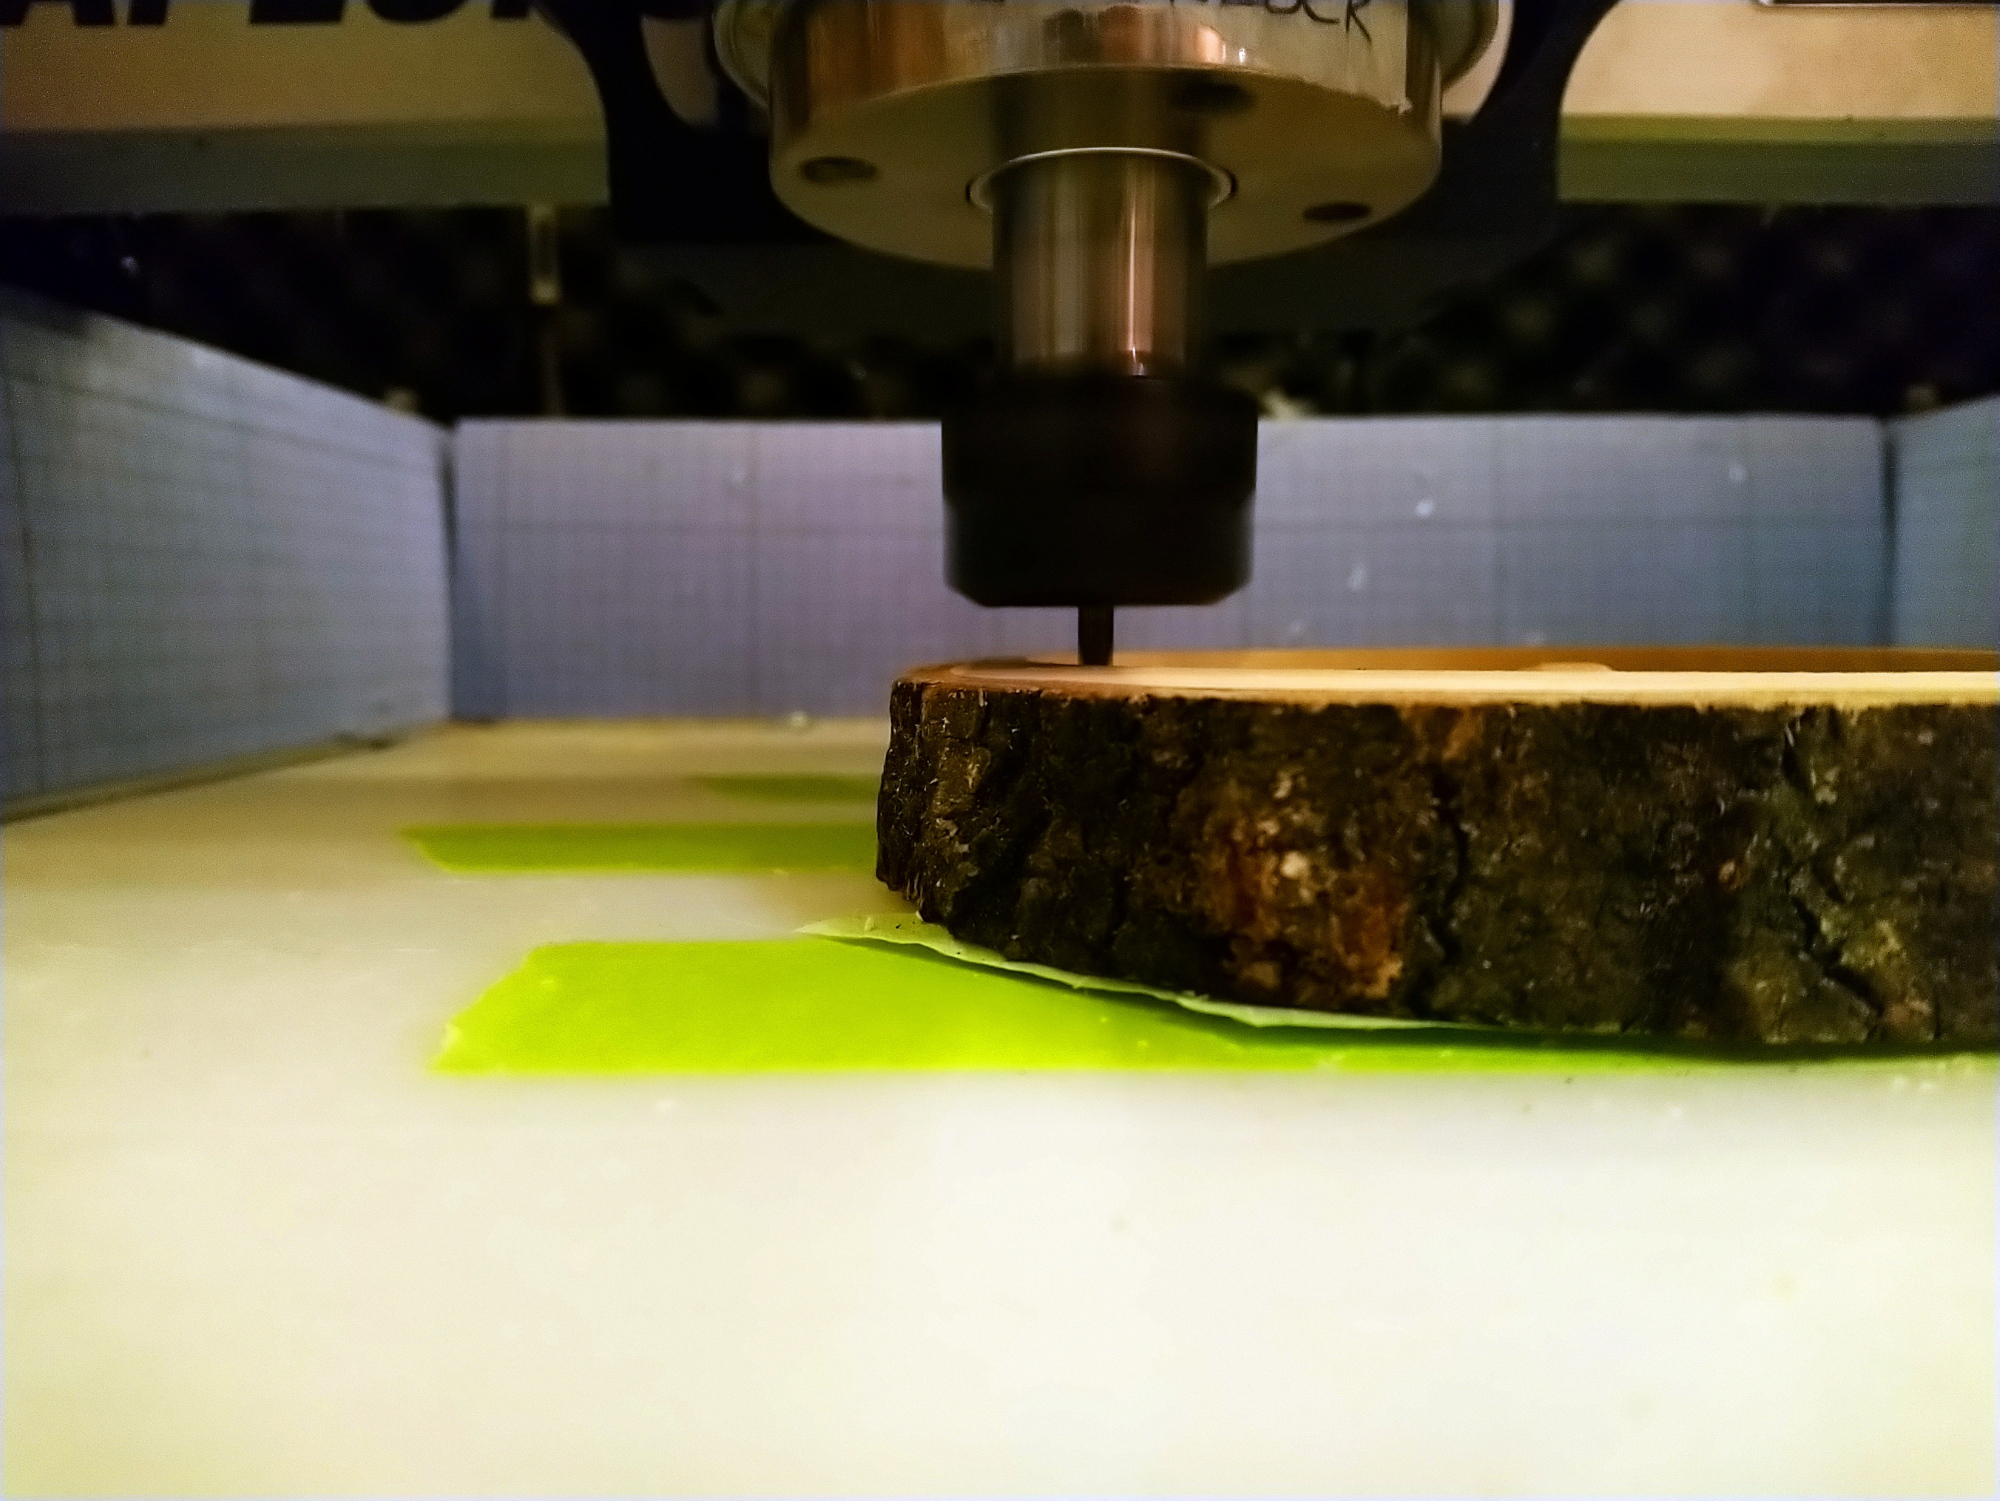
I installed the tapered endmill (0.5mm ballnose tip), luckily it was just long enough for the piece thickness with some margin:
For finishing, I told CC I would be using a 1/32" ballnose (0.8mm, close enough to the size of the tip of my tapered endmill), 10.000RPM, 60ipm, 0.2mm stepover (0.008") and got this:
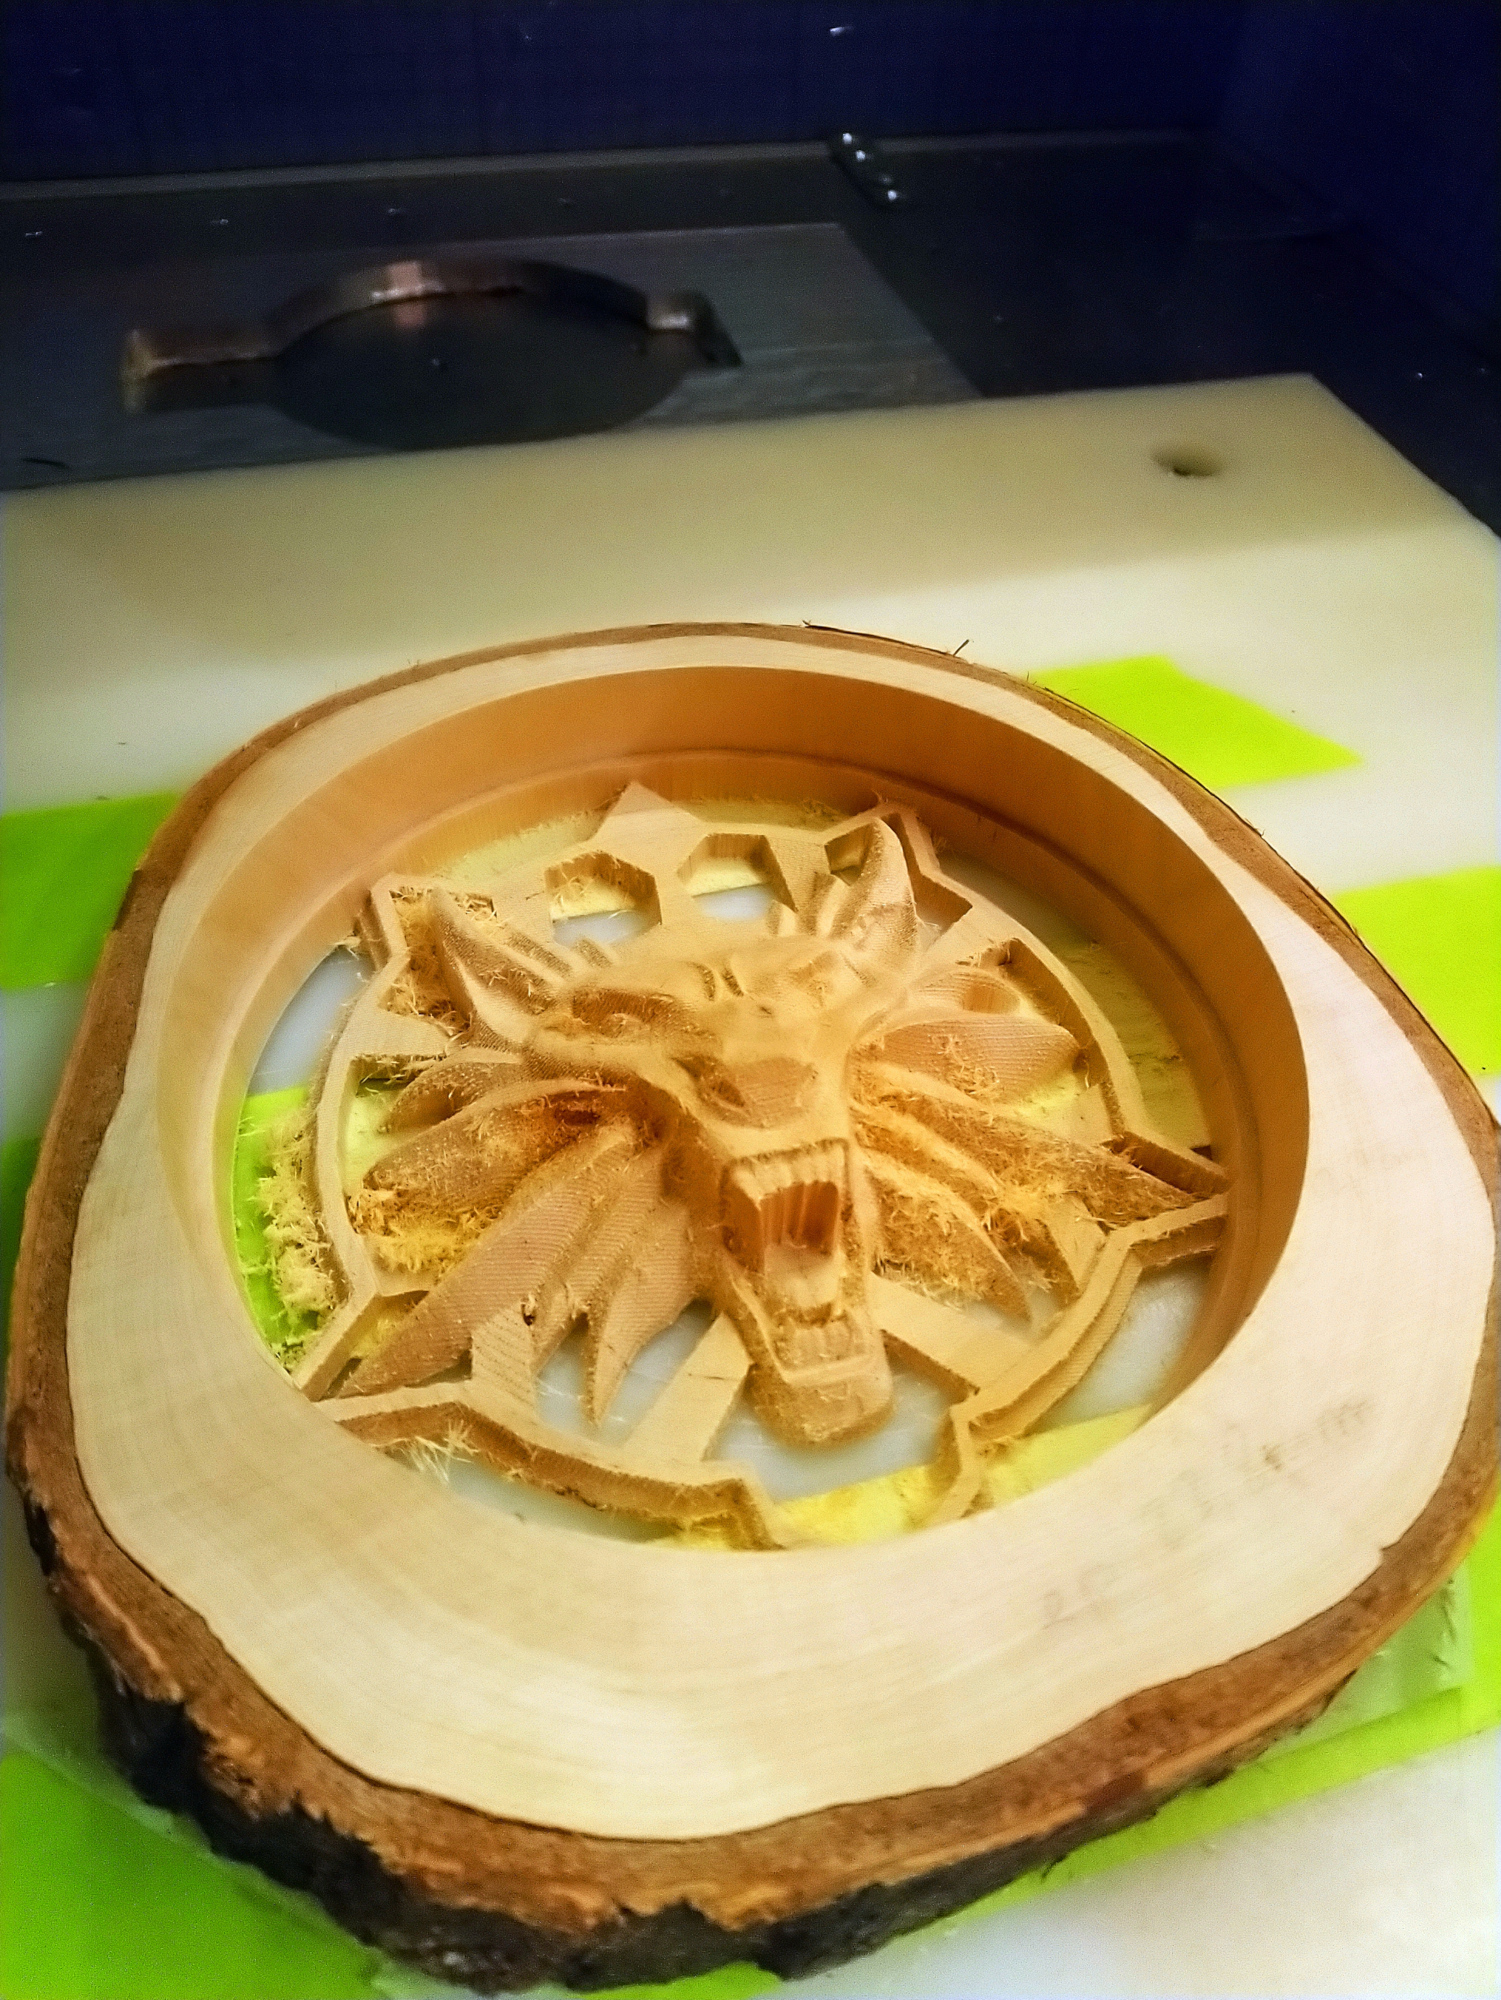
I decided to run the second finishing pass (same settings but at 90°) to get rid of those fuzzies, and it worked perfectly.
Finally I used a 6mm square endmill to mill a flat on the bottom of the tree cookie.
Overall, close to 5 hours cutting time.
Now came the realization that using tape & glue for this job was a poor choice, I tend to trust it so much that I don’t even consider alternatives anymore. It holds the piece so well that it’s not very suitable for thin or fragile pieces like this one. However, with a little patience, sliding a scraper under the piece all around, I managed to take it off just fine. Phew! close call.
I did a little clean-up of the open parts with a small file, and left the face untouched.
It’s about 6" wide.
I’m pretty happy with the result !

17 Likes
Very nice. And all end grain. Wow!
1 Like
that came out very nice
2 Likes
Wow! That looks awesome!
1 Like
Excellent work!
Here’s your 20…
Is the subject a Wolf, Werewolf or a Gargoyle?
That would be a wolf, The Witcher is big on wolves.
Is there any way to add a toolpath that would allow undercutting the teeth just a bit (no pun intended) with a bit such as this?
I’m guessing the best way would be to do this cut at the beginning of the roughing pass to minimize stress of the finer details?
With a (much smaller) T-slot bit this might be doable, but then it would be a tricky game of generatting the appropriate G-code for approaching/cutting/leaving with touching anything else. But I must say I kind of like the way the teeth ended up looking, and it makes the piece less likely to break there (a wolf with a missing tooth wouldn’t be nearly as scary  )
)
3 Likes
This topic was automatically closed after 30 days. New replies are no longer allowed.