Yes! I am glad that you agree that Carbide Create can do it. I was doing it manually and then i got frustrated and decided to reach out to the smart community. Sounds like you have done it manually before can you please share your carbide create file.
Thanks
Such a file would be specific to a particular size of box and dovetail bit geometry — please specify both and we’ll work up the instructions for doing this
One concern I have there is that is a very small bit for such thick stock.
I’d suggest using something with a cutting depth of at least 2/3rds the stock thickness (if you’re going to do half-blind dovetails) and of necessity if you’re going to do through dovetails you’ll need something which can cut deeper than your material thickness (this would also entail some manual post-processing w/ either a float and/or a saw and/or a chisel).
I picked up a pair of boards and the first suitable endmill I found was a Diablo 1/4" shank, 1/2" diameter, 1/2" cutting depth, 14 degree dovetail bit, 1 7/8" o.a.l. at the local Home Depot.
Top and bottom of the box weren’t specified either, so I picked up some 1/4" (5.2mm) lauan plywood which will float in grooves.
How the box will open wasn’t discussed either, so we’ll do the traditional cutting in half.
Actually, it’s been a long time since geometry in high school.
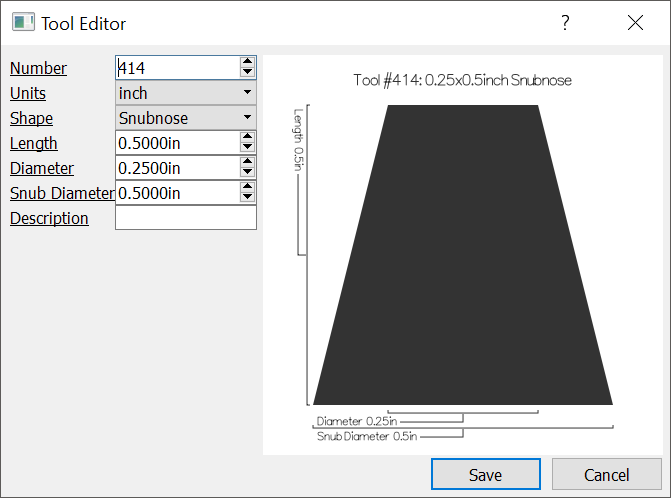
Instead, it’s more straight-forward to just draw this up — we start with the endmill itself since it and the stock dimensions as discussed above are the fundamental constraints.
Since the dovetail bit we have selected can only cut to a depth of 1/2", we have to leave 1/4" uncut for the blind dovetails, and we have to determine if we will draw up the pins or tails first. Folks do it both ways, and there are numerous arguments for tails first:
We’ll do tails first since that is the board which is held vertically and a bit easier to visualize.
The next consideration is how many pins / tails there will be — as noted, we are constrained by the endmill geometry in a way that we are not when cutting by hand, so the tails have to be greater than 0.5" at their largest dimension, and must be at least 0.25" at the base. With a 5" tall box, we will simplify this and have 5 tails/pins, with a half pin at the top and bottom.
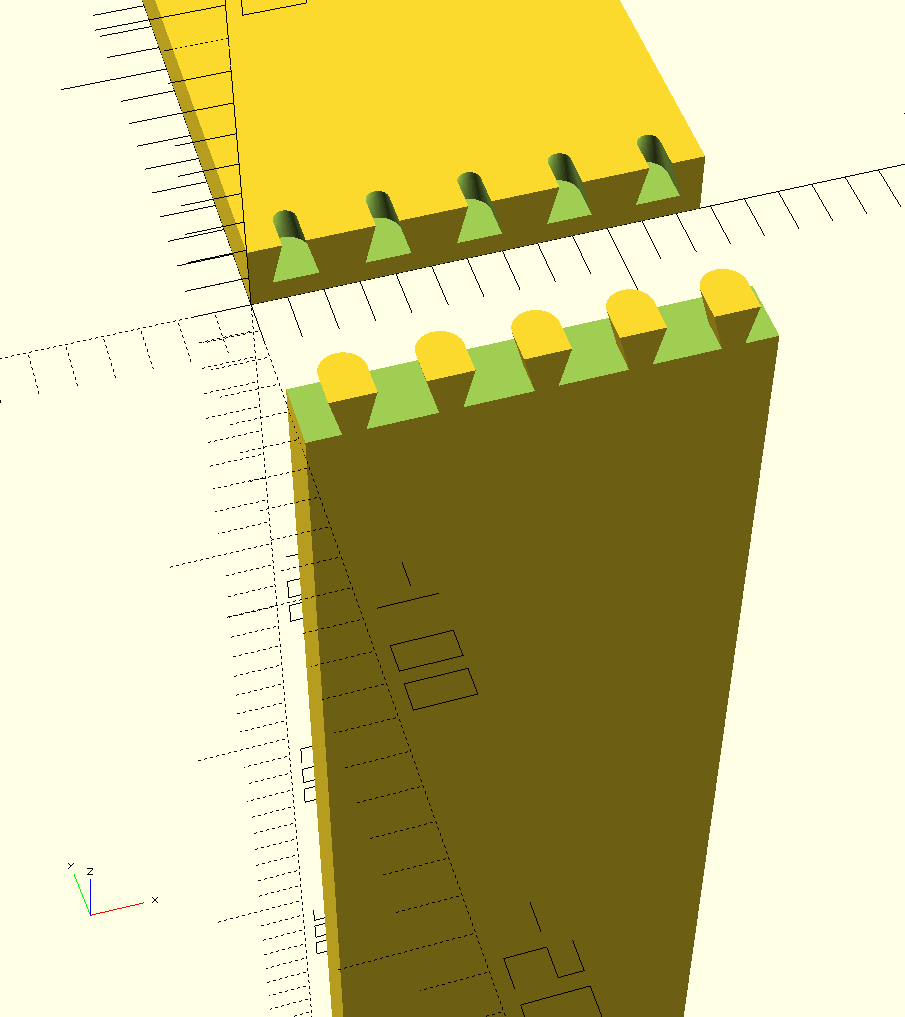
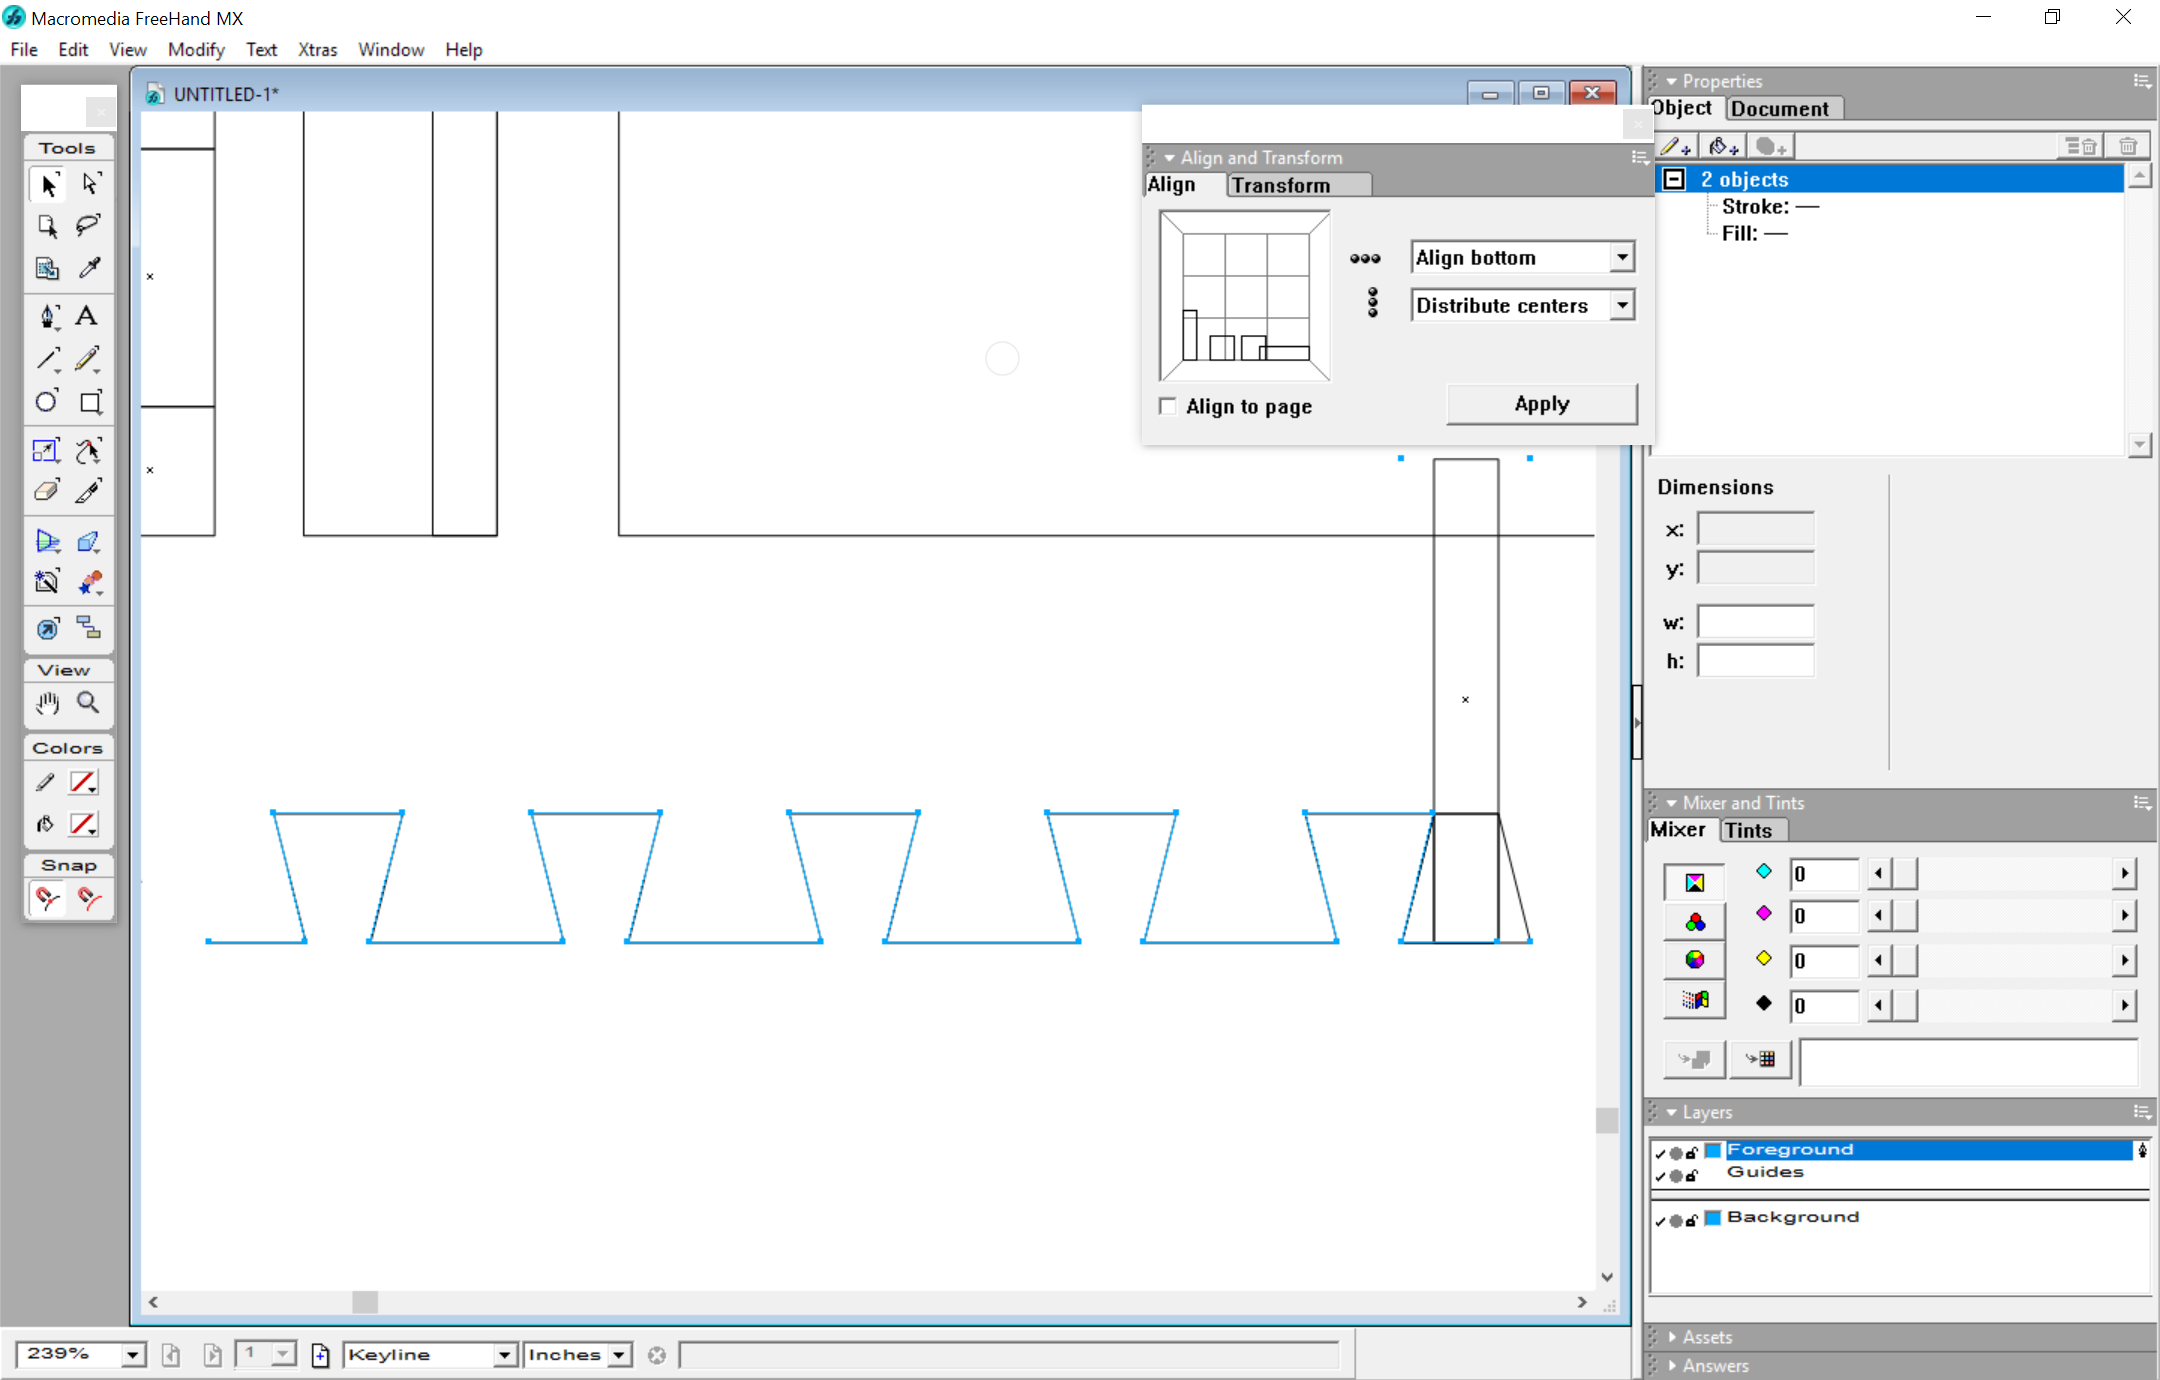
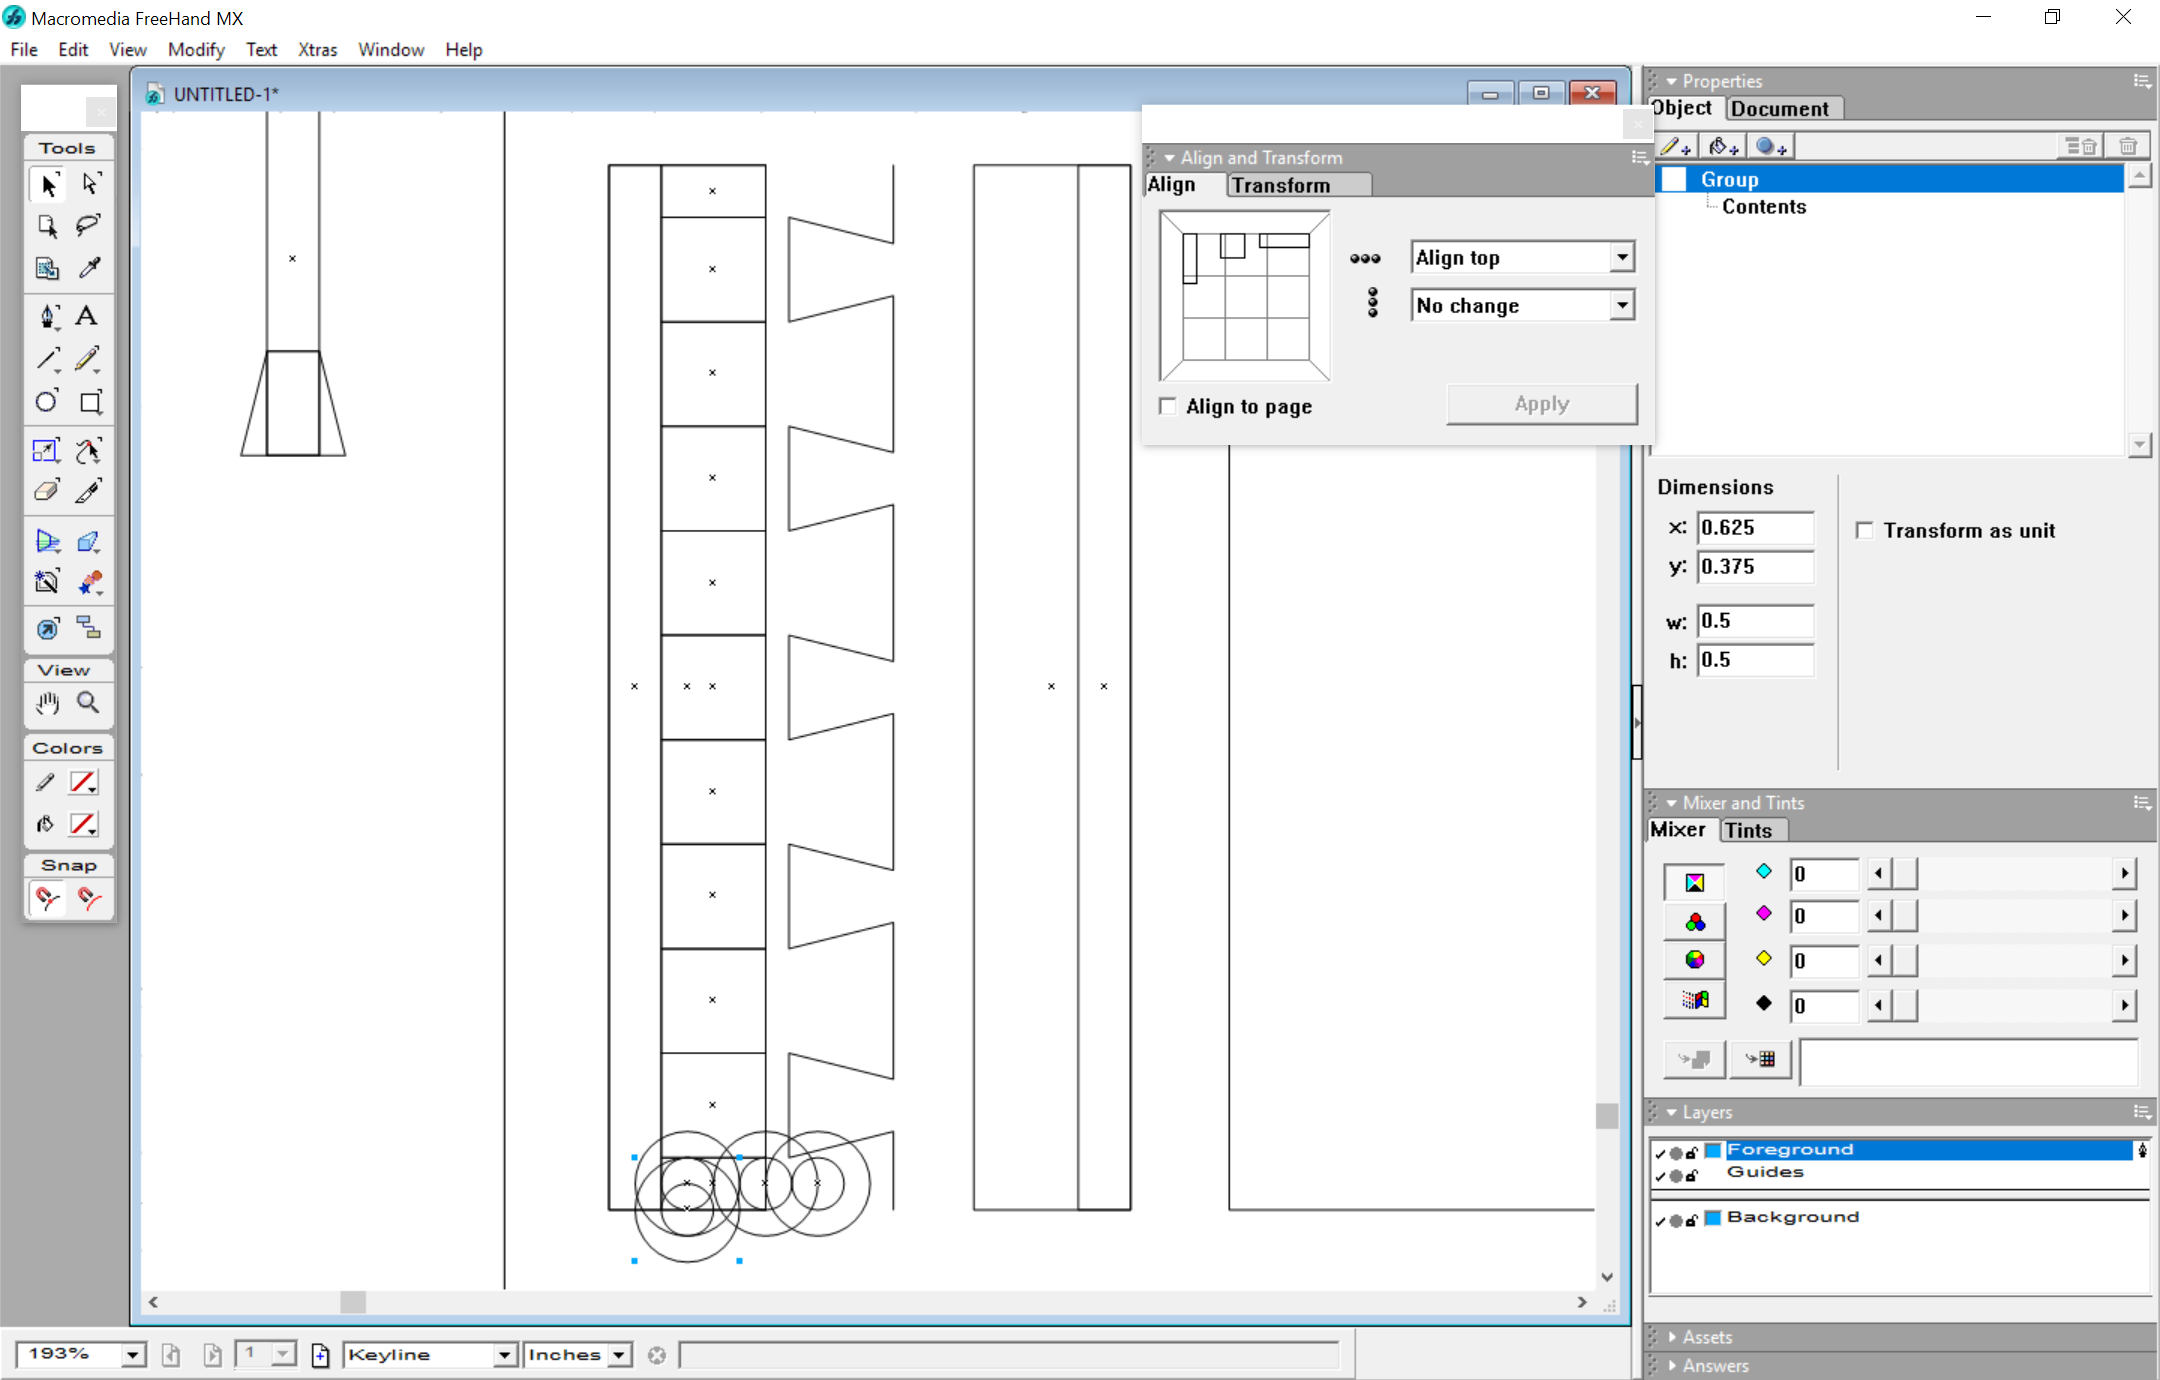
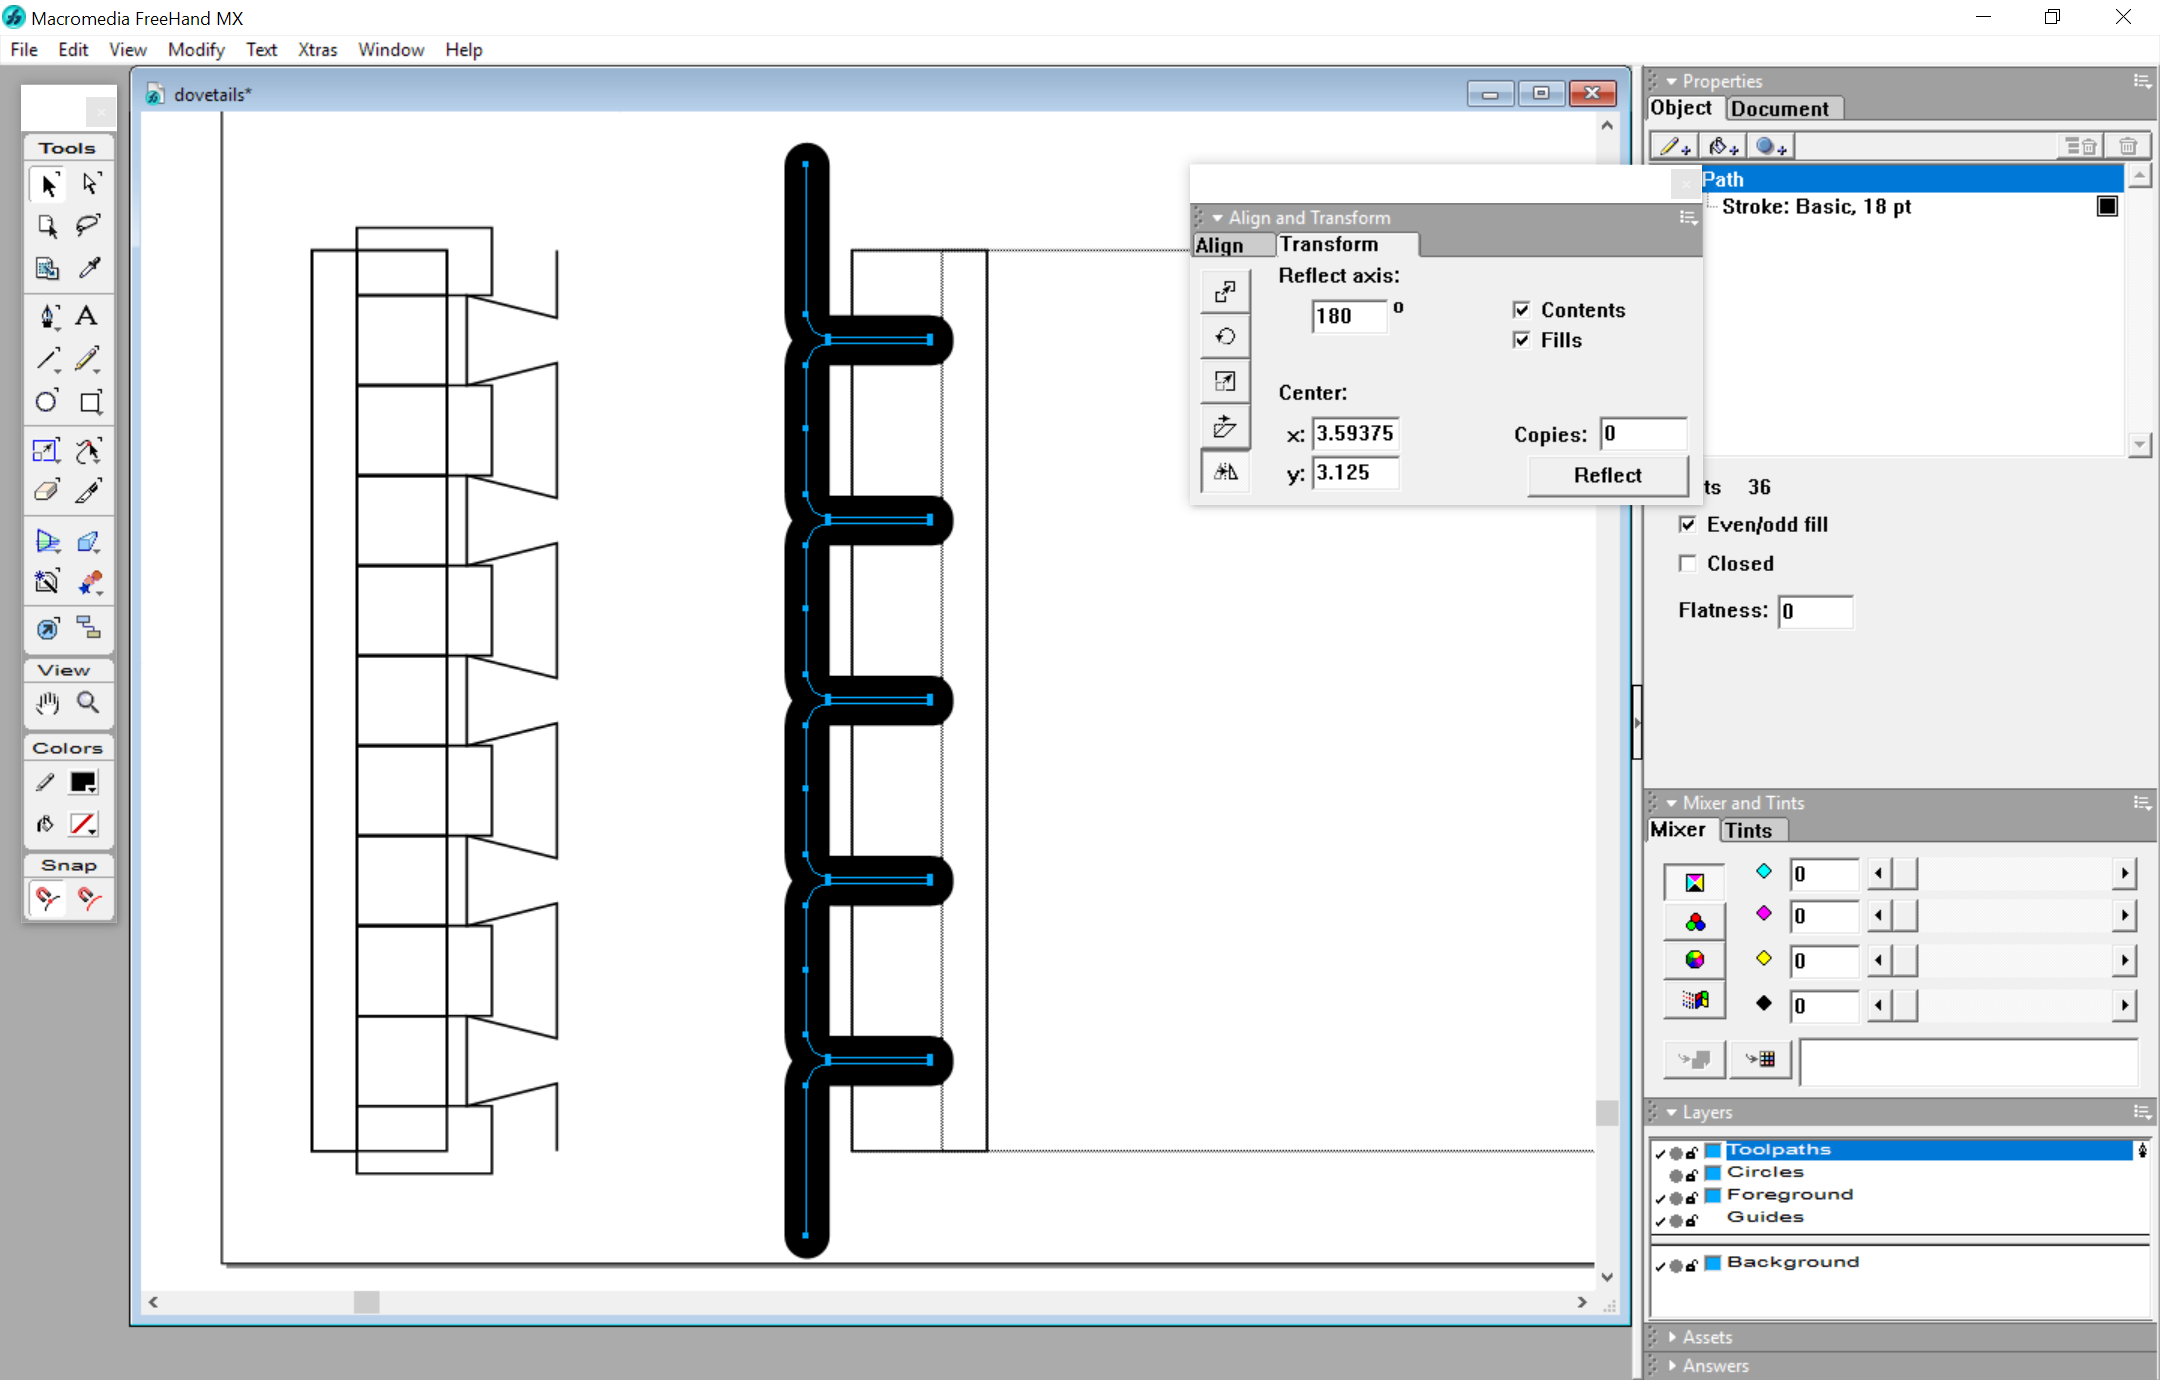
One way to do this visually is to draw up a side view of the tails, evenly arrange the tips and then use the drawn up tool to line things up:
One has to consider that one will be working with a 1/4" endmill which will be cutting from the center out in Carbide Create, but the actual path ultimately will be the dovetail bit which will cut a 1/2" diameter at the bottom. We will need to leave clearance at blind side to ensure the dovetail bit doesn’t blow out, and overcut on the other to ensure that we will have a clean, square cut of the sides of the tail — drawing in some circles will help to visualize this:
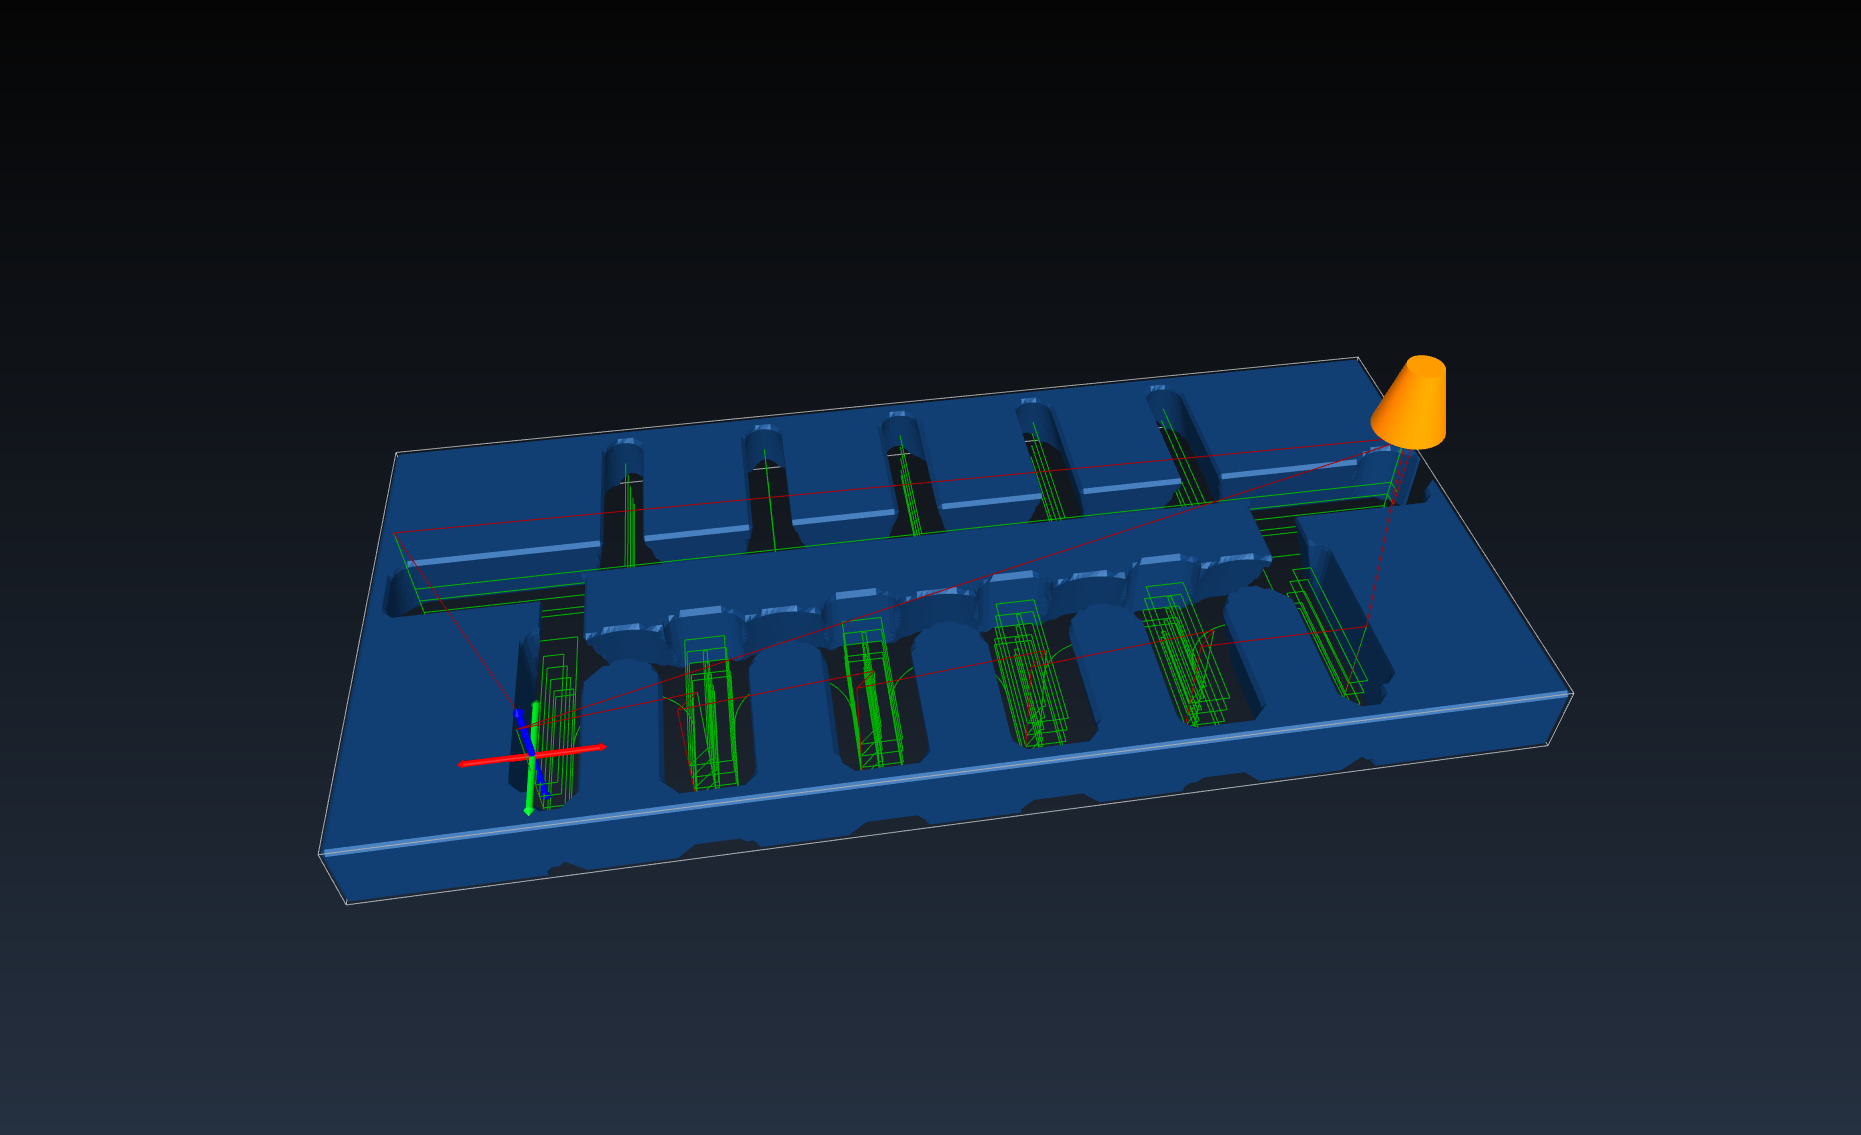
Probably it would be best to make two cuts, one with a square endmill to clear the center, then a second cut as an inside contour pass with the dovetail bit — note that it will be necessary to work up the path so that it plunges from a point where it will not remove material which needs to be preserved.
(This is why it was originally noted that Carbide Create can’t directly do this — one will either need to edit the G-Code by hand or work up the orientation of the geometry so as to ensure that there are no such difficulties)
WillAdams this is some awesome work you have done do you have a copy of the carbide create file? I am confident if you provide the file I can do some additional work on top of the great stuff that you have done. What is the best way to upload the file to the forum. I am sure others will benefit from this too.
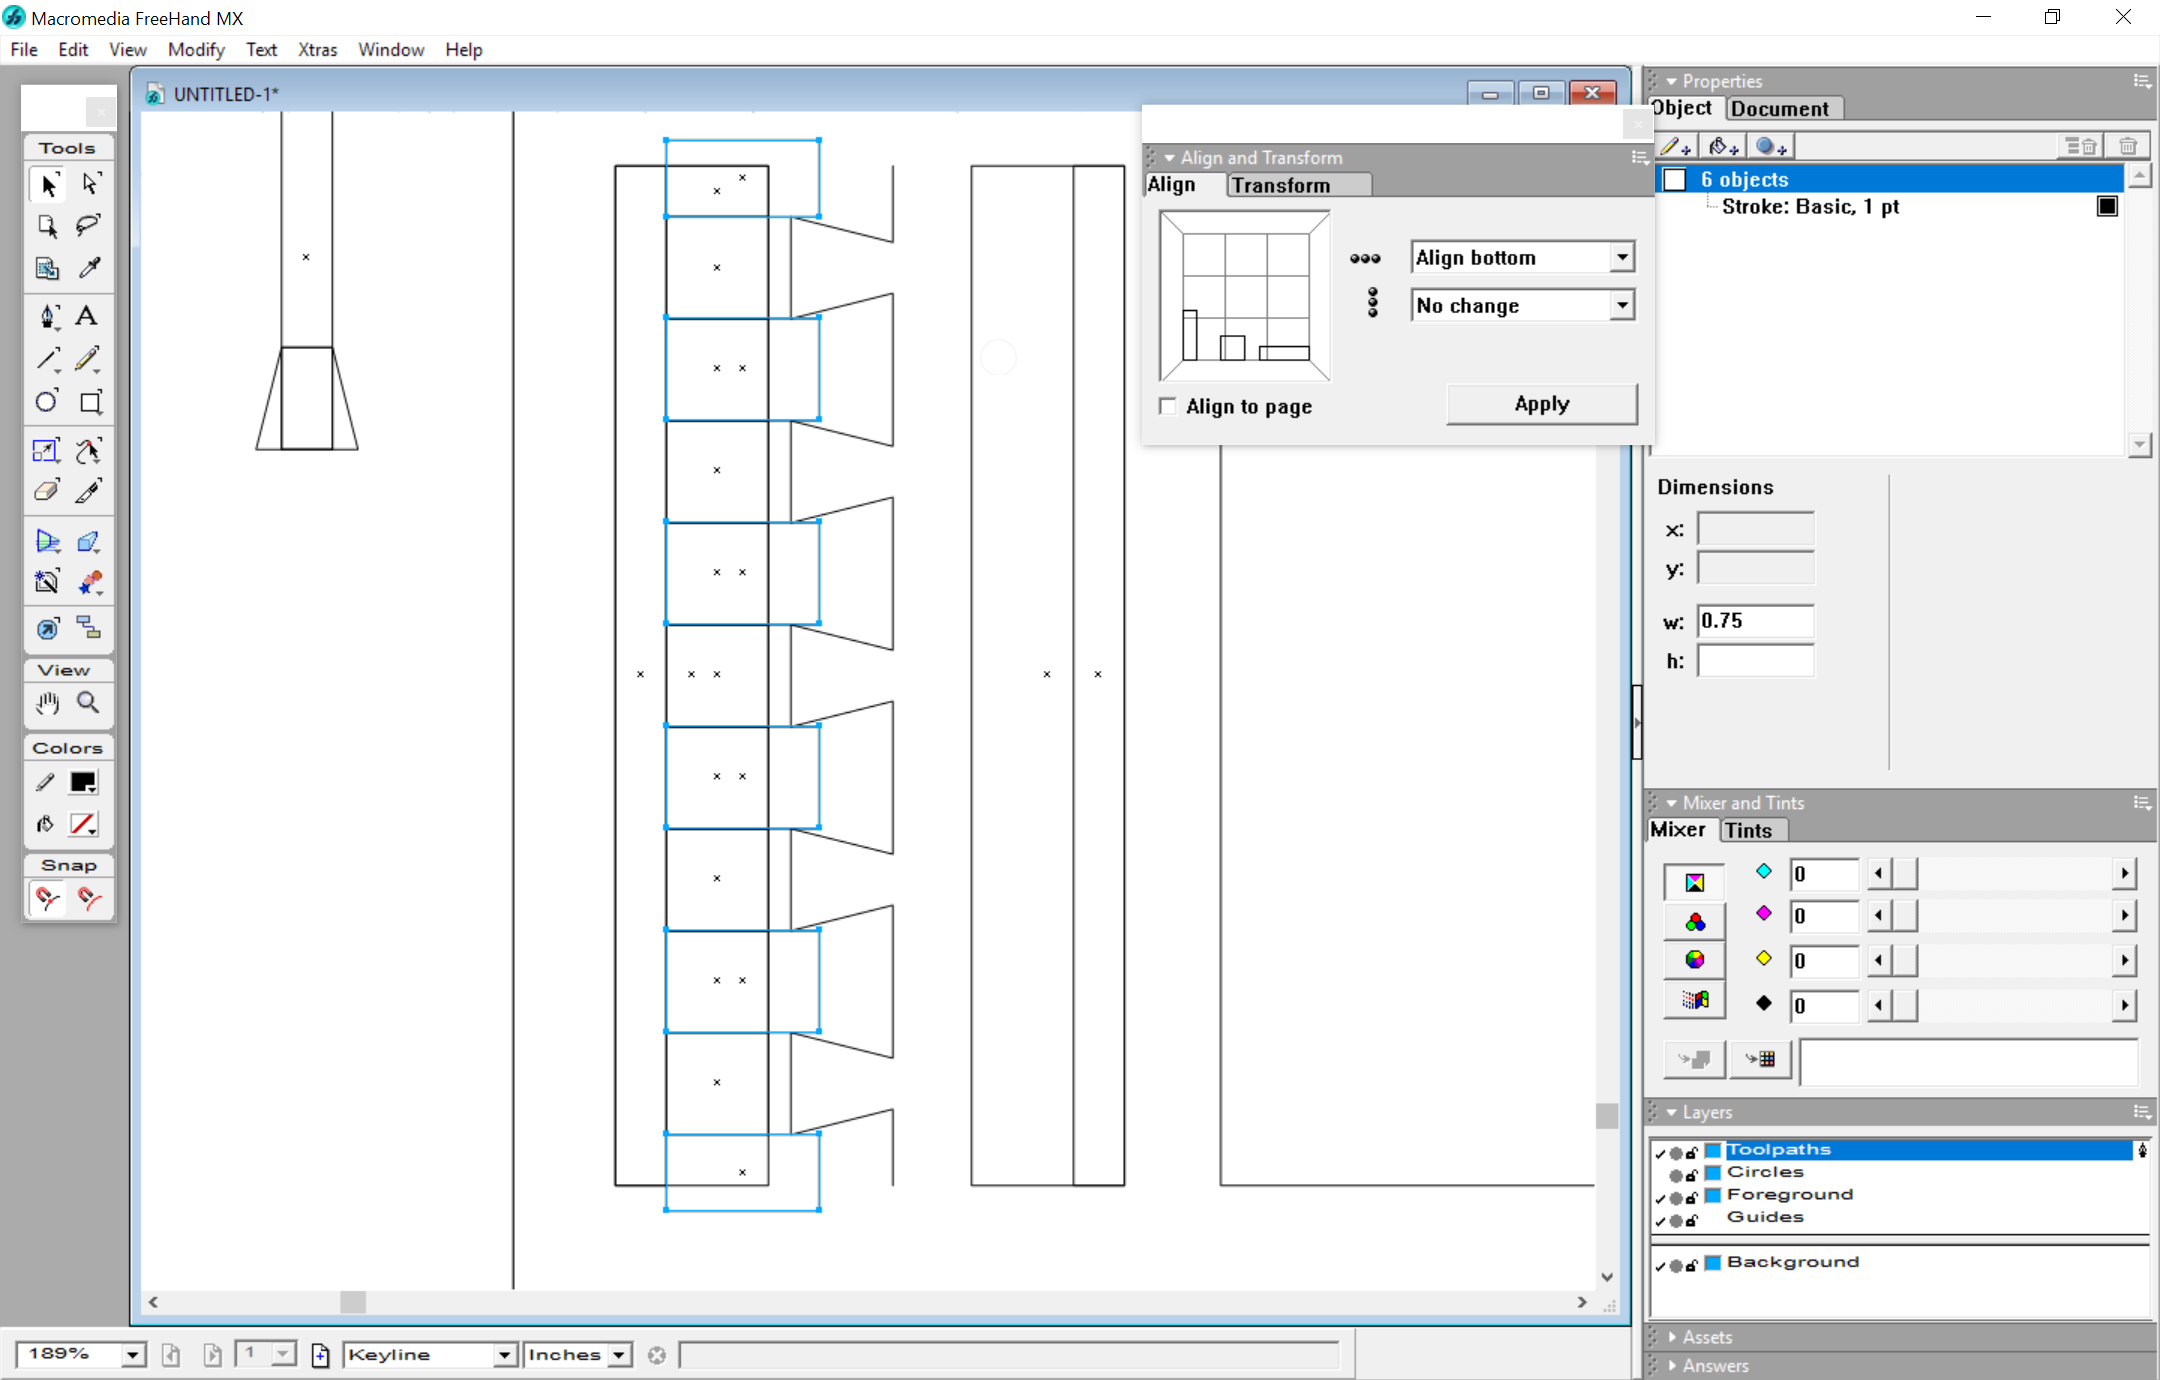
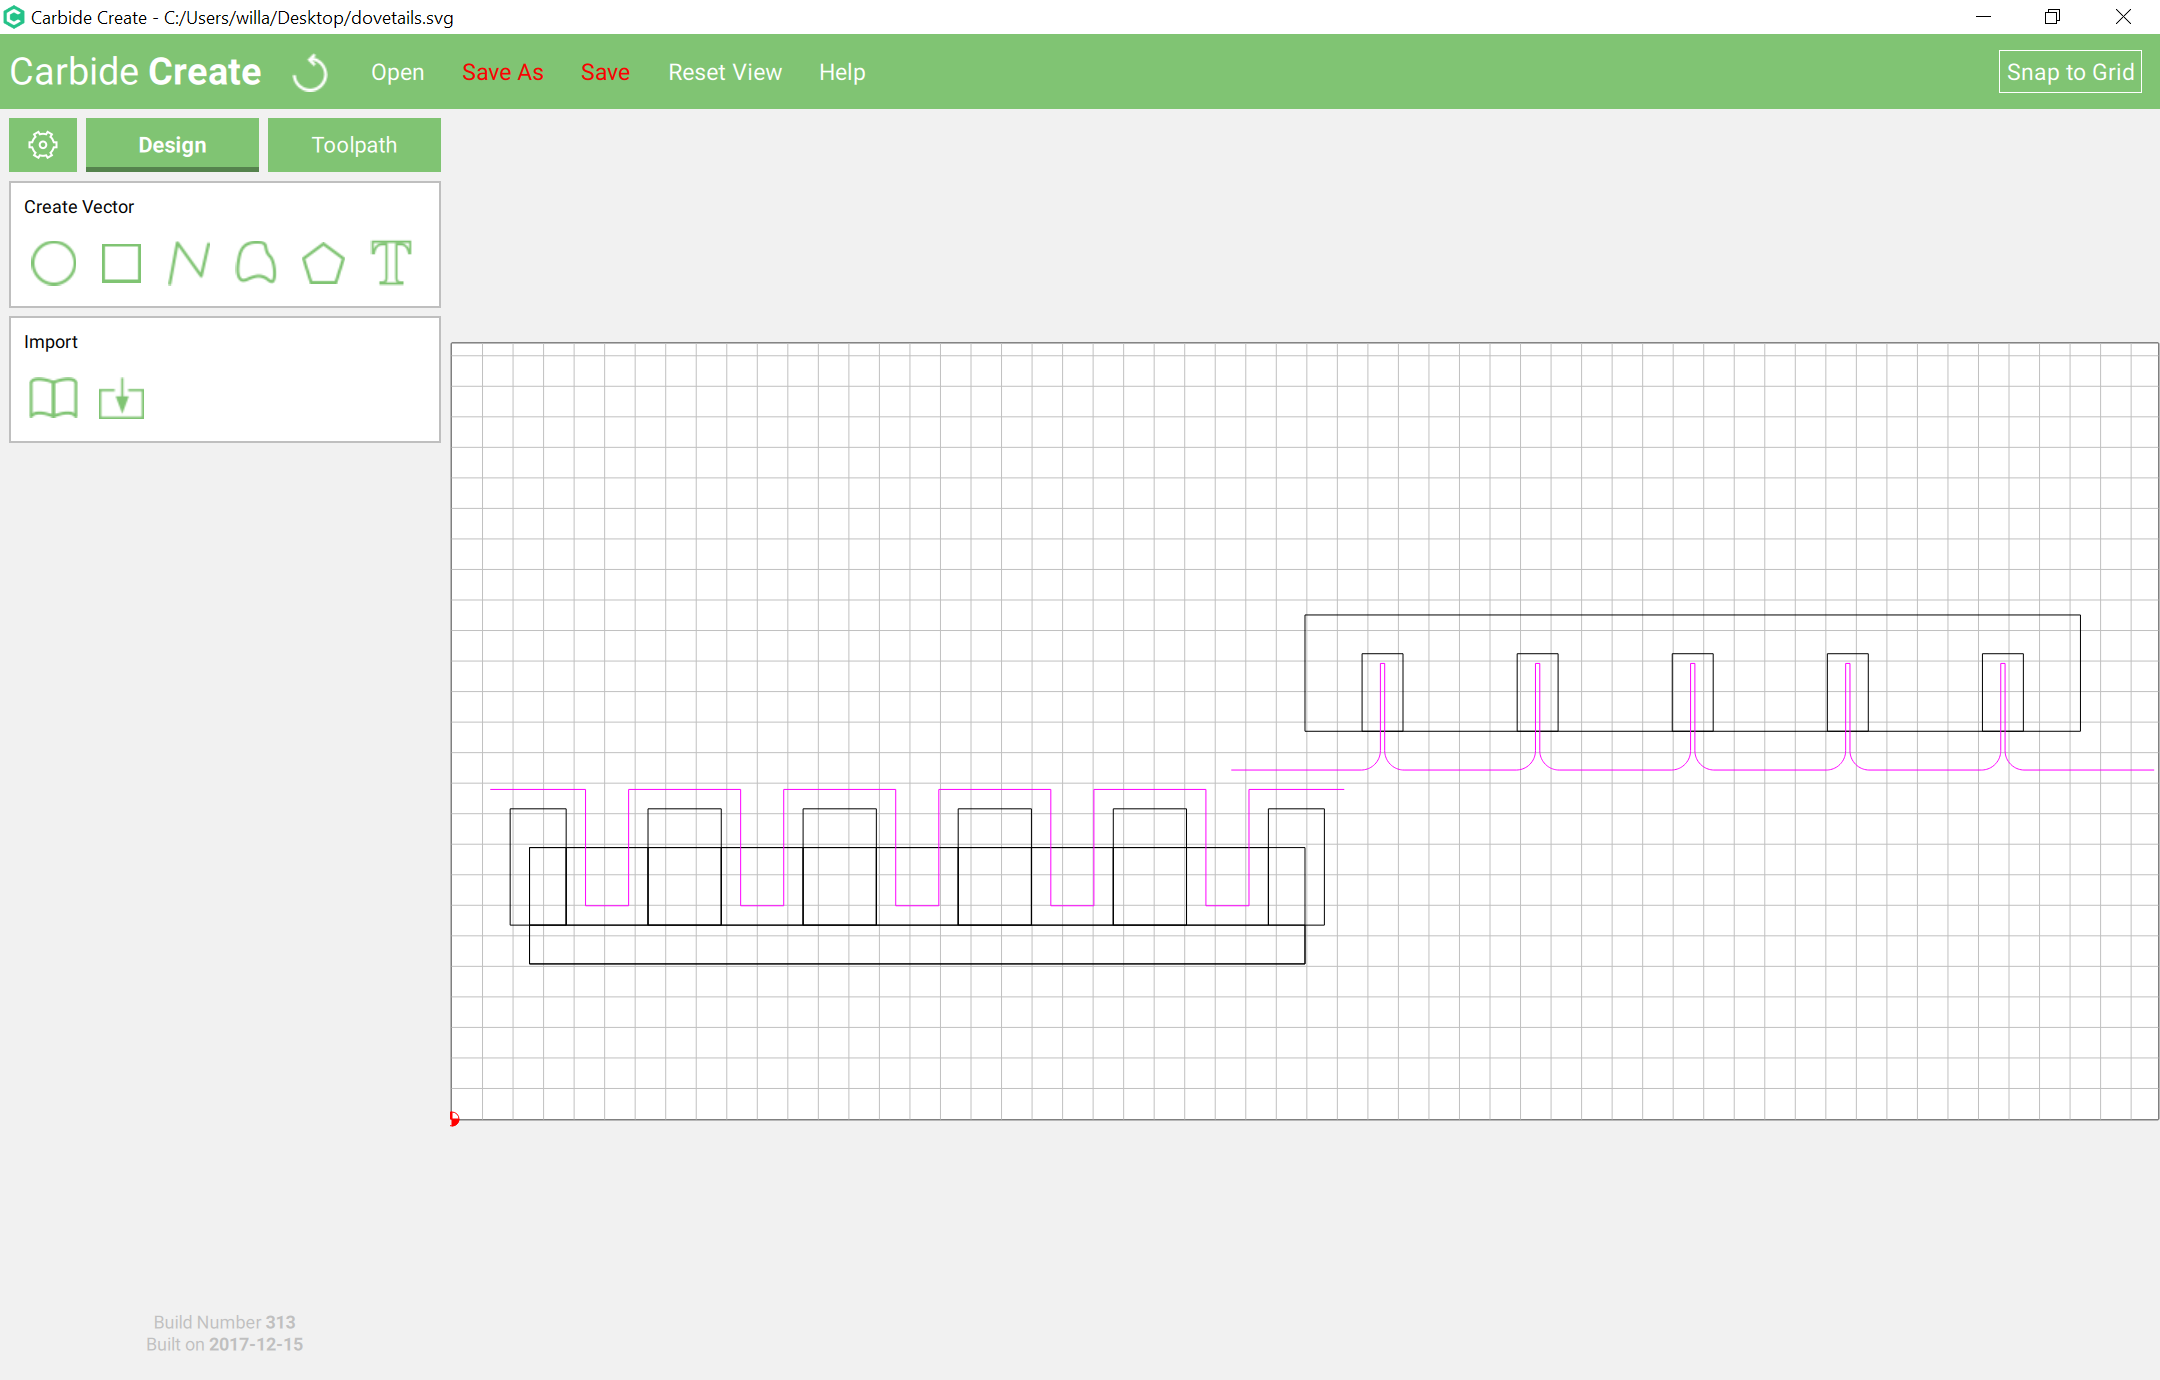
cuts w/ a 1/4" endmill to clear the pockets to the depth of the cut
clearance for the endmill when making the pockets
draw in paths for the dovetail bit to cut along a no offset contour path
then verify that things will fit together
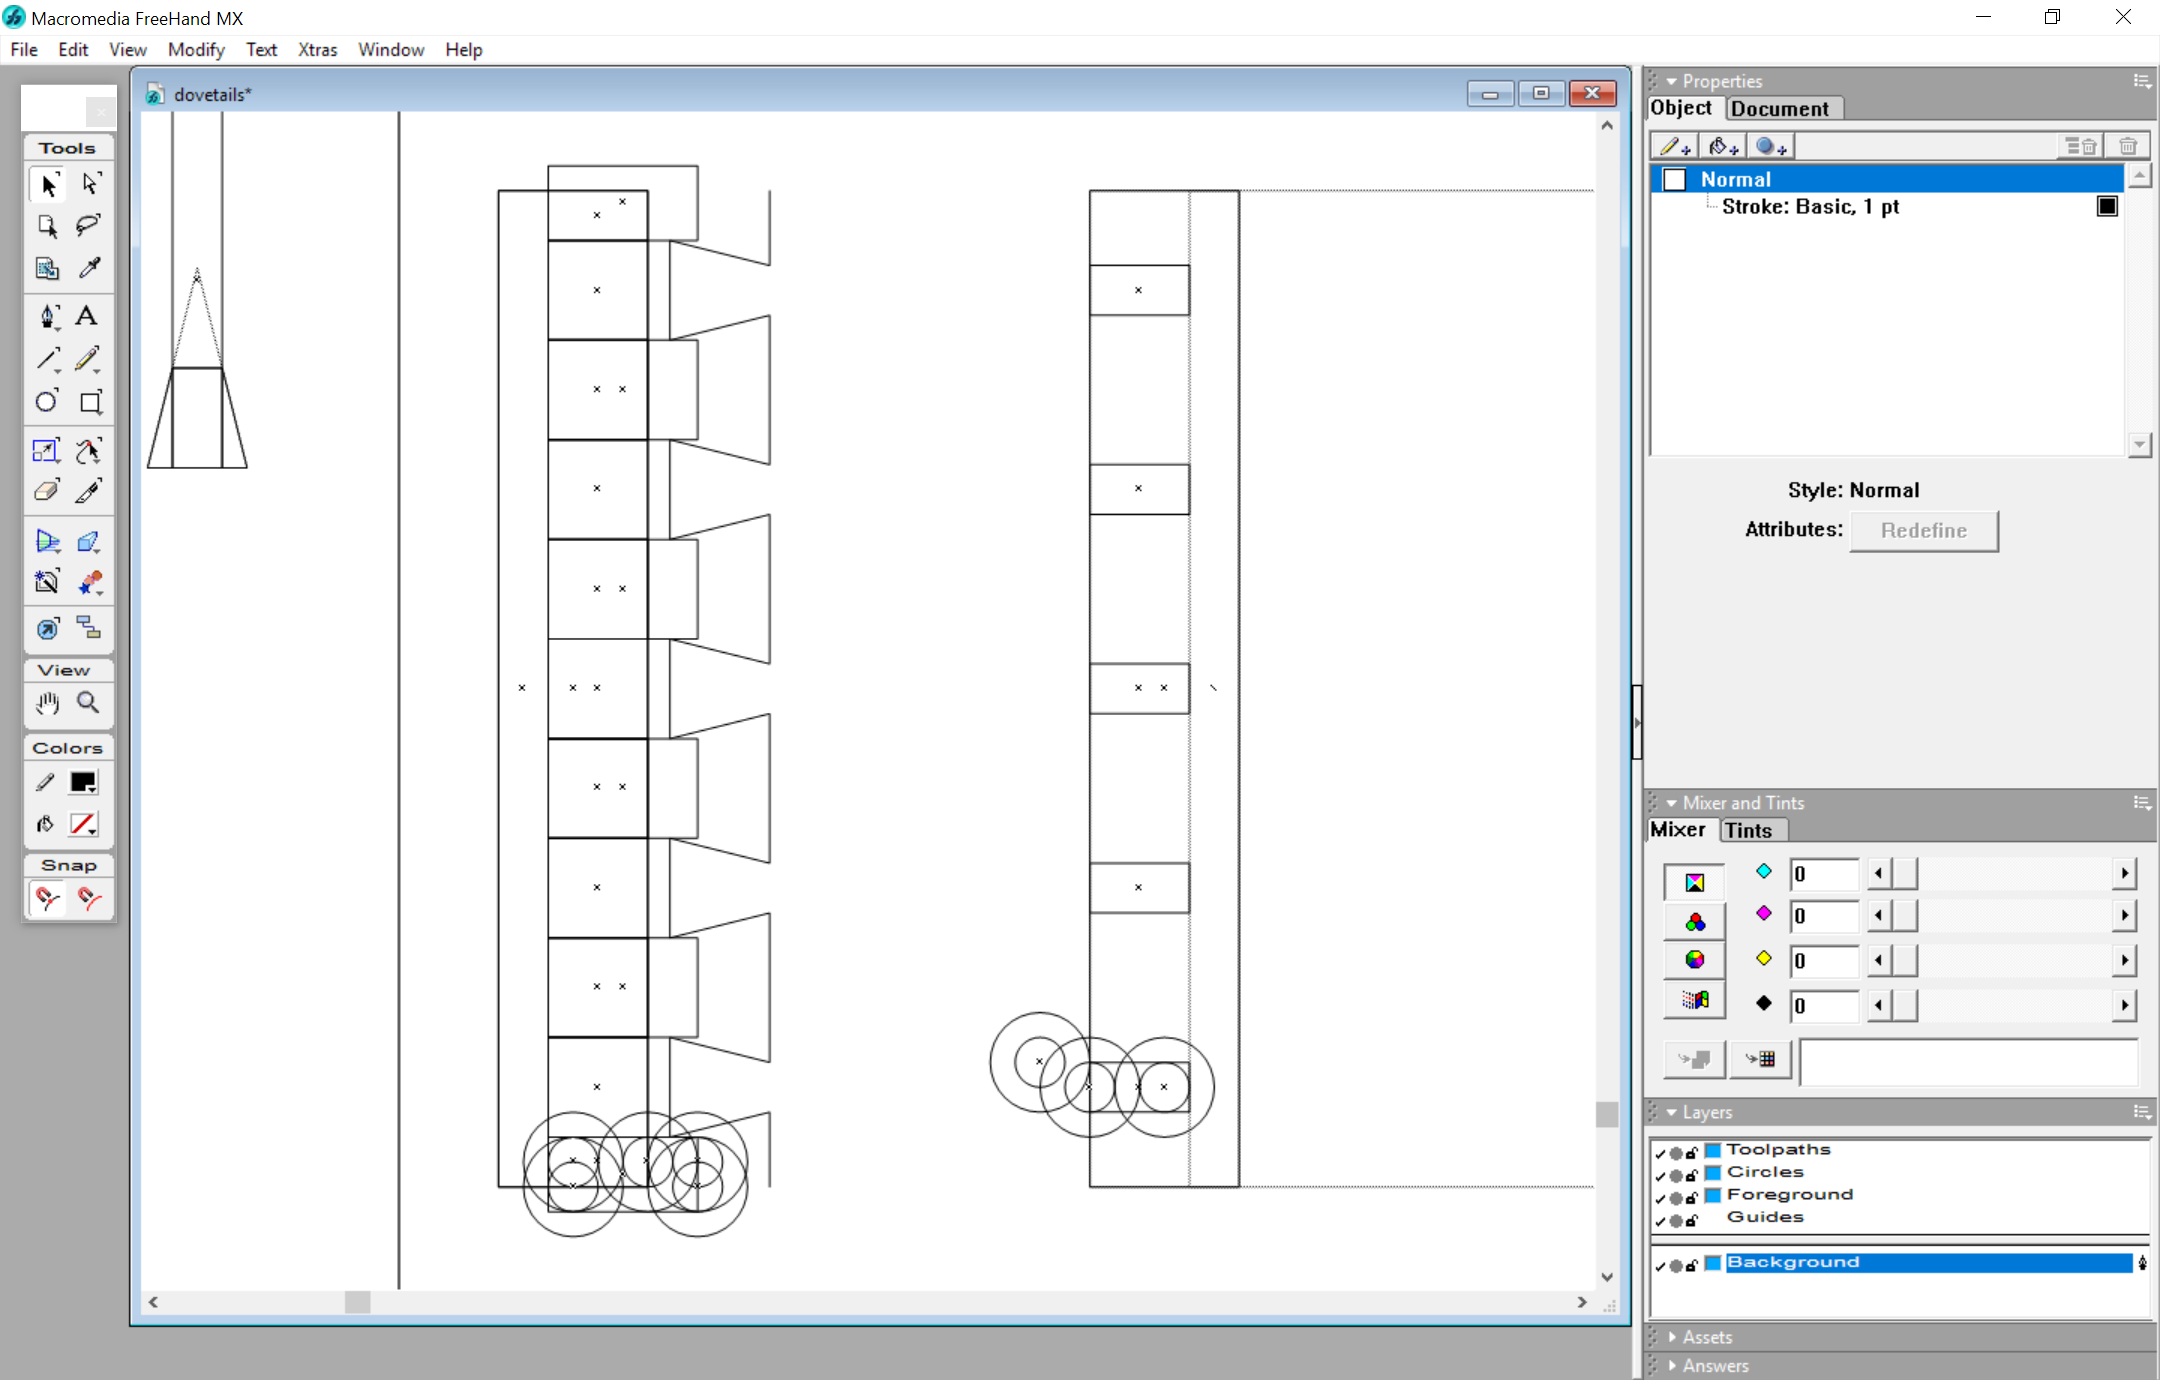
then arrange the paths in Carbide Create to cut the pair with the tails being cut out of the board held vertically and the pins cut out of the board held in place on the machine
Set the origin to the center of the stock and align the corner of the board against it. Adjust the pockets and cut them to the desired depth using a suitable endmill, then set up a different tool for the dovetail bit and assign a toolpath which has a depth per pass sufficient to ensure that only one pass will be made.
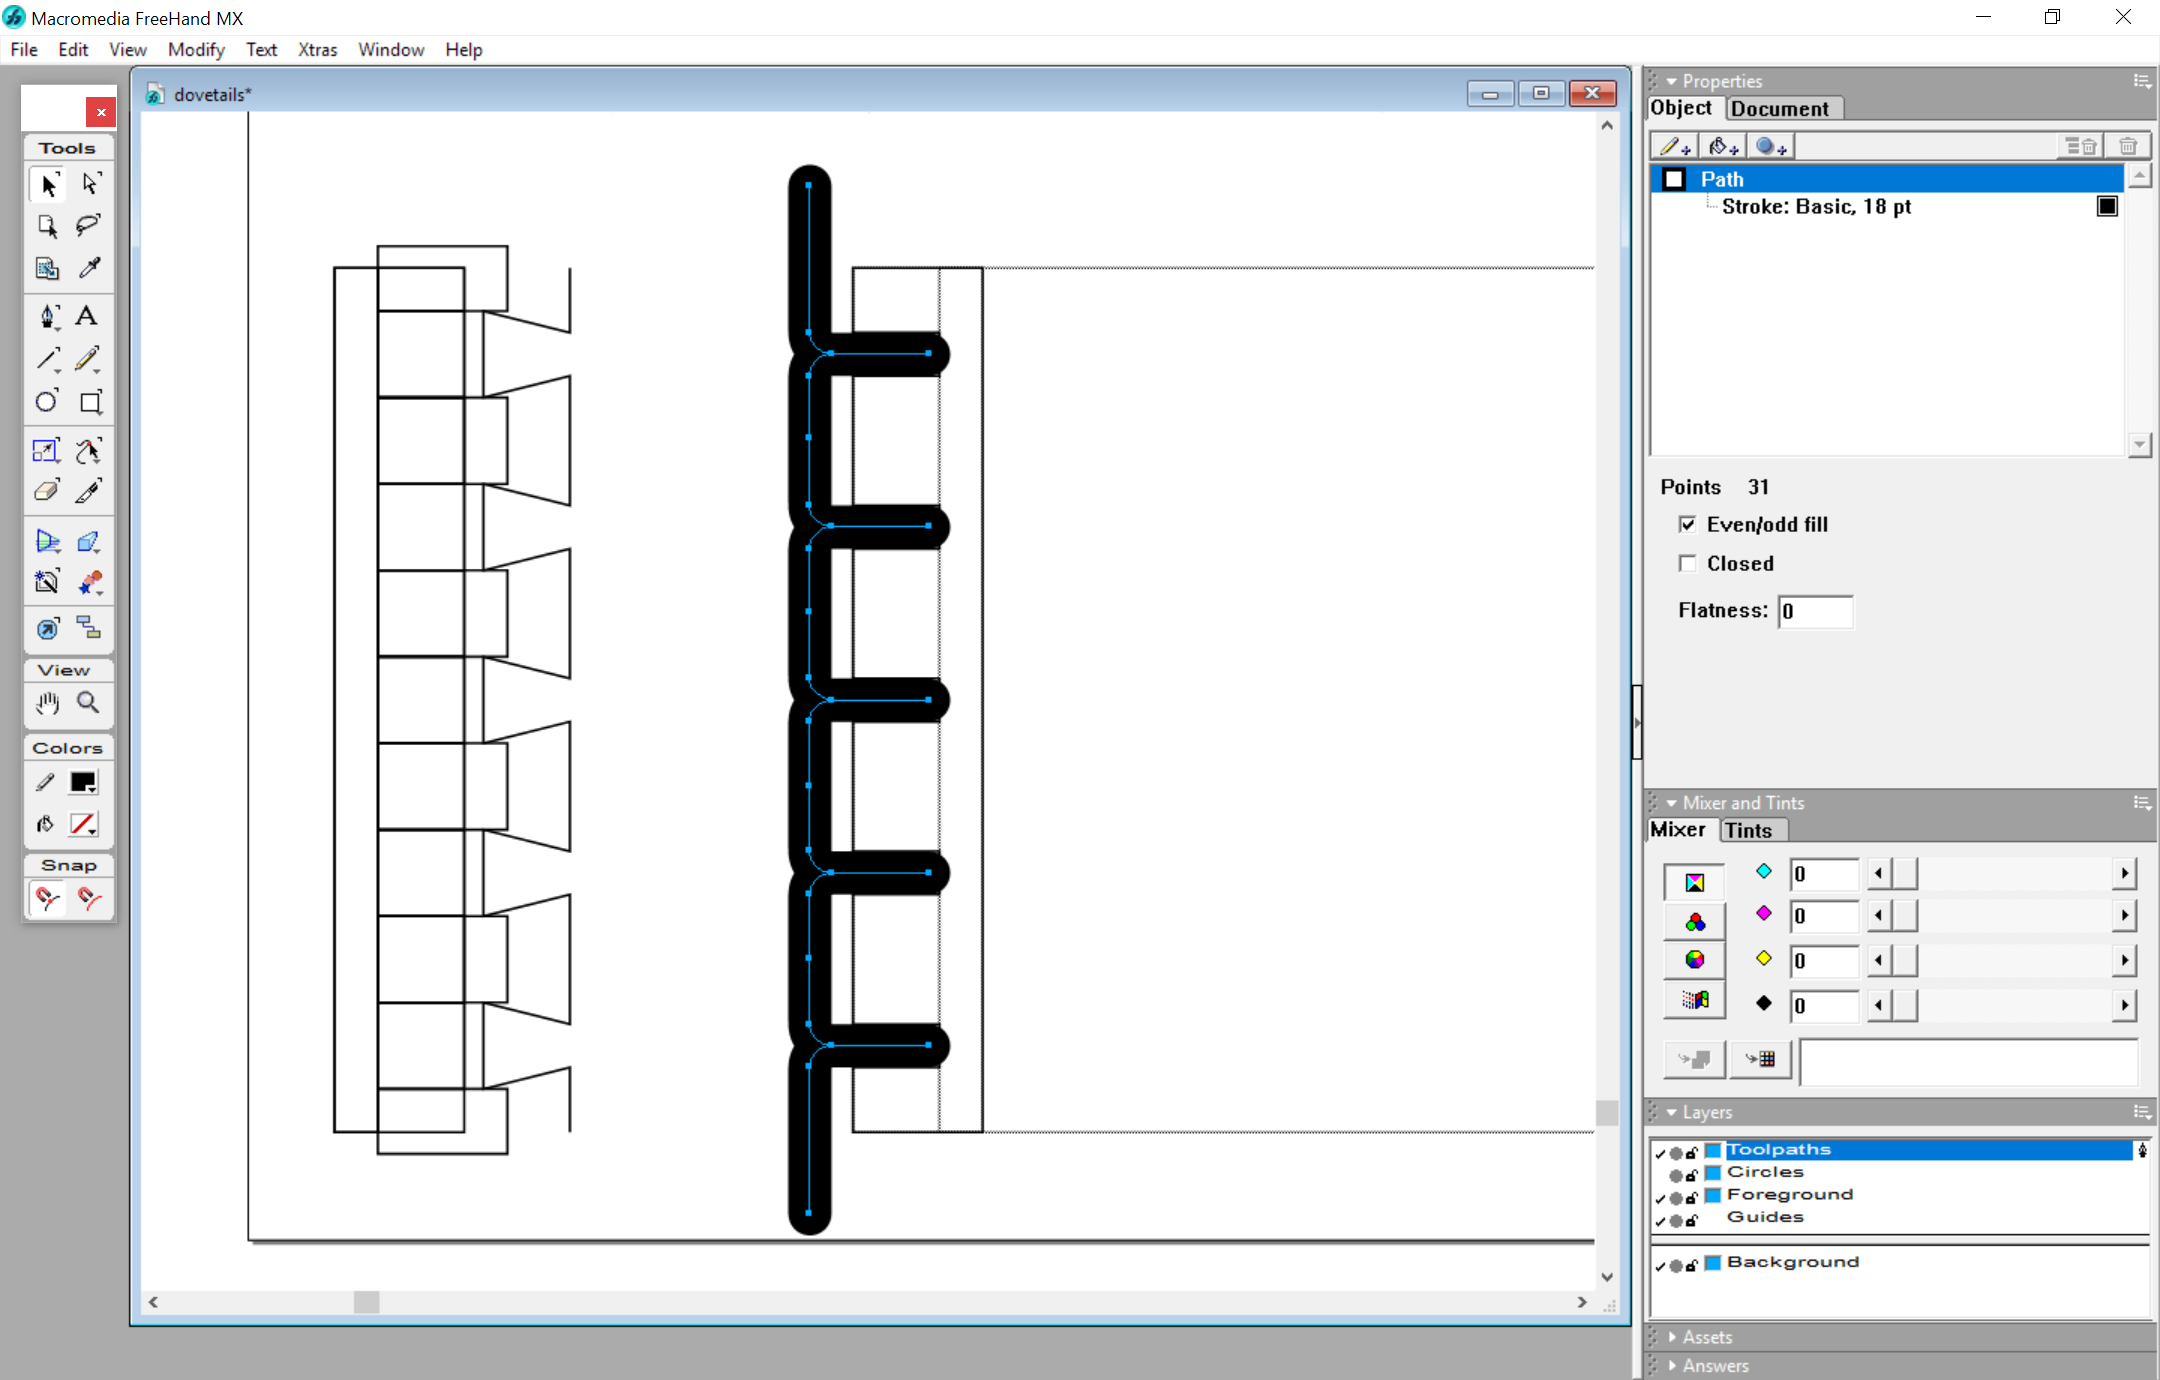
EDIT: Sleeping on it, I believe the board which is held vertically needs to have its toolpaths adjusted — they need to be cut all the way through — it’ll also need to be shorter by twice the blind depth left in the other board.
Hi William
I just ordered the software from tailmaker. it seems like it will do the trick. I will test it out this weekend and keep you posted. Thanks so much for all you EXCELLENT assistance.


 looks really cool