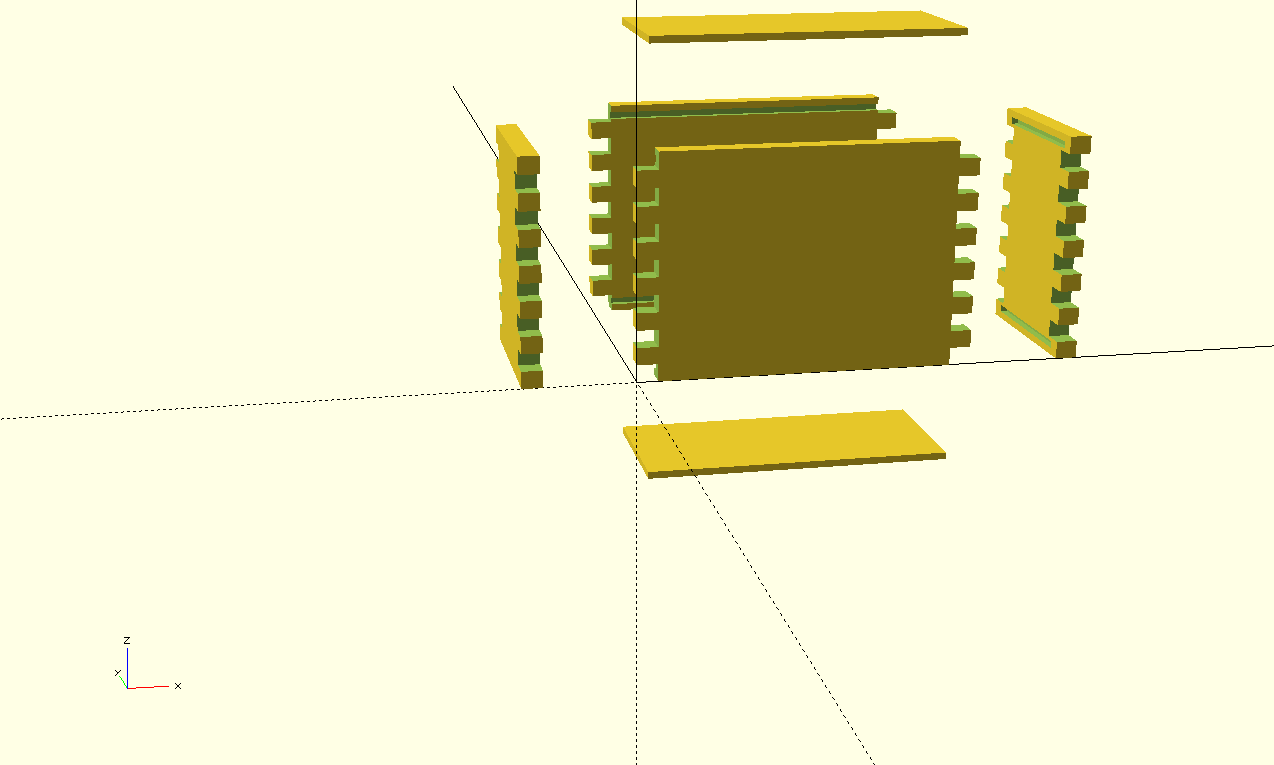
Okay, worked out the OpenSCAD code for the parts and interface.
It’d be great if folks could play around with it a bit and see if it makes sense — if it does, next up is working out the METAPOST code for the parts, and how to get this into Carbide Create.
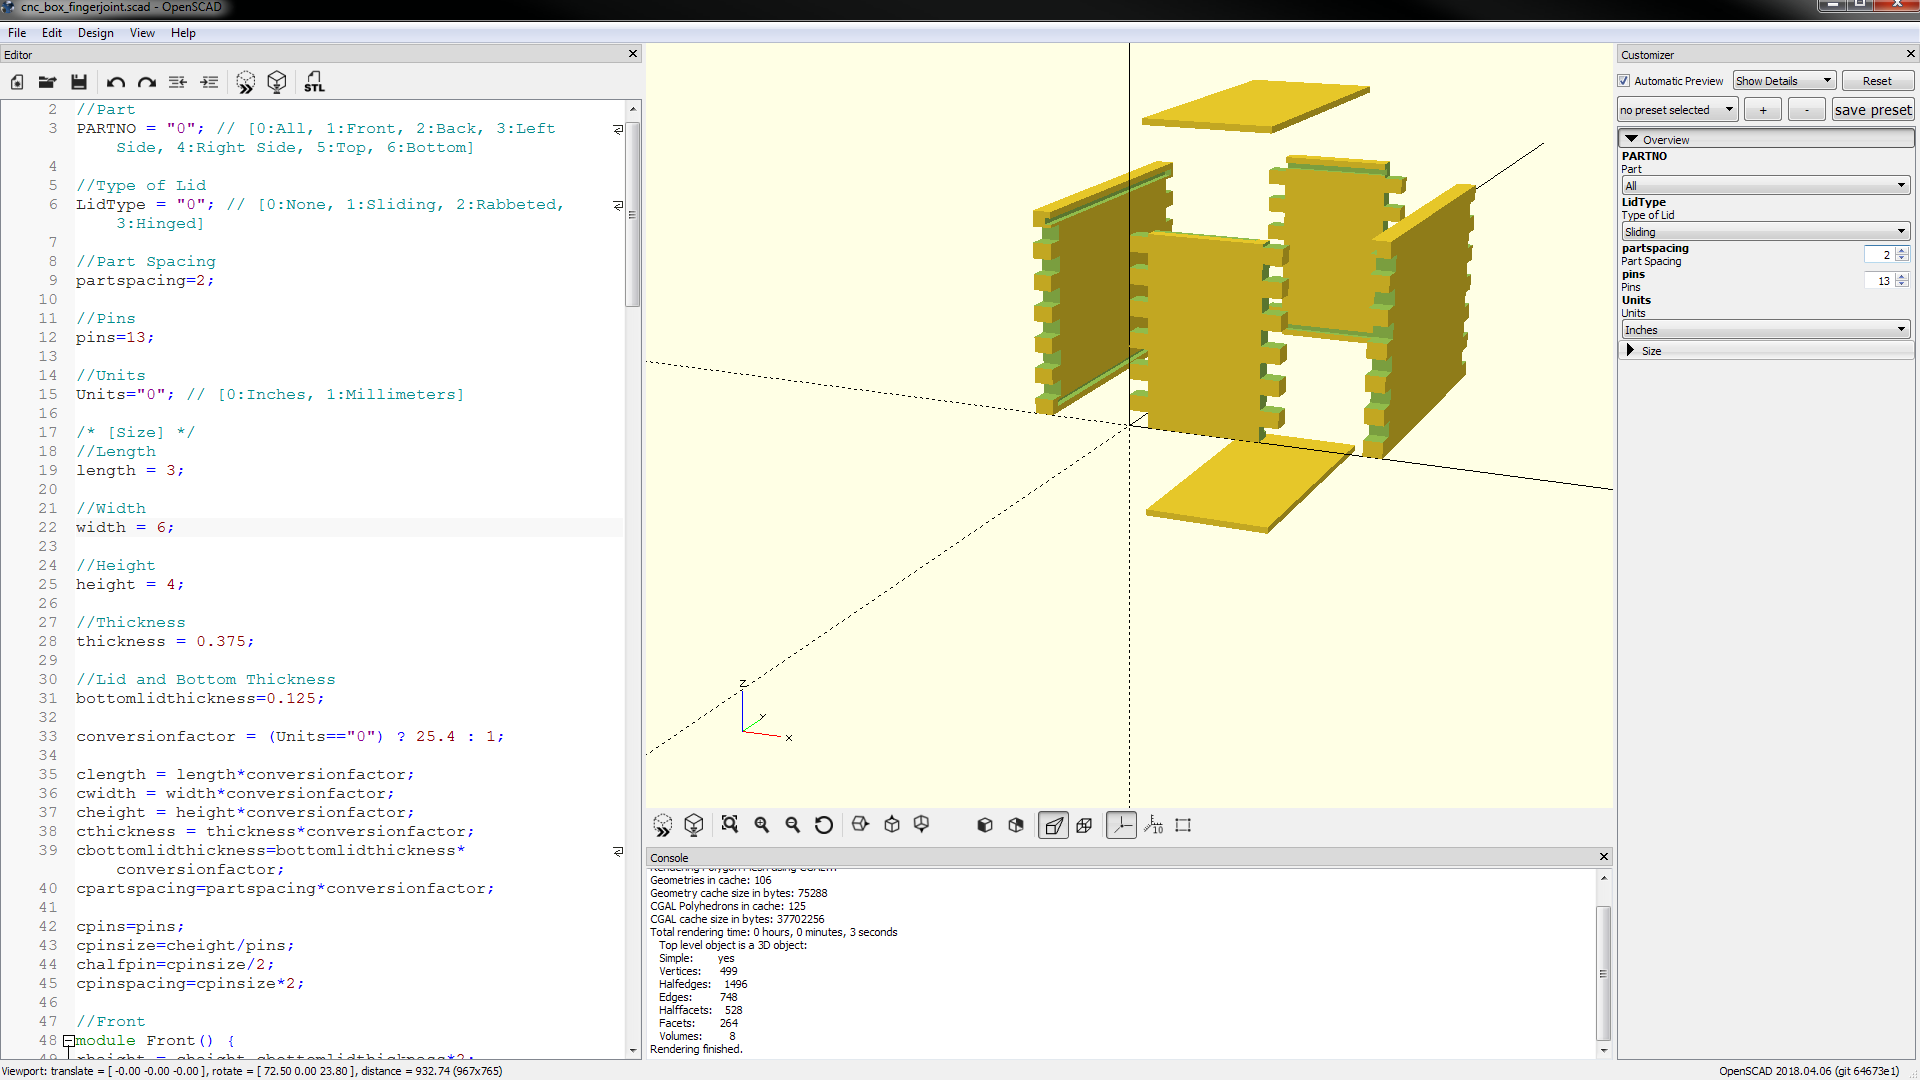
Nicely done, I especially like the stopped dados. Do you need notches in the top/bottom for those? Also the lid might be hard to remove from this design, maybe one of the side dados can go all the way through so it slides out?
When working on parametric things in OpenSCAD it’s sometimes useful to pass your parameters into the function/modules. Especially for things like the front/back/left/right where the code is mostly the same except for the size parameters (and an offset for the first notch). Those could potentially be replaced by a single module with some parameters.
You may already be aware of this, but thingiverse has a nice customizer web-app for OpenSCAD which is really nice.
I tried making a box in OpenSCAD for the CNC once to hold a circuit board with cutouts, it was a much simpler design using rabbits for the joinery. Had a hard time exporting it and never really found a good solution.
Removing the lid will be a very traditional sawing off — I may add an additional path for that though — that’s a good point.
Yes, rabbeted boxes are much easier — I’ve done a couple of write-ups of those and didn’t trouble for the 3D modeling — will probably revisit that once I’ve got this nailed down. I’ve also got a very decorative box design which uses a V endmill and some other nifty things.
That’s great! I love the idea of doing finger jointed stuff or dovetails on the C3D machine, and I’ve been working on different ways of doing boxes: Mitre joints, rabbit joints, even trying to figure out how to do finger joints with round tops to match cutter diameter. I failed miserably at drawing that, btw. I know there are third party g-code generators for doing those, but I can’t get my head around not seeing it on the screen beforehand and just letting it go at it.
One minor issue is that for simplicity, we’ll “give the program its head” and set the thickness of the lid to match the dimensions of the pins — new file presently.
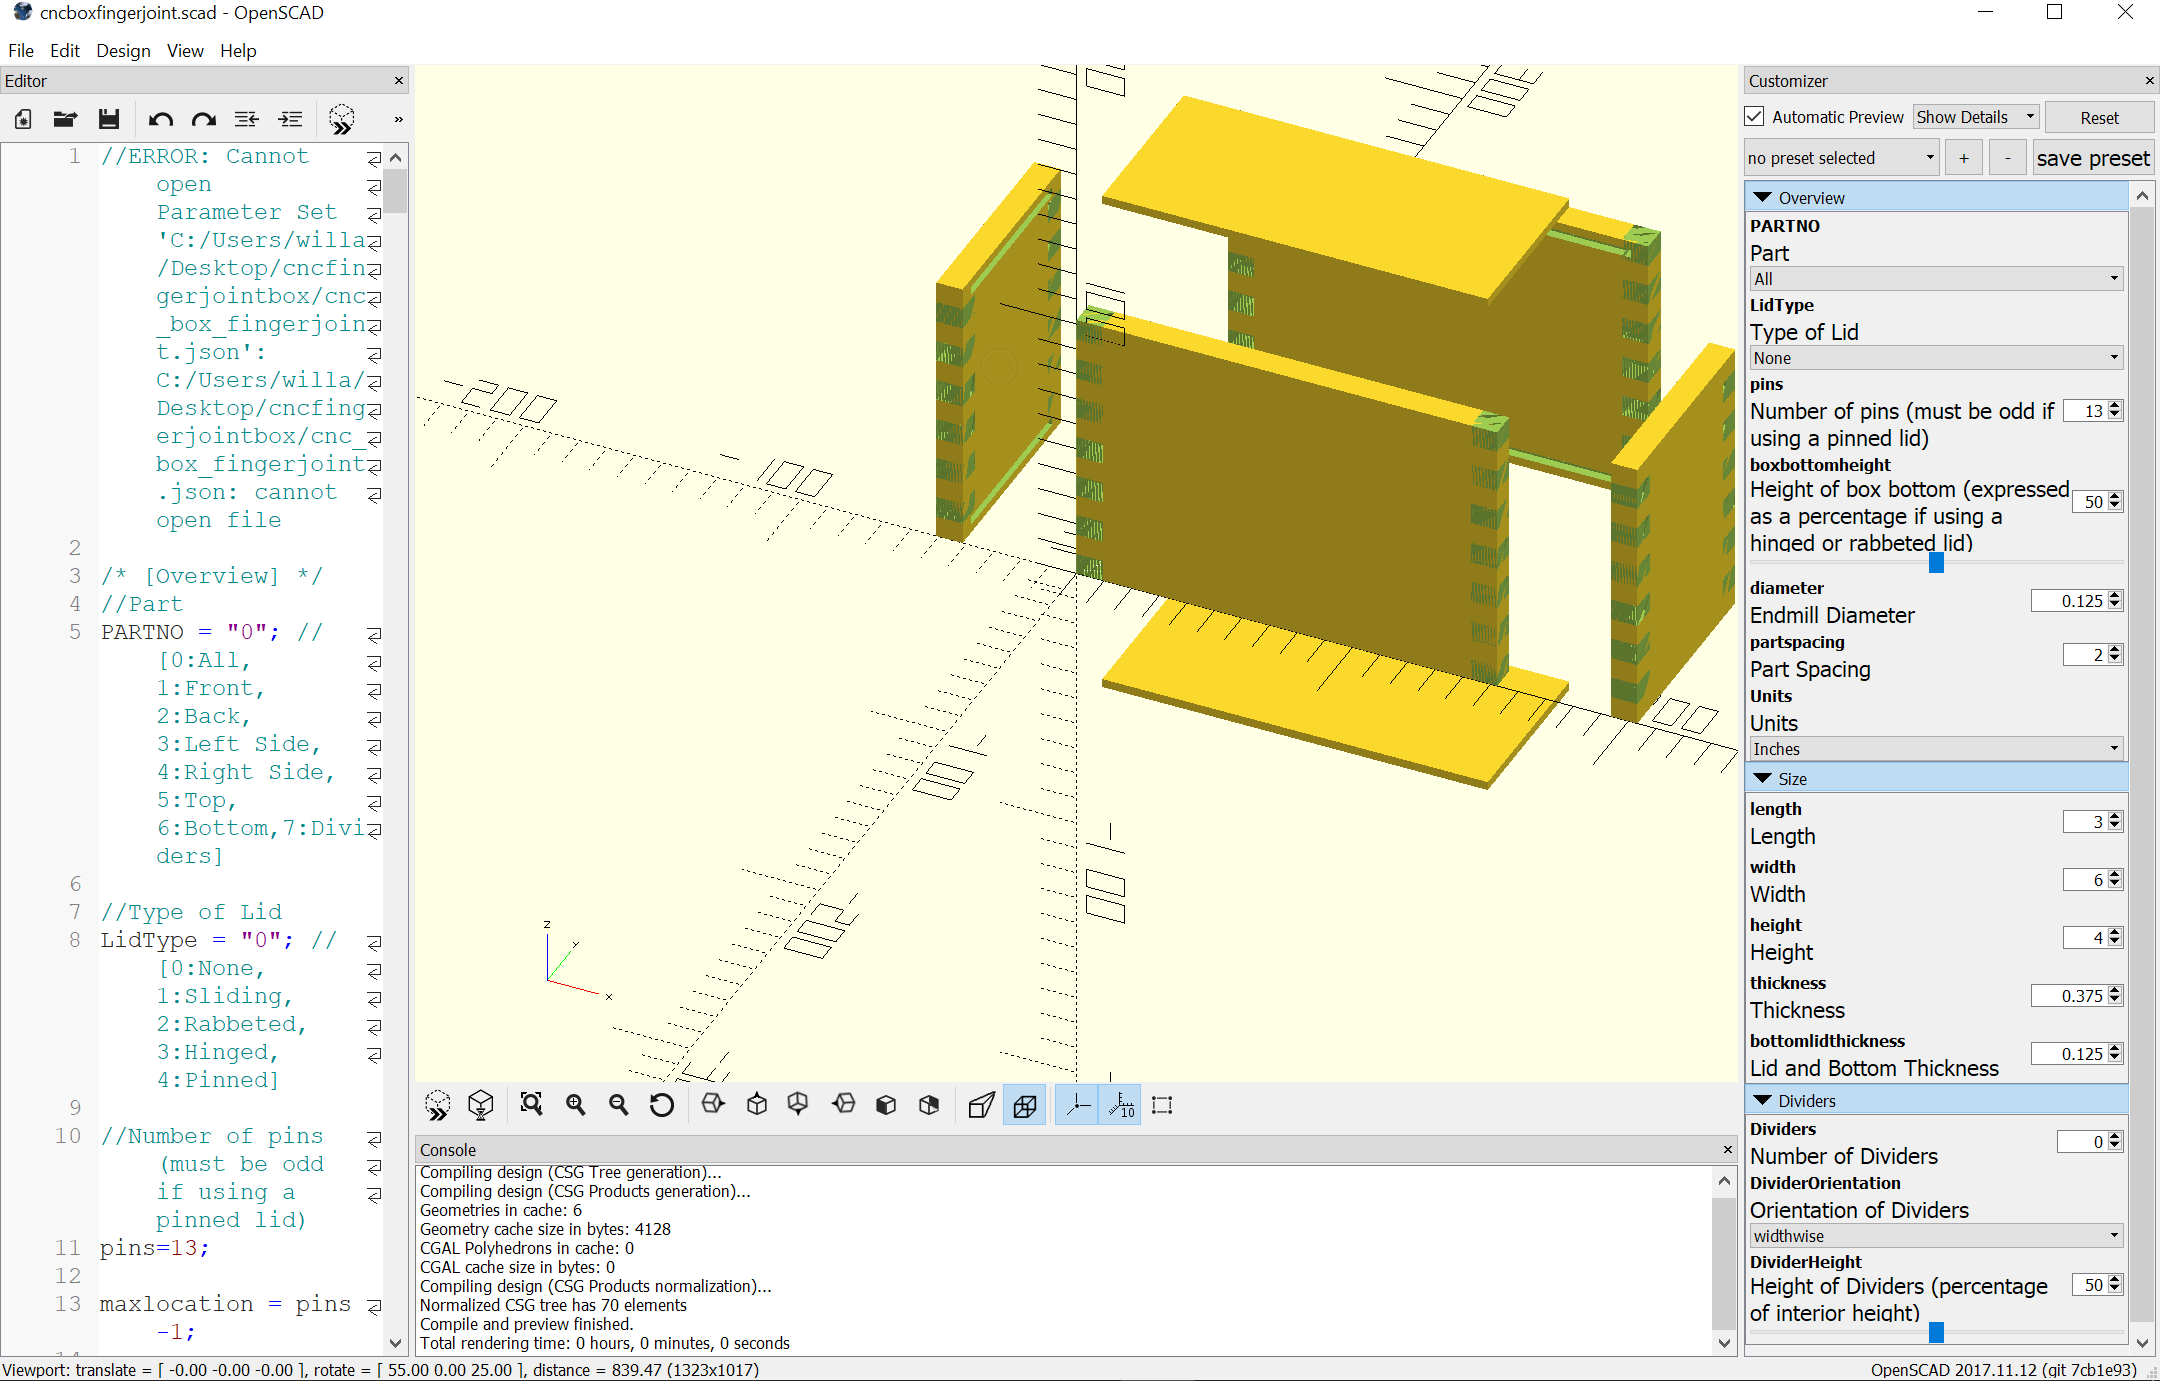
Next up is working out the implementation of the dividers (added that into the interface — seem reasonable?) and then the JSON preferences setup — then all I have to do is work up a Luascript to read in the JSON values, a TeX file to pull that in, and a METAPOST figure which will draw out the various options.
Okay, got the divider implementation done, and I hope that’s pretty much it — the only other feature I can think of is some sort of error checking or enforcement of the interface options. Unfortunately, the interface for doing that is not clicking with me, so we’ll have to see.
Griff
(Well crap, my hypometric precursor device is blown…)
18
Will, you never cease to amaze me! One post and you reveal to me 4 more software packages I need to learn, along with the other dozen or so I have on my Will Adams list.
Don’t feel a need to learn these, and they’re not quite software packages.
JSON == JavaScript Serial Object Notation — it’s a format for storing data
Lua — this is a programming tool often used for scripting and embedded in other tools, in this, inside TeX
TeX — this is a mathematical typesetting tool, arguably obscure, and not much used outside of that specialty, though I’ve used it for pretty much anything and everything
METAPOST — this is a programmatic drawing tool derived from METAFONT which was developed to make fonts for TeX — it’s actually a library inside of luatex
Arguably it’s one file format, and just one software tool — I’m hoping for this it will all be turnkey, though I’m not having as much with JSON as I’d hoped (trying to figure out why it’s not importing the file). EDIT: JSON file is importing and exporting (had an extra comma).