Machining 3d parts, the easy way!
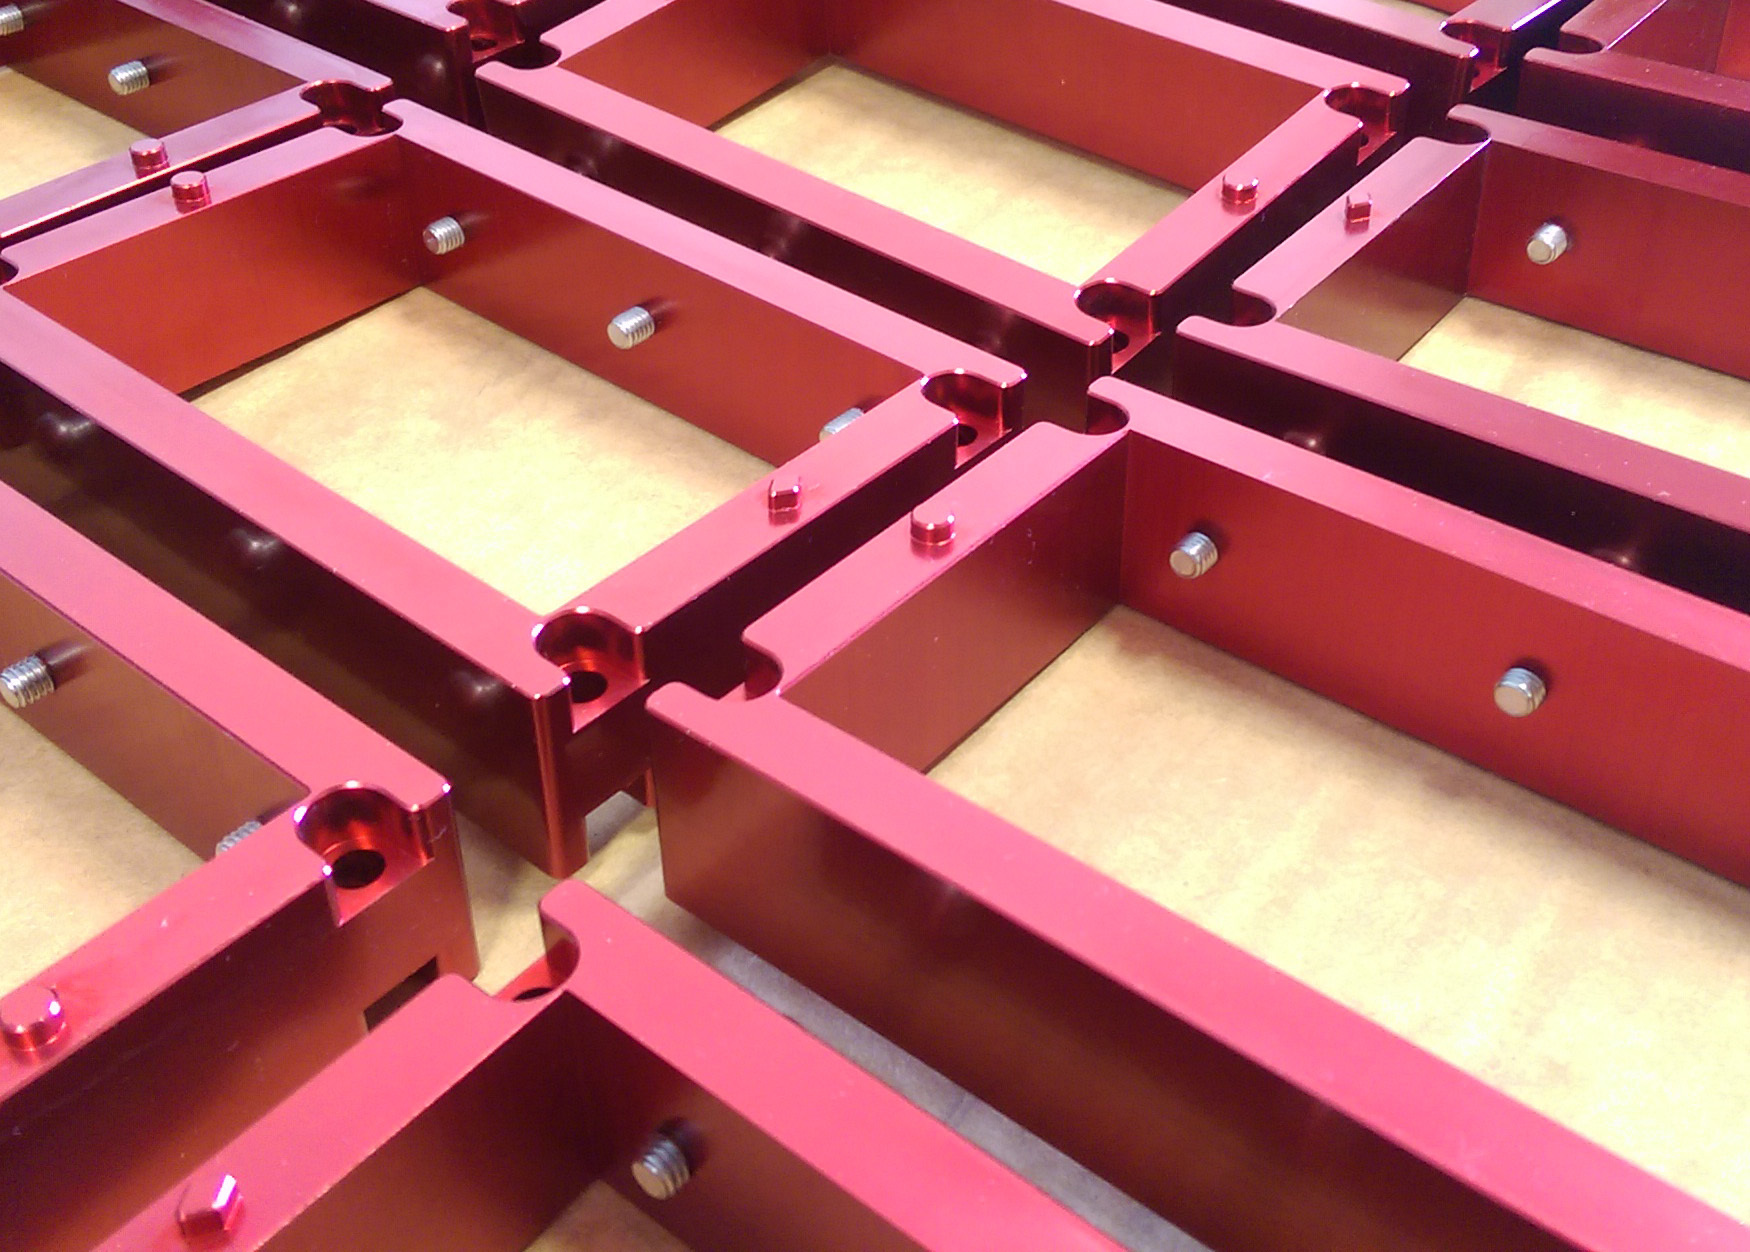
Lets get started with an overview of the Carbide 3D Flip Frame.
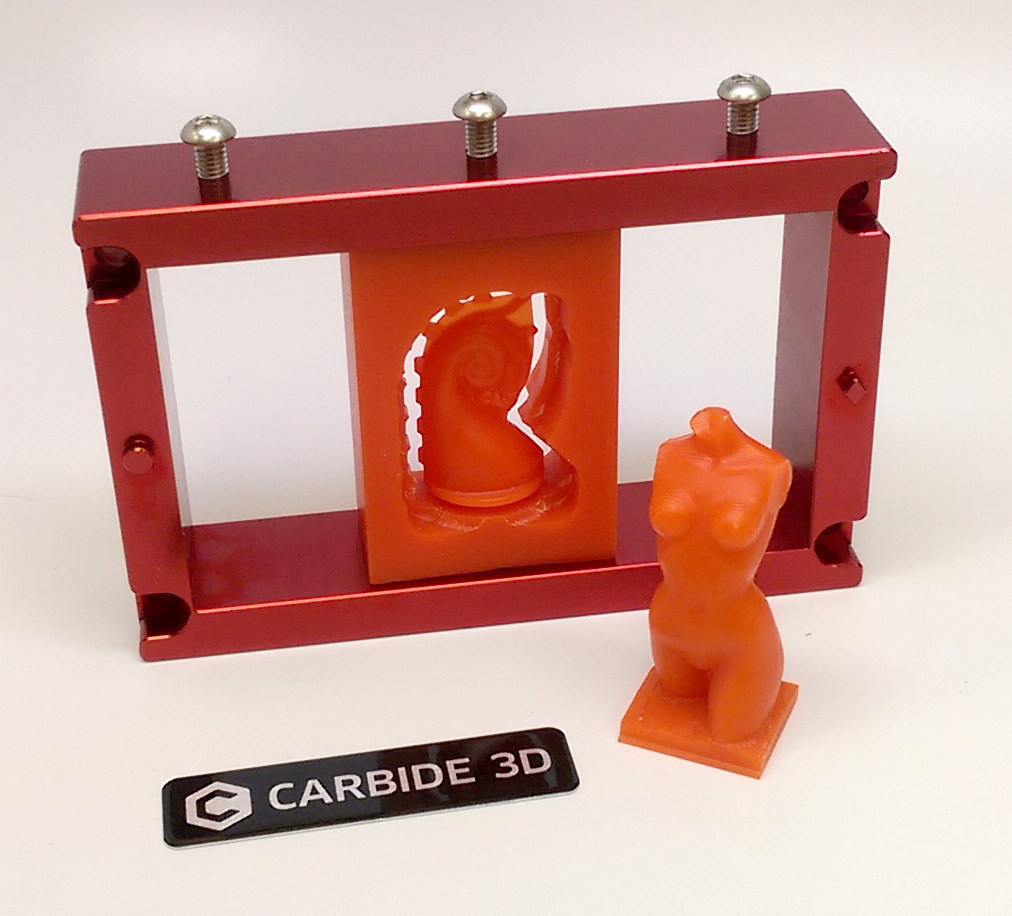
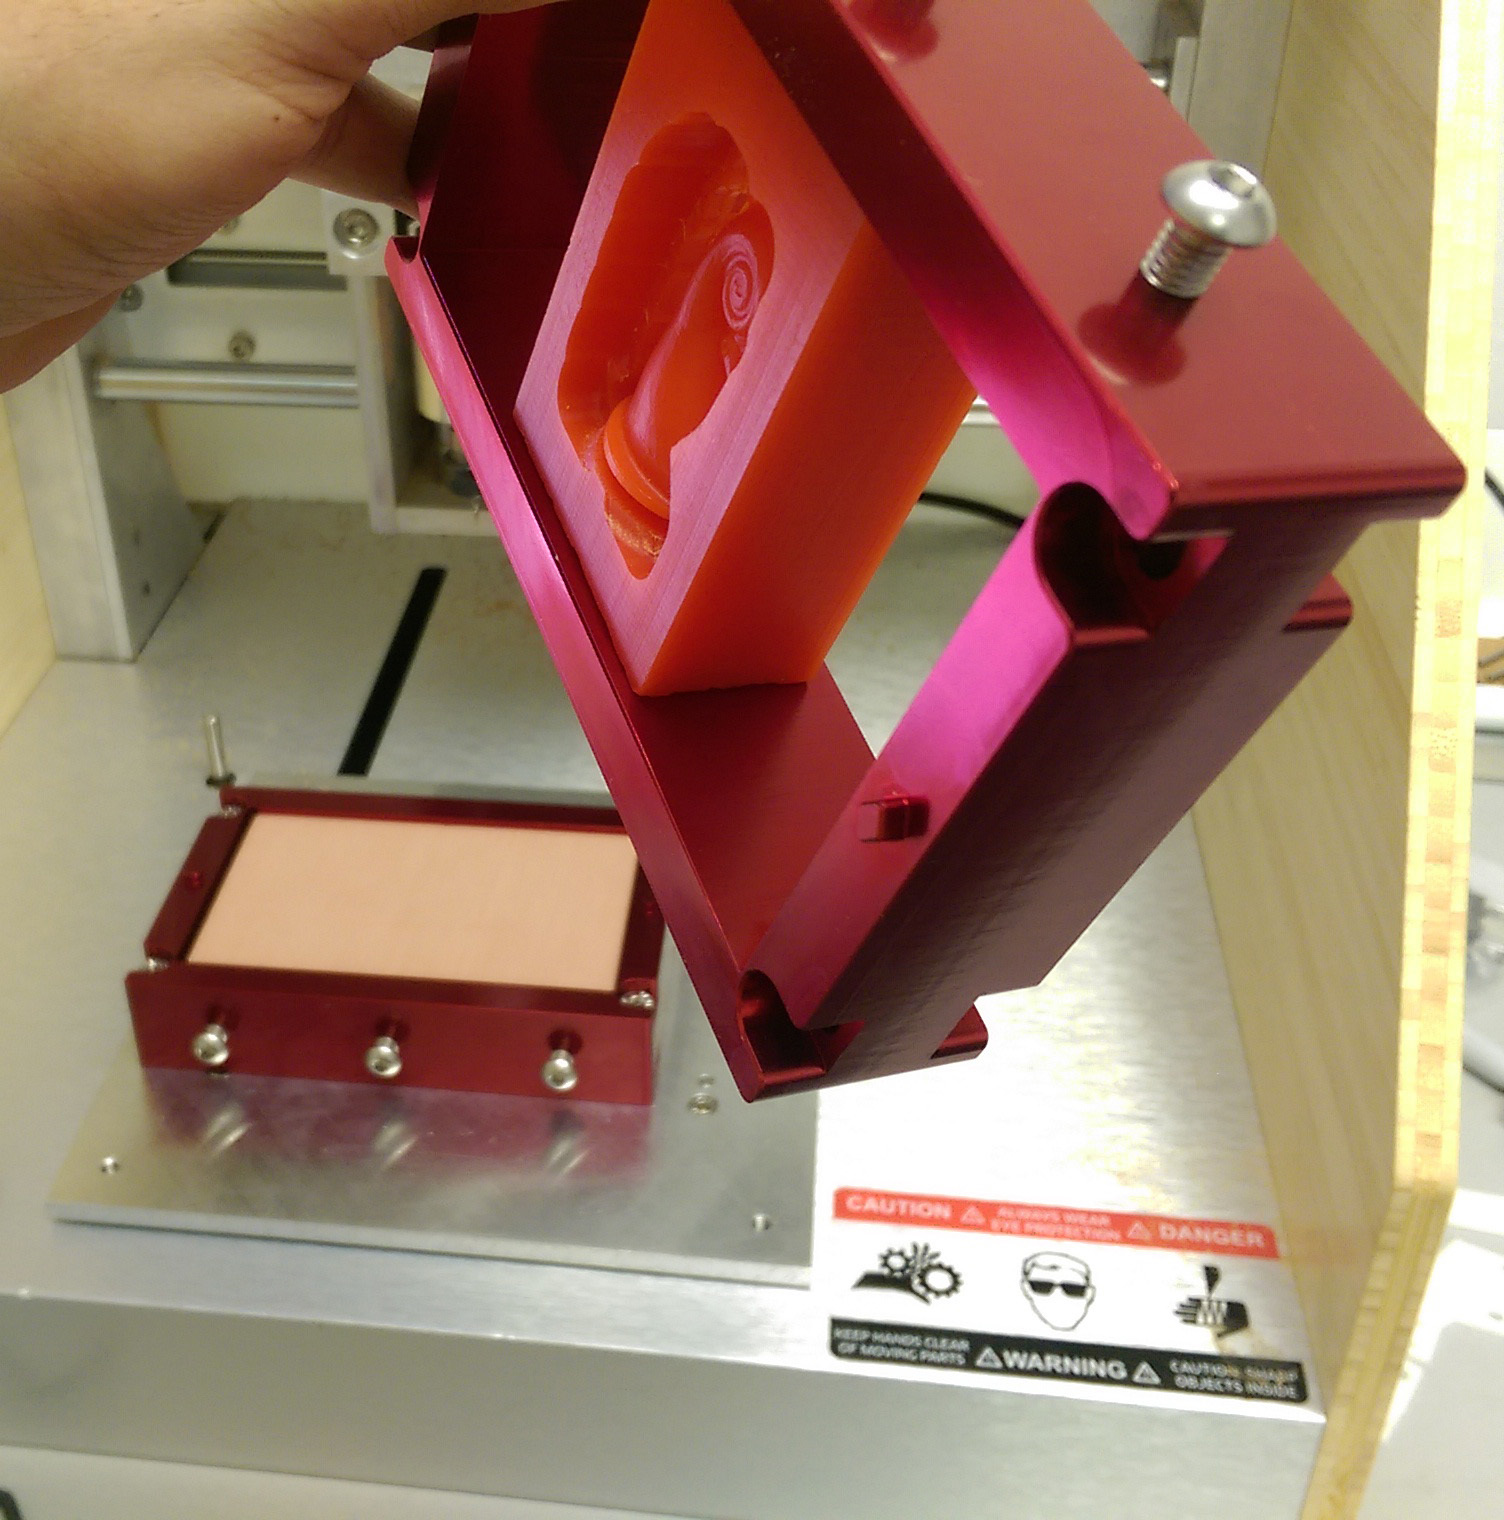
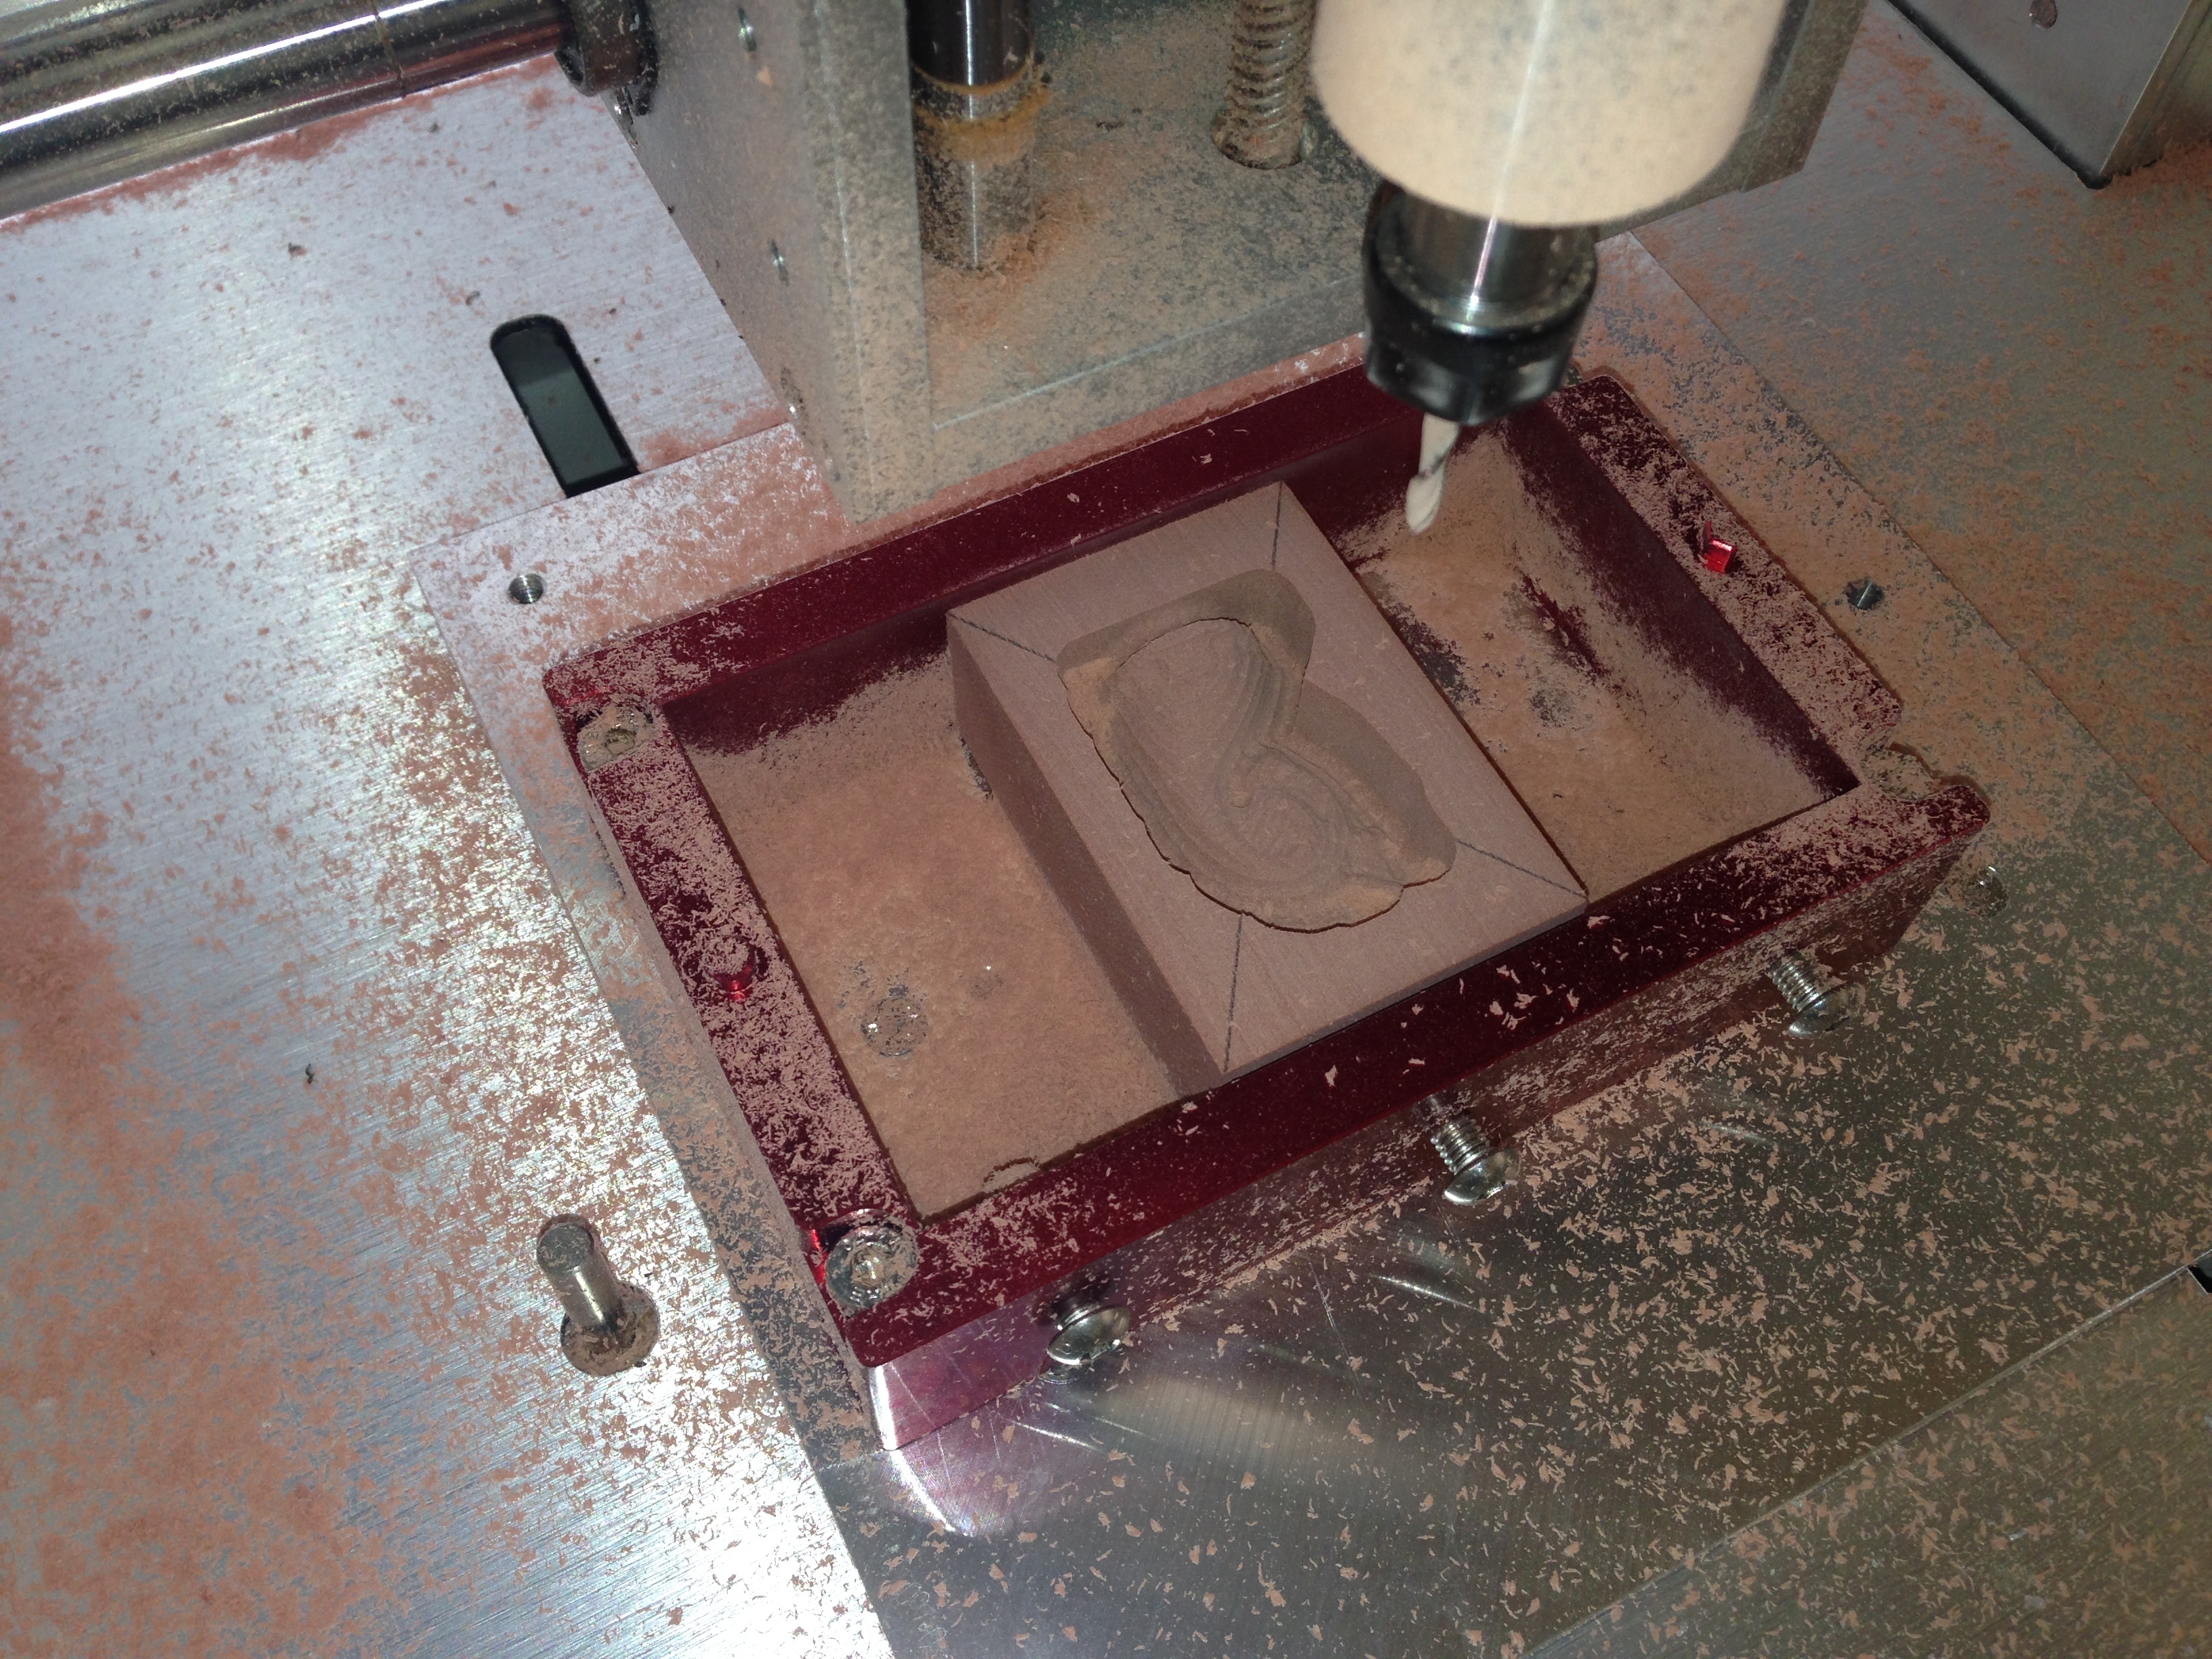
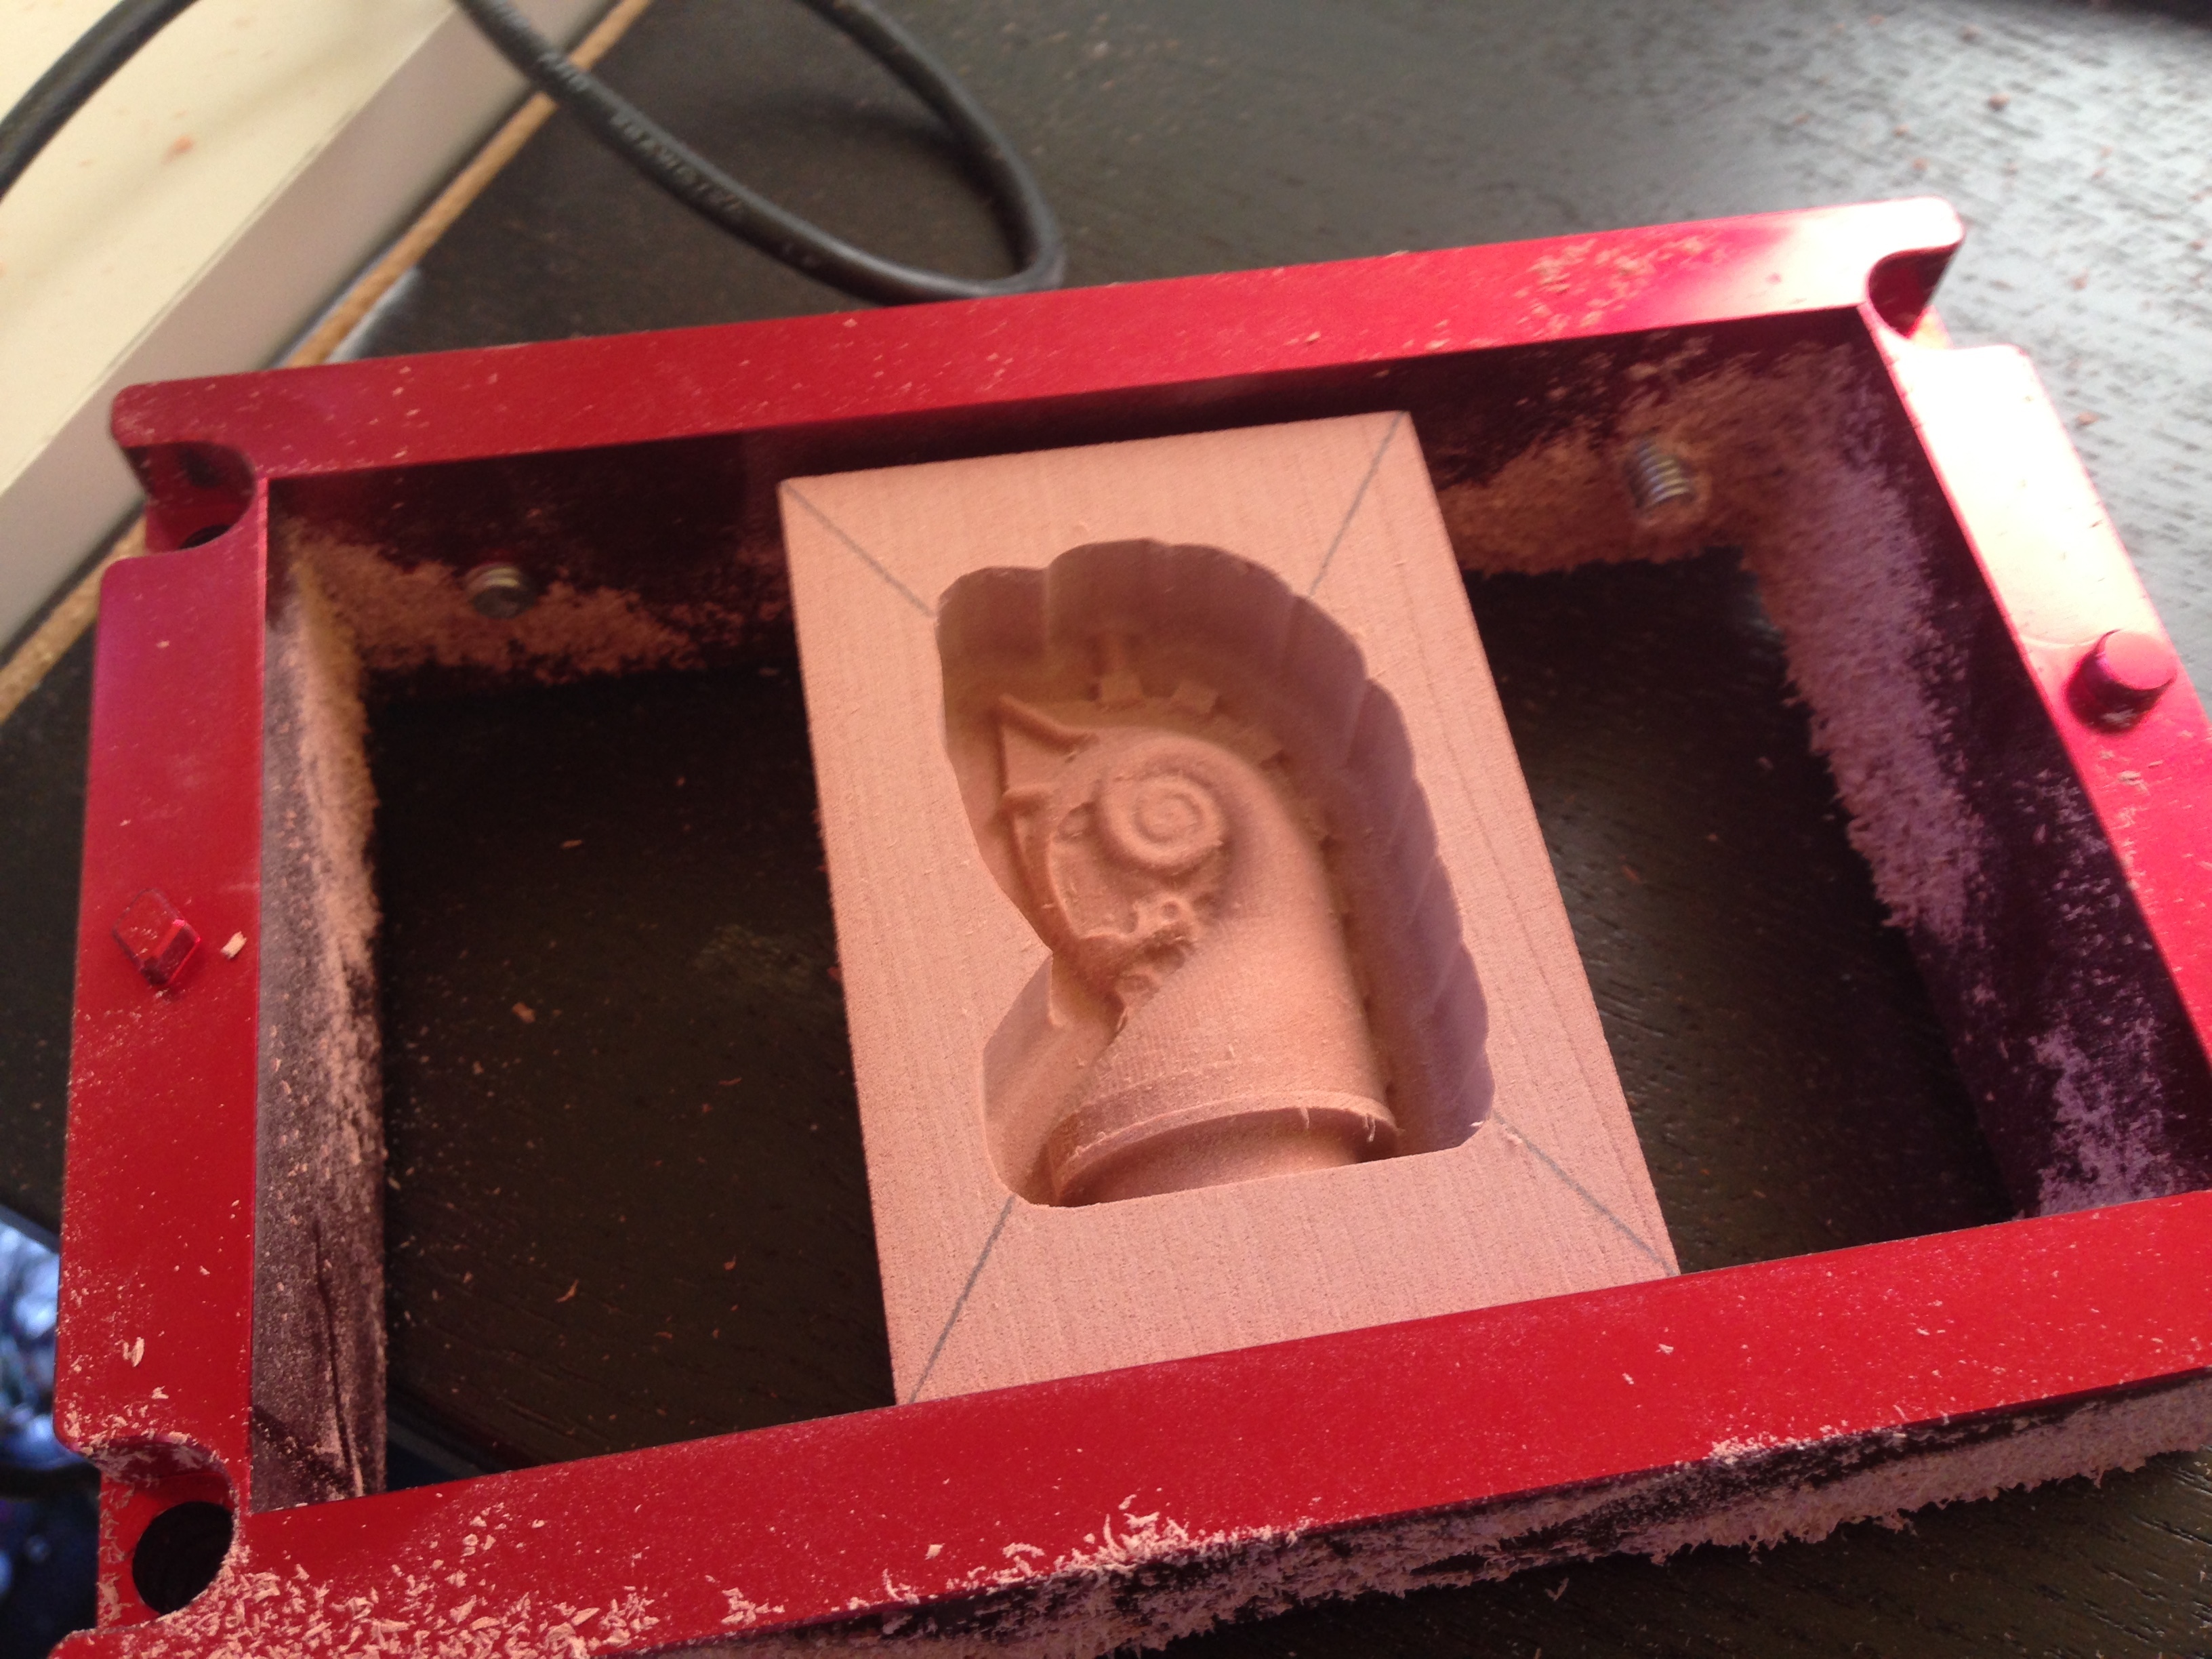
2 sided Knight and Female Figure.
Machined in Precision Wax Blocks in the Flip Frame.

The Flip Frame holds material up to 1.25" thick and has a maximum interior holding area of 2.9" x 4.9".
Stock materials smaller than these dimensions can be held in the frame with the 3 adjustable button head bolts and some shimming.
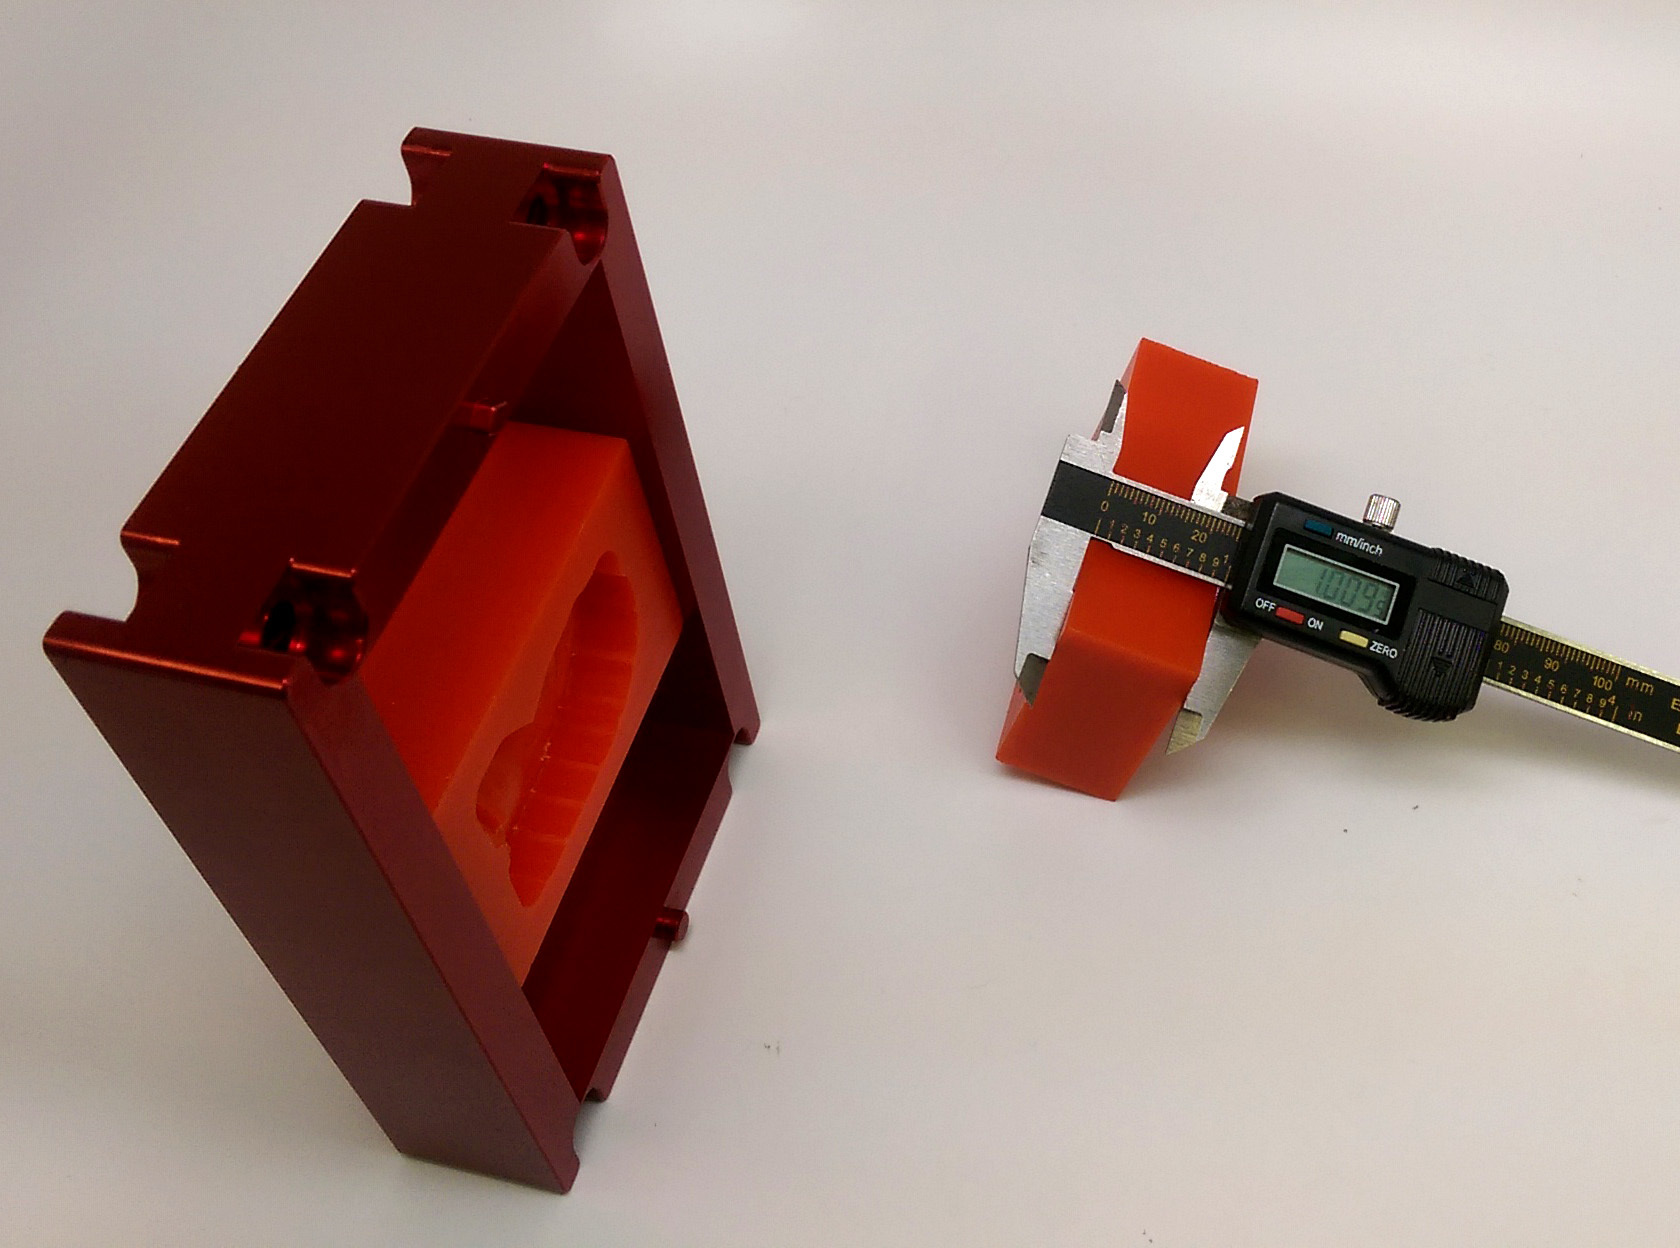
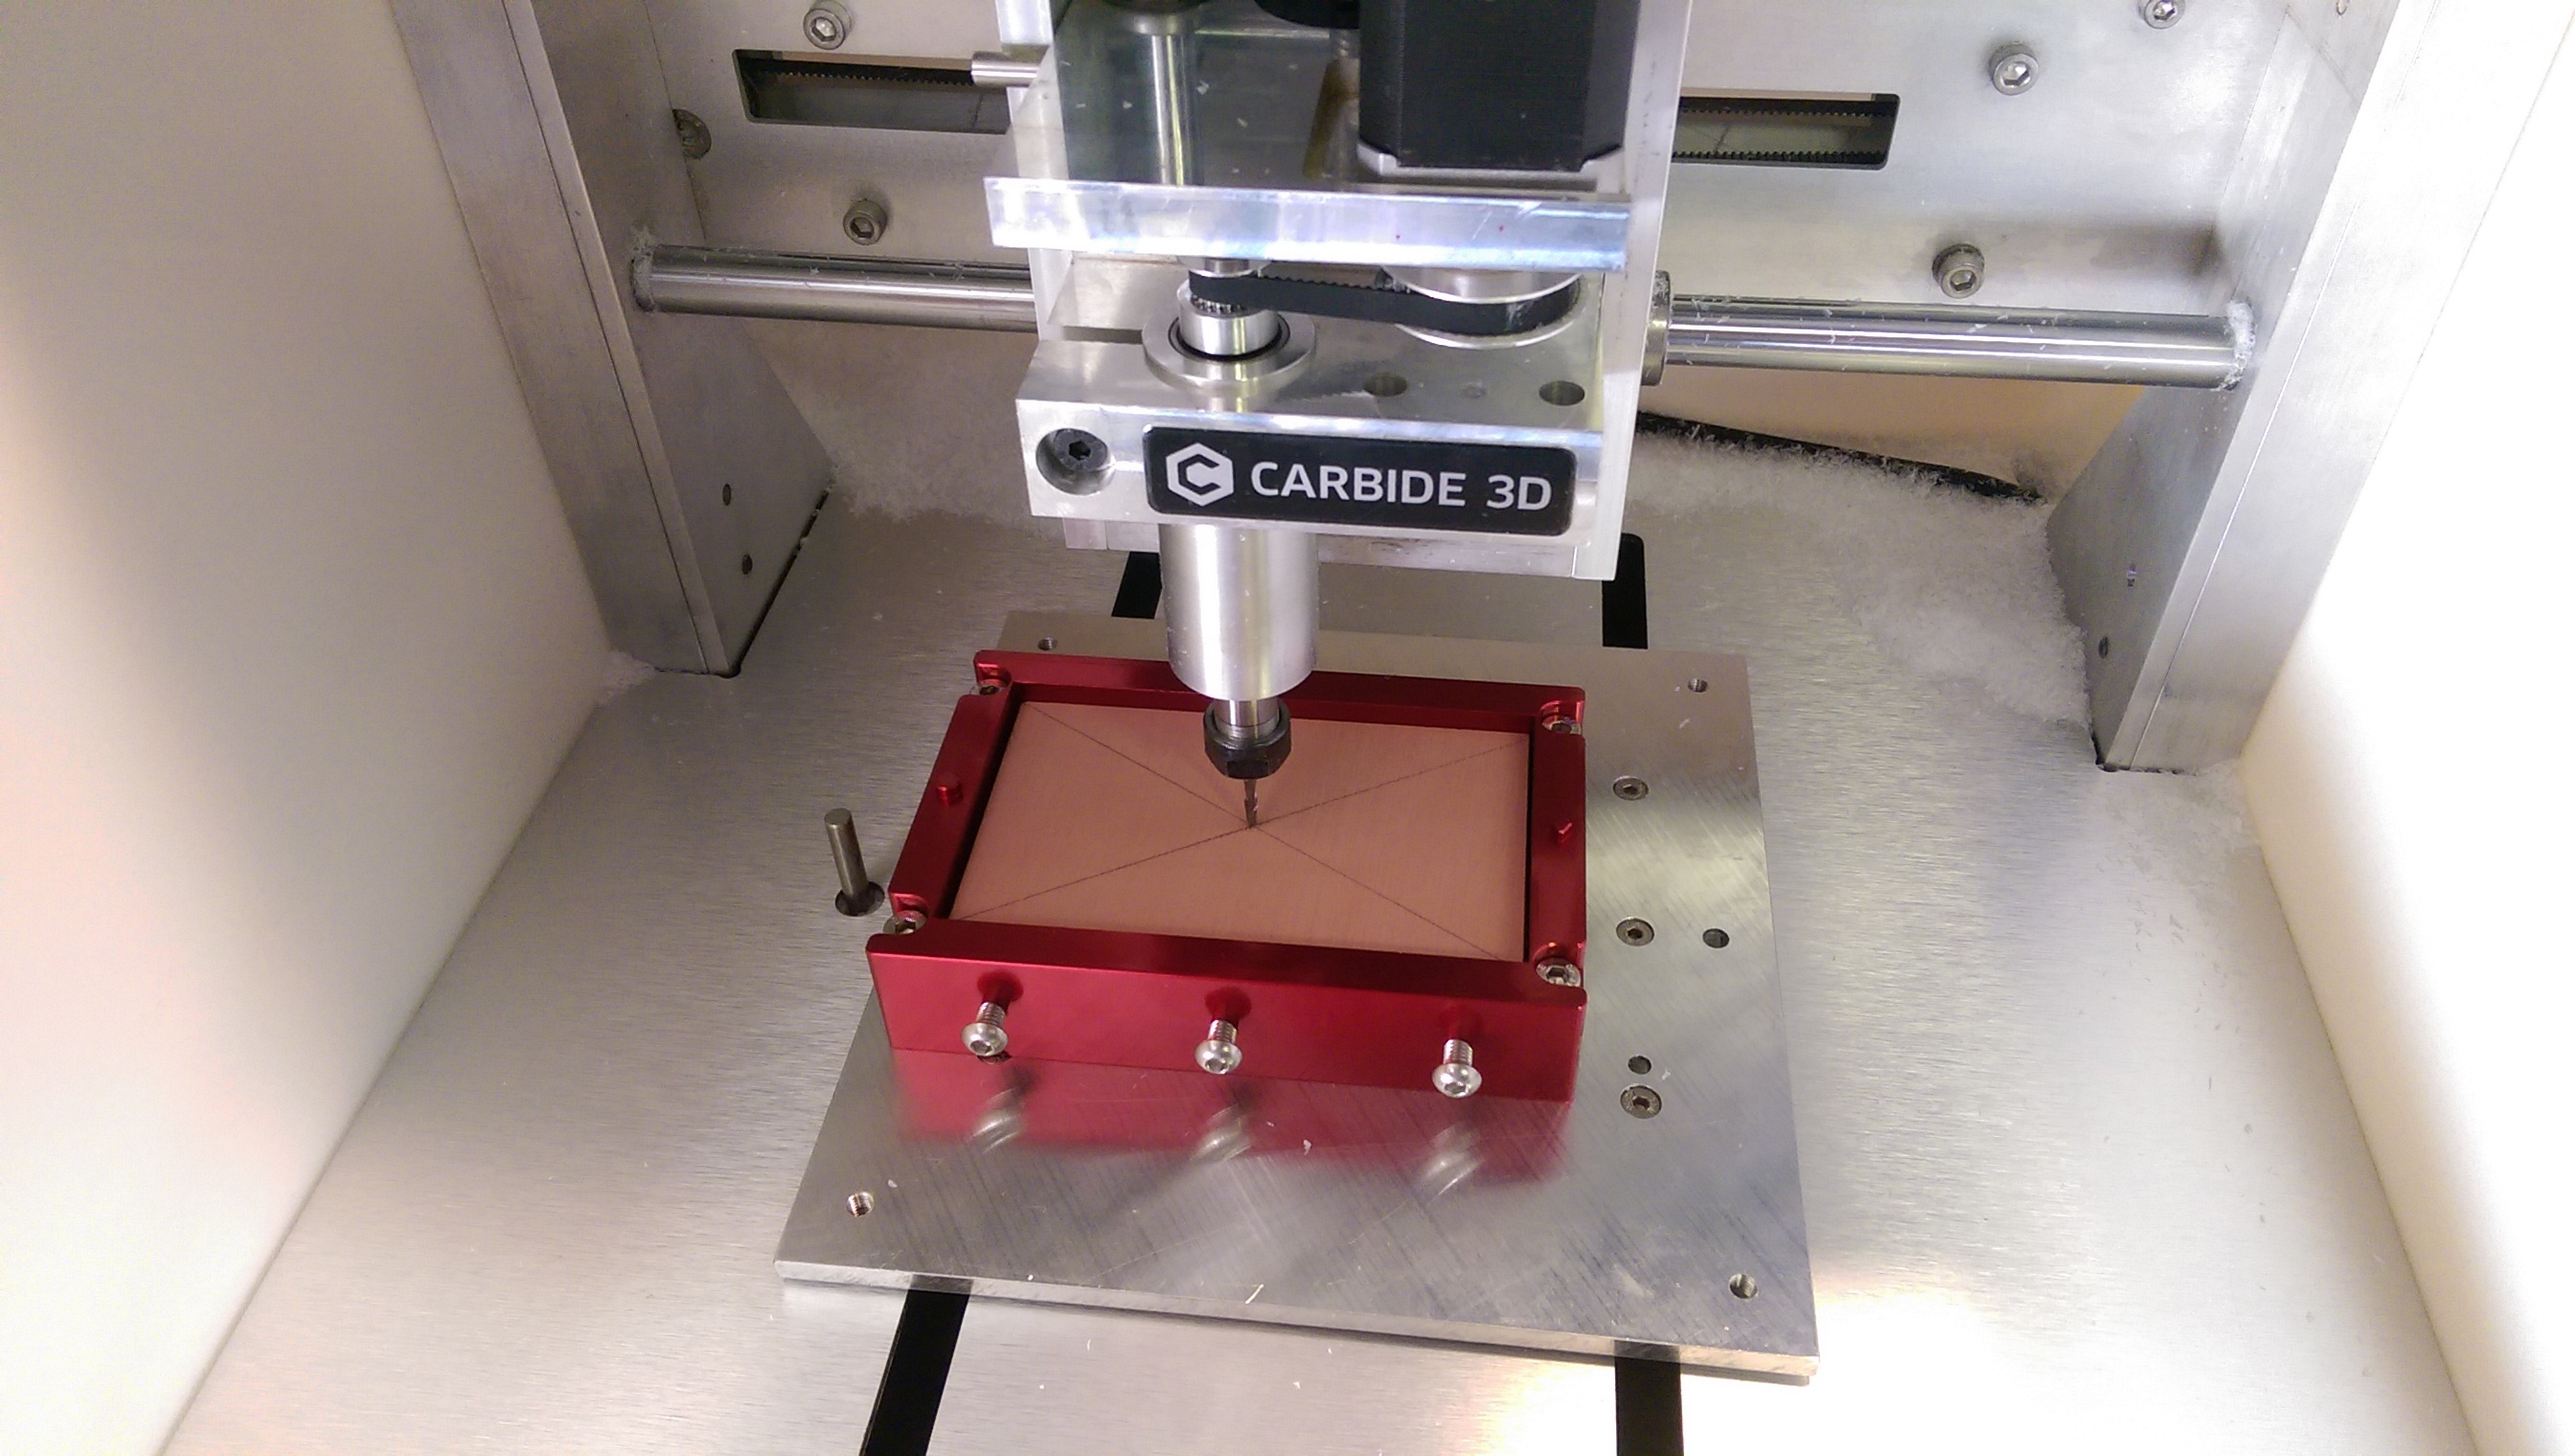
Step one when using the flip frame is to measure your stock.
This Wax block is exactly 1.009" thick and this dimension is very critical to setting up our Meshcam job.

The Flip Frame is secured to the table with 4 hex head bolts with nylon washers.
The 3 button head hex bolts hold the stock securely in the frame.
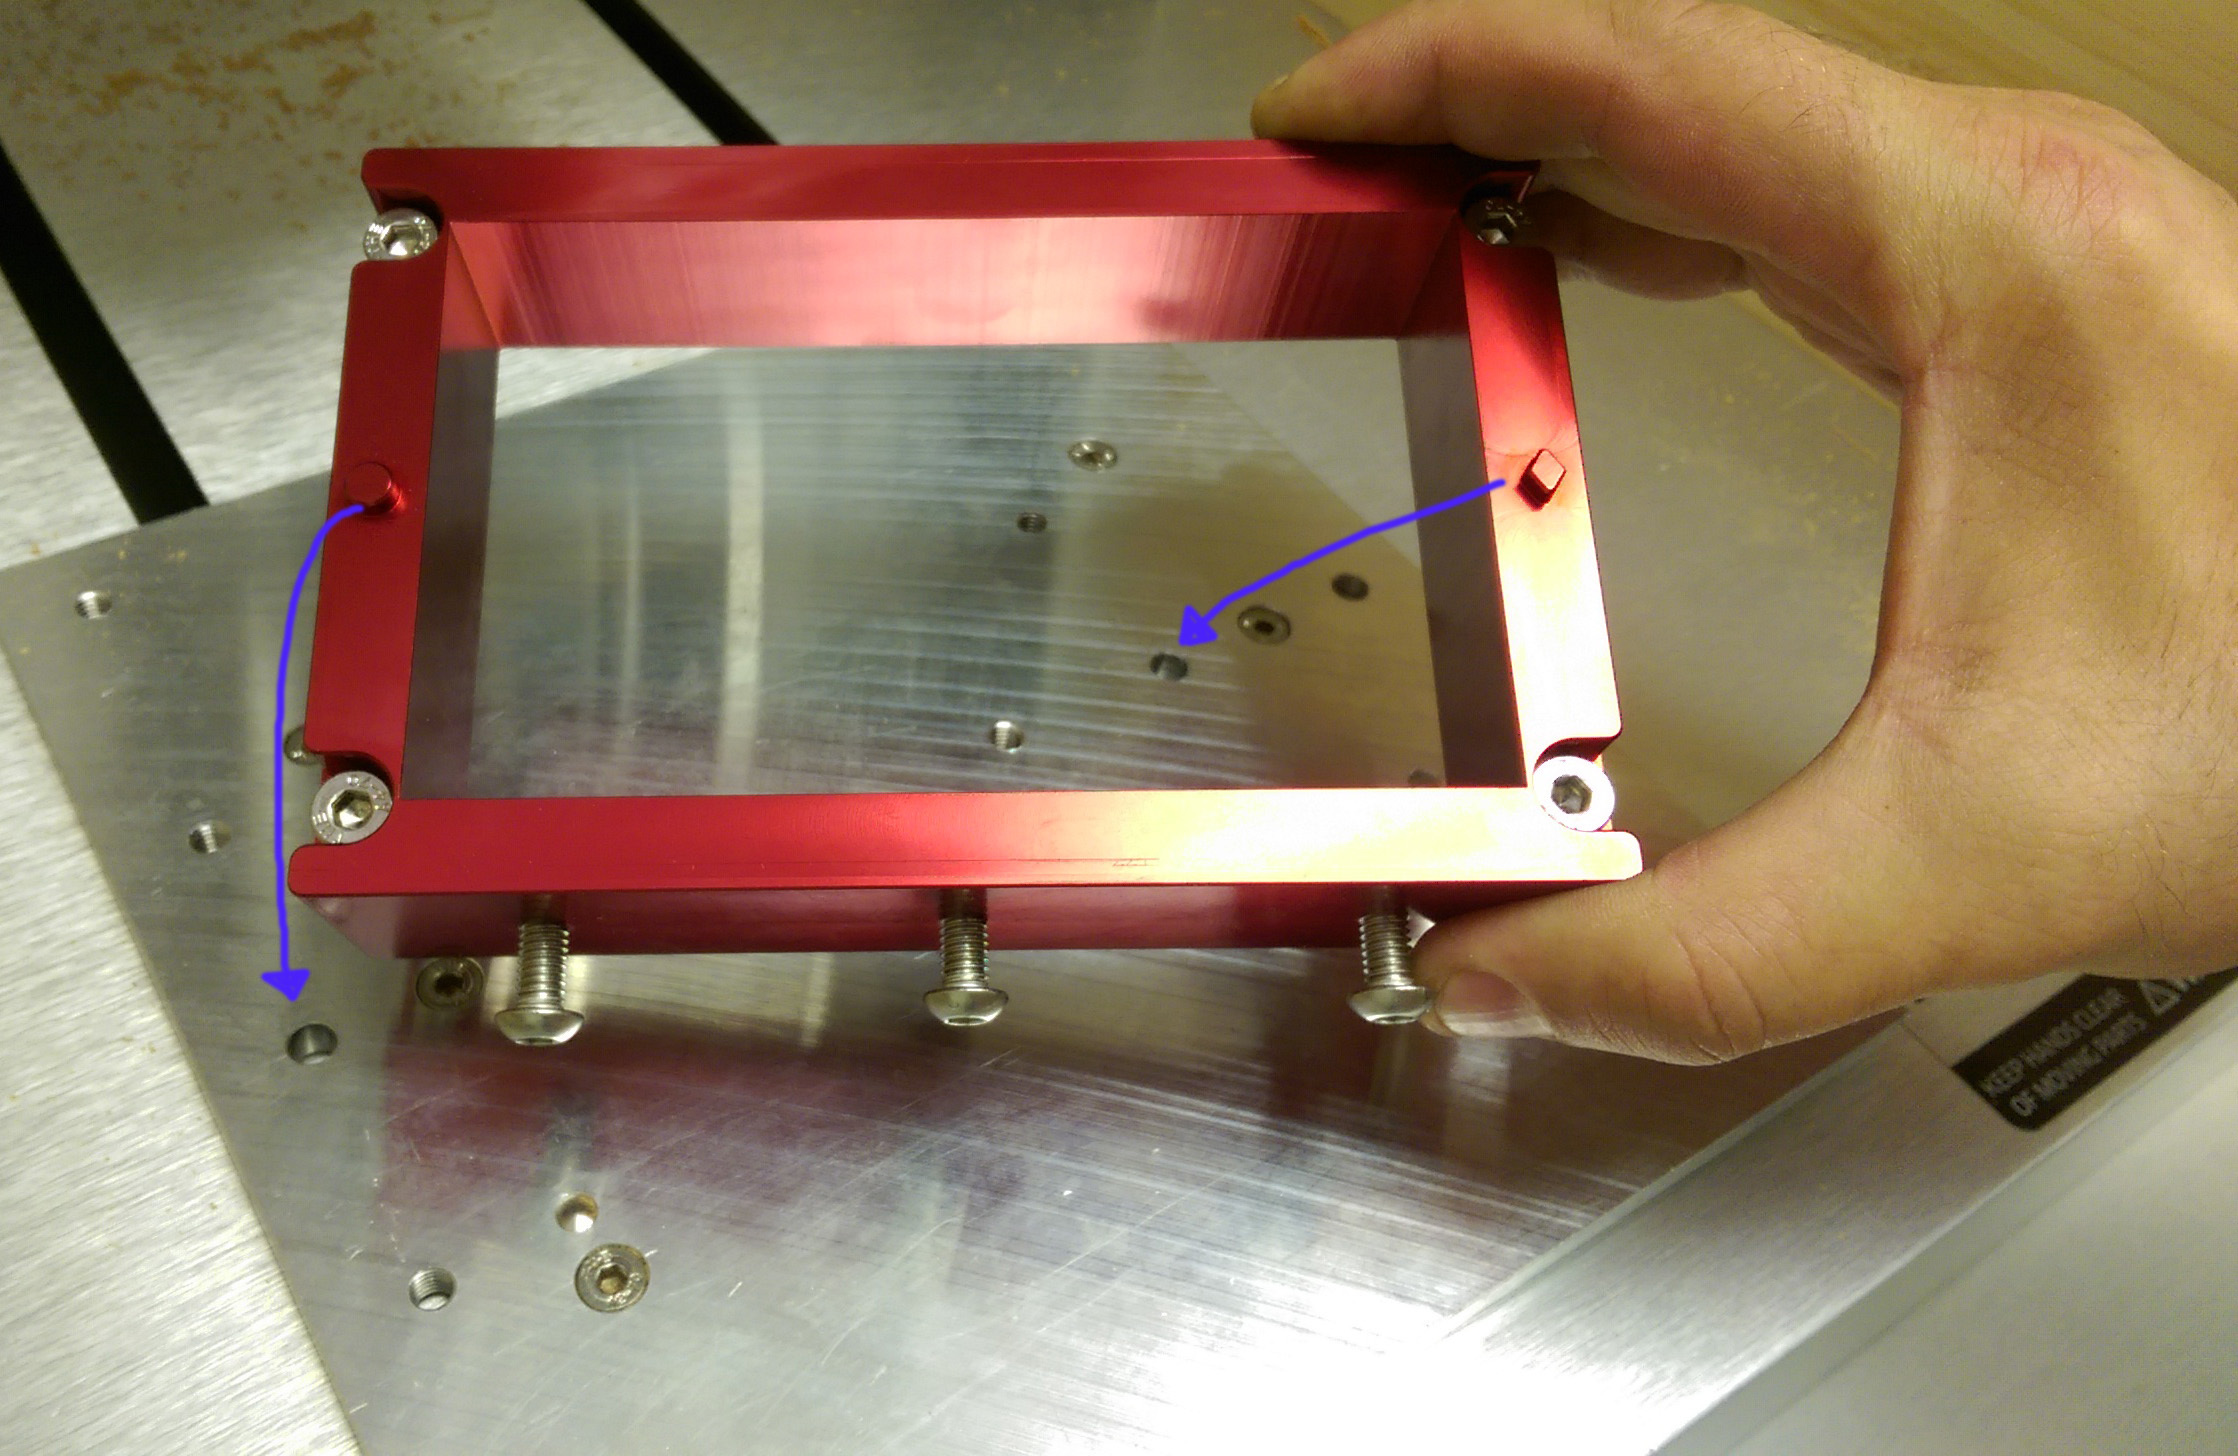
There is a Circular locating post and a diamond post.
Circle goes to the left, diamond on the right.
With the Flip Frame flat and in its proper location holes on the table, the 3 button heads should be facing you.
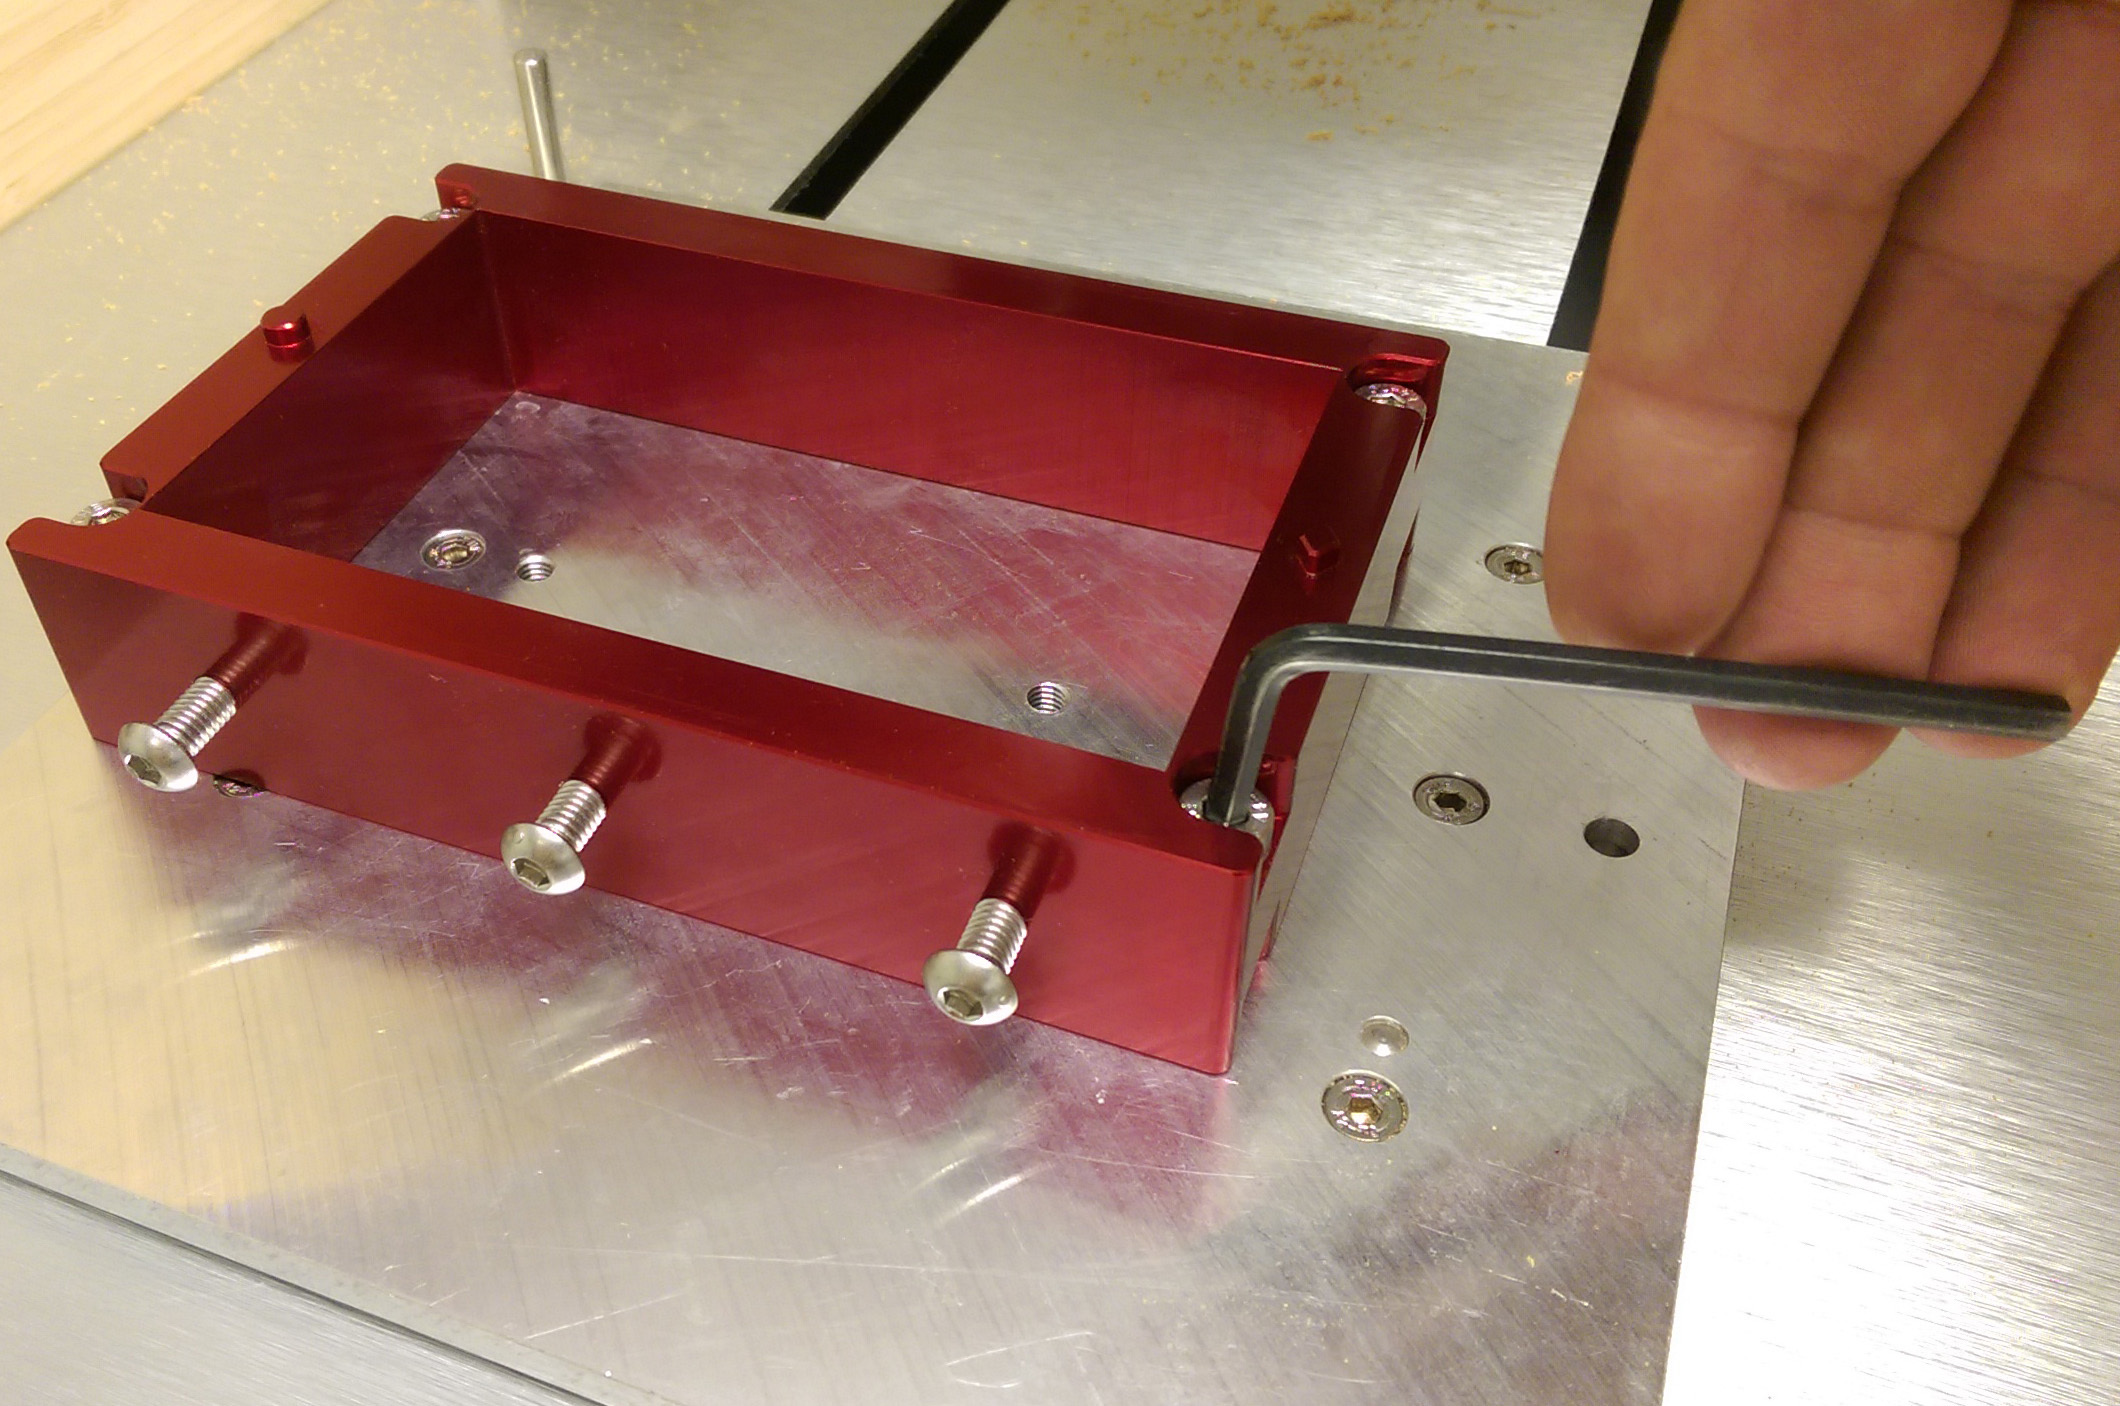
Secure the frame to the table, the bolts should be snug.

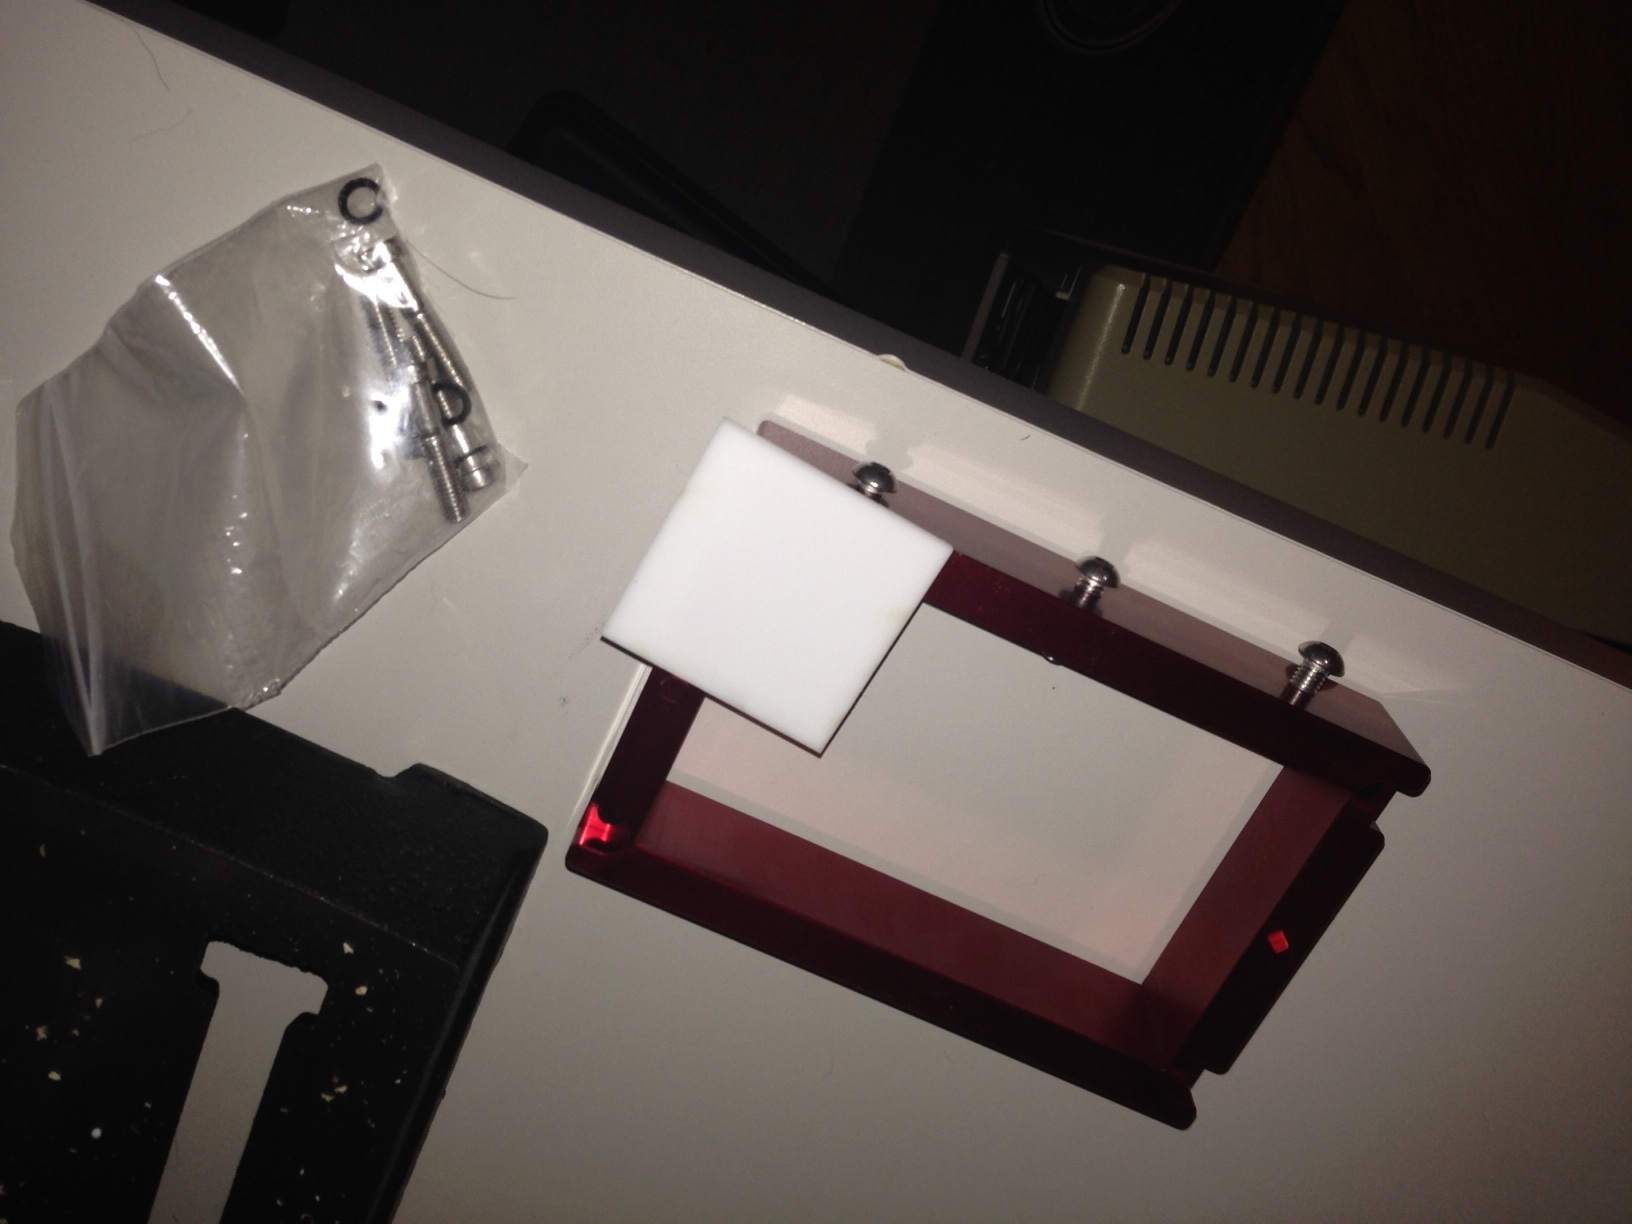
Like the wax blocks, the renshape is also 1" thick.

Lets do a little math to ensure the stock material is in the middle of frame.
1.25 - 1 = .25
.25 /2 = .125
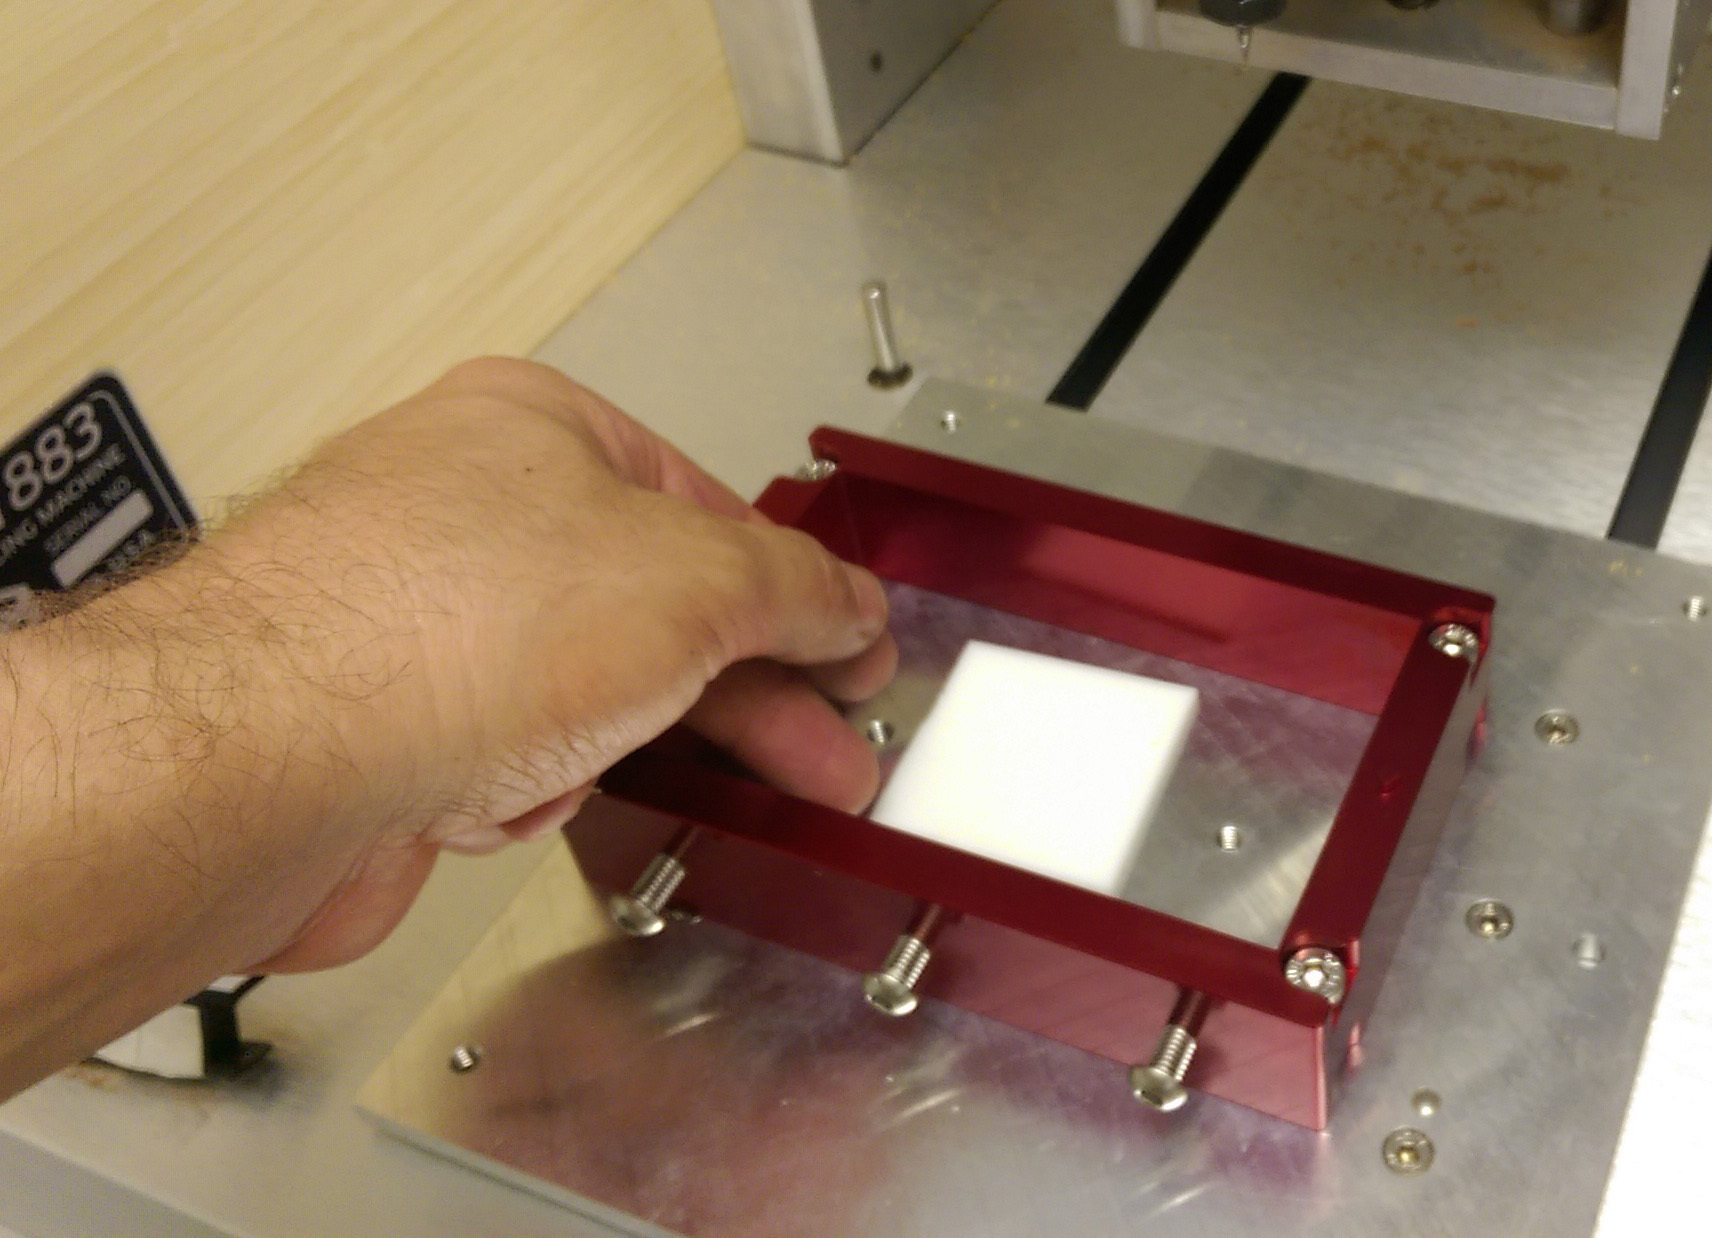
Since the Frame is 1.25" thick and my stock is 1", I can use a 1/8 inch shim to float the stock in the middle of the frame in the z axis.
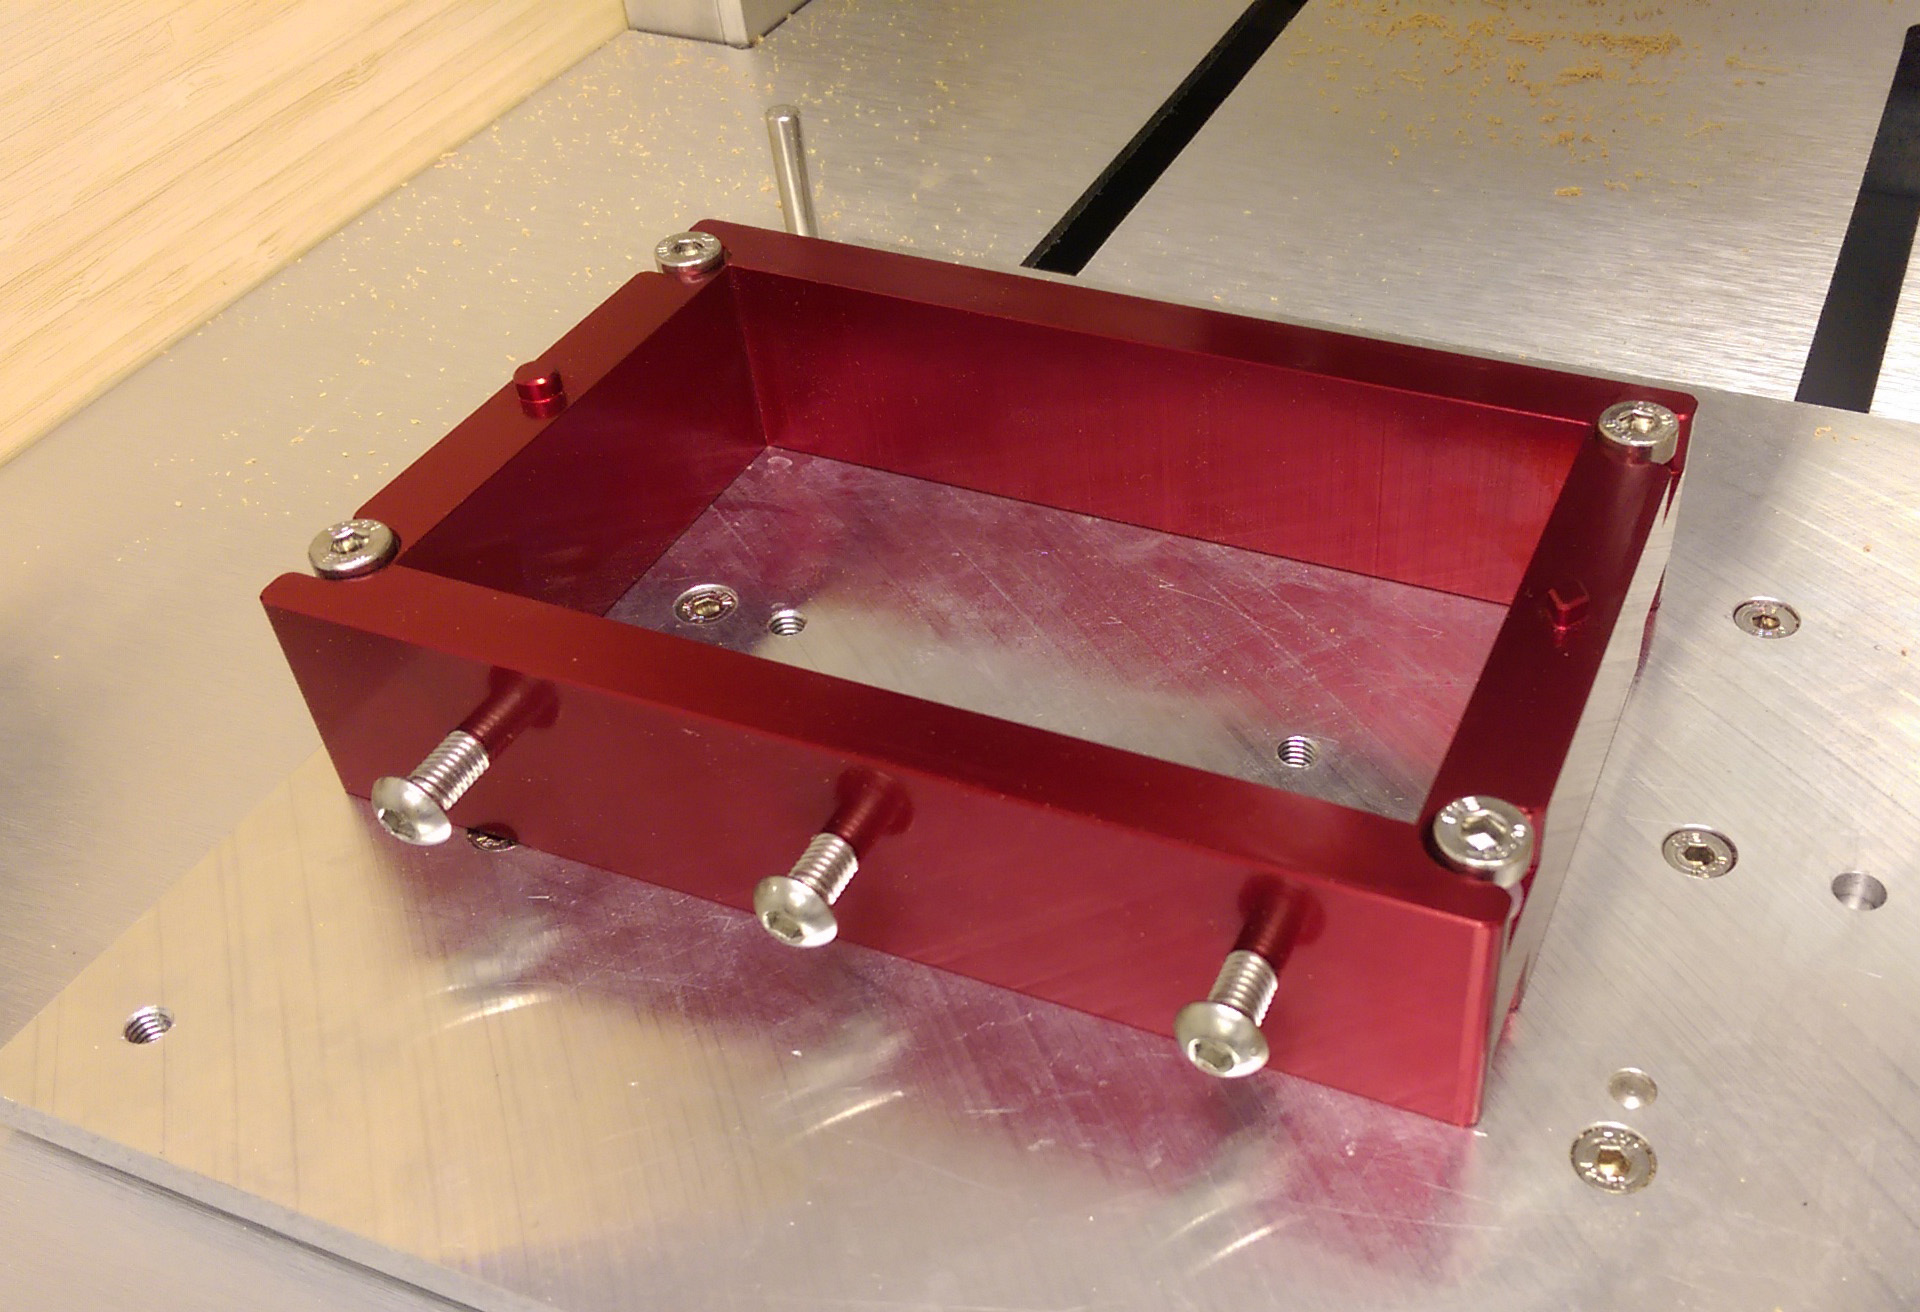
Apply consistent level pressure to the stock to ensure it is level.
Secure the stock with the 3 bolts. A quarter to half turn past initial engagement is safe. You dont want to deform the material, but you want it secured.
The .125" shim below my 1" thick renshape is holding my stock in the middle of the 1.25" flip frame.
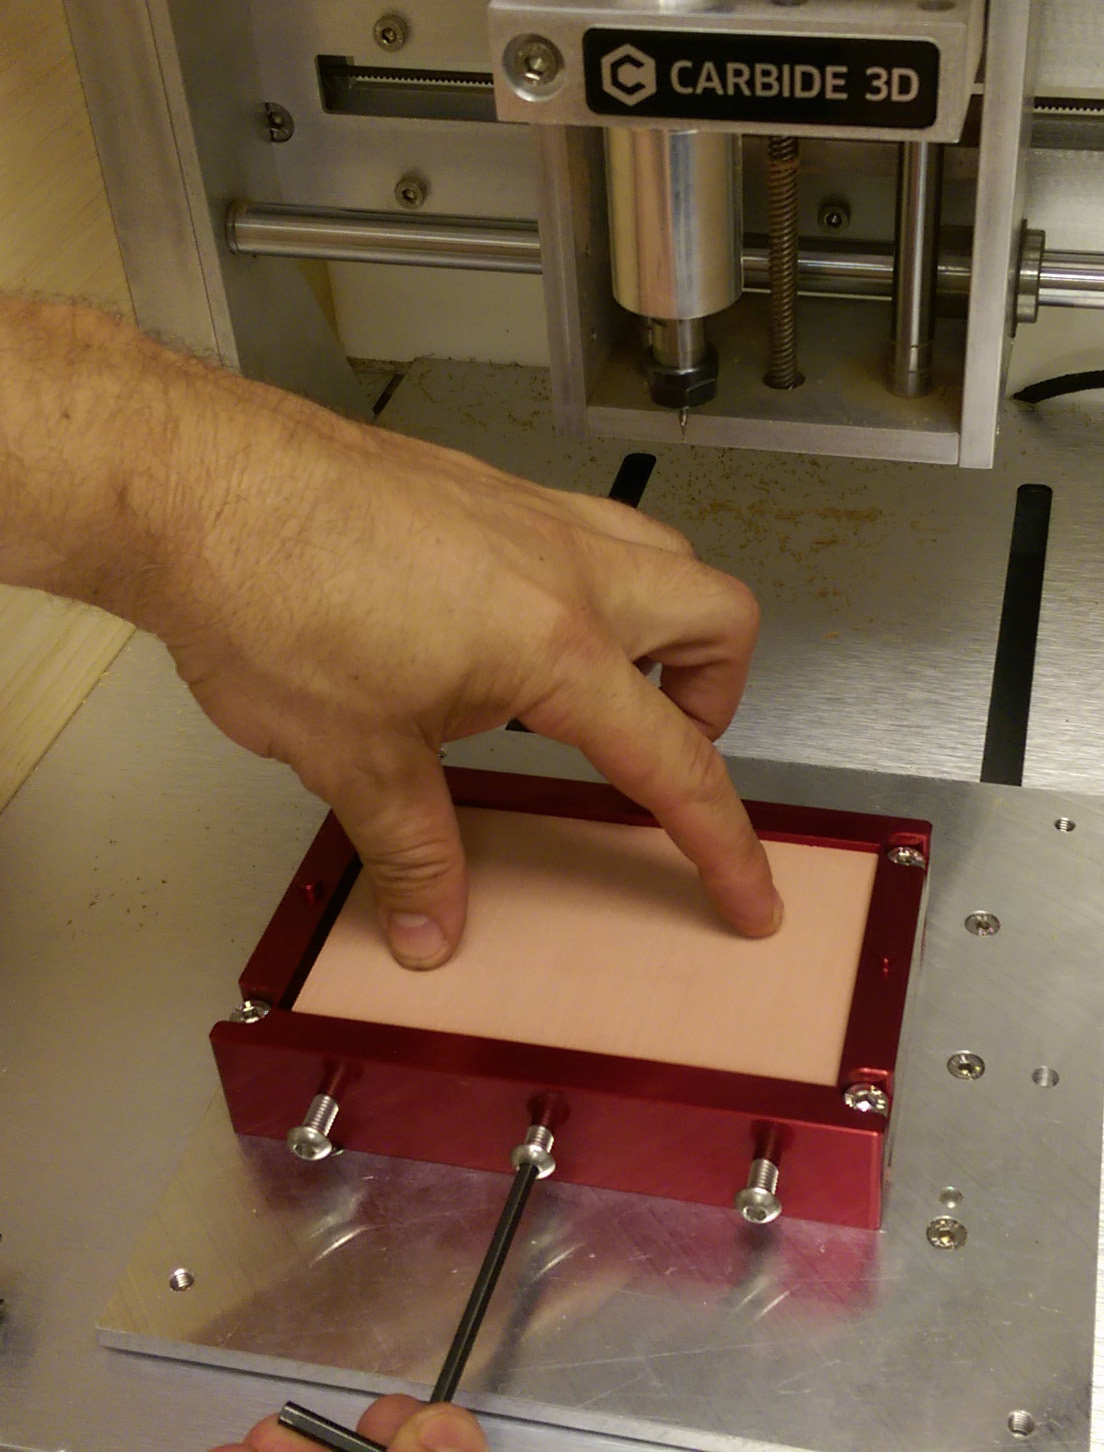
Here you can see the Wax block has .125" spacing on either side of the Flip Frame. The Carbide 3D store has wax and renshape material blanks cut to fit the flip frame and we will be adding more materials soon.
Now lets setup a Meshcam file.
I have set up this job as a 3 axis part, not a 2 sided job.
Meshcam is a very powerful program, by flipping the part in meshcam manually hopefully it shines a little light on some features you may not have used before.
We can do a Meshcam 2 sided machining tutorial with the flip frame next, but for now heres my work flow.

I have set up this Chess piece in Meshcam;
- Stock is defined to match the wax block 2 x 3 x 1
- Supports have been added
- The Z location is at the center and TOP of the stock
- Maximum depth is set to 1 mm past HALF the z hieght.
- The Machining Region has been defined to retain a frame around the work.
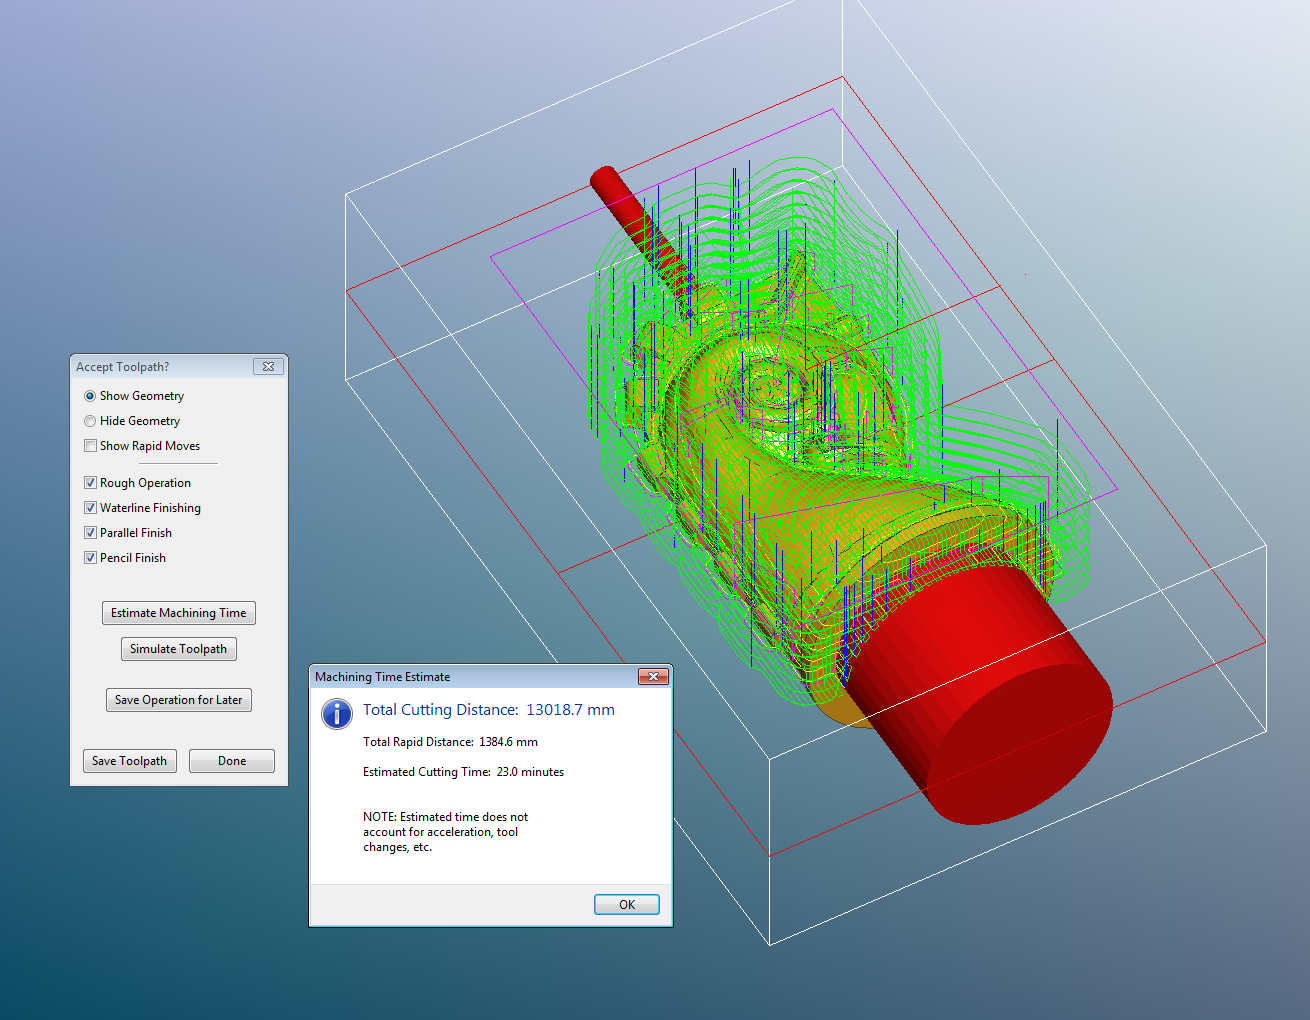
- Toolpath has been set to cut using a .125" ball and a .063" ball and cutting the “Geometry only” takes just over 25 minutes per side. The .25" cutter can be used for roughing and takes 20 minutes to cut each side.
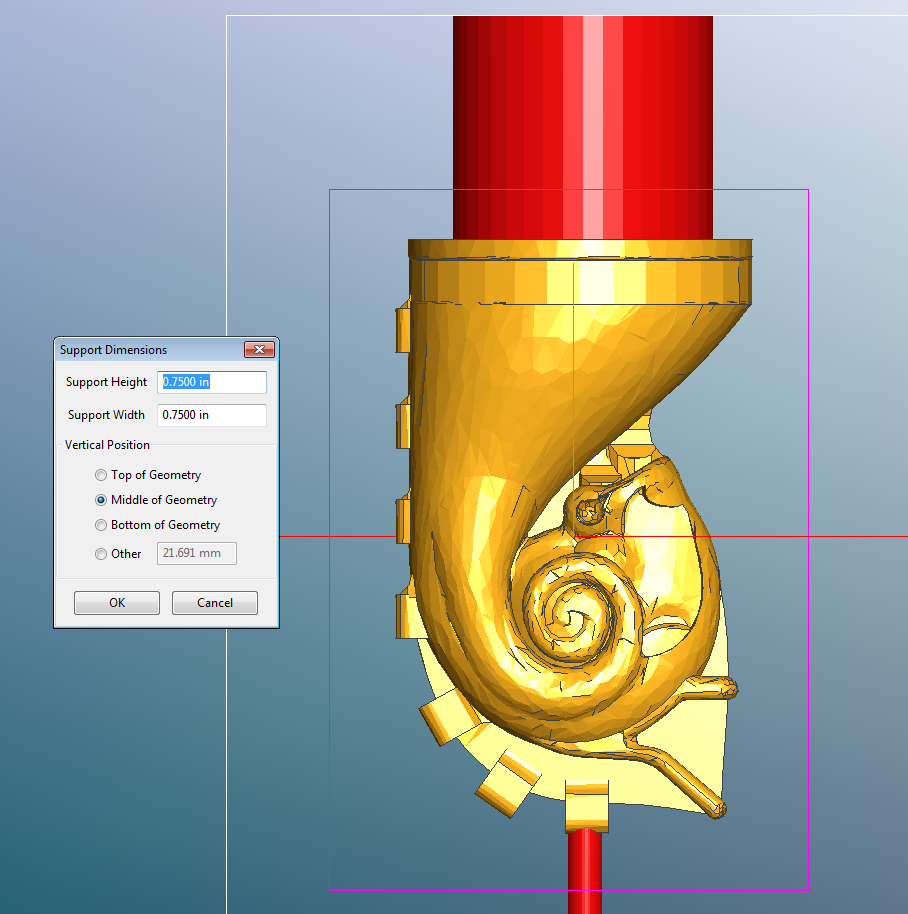
- Supports added are .75" for the base and .1" to fit within the detail on top.

- The Z location is at the center and TOP of the stock

- Maximum cutting depth is set to 2 mm past HALF the z hieght.
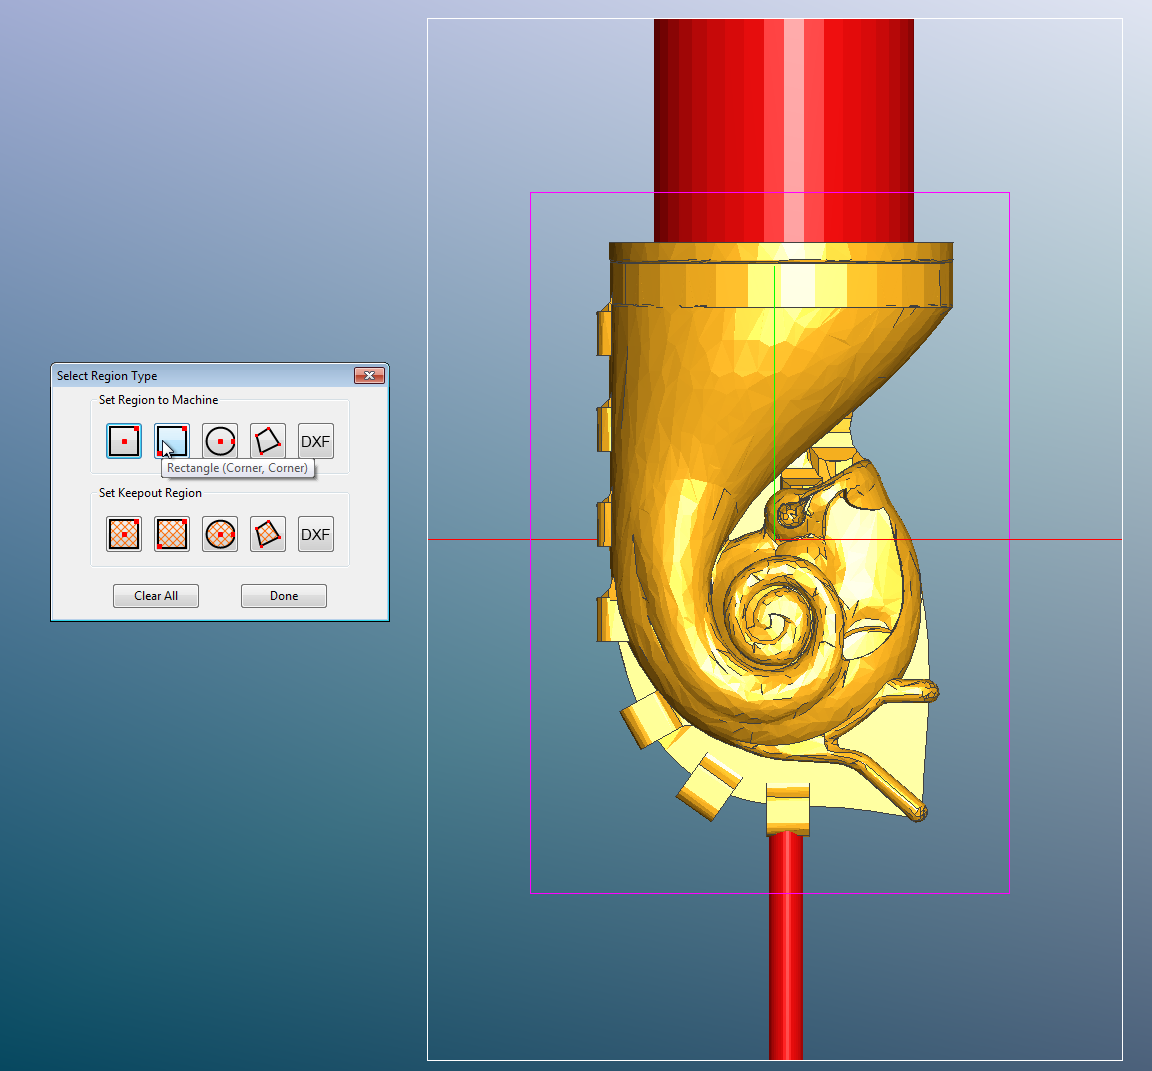
- The Machining Region has been defined to retain a frame around the work.
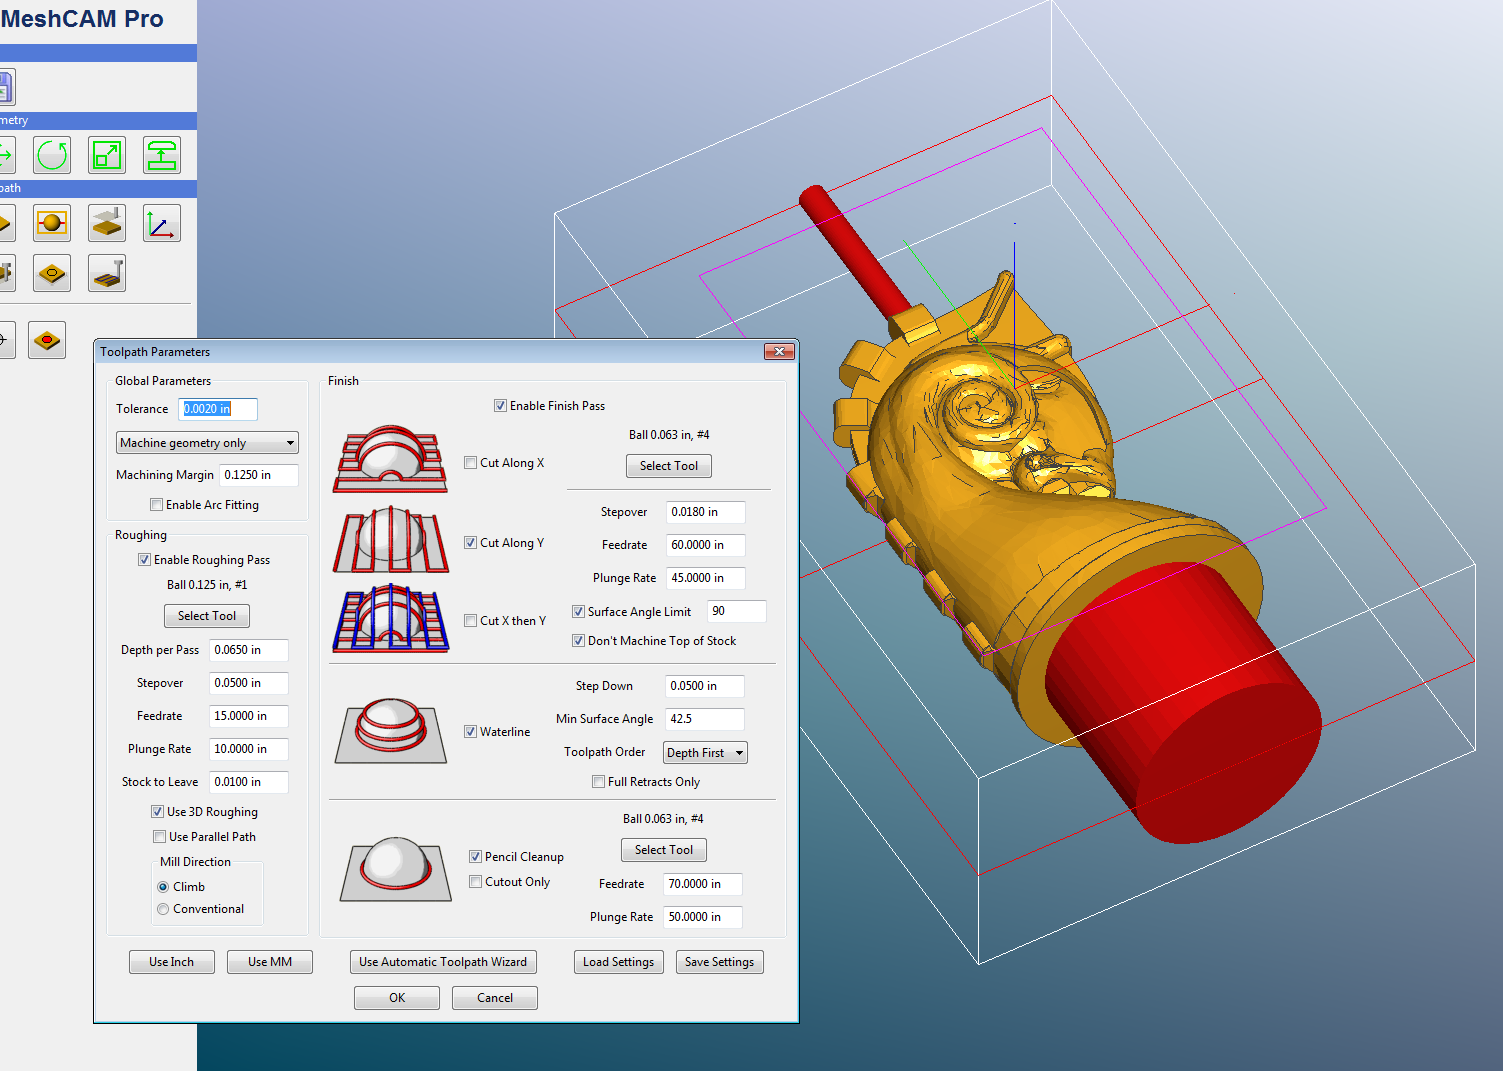
- Toolpath has been set to cut using a .125" ball and a .063" ball and cutting the “Geometry only” takes about 25 minutes per side. The .25" cutter can be used for roughing and takes 20 minutes to cut each side.
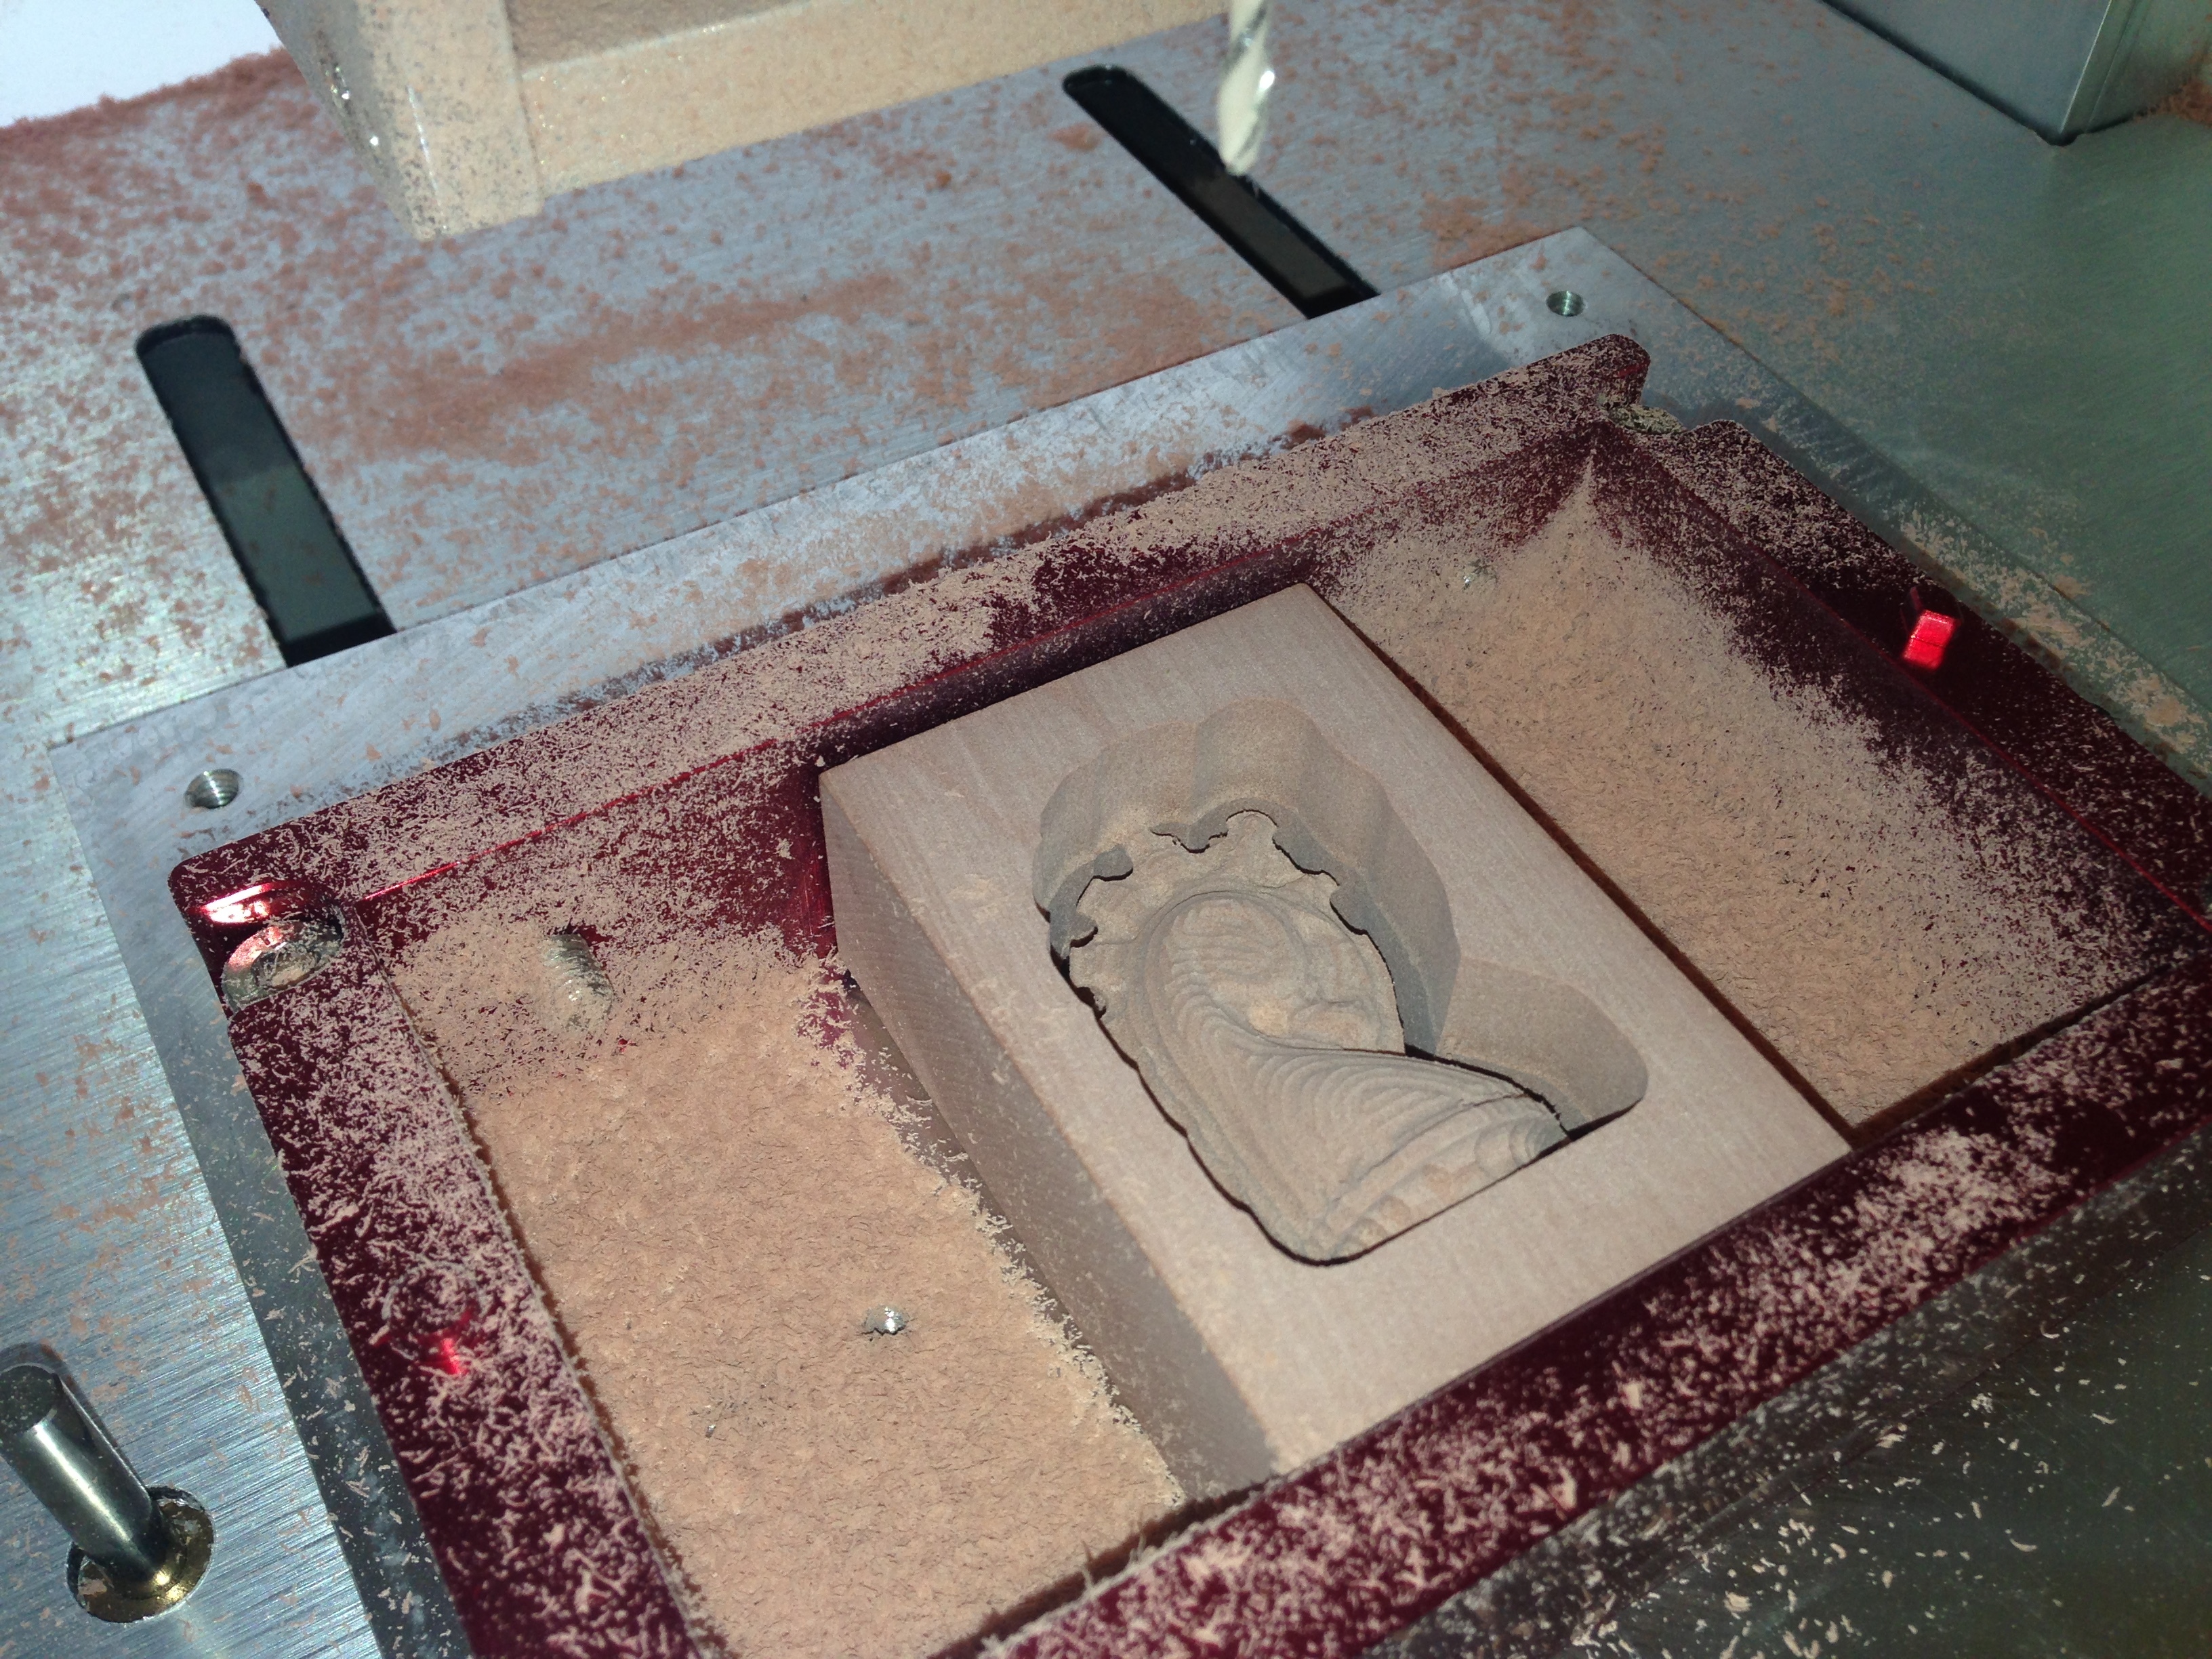
Side A is compete. Save your meshcam job as side A.

For the Second side (Side B) we need to Rotate the Part Geometry in Meshcam.
The Flip Frame is designed to rotate the part 180 degrees around the X axis.
(Use the view/ from above tab to ensure you have flipped the part correctly)
You will have to repeat your setup details again, and although it takes some time, there are situations where it would have to be done individually, like if you wanted to do a 4 sided job, but lets get to that later…
Setting ZERO for 2 sided machining on the Nomad.
To start 3d Machining with the Nomad you need to:
- Jog to the Center of your Flip Frame Stock using the Rapid to Center position in Carbide Motion.
- Use X axis and Z axis jogging to define the center top of the stock as ZERO.
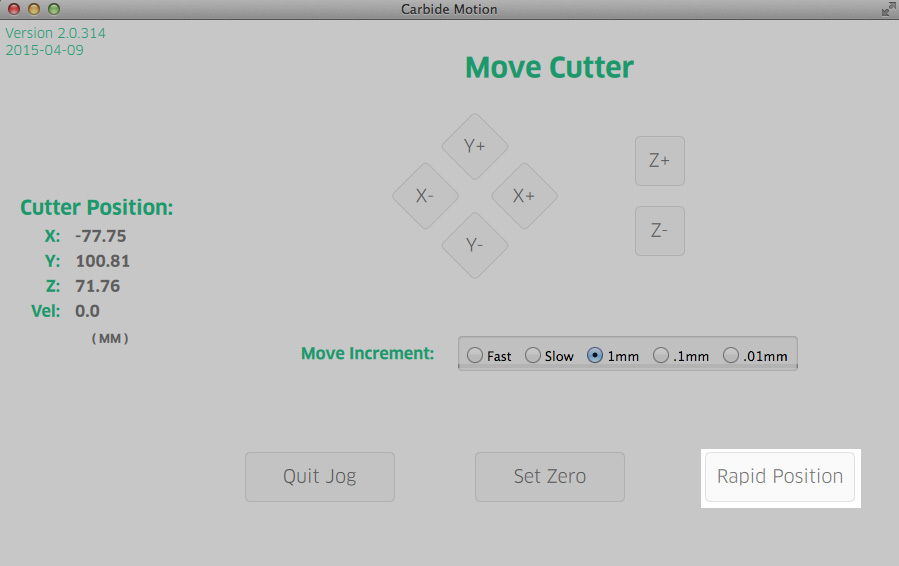
Use the Rapid Position Button in Carbide Motion
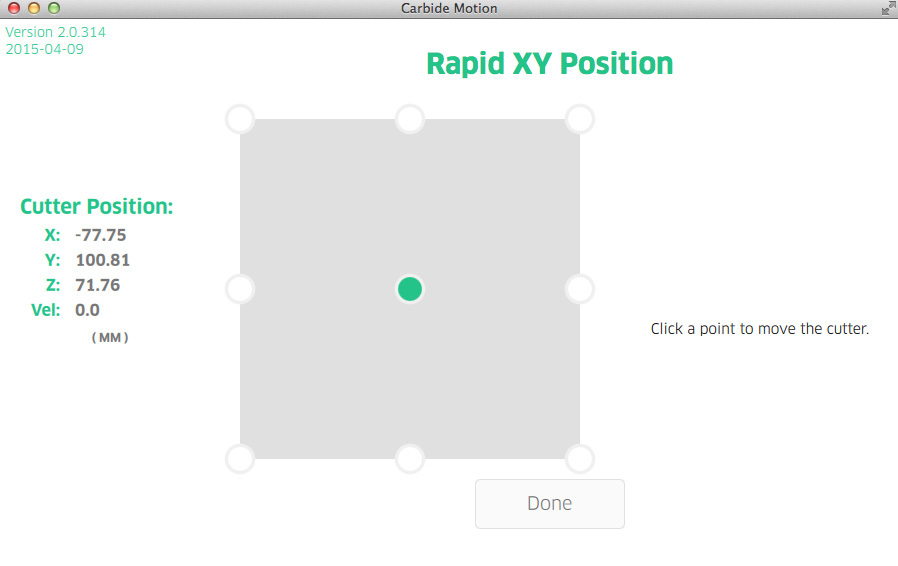
- Jog to the Center of the Nomad table using the Rapid to Center position.
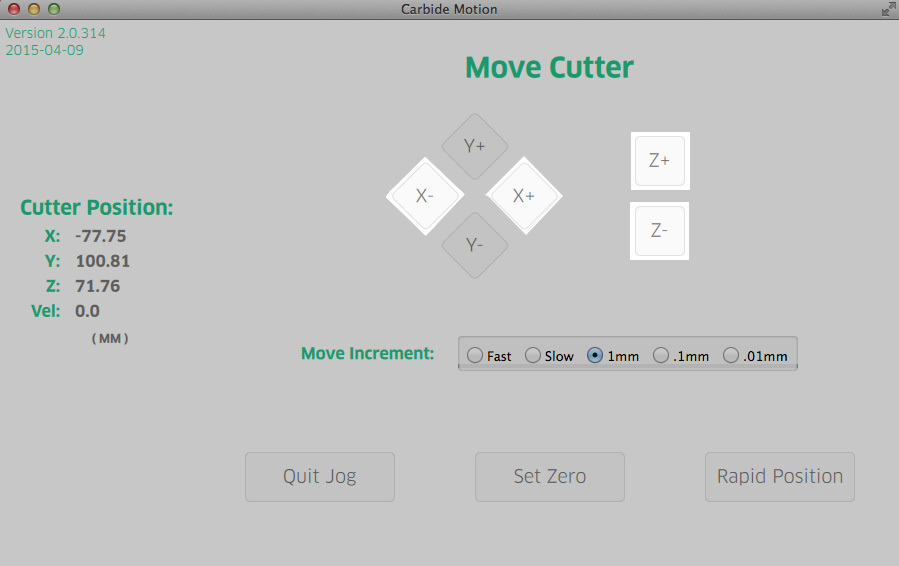
ONLY use the X and The Z buttons only Jog to the Top Center of the stock

Using the X and The Z buttons only Jog to the Top Center of the stock
Do not change the Y axis location.
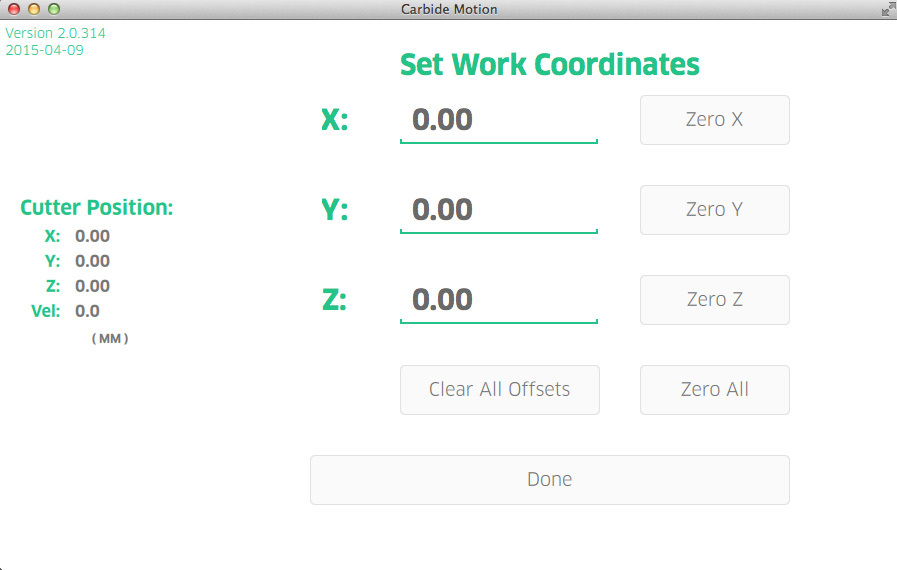
Set all X,Y,Z axis to ZERO in Carbide Motion.
Next step is Load the Side A job.
Note:
The Frame flips around the X axis, so this is how the frame and model in meshcam will look from above:

Side A orientation of the Model and Flip Frame.

Side B orientation of the Model and Flip Frame.
2 sided machining, accurately and repeatably is a very powerful feature.
With the Carbide 3D Flip Frame the world of potential is expanded!
To get you started here are the files I used.
Happy Machining!
FLIP Knight CHESS B.mcf (579.2 KB)
FLIP Knight CHESS A.mcf (579.2 KB)
3D WAX 125 063.tps (2.1 KB)
3D RENSHAPE 25 063.tps (2.1 KB)
And the Female Figurine
Female figure B.mcf (699.0 KB)
Female figure A.mcf (699.0 KB) Files

 , my point was that instead of running it as a 3D job, if you ran it as a 2 sided job. In the video for example that Darren Lafreniere did, he milled the fan that way. He did tho need to shim the stock to be in the middle of the frame, hence my question. Apollo mentioned he was going to do a do a Meshcam 2 sided machining tutorial (I presume with the flip frame) but didn’t get around to it. Thanks