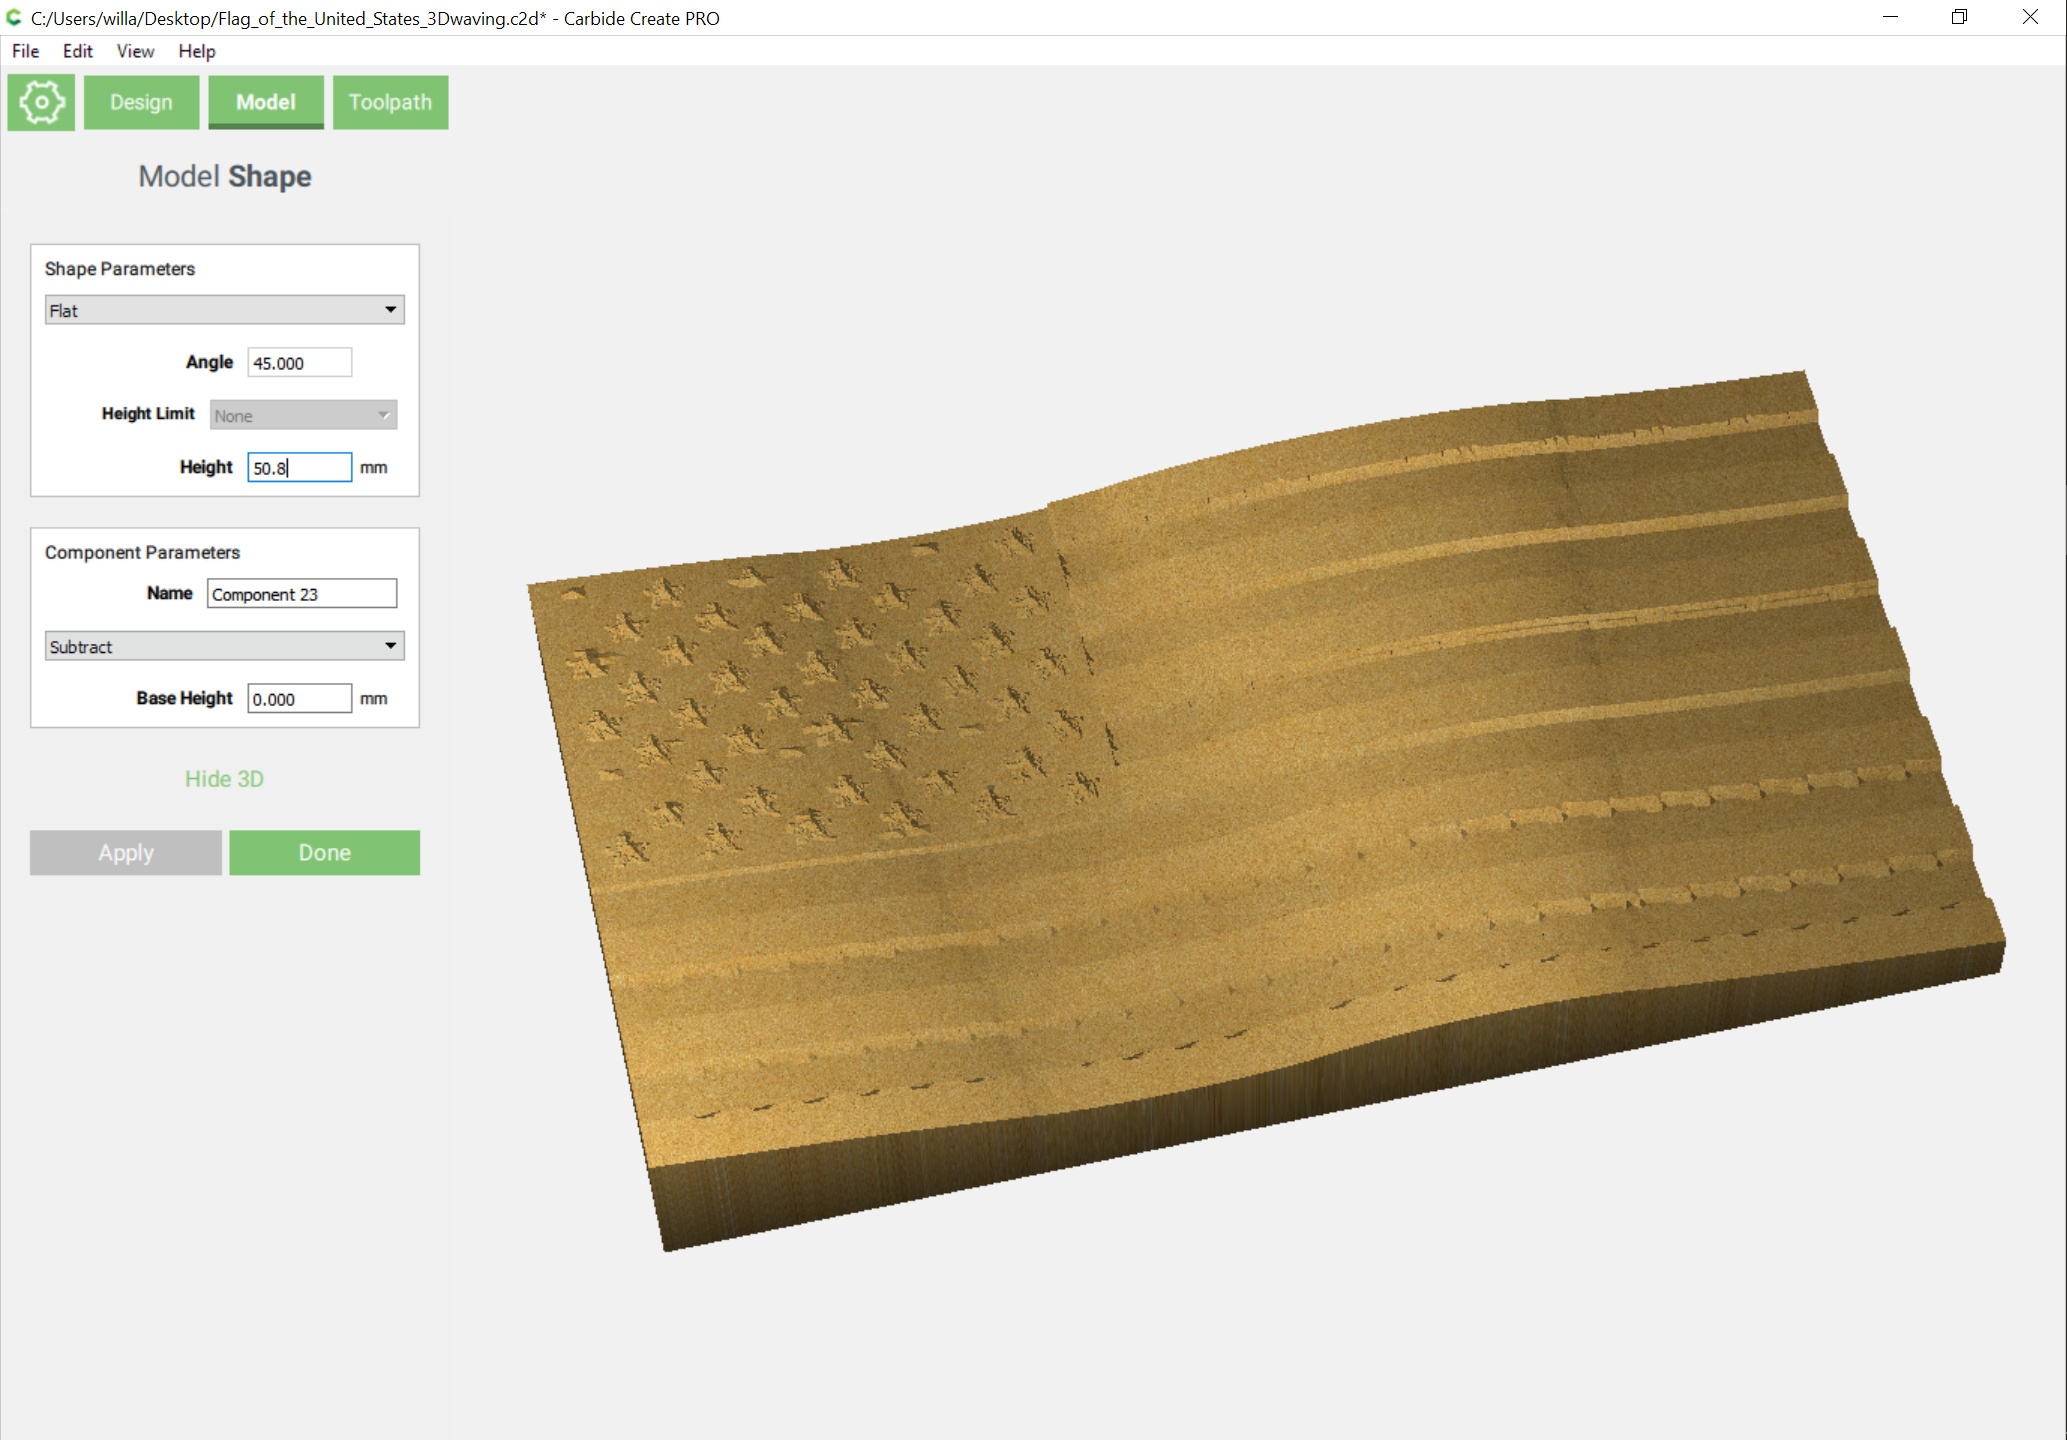
Carbide Create Pro wavy flag

I’m new to Carbide Create Pro, but I decided to give it try to see if I might be able to create something like what you want.

I started with a grayscale wave pattern (I didn’t spend much time on this, but it didn’t come out too badly):

I imported an SVG of the US flag, then I created a base component selecting the grayscale image as a texture. For the stripes, field and stars I Added and Subtracted components as necessary to create the model.

Here’s the file for reference:

US Flag w-Wave v2.c2d (1.0 MB)

7 Likes

I’m going to try this right now if I can figure out what exactly your telling me to do… Lol

I’m trying to use your example and reproduce it a little bigger … CAN YOU PLEASE link me to the right grayscale pattern.
Second a little bit more description of what you did for us new to CAD/CAM everything folks.
Lastly thank you for helping me with this. I may never make a flag but I will use the ideas.

The only thing I can’t figure out is how do you draw the greyscale image. What program did you use?

I used Photoshop to make the grayscale image, although I did it very quickly and it’s not very good. If you have Windows 10, you can use Paint3D to make one.

In Paint3D, use the Spraycan brush and move the slider to a pretty big Thickness. Select the light gray color and draw some wide stripes:


Pick the darker gray color and reduce the thickness and draw in the middle of each gray stripe. You want to make a gradient from white to dark gray or black. Adjust the Opacity slider if necessary to make the gradient smoother:

Save it as a JPG or PNG file.
There are better ways to make this kind of texture, but this gets the job done.

2 Likes

@CCCnc: You should be able to use the grayscale pattern I attached in this thread if you click download. You should also be able to edit the .c2d file I attached and make it any size you want. Once you have resized your job, select and scale up the vector image of the flag. Disable or delete the existing Base component, since you want to resize it. Select the vector that defines the border of the job (the rectangle defining the shape of the flag) and click the Texture button in the Model tab. Select the texture image you downloaded or created and adjust the Texture Parameters until you get what you want. You can click Apply and Show 3D after each adjustment to see what it will look like. I used an angle of 0° and adjusted the XY Scale of the texture until it filled the flag shape. Base Height is the starting thickness and Texture Height is how high the waves will be. Adjust those to your liking.

Texture parameters:

3D view of the texture:

I hope that helps. Once you figure out the texture feature, adding other shapes can be figured out. You are basically adding or subtracting shapes one on top of another to create the overall shape.

3 Likes

I think I’ve got the idea of how to do it but getting the grayscale download or created is what I’m having trouble with.

Ok… I don’t know what I’m doing wrong.
I went to paint 3d drew the same kind of grayscale pattern… Saved it a png. … Then I open it as a texture and it looks like this.

@CCCnc: Look at the image I attached of the texture parameters. When you first select the texture file you will see that list of parameters. It looks like your texture file is smaller than the flag and so it is tiling a number of times to fill in the whole flag. It also looks like it’s rotated, so you will want to change the angle to 0° and try an XY Scale of something like 400% and click Apply (not Done) to see how it looks. Adjust the XY Scale, Height and Base Height until the texture looks the way you want in the Show 3D view and then click Done.

3 Likes

Start with a vector version of the flag — one is available here:

Begin by drawing in a surrounding rectangle which is adequately larger to allow one to have some working room:

(Note that the next step will be easier if the rectangle lines up with the grid and snap to grid is turned on — adjust dimensions/placement as appropriate)

Draw in shapes using the polyline or curve tool which will define the midpoints of each ripple in the cloth:

Assuming one has the stock thickness set to 2" (50.8mm), begin the 3D modeling by adding the rectangle at half that thickness (25.4mm) as an initial median:

Select each polygon and apply a suitable 3D modeling to it:

Adjust the modeling of the polygons until one arrives at the desired effect.

Select each element of the flag and assign a suitable 3D modeling effect:

Then remove the surround material from the model:

Arriving at:

1 Like

Sure, that’s another way to do it…or…you could model the whole thing in Fusion 360, but that’s another thing entirely. :slightly_smiling_face:

1 Like

This black and white scale that you made is what has been holding me up for the last few years I know that sounds crazy but I have been banging my head and then giving up trying to make this damn thing. I have recently downloaded inkscape as I was told I could make it there but still that program is beyond my skill set. I do not want to use anyone else’s I do want to learn how to make what seems to be simple to other people and hell to me for some reason. I’m told I need to make a 256 grayscale file that will open in carbide create any help from you or anybody who sees this I would appreciate it greatly.

Did you ever figure out how to make the wavy flag?

@ChrisPowell has great greyscale wavy templates and videos to help!

I recommend using a pixel-based paint application to create the grayscale texture image. That would be something like Photoshop ($$$), Gimp (free but steep learning curve) or Paint3D (comes with Windows 10) like I showed in the example above. In the example, dark areas are raised and light areas are lowered.

Inkscape is for vector-based drawing (scalable graphics, not pixel-based). It can make gradients and graphics for textures, but it has a steep learning curve, as you’ve found out. The simple way I showed with Paint3D will get you there the quickest.

I have tried the windows version I did download gimp but I cannot figure out for the life of me how to make the freaking black and white file it’s simple to many people but it’s my numbing to me all I need is a few black lines that Fade Out and then create it into a file that car by create can open this has been the worst fing thing I’ve ever had to deal with with this CNC. I feel like carbide creates should be able to do this type of file integrated into the system but it don’t. I seen a tutorial on Windows paint shop where you use the spray can but again I cannot for the life of me figure out how to make it grayscale and create a faded black and white file STL

What do you wish to do which you are having difficulty with?

Please draw it up in 2D and describe what you are having difficulty with.

So, are you using Windows operating system? If so, carefully follow the images I attached above to create the faded black to white stripes. Look at the positions of the sliders for Thickness and Opacity and the colors used in each picture. Use only gray colors with the spray can. As far as i can tell, there is no way to make the file “grayscale” in Paint3D, but it doesn’t seem to matter. Once you have that, save it as a .PNG or .JPG image file. Once imported into Carbide Create as a texture, the dark areas will be raised and the light areas lowered.