I was having issues with excessive depth of cut that I finally tracked down to a worn leadscrew main nut/anti-backlash nut assembly, documented here: Z-Plus play/backlash question
Support was kind enough to expedite repair parts, it took about 20 mins to replace and was easy enough to do. Here are the steps for anyone else with the same problem.
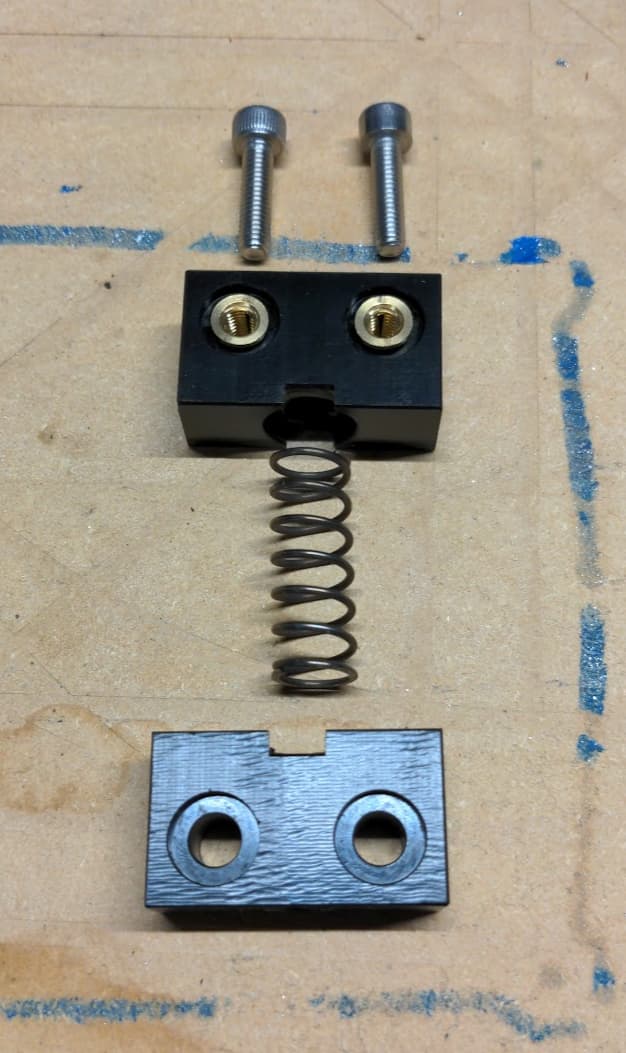
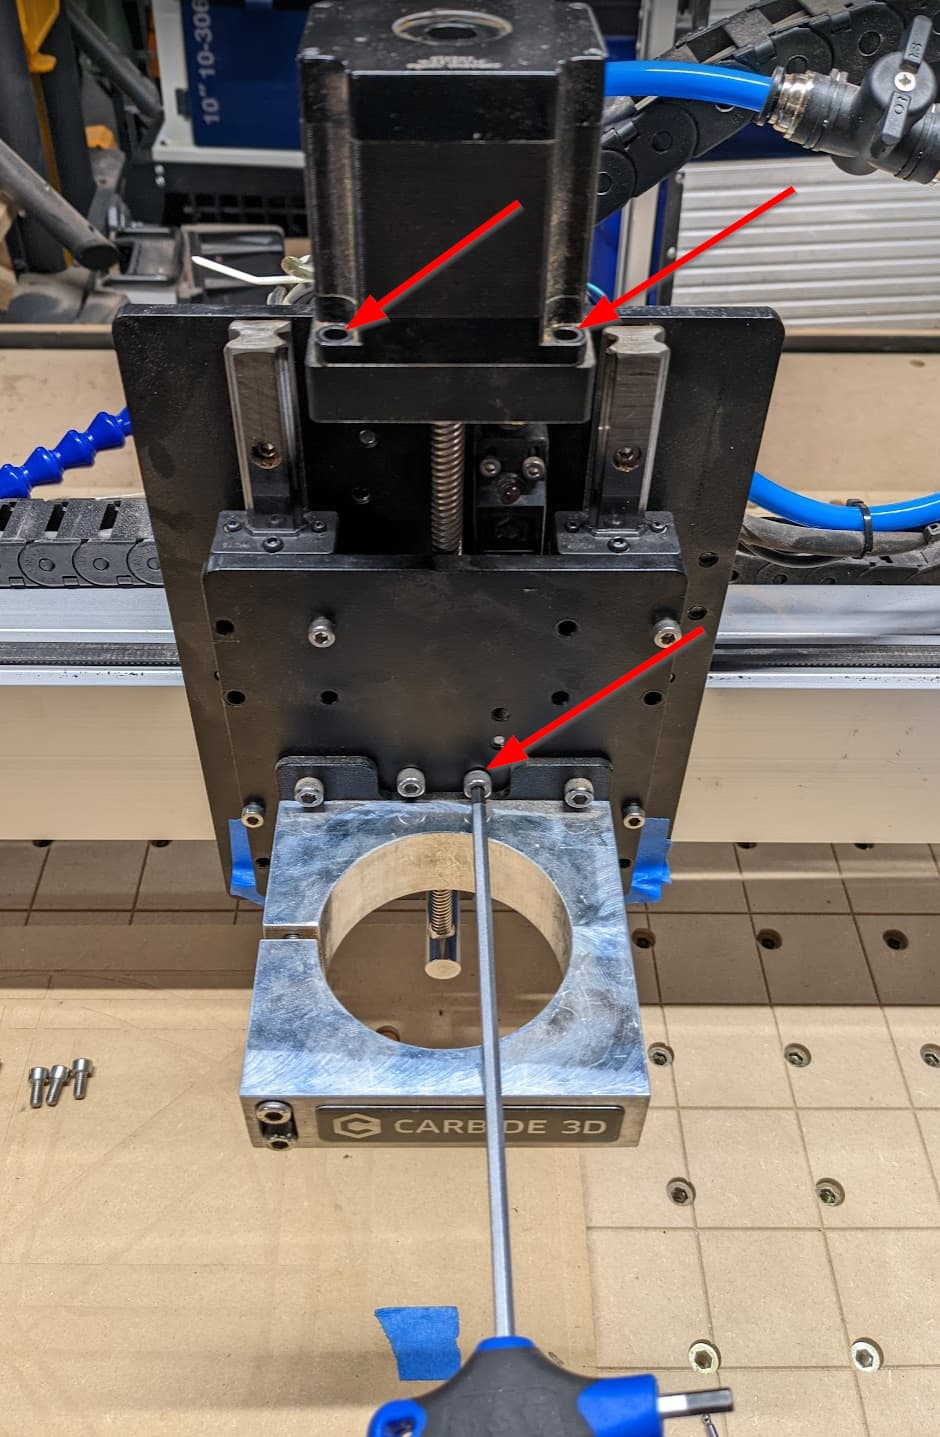
This is the assembly that needs replacement. Note that the nuts are plastic (feels like nylon or similar). The main nut is held on with the 2 screws and the anti-backlash is held in place by tension from the spring.
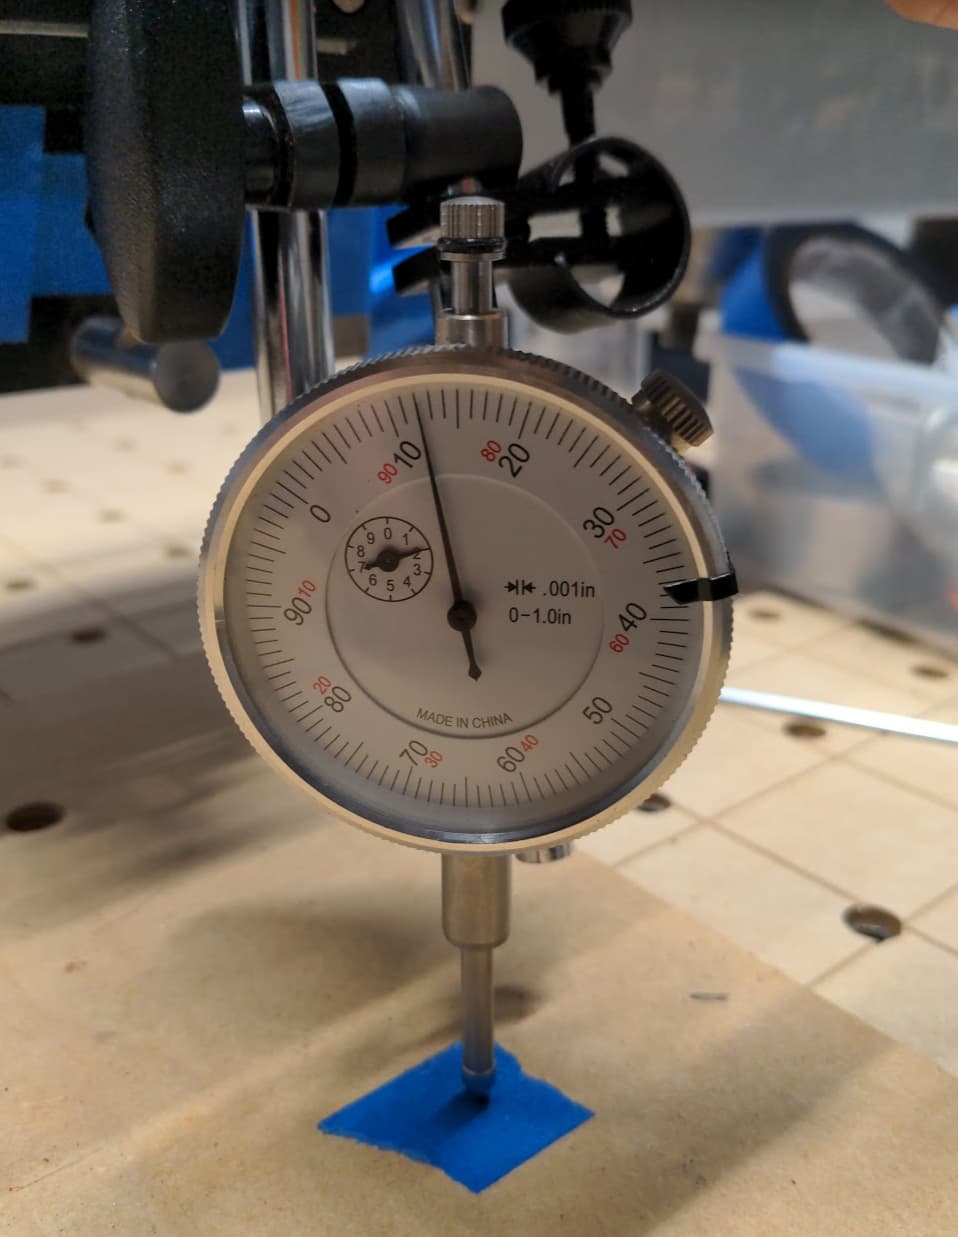
First, a quick dial gauge test on the original assembly:
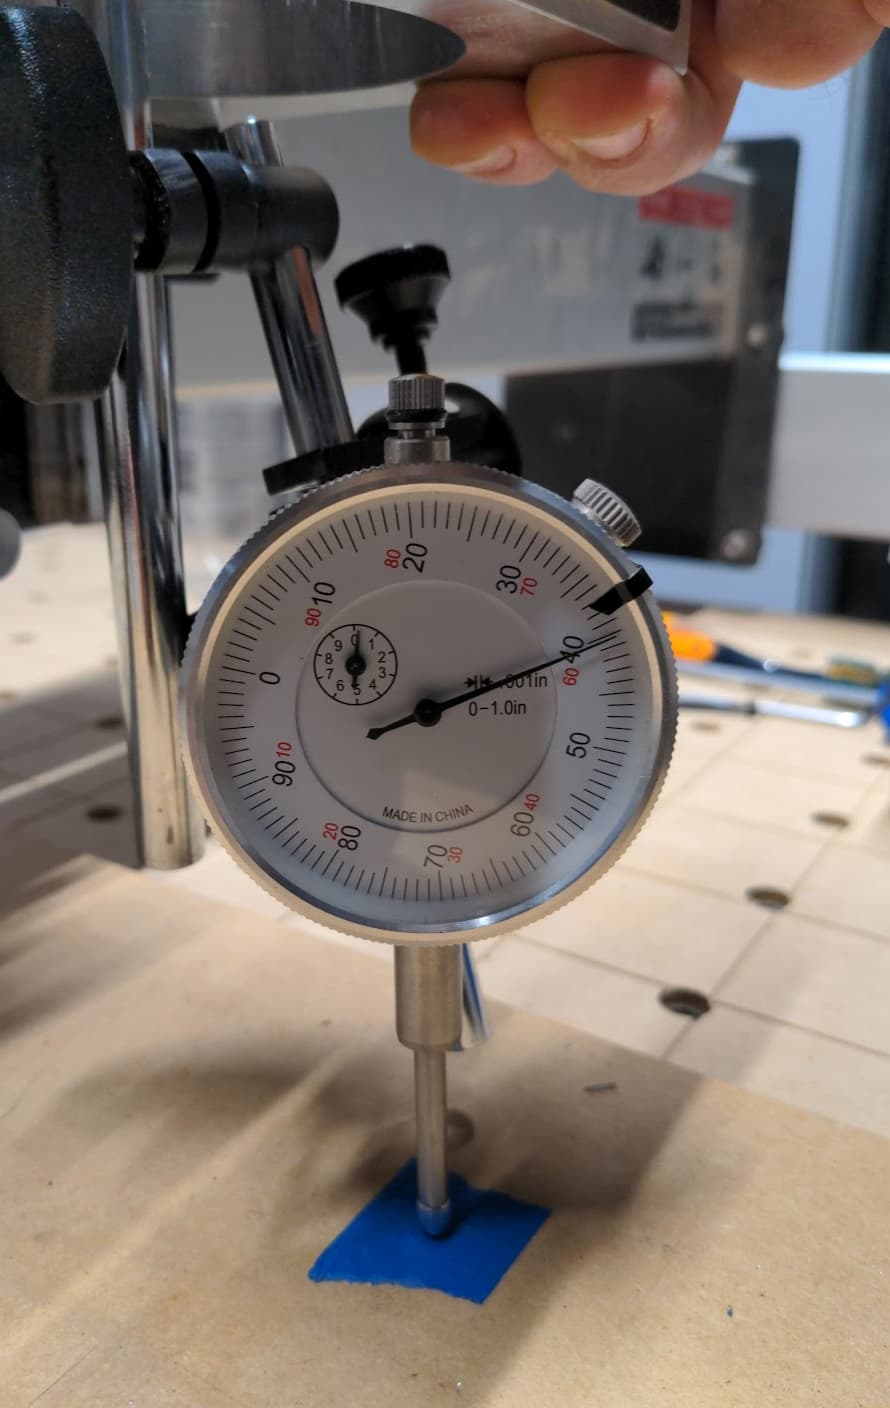

The left is with a gentle lift and the right light pressure and shows total play in the assembly of 0.020 inches / 0.51 mm.
- Disconnect power to your router
- Lower your Z axis to allow room to remove your router from the clamp
- Raise your Z axis a few centimeters
- Disconnect power to your CNC
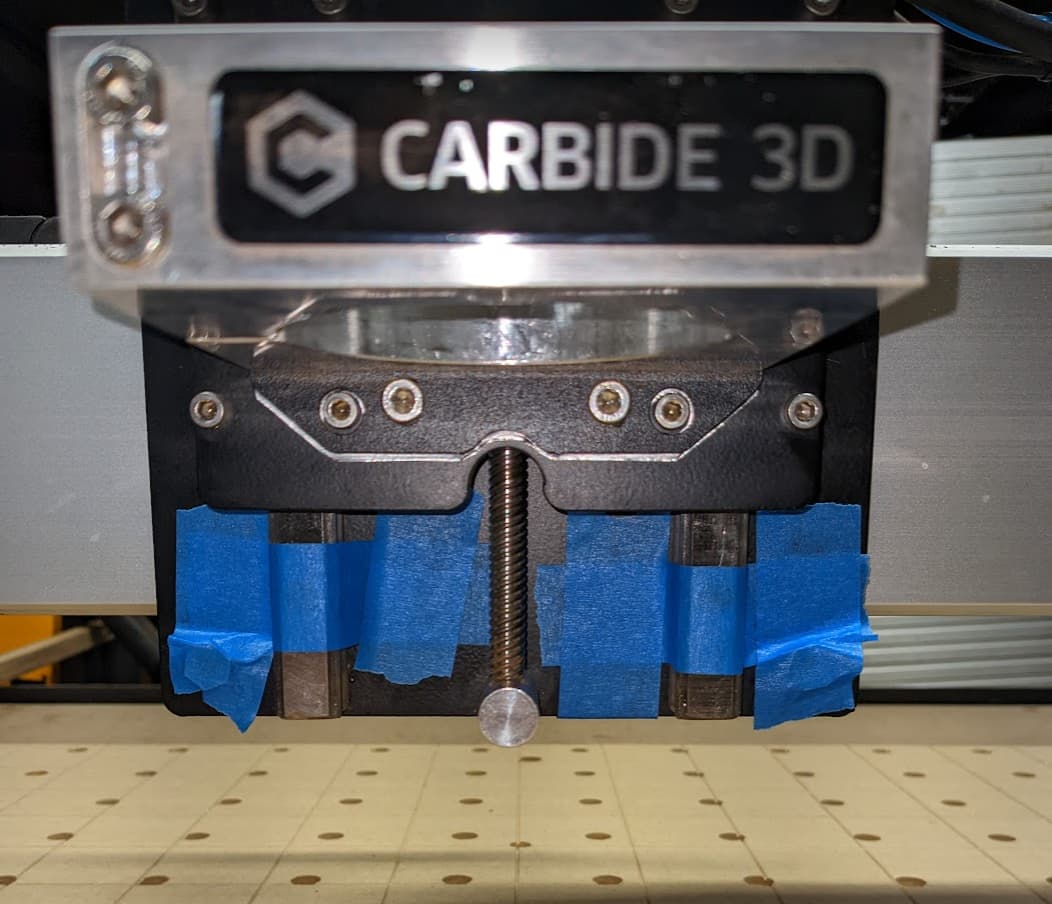
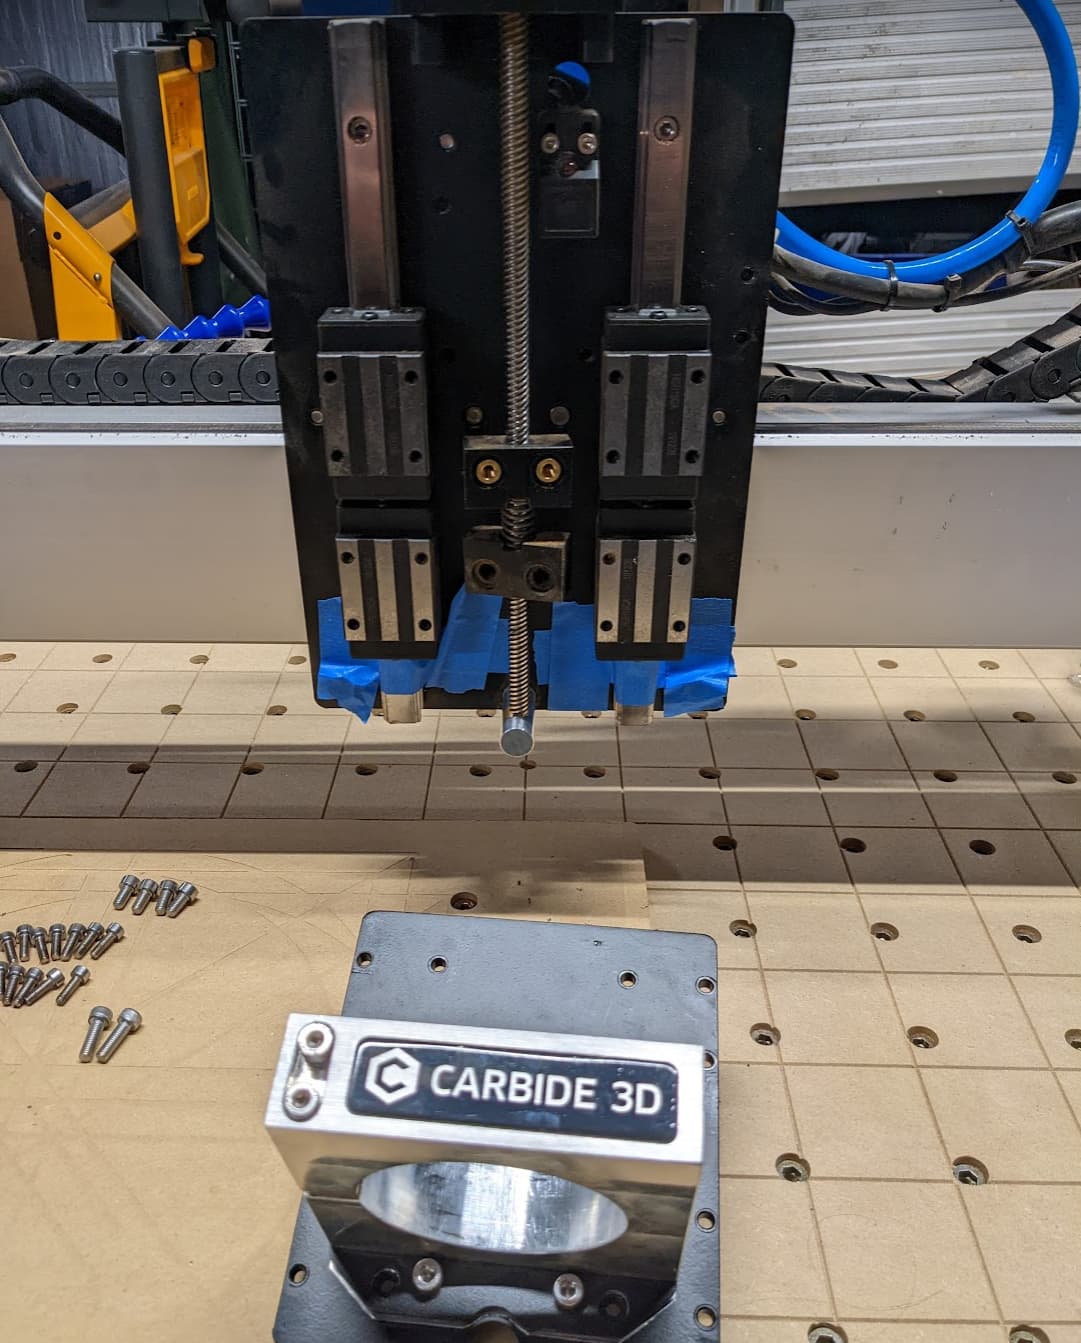
- Place blue tape across the bottom of the slide rails (this will keep the bearing slides from dropping off the end)
- Remove three of the screws from each bearing slide, loosen the 4th (note: the bottom slides only have 3 screws)
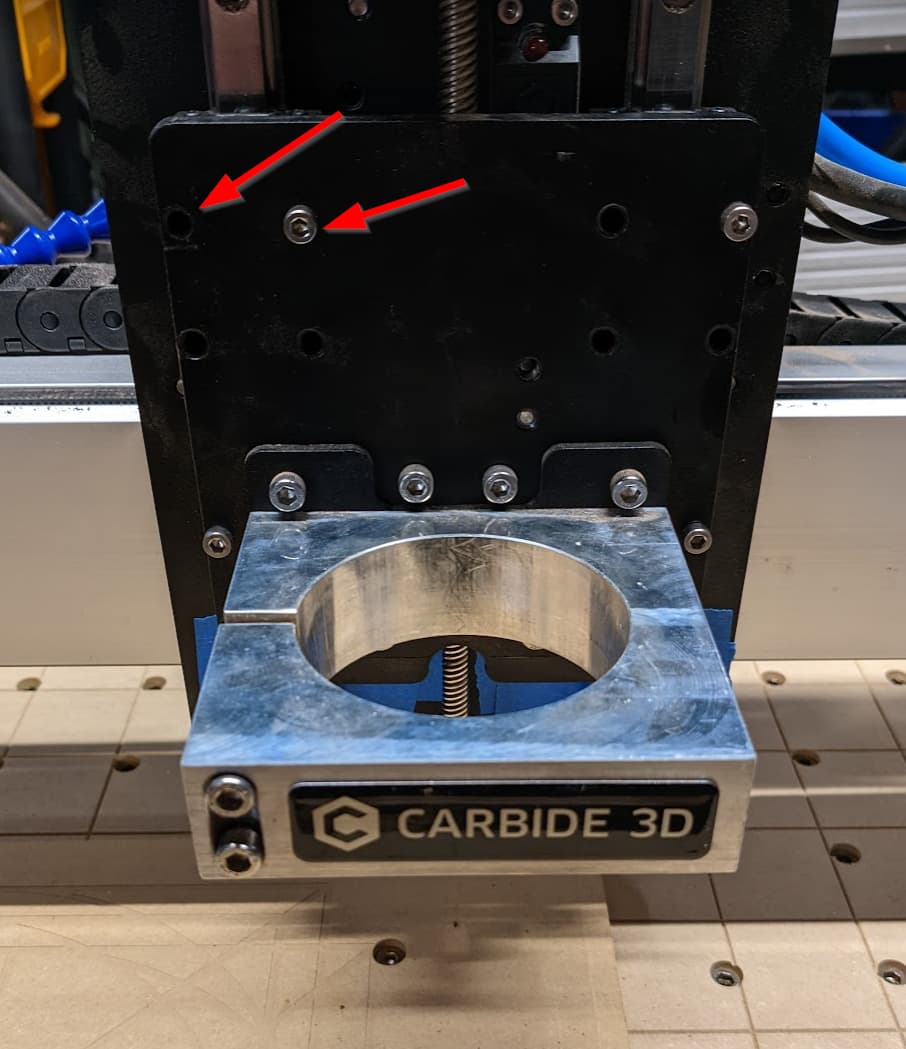
- Remove the 4 screws holding on the stepper motor
- Remove 1 screw holding on the main leadscrew nut and loosen the second screw
- Carefully remove the final screw holding each bearing slide, lower the brearing slide to rest on the tape (note: letting these fall off the bottom will cause the bearings to fly out and you to be very sad!)
- While supporting the carriage, remove the final nut holding it to the lead screw
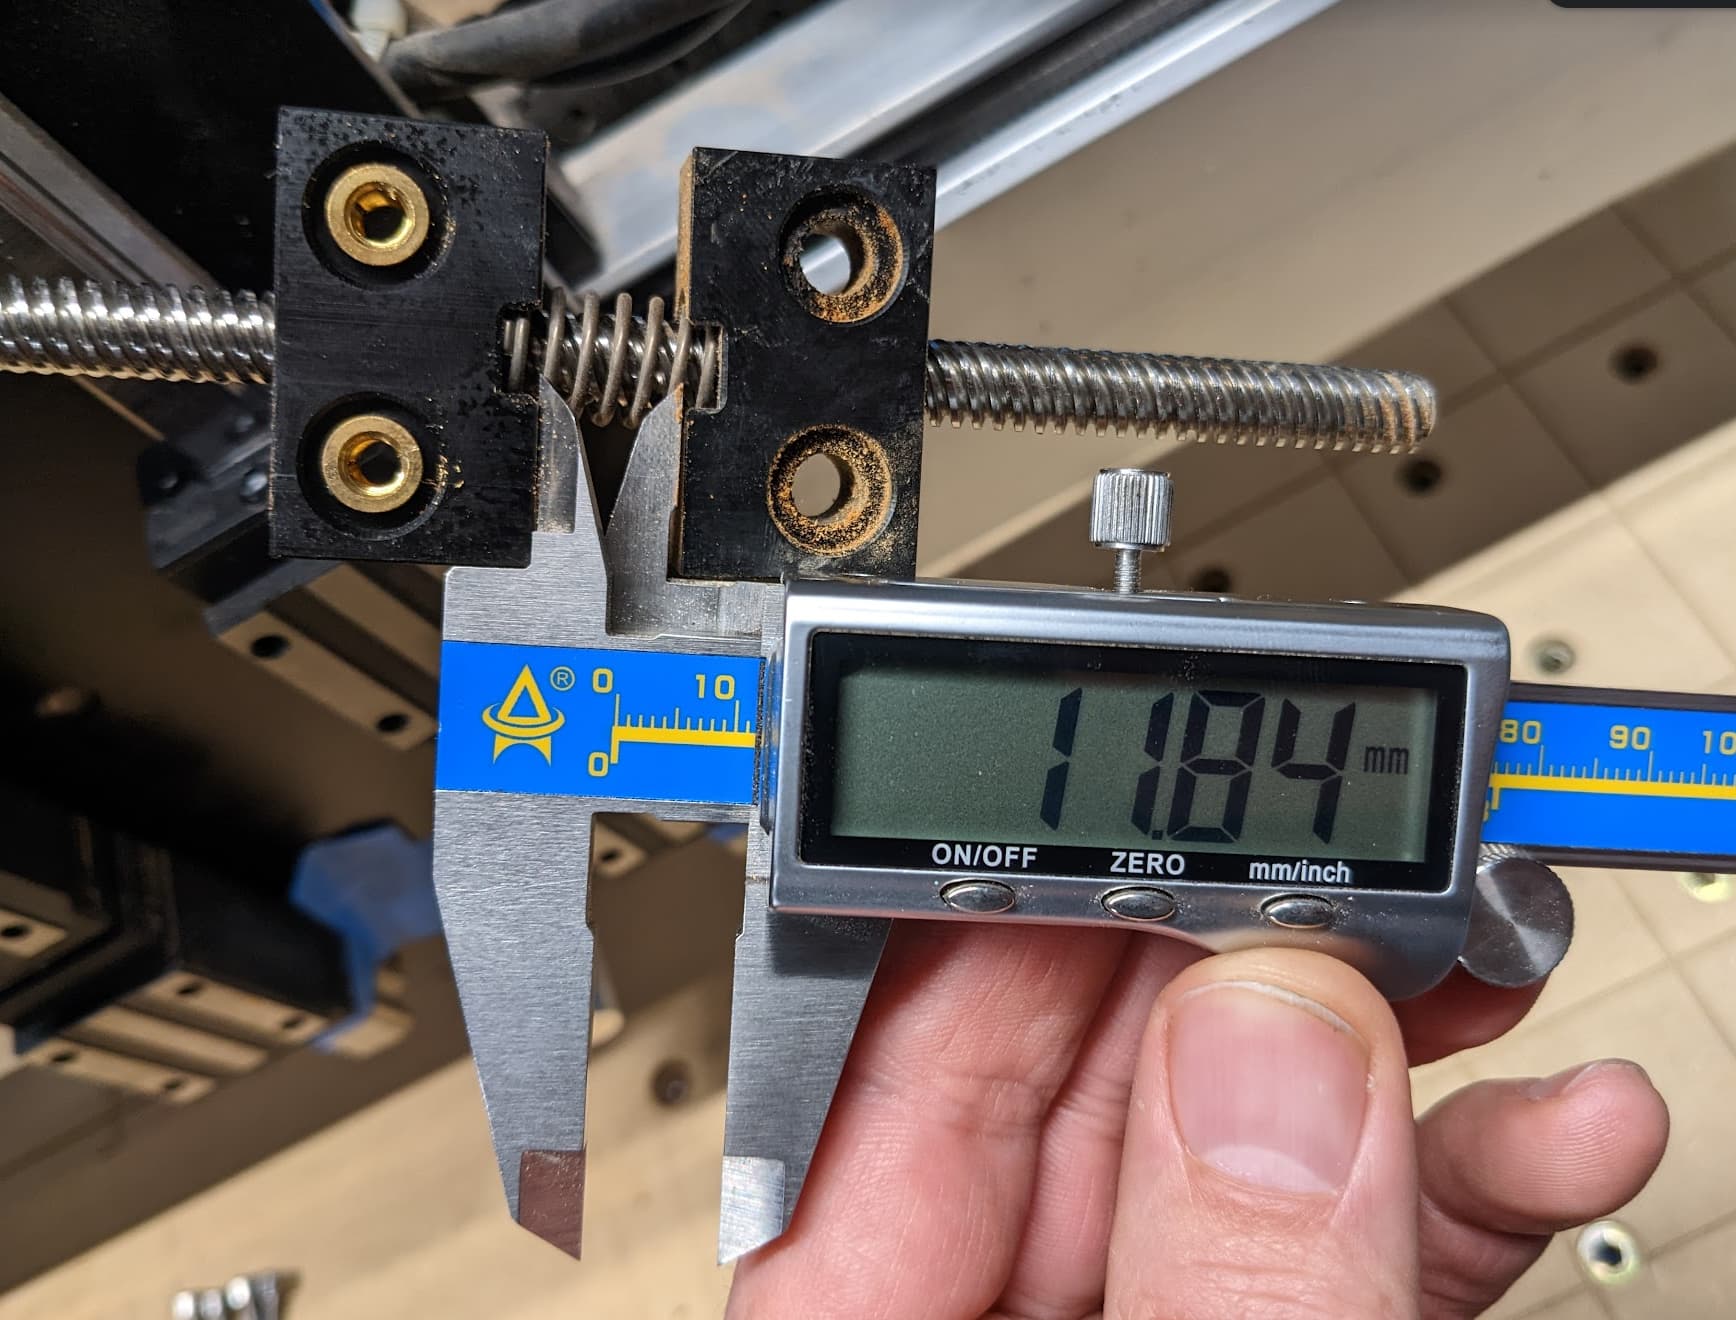
- Tilt the motor and screw away from the Z assembly, using calipers measure the spacing between the main nut and anti-backlash nut (mine was ~11.8mm)
- Remove both nuts and replace with the new ones, screw the bottom nut on to match the original spring compression distance
- Assemble in reverse by supporting the carriage and loosely reattaching the two screws into the main nut (note: these will be tight, the brass threads are split so they expand into the plastic as you insert the screw)
- Still supporting the carriage, put one screw loosely into each bearing slide and the 4 motor bolts
- Now add in the remain screws and begin snugging down each one
- Check all your bolts again and remove the blue tape
- Test with your dial gauge
Left is light lift and right is gentle pressure down, shows a movement of 0.005 inches / 0.13 mm, that’s an improvement of 0.015 inches / 0.38 mm. I can no longer feel the play in the nuts, big improvement! - Return power to the CNC and lower the Z axis to reinstall your router
- Run a homing sequence and then test the full movement of the Z axis

Here’s a video showing the difference, the top nut is the new one and the bottom nut is the old one. It is clearly sloppy on the screw.
I tried to get better photos of the threads, but I don’t have anything that would get me a clear picture to show the comparison or measure. Visually, it was clear the threads were half as thick compared to the new nut.

Ultimately, these are a consumable part. There are not any wipers to keep dust out (and I do run dust collection) and you’re not supposed to lube the screw (because that would attract dust and there are no wipers…). The friction of the plastic on the steel screw combined with the weight of the assembly and router mean this is destined to wear out. I had 150 hours on these, captured by SuperPID, but they probably started going out at half that. Because it’s a custom part, not something you can just order a few of an have on hand. Luckily C3D support sent it out free for me, hope they continue that.