I’ve found a couple of things that improved my results chamfering Aluminium on my machine
The effective feed rate as the chamfer toolpath runs round the edge of the hole can be way higher than the ‘feed rate’ shown in Fusion (I broke a few things that way…) I now slow down the feed rate to account for the effective speed
See the Haas video that Kevin linked to in this thread
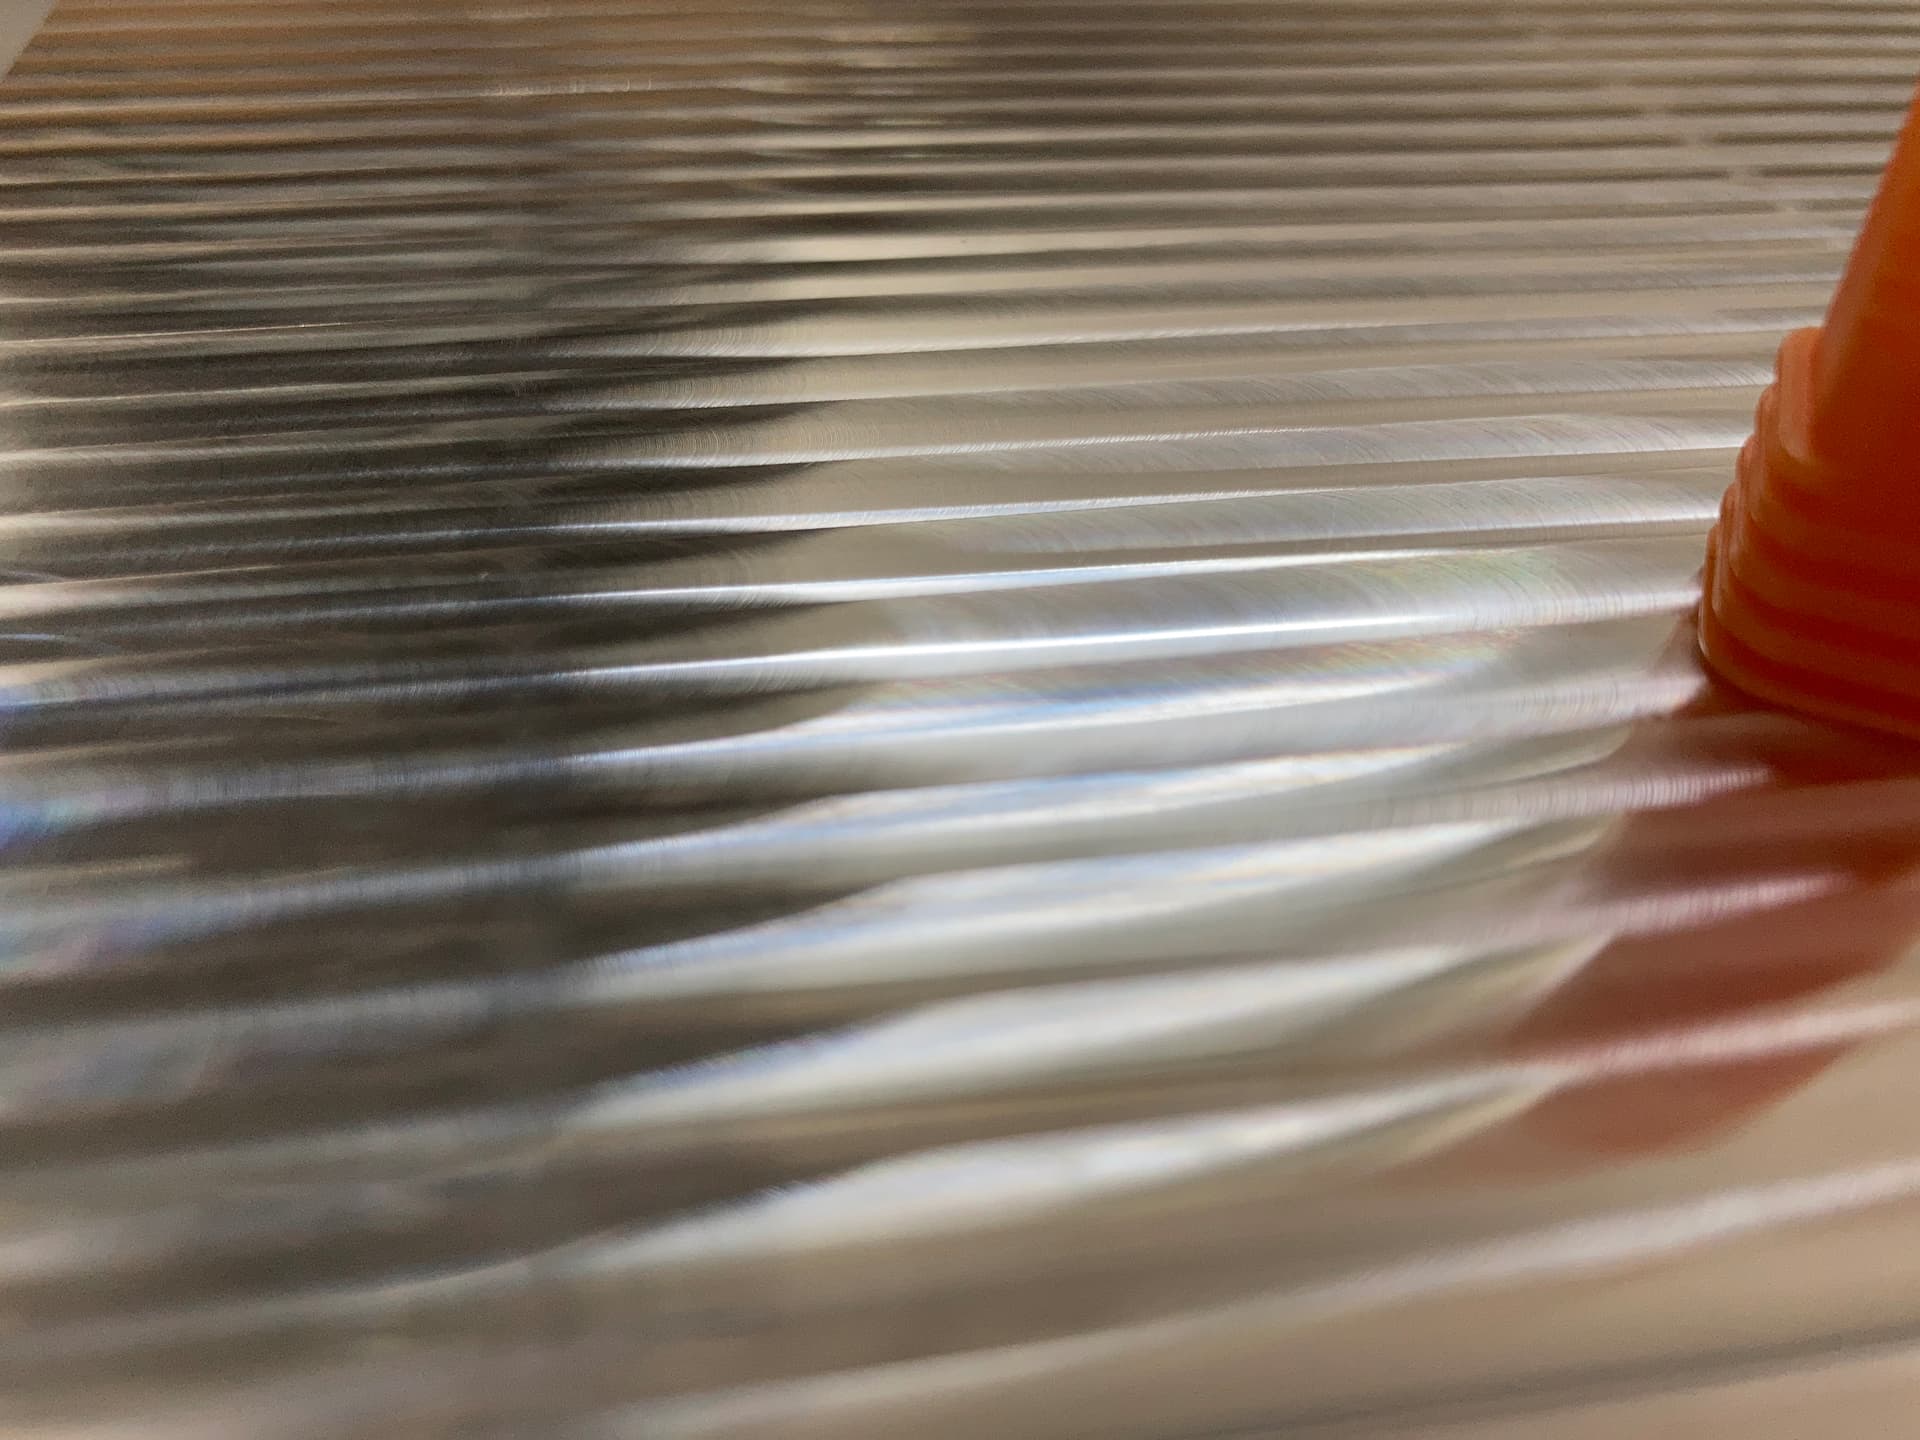
When using a stepover to do multiple passes of the chamfer cut, each stepover increases the surface area of the cut thanks to the geometry, so a small final stepover leaves small enough chatter for the repeat finishing pass to clean up
So far this is the best surface finish I got across a 6x6 block of 6061 aluminum with a uncoated 6mm single flute. You can see a slight line in 2 spots that highlight small flat spots on my V wheels from having them too tight and leaving the machine sitting for a month while I was recovering after surgery but you can’t feel them with your eyes closed.
It’s right at the small end of feed per tooth and low WoC too but I’ve found high RPM, low WoC and moving reasonably fast all leads up to a nice smooth chamfer.
I have a couple of 4mm and 6mm 45 degree 2 flute carbide cutters I got from eBay but the cutter I’ve used most for chamfers on wood and Aluminium is, believe it or not -
Which I’m sure you’re not meant to use on metal but it really does work well
I try to push the chamfer tip offset as far as the geometry allows me to in order to get a higher surface speed and not only wear down the very tip of the cutter.
3 Likes
Griff
(Well crap, my hypometric precursor device is blown…)
344
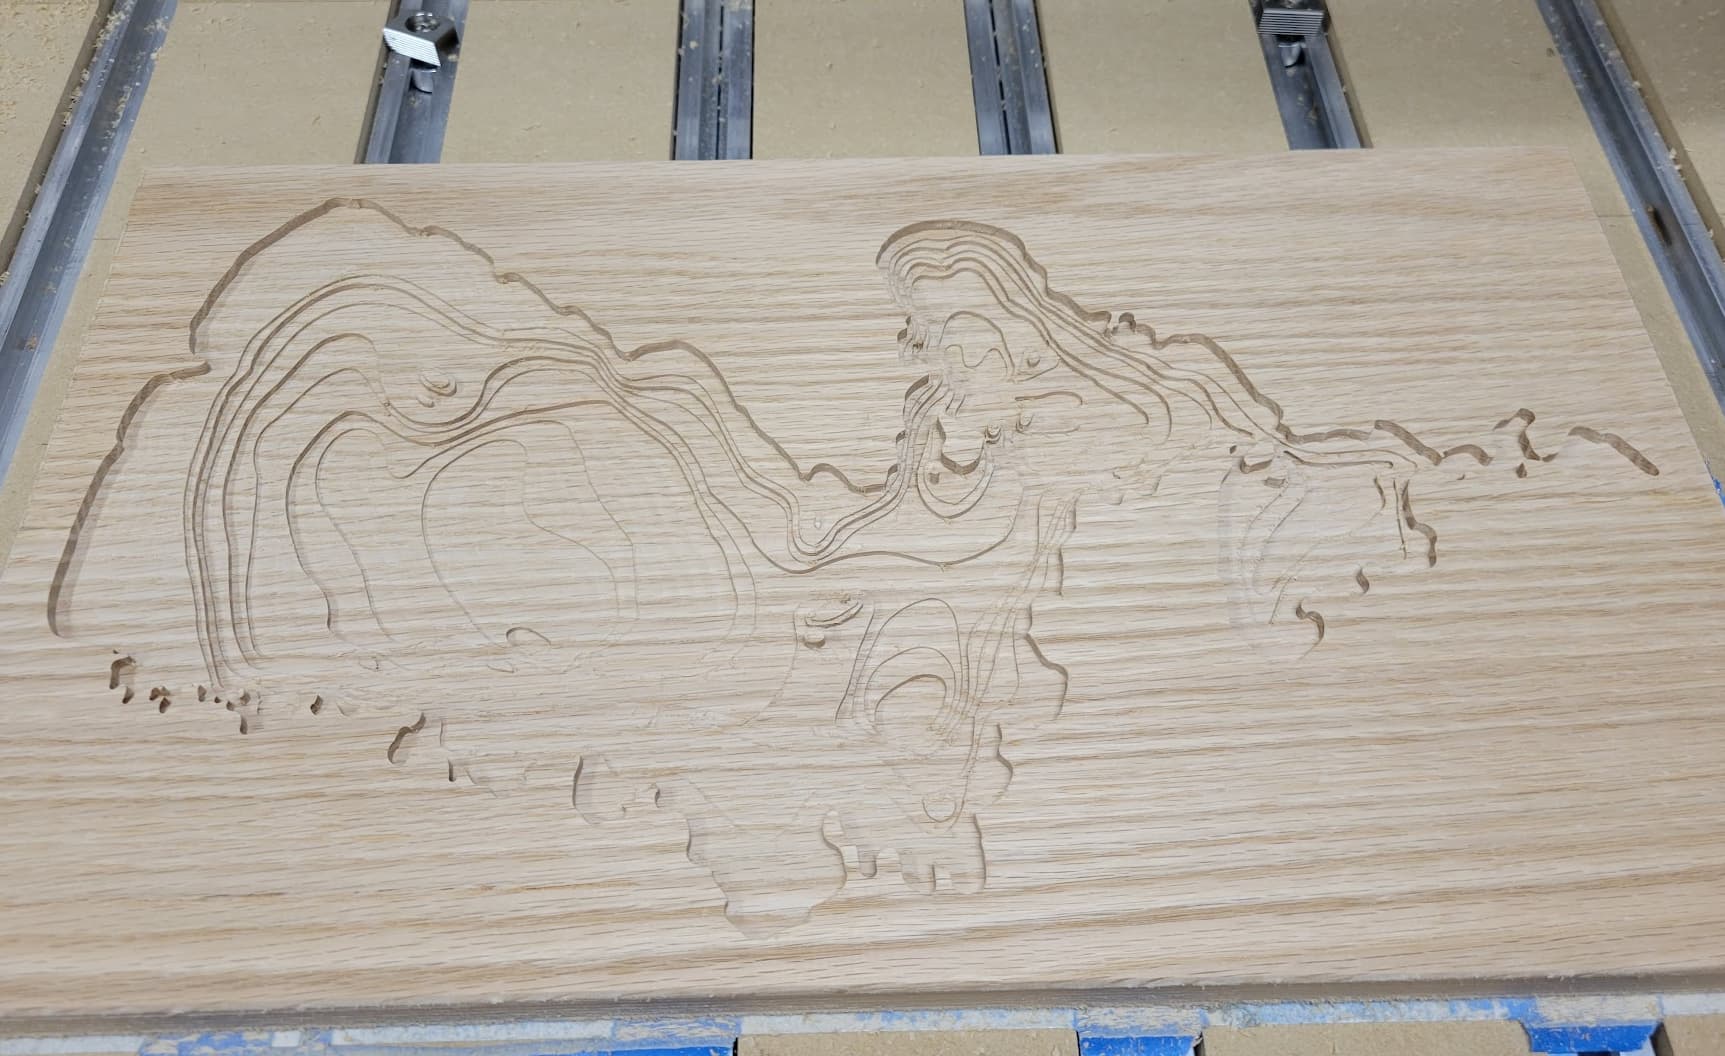
Another lake map test in pine. I’m going to test out the epoxy on this one now. The first depth (which is the lake contour) needs to be deeper (at least 3mm, maybe 5mm if the thickness of stock allows) as trying to pour epoxy with 1mm of clearance will be a nightmare, and I also need some allowance for sanding the top.
So well below the min step size for the motors then and not the accuracy constraint.
Thx
1 Like
Griff
(Well crap, my hypometric precursor device is blown…)
350
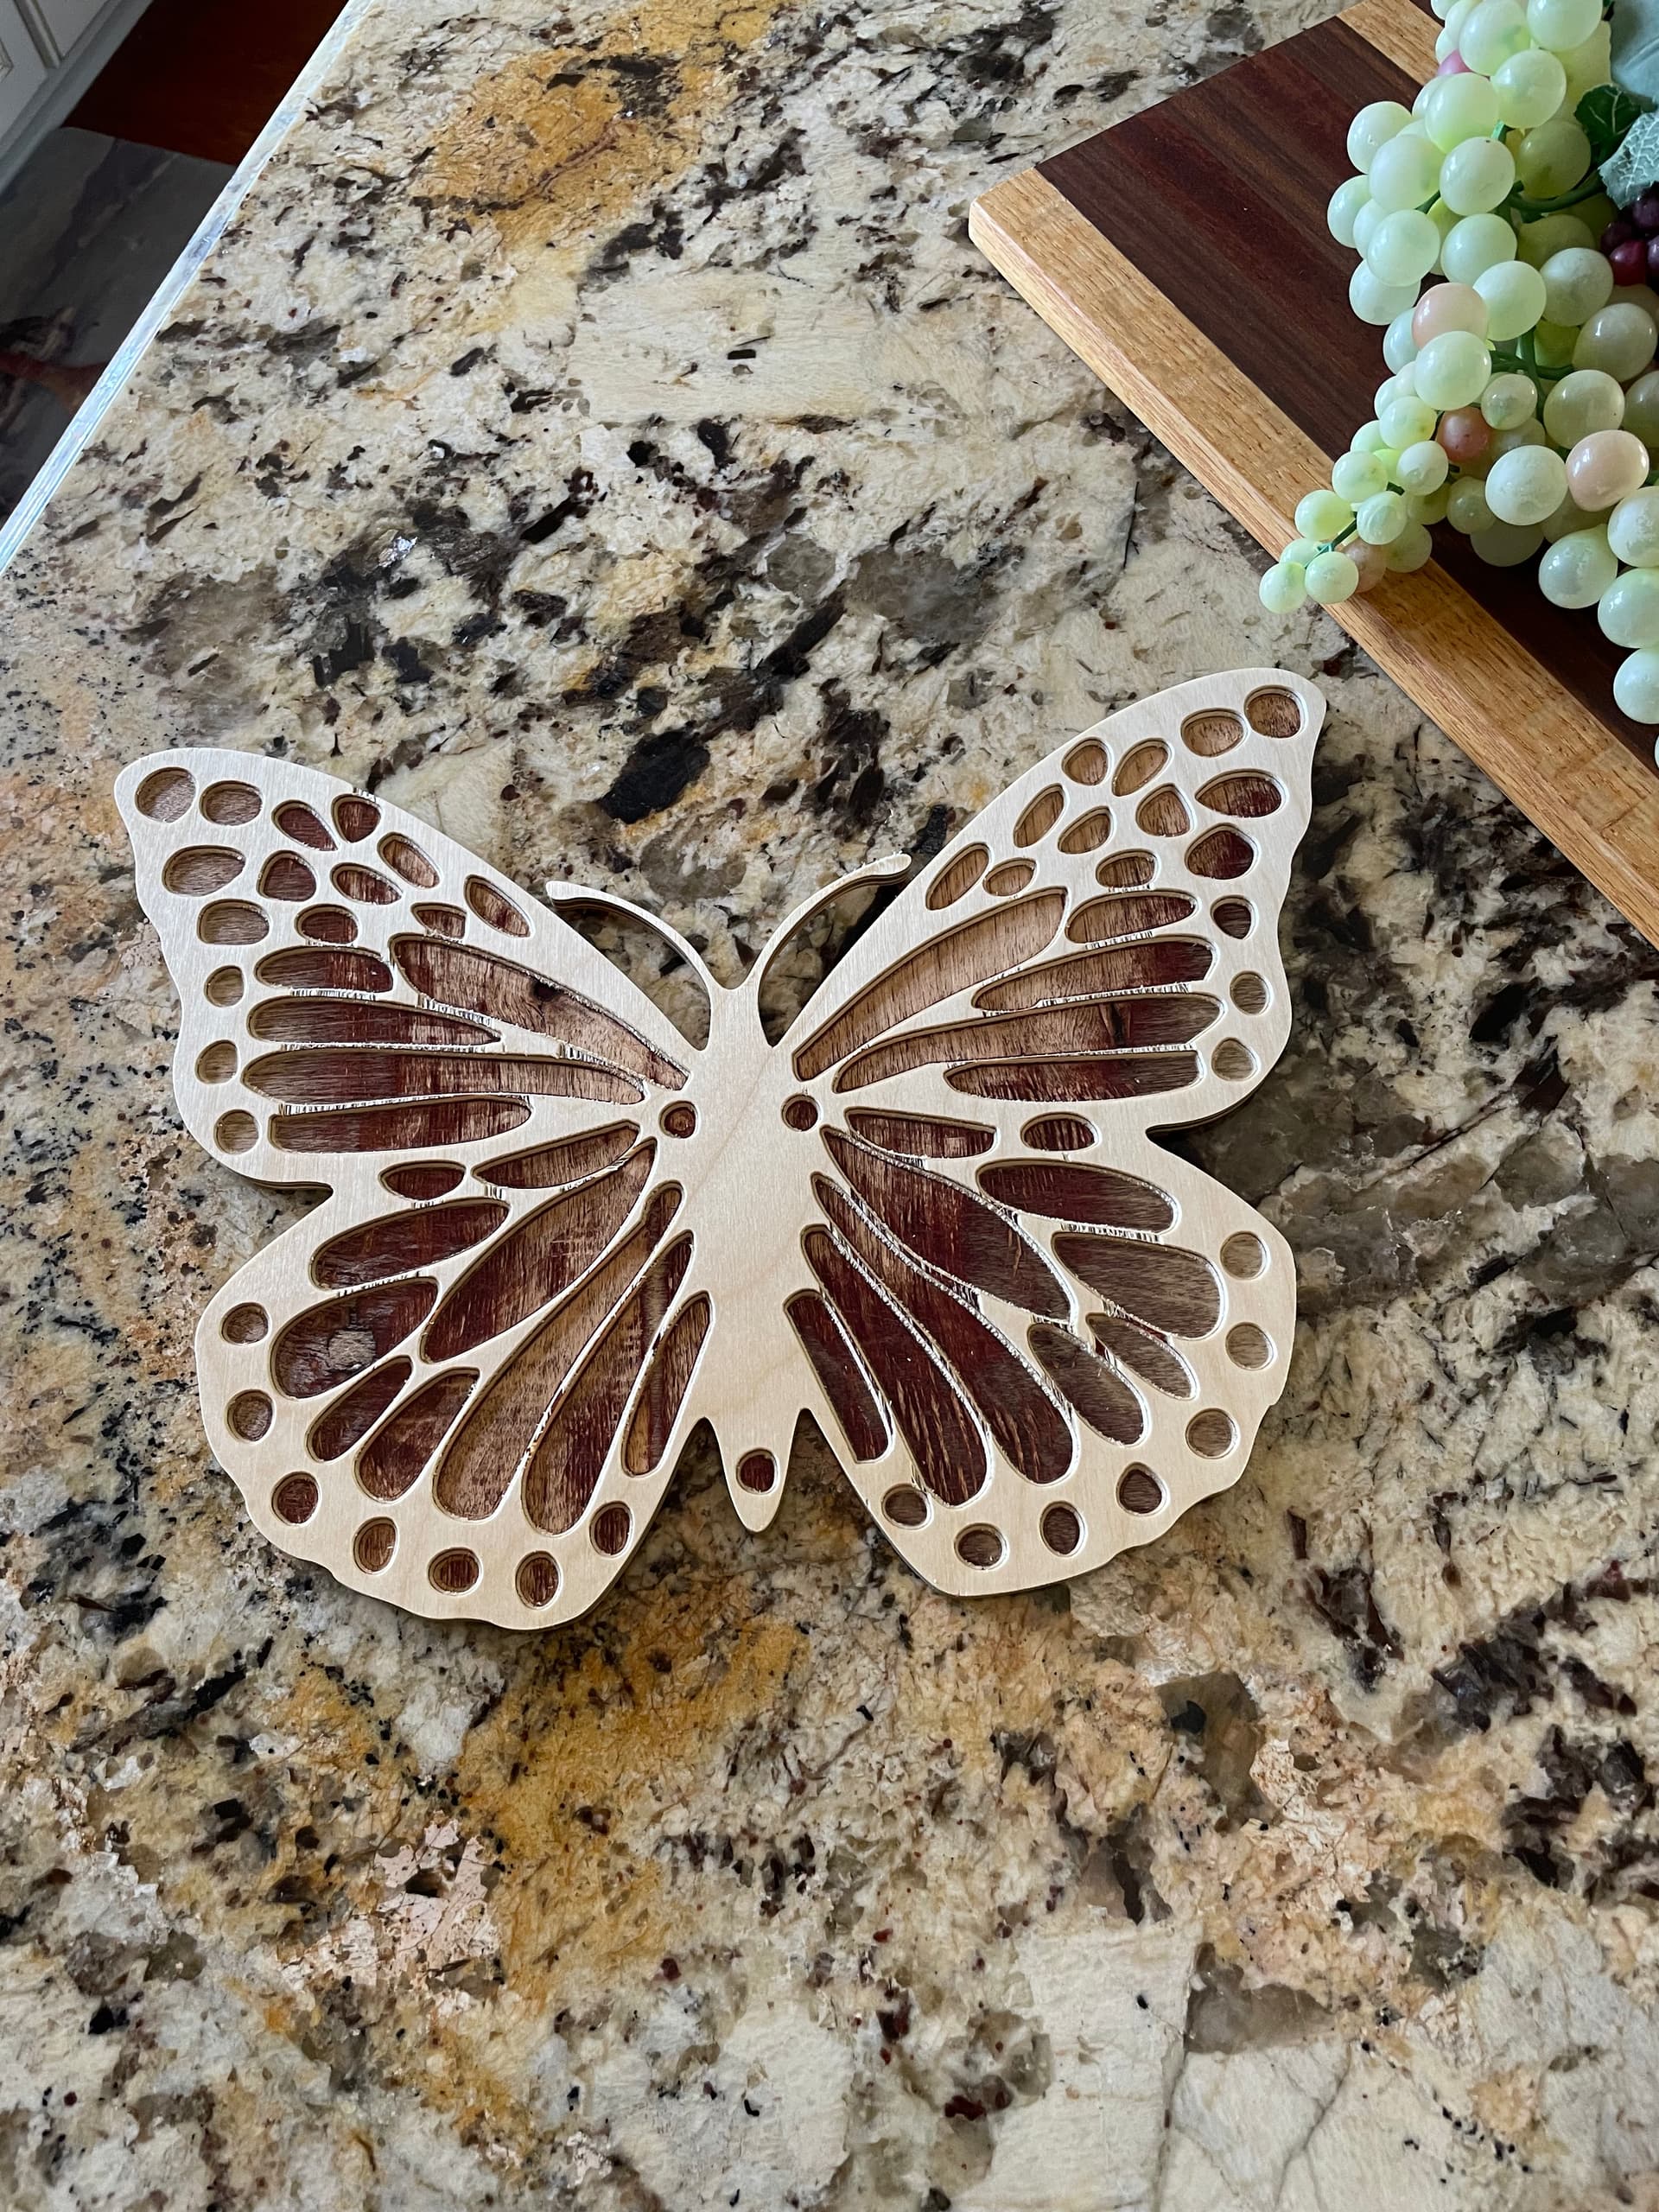
Been cutting some butterfly’s as requested by the grand kids. This one we were going to learn to airbrush with. So instead of thru cuts we cut .1” pockets. I sprayed it with some gloss lacquer to seal it. Now I’m torn, I kinda like it this way.
Griff
(Well crap, my hypometric precursor device is blown…)
352
True enough. Wasn’t a concern in this case as it’s a learning project, will be outside exposed to our version of weather so won’t last too long.
If a gift for a discerning cove such as yourself I’d simply use a 30 degree 1/8” v-bit in the contours slightly oversize and the depth of the first layer of ply. This would be the first cut. Works well in decent quality Baltic birch.
Time to do a sealing coat of epoxy before the pour. If anyone has faced off epoxy before, any time? I figure it will be like surfacing any other thing? After the pour I will face it off and sand. (I don’t own a planer)
Any ideas how much desire NOT to sand I can cover with a surface finish of sorts? Can I get to maybe 320 grit and finish with a poly and get that glass look back?
There are a variety of options. Arguably the best one if your project lends itself to it, is…pouring a final thin layer of clear epoxy onto the piece. It’s like magic, the original machined surface won’t show and you end up with a clear shiny finish. But of course, many times you can’t do this (e.g. if you would like to keep the wood surface alone)
What I often do is sand it manually, from 320 down to 3000 grit or so. But I’m really no expert, and I seem to remember folks mentioning a number of good tips, let me search…
Nice, thanks! I will definitely see if I can pull off leaving the shiny finish. I think I can actually, I’ve left enough depth in the first contour (4mm) such that I should hopefullybe able to full up with maybe 2mm to spare, and then I can face the wood up to 2mm without touching the epoxy, but removing the seal coat epoxy from the surface of the oak.
That said, next time, I’m going to look at wood that’s a bit less … fibrous ? then oak? Or maybe run faster, spring pass, etc etc. A few curlies I had to try to clean up then said forget it.
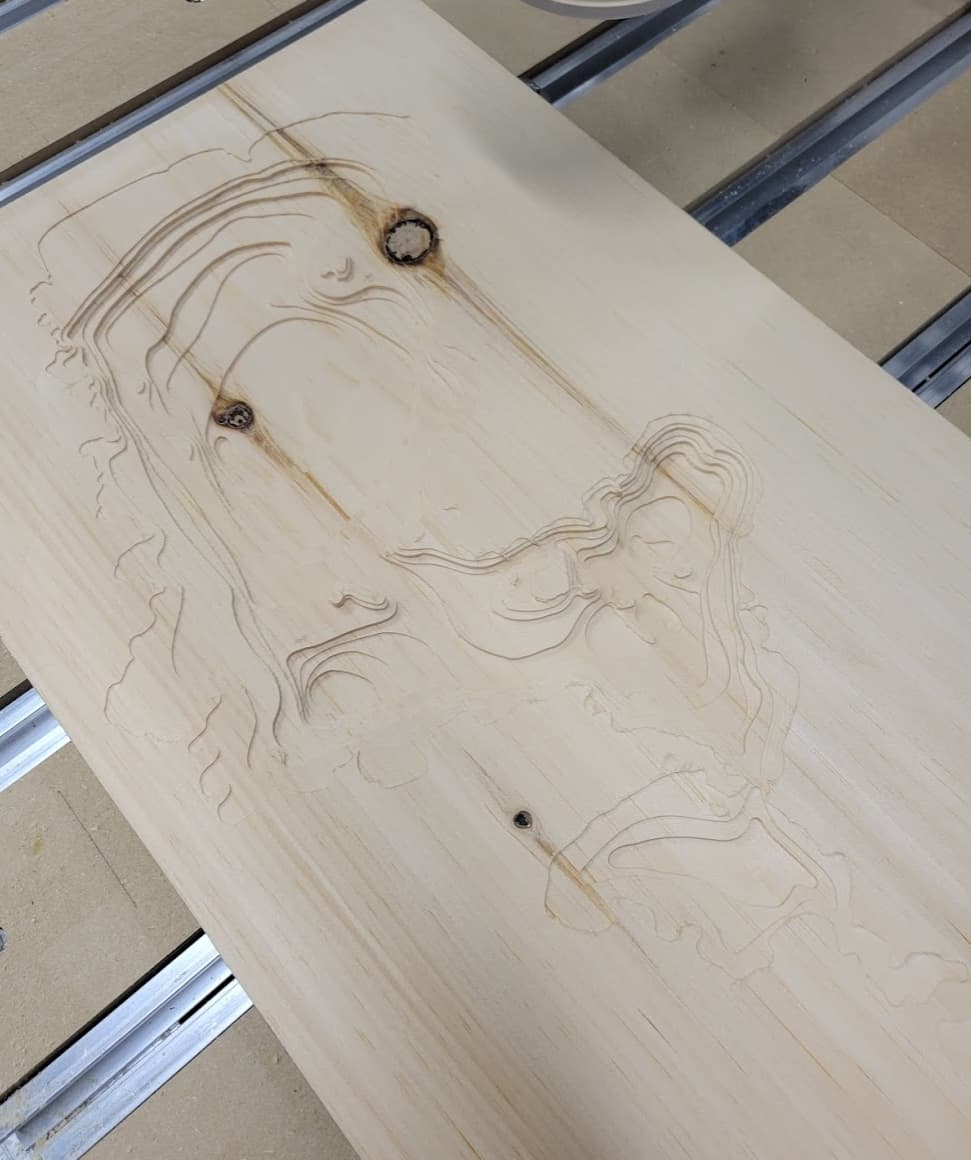
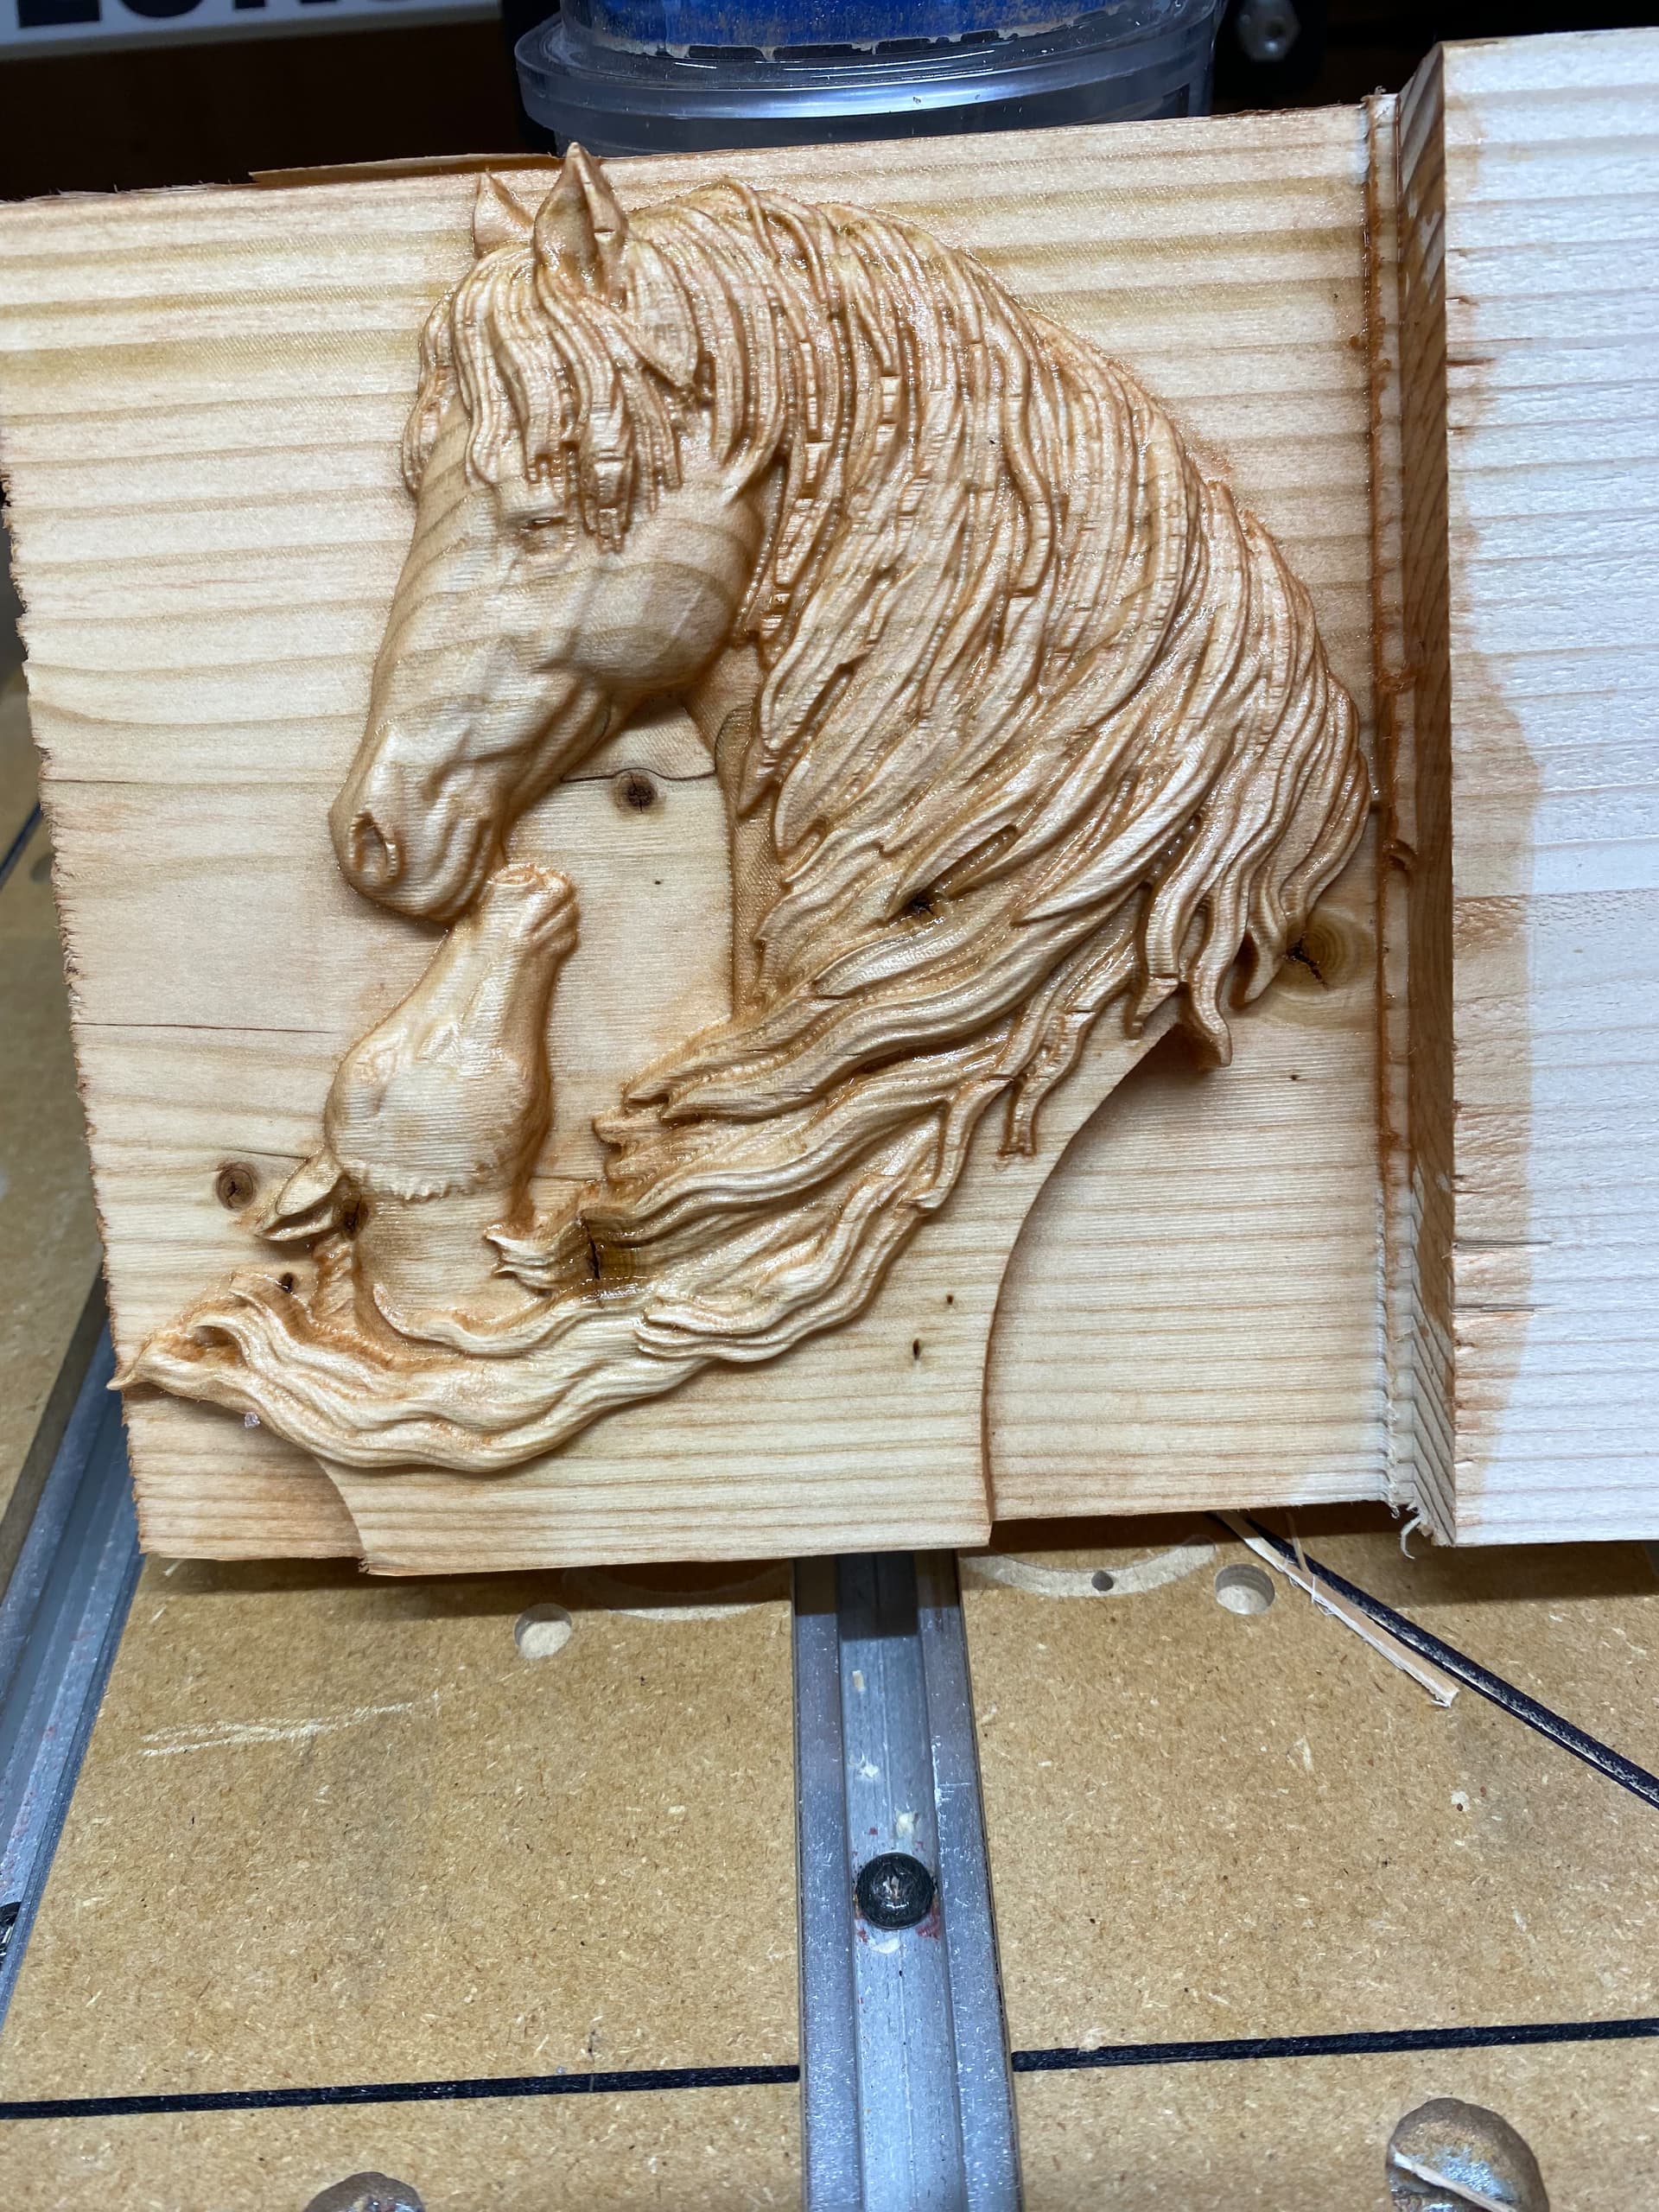
I feel down the STL rabbit hole today with a short piece of 2x6 in hand.
I grabbed the free STL demo at 3dwave and loaded it into the STL to PNG tool@fenrus wrote. BTW, thank you for making that available.
I imported the PNG, made one roughing and two finishing tool paths and presto, I had a pretty nice looking chuck of pine 2x6 in hand. I brushed a little oak polyshade over it for some highlights.
@greg5 Actually, you do have a planer albeit, one with a very narrow blade, your Shapeoko! Smoothing the top or last layer pour works great and your don’t end up with plastic dust from sanding everywhere, just chips
For my final finish, I’ve had great success spraying with a polycoat type finish, satin, gloss or somewhere between after sanding with 220 when finished smoothing. This thread dives deep into the options and finishing techniques by several users including @AndyC and @fenrus , and others, as @Julien had mentioned. Looking forward to seeing your final result!