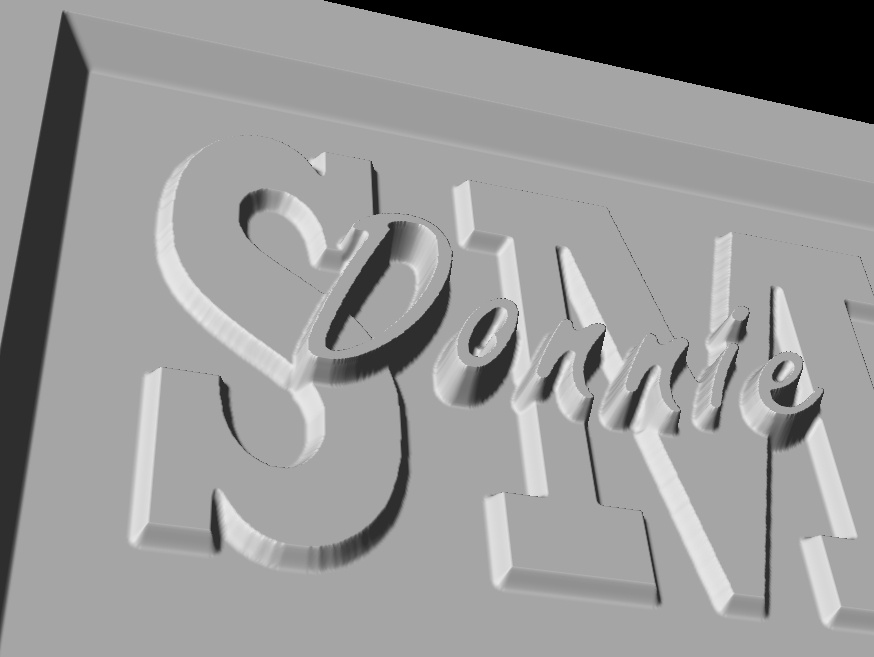
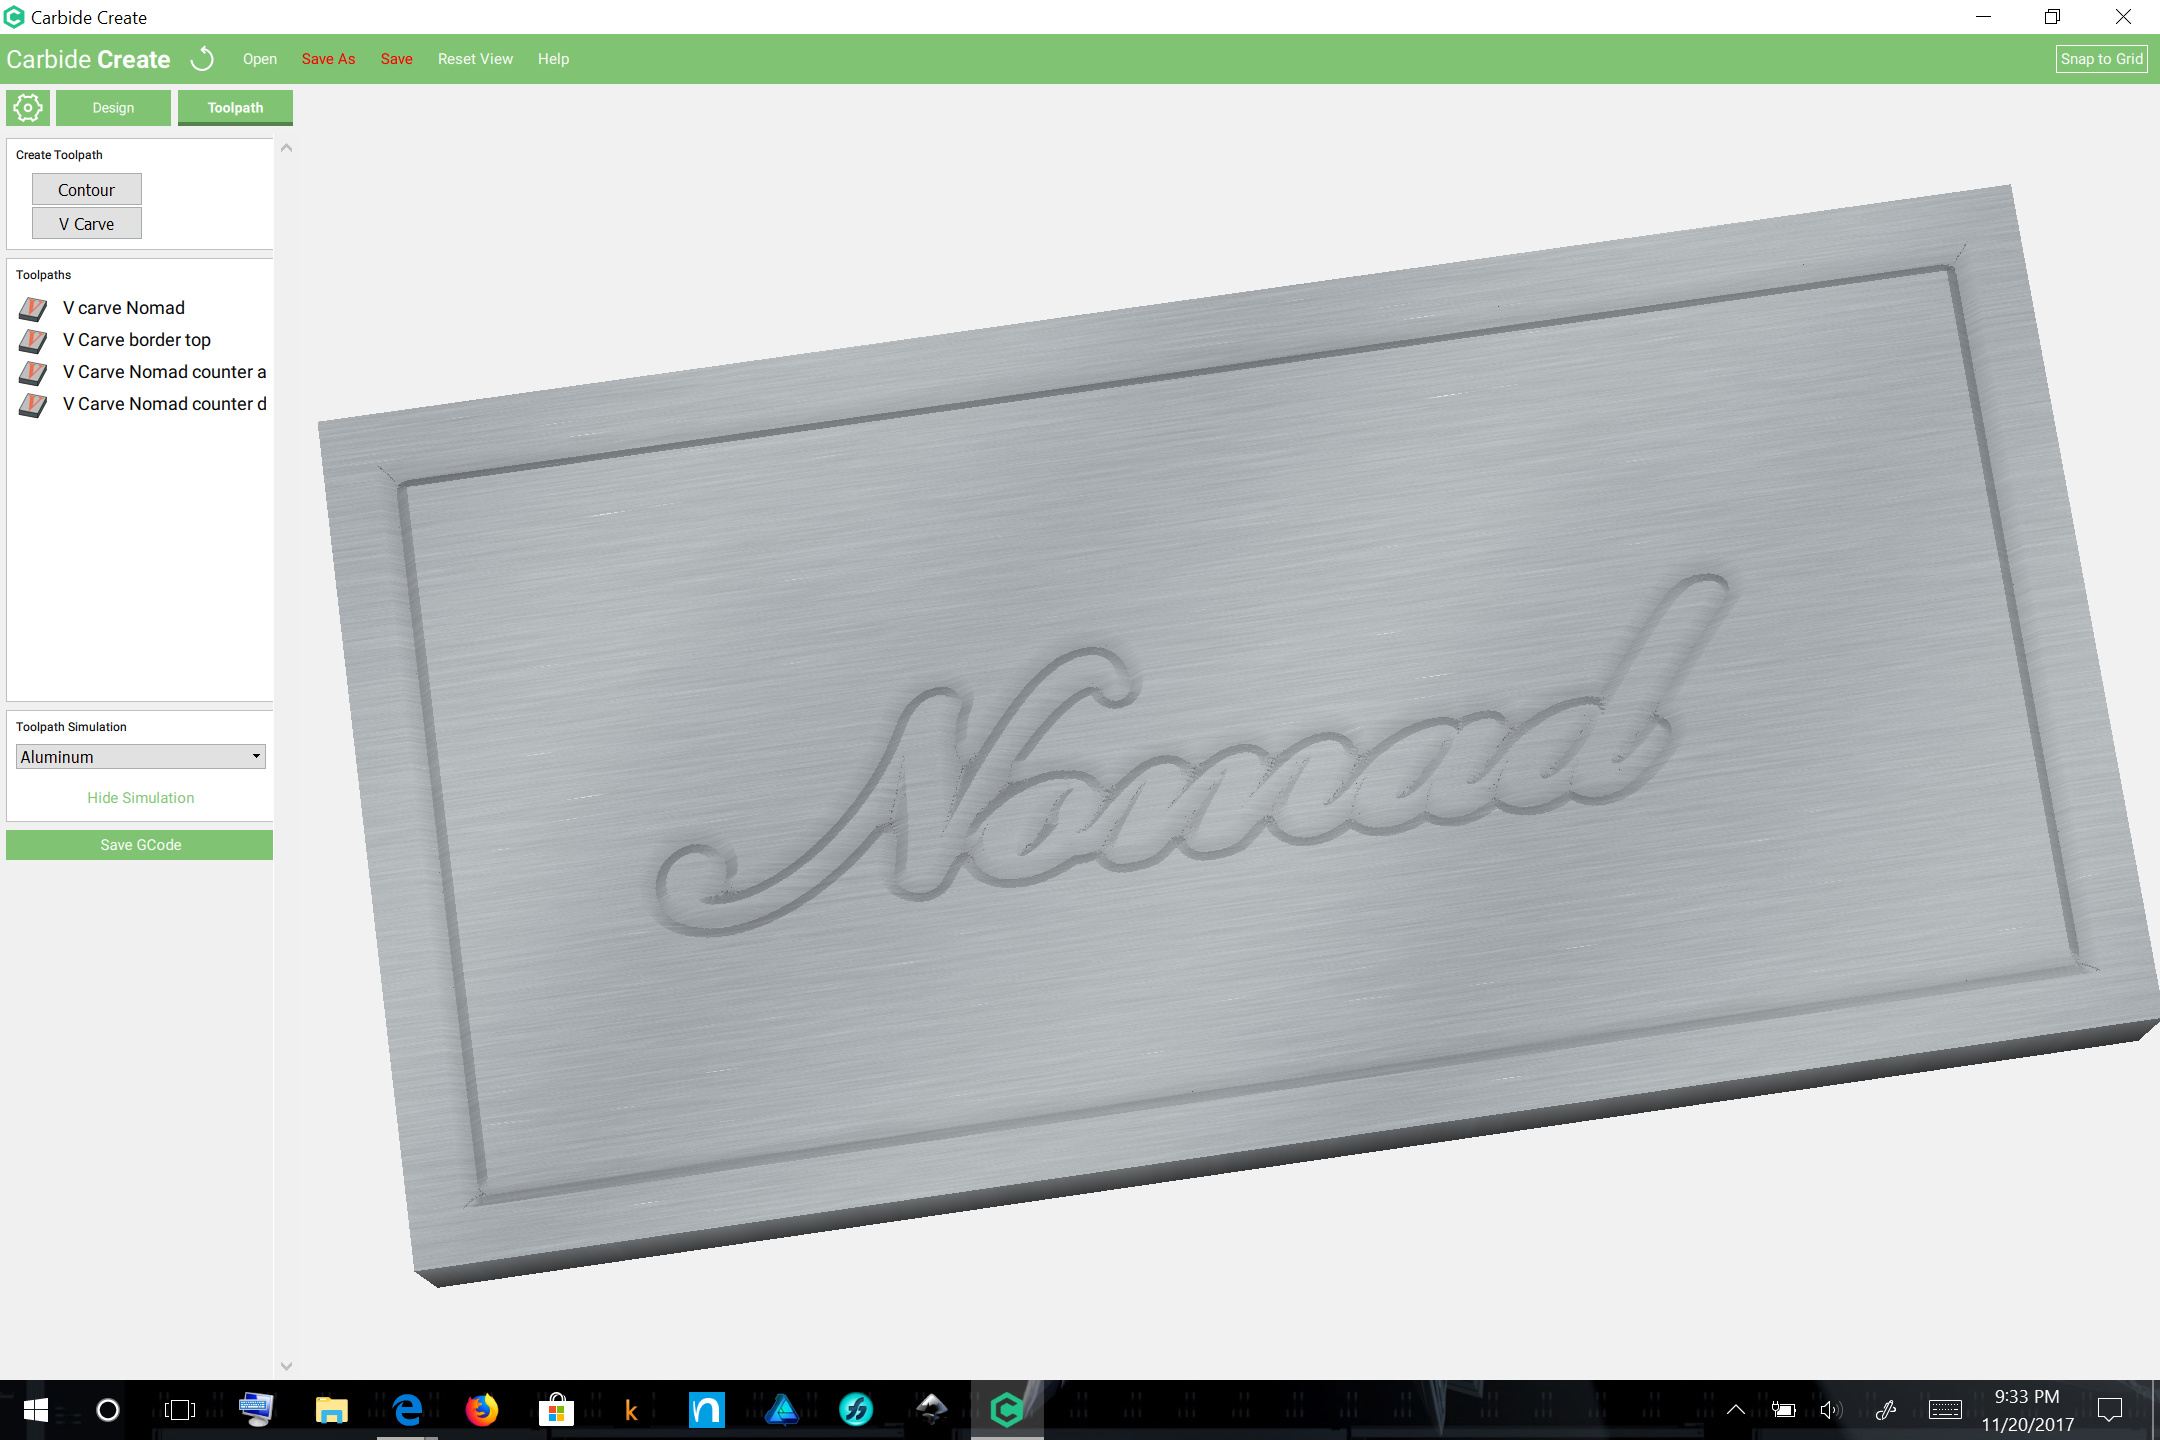
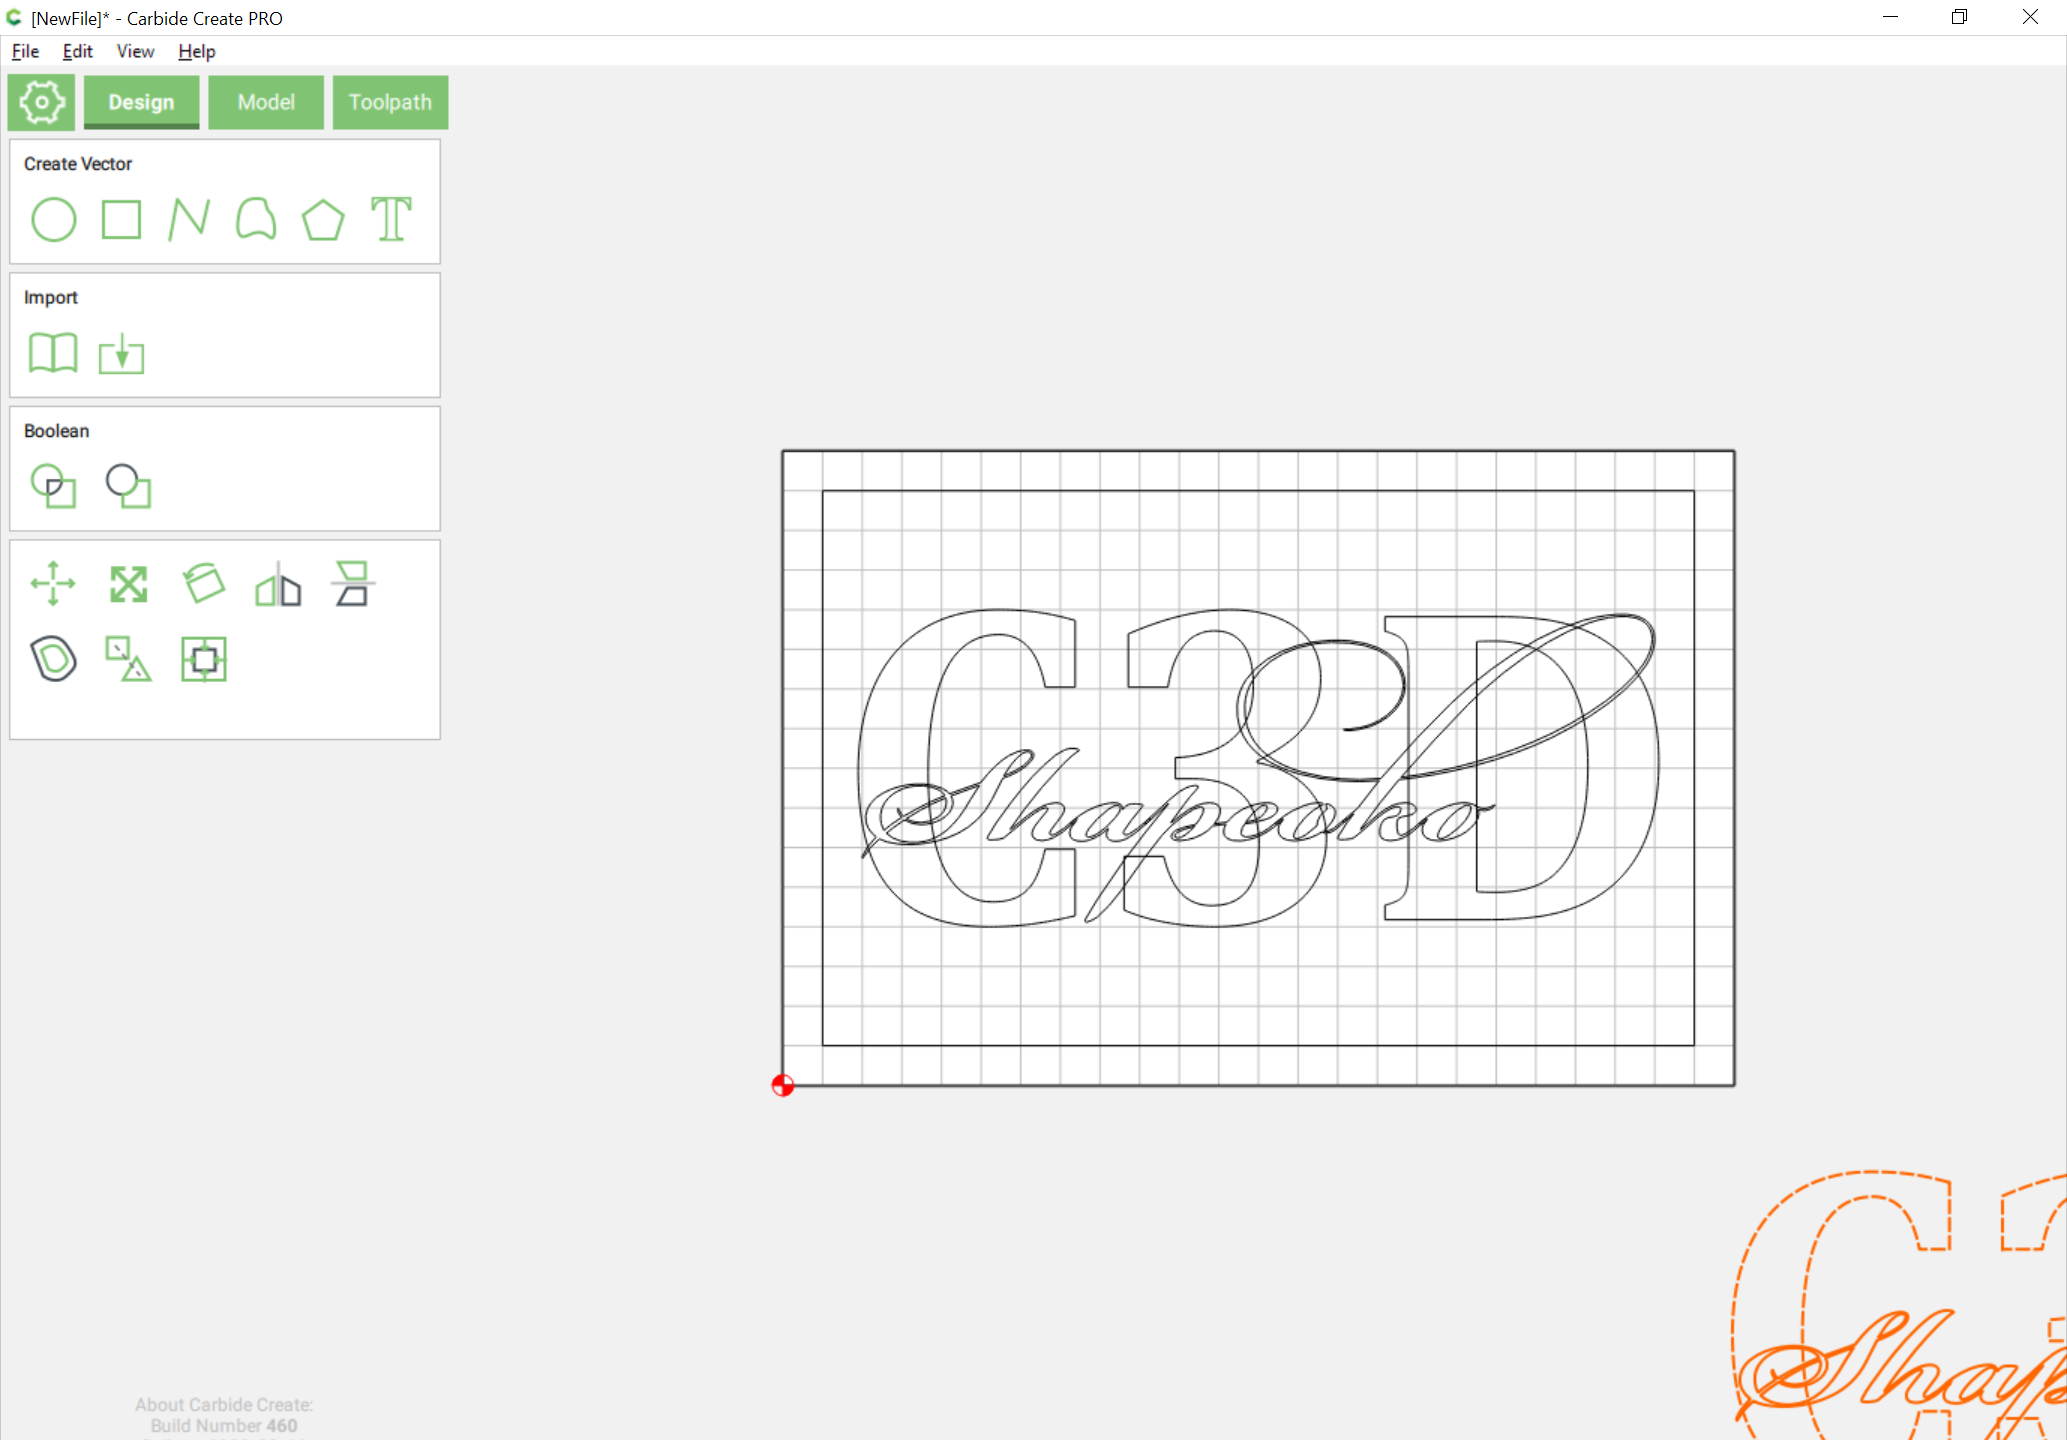
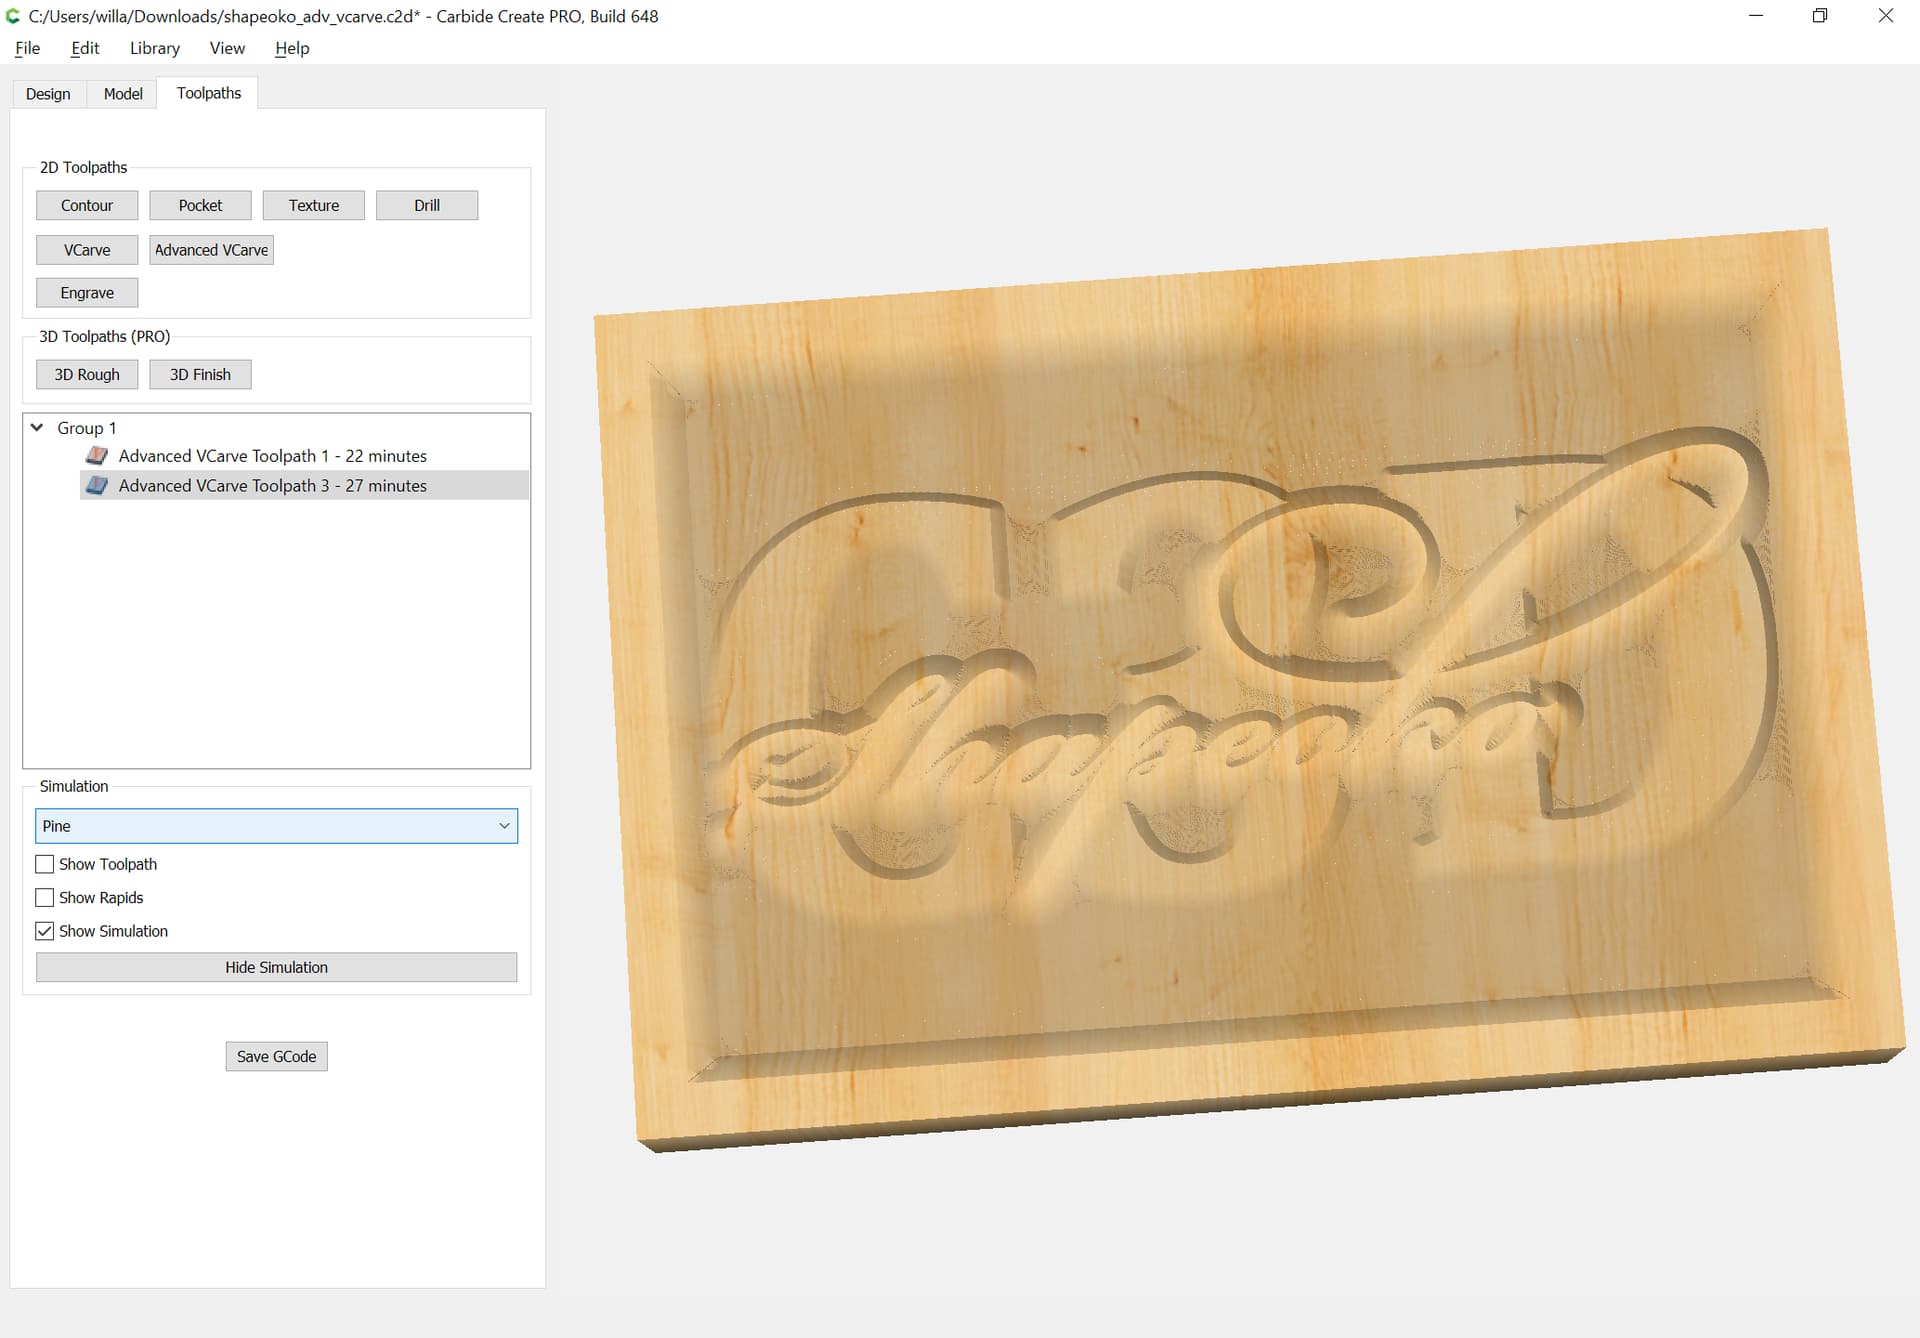
I’ve been using a different hobby cnc machine with it’s own software for a number of years. The attached picture is an example of a plaque that I create with this software and machine.
I am trying to decide between purchasing a Shapeoko XXL or a X-Carve 1000x1000. I’ve gone through all the pros and cons of each machine. I’ve done a ton of reading on both machines forums. The “usability” of the base software that comes with each machine will play a part in my decision.
I’ve used both Carbide Create and Easel. I’ve watch the tutorials on both packages.
I’m having difficulty creating a project such as the example in the attached picture with CC. I was able to able to create the big rectangle pocket cut that left the last name “Smith” present but I was not able to get the lettering on top of “Smith” to show up. What I am trying to accomplish is raised text with higher text on top.
I realize the I could use a third party package to accomplish this but I would like to learn how to do it with CC.
Could someone take me by the hand and lead me down the path of enlightenment???
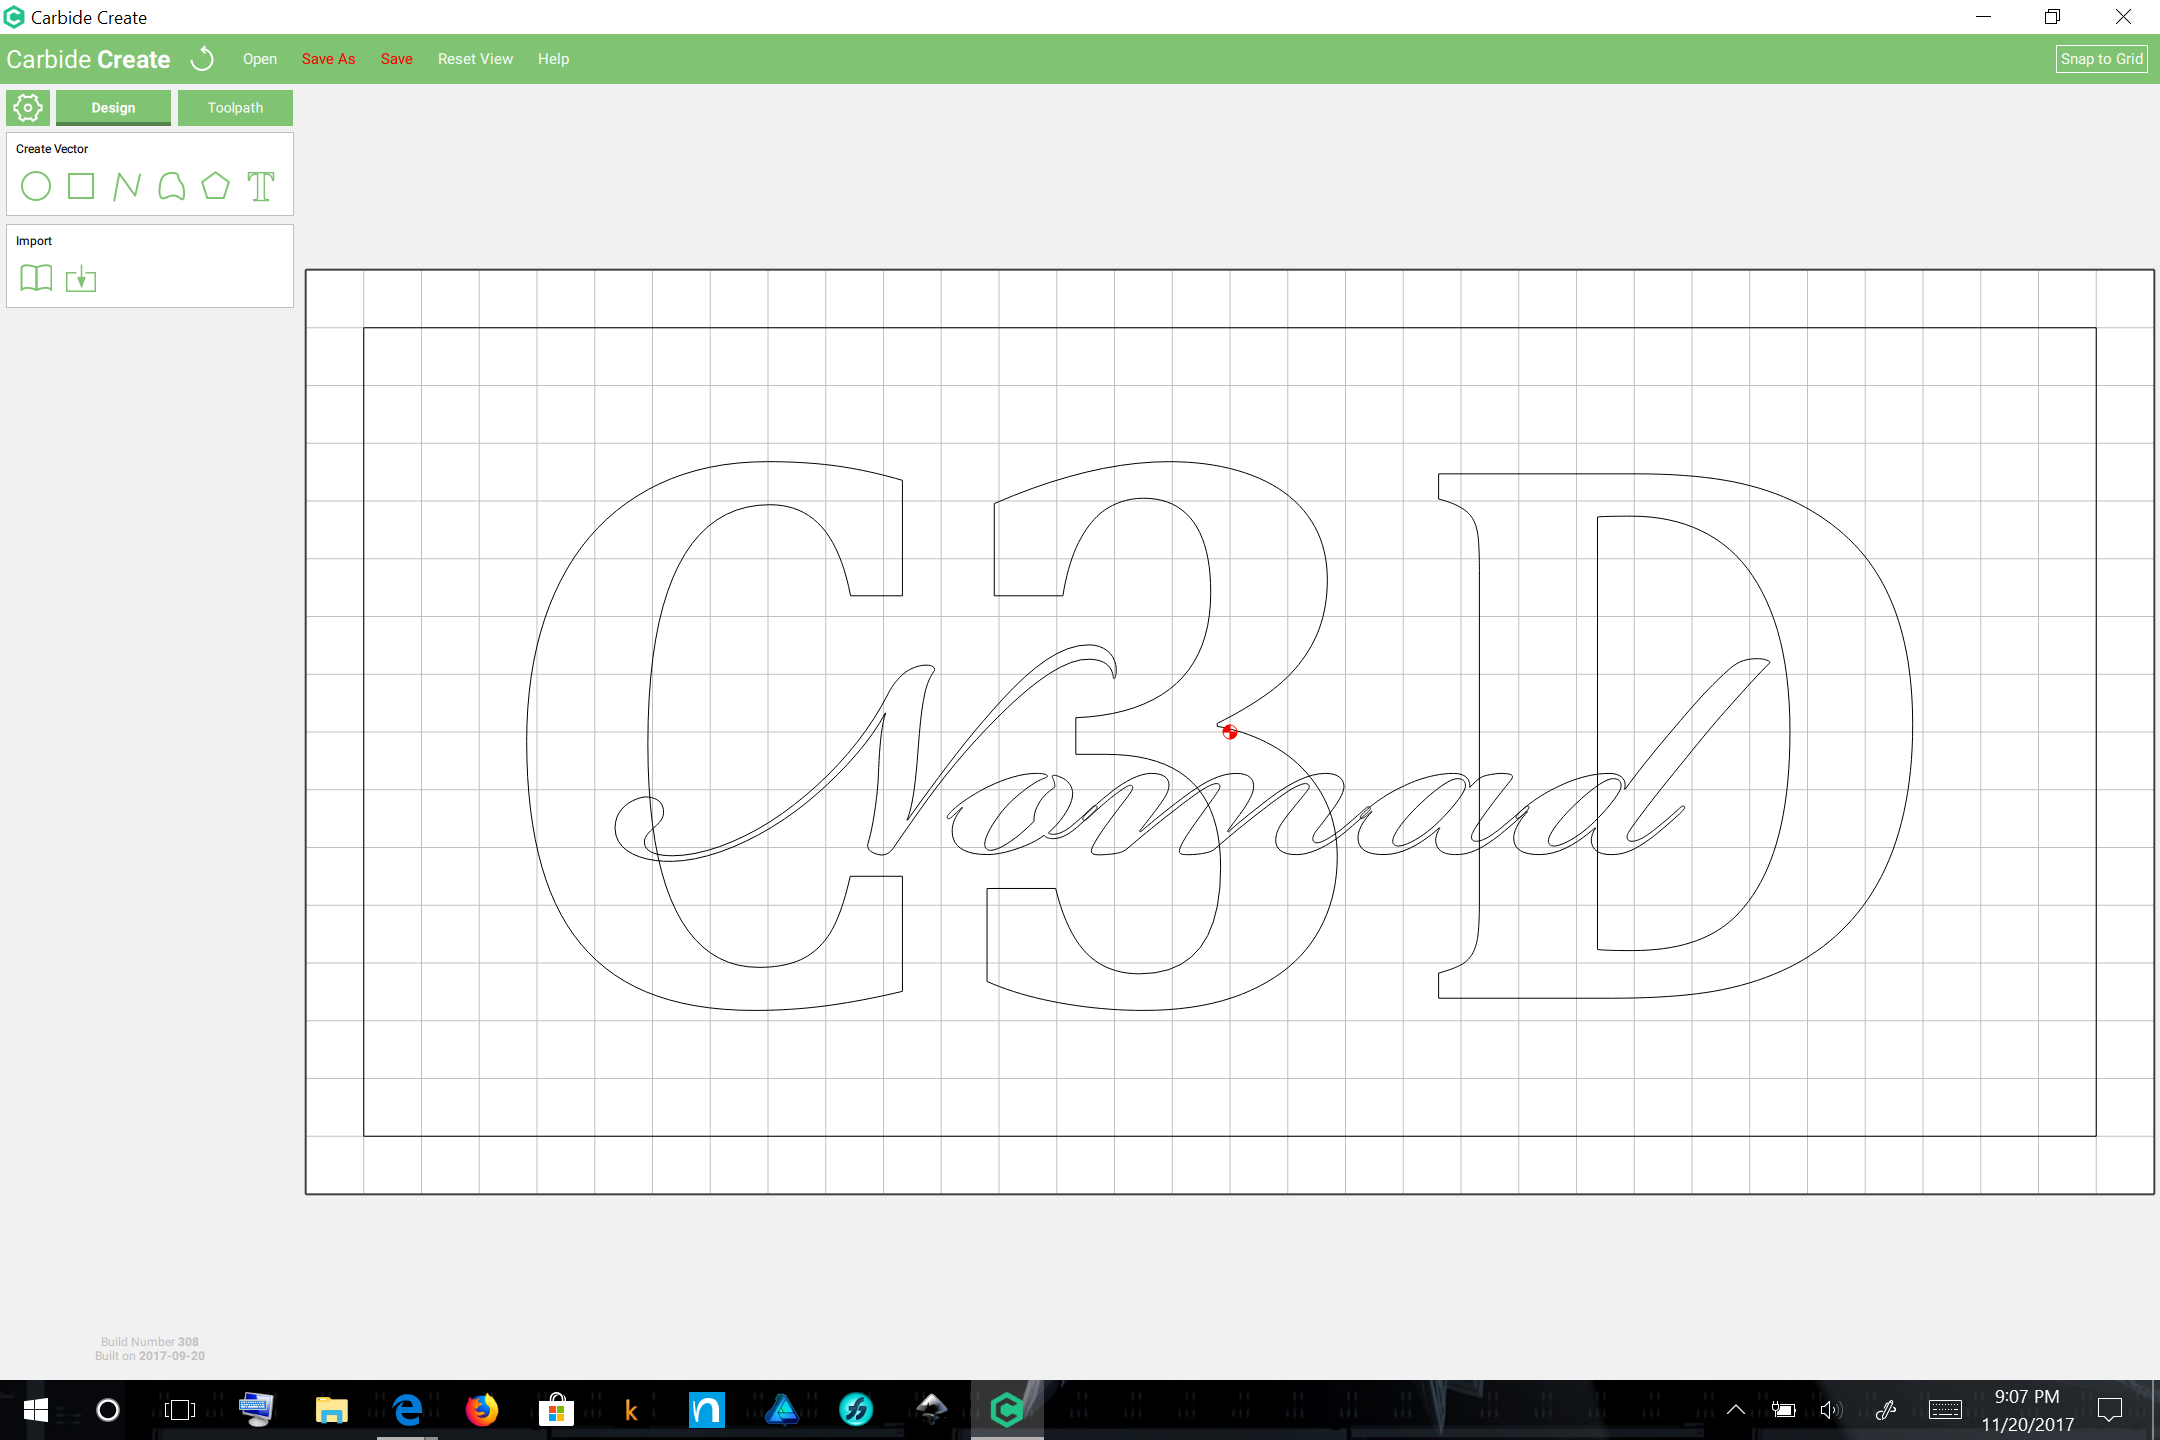
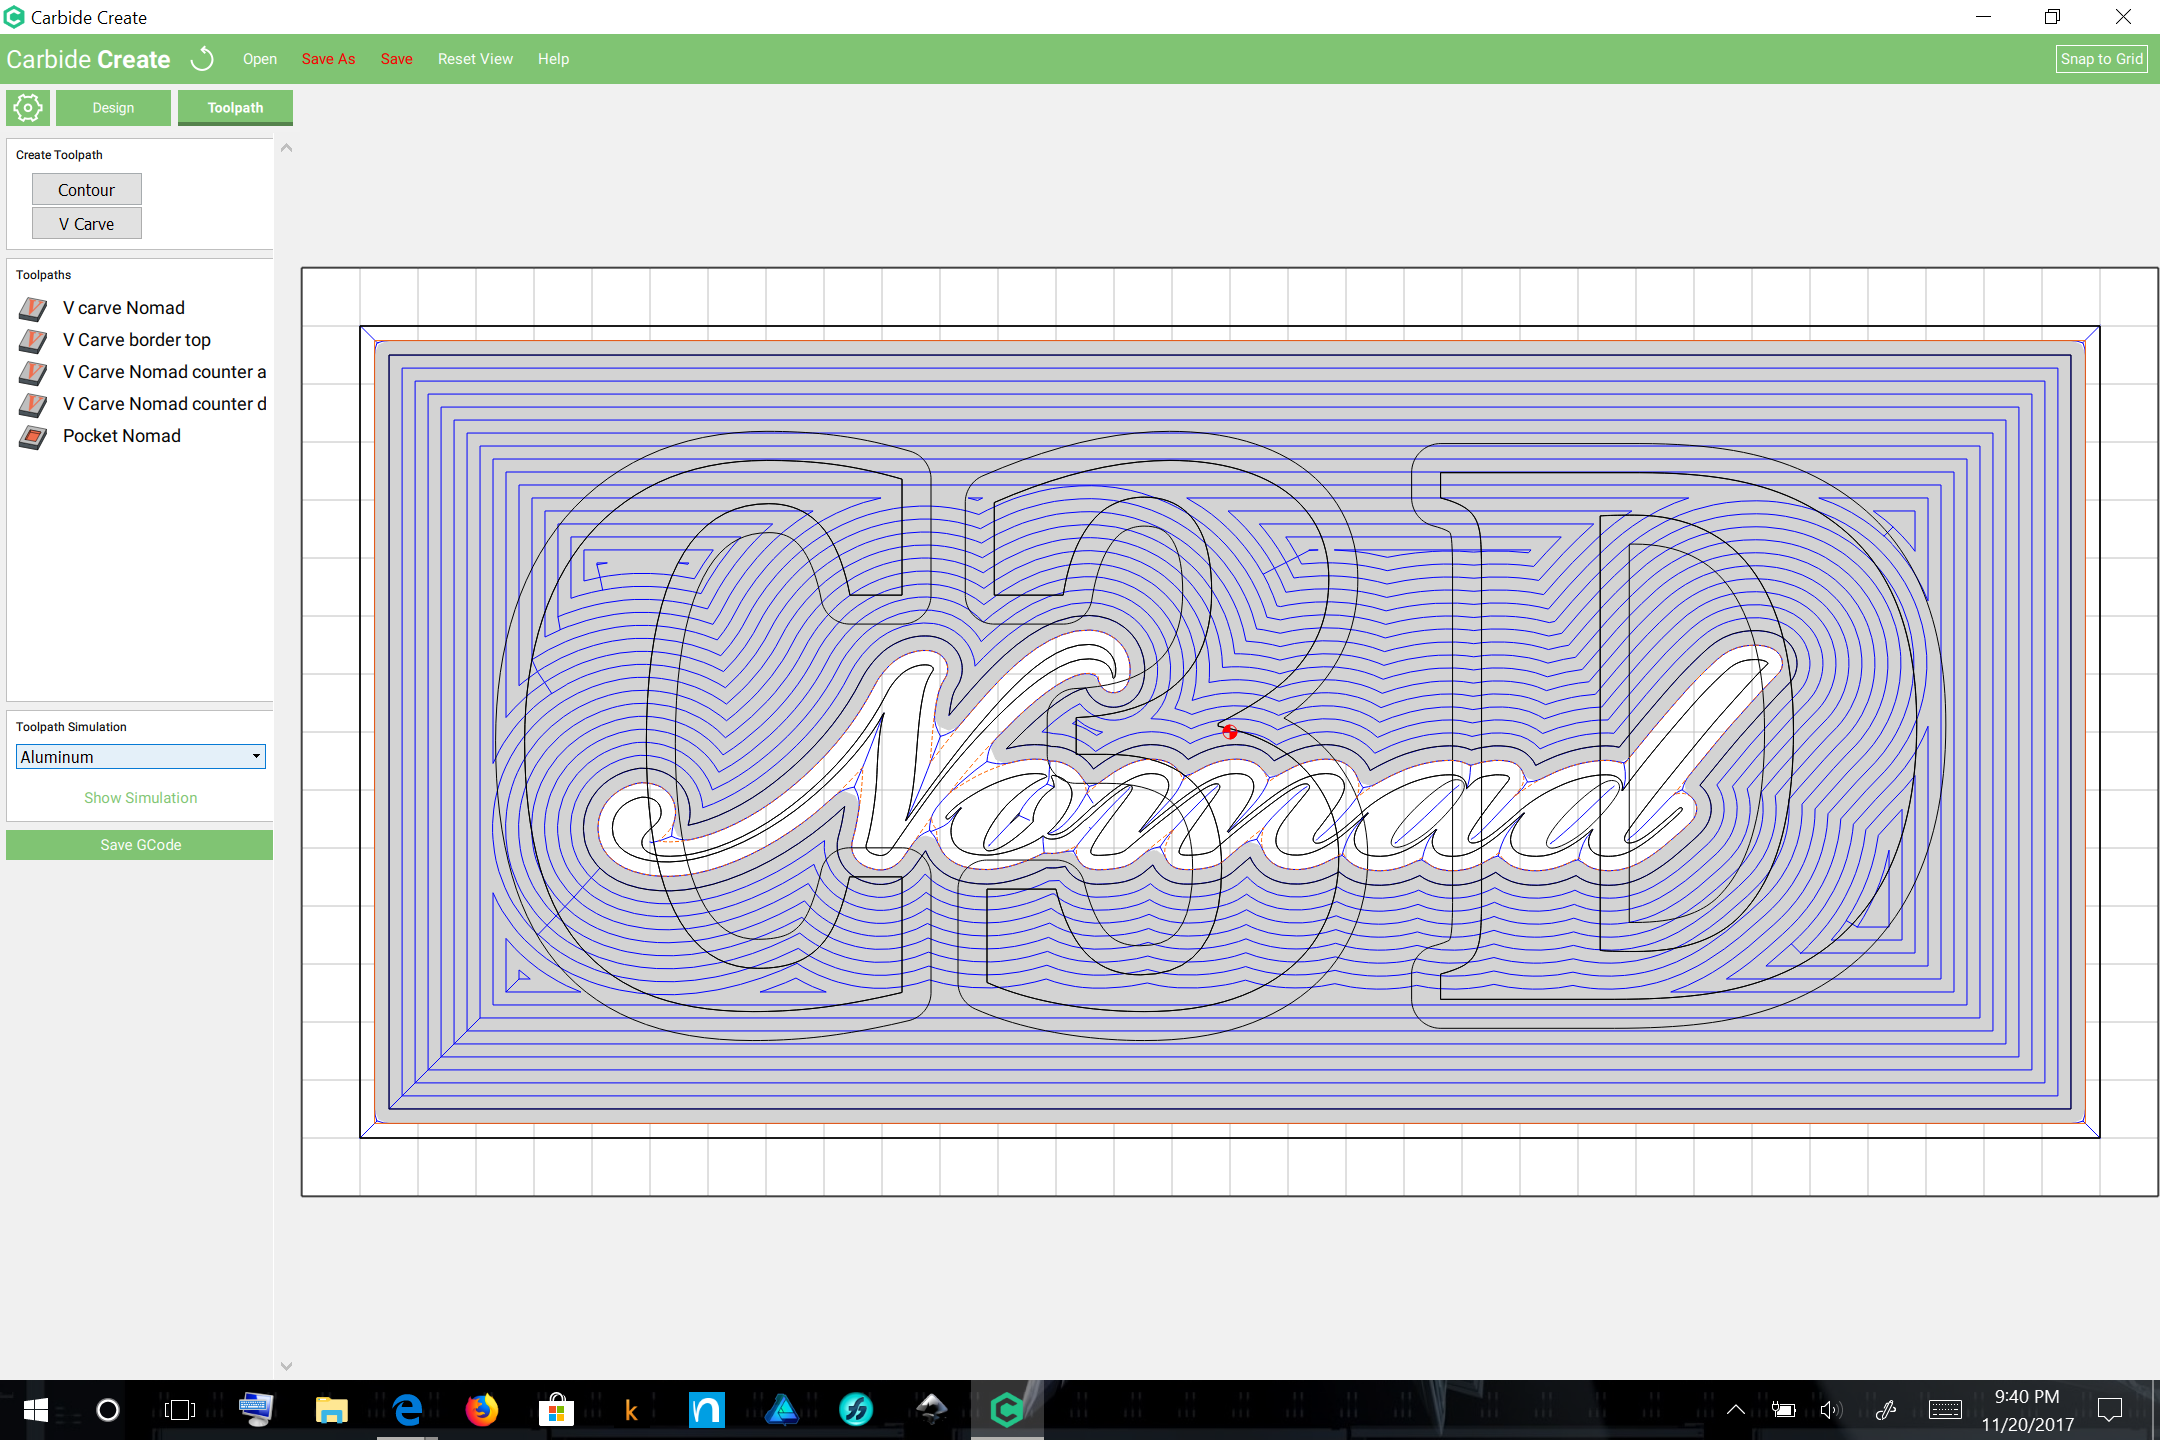
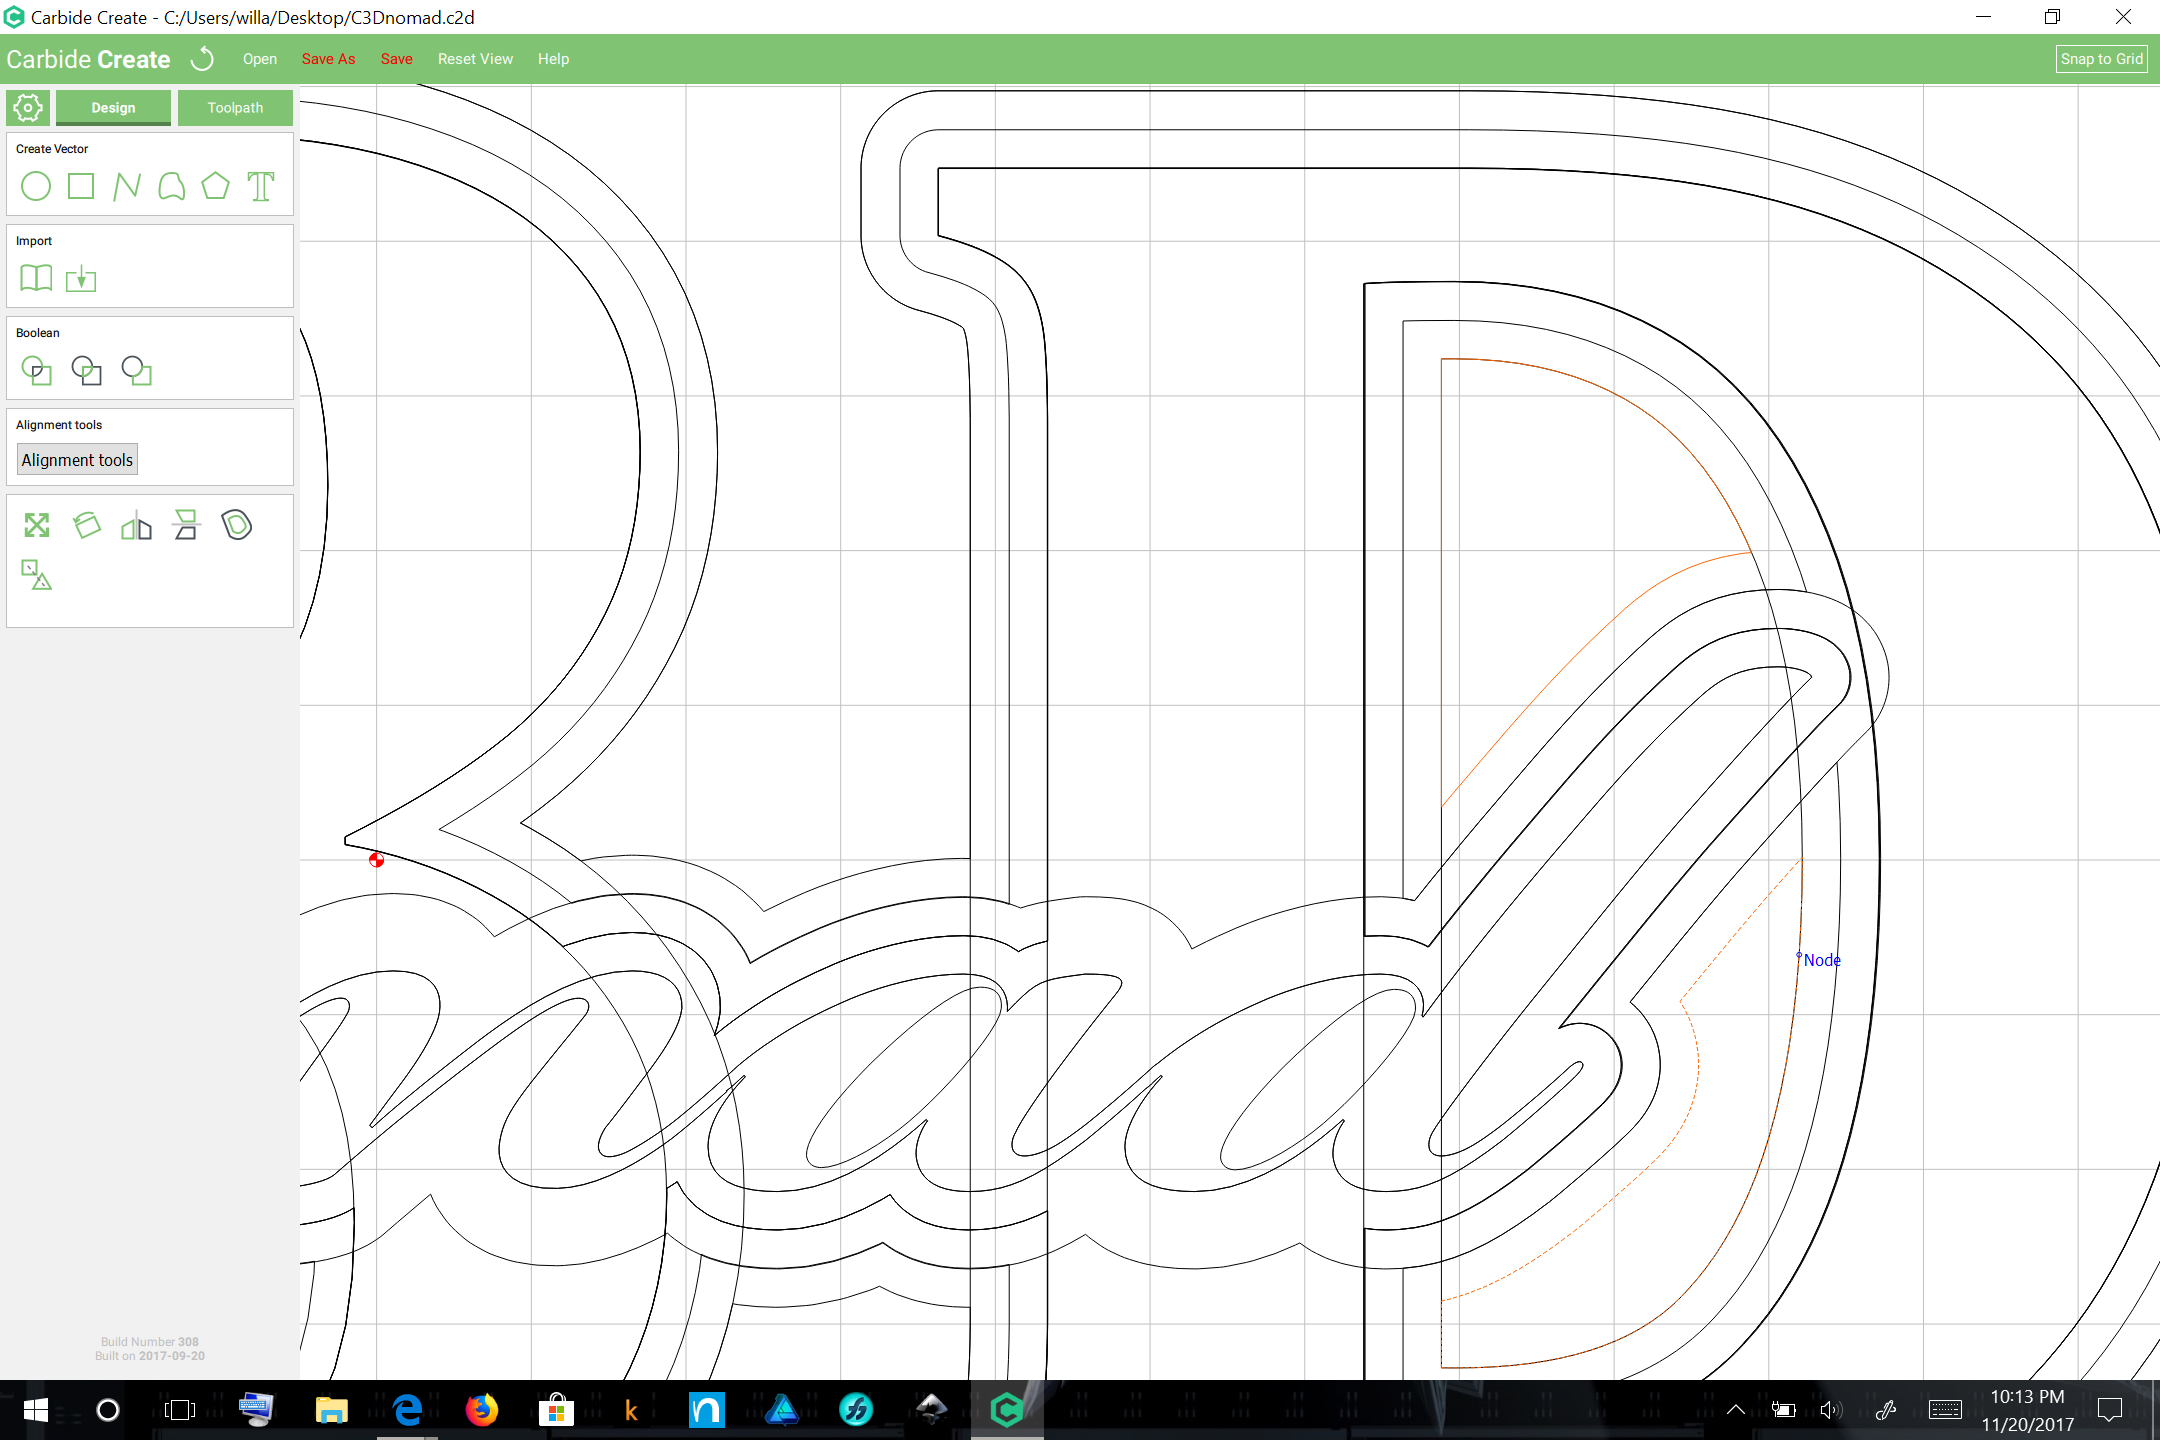
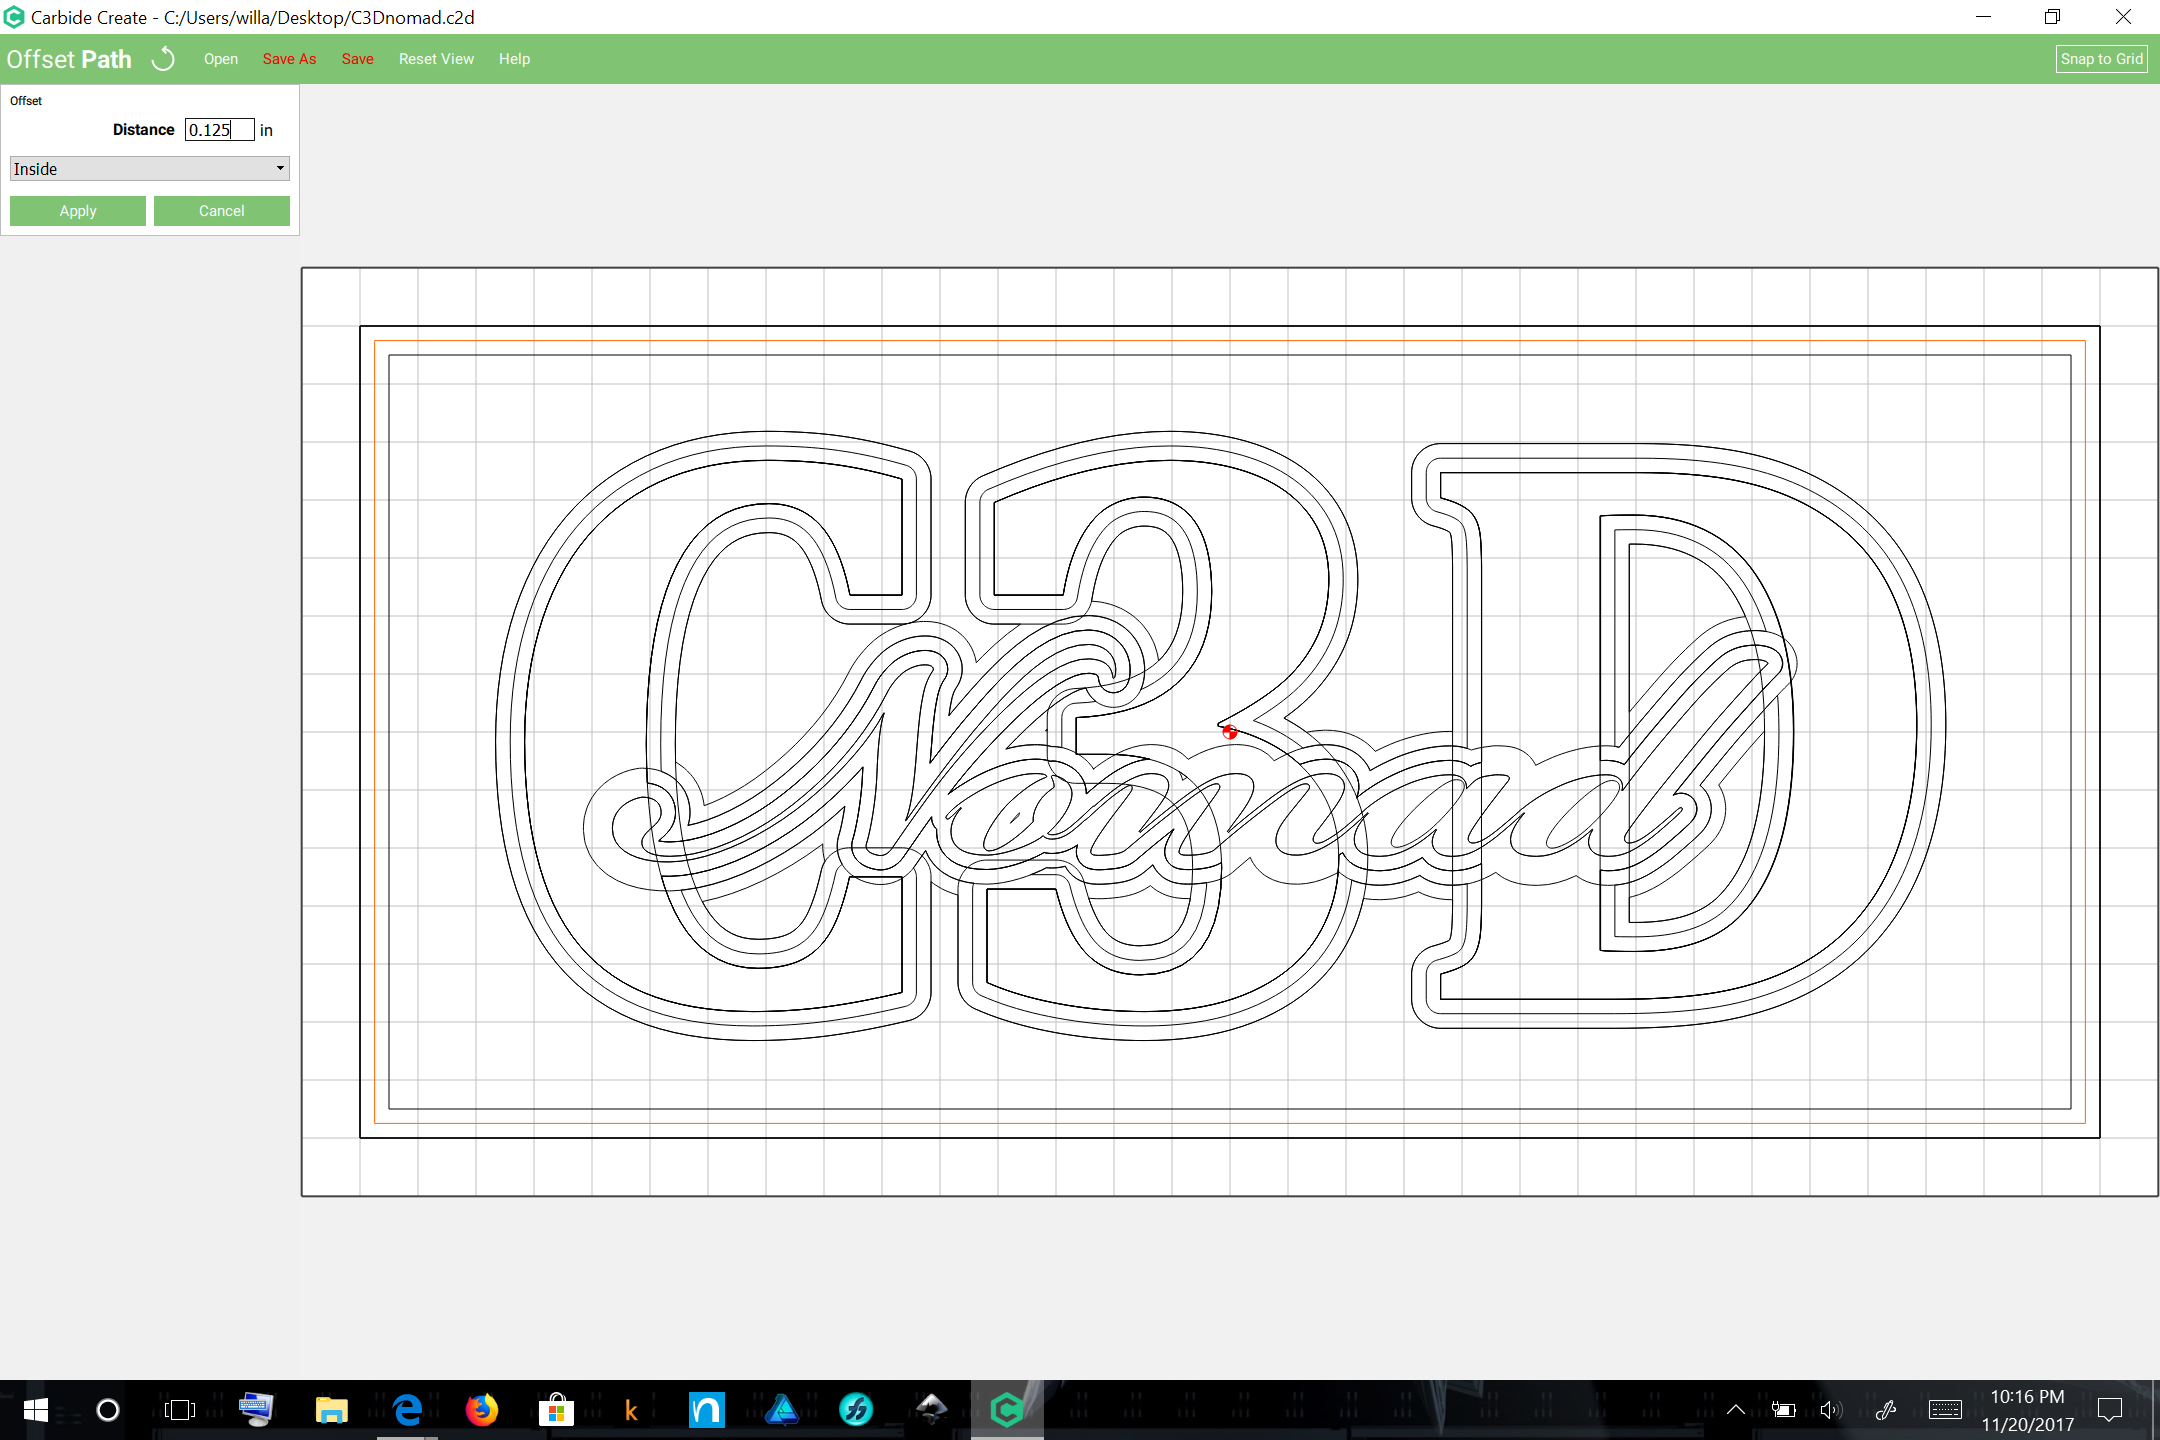
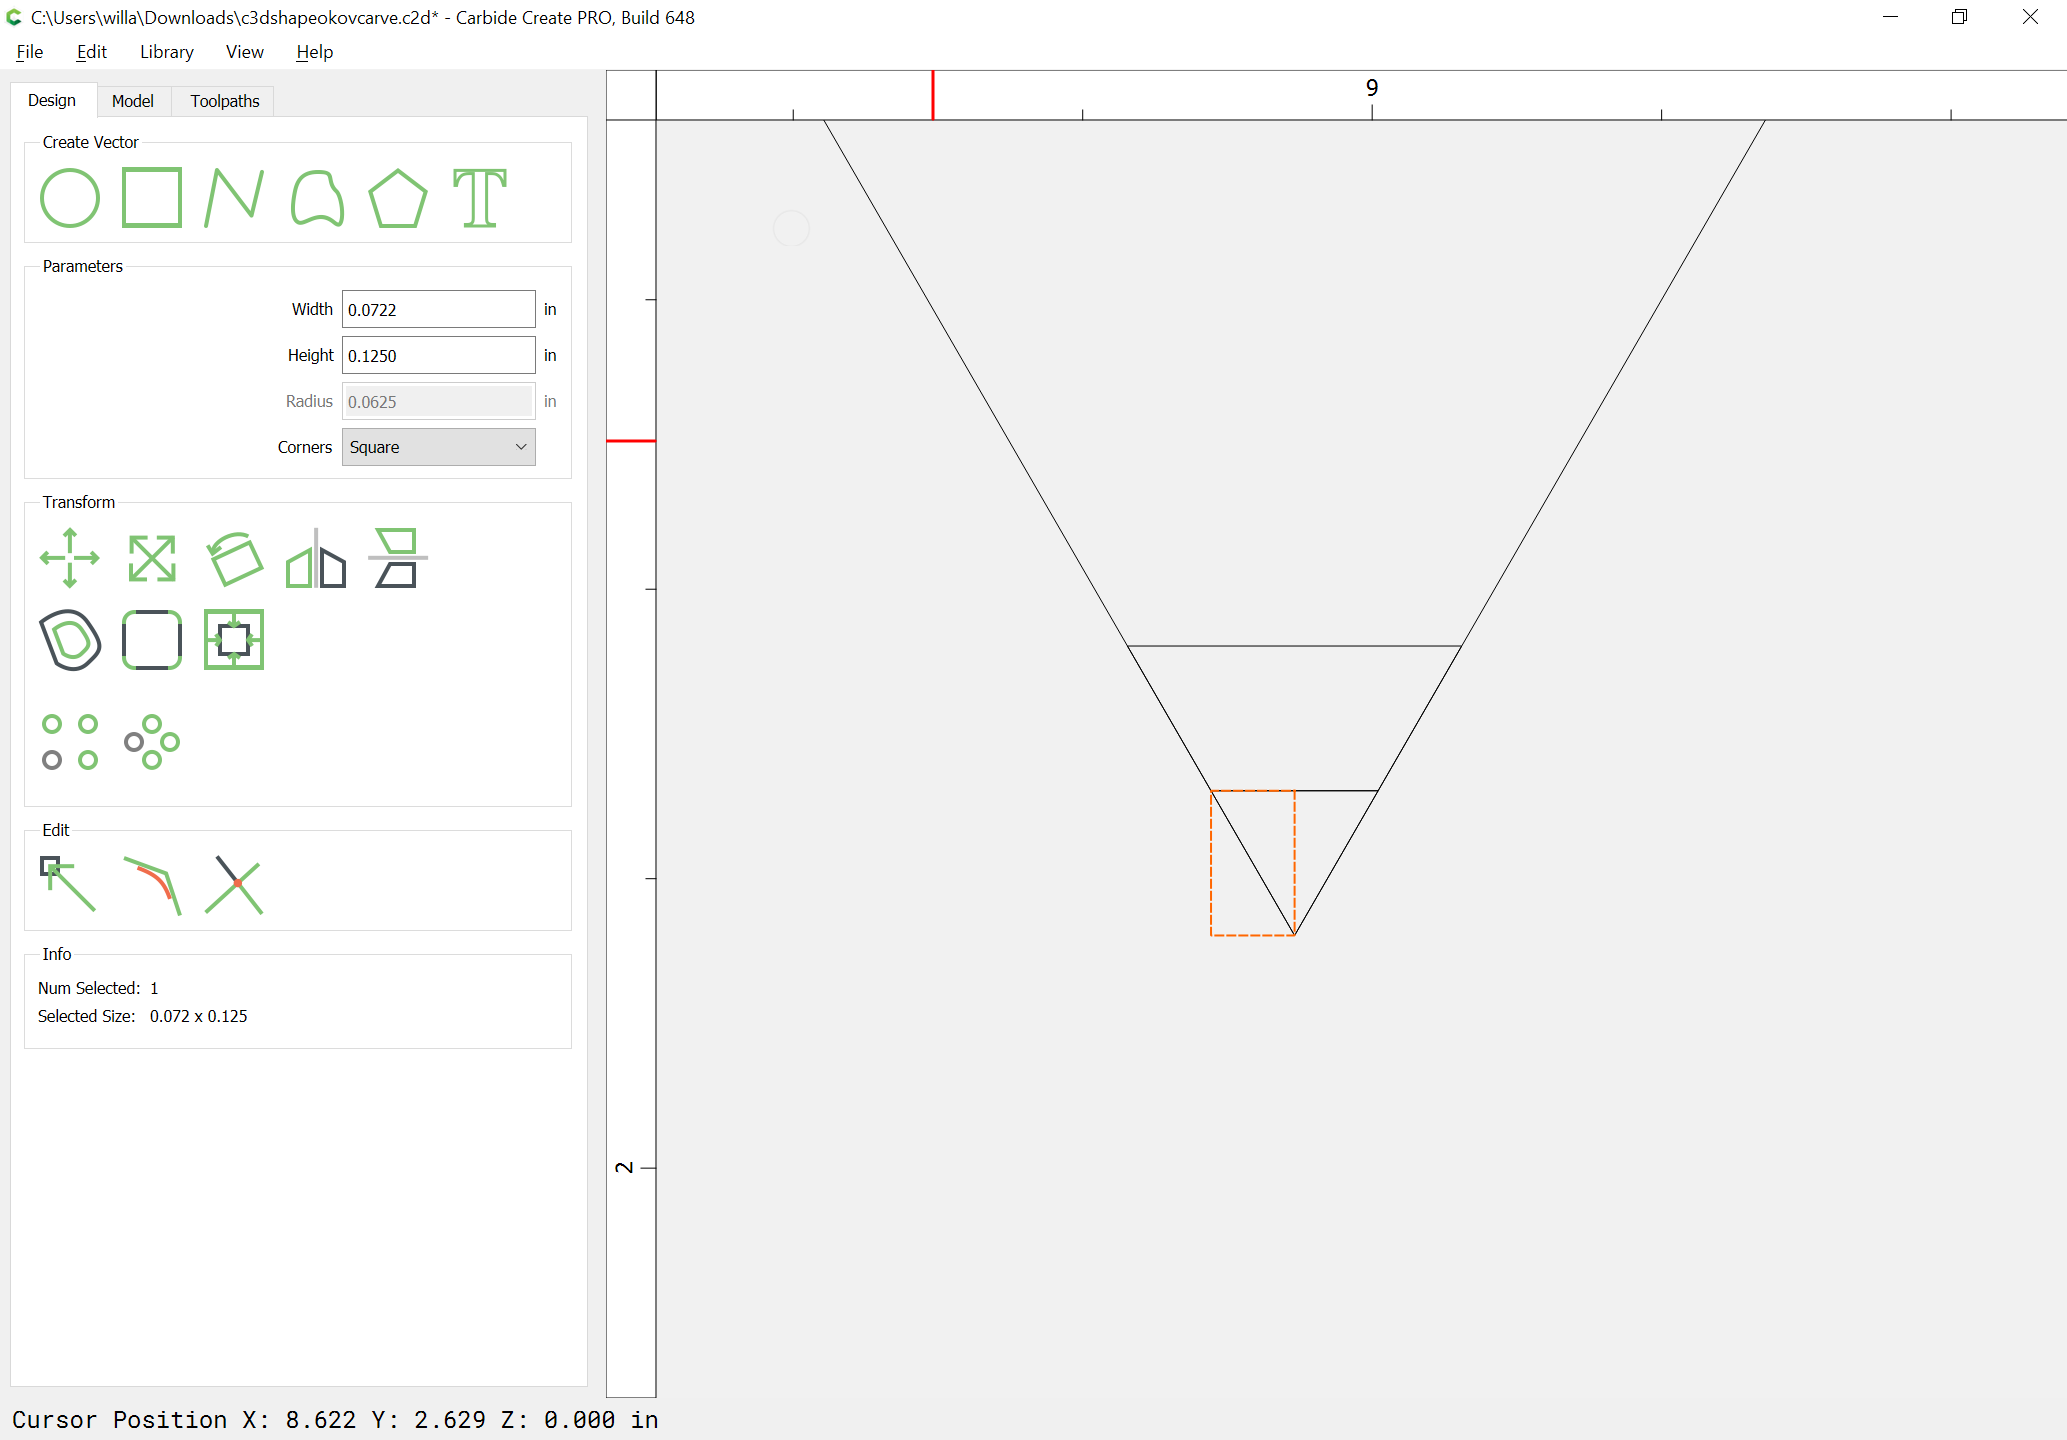
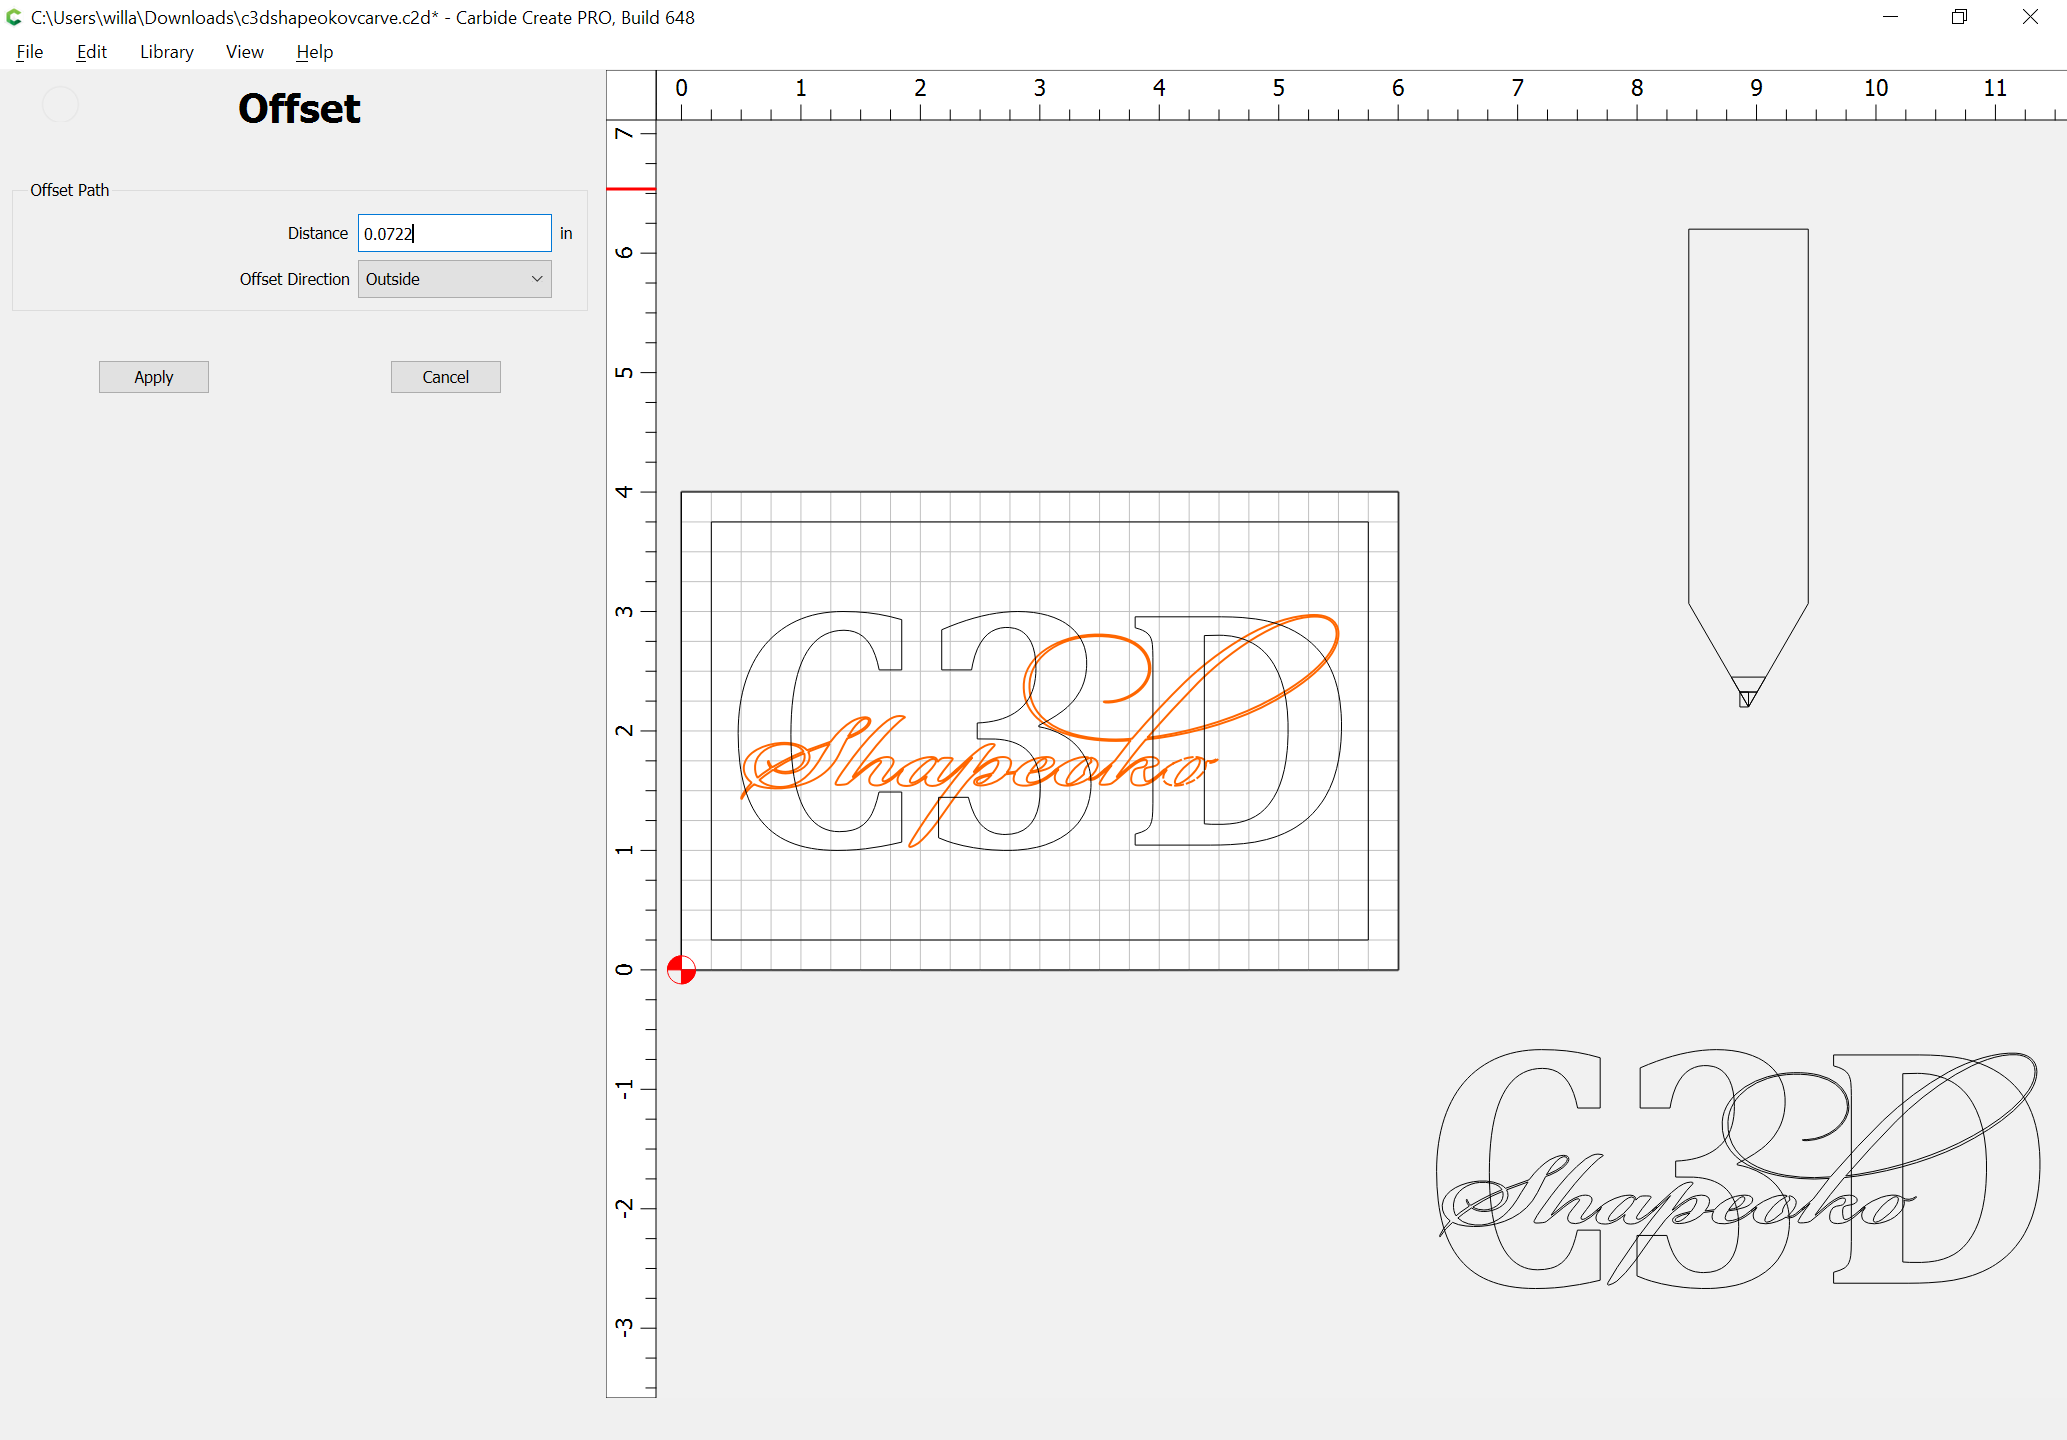
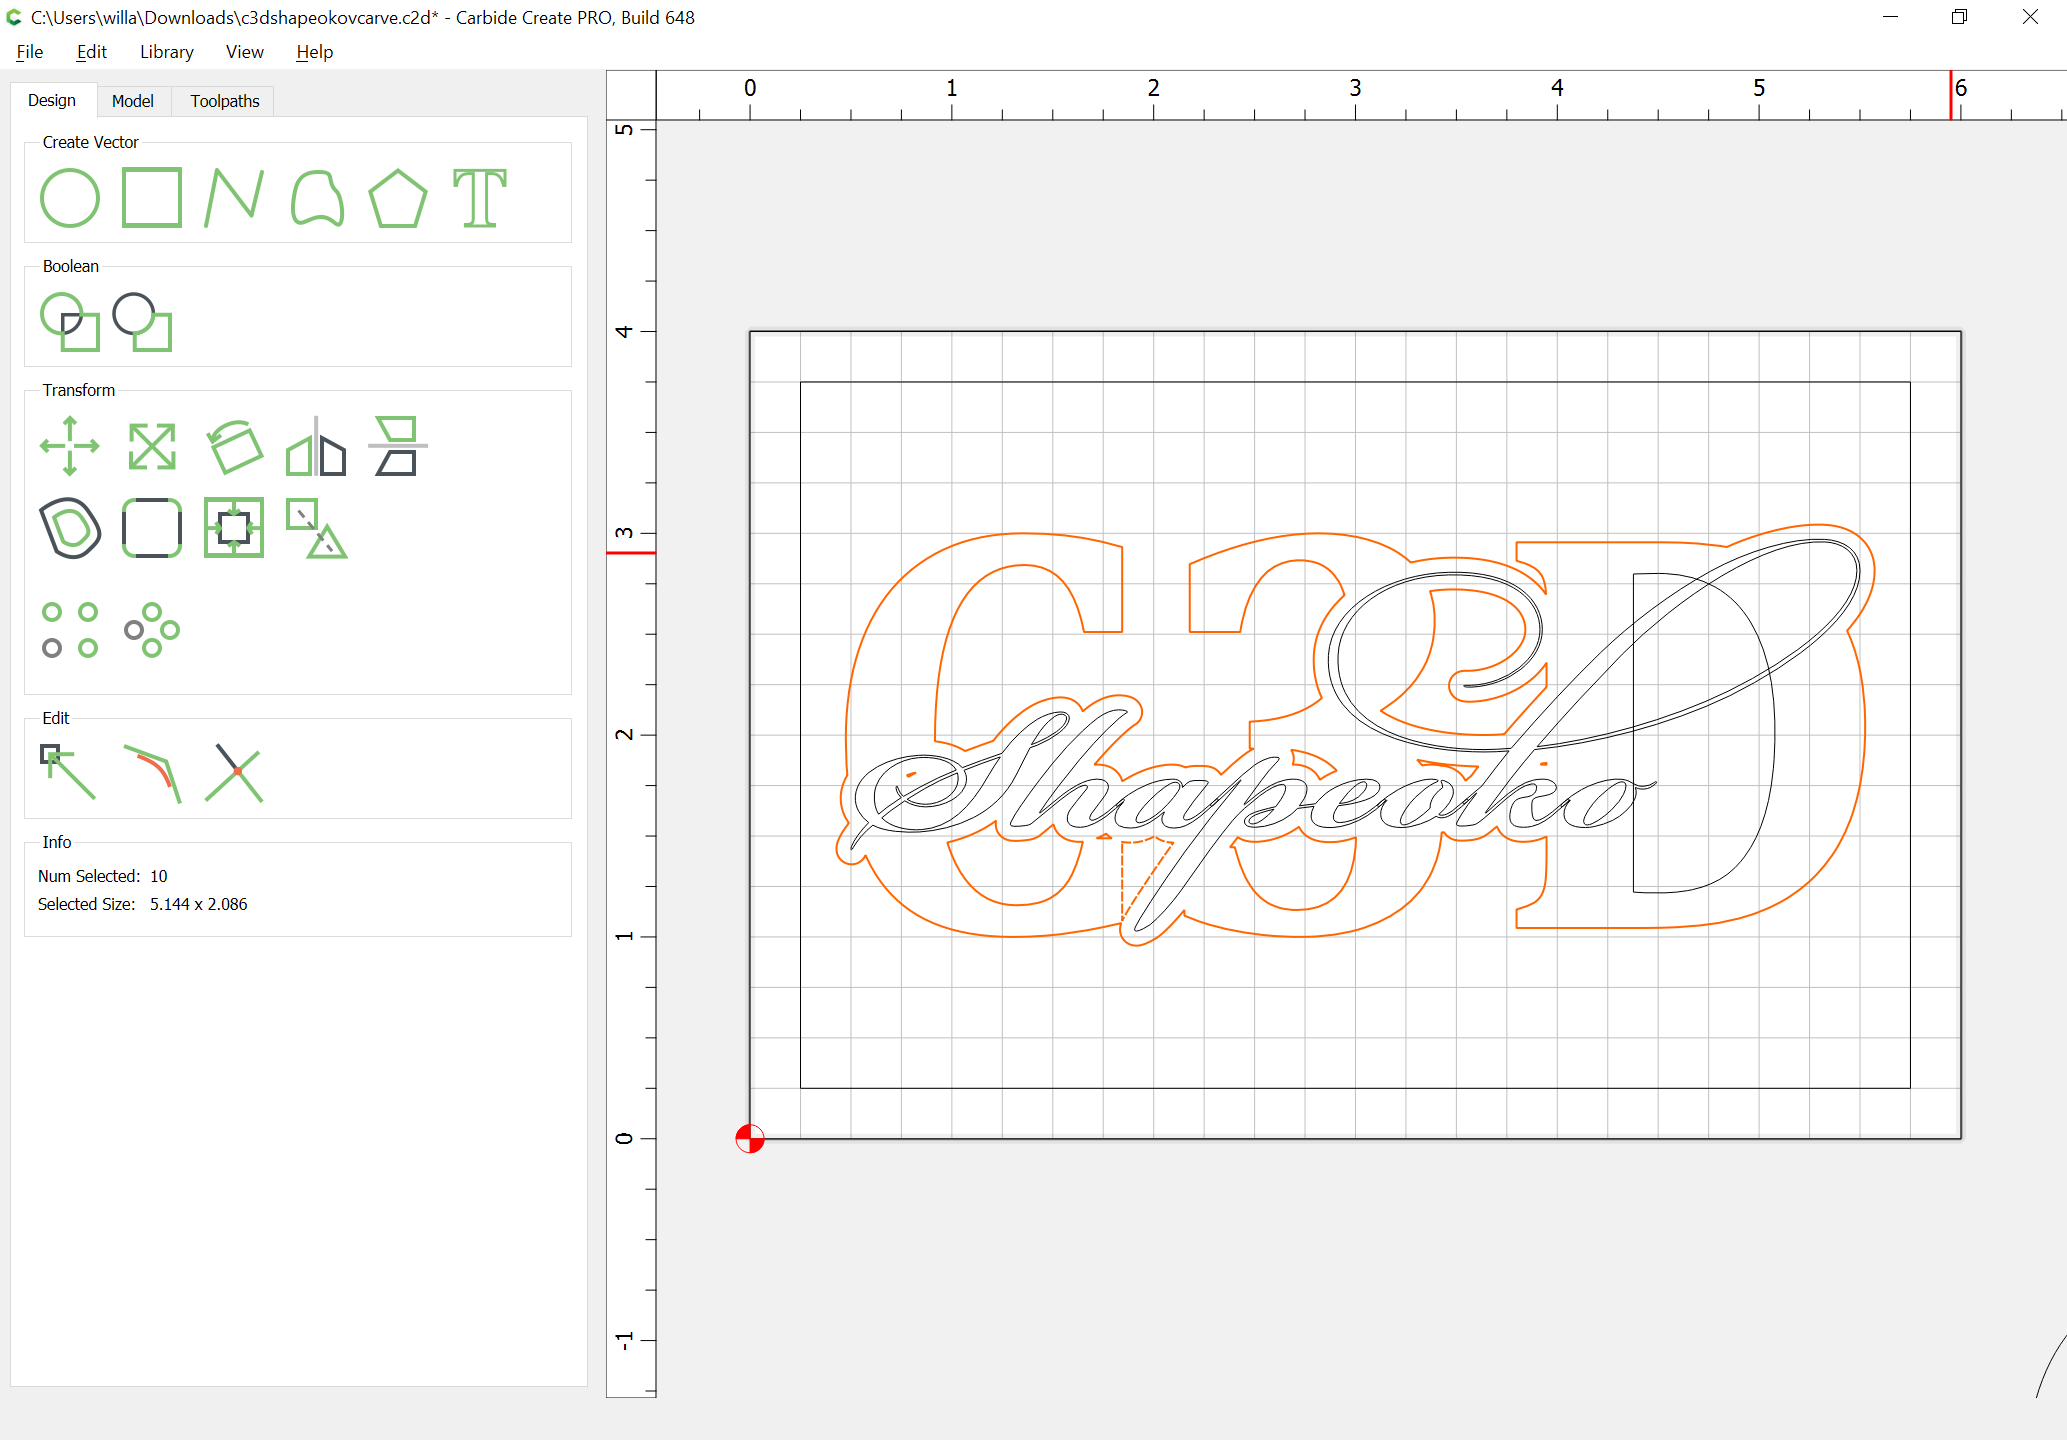
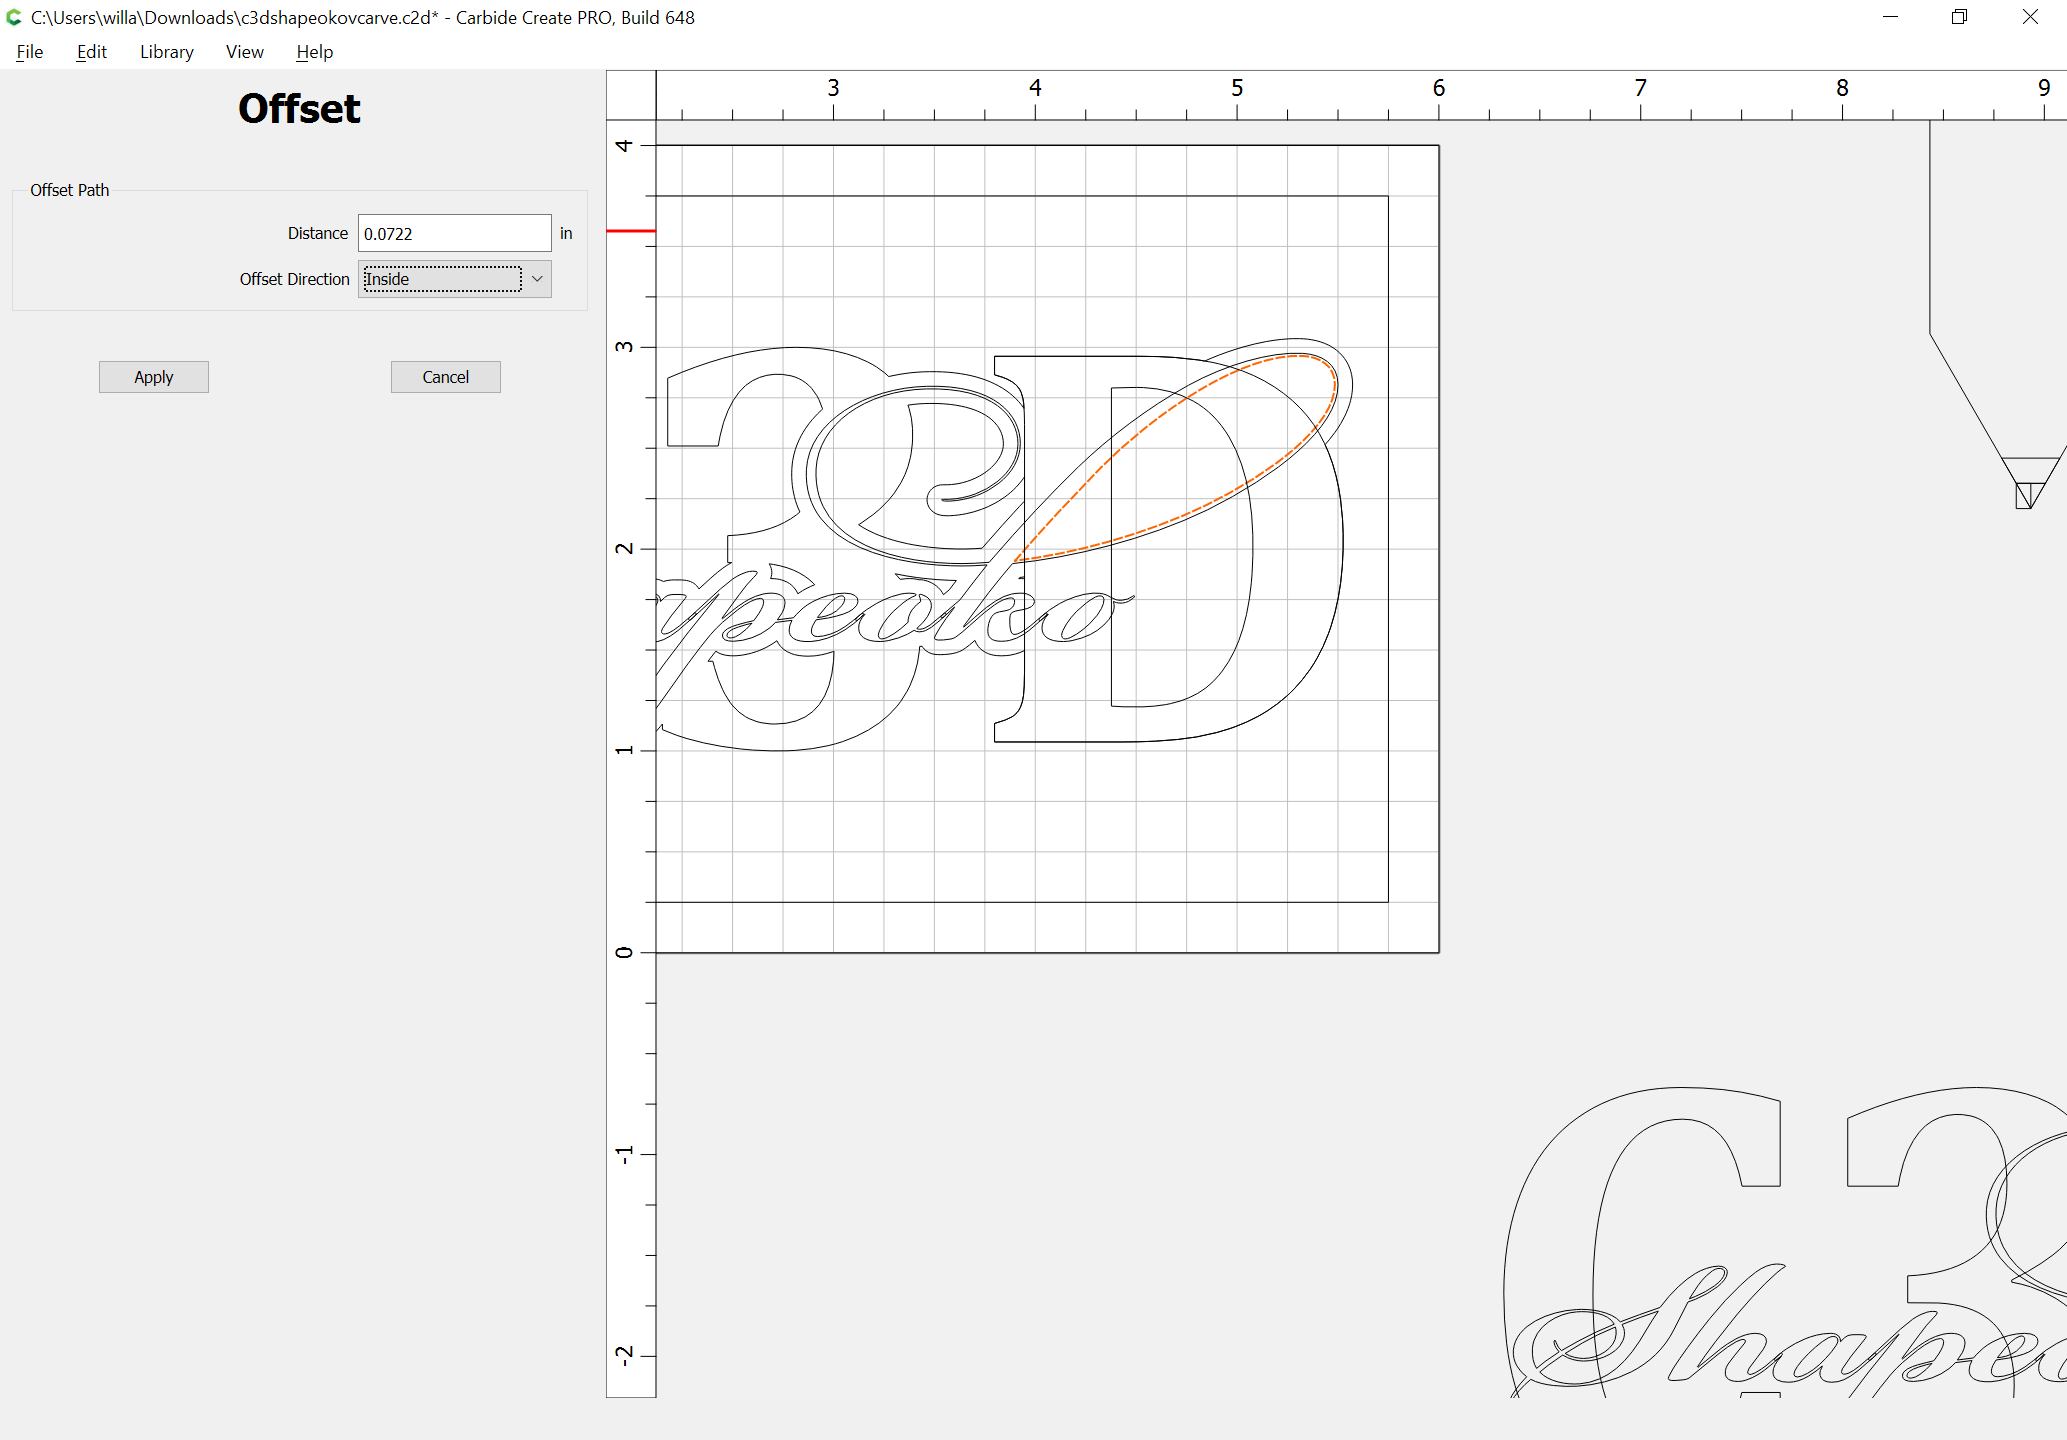
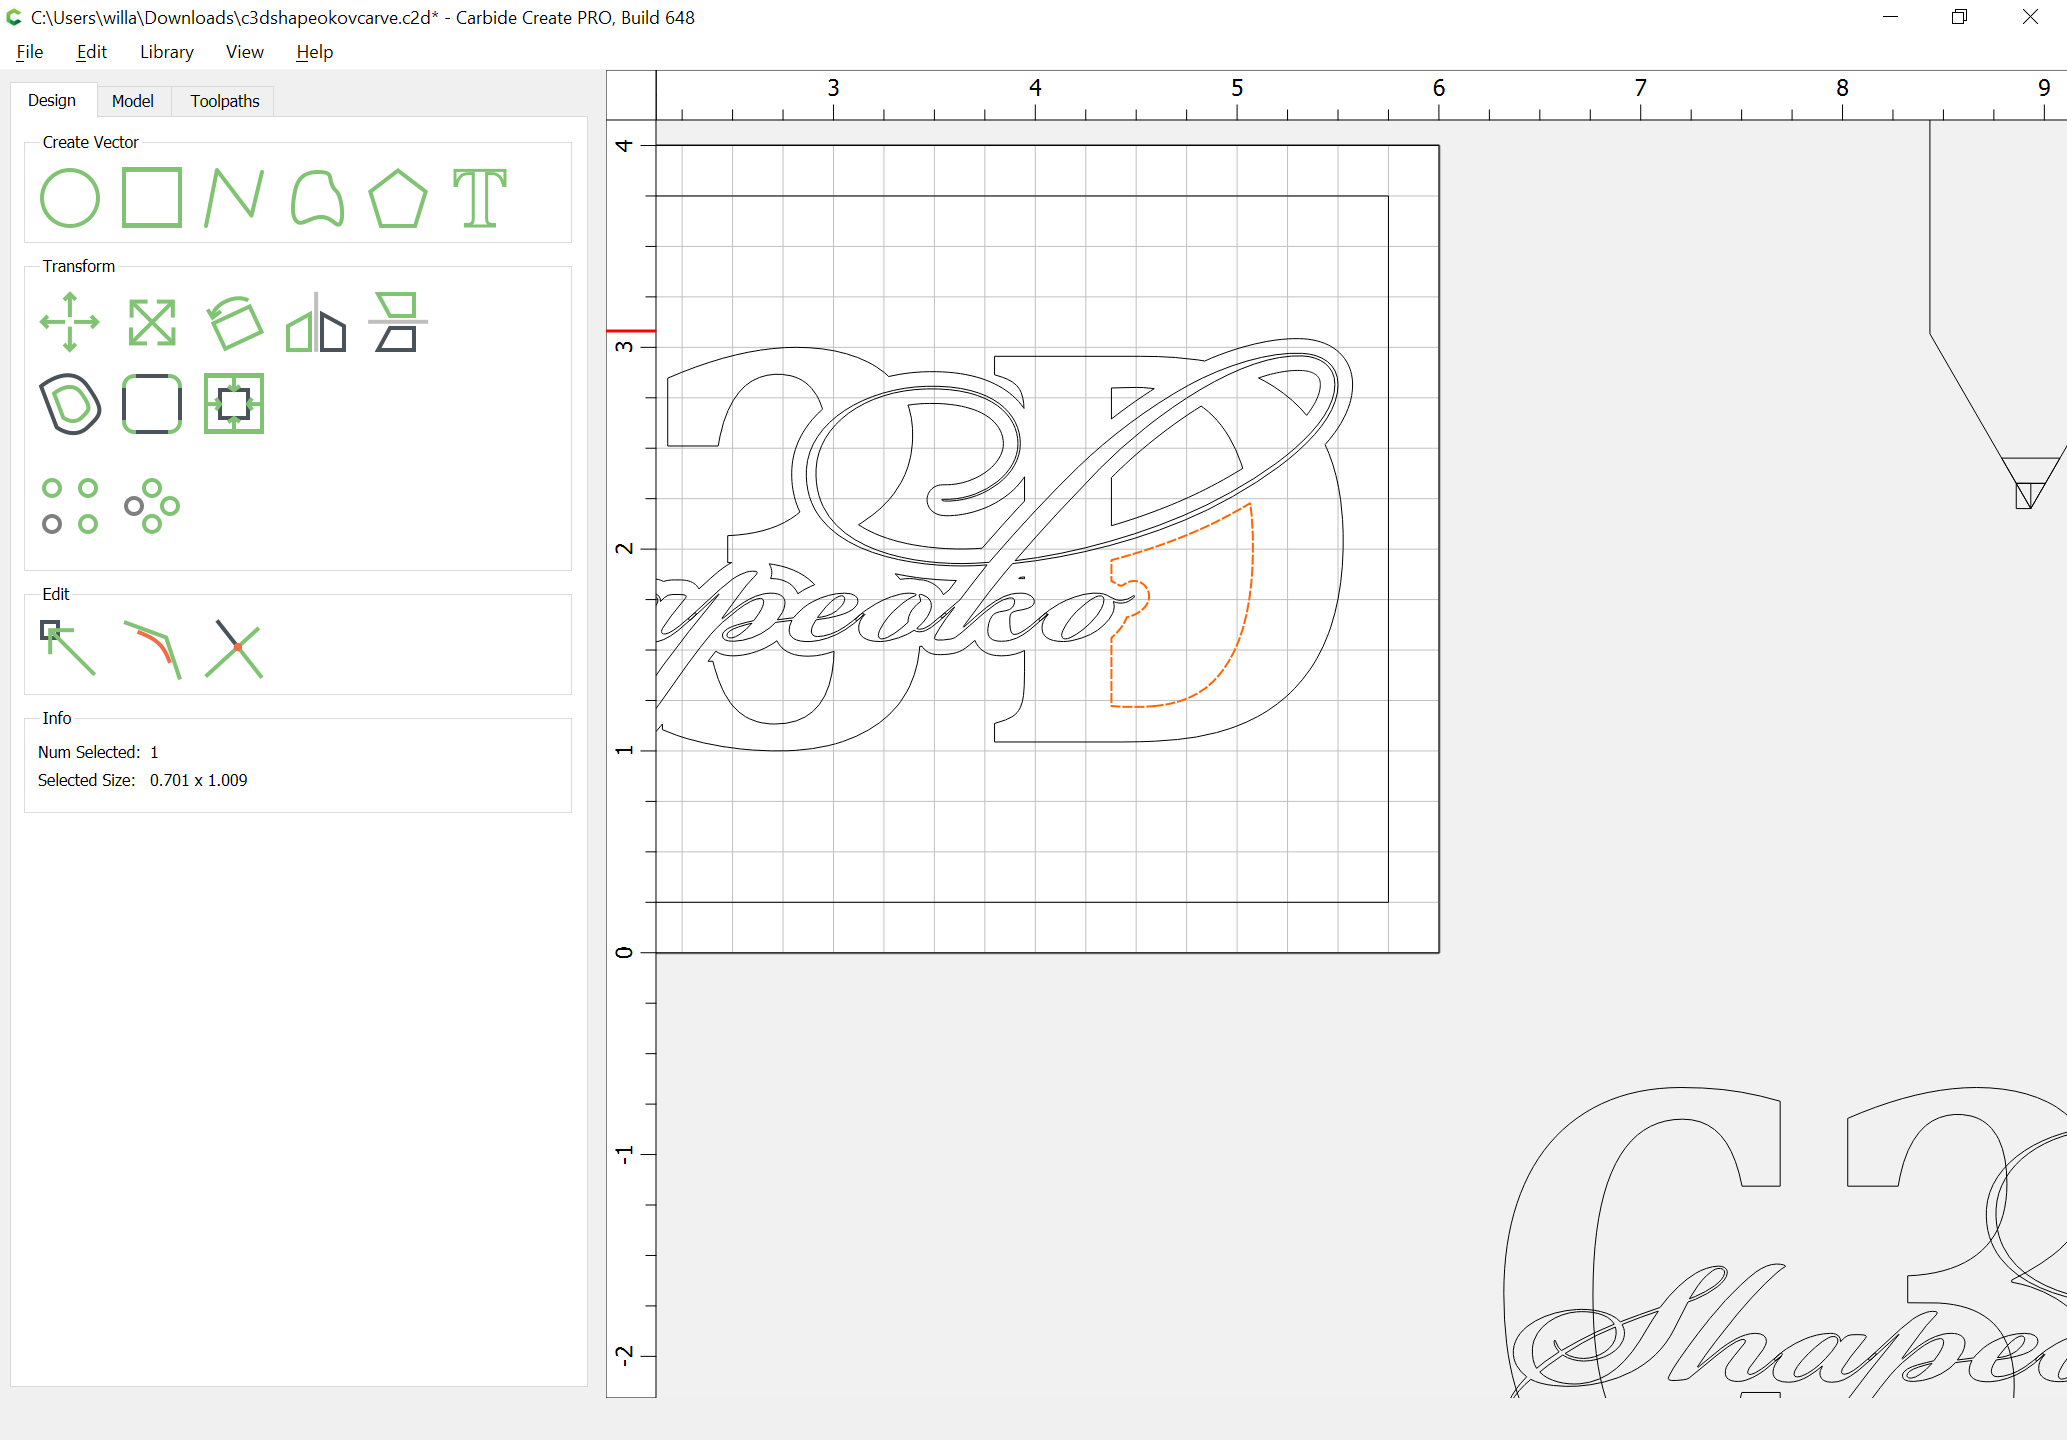
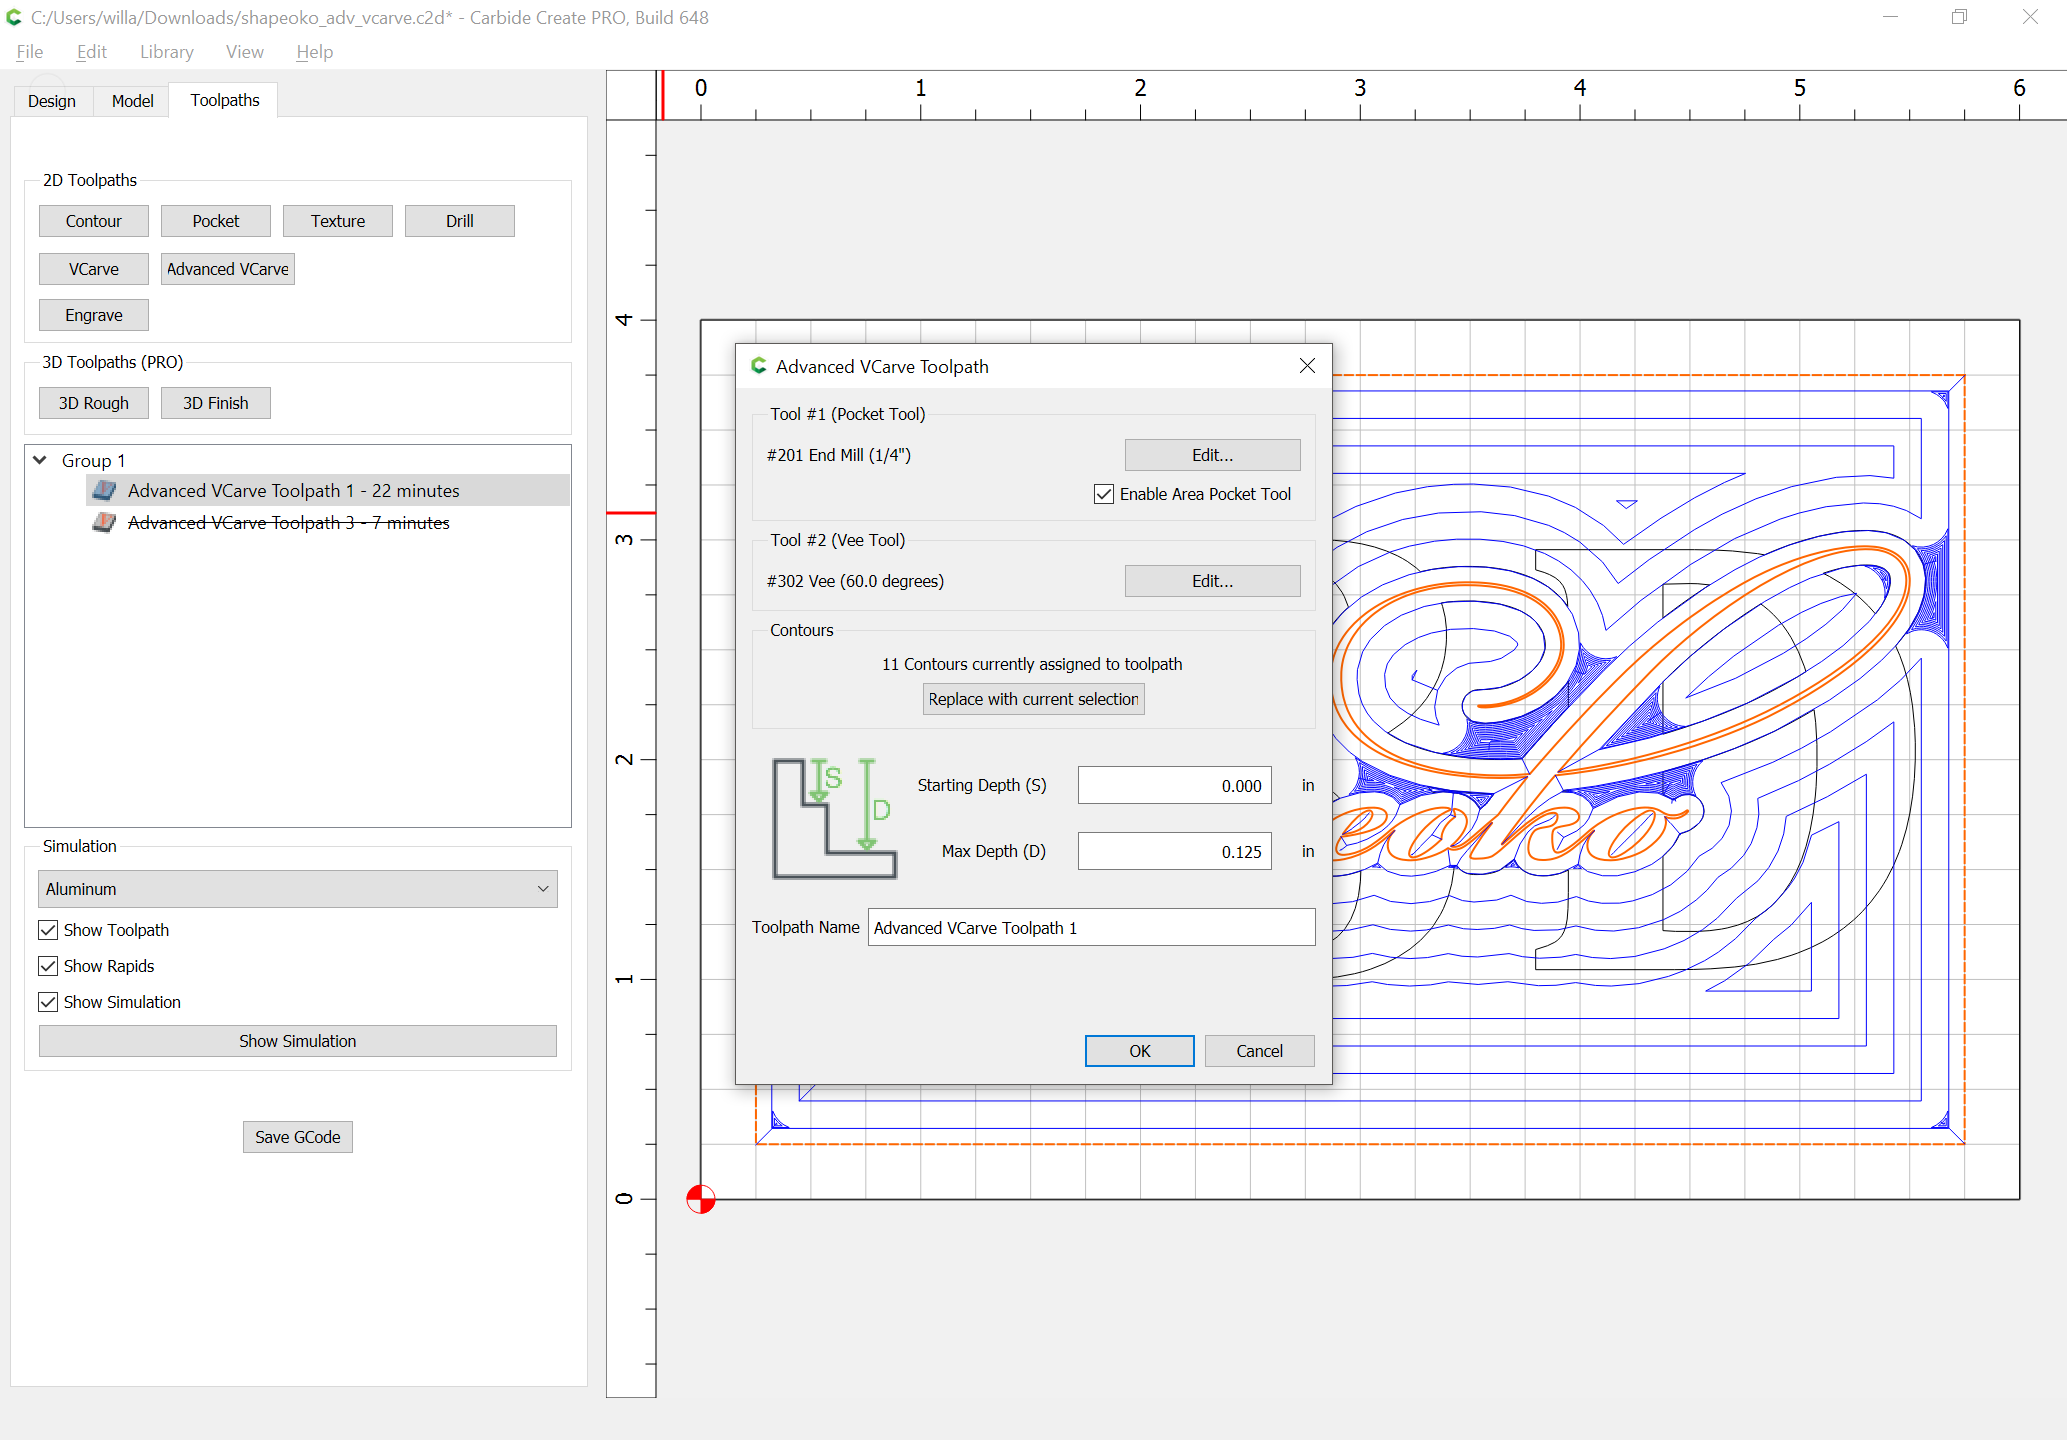
Do the math, or draw up a depiction for how deeply the V-shaped endmill which you are planning on using will cut for a given width. Select the paths and do an offset to match that for the desired — we’ll simplify things and use a 60 degree endmill (it cuts as wide as deep since it forms an equilateral triangle), so for a 1/8" depth, we’ll offset 1/8" out from the text and 1/8" in from the border after duplicating each piece:
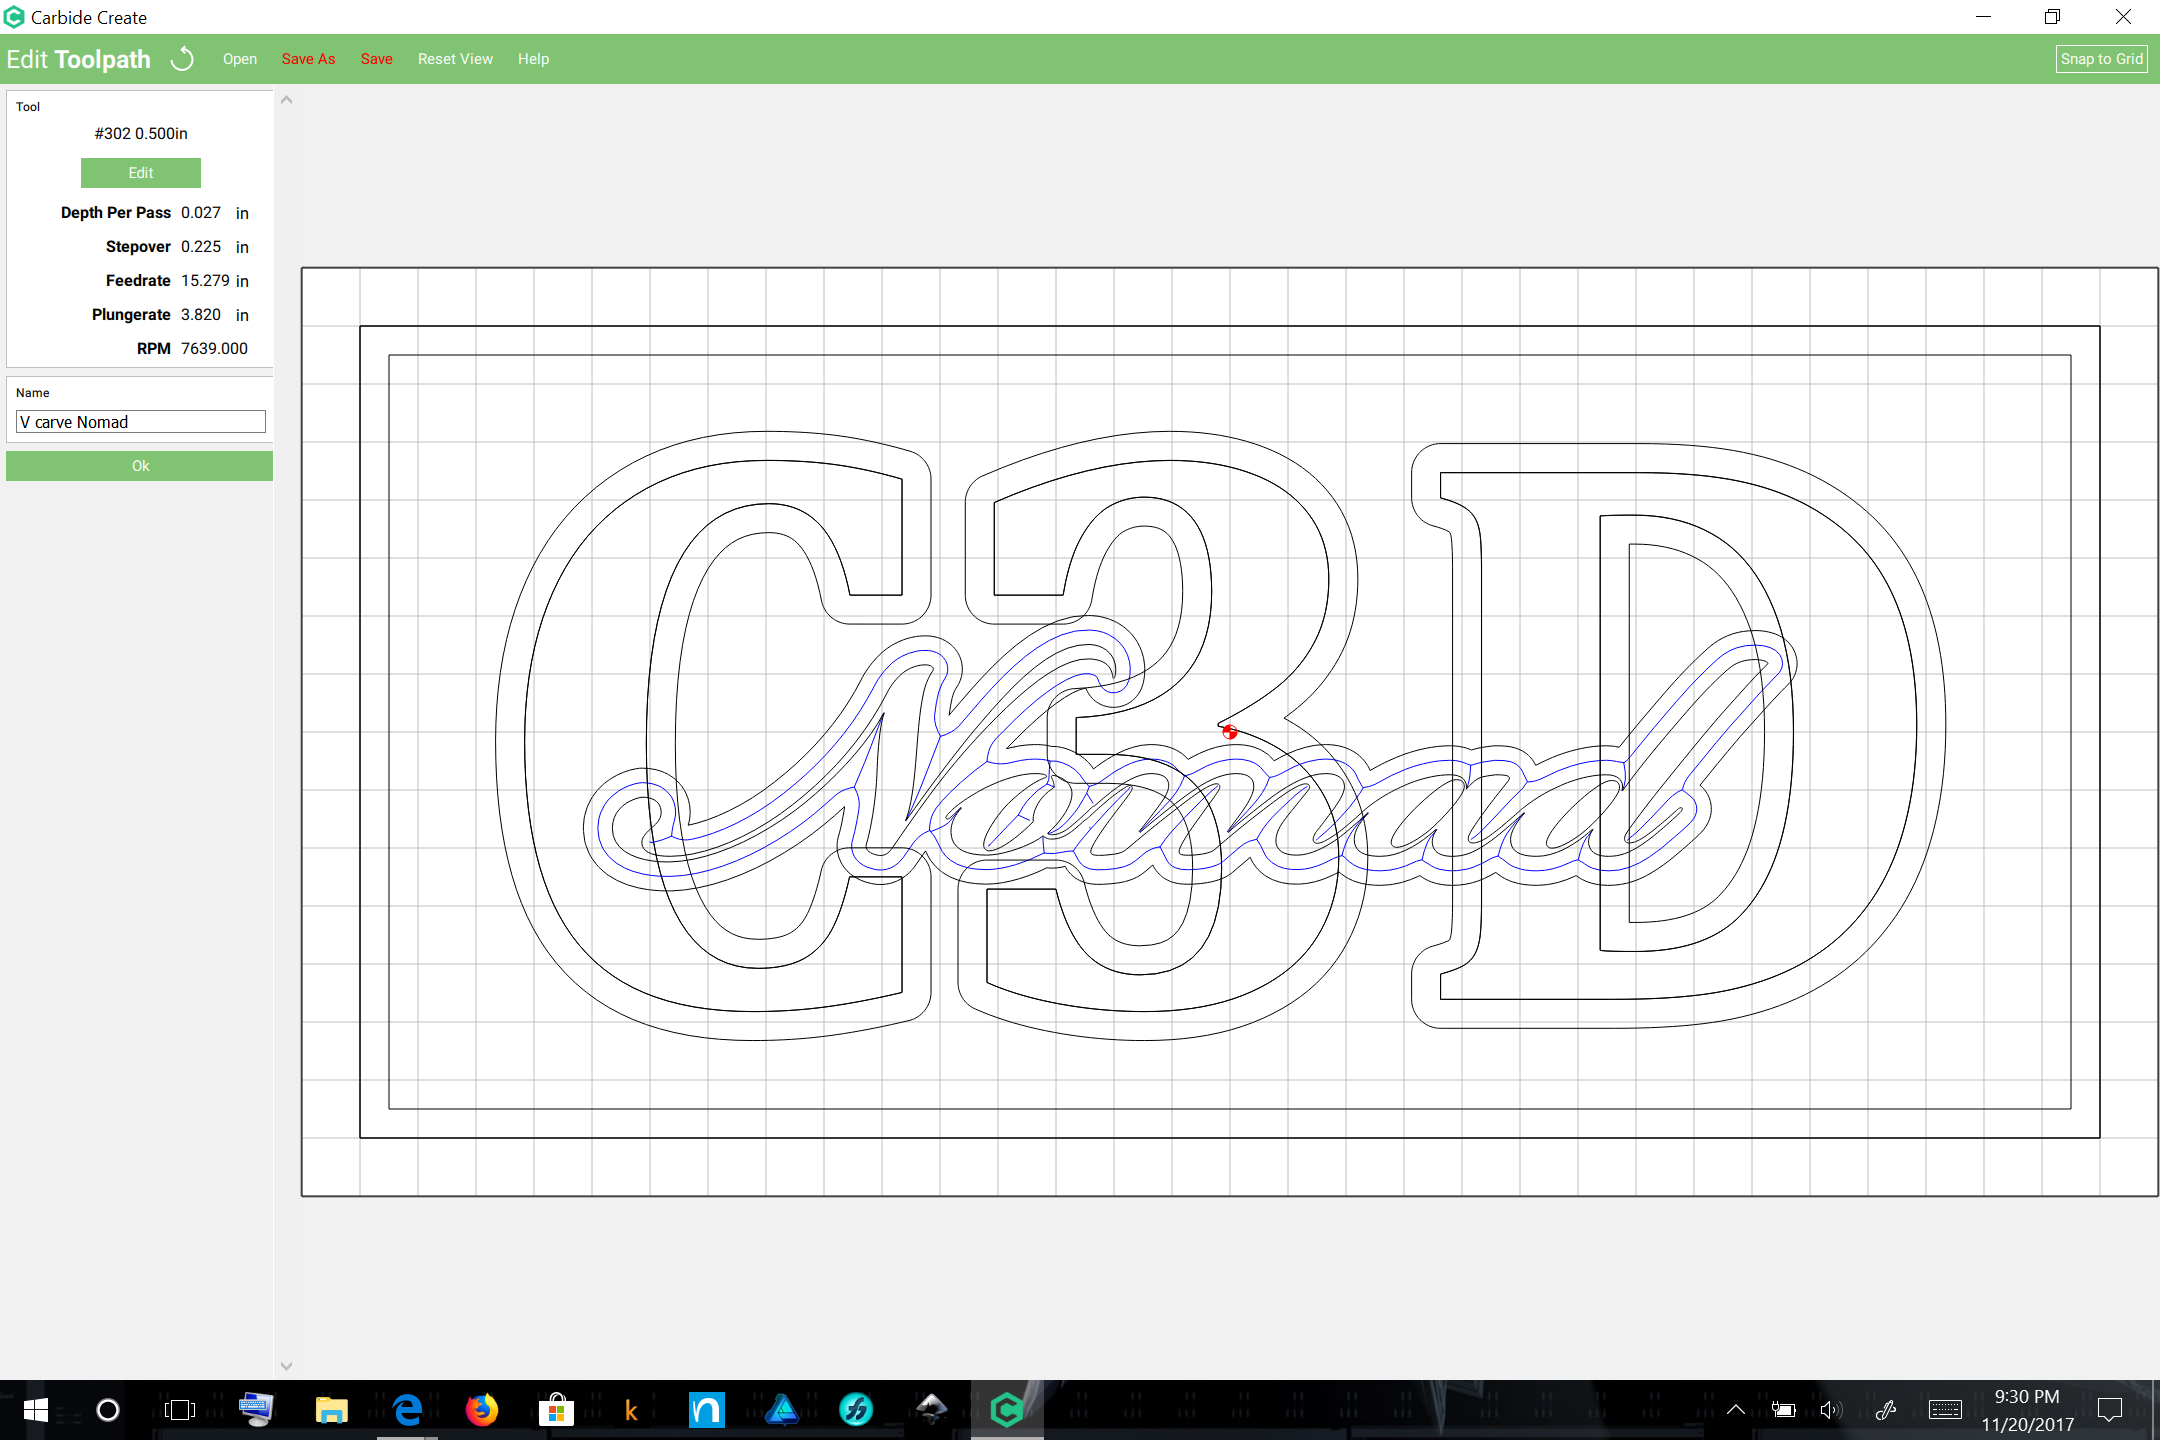
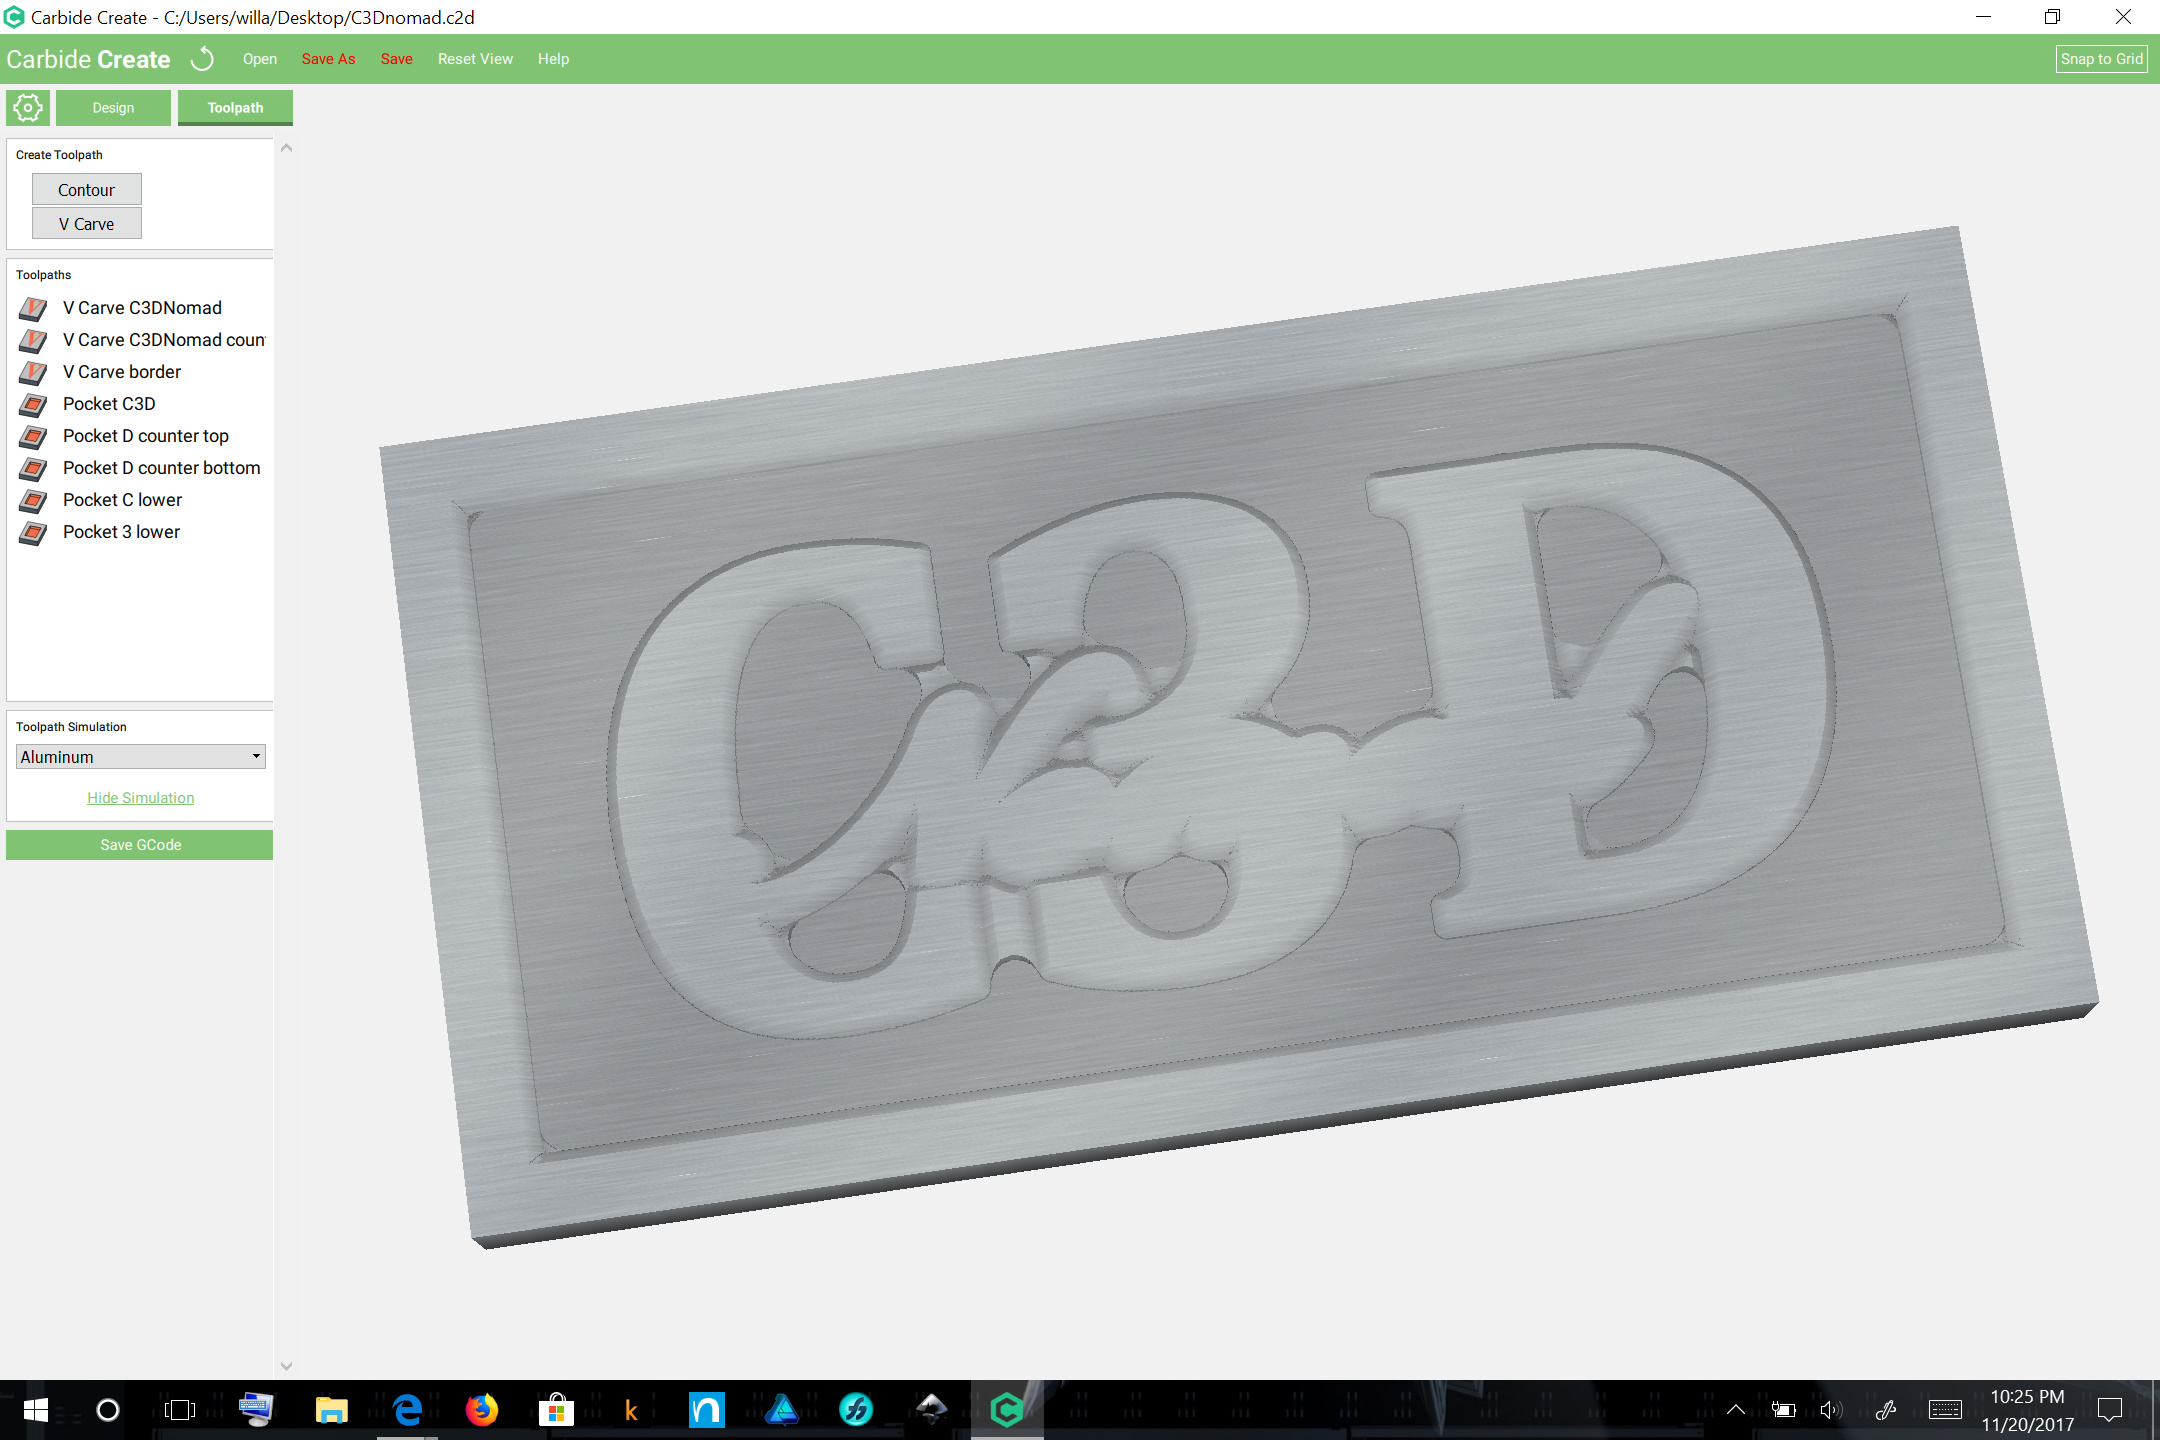
Since Carbide Create won’t allow one to set the initial cutting height of a V Carve, one would the duplicate the file and reduce the stock thickness in the duplicate by the thickness of the above pocket.
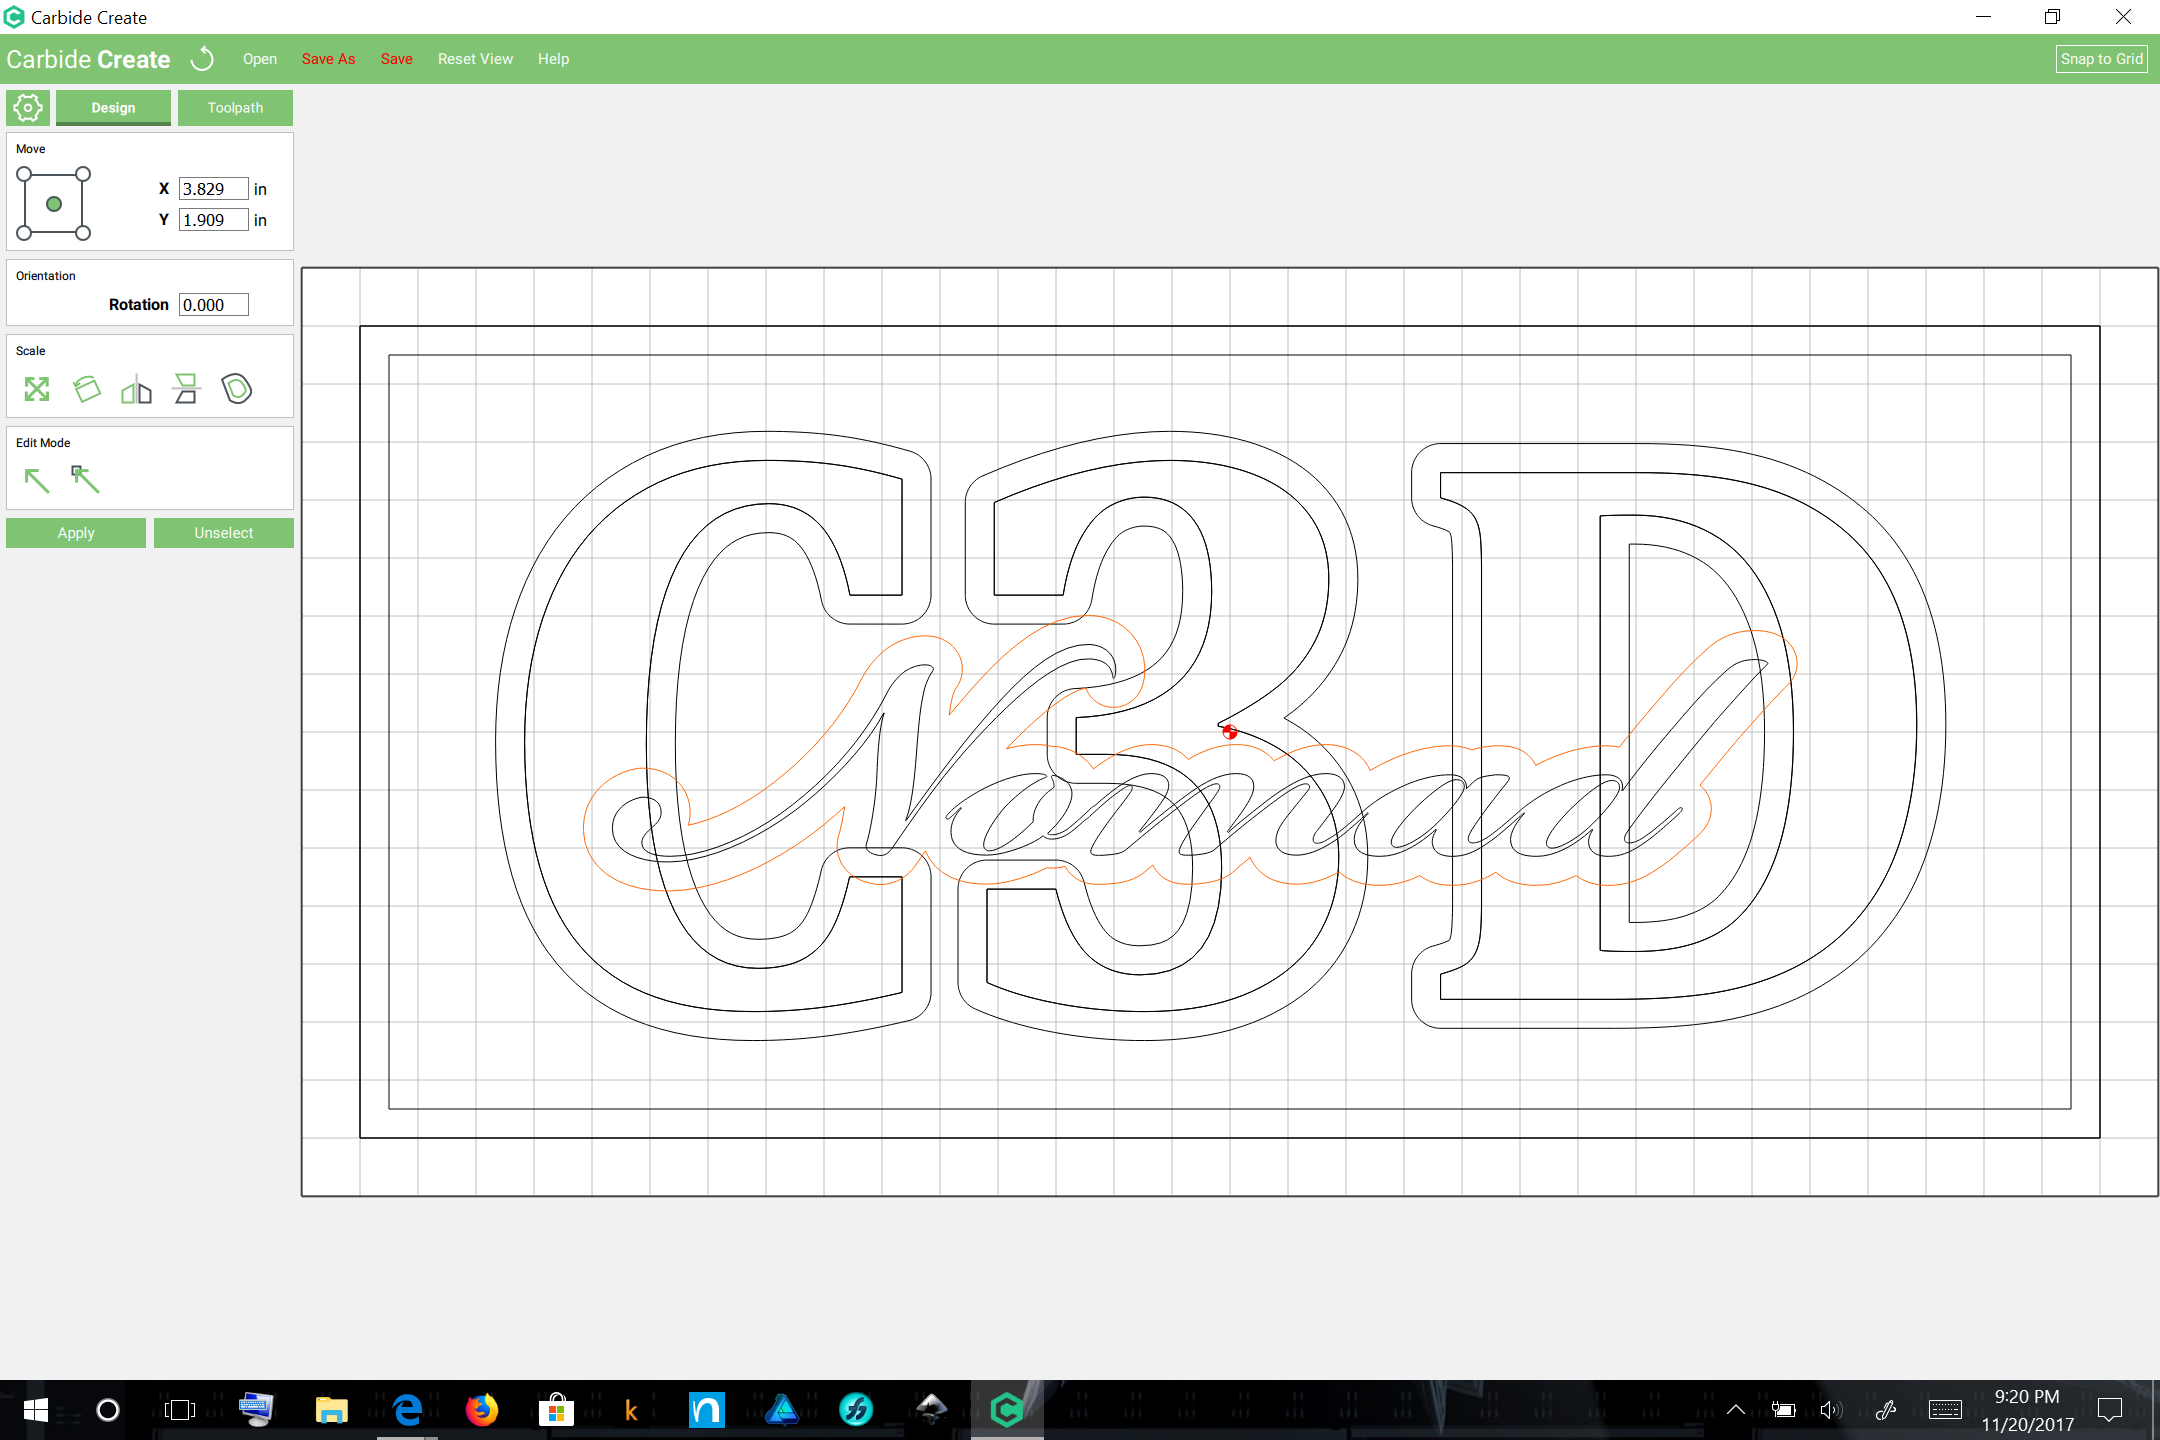
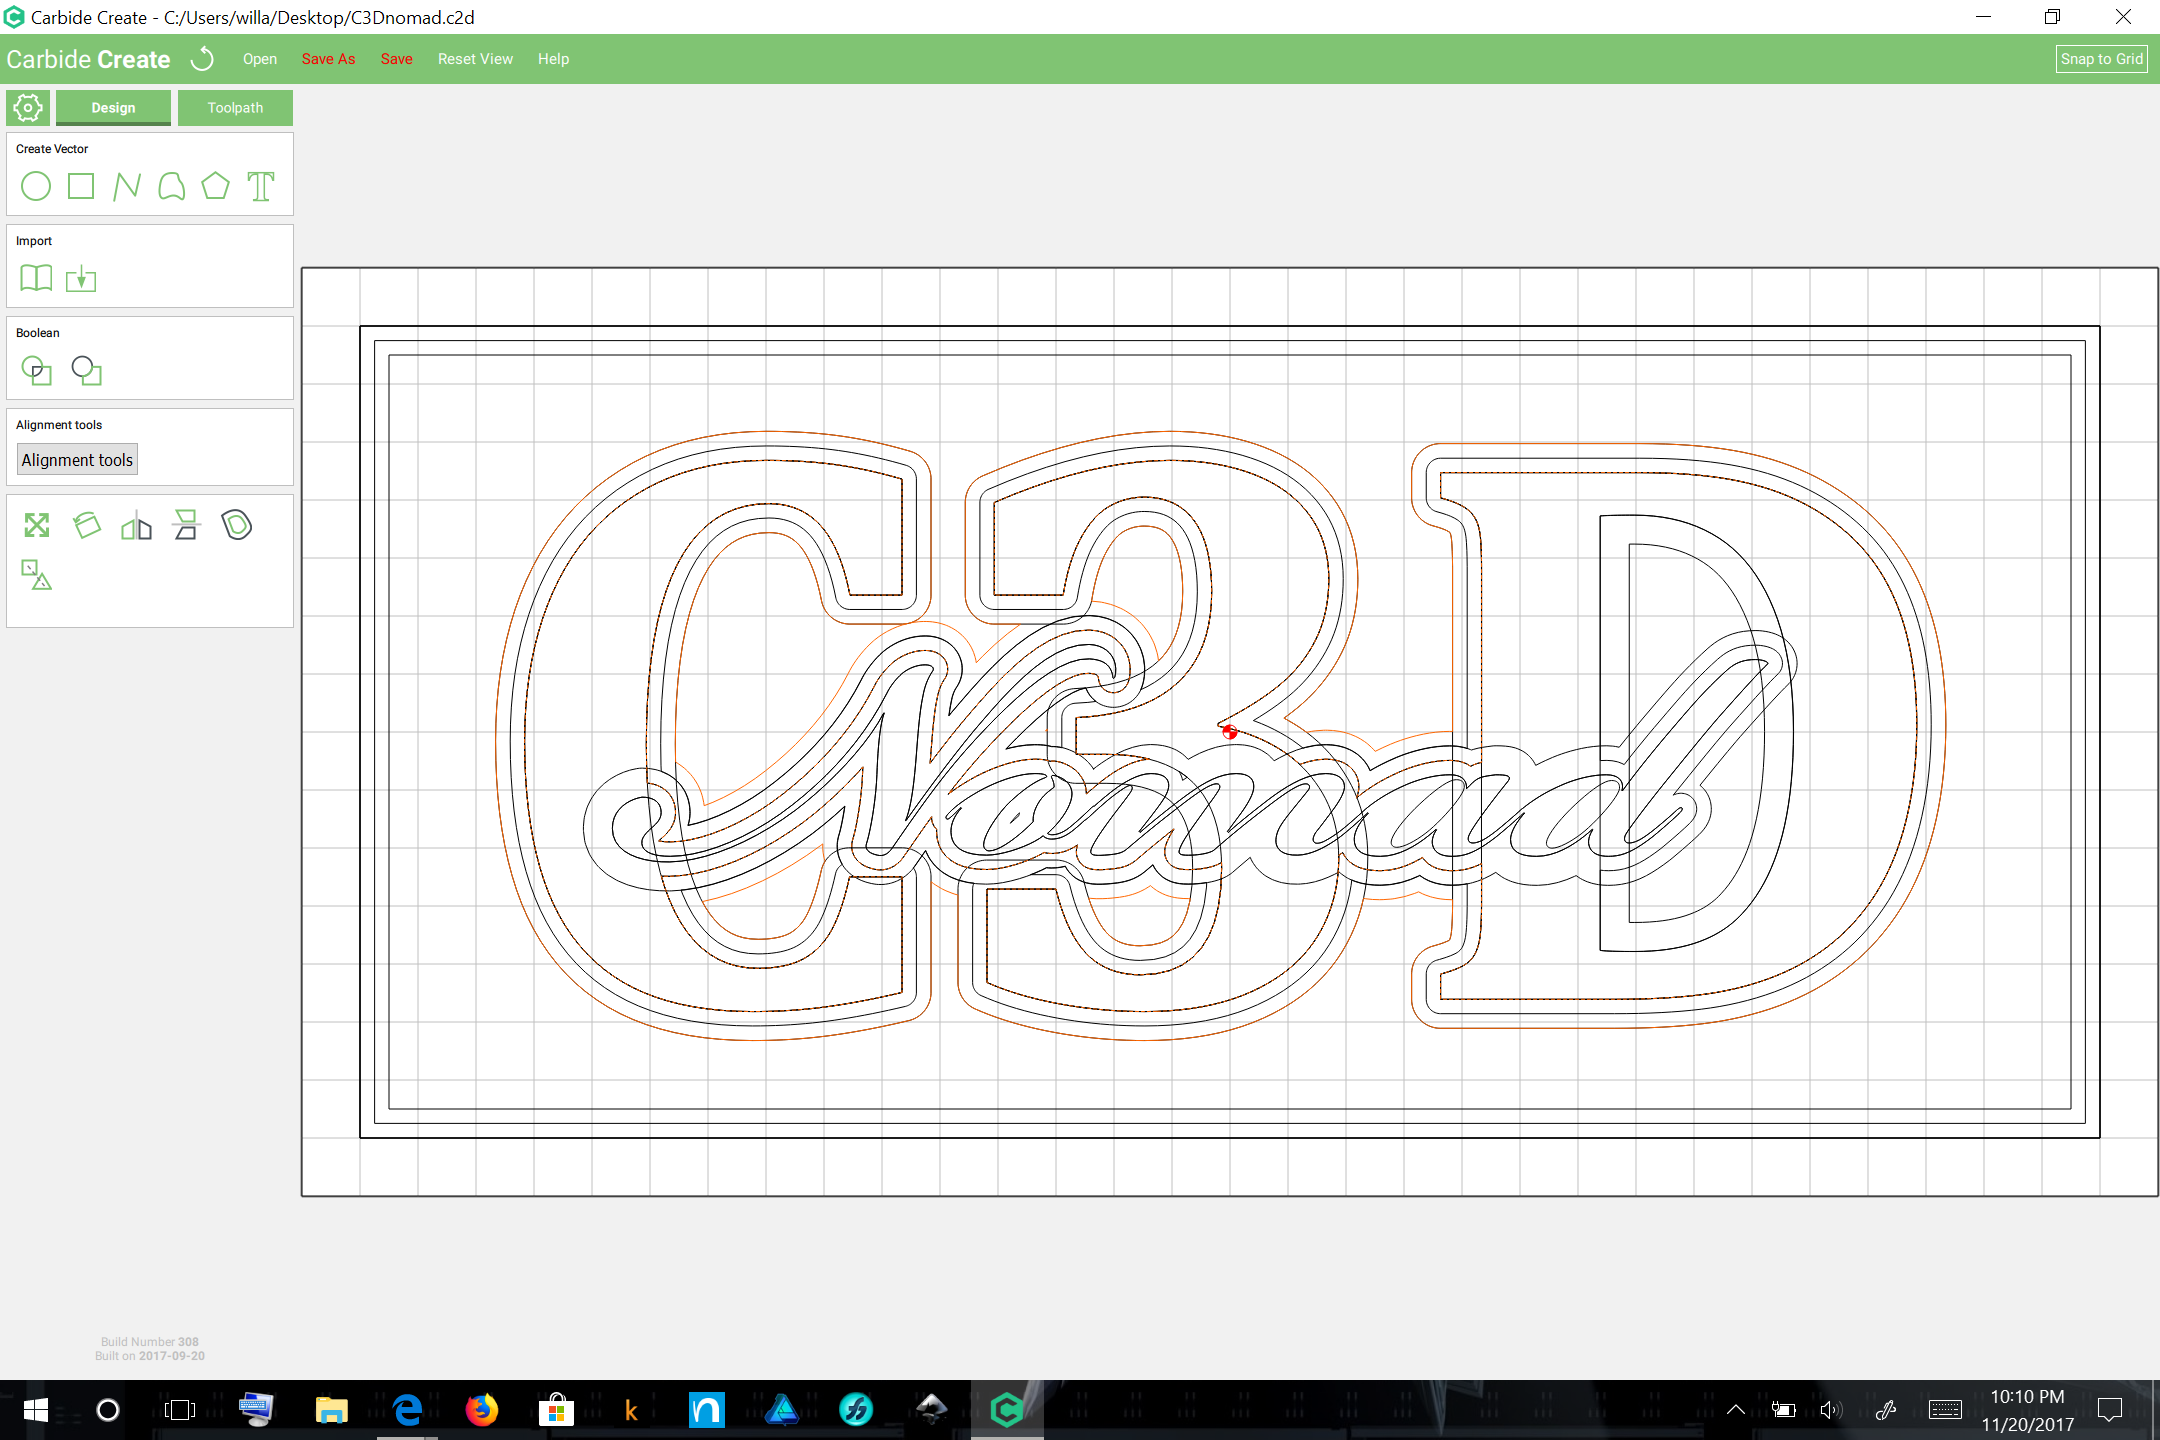
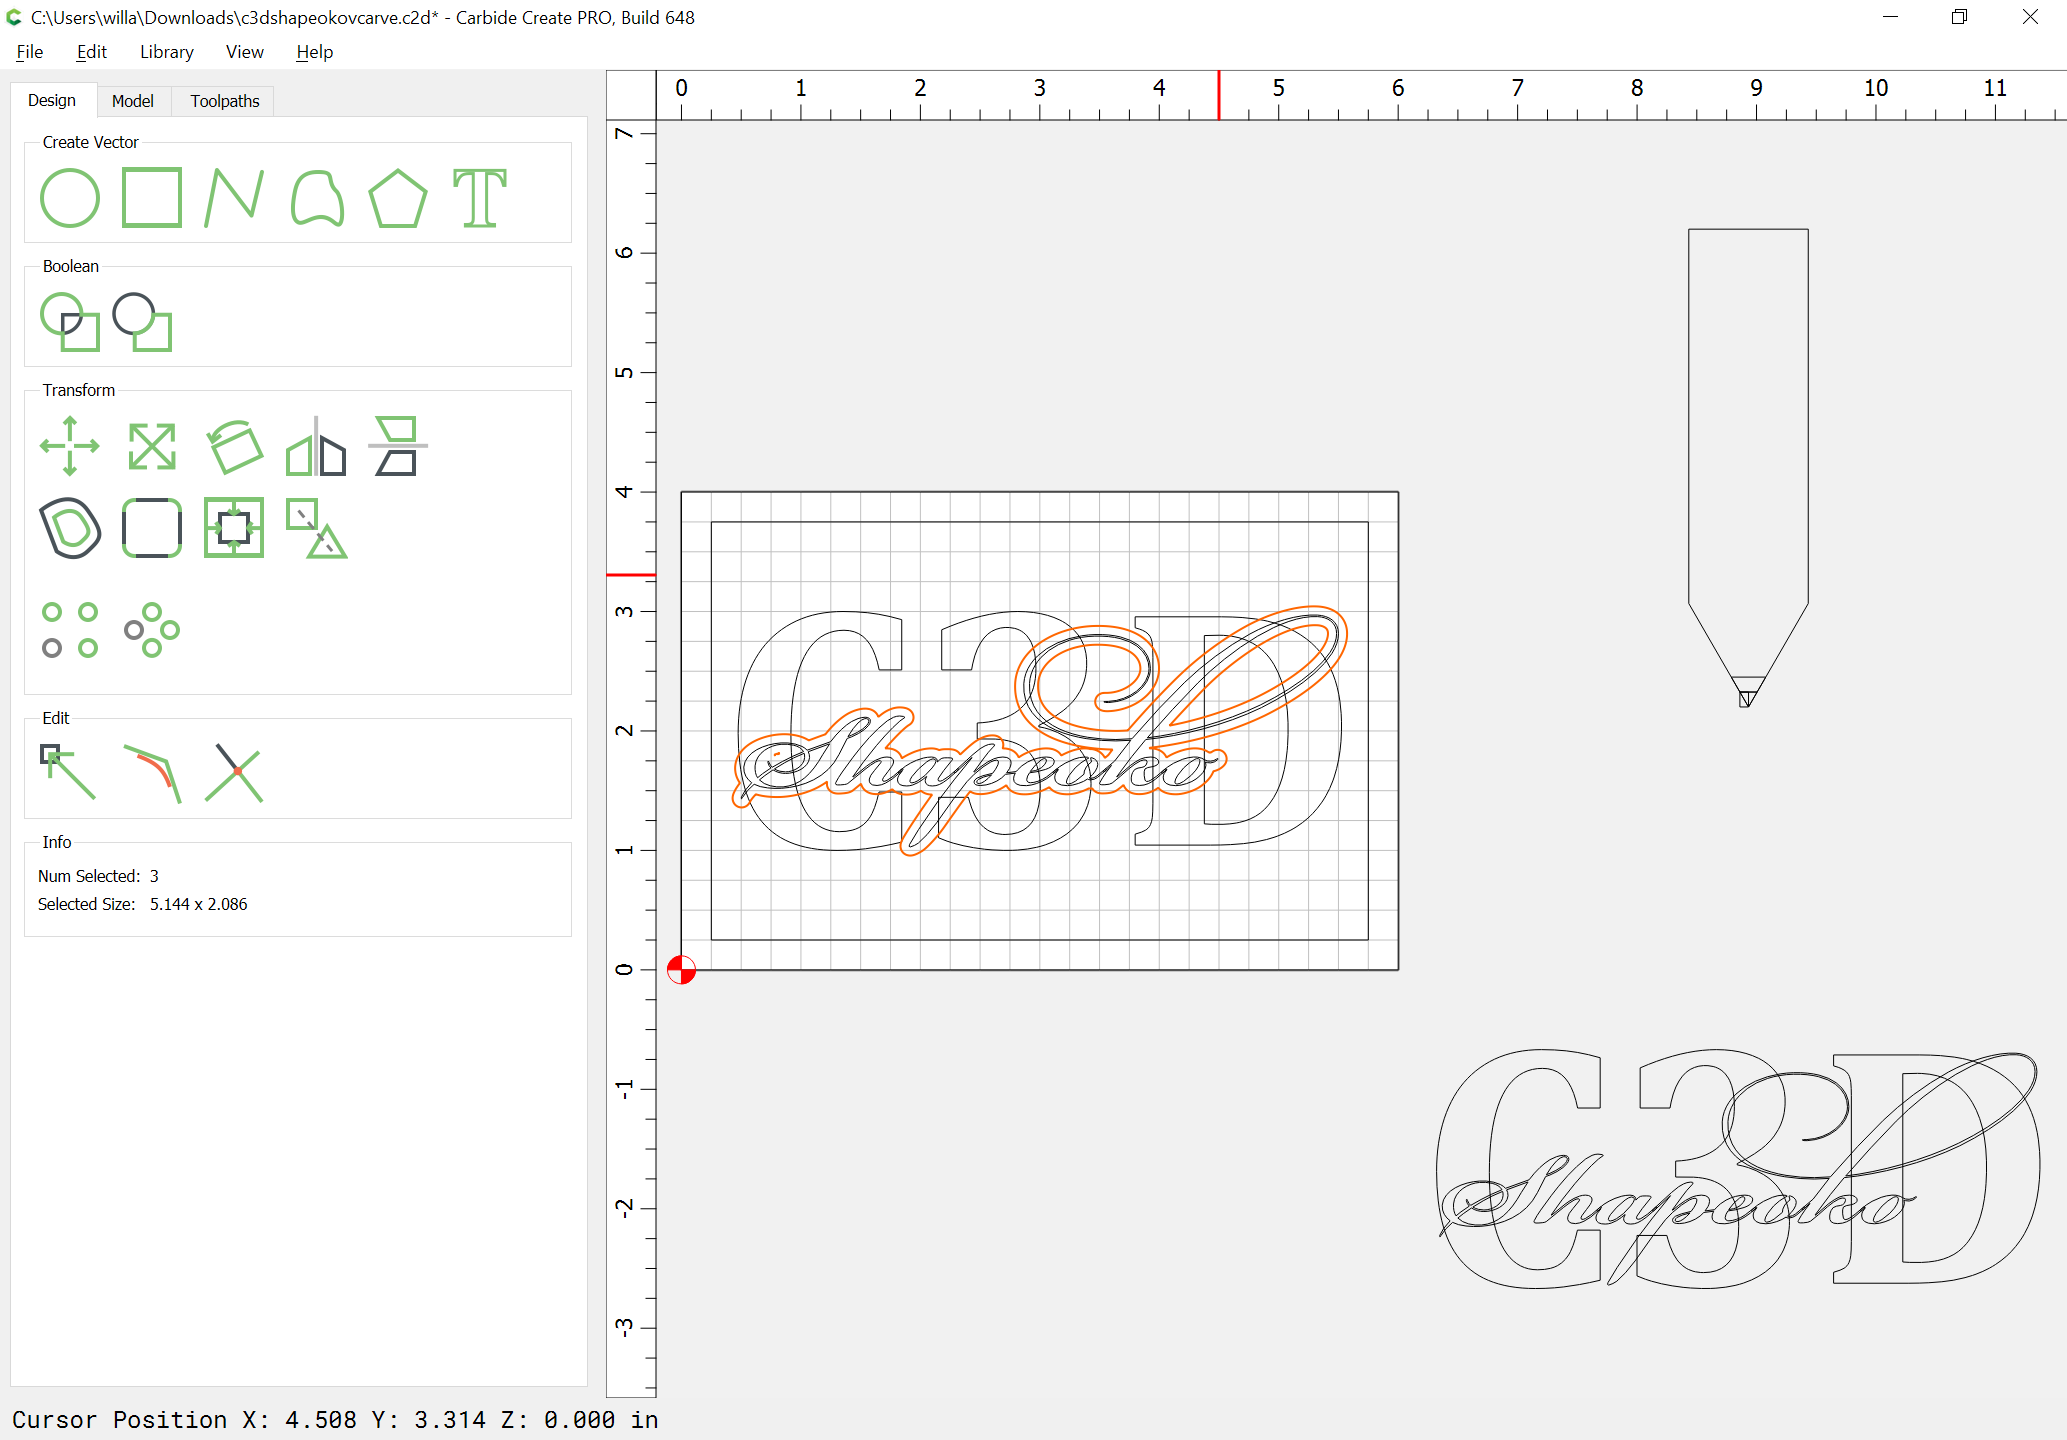
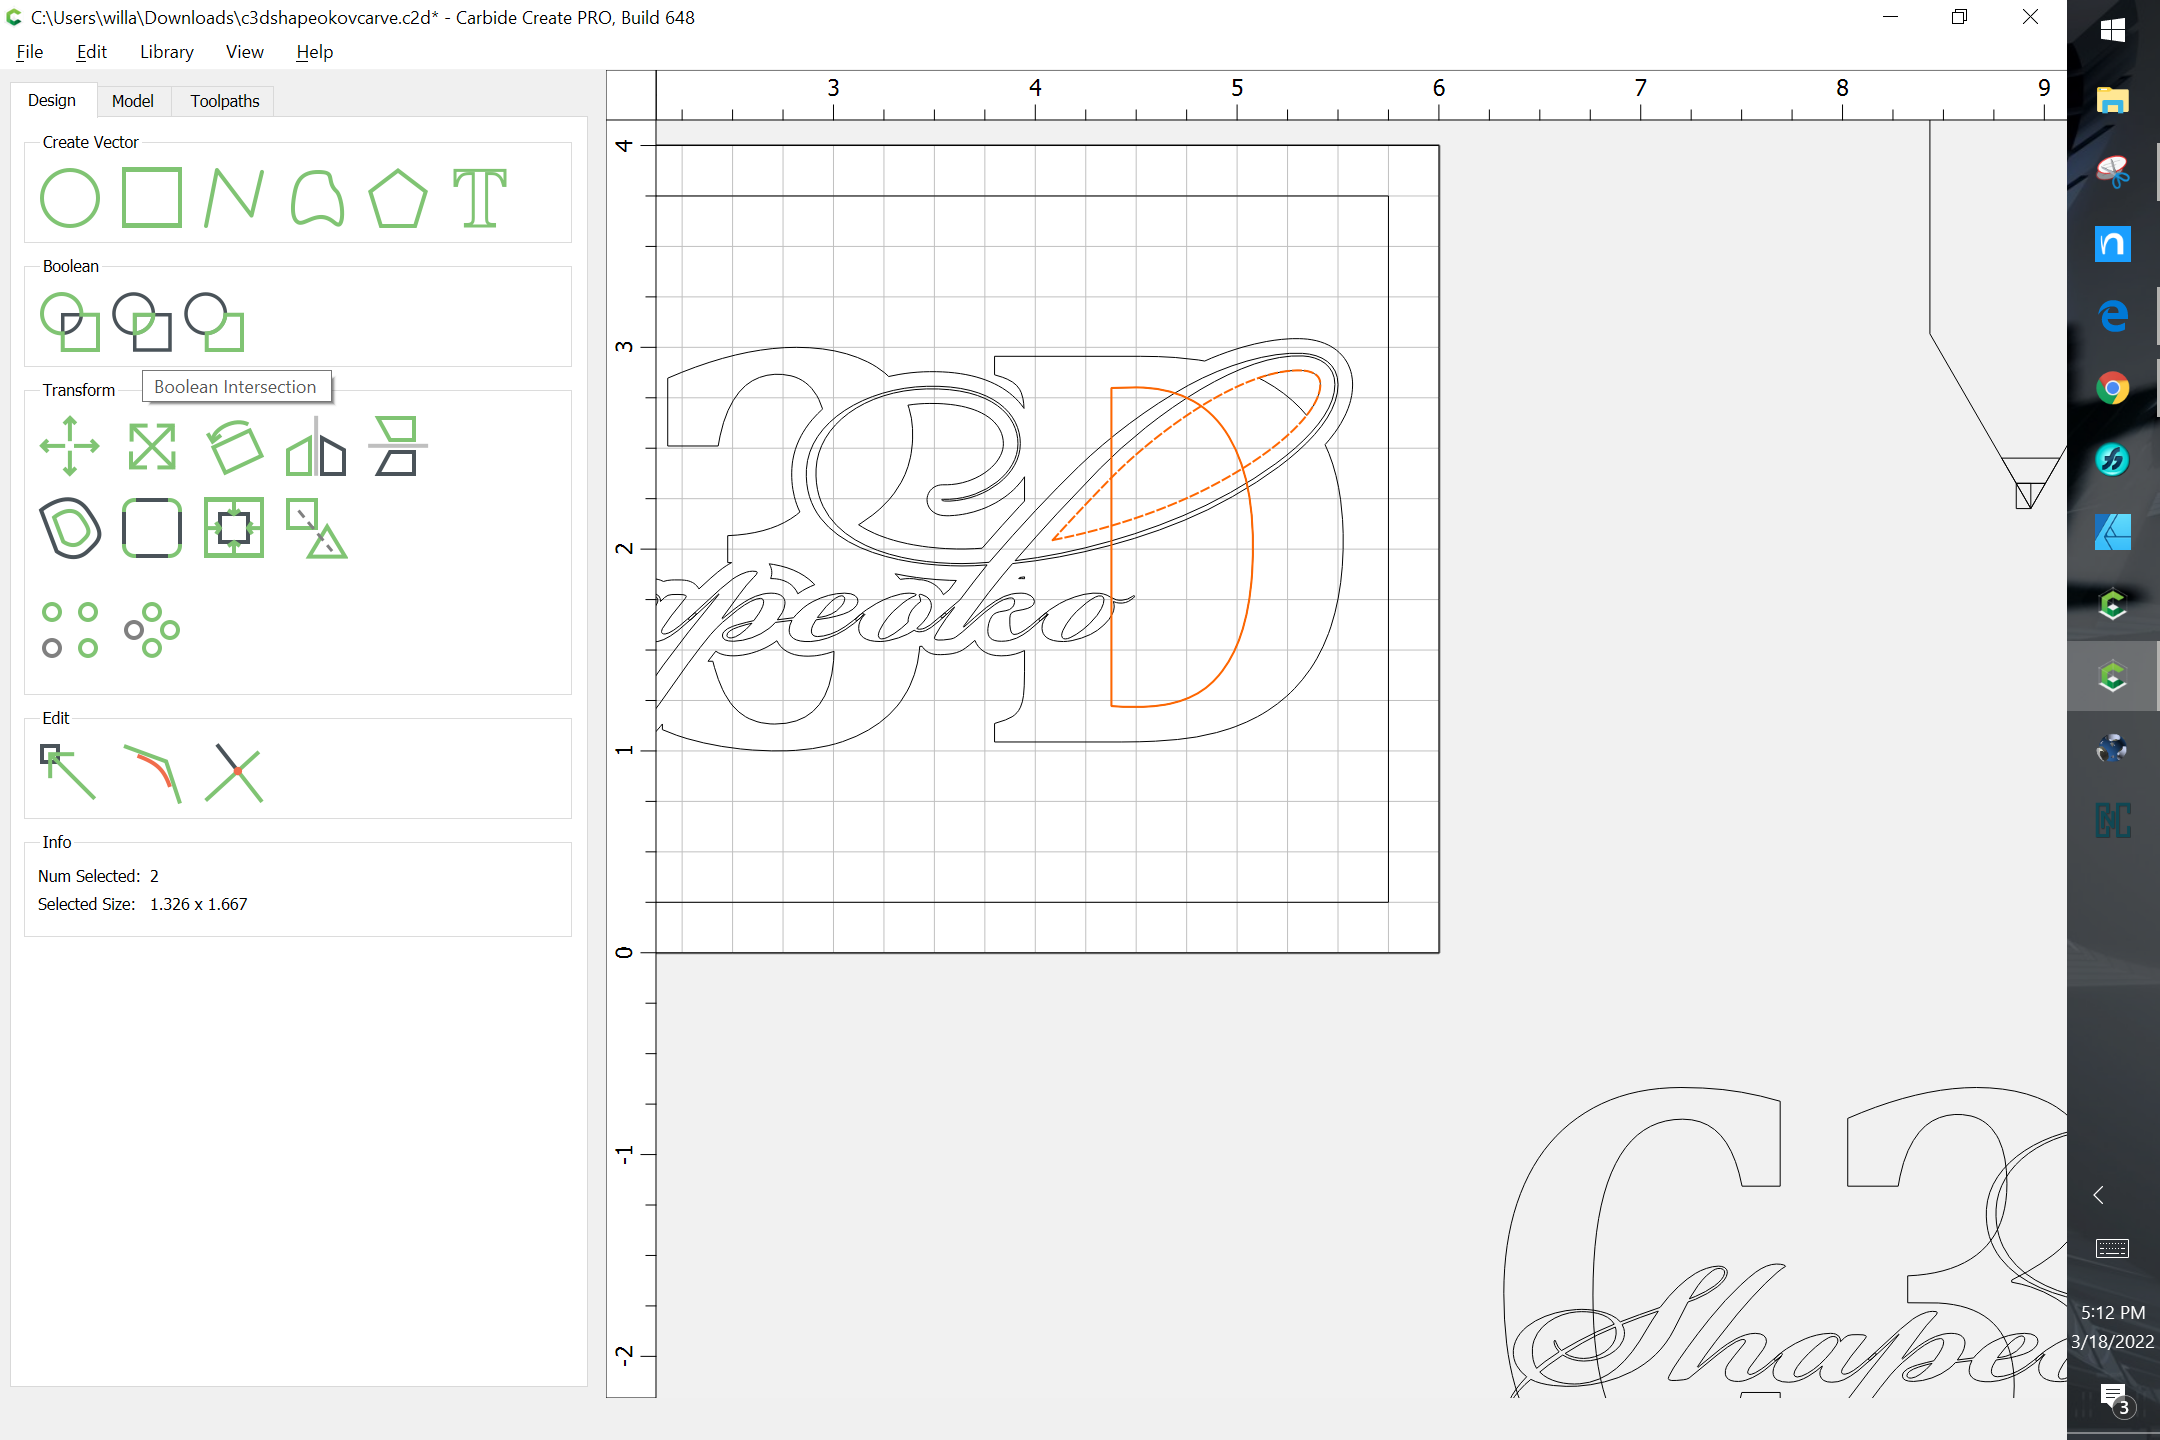
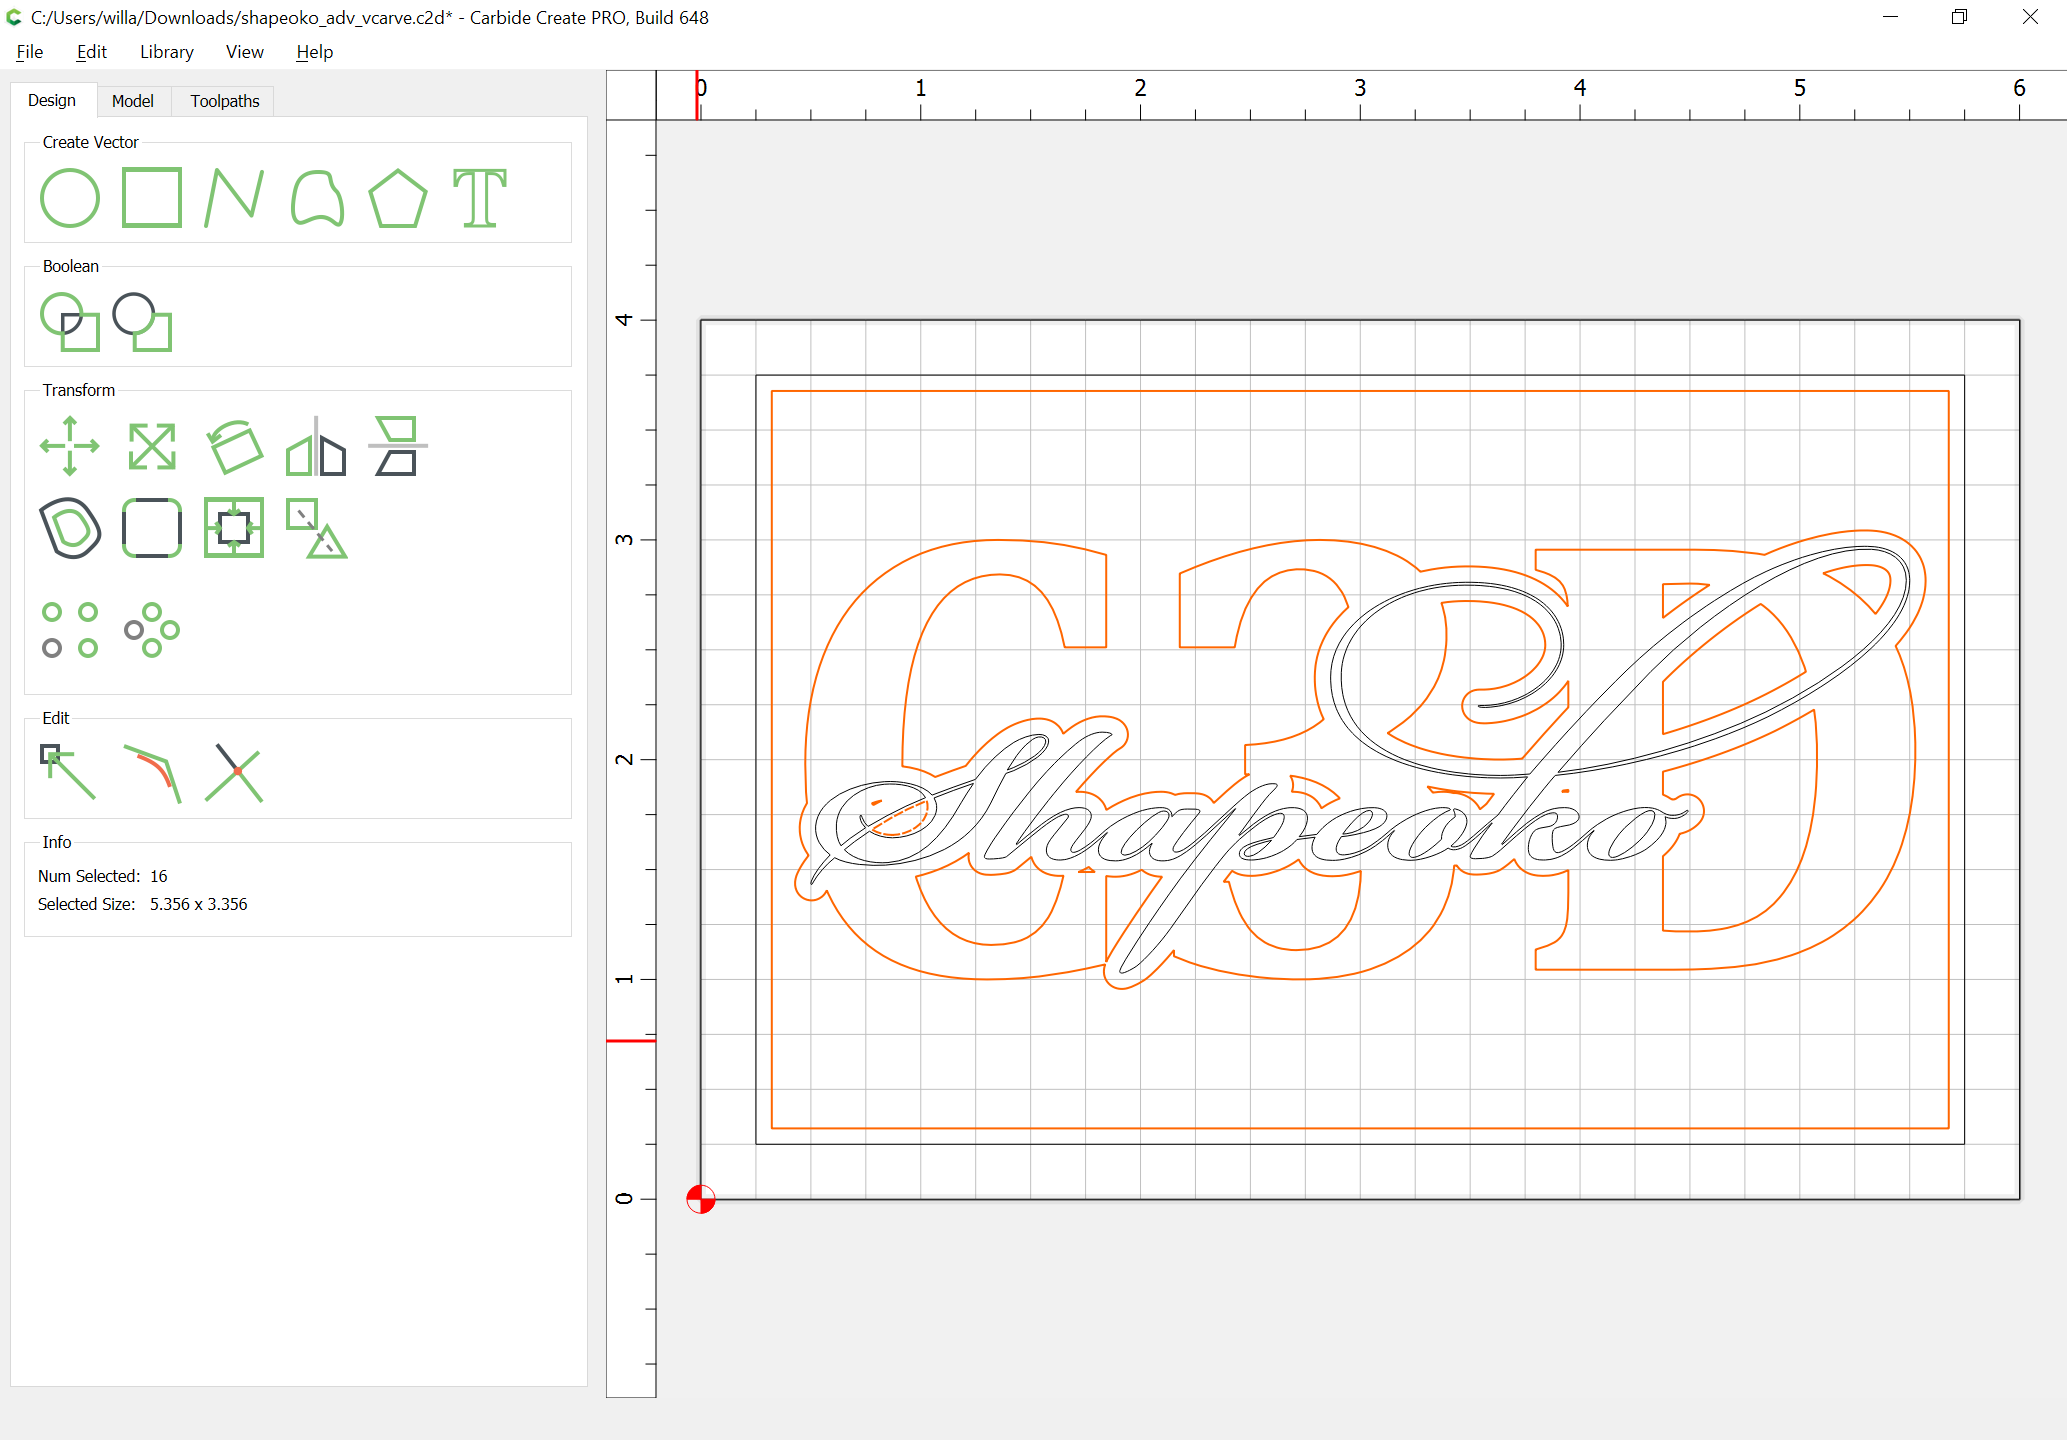
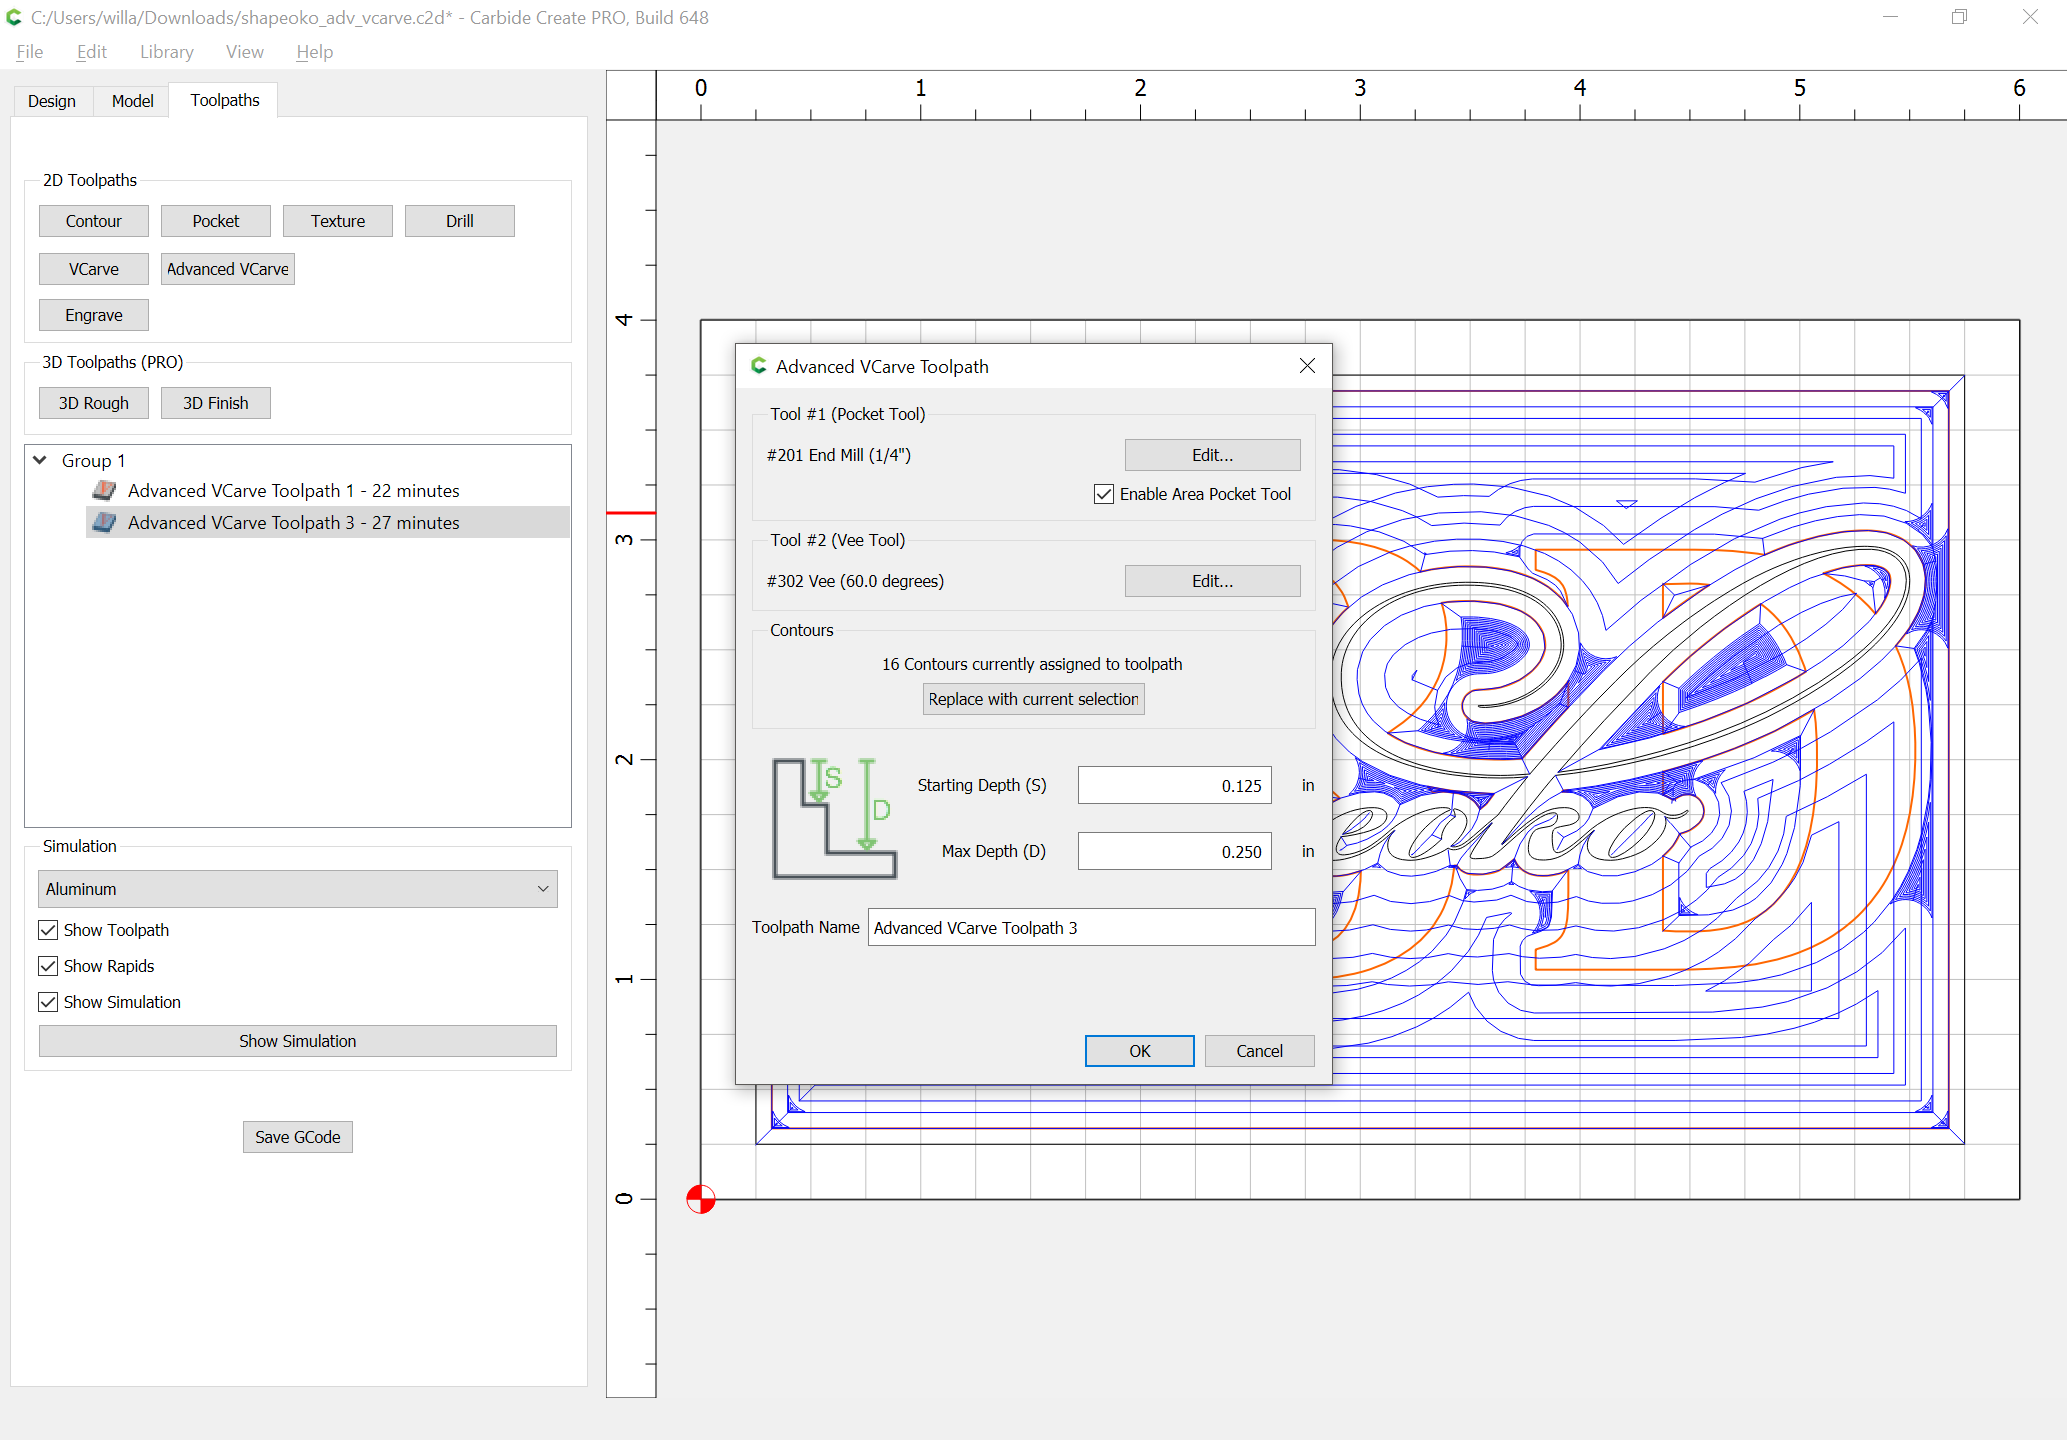
Since the middle path of the script outline represents where the part falls at the bottom, start by selecting that and unioning it to the text, duplicating it twice and offsetting by 0.62 and 1.25:
Thanks a bunch for all the info. It seems a little overwhelming so I will have to digest it a while.
Let me correct one thing you may have misunderstood. Don’t worry about the slight slope to the letters. Pretend that they are not there.
How would one do this without v-carve? Say just using a .125 ball bit or something like that. Nothing fancy, just carve leaving the pocket, first layer of letters then the highest level of letters.
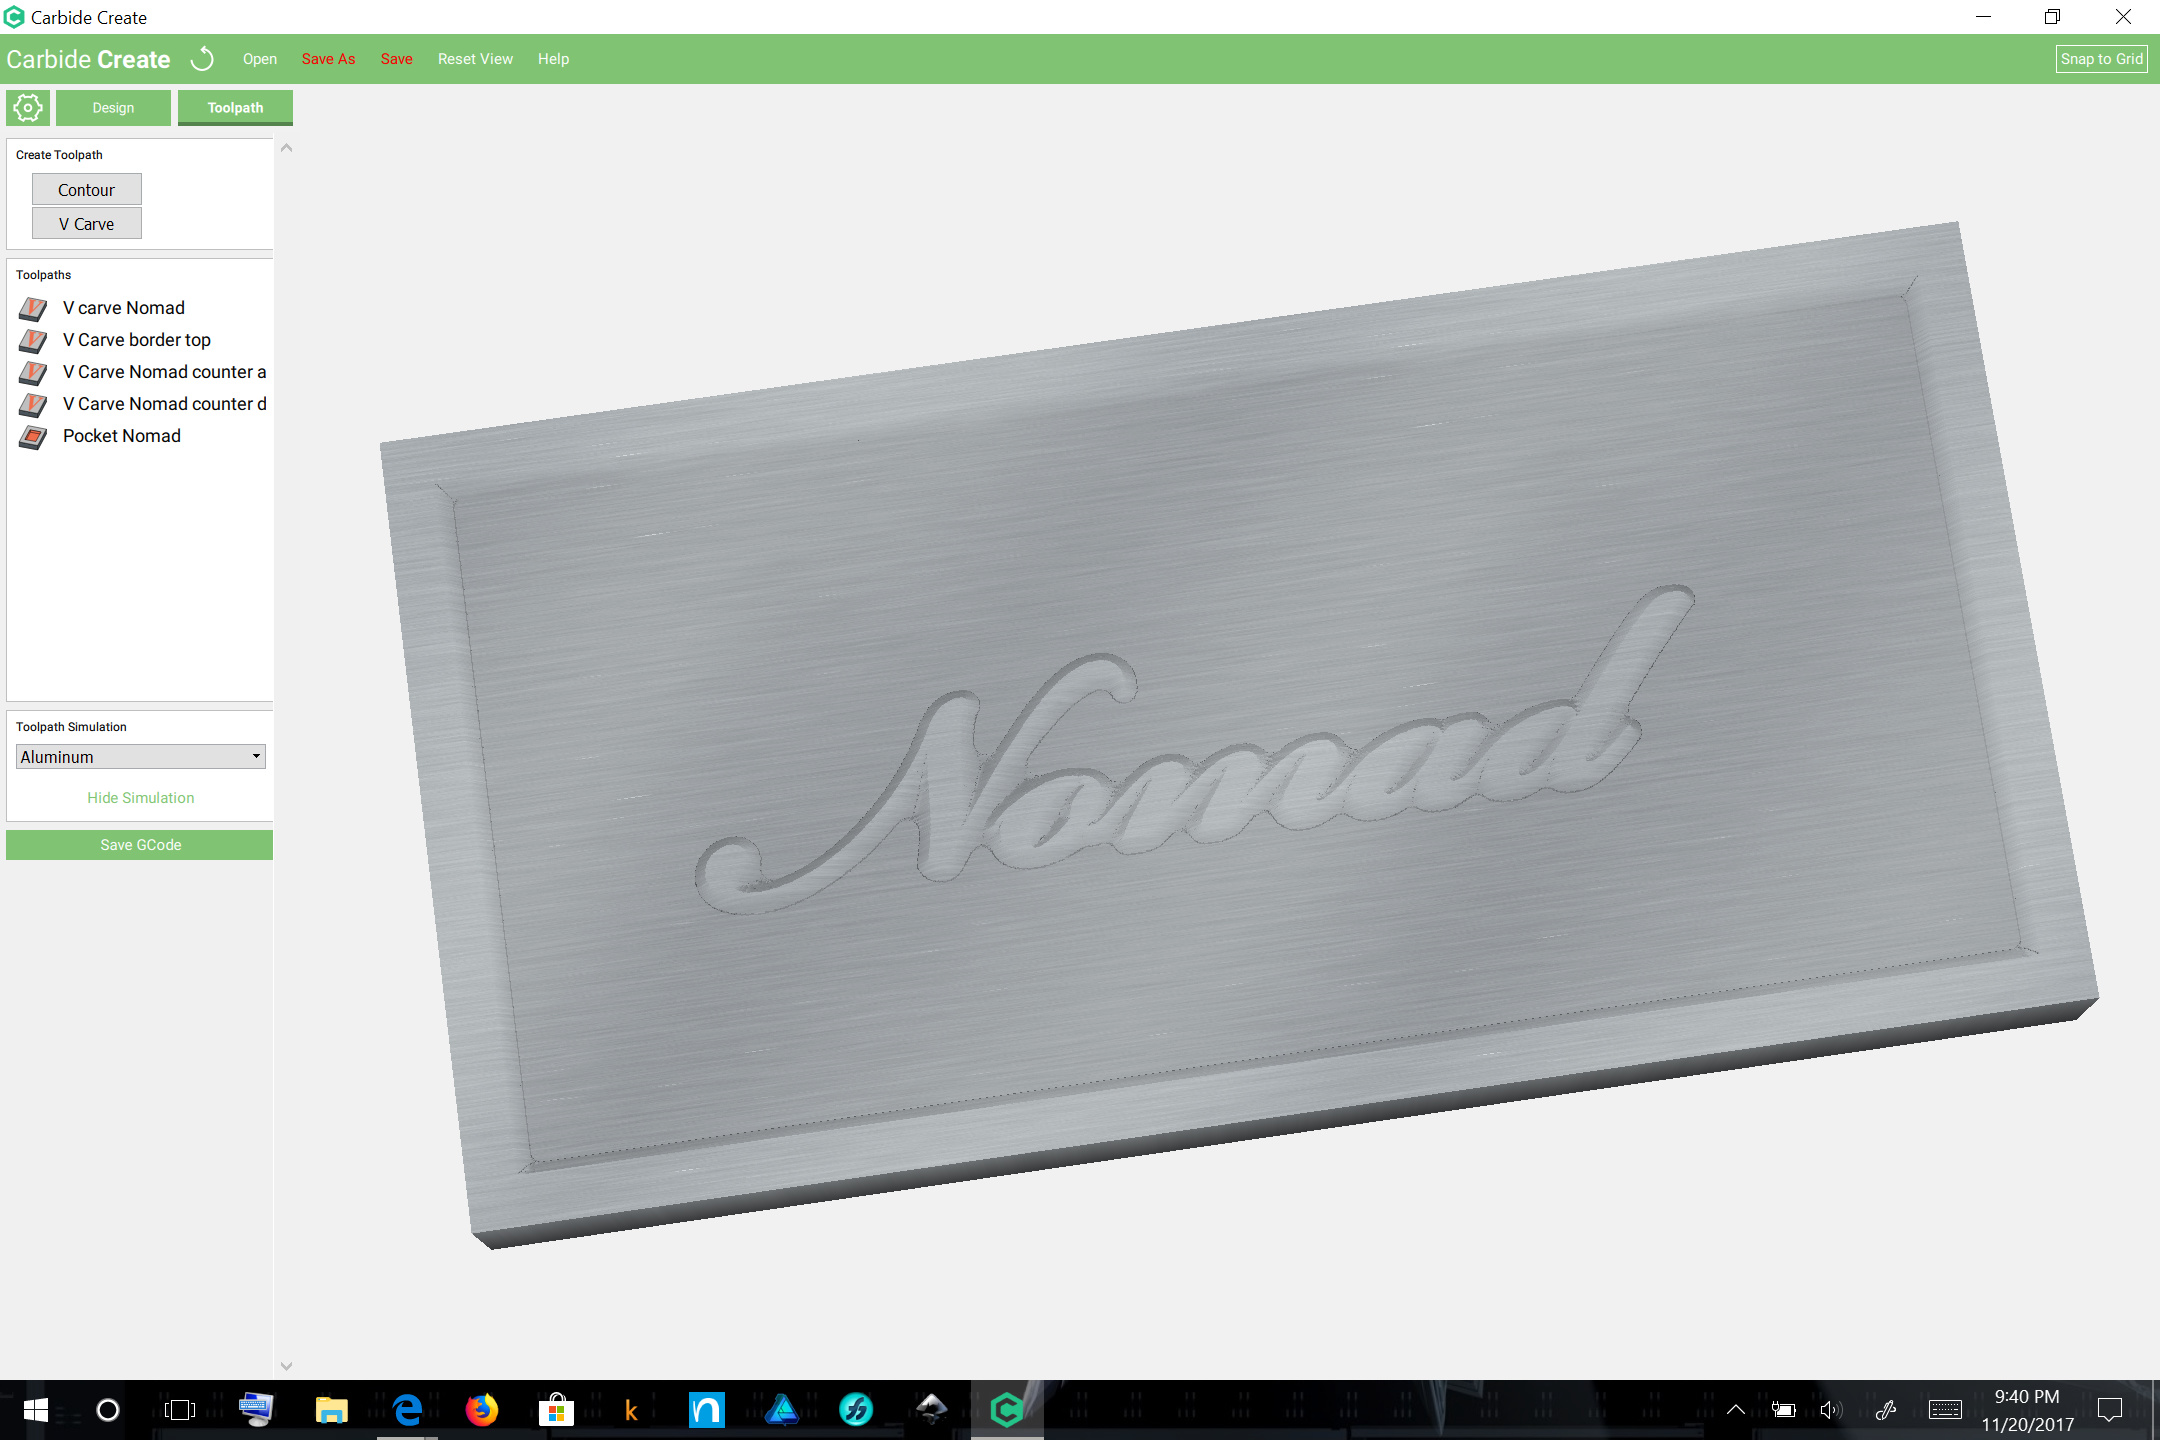
Generate G-code from the two files and cut them sequentially and one should get the desired appearance.
Please note that we have a standing offer for customers who are having difficulty with projects / tasks to send them in to support@carbide3d.com and we’ll work up a customized step-by-step tutorial.
Leaving off the V Carve step will remove a lot of the detailing, esp. in the tighter areas. If you simplify the design / use blocky enough letters then yes, that could be omitted while still allowing for a nice appearance.
Carbide Create is excellent for many, many things, but as soon as you get into more complex 2.5D work and specifically vCarving, Vectric’s suite is really just the best. I waffled for ages trying to use every free CAD/CAM package available before finally biting my wallet and forking over the $300. It’s been the best money I’ve ever spent on software, hands down.
I did some more searching on the Internet. What I am trying to do in Carbide Create is called “text on text”. I found several YouTube videos on doing this in with VCarve but I would like to know if it can be accomplished, fairly straight forward’ in in CC.
Not a native feature but Will broke down one way of doing it. My instincts would push me into Illustrator/Inkscape and do some of the brainwork by hand if I only was doing one such sign. You essentially need to think of it as 2 jobs, one that goes to a certain depth with just the top lettering, then one that goes to the bottom of the cut with the two sets of words merged.
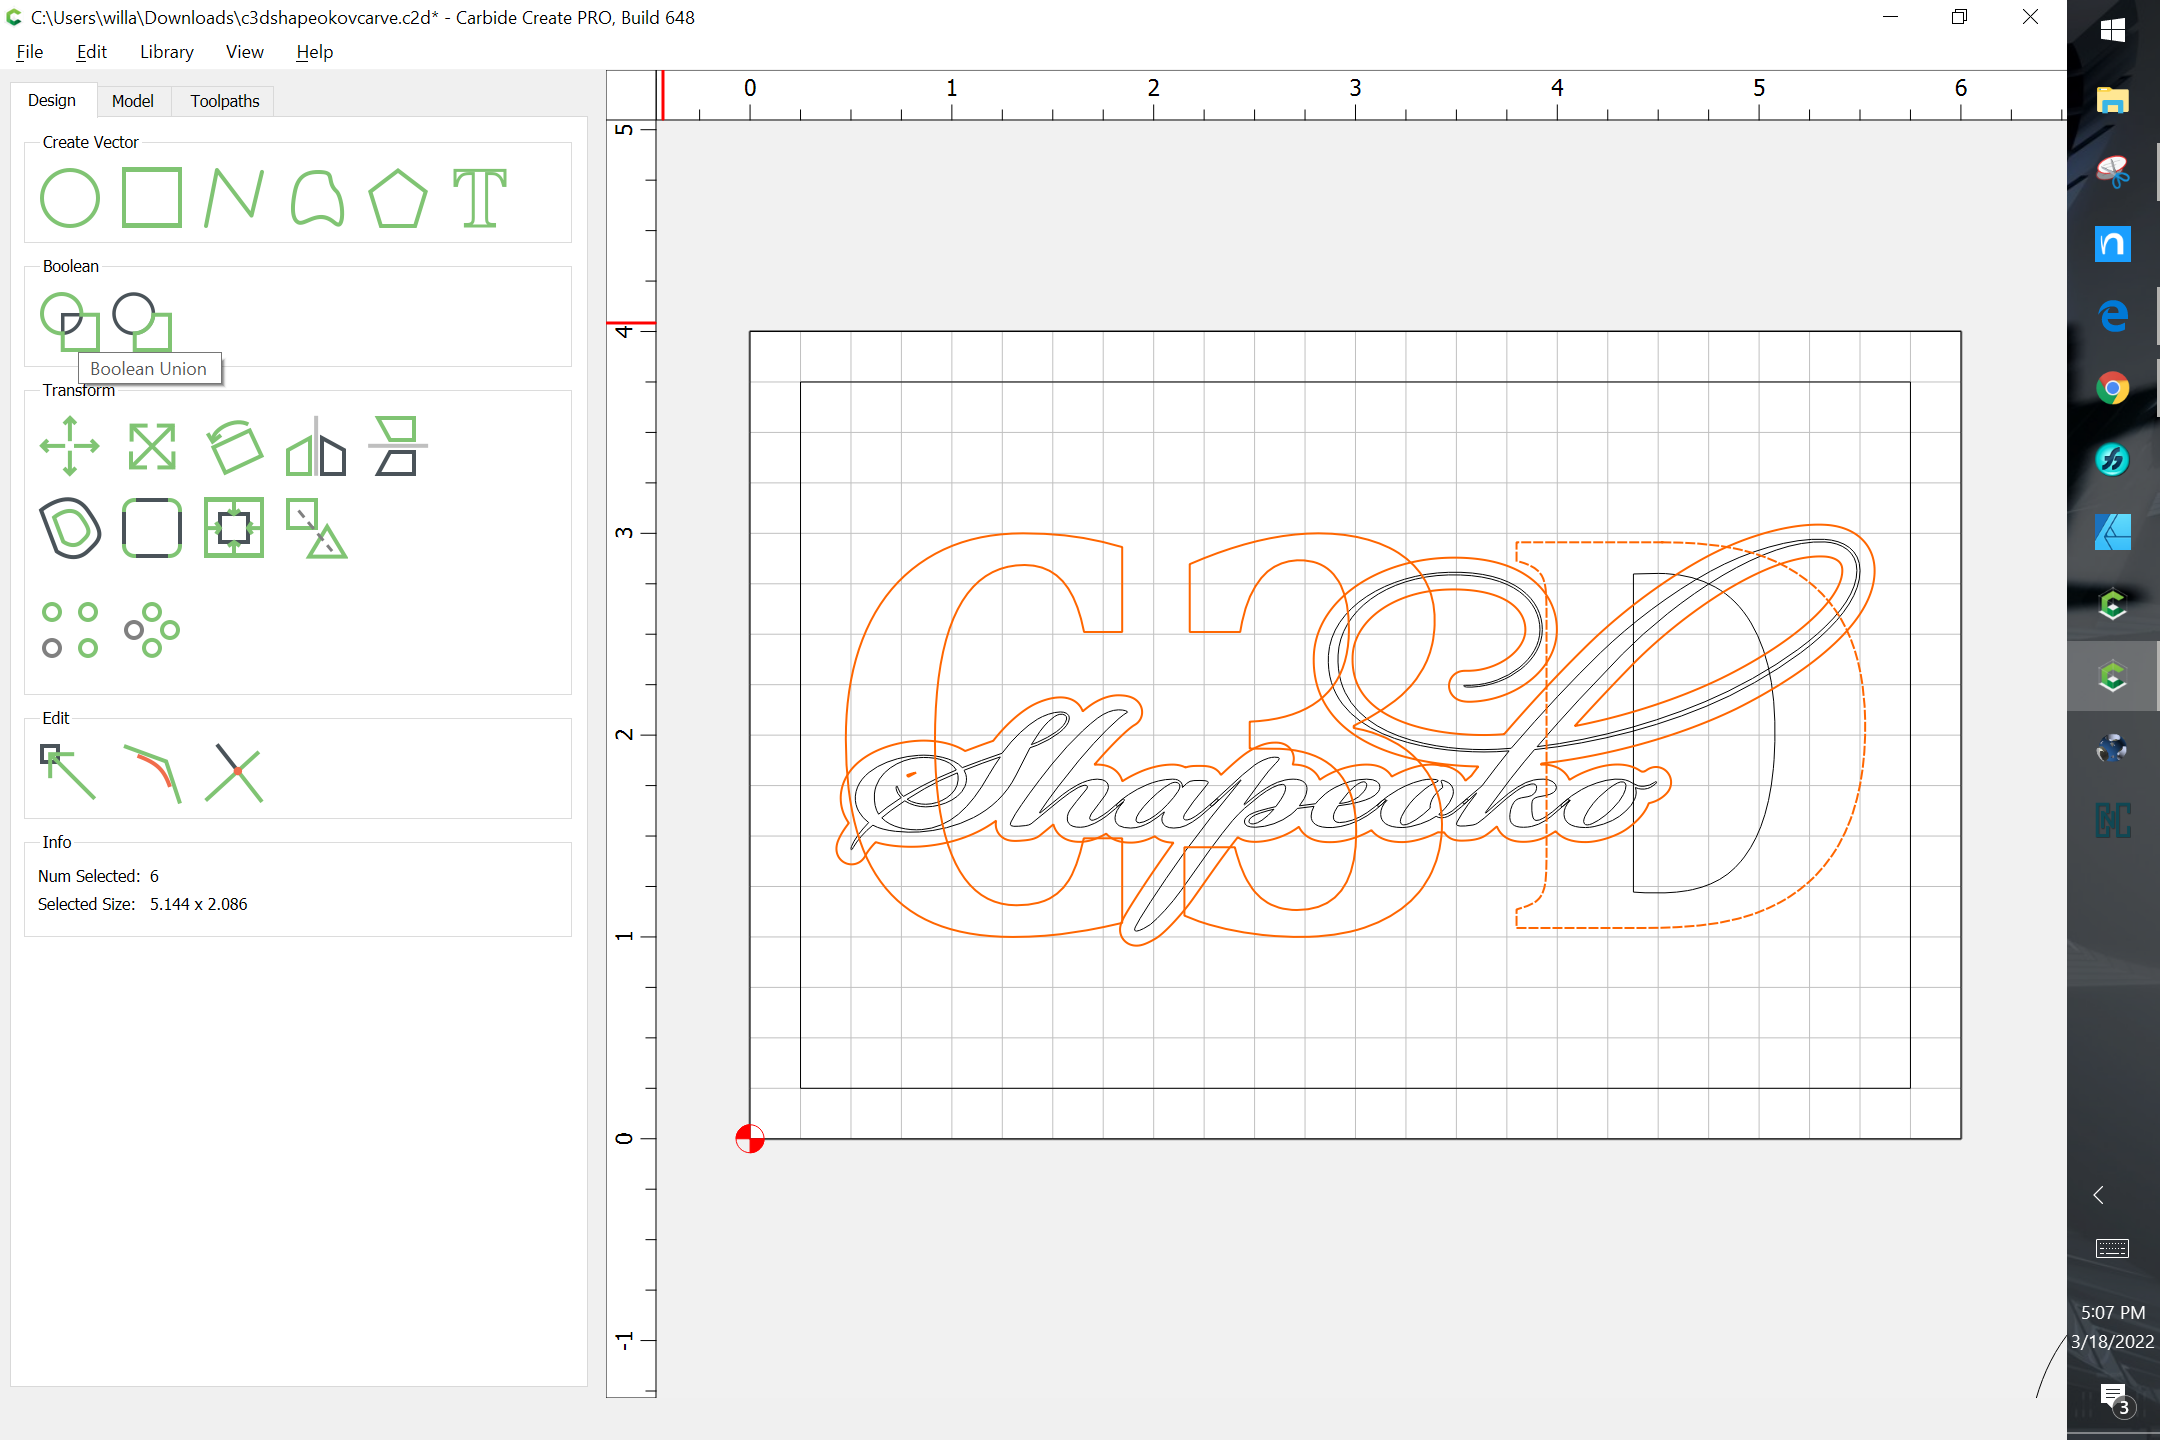
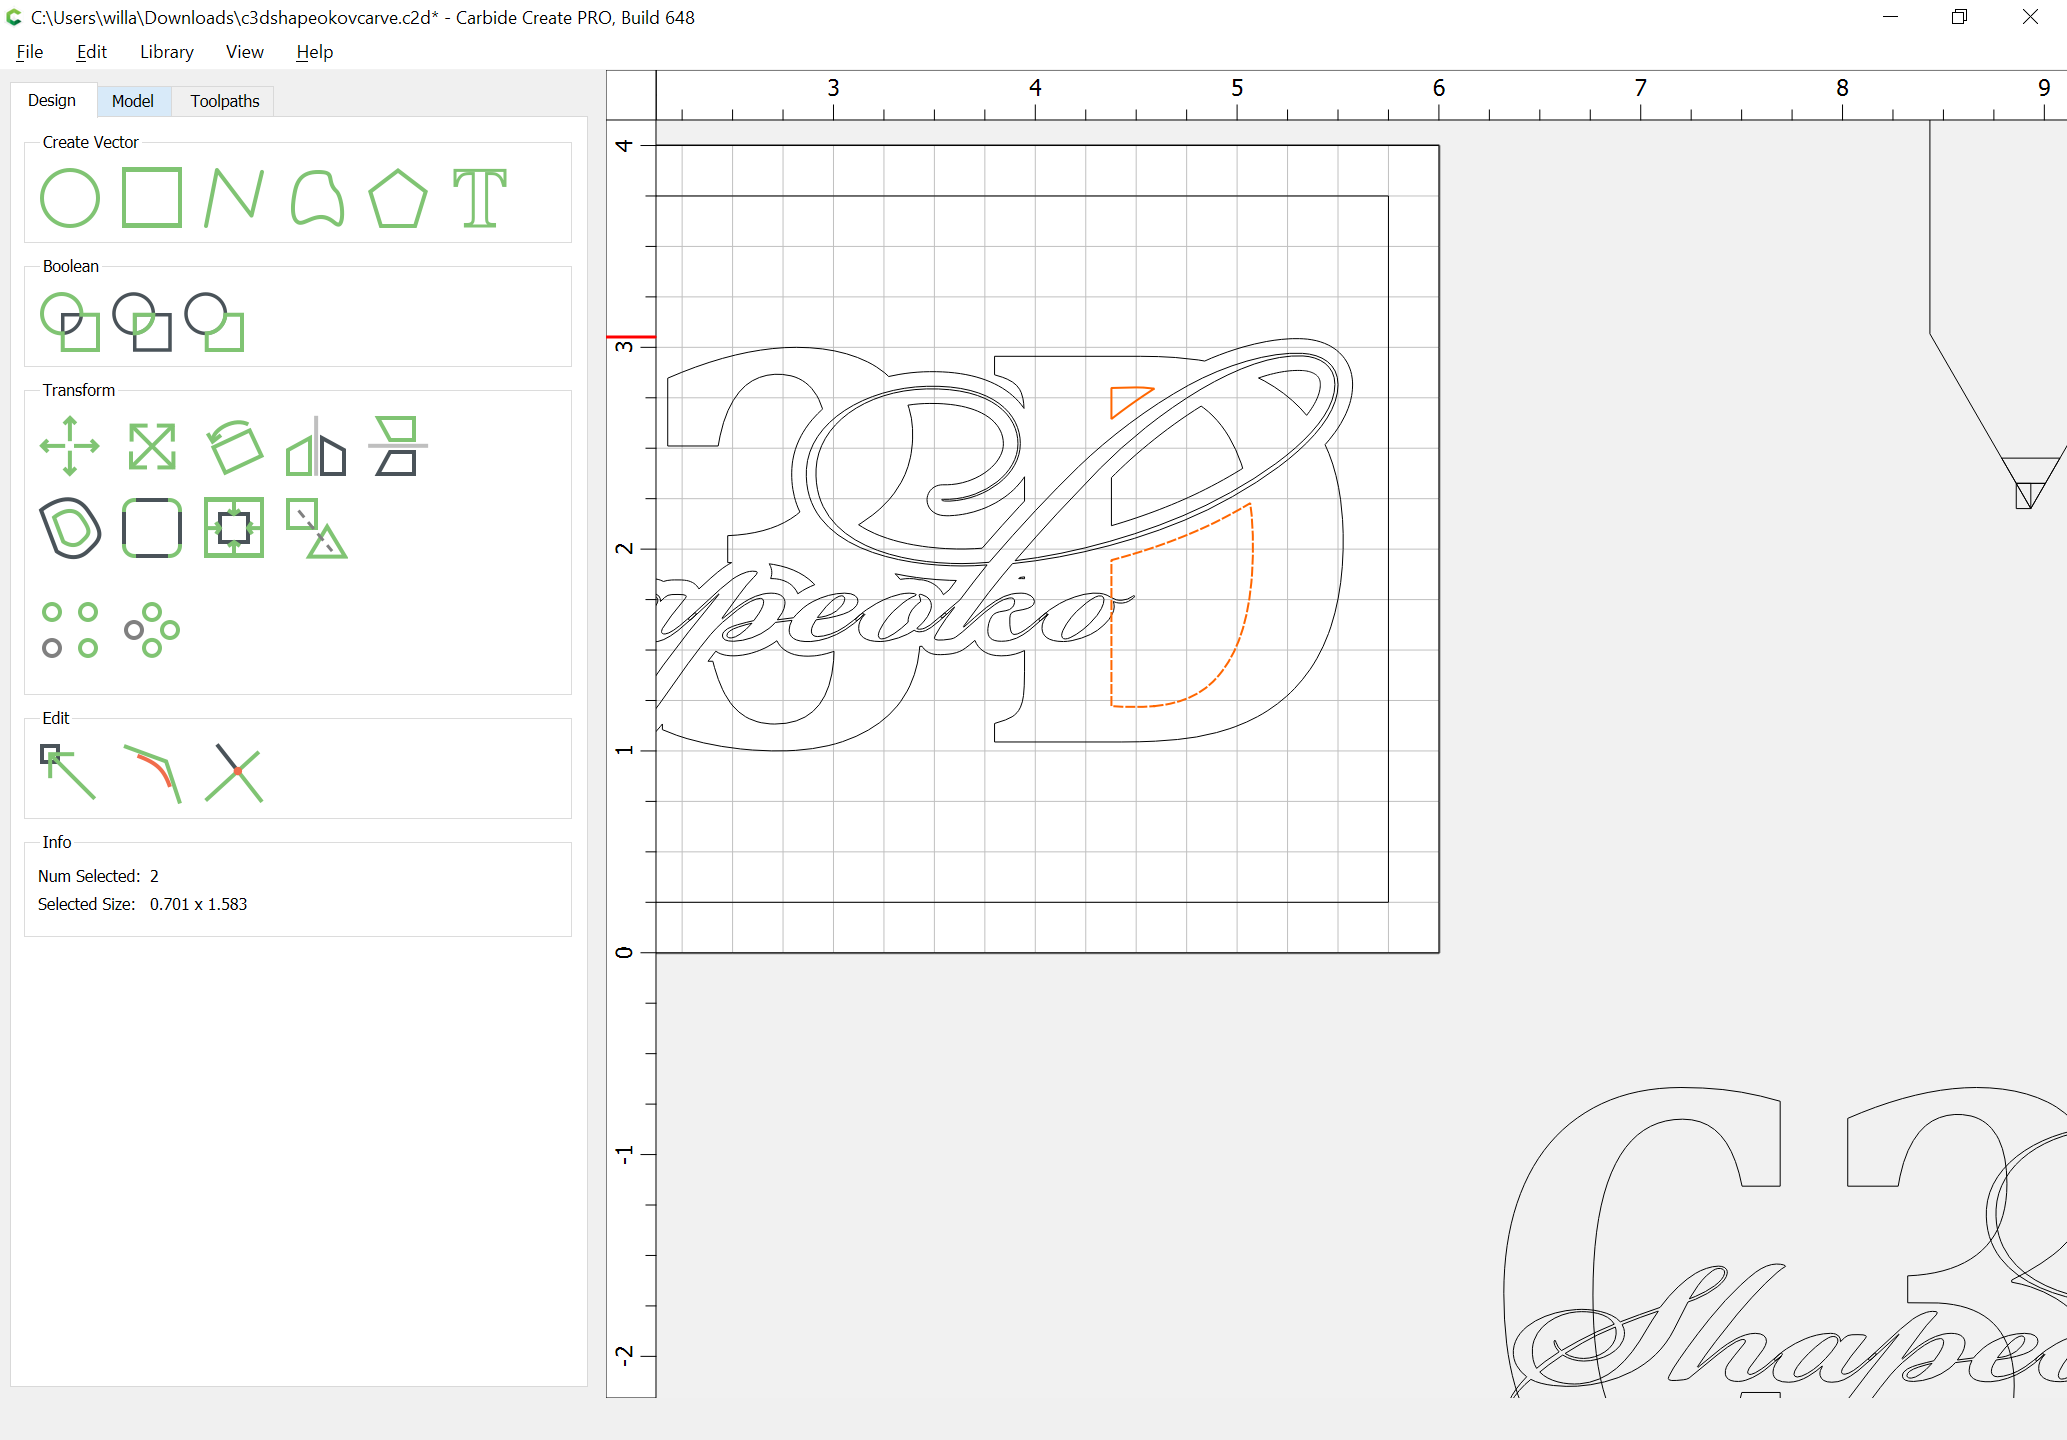
Where geometry has been lost, bring back the geometry which was used by repeating the offset (inset since we only need the counter) and dragging the original back into place: